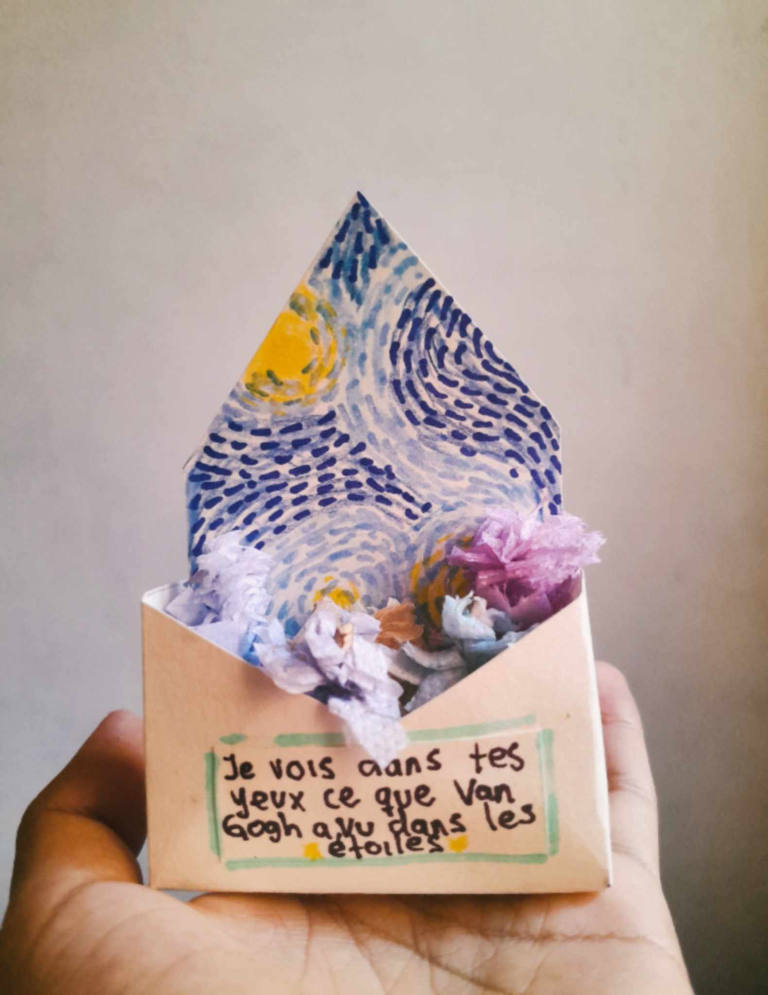
Mini-caja Van Gogh para regalar / Van Gogh mini-box to give as a gift 🌻

in #hive-1305609 months ago
Hola, creativos de Hive! Se acerca San Valentín y no hay nada mas lindo dar algo hecho con tus propias manos.

Hoy les traigo el tutorial de cómo podemos hacer una cajita para meter cositas que quieras darle a tu persona especial; ésta te puede servir para meter dulces, florecitas de papel, algún accesorio e incluso si nos podemos creativos, podría servir para guardar algo mas grande. Los dejo con el paso a paso detallado a continuación, espero les guste mucho:

Hello Hive Creatives, Valentine's Day is coming and there's nothing nicer than giving something made with your own hands.

Today I bring you the tutorial of how we can make a little box to put little things you want to give to your special someone; this can be used to put candy, paper flowers, some accessory and even if we can be creative, it could be used to keep something bigger. I leave you with the detailed step by step below, I hope you like it very much:
MATERIALES // MATERIALS

Utilizaremos materiales que todos tenemos por casa, pero, en caso de que no, que se pueden conseguir fácilmente y suelen ser económicos:

  • Cartulina o papel grueso color blanco.
  • Lápices de colores (azul, amarillo y celeste)
  • Marcadores (azul, amarillo y celeste)
  • Tijeras
  • Marcador punta fina negro
  • Colbón

We will use materials that we all have at home, but, in case we don't, they can be easily obtained and are usually inexpensive:

  • Cardboard or thick white paper.
  • Colored pencils (blue, yellow and light blue).
  • Markers (blue, yellow and light blue)
  • Scissors
  • Black fine point marker
  • Colbón

PROCESO // PROCESS

Empezaremos dibujando la siguiente figura en la hoja de cartulina o papel de preferencia:

We will start by drawing the following figure on the sheet of cardboard or paper of our choice:
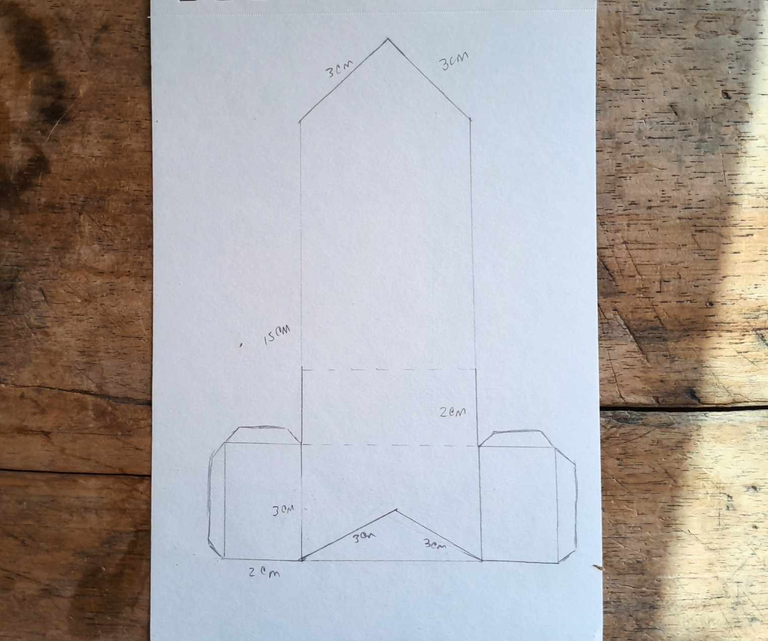
Con ayuda de una regla, trazaremos una linea horizontal de 6cm al borde inferior de la hoja, para luego dibujar dos líneas verticales de 12 o 15cm en cada borde de la línea horizontal. Luego de eso, trazaremos dos lineas perpendiculares en la parte superior, lo cual conformará una especie de pirámide. En la parte inferior de la figura, haremos lo mismo que hicimos arriba, pero esta vez, haremos la pirámide menos pronunciada.

En los laterales de la parte inferior de la figura, haremos una linea horizontal de 2cm a cada lado y a partir de ahi, una linea vertical de 3cm que vaya hacia arriba. Luego de trazar la linea vertical, hacemos otra linea de 2cm, para juntar las figuras laterales con la principal.

Básicamente ya la figura está lista, ahora lo que nos queda por hacer es dibujar una especie de aletas a cada lado y en la parte superior de las dos figuras laterales. También trazaremos, con una linea delgada las partes por donde se doblará el papel. En la imagen anterior pueden ver todo lo que acabo de explicar ♥️

With the help of a ruler, we will draw a horizontal line of 6cm at the bottom edge of the sheet, and then draw two vertical lines of 12 or 15cm at each edge of the horizontal line. After that, we will draw two perpendicular lines at the top, which will form a kind of pyramid. At the bottom of the figure, we will do the same as we did above, but this time, we will make the pyramid less pronounced.

On the sides of the lower part of the figure, we will make a horizontal line of 2cm on each side and from there, a vertical line of 3cm going upwards. After drawing the vertical line, we make another line of 2cm, to join the lateral figures with the main one.

Basically the figure is ready, now what remains to be done is to draw a kind of fins on each side and at the top of the two lateral figures. We will also draw, with a thin line, the parts where the paper will be folded. In the image above you can see everything I just explained ♥️
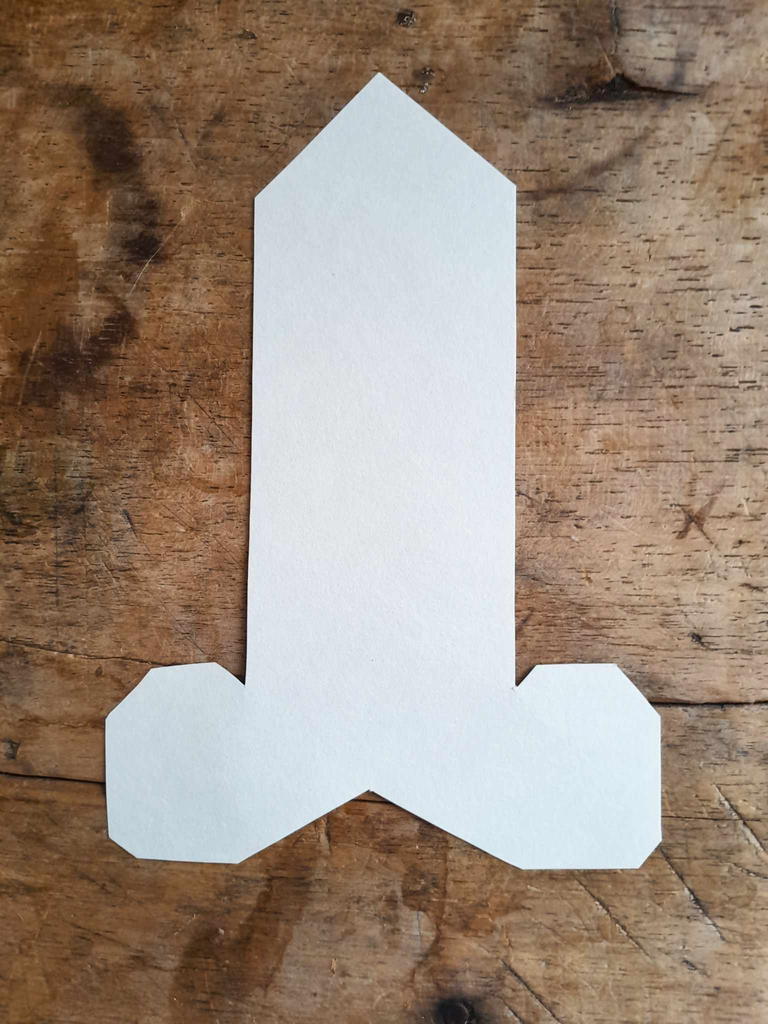
Al recortar la figura nos debe quedar algo así ⬆️

Cutting out the figure should give us something like this ⬆️

Luego de tener esto, vamos a hacerle la decoración, pues, será mas complicado hacerlo después con la caja ya armada. El dibujo fue bastante sencillo, pues como pudieron ver en el título del post, me inspiré en el arte de Van Gogh para hacerlo, específicamente en su obra "La noche estrellada".

After we have this, we are going to make the decoration, because it will be more complicated to do it later with the box already assembled. The drawing was quite simple, as you can see in the title of the post, I was inspired by the art of Van Gogh to do it, specifically in his work "The starry night".
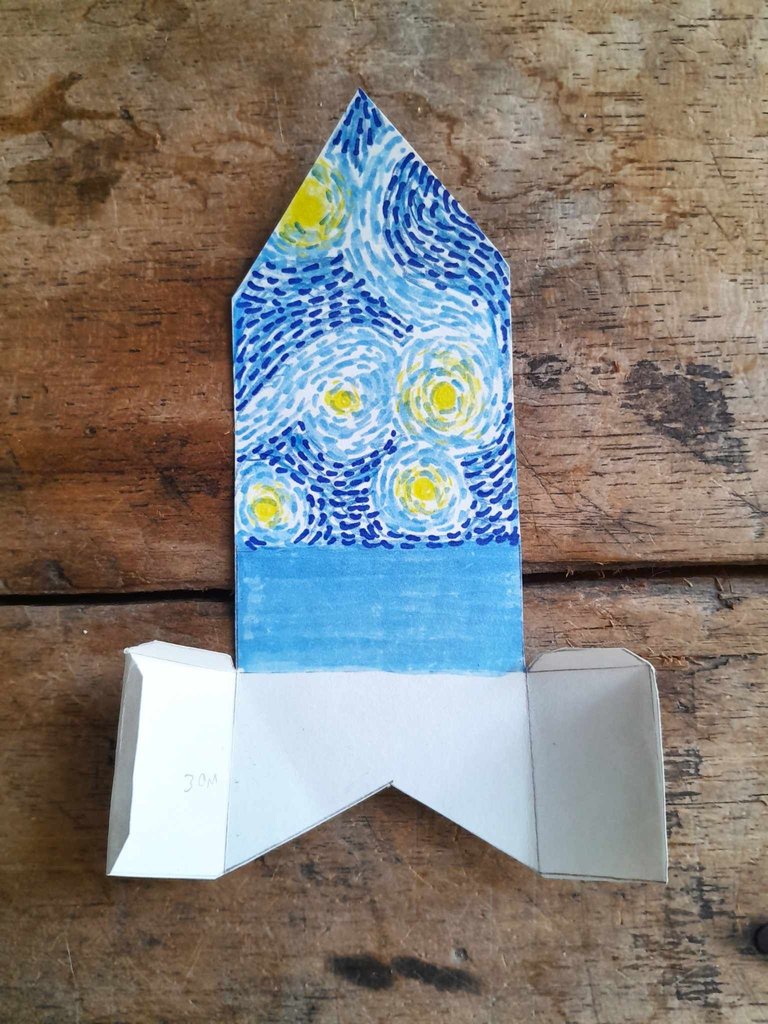
Luego de haber hecho la ilustración, llegó la hora de cerrar la caja, esto lo haremos de la siguiente manera:

  • Doblaremos hacia adentro la parte donde finaliza el dibujo y también donde finaliza la parte pintada de azul.
  • Luego de esto, doblaremos la parte sin pintar hacia arriba y los cuadros hacia adentro, al igual que las aletas.

Debe quedar algo así:

After having made the illustration, it is time to close the box, we will do it in the following way:

  • We will fold inwards the part where the drawing ends and also where the part painted in blue ends.
  • After this, we will fold the unpainted part upwards and the squares inwards, as well as the fins.

It should look something like this:
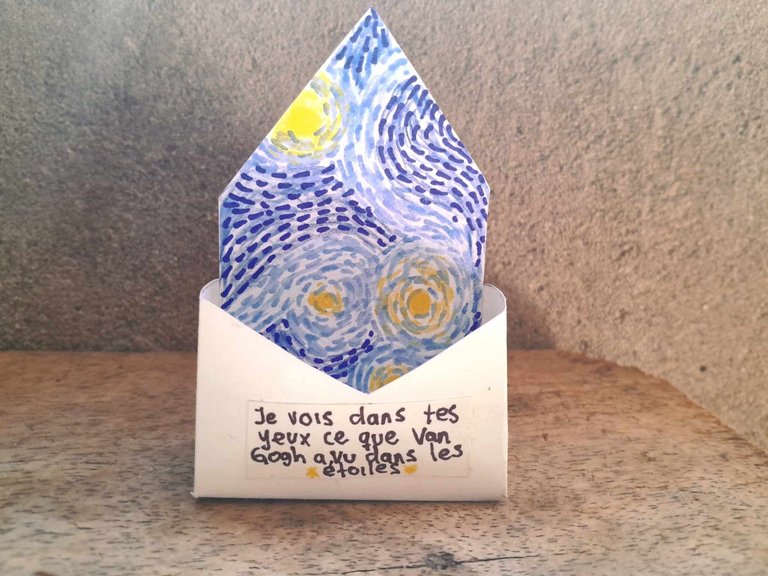
Yo le agregué una frase en frente porque sentí que le faltaba algo, tu lo puedes dejar sin nada o dibujarle algo bonito.

Una vez que tengo la cajita lista, puedo rellenarla con lo que quiera, en mi caso le metí unas flores hechas de papel (muy fáciles de hacer, por cierto), pero como dije anteriormente, pónganle, lo que quieran c:

I added a phrase in front of it because I felt it was missing something, you can leave it without anything or draw something nice on it.

Once I have the box ready, I can fill it with whatever I want, in my case I put some flowers made of paper (very easy to make, by the way), but as I said before, put whatever you want in it c:
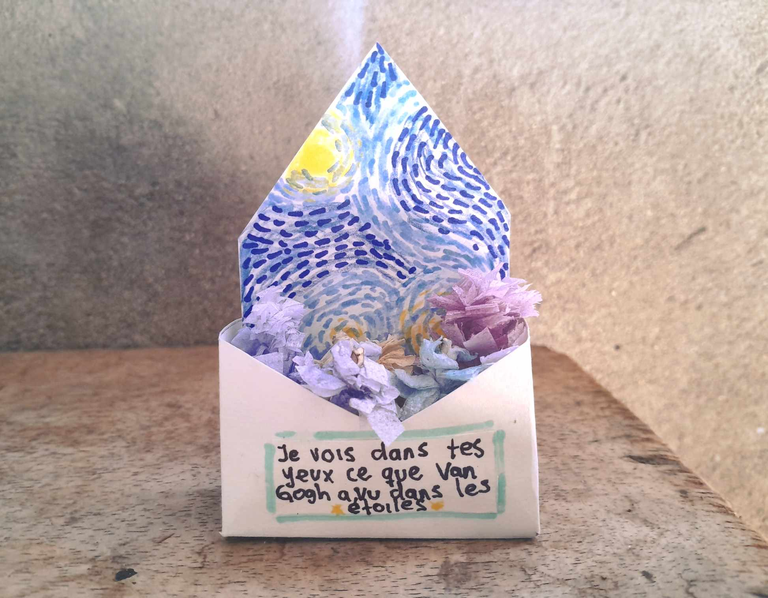
Y listo!. Espero les haya gustado mucho el tutorial, volveré con más muy pronto!!

And that's it. I hope you liked the tutorial, I'll be back with more very soon!

Gracias por leer y observar.

Thanks for reading and watching.

Texto traducido en: DeepL

Instagram

Sort:  

1.png
Vota por HIVEDIY como Witness en el siguiente Link:
https://vote.hive.uno/@hivediy

Ty for the supp

I loved your idea, especially that you were so explicit with the mold, as it has its difficulty. Thanks for sharing with us.

Me encantó tu idea, sobre todo que fueras tan explícita con el molde, ya que tiene su dificultad. Gracias por compartir con nosotros.

@sagarkothari88 vote 15%

Hey @gltorres12! sagarkothari88 upvoted based on request from @equipodelta
| Hive Curators Community | Join Discord | Support Witness | Follow Curation Trail |
Keep Up the good work on Hive ♦️

Ty for the support ❤️✨️

This is so nice. A brilliant gifting item

Ty so much

Beautiful!very wonderful idea

Thank You so much