¡Hola hivers!💜
Espero que se encuentren bien y felices, queridos artesanos. Como algunos saben, tengo un emprendimiento llamado Poeticabyg, donde vendo materiales de arte, dicto talleres de lettering y después diciembre del 2023 diseño y hago planners artesanales. Siempre había tenido la idea de hacer mis propias agendas desde cero, es decir, diseñar los interiores, hacer la impresión y el armado en su totalidad. He sido autodidacta con el tema, poco a poco he ido comprando materiales y máquinas que me ayuden con esto. He ido aprendiendo del encuadernado artesanal de libretas cosidas (de lo que todavía me falta mucho por aprender) y ahorita estoy con planners y agendas anilladas.
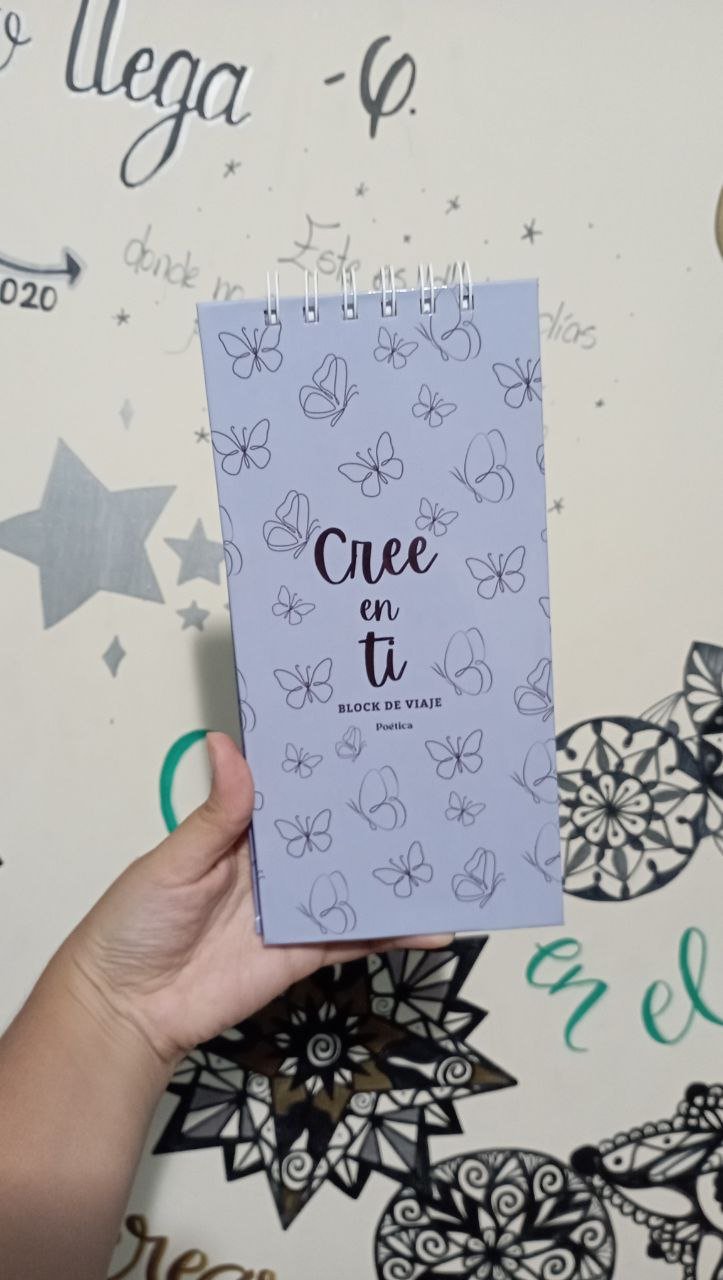
Empece con planners diarios y semanales. Cuando empezaron a ver mi trabajo, llegaron clientes pidiendo una agenda de citas, otra agenda de citas para lahista, otra agenda emprendedora para organizar un negocio y yo, que amo los retos, me atreví con esas ideas. Me gusta poder diseñar algo muy personalizado y que se adapte a las necesidades de cada quien. En esta ocasión me pidieron un cuaderno de control pediátrico para que unos padres lleven el control de visitas al pediatra para su bebe, vacunas, logros de crecimiento, dentición y todo lo relacionado a los primeros años del bebe. Hasta me asesoré con un pediatra y estoy muy contenta con el resultado. Les contare un poco de mi parte favorita, el armado del cuaderno:

MATERIALES
Para las tapas:
Carton (uso carton 1 en kilo de calibre 0.8 cortado de 15 x 22.7 cm)
Papel autoadhesivo con el diseño impreso
Cartulina (para la contratapa)
Cinta doble faz
Cutter o exacto
Para el interior:
Hojas impresas con el interior (son tamaño carta y las cortó con una guillotina para que sean media carta)
Anillas (segun diseño use de color dorado)
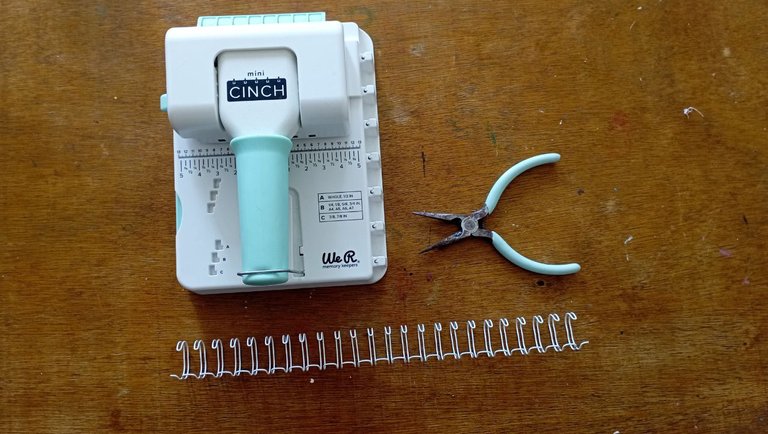
Máquina encuadernadora (yo uso la mini cinch de we r maker)
Para bolsillo interno:
Cartulina (use dos tonos de verde)
Cinta doble faz

PASO A PASO DE LAS TAPAS


PASO 1
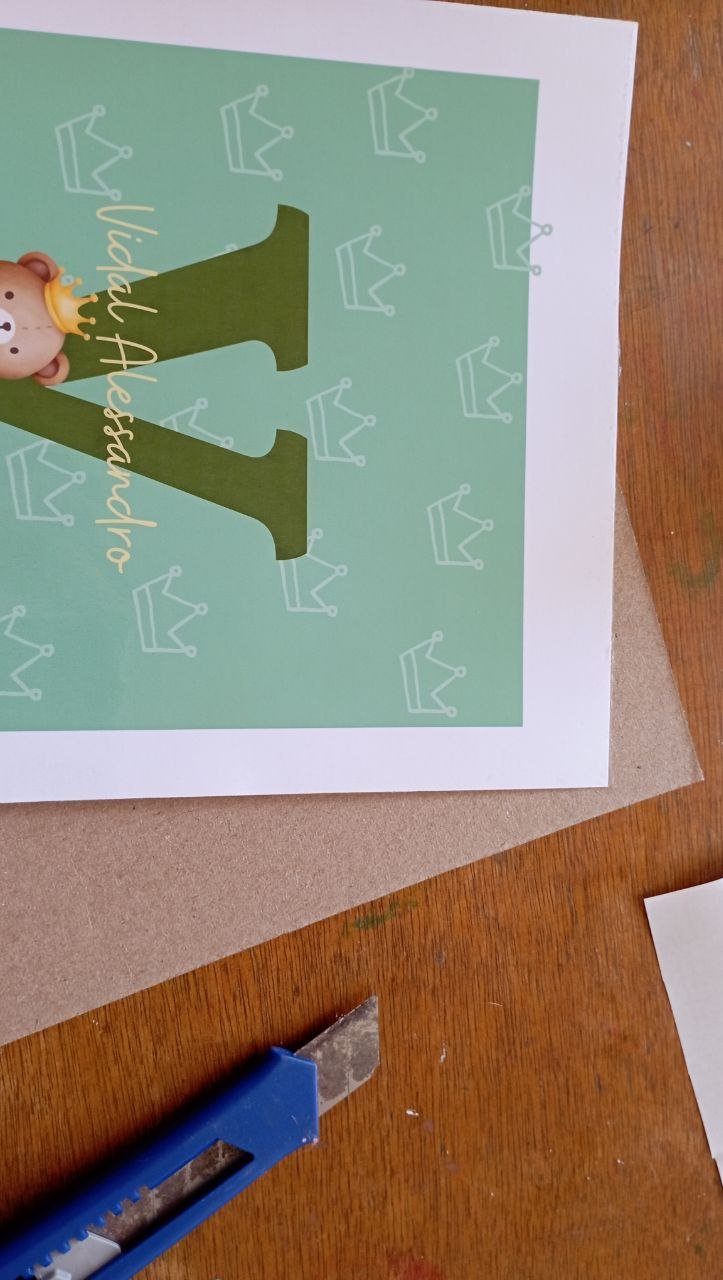
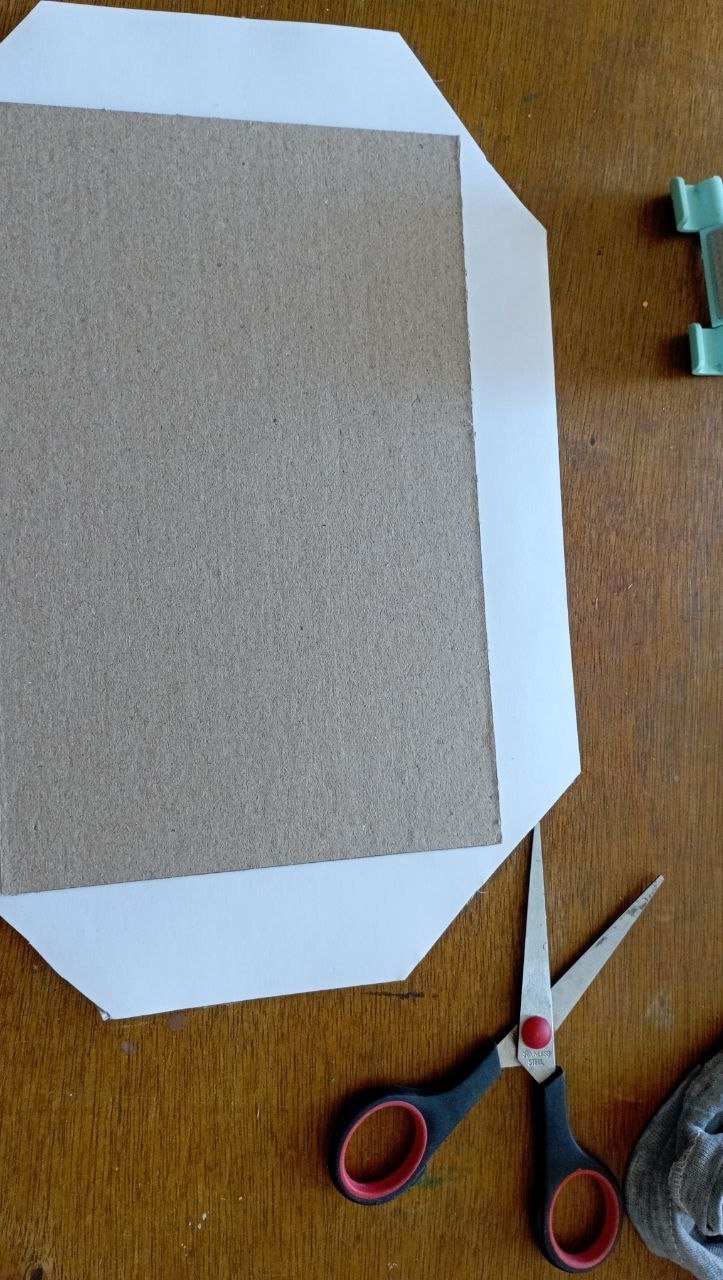
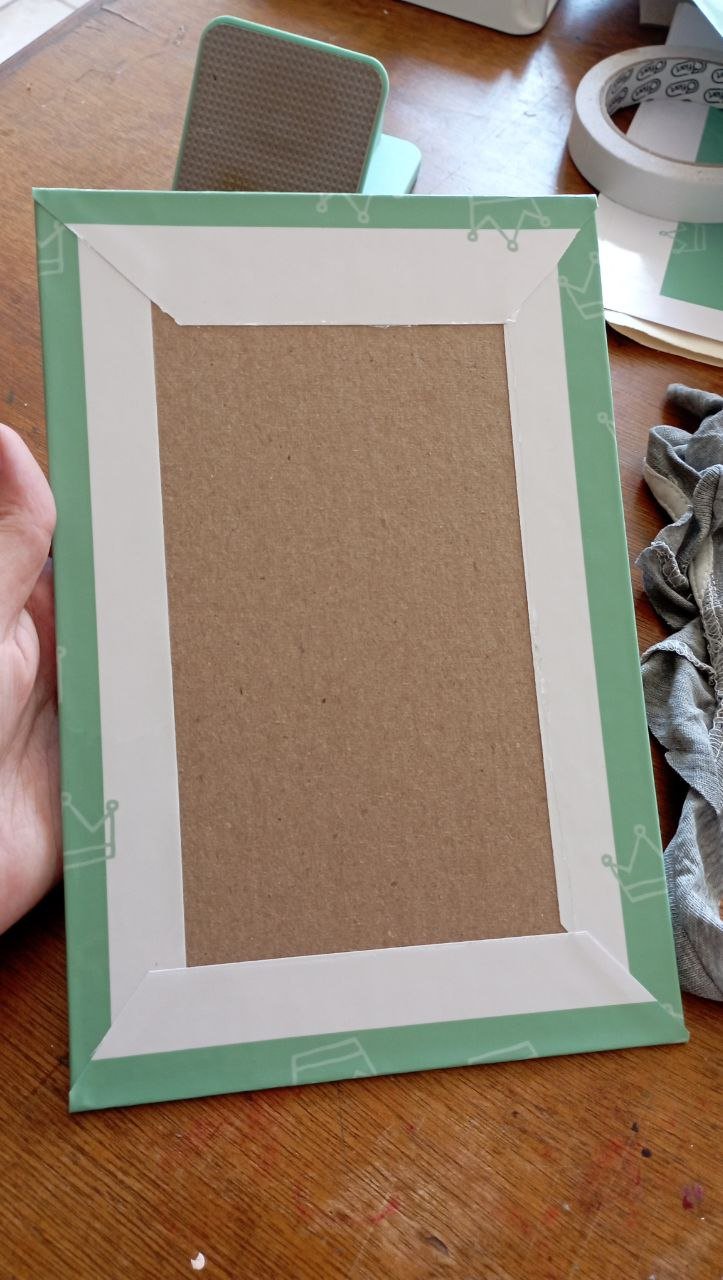
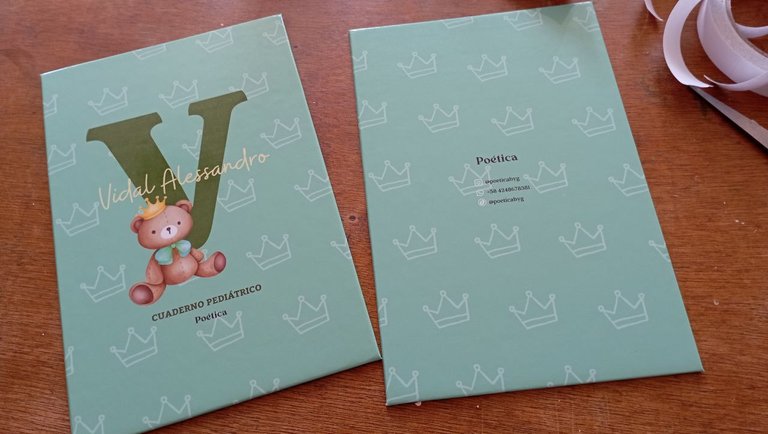
Para las tapas lo primordial es forrarlas, para esto usó papel autoadhesivo que anteriormente fue laminado. Uso un cutter o exacto para marcar y centrar el cartón. Procedo a pegarlo. Con los extremos sobrantes, hago cortes triangulares en las esquinas y los sobrantes los pego a la contratapa para asegurarlo.
 |  |
|---|
 |  |
|---|
PASO 2
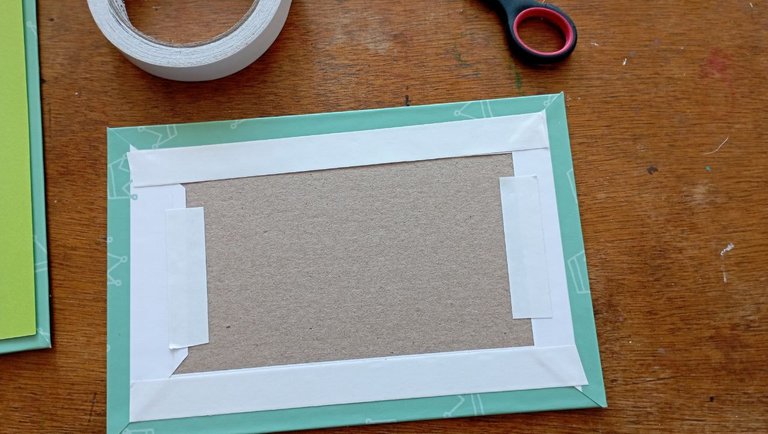
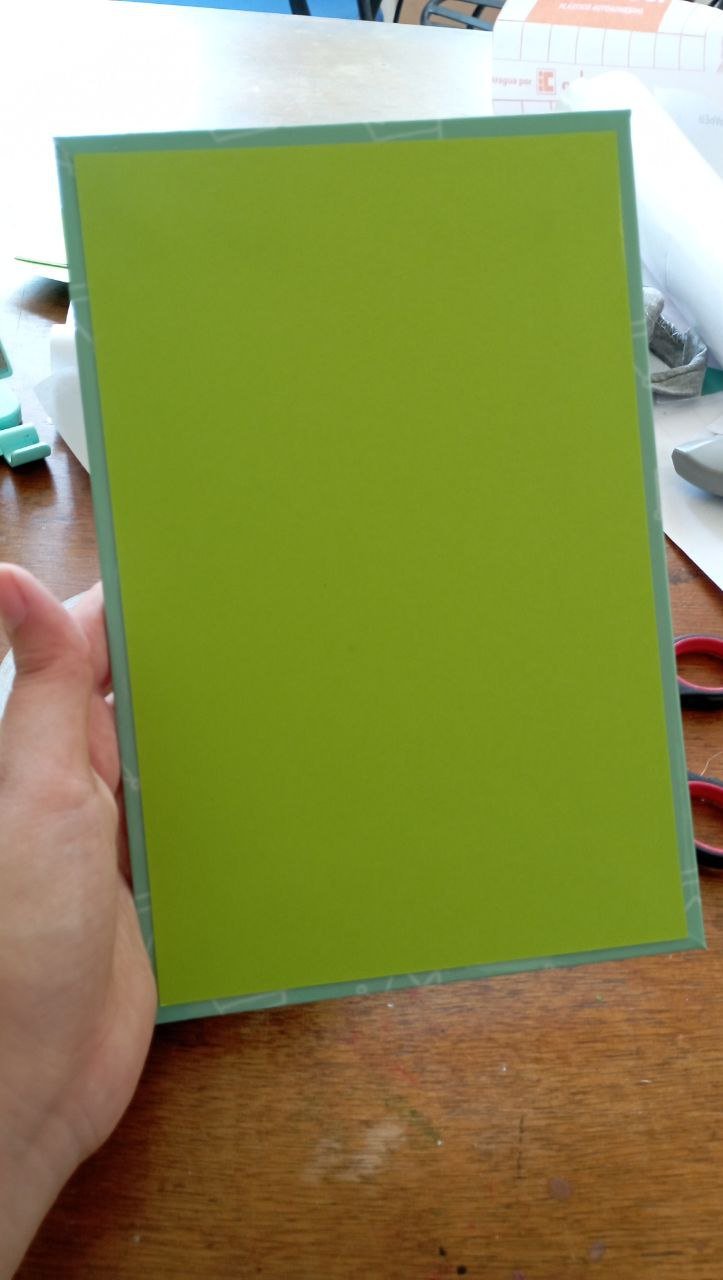
Para afinar la contratapa usaré la cartulina. En este caso use en color verde, que combina con la portada. Pudiera haberlo pegado con silicona o pega, pero conocí la cinta doble faz. Esta es una cinta que viene en distintos espesores (uso la de menor espesor) y me permite pegar sin hacer ningún desastre. Es mágica, y prácticamente la uso para todo. Corto pedazos según el tamaño, los pego en el cartón y luego retire el papel que trae y procedí a pegar la cartulina, dejando un pequeño espacio simétrico en cada uno de los lados.
 |  |
|---|
 |  |
|---|
PASO 3
Tapas listas, hasta que haya que perforarlas.

PASO A PASO DEL BOLSILLO INTERNO


PASO 1
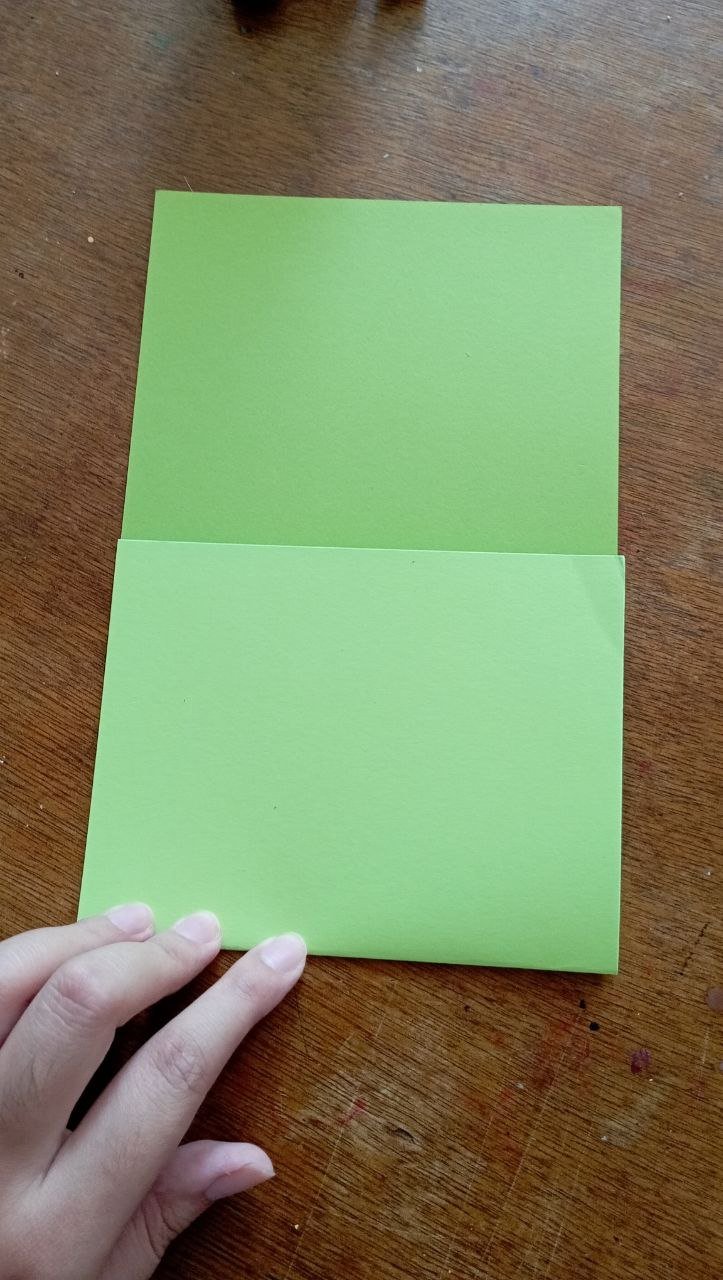
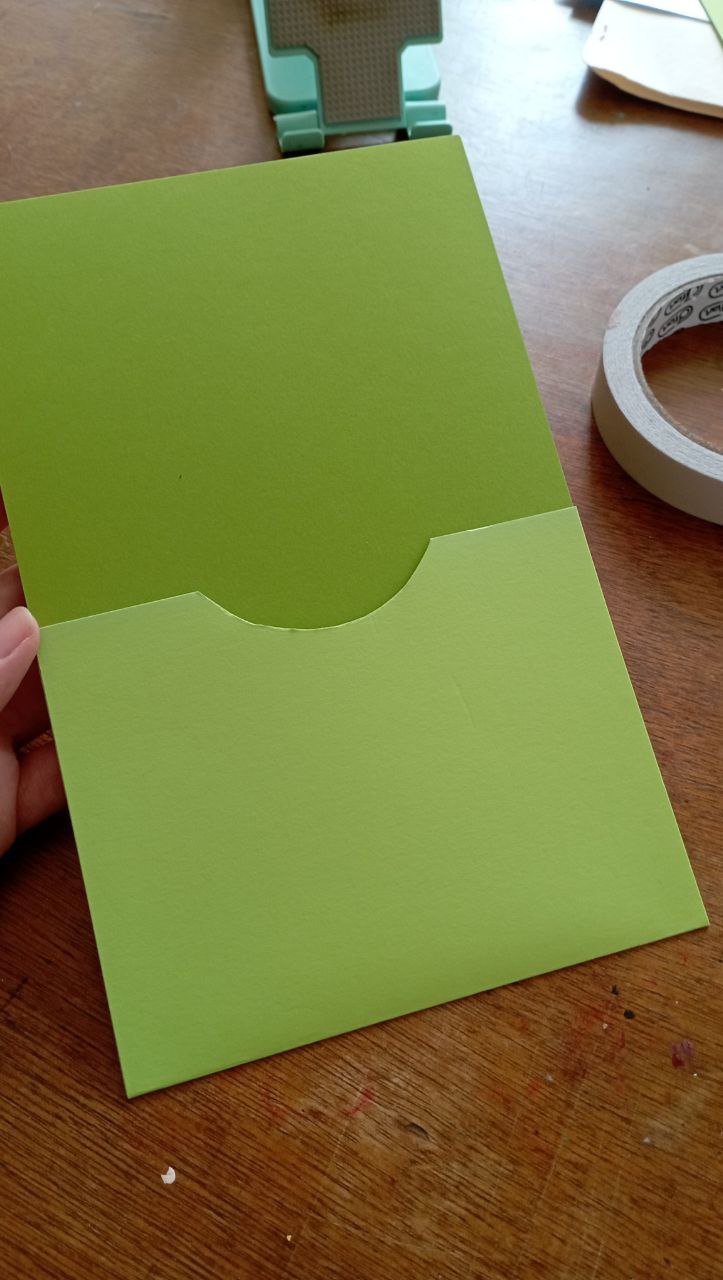
Para el bolsillo interno use dos colores de cartulina (dos tonos de verde). Es un bolsillo muy sencillo, pero doble, podra meter documentos tanto por delante como por detrás del bolsillo. Corte media cartulina tamaño carta de ambos colores (así serán del tamaño de las hojas del interior). Una de las cartulinas la doble por la mitad y le corte un semicírculo para darle un toque distinto.
 |  |
|---|
PASO 2
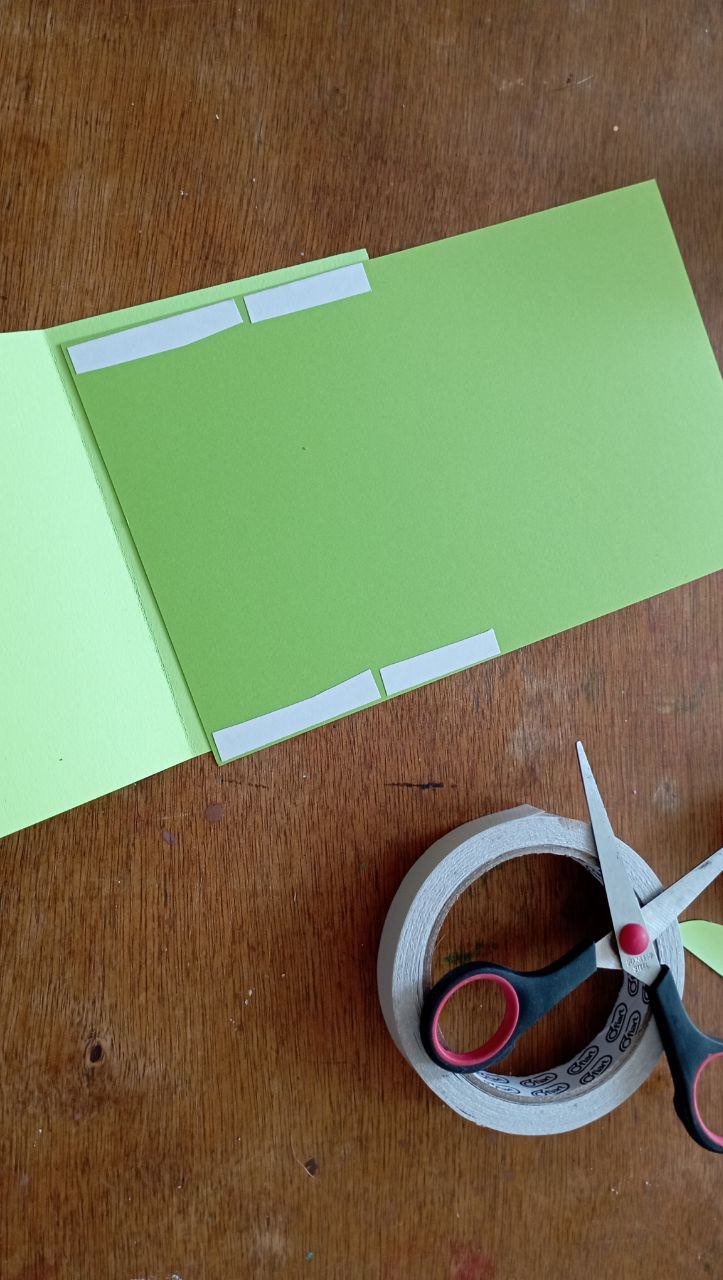
Una vez listo el medio círculo, la posicione y usando la cinta doble faz procedí a pegar los bolsillos a la cartulina base.
 |  |
|---|
PASO 3
Bolsillo listo hasta que toque perforarlo.

PASO A PASO DEL INTERIOR

PASO 1
En este punto ya el interior está impreso en tamaño carta y cortado a la mitad. Viene la mejor parte hacer las perforaciones para empezar a anillar.
Para esto uso una encuadernadora llamada mini cinch. Es toda una cuchurita, pero poderosa, que hasta ahora ha cumplido con su trabajo y mis locas ideas. Abre 6 huequitos de una vez y trae su regla para cuadrar estos huequitos según necesites.
 |  |
|---|
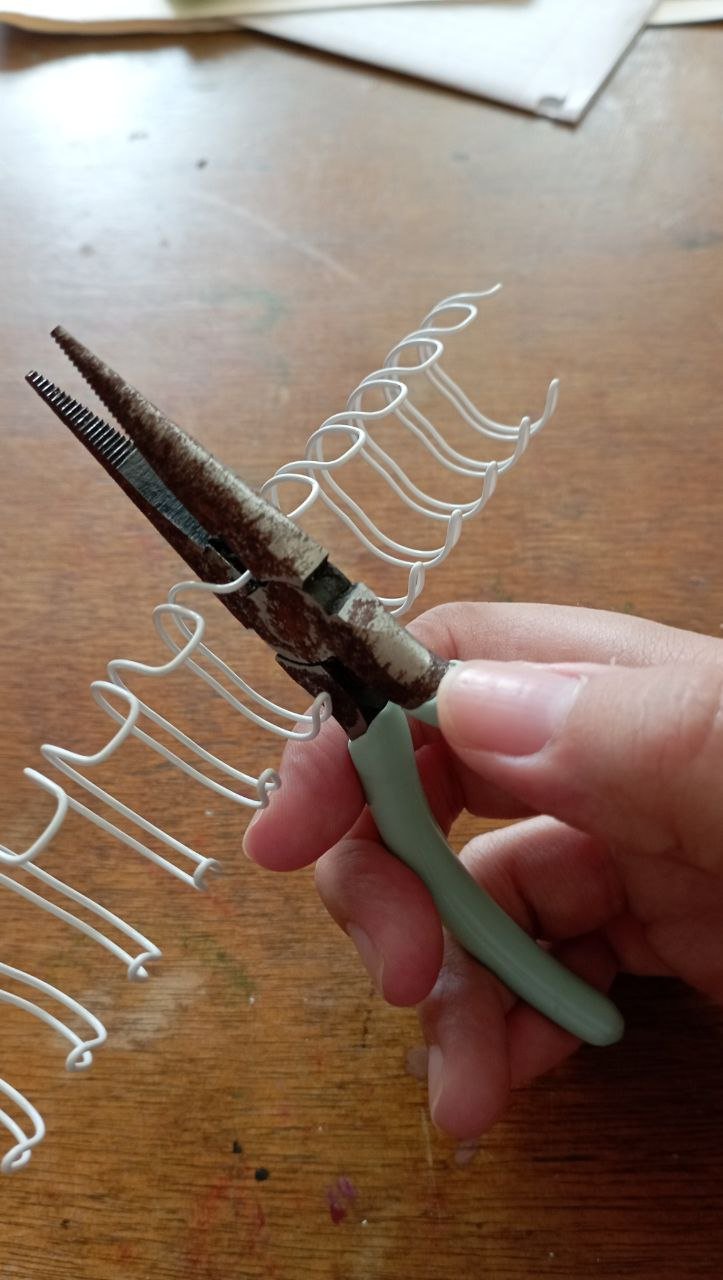
Para adelantar un poco el proceso, antes de empezar a performar aprovecho y cortó las anillas a la medida. Este cuaderno llevará 6 anillas abajo y 6 arribas, lo que le dará seguridad. Use de color blanco segun los deseos del cliente y el diseño.
 |  |
|---|
PASO 2
Empieza la parte divertida: perforar las hojas.
Previamente, ordene las impresiones de la última página a la primera para así ir armando de una vez.
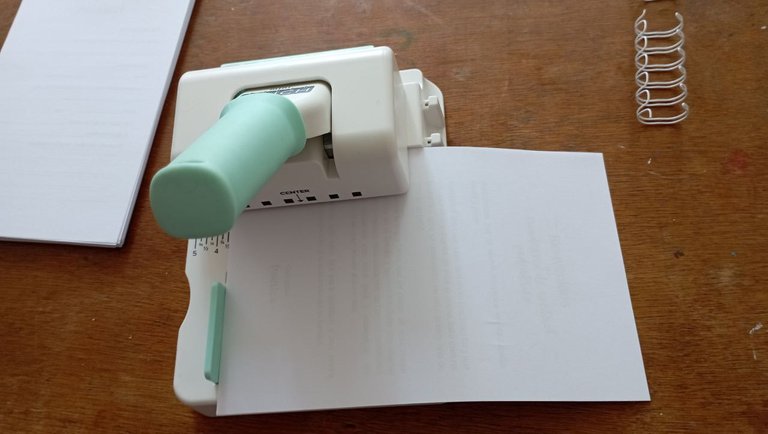
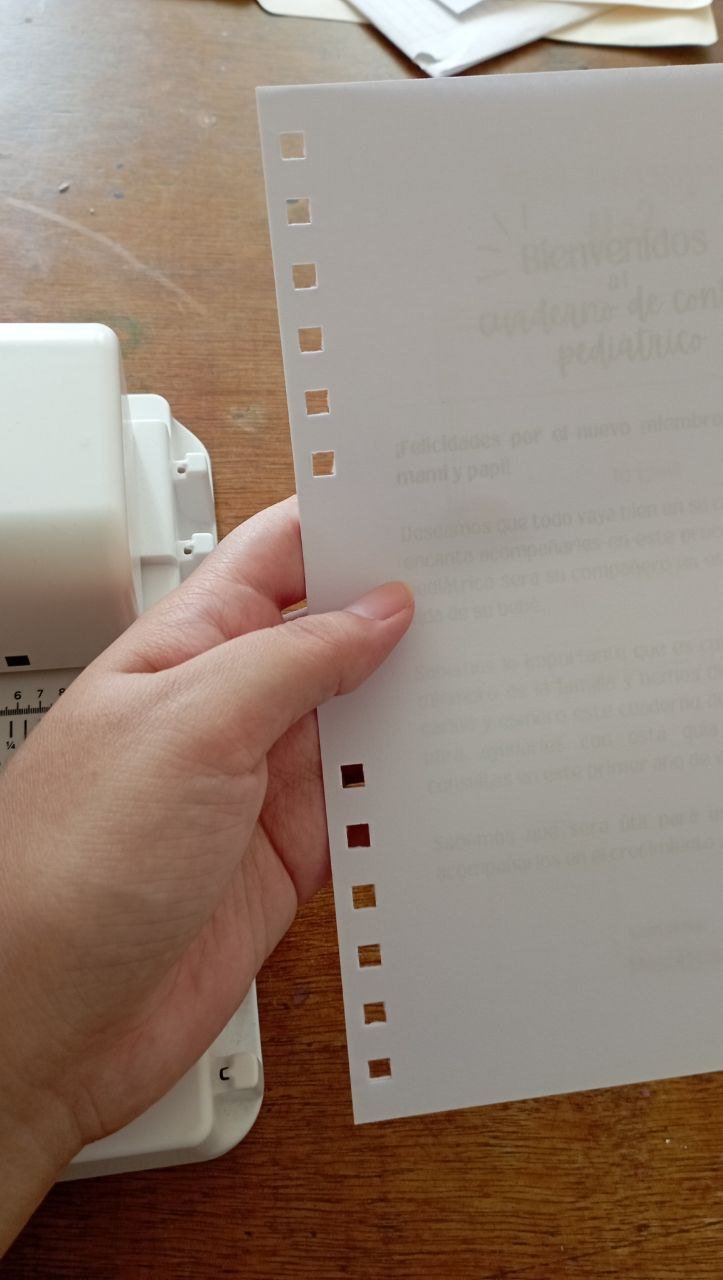
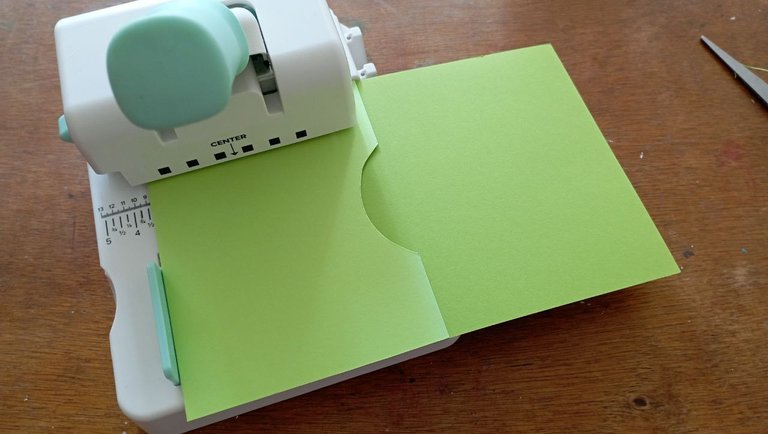
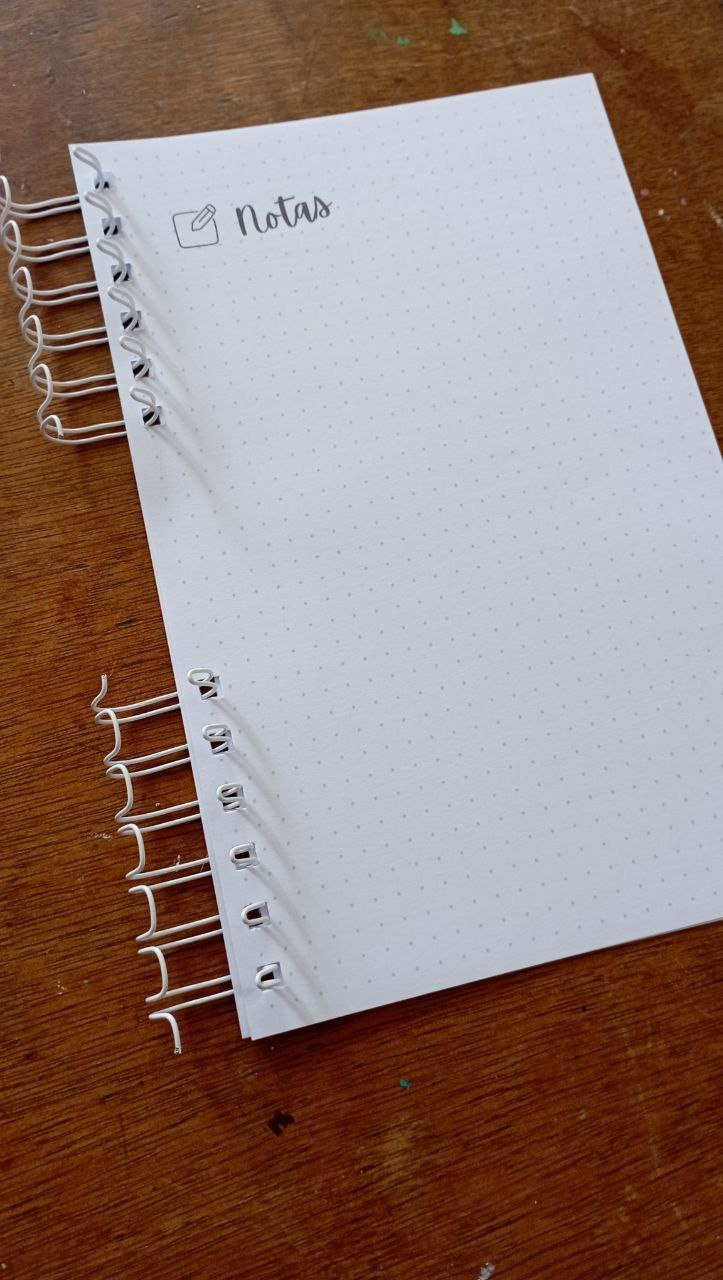
Para la perforación, colocó la regla en la medida justa y me encargo en pequeños lotes de perforar ambos entremos con mucho cuidado de que queden bien pegadas de la regla para que así todas se vean prolijas.
 |  |
|---|
 |  |
|---|
PASO 3
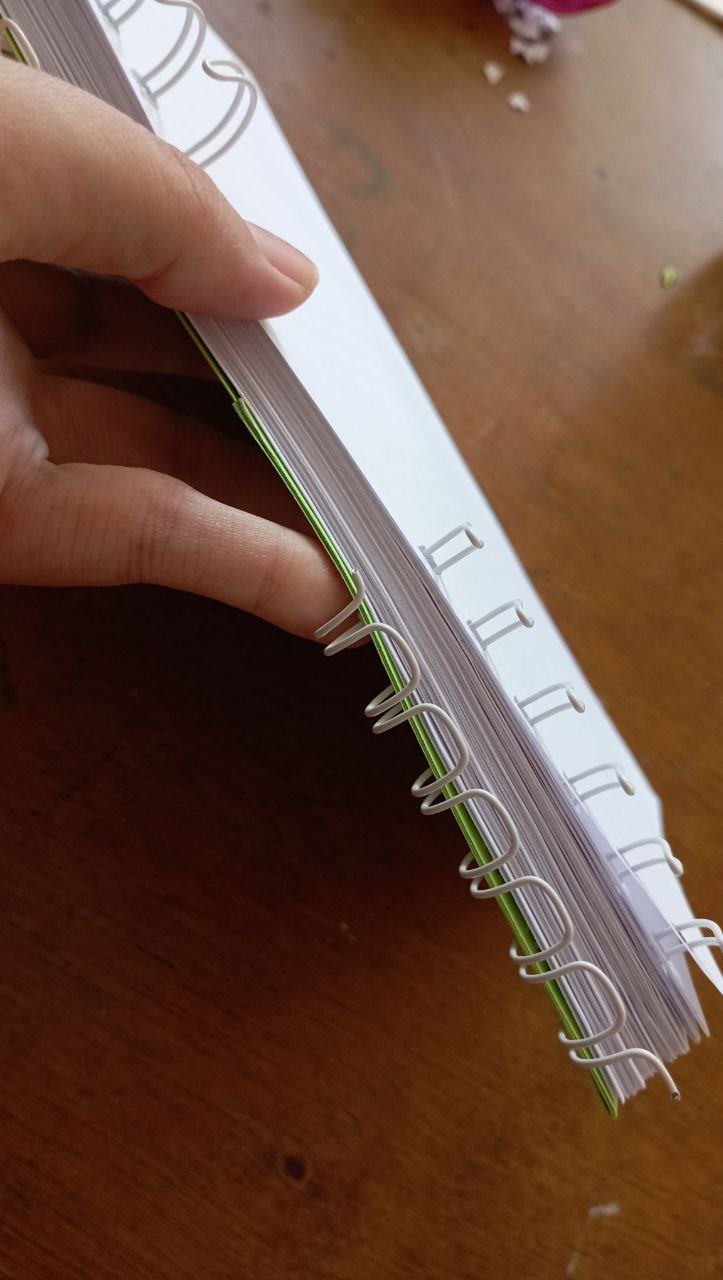
Una vez perforadas las hojas, voy metiéndolas en las anillas. Justo empecé con el bolsillo, ya que sería la última parte (sin meter la tapa trasera).

PASO 4
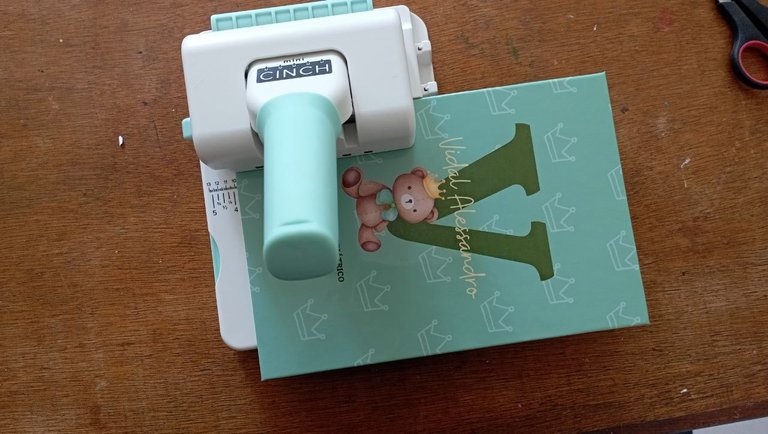
Al terminar con las hojas, toca perforar las tapas. Para esto retiro la regla y uso la medida que tengo establecida según pruebas que he hecho antes de 3 ¾. Empiezo con la portada y procedo a hacer en ambos extremos. Hago lo mismo con la tapa trasera y la colocó frente a frente con la portada.

PASO 5
Con todos los elementos unidos por las anillas, viene la hora de cerrarlas. Para esto, la mini cinch trae en su parte trasera un espacio para meter las anillas y con la misma palanca cerrarlas. Con dos toques en cada anillo es suficiente.

PASO 6
Pruebo cerrar el cuaderno, ver que funcione bien y el cuaderno de control pediátrico esta listo.
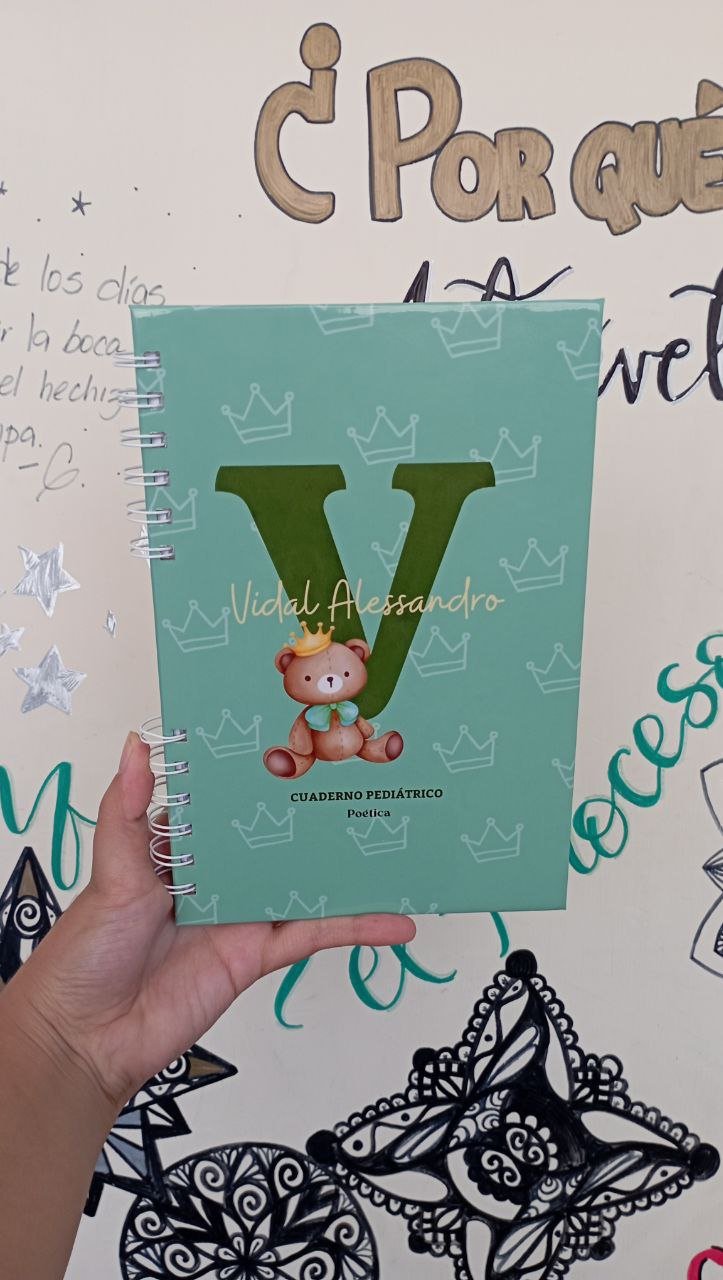
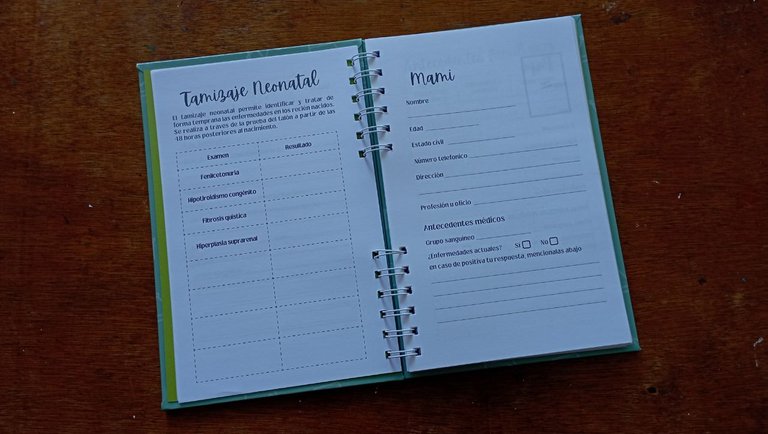 | 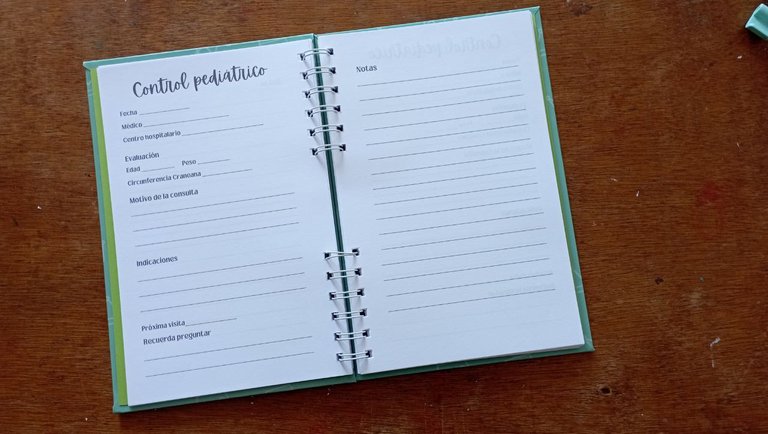 |
|---|

TOQUE EXTRA

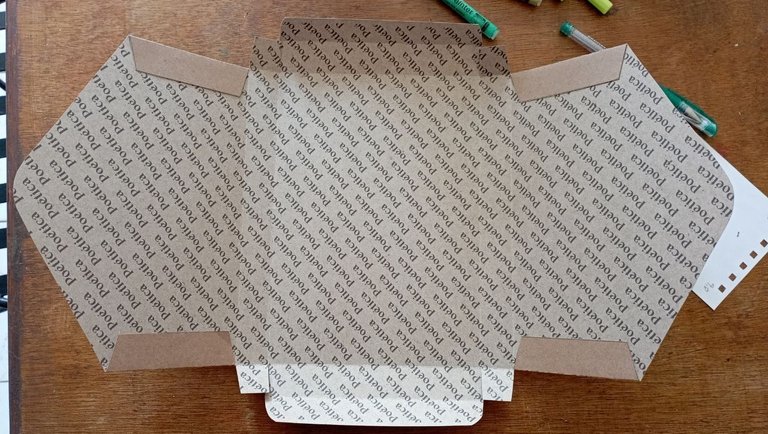
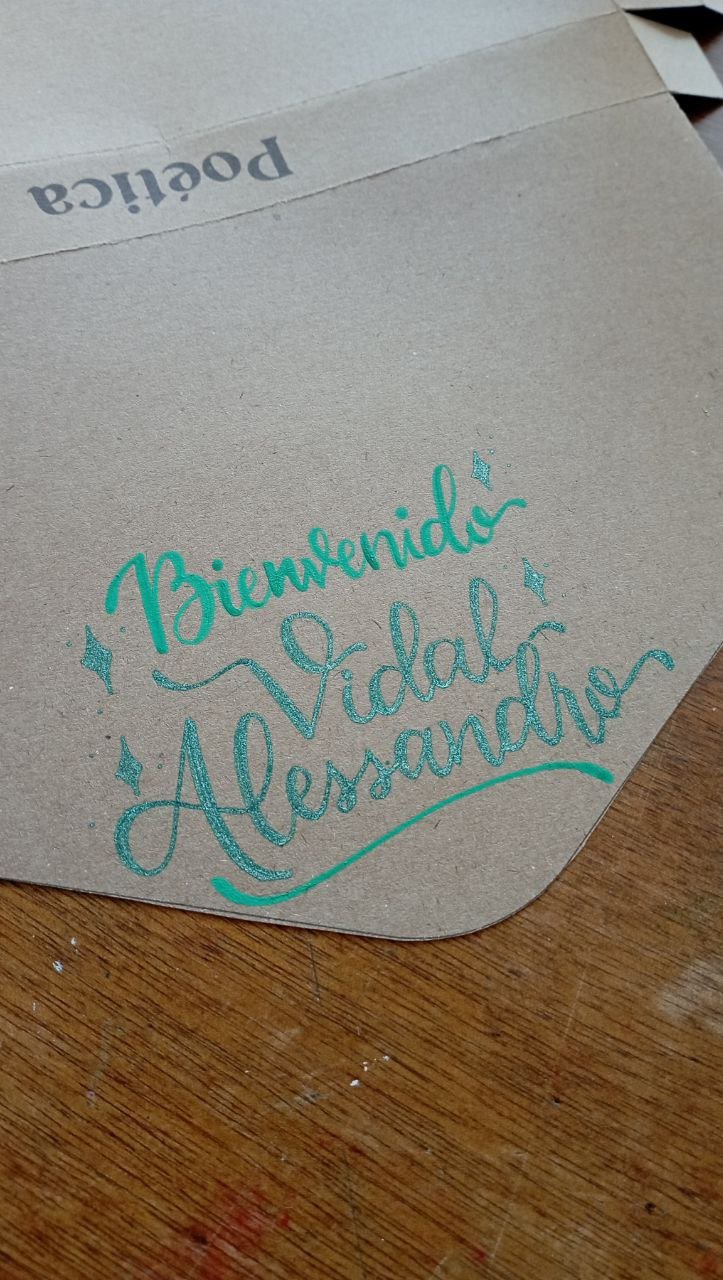
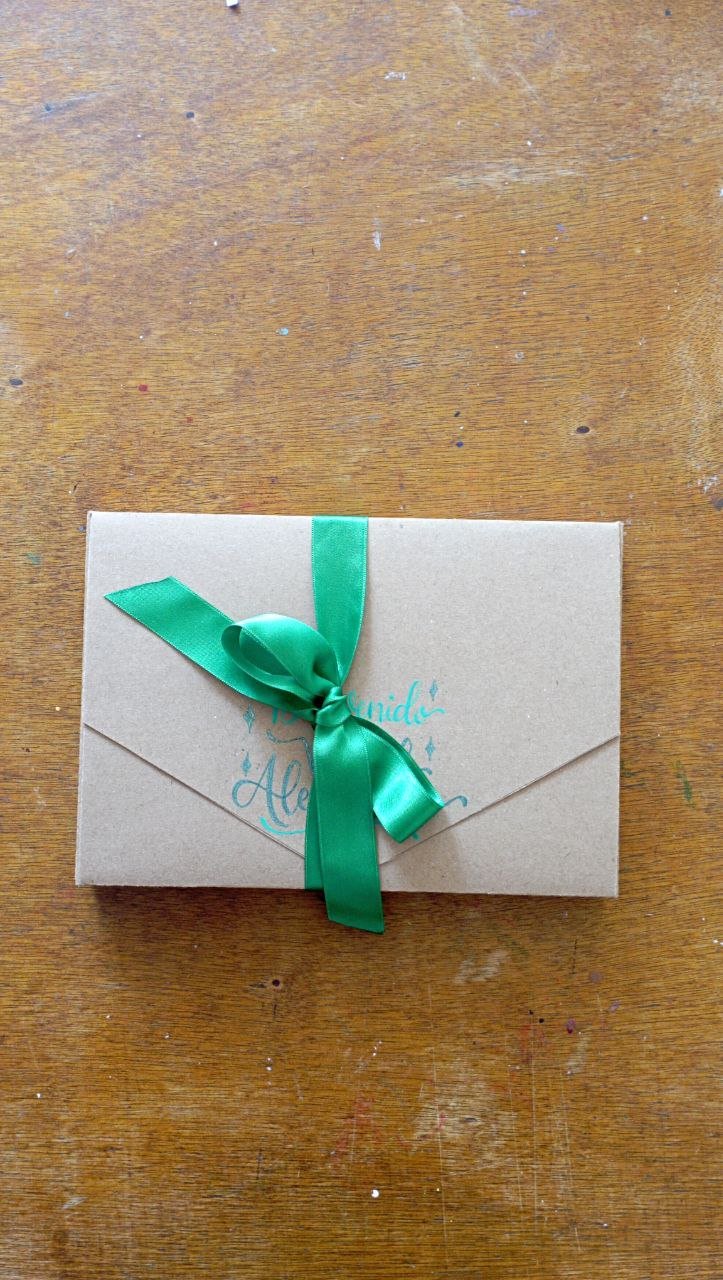
Este no es un paso extra, pero si es mi toque personal. Mande a diseñar unas cajas tipo sobre para los planners y agendas en una cartulina tipo kraft. Este tiene mi logo y procuro que cada uno lleve su nombre en lettering. Como este era un regalo para un nuevo bebé, le puse: “Bienvenido Vidal Alessandro” en tonos verdes. Para finalizar cerré con un lazo verde.

Hacer estos planners de cero es un trabajon, pero soy feliz haciéndolas y viendo lo felices que son los clientes al recibirlas. Es una actividad agotadora y a veces me provoca halar de mi cabello de lo perfeccionista que soy, pero yo mismo me maravillo y enorgullezco de mi crecimiento y aprendizaje.
Fue un placer contarte un poco acerca de una de mis actividades favoritas.
Gracias por leerme
Con cariño, G.


Hi hivers! 💜
I hope you are well and happy, dear crafters. As some of you know, I have a venture called Poeticabyg, where I sell art materials, teach lettering workshops and after December 2023 I design and make handmade planners. I had always had the idea of making my own planners from scratch, that is, designing the interiors, printing and assembling them in their entirety. I have been self-taught on the subject, little by little I have been buying materials and machines to help me with this. I've been learning about handmade binding of sewn notebooks (which I still have a lot to learn) and now I'm working with planners and ringbound agendas.

I started with daily and weekly planners. When they began to see my work, clients came asking for an appointment planner, another appointment planner for the listener, another entrepreneurial planner to organize a business and I, who love challenges, dared to take on these ideas. I like to be able to design something very personalized and that adapts to the needs of each client. This time I was asked for a pediatric control notebook for parents to keep track of visits to the pediatrician for their baby, vaccines, growth achievements, teething and everything related to the early years of the baby. I even consulted a pediatrician and I am very happy with the result. I will tell you a little bit about my favorite part, the making of the notebook:

MATERIALS
For the covers:
Cardboard (I use cardboard 1 in kilo of 0.8 caliber cut 15 x 22.7 cm)
Self-adhesive paper with printed design
Cardboard (for the back cover)
Double-sided tape
Cutter or exacto
For the inside:
Printed sheets with the inside (they are letter size and I cut them with a guillotine so they are half letter)
Rings (depending on the design I use gold color)
Binding machine (I use the mini cinch from we r maker).
For the inside pocket:
Cardboard (use two shades of green)
Double-sided tape

STEP BY STEP OF THE COVERS


STEP 1
For the covers, the first thing to do is to line them, for this I used self-adhesive paper that was previously laminated. I use a cutter or exacto to mark and center the cardboard. I proceed to glue it. With the leftover ends, I make triangular cuts in the corners and glue the leftovers to the back cover to secure it.
 |  |
|---|
 |  |
|---|

STEP 2
To refine the back cover I will use the cardboard. In this case I used green, which matches the cover. I could have glued it with silicone or glue, but I used double-sided tape. This is a tape that comes in different thicknesses (I use the thinner one) and allows me to glue without making a mess. It's magic, and I pretty much use it for everything. I cut pieces according to size, glue them on the cardboard and then remove the paper it comes with and proceed to glue the cardboard, leaving a small symmetrical space on each side.
 |  |
|---|
 |  |
|---|
STEP 3
Lids ready, until they need to be pierced.

STEP BY STEP OF THE INTERNAL POCKET


STEP 1
For the inside pocket I used two colors of cardboard (two shades of green). It is a very simple pocket, but double, you will be able to put documents in both the front and the back of the pocket. Cut half a piece of cardboard in both colors (so they will be the same size as the inside pages). Fold one of the cards in half and cut a semicircle to give it a different touch.
 |  |
|---|
STEP 2
Once the half circle was ready, I positioned it and using the double-sided tape I proceeded to glue the pockets to the base cardboard.
 |  |
|---|

STEP 3
Pocket ready until it is time to punch it.

STEP BY STEP OF THE INTERIOR


STEP 1
At this point the inside is already printed in letter size and cut in half. Now comes the best part, making the perforations to start banding.
For this I use a binding machine called a mini cinch. It's quite a little knife, but a powerful one, and so far it has done its job and my crazy ideas. It opens 6 holes at a time and comes with a ruler to square these holes as needed.
 |  |
|---|
To speed up the process a bit, before starting to perform, I took advantage of the opportunity and cut the rings to size. This notebook will have 6 rings on the bottom and 6 on the top, which will give it security. Use white color according to the customer's wishes and design.
 |  |
|---|
STEP 2
The fun part begins: punching the sheets.
Previously, I ordered the prints from the last page to the first in order to assemble them all at once.
For the perforation, I place the ruler at the right size and in small batches I perforate both sides, being very careful to make sure they are well stuck to the ruler so that they all look neat.
 |  |
|---|
 |  |
|---|
STEP 3
Once the sheets are punched, I put them in the rings. I just started with the pocket, since it would be the last part (without putting the back cover in).


STEP 4
After finishing with the sheets, it is time to perforate the lids. For this I remove the ruler and use the measurement I have established according to the tests I have done before of 3 ¾. I start with the front cover and proceed to do at both ends. I do the same with the back cover and place it face to face with the front cover.

STEP 5
With all the elements joined by the rings, it is time to close them. For this, the mini cinch has a space at the back to insert the rings and close them with the same lever. Two touches on each ring is enough.

STEP 6
I try to close the notebook, check that it works well and the pediatric control notebook is ready.

 |  |
|---|

EXTRA TOUCH


This is not an extra step, but it is my personal touch. I had envelope type boxes designed for the planners and agendas in a kraft type cardboard. This one has my logo on it and I try to have each one with my name in lettering. As this was a gift for a new baby, I put: “Welcome Vidal Alessandro” in green tones. Finally, I closed it with a green ribbon.


Making these planners from scratch is a lot of work, but I am happy making them and seeing how happy the clients are when they receive them. It is an exhausting activity and sometimes causes me to pull my hair out because of how much of a perfectionist I am, but I myself marvel and take pride in my growth and learning.
It was a pleasure to tell you a little about one of my favorite activities.
Thank you for reading me
With love, G..
FUENTE
Fotos: tomadas por mi desde mi redmi 10
Traducción: Deepl
El diseño tanto interno como externo del planner y armado es de mi autoría
SOURCE
Photos: taken by me from my redmi 10
Translation: Deepl
Both the internal and external design of the planner and assembly are my authorship.
