Hola hola, hivers "BIENVENIDOS A MI BLOG".
Espero y confío en Dios que se encuentren bien gozando de buena salud, paz y amor. Un saludo muy espacial a esos creativos artesanos que día a día nos enseñan nuevas manualidades, artesanías, diseños, etcétera.. Se que e estado un poco ausente de la comunidad pero les quiero asegurar que verán por aquí mi post más seguidos. En esta ocasión voy a mostrarle como elaborar un hermoso adorno alusivo a un pollito, para llenar de alegría a los más peques de la casa, es muy fácil de hacer y sobre todo económico... Sin mas que decir. **¡Dejemos que nuestra creatividad sea nuestra guía! **
Hello hello, hivers "WELCOME TO MY BLOG".
I hope and trust in God that you are well enjoying good health, peace and love. A very special greeting to those creative artisans who every day teach us new crafts, crafts, designs, etc.. I know I have been a little absent from the community but I want to assure you that you will see my post more often. This time I will show you how to make a beautiful ornament alluding to a chick, to fill with joy the little ones of the house, it is very easy to do and above all economical .... Nothing more to say. Let our creativity be our guide!

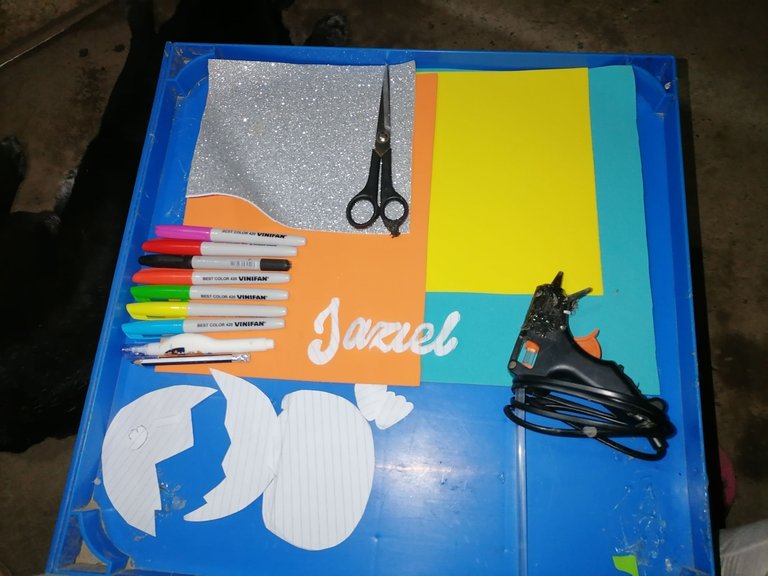
°Foami o goma eva de color: Blanco, plateado, azul, amarillo y naranja.
°Pistola de silicón
°Silicón en barra
° rotuladores de color: Azul, negro y naranja.
°Corrector.
°Tijeras.
°Moldes del nombre del niñ@
°Lápiz
°Moldes de un pollito y un huevo roto.
**_MATERIALS:
°Foami or colored eva rubber: white, silver, blue, yellow and orange.
°Silicone gun
°Silicone stick
° colored markers: blue, black and orange.
°corrector.° Scissors.
°Child's name molds.
°Pencil
°Molds of a chick and a broken egg._**
Pasos a seguir: Steps to follow:
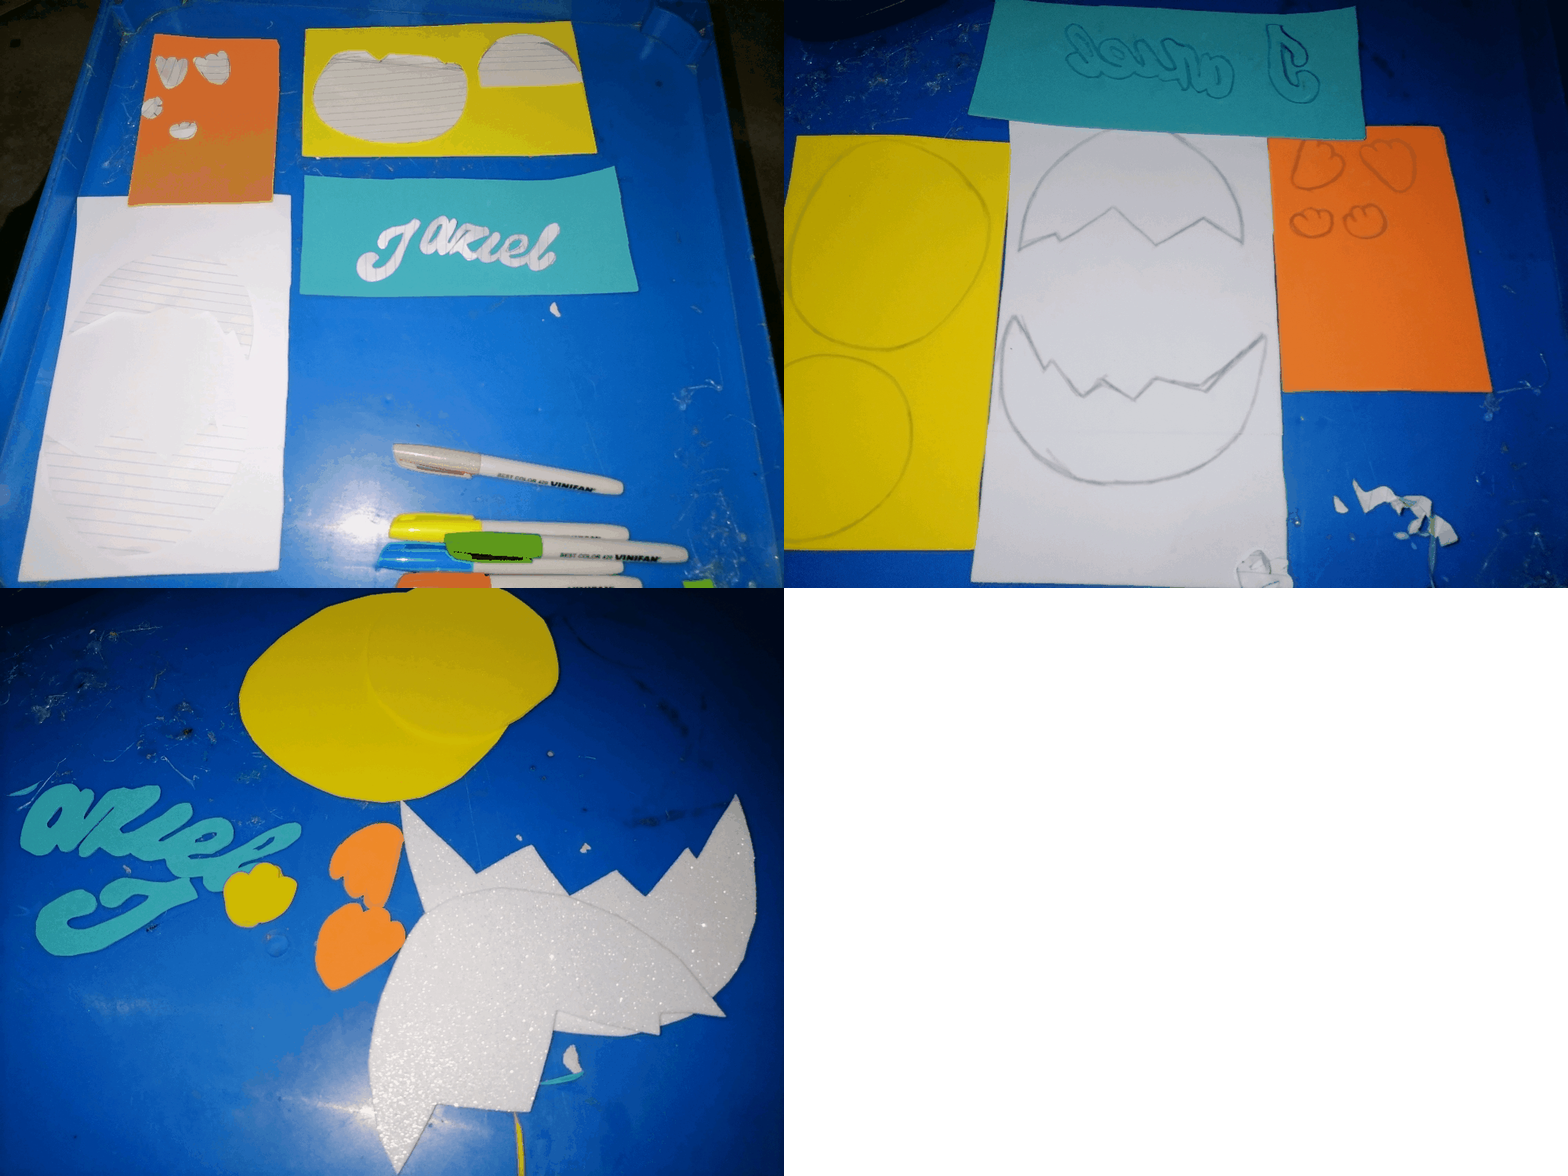
Paso 1:
Primero colocamos los moldes en los diferentes colores de goma eva, marcamos y recortamos.Step 1:
First we place the molds in the different colors of eva rubber, mark and cut out.
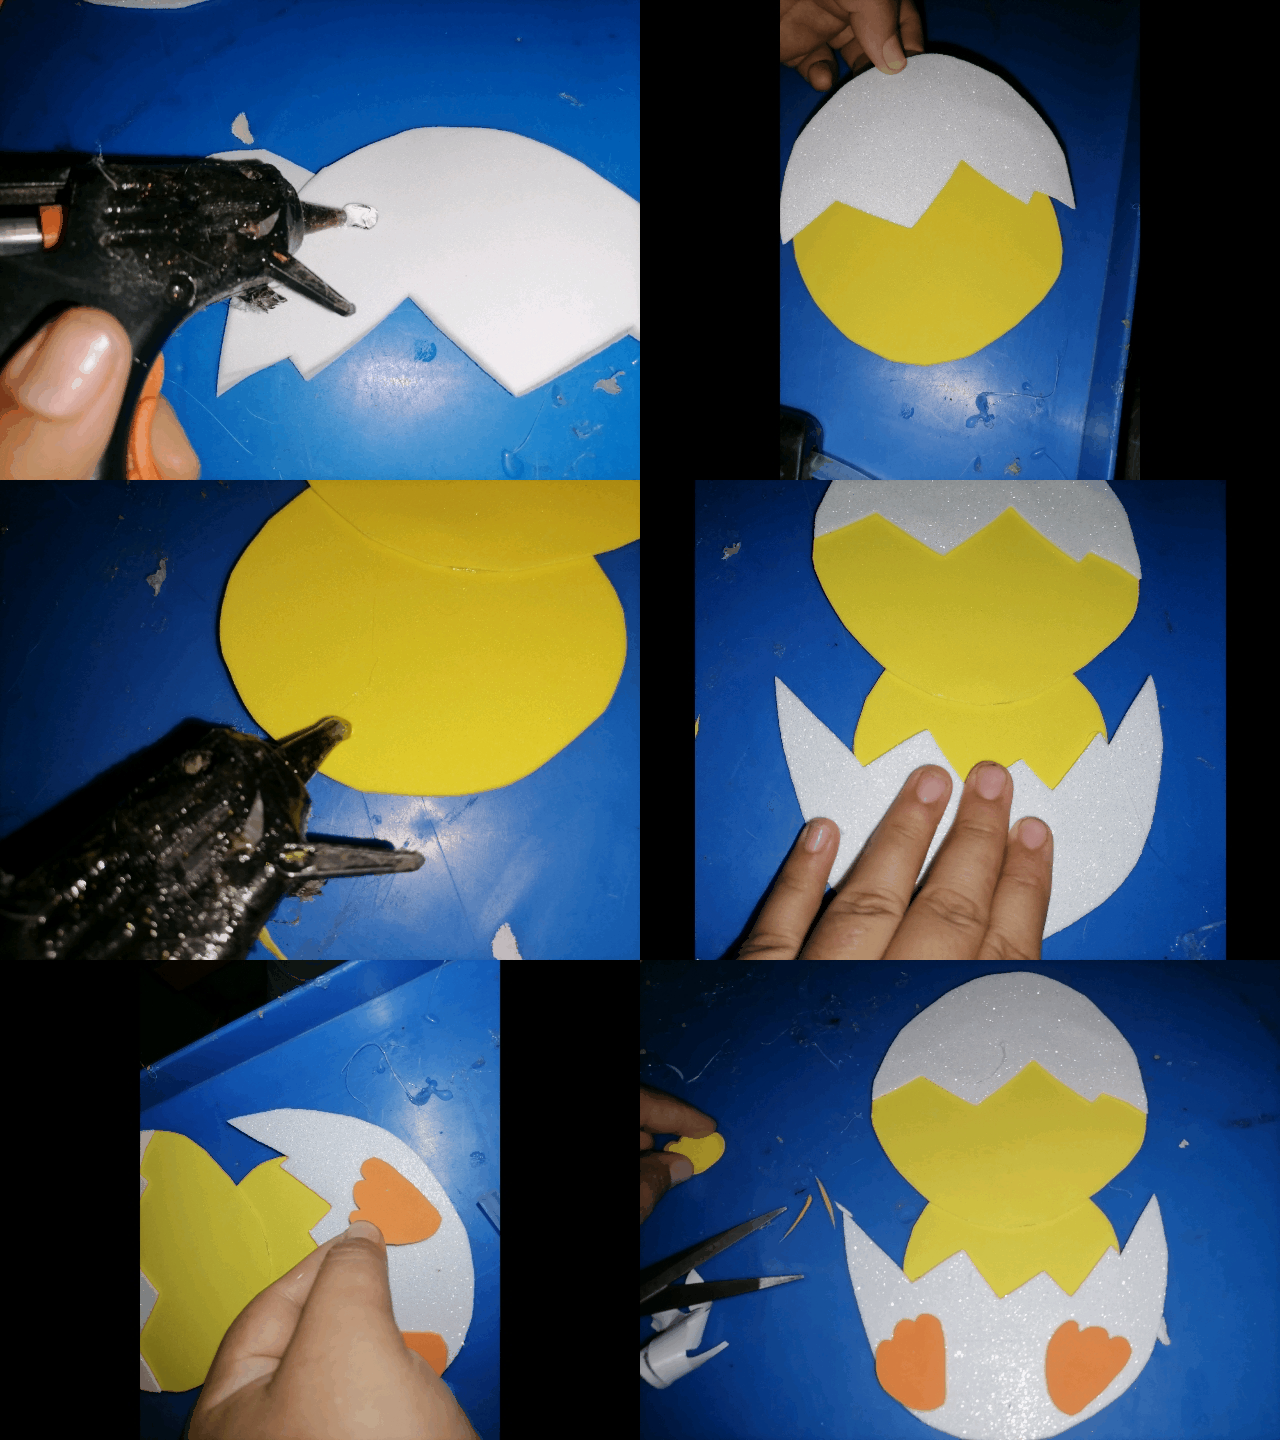
Paso 2:
Después agregamos slicon caliente sobre la parte trasera de unos de los huevos y lo pegamos encima de la cabeza, el cuerpo lo pegamos debajo de la cabeza por la parte de atrás, encima del cuerpo en la parte inferior pegamos la otra mitad del huevo, y sobre ese huevo pegamos las patas del pollito.Step 2:
Then we add hot slicon on the back of one of the eggs and glue it on top of the head, the body we glue it under the head on the back side, on top of the body at the bottom we glue the other half of the egg, and on top of that egg we glue the legs of the chick.
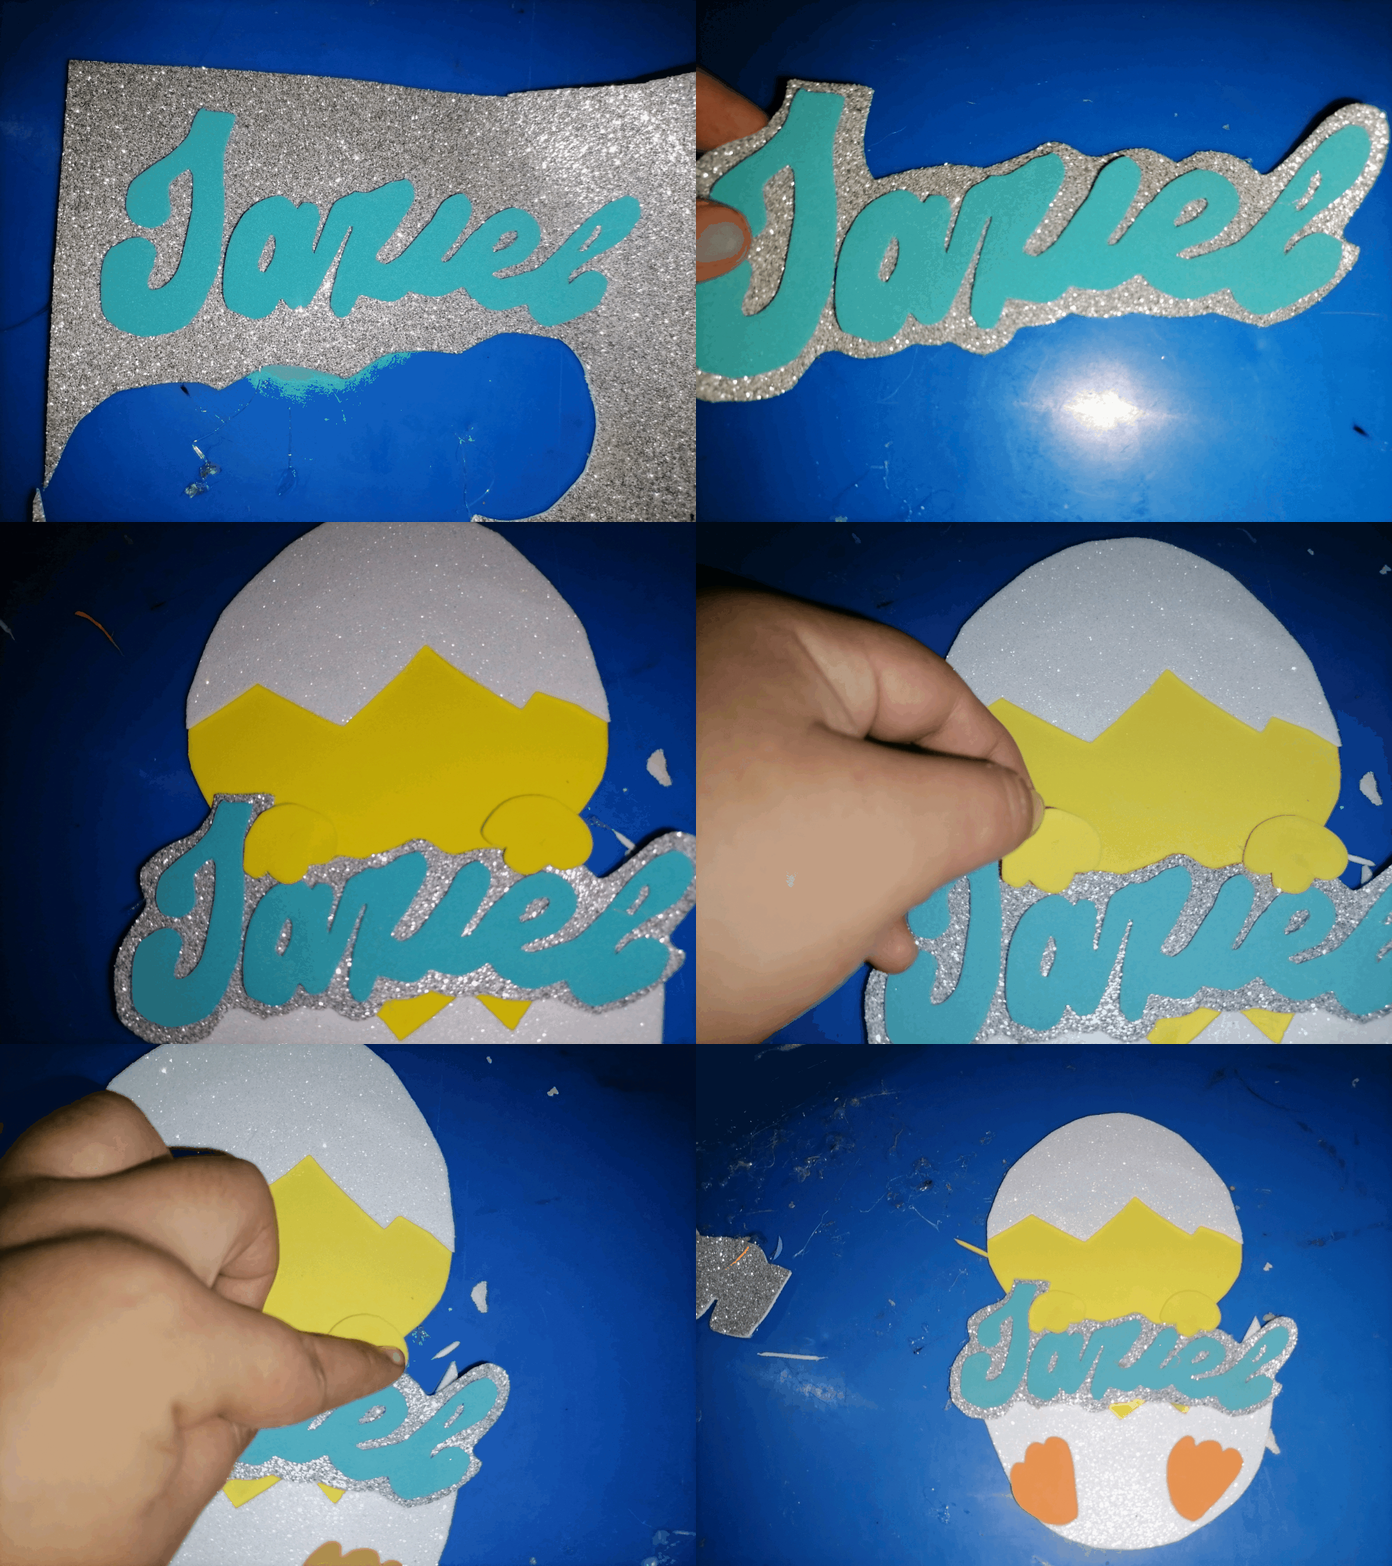
Paso 3:
Ahora el nombre lo colocamos sobre la goma Eva de color plateado y cortamos rodeando el nombre lo pegamos en el cuerpo del pollito, y encima del mismo pegamos las manitos.Step 3:
Now we place the name on the silver colored eva rubber and cut around the name we glue it on the body of the chick, and on top of it we glue the little hands.
Paso 4:
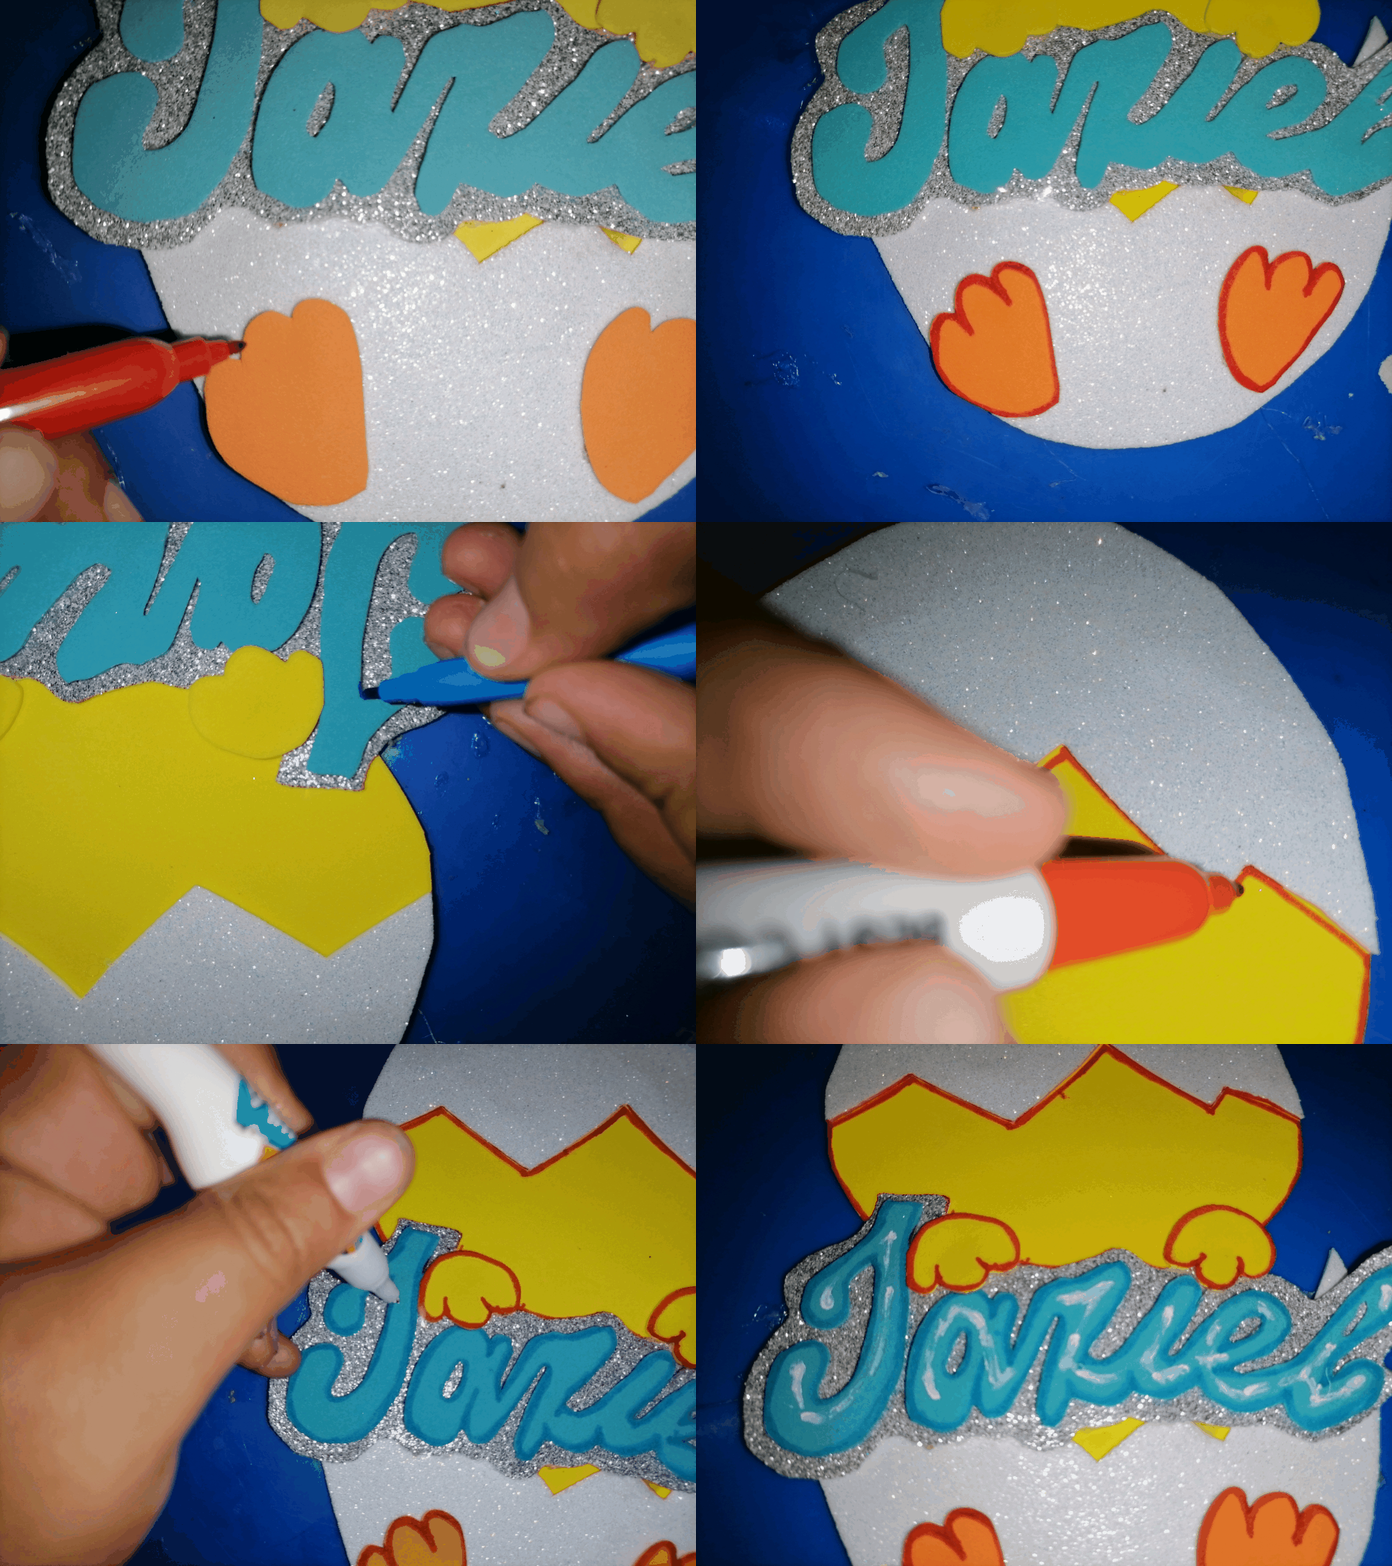
Hecho esto con el rotulador de color naranja, hacemos los bordes y detalles de las patas, manos y cabeza del pollito, con el rotulador azul del borde del nombre, y con corrector de damos como un sombreado a los nombres. (la técnica del sombreado la aprendí de mi amiga @kathelopez77).Step 4:
Done this with the orange marker, we make the edges and details of the legs, hands and head of the chick, with the blue marker on the edge of the name, and with corrector we give as a shading to the names. (I learned the shading technique from my friend @kathelopez77).
Paso 5:
por ultimo apemosndos redondos, dibujamos los ojos con los rotuladores negro, y azul, con el corrector hacemos unos detalles, con el rotulador naranja hacemos el pico y con el negro nuevamente vamos hacer el borde del mismo.Step 5:
Finally, we draw the eyes with the black and blue markers, with the corrector we make some details, with the orange marker we make the beak and with the black marker again we will make the edge of the beak.queridos amigos ahora solo nos queda adornar el cuarto de nuestros hij@s, o muy bien adornando esa parte favorita del niñ@
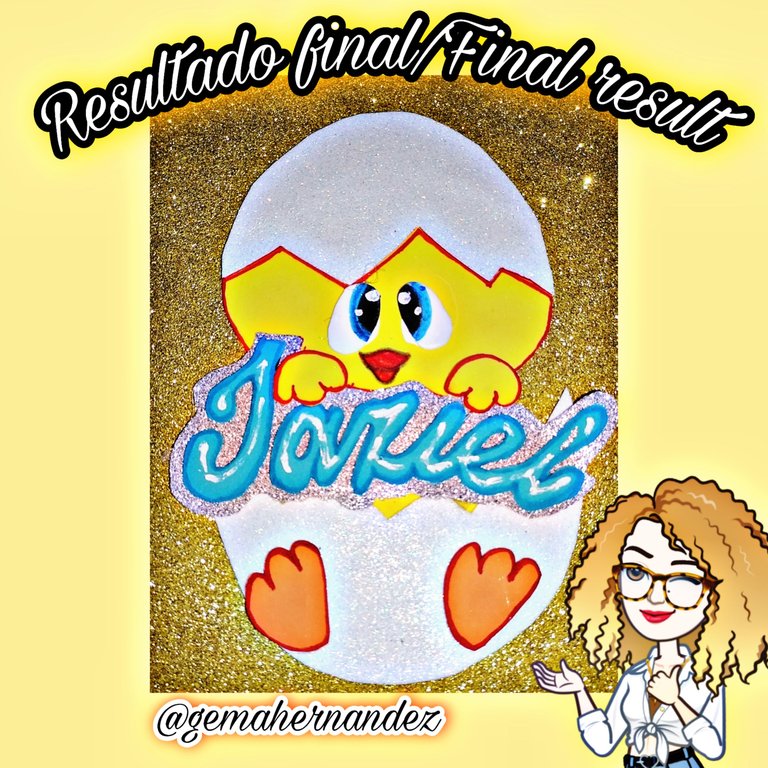
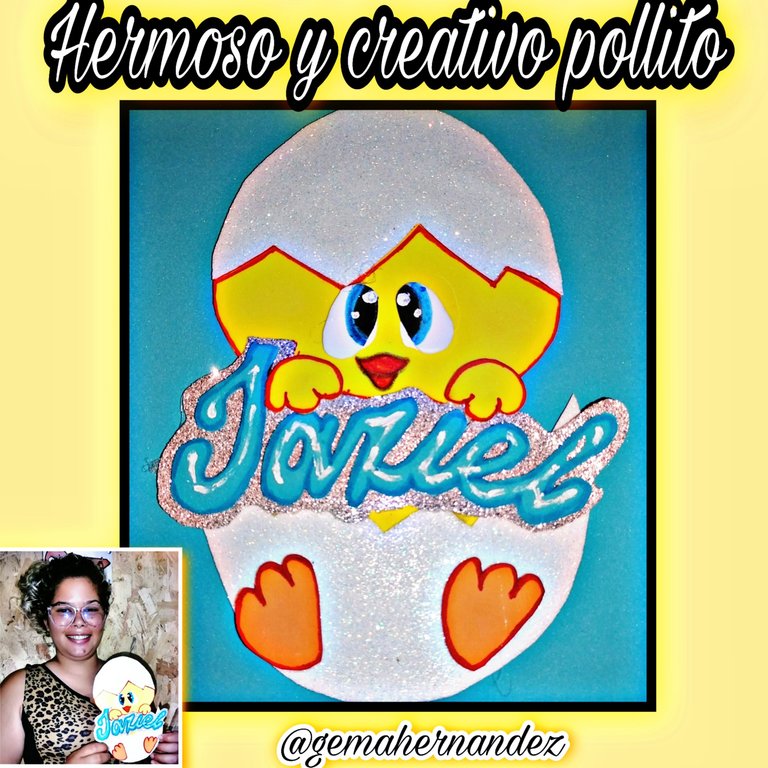
Aquí les muestro el resultado final
Dear friends, now we just need to decorate the room of our children, or very well decorating that favorite part of the child.
Here I show you the final result
Muchas gracias por leerme Espero les guste y sobre todo lo puedan hacer en casa recuerda seguirme @gemahernandez y así ver mi contenido Bendiciones 😘 😘 Thank you very much for reading me .I hope you like it and above all you can do it at home .remember to follow me @gemahernandez so you can see my content Blessings 😘 😘 Traducido con www.DeepL.com/Translator (versión gratuita)
Translated with www.DeepL.com/Translator (free version)
