Hola hola comunidad hermosa de hive espero todos se encuentren muy bien, esta vez les traigo una idea súper genial para regalar a papá en su día o para empezar un emprendimiento y si ya lo tienes entonces puedes hacer esta idea que te aseguro se te va a vender muchísimo y que los papás van a quedar encantados con este detalle, que además de lindo es económico y fácil de hacer.
Hello hello beautiful community of hive I hope you are all very well, this time I bring you a super cool idea to give to dad on his day or to start a business and if you already have it then you can do this idea that I assure you will sell a lot and that dads will be delighted with this detail, which besides being cute is economical and easy to do.
Yo tengo un emprendimiento como ya les he contado en varios post y siempre ando innovando mis ideas para así poder llegar a más clientes, a veces suele ser un poco difícil pero si te sabes administrar tenlo por seguro que tu emprendimiento siempre será próspero y abundante, lo más importante es no darte por vencido y si en algún momento sientes que no te va muy bien sigue adelante y busca otras ideas. ÉXITOS QUE SÍ SE PUEDE.
I have a business as I have already told you in several posts and I am always innovating my ideas in order to reach more customers, sometimes it can be a little difficult but if you know how to manage it be sure that your business will always be prosperous and abundant, the most important thing is not to give up and if at any time you feel that you are not doing very well go ahead and look for other ideas.SUCCESSES THAT YES YOU CAN

AHORA SI EMPECEMOS CON LOS MATERIALES.
NOW LET'S GET STARTED WITH THE MATERIALS.

- Una cerveza esta yo la decore antes, pero es opcional también puedes colocarle una coca cola o alguna otra bebida si así lo deseas.
- Pistola de silicón.
- Globo.
- 3 bombones, puedes colocarle más si consideras que le falta.
- tijera.
- tirro o cinta plástica.
- Inflador.
- Palitos de altura.
- Papel crepe: azul, negro y blanco.
- Cotufera o alguna otra caja que tengas.
- lazo.
- Cositas para decorar, opcional.
- Amor.
- I decorated this one before, but it is optional you can also >put a coke or any other drink if you wish.
- Silicone gun.
- Balloon.
- 3 chocolates, you can add more if you think it lacks.
- scissors.
- string or plastic tape.
- Inflator.
- Sticks of height.
- Crepe paper: blue, black and white.
- Cotufera or any other box you have.
<- ribbon.- Little things to decorate, optional.
- Love.

PASO A PASO
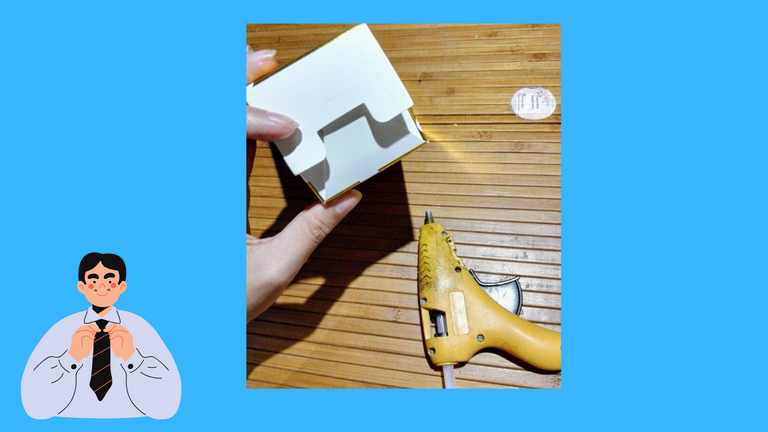
PASO 1
- Lo primero que debemos hacer es pegar con nuestra pistola de silicón las pestañas de nuestra cajita por debajo, esto va a garantizar de que no se salga nada.
STEP BY STEP
STEP 1
- The first thing to do is to glue with our silicone gun the tabs of our box underneath, this will ensure that nothing comes out.
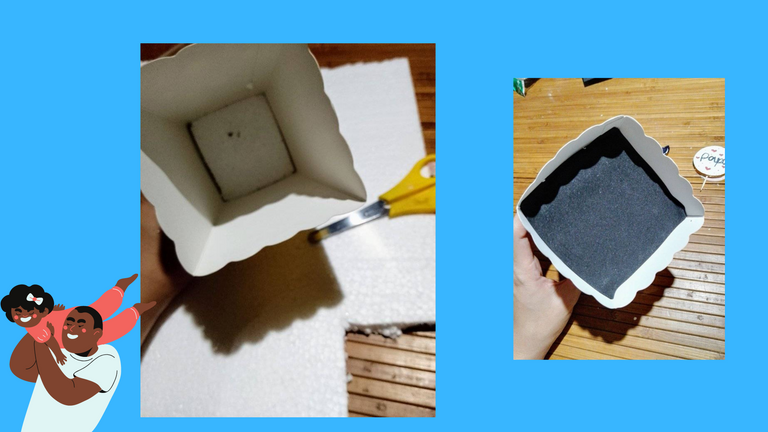
PASO 2
- Ahora cortamos cuadraditos de anime según el tamaño de nuestra cajita, hasta llenarla no por completo, en lo personal me gusta colocarle al final un cuadrado de foamy para que no se vea el anime, pero ya esto sería opcional.
STEP 2
- Now we cut anime squares according to the size of our box, until we fill it not completely, personally I like to place a square of foamy at the end so that the anime is not seen, but this would be optional.
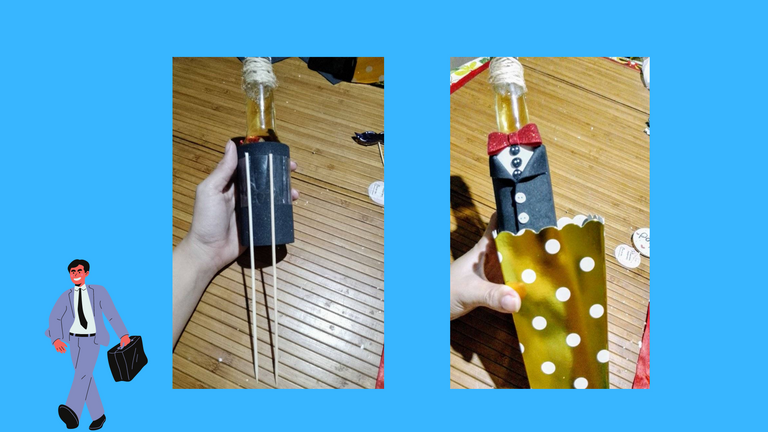
PASO 3
- tomamos 2 palitos de altura y lo pegamos detrás de la cerveza con cinta plástica, así aseguramos que no se mueva de su sitio ni se caiga. Luego de esto la inserte a un costado de la caja.
STEP 3
- we take 2 sticks of height and we stick it behind the beer with plastic tape, this way we ensure that it does not move from its place or fall. Then insert it into the side of the box.
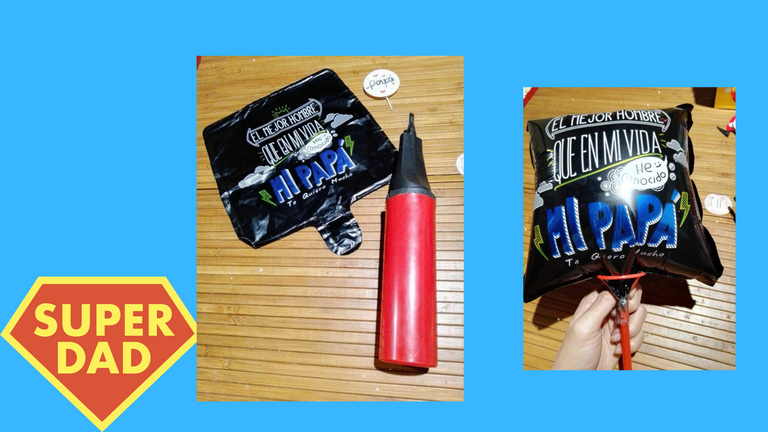
PASO 4
- Inflamos nuestro globo con el inflador para luego colocarle el palito yo siempre lo aseguro para que quede fijo con cinta adhesiva.
STEP 4
- We inflate our balloon with the inflator and then place the stick on it. I always secure it so that it is fixed with adhesive tape.
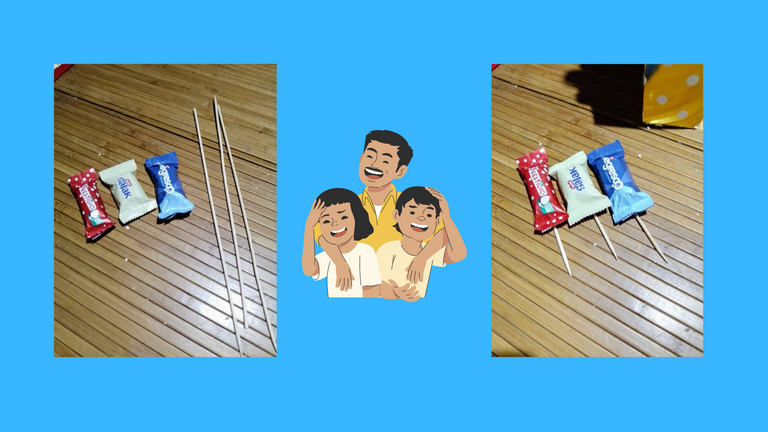
PASO 5
- Luego de que ya este nuestro globo listo, tomamos los tres bombones y lo pegamos con silicón caliente a los palitos de altura, yo los corte no tan altos pero esto es opcional del tamaño que lo desees cortar.
STEP 5
- After our balloon is ready, we take the three chocolates and glue them with hot silicone to the sticks, I cut them not so high but this is optional depending on the size you want to cut.
PASO 6
- Inserte los tres bombones en la parte de adelante en forma de abanico, y así ya va quedando nuestro arreglo. Aparte de eso recorte tiras largas de papel crep azul oscuro y cuadritos de papel crepe negro, azul oscuro y blanco para decorar.
STEP 6
- Insert the three chocolates in the front part in the shape of a fan, and this is how our arrangement will look like. Besides that, cut long strips of dark blue crepe paper and squares of black, dark blue and white crepe paper to decorate.
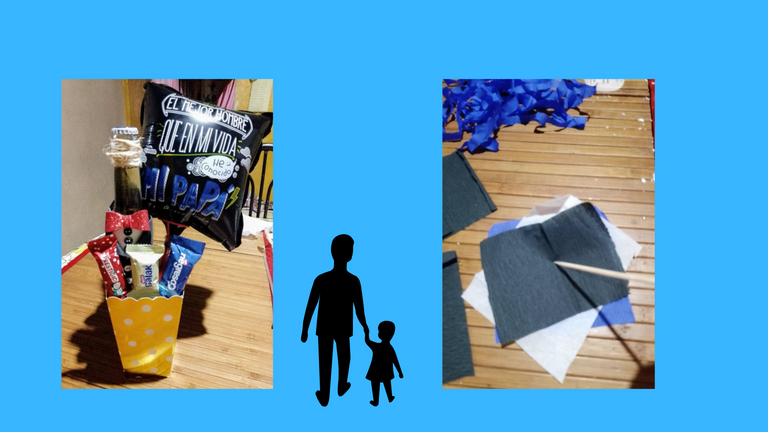


PASO 7
- Ya por ultimo le coloque estos detalles que previamente realice con cartulina y marcador negro, finalizo colocando un lazo azul y el logo de mi emprendimiento.
STEP 7
- Finally I put these details that I previously made with cardboard and black marker, I finish with a blue ribbon and the logo of my enterprise.
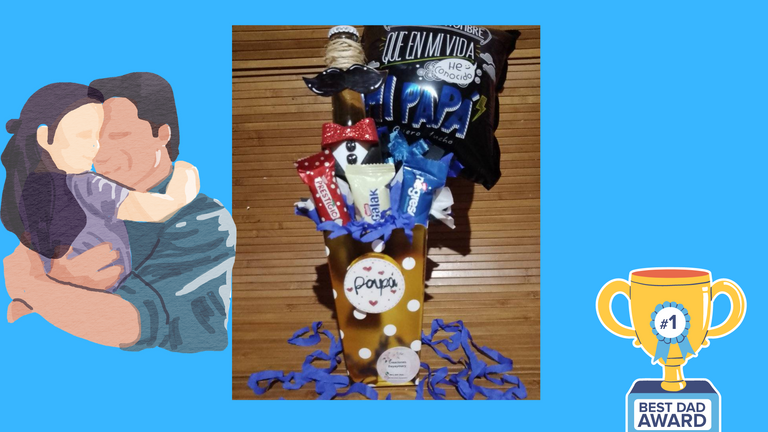
RESULTADO
Y así quedó este hermoso arreglito, espero les haya gustado y se animen en realizarlo. GRACIAS POR LLEGAR HASTA AQUÍ SALUDOS
RESULT.
And so was this beautiful arrangement, I hope you liked it and I encourage you to do it. THANKS FOR COMING THIS FAR GREETINGS
