VERSION ESPAÑOL
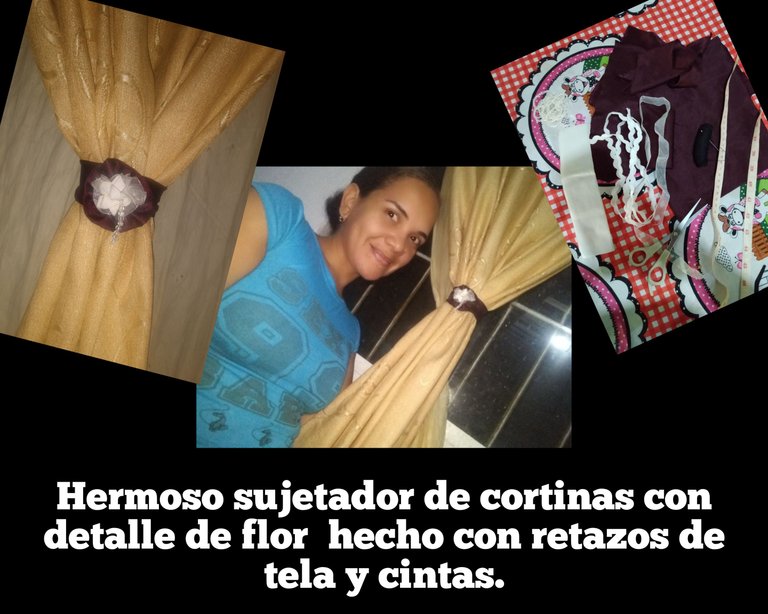
Cuando me mudé tenía muchas ideas que hacer en la casa nueva, aunque no es mía propia luego me desanime pero cuando uno le encantan las manualidades siempre surgen 💡 ideas 😁. Una de las que quise hacer al principio tenía que ver mucho con las cortinas, ya que cada vez que queríamos cerrar las cortinas o dejarlas entre cerradas y abiertas para dar más luz a la casa usábamos alguna tira o cinta ,no me gustaba el aspecto. Así que dije debo realizar un agarra cortinas, no se si ese término exista 😂, pero así lo busque en internet y además de las ideas que ya tenía con las que ví pude realizar unos hermosos agarra cortinas que les mostraré a continuación, el paso a paso, para que vean que los pueden hacer en casa hasta con materiales de provecho , de modo sencillo y hasta extravagante siempre dándole el toque personal de cada quien.
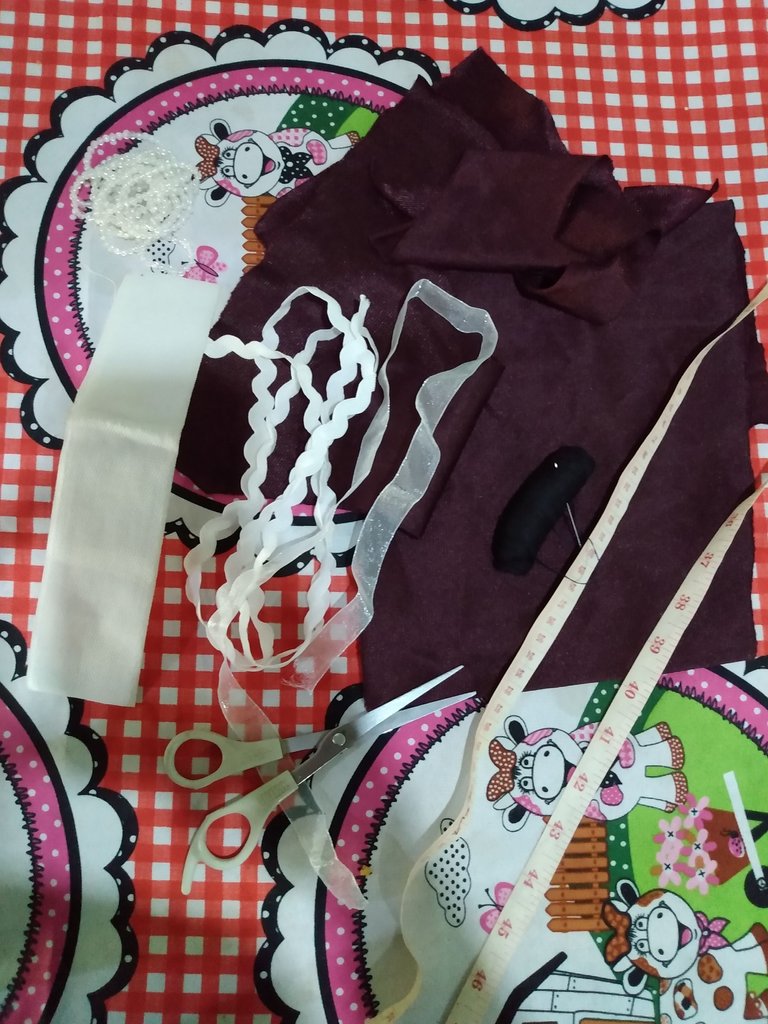
Para ellos uso los siguientes materiales:
- 1 rectángulo de 43 x 5 cm( del cual se sacó dos, de 21,5 cm x 5 cm )
- 2 rectángulos de 18 x 2,5 cm.
- 2 cintas onduladas de 14 cm.
- 2 cintas lisas de 18 cm
- Perlas pequeñas (24 piezas)
- Hilo 🧵
- Aguja
- Silicón
- Yesquero
- Vela🕯️
- Tijeras ✂️
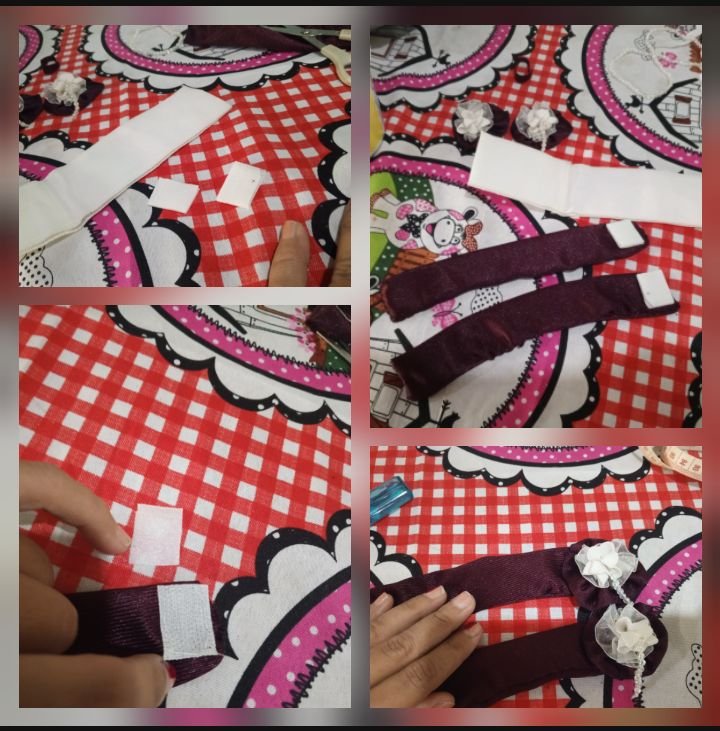
- Cierre mágico
- Cinta métrica
Procedimiento ✍️.
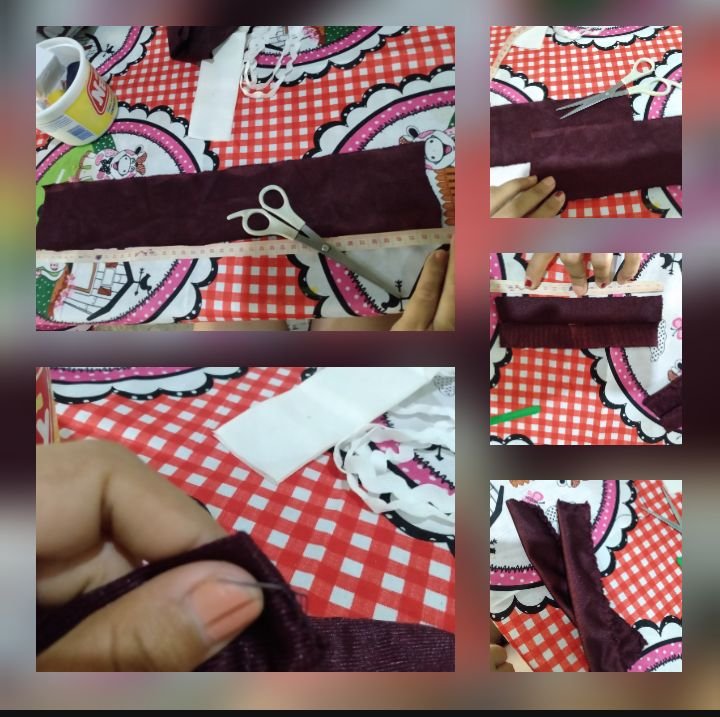
Primeramente tomé del gran retazo de tela vinotinto que tenía y saque un rectángulo de 43x5cm y a su vez lo dividí o corté a la mitad,para obtener dos piezas iguales más pequeños. Corté dos nuevas piezas que servirían para el detalle principal , que sería una flor 🌸, entonces corté dos rectángulos de 18 cm los cuales cosí por todo el borde e iba frunciendo hasta ir dando forma a una flor, el borde de estos los queme con fuego en una vela 🕯️ o yesquero,para que no se salieran los hilos y fuera más permanente. Realicé dos veces este paso hasta obtener dos formas de flores redondas.
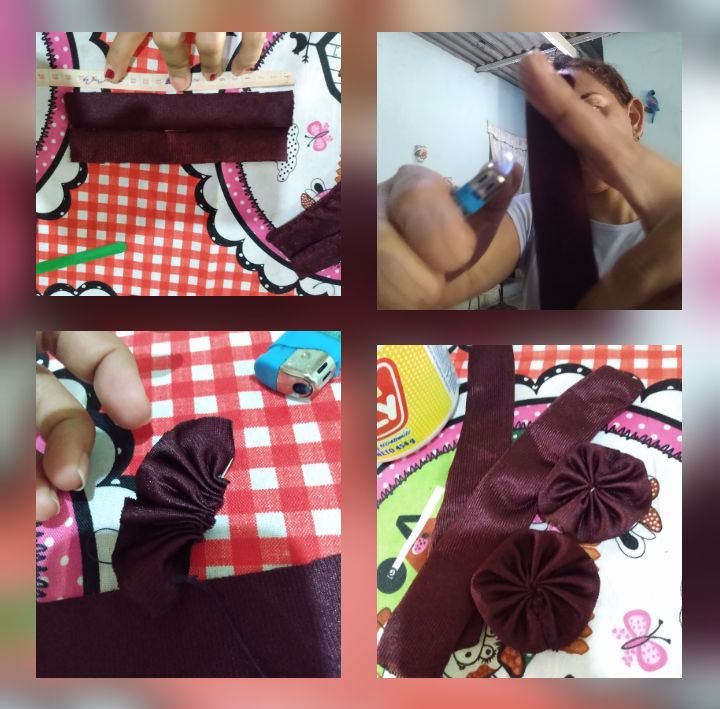
Tomé y corte las cintas onduladas y las tipo velo de novia, de 14 cm cada uno , teniendo al final dos de cada tipo estos sería el detalle en el centro de la flor con las perlas, que quería que se viera sobresaliente así como una flor 3d y diferentes.
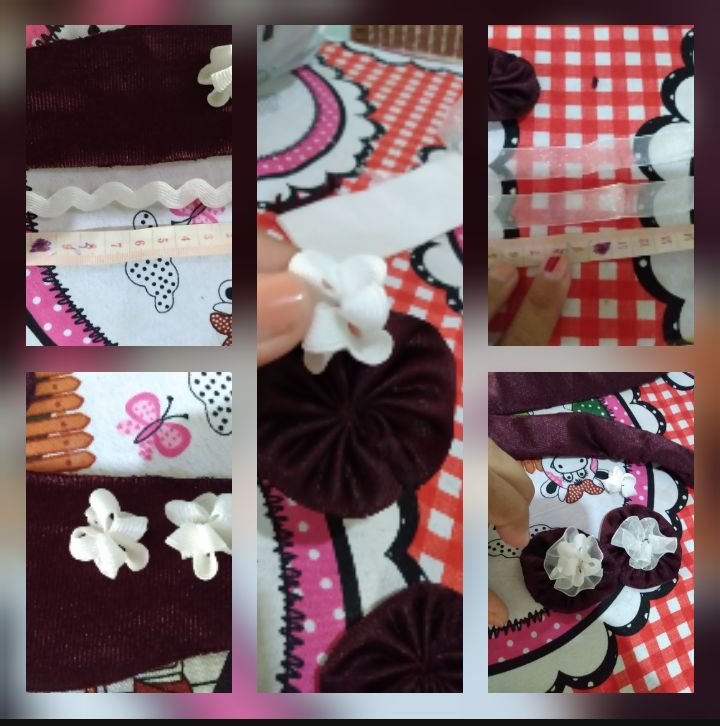
Para el detalle de las perlas,saque doce piecitas de ellas o 12 perlas y las introduje en el hilo una a una, cosí en el centro de la flor y quedó muy bonito este detalle.
Terminado esto, corte dos piezas del cierre mágico para que encajaran bien en el grosor de la cinta , los pegué con silicón caliente ♨️. En la parte interna y otra en la parte externa para que haga el contacto y cierre del agarra cortinas
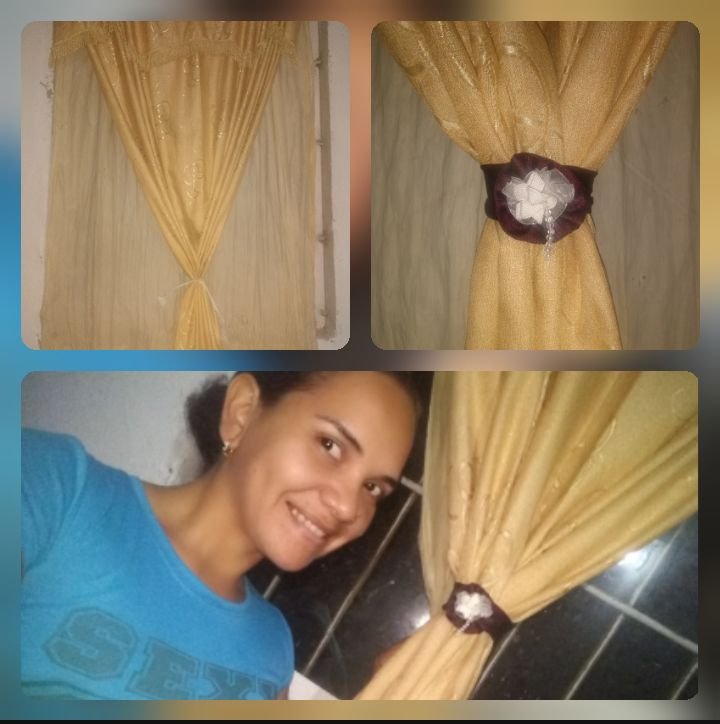
Me gustó mucho este diseño apesar de ser sencillo cumplió mi objetivo y además le da un toque especial y elegante a mis cortinas, sin tener que amarrarlas con una cuerda, una trenza cualquiera o incluso con un pedazo de cinta.
¡Nuestra mente es el límite 😁💡!
Hasta acá mis queridos lectores, agradecida de que pasen por aquí y que me lean, gracias por su apoyo . Cuídense, bendiciones besos y abrazos cibernéticos 😘😘
Todo el contenido que se encuentra en esta publicación es amplia-mente original del autor, cualquier duda y recopilación del mismo, deben hacer mención de mi persona.
- El texto es original de: @gabyceleste
- Todos los Derechos Reservados / @gabyceleste
- Fotografías tomadas de mi teléfono y editadas en Polish photo editor.

VERSION INGLÉS
A pleasure to greet you dear friends of this great and creative community @diy , I love the crafts that I can do at home either by seeing somewhere even if I do not see them I manage to see if I can make some detail that I can have at home and give my touch and most importantly a use and function to some lack that you have.
When I moved I had many ideas to do in the new house, although it is not my own then I got discouraged but when you love crafts always arise 💡 ideas 😁. One of the ones I wanted to do at first had to do a lot with the curtains, since every time we wanted to close the curtains or leave them between closed and open to give more light to the house we used some strip or tape ,I did not like the look. So I said I must make a curtain tieback, I do not know if that term exists 😂, but so I looked on the internet and in addition to the ideas I already had with the ones I saw I could make some beautiful curtain tiebacks that I will show you below, step by step, so you can see that you can make them at home even with useful materials, in a simple and even extravagant way always giving the personal touch of each person.
For them I use the following materials:
1 rectangle of 43 x 5 cm( from which I took out two, of 21.5 cm x 5 cm ).
2 rectangles of 18 x 2,5 cm.
2 wavy ribbons of 14 cm.
2 smooth ribbons of 18 cm.
Small beads (24 pieces)
Thread 🧵
Needle
Silicone
Tinder
Vela🕯️
Scissors ✂️
Magic clasp
Tape measure
wys
Procedure ✍️.
First I took the large piece of vinotinto fabric I had and took a rectangle of 43x5cm and in turn I divided it or cut it in half, to get two smaller equal pieces. I cut two new pieces that would serve for the main detail, which would be a flower 🌸, then I cut two rectangles of 18 cm which I sewed all around the edge and was gathering until giving shape to a flower, the edge of these I burned with fire in a candle 🕯️ or tinder, so that the threads would not come out and it would be more permanent. I did this step twice until I obtained two round flower shapes.
I took and cut the wavy ribbons and the bridal veil type, of 14 cm each, having at the end two of each type these would be the detail in the center of the flower with the pearls, which I wanted to look outstanding as well as a 3d flower and different.
For the detail of the pearls, I took twelve small pieces of them or 12 pearls and introduced them into the thread one by one, I sewed in the center of the flower and this detail was very nice.
Once this was done, I cut two pieces of the magic clasp to fit the thickness of the tape, and glued them with hot silicone ♨️. In the internal part and another one in the external part to make the contact and close the curtain holder.
I really liked this design despite being simple, it fulfilled my goal and also gives a special and elegant touch to my curtains, without having to tie them with a rope, a braid or even with a piece of ribbon.
Our mind is the limit 😁💡!
So far my dear readers, thank you for stopping by here and reading me, thank you for your support. Take care, blessings, kisses and hugs 😘😘😘.
All content found in this publication is largely original to the author, any questions and compilation of the same, should make mention of me.
- The text is original from: @gabyceleste
- All Rights Reserved / @gabyceleste
- Photographs taken from my phone and edited in Polish photo editor

