
Greetings to all, fellow lovers of art, crafts and also, video games.
Surely you have heard of the Resident Evil saga of games. I knew about it thanks to a friend with whom I was taking private lessons, to whom his dad gave the game Resident Evil 3: Nemesis.
I didn't know what the game was about, but I didn't hesitate to buy it to play it on my Playstation. I found it terrifying but entertaining at the same time, because I could collect plants and ammunition to kill all the zombies you encountered in the mythical Raccoon City.
It was easy to kill the zombies, but the trauma of many who played this game comes when it appears, surprisingly, the main character of this publication, Nemesis.

Saludos a todos, compañeros amantes del arte, las manualidades y también, los videojuegos.
Seguramente han escuchado hablar de la saga de juegos de Resident Evil. Yo la conocí gracias a un amigo con quien veía clases particulares, a quien su papá le regaló el juego Resident Evil 3: Nemesis.
No sabía de qué era el juego, pero no dudé en comprarlo para jugarlo en mi Playstation. Me pareció terrorífico pero entretenido a la vez, porque podía recolectar plantas y municiones para ir matando a todos los zombies con los que te encontrabas en la mítica Raccoon City.
Era fácil matar a los zombies, pero el trauma de muchos que jugaron este juego llega cuando aparece, de manera sorpresiva, el personaje protagonista de esta publicación, Nemesis.
It is a character that you could fill with shots and never died, only after emptying almost your entire inventory of ammunition the guy finally passed out, to appear again later...
It's a character that gave terror and stress when he appeared in the game. It was so desperate to be in the same scenario as him, that the only thing you wanted was to run away and escape from that area until you got somewhere where Nemesis was not.
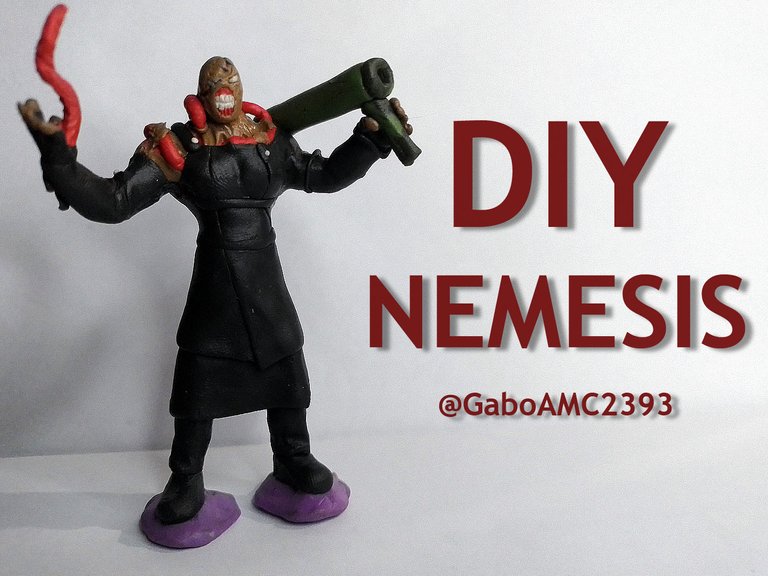
In order to remember this character that caused me so much fear during my long hours playing Resident Evil 3, I wanted to make a Nemesis figurine. Join me in the tutorial of this sculpture, I hope you like it.
Es un personaje al que podías rellenar de tiros y nunca se moría, solo después de vaciar casi todo tu inventario de municiones el sujeto finalmente se desmayaba, para volver a parecer más adelante...
Es un personaje que daba terror y estrés cuando aparecía en el juego. Era tan desesperante estar en el mismo escenario que él, que lo único que querías era huir y escapar de esa área hasta llegar a algún lugar donde no estuviese Nemesis.
Con motivo de rememorar a este personaje que tanto miedo me causó durante mis largas horas jugando Resident Evil 3, quise hacer una figurita de Nemesis. Acompáñenme en el tutorial de esta escultura, espero les guste.
Materials
- Plasticine
- Wire
- Adhesive Tape
- Cardboard
- Glue
- Tools: Knitting needle and tweezers.
Step by step
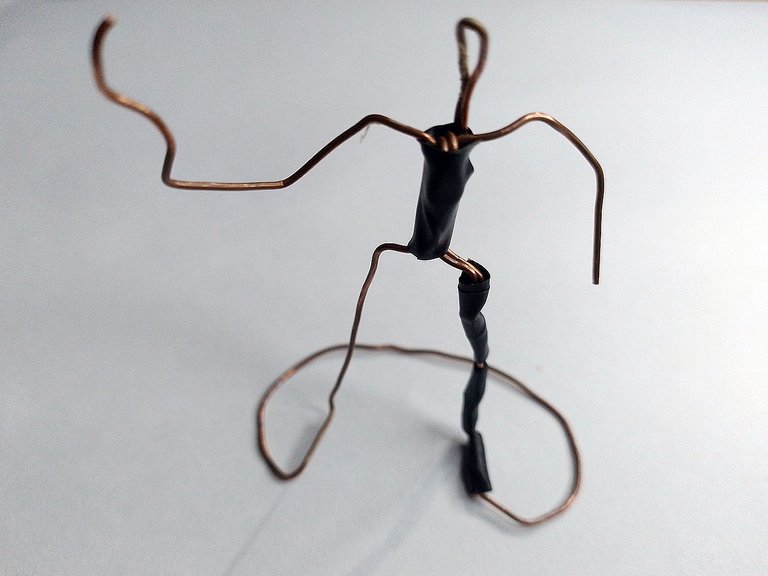
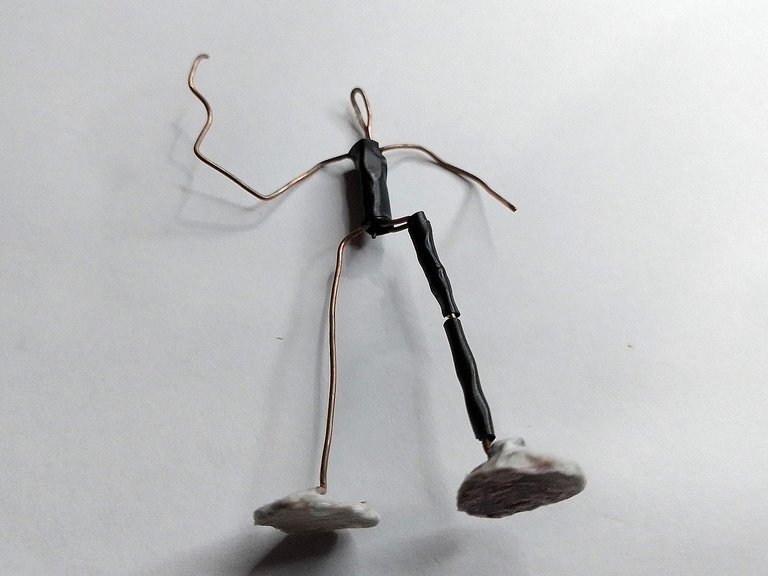
To begin. I used the wire to create the skeleton and the adhesive tape to join some parts of this skeleton, to make a good complete support for the character, because I wanted to give good support to each piece to keep the figure well.
Notice that in the image on the right I placed a cardboard base for the feet, which I attached with glue.
Materiales
- Plastilina
- Alambre
- Cinta Adhesiva
- Cartón
- Pegamento
- Herramientas: Aguja de tejer y pinzas.
Paso a paso
A comenzar. El alambre lo usé para crear el esqueleto y la cinta adhesiva para unir algunas partes de este esqueleto, para hacer un buen soporte completo para el personaje, pues deseaba darle buen soporte a cada pieza para conservar bien la figura.
Fíjense que en la imagen de la derecha le coloqué una basesilla de cartón para los pies, la cual adherí con pegamento.
 |  |
|---|
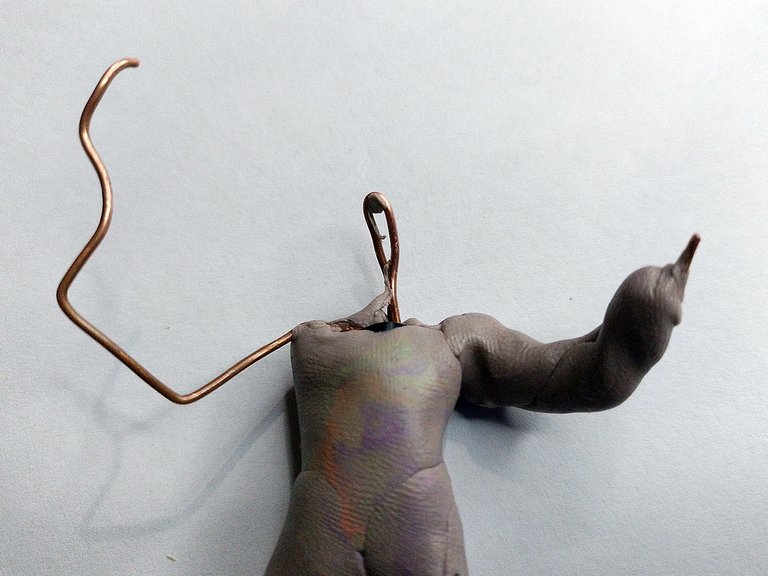
Once the skeleton is ready, I began to cover it with plasticine of a uniform color, in this case brown, one that goes well with the skin color of Nemesis himself.
Una vez que el esqueleto está listo, comencé a cubrirlo con plastilina de un color uniforme, en este caso de color marrón, uno que va bien con el color de piel del propio Némesis.

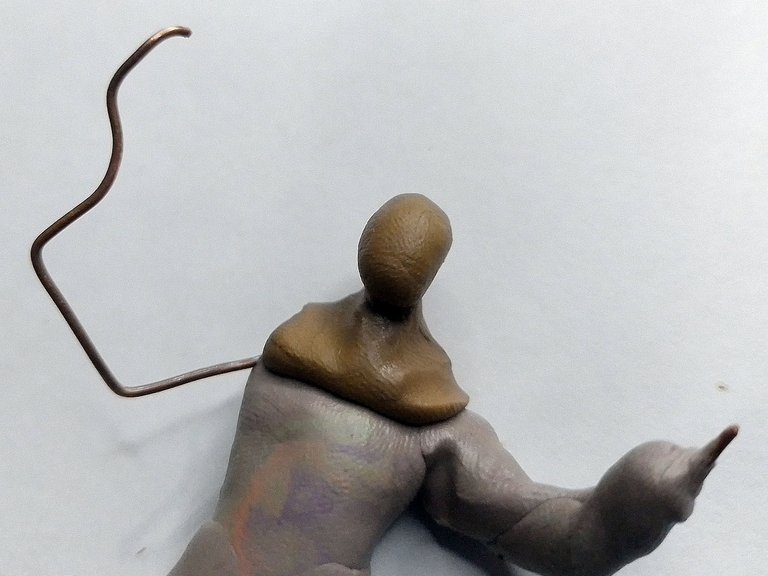
Although it is a skin-like color, for nemesis' own skin I used a slightly darker brown color, like a clay-like color and very faded, like a zombie's own skin.
As you can see in the image below, I started by placing the character's neck:
Aunque es un color parecido a la piel, para la propia piel de némesis usé un color marrón un poco más oscuro, como un color arcilloso y muy descolorido, como la propia piel de un zombie.
Como pueden ver en la imagen de abajo, comencé colocando el cuello del personaje:
 |  |
|---|
After this I continued molding to give it the best possible shape, placing other parts such as the arm and shoulders.
Notice that both the neck and the head I placed the final color of the skin of Nemesis, while the other parts I placed them in any color, this is because later I would cover them with black plasticine, as if it were a real suit but made of plasticine.
Luego de esto continué moldeando para darle la mejor forma posible, colocando otras partes como el brazo y los hombros.
Fíjense que tanto el cuello como la cabeza la coloqué del color final de la piel de Nemesis, mientras que las otras partes las coloqué de cualquier color, esto es porque más adelante las cubriría con plastilina negra, somo si fuese un traje real pero de plastilina.
 |  |
|---|
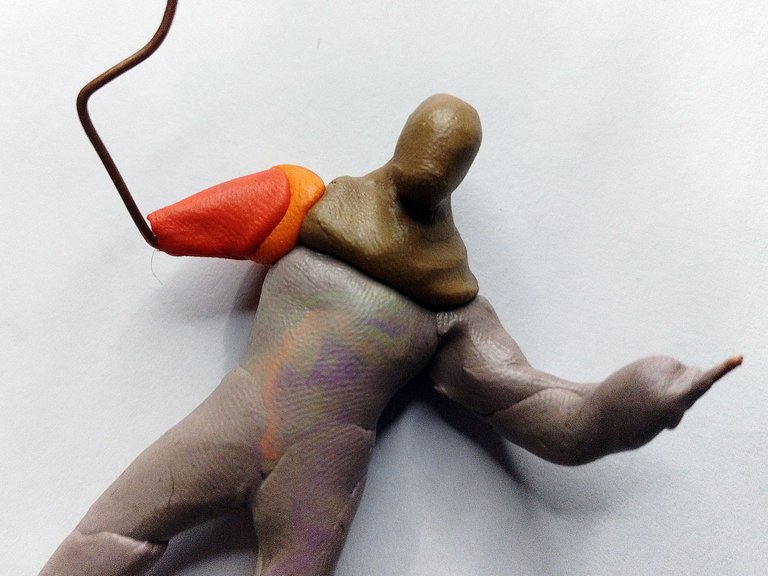
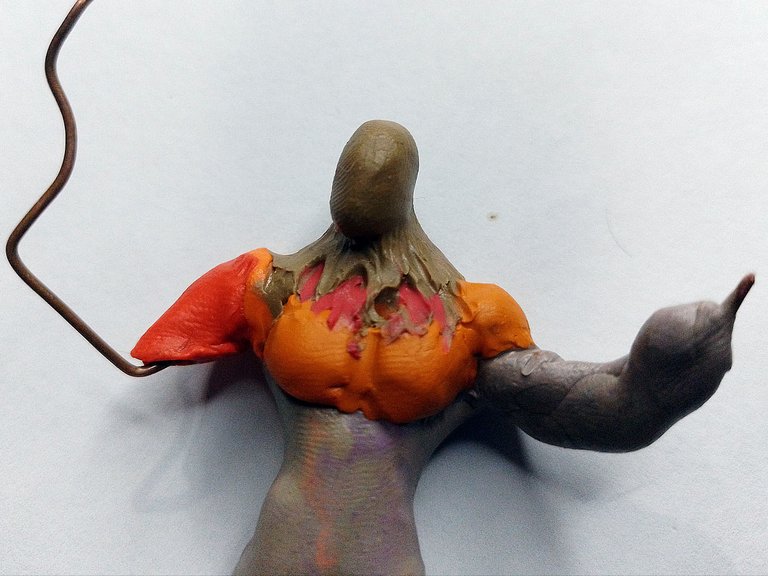
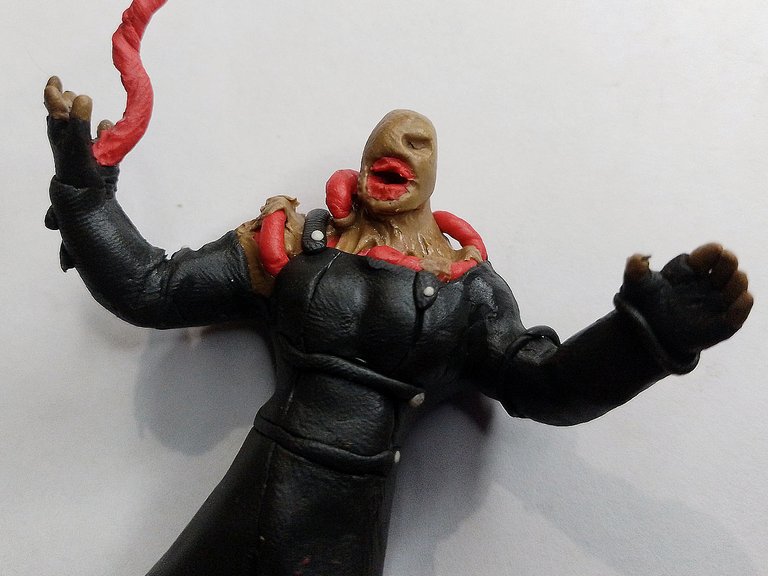
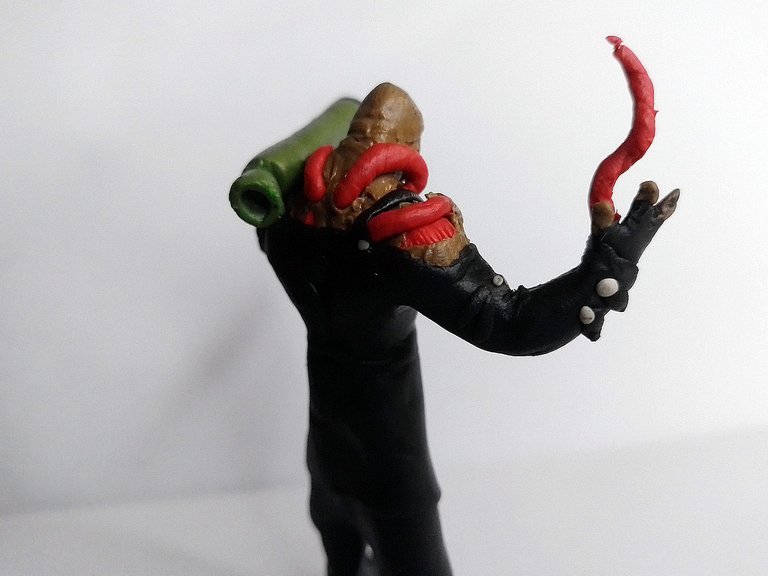
Here you can see a more advanced process, when I have already placed pectorals and some red to create that tearing effect that nemesis has on the neck, leaving the red muscles exposed.
I did this with the knitting needle, creating elongated cavities where I placed the red plasticine. I also created some rips all along the skin, as shown in the image:
Aquí pueden ver un proceso más avanzado, cuando ya he colocado pectorales y algo de rojo para crear ese efecto de desgarre que tiene némesis en el cuello, dejándo al descubierto los músculos rojos.
Esto lo hice con la aguja de tejer, creando cavidades alargadas donde coloqué la plastilina roja. También creé unas rasgaduras a lo largo de toda la piel, tal como se ve en la imagen:
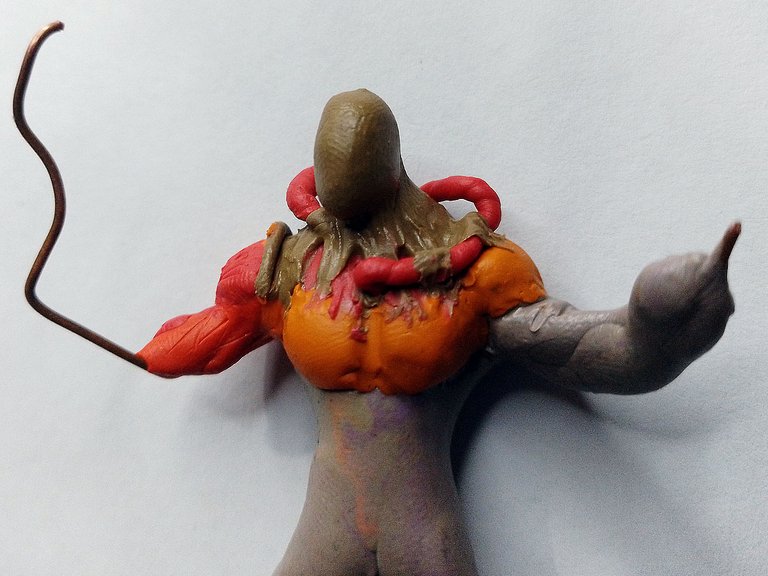
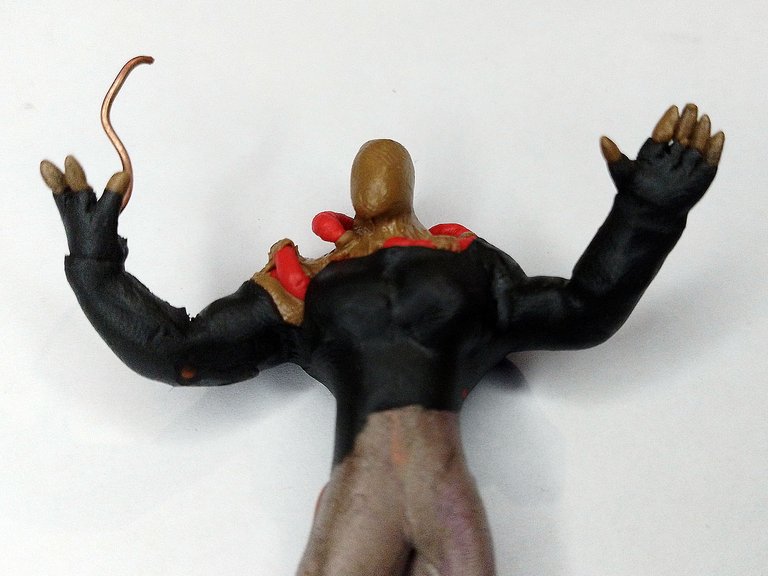
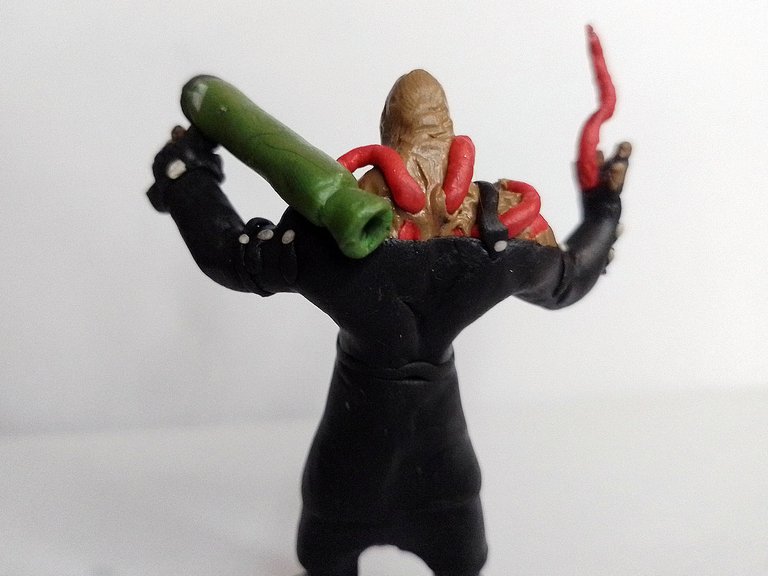
On the other hand, something very characteristic of Nemesis is a kind of elongated veins and rough texture that run throughout his body. Although these veins look more like a kind of intestine, I made them in the original red color of the character and continued placing them along the neck, back and chest.
Below you can see the photos of how the figure evolved as I was placing these pieces.
It should be noted that some parts of these veins I covered them with brown, as if they were dead skin covering them.
Por otra parte, algo muy característico de Nemesis es una suerte de venas alargadas y de textura rugosa que recorren todo su cuerpo. Aunque estas mas bien parecen una suerte de intestino, los hice del color rojo original que tiene el personaje y continué colocándolas a lo largo del cuello, la espalda y el pecho.
Abajo pueden ver las fotos de cómo fue evolucionando la figura cuando iba colocando estas piezas.
Cabe destacar que algunas partes de estas venas las cubrí con marrón, como si fuese piel muerta que las cubre.
 |  |
|---|
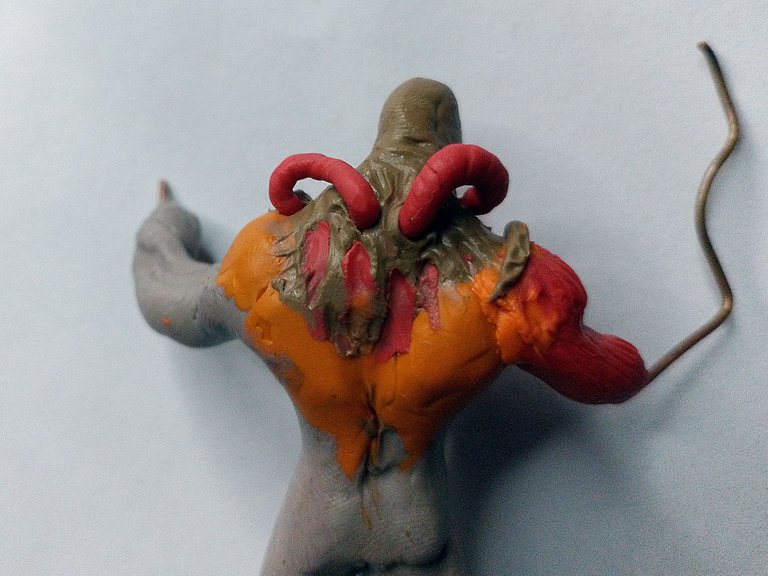
Note that this is how the base shape of the neck is finished, which is the only uncovered part of the character, the rest is covered by his costume.
Fíjense que así quedó terminada la forma base del cuello, que es lo único descubierto del personaje, lo demás está cubierto por su traje.
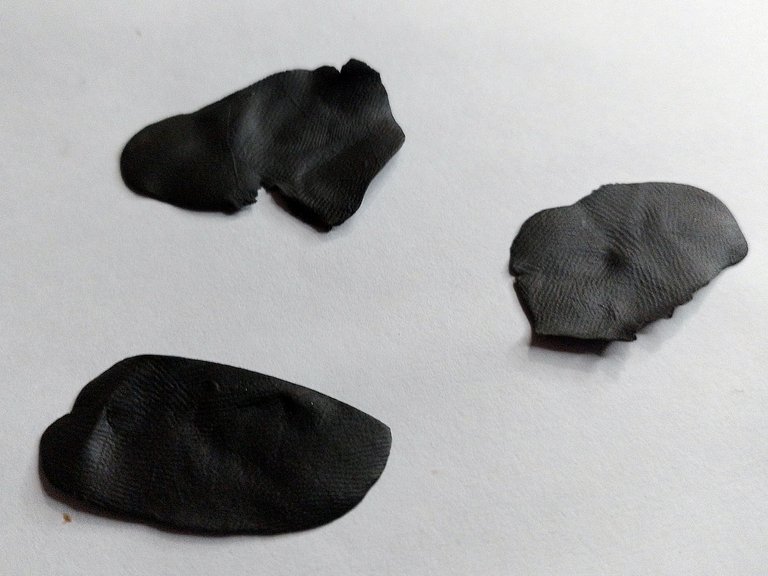
Precisely, I have to talk about the costume. I made it by covering the sculpture with numerous sheets of black plasticine, as you can see in the image below:
Precisamente hay que hablar del traje. Este lo hice cubriendo la escultura con numerosas láminas de plastilina negra, tal como las que observan en la imagen de abajo:
I used a blade to make the necessary cuts, and like a tailor I covered the body as if it were a suit until it began to take shape.
Usé una hojilla para hacer los cortes necesarios, cual confeccionista cubrí el cuerpo como si fuese un traje hasta que comenzó a tomar forma.
 |  |
|---|
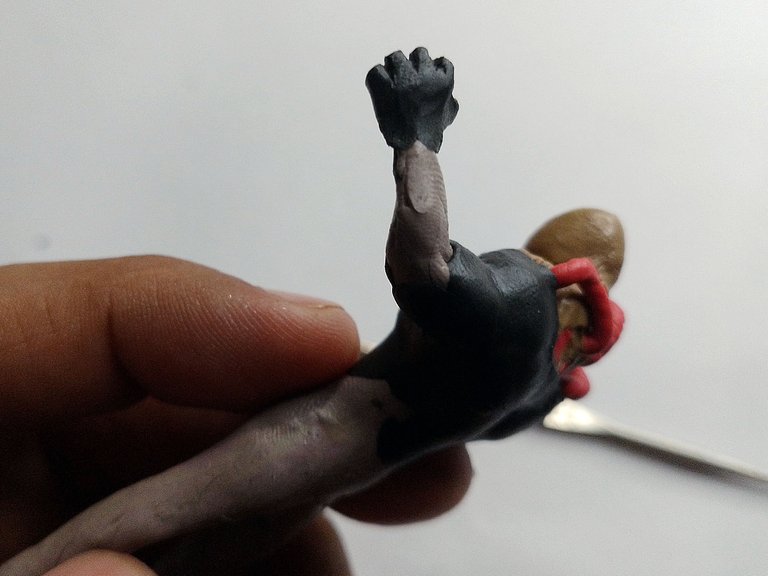
I also made the hands, placing first the black part of the gloves and then the fingers of the same color of skin with which I made the neck and head.
También hice las manos, colocando primero la parte negra de los guantes y luego los dedos del mismo color de piel con el que hice el cuello y la cabeza.
 |  |
|---|
Below you can see how the torso looked like once it was covered with the black plasticine sheets.
A continuación pueden ver cómo iba quedando el torso una vez cubierto con las láminas de plastilina negra.
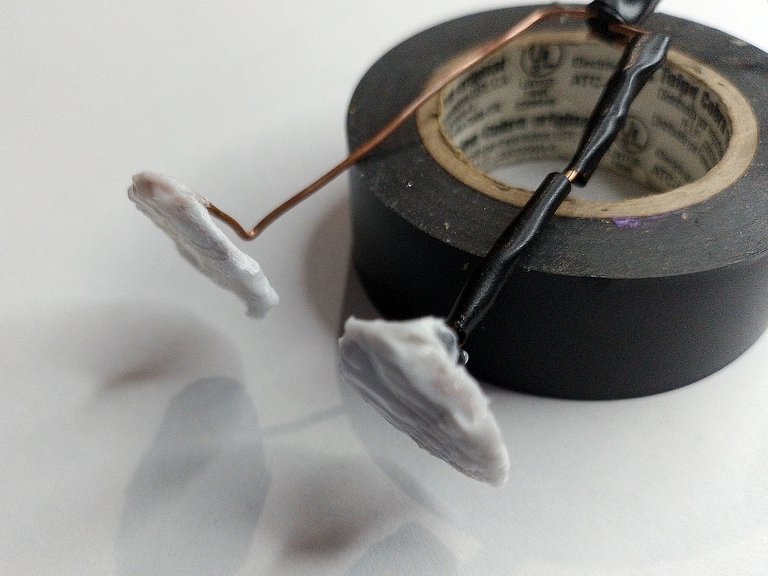
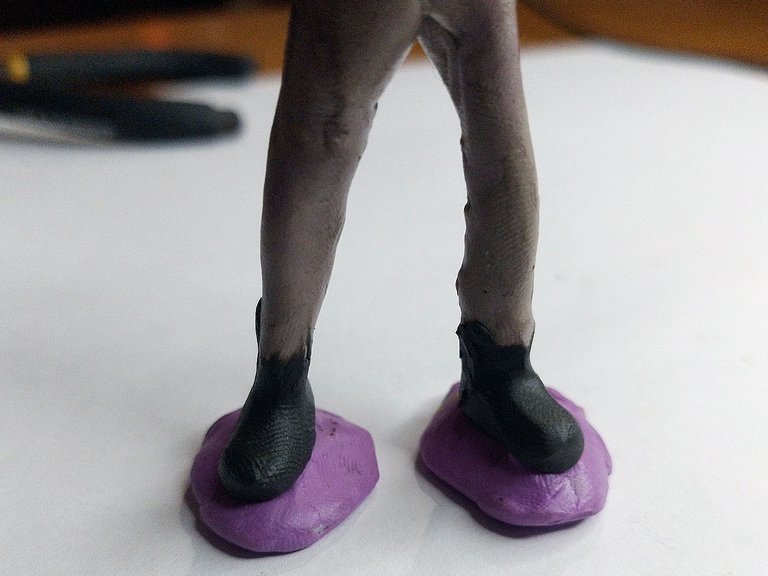
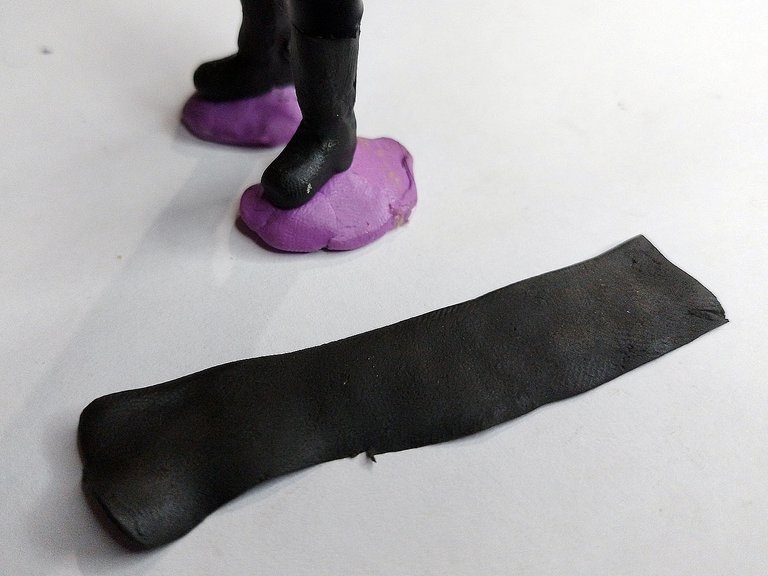
For the legs I made the thick shoes of nemesis with black plasticine as well, then I continued covering the legs with more plasticine sheets.
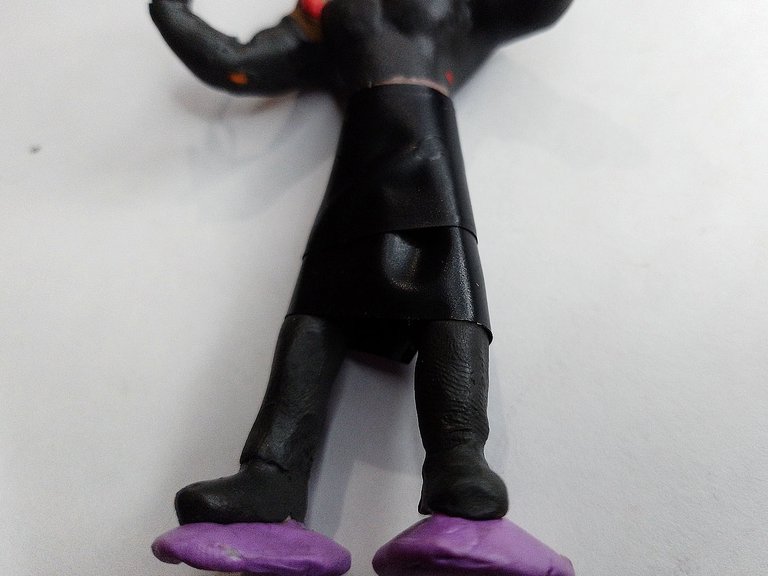
It is worth noting that for the lack of the suit I used tape to create a support.
Para las piernas hice los zapatos gruesos de némesis con plastilina negra también, luego continué cubriendo las piernas con más láminas de plastilina.
Cabe destacar que para la falta del traje usé cinta para crear un soporte.
 |  |
|---|
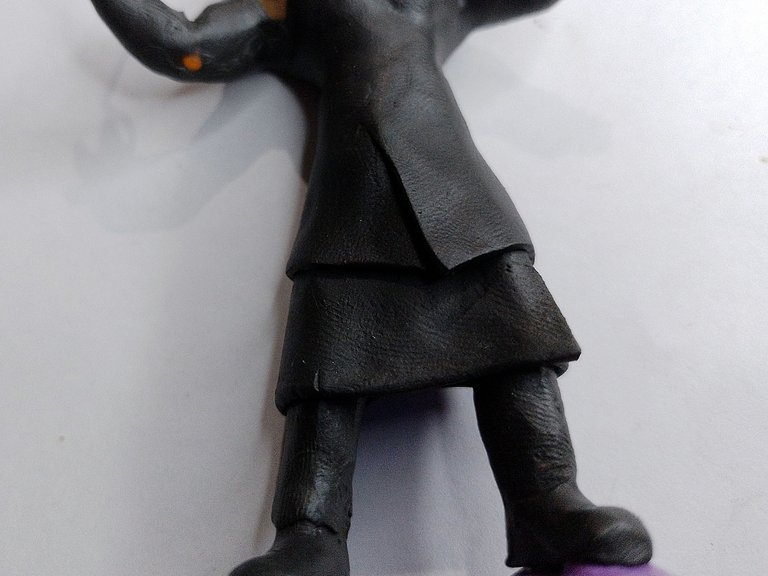
I added glue to fix the adhesive tape well, then I cut more sheets of black plasticine and covered this tape to be able to mold well the skirt of this kind of raincoat worn by Nemesis.
Agregué pegamento para fijar bien la cinta adhesiva, luego corté más láminas de plastilina negra y cubrí esta cinta para poder moldear bien la falda de esta suerte de gabardina que usa Nemesis.
 |  |
|---|
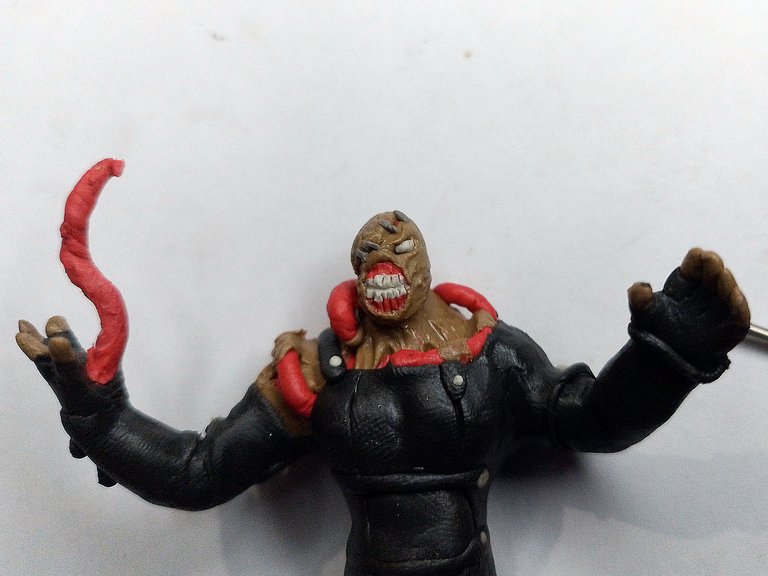
Then I added details like straps, stitches and buckles. Below you can see how the character looked up to this point:
Después agregué detalles como correas, puntos y hebillas. A continuación pueden ver cómo quedó el personaje hasta este punto:
The last thing I did, so as not to damage it, was the character's face.
It's a very characteristic face so I didn't want to make it any different at all. I made it as similar as possible, trying to keep as many similarities with the character as possible.
Lo último que hice, para no dañarla, fue el rostro del personaje.
Es un rostro muy característico así que no quise hacerlo para nada diferente. Lo hice lo más parecido posible, tratando de guardar la mayor cantidad de similitudes con el personaje.
 |  |
|---|
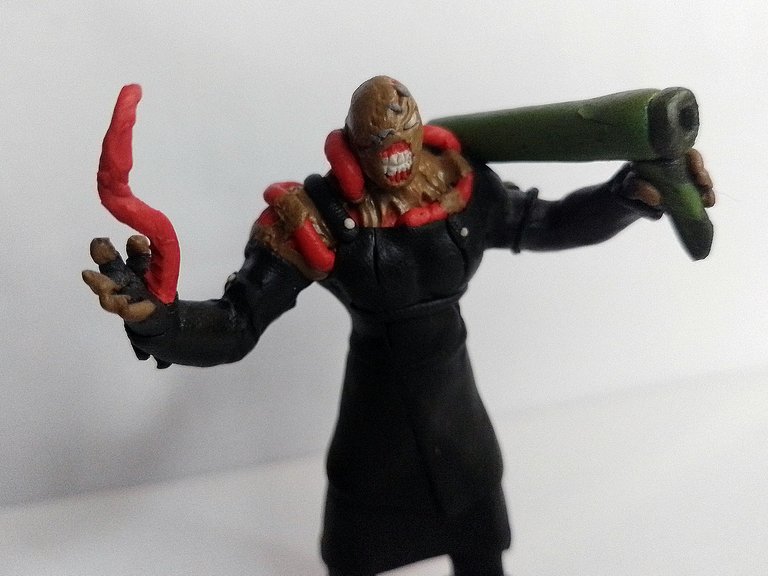
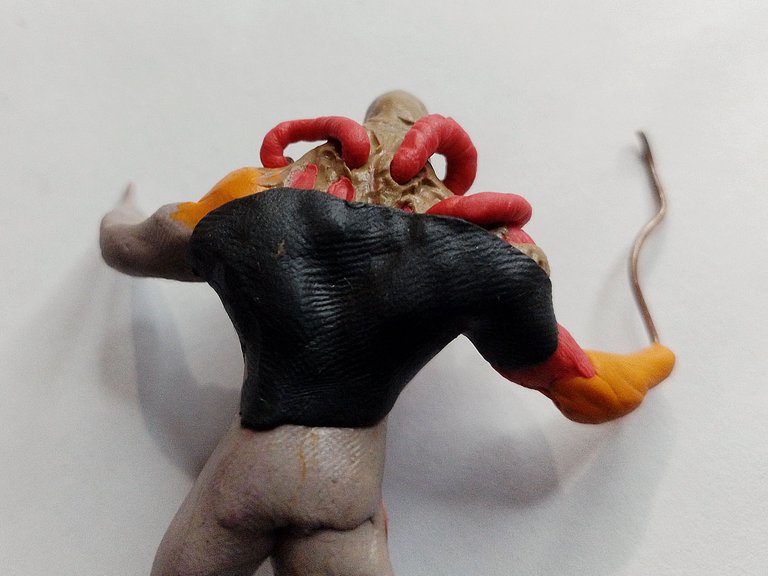
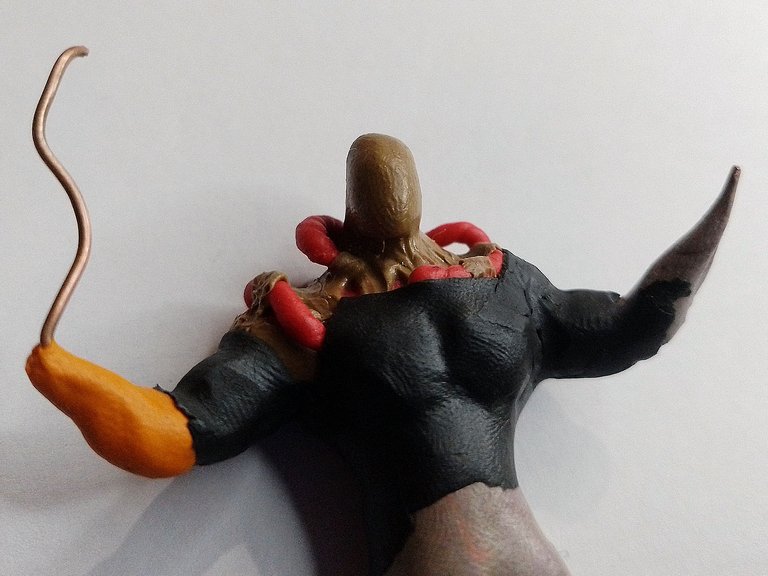
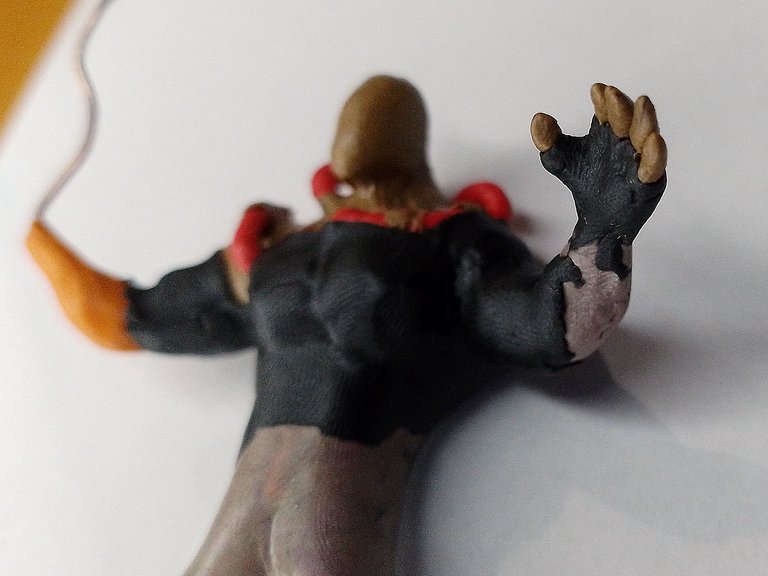
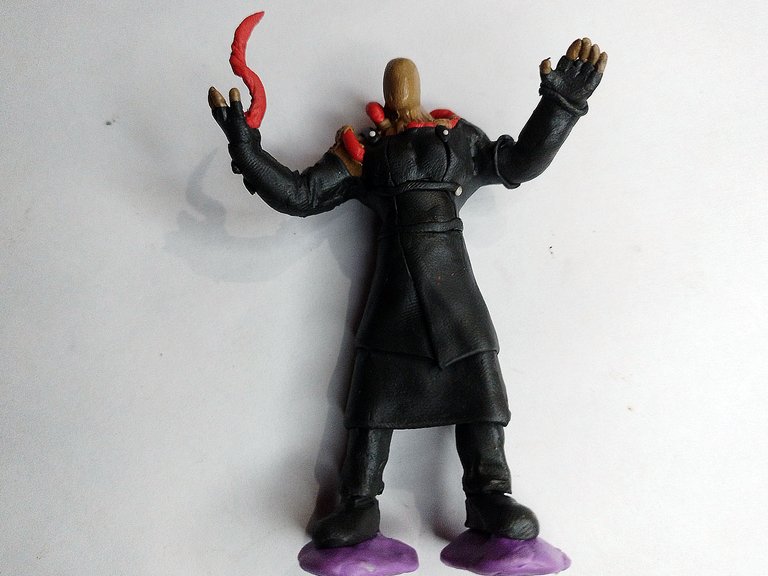
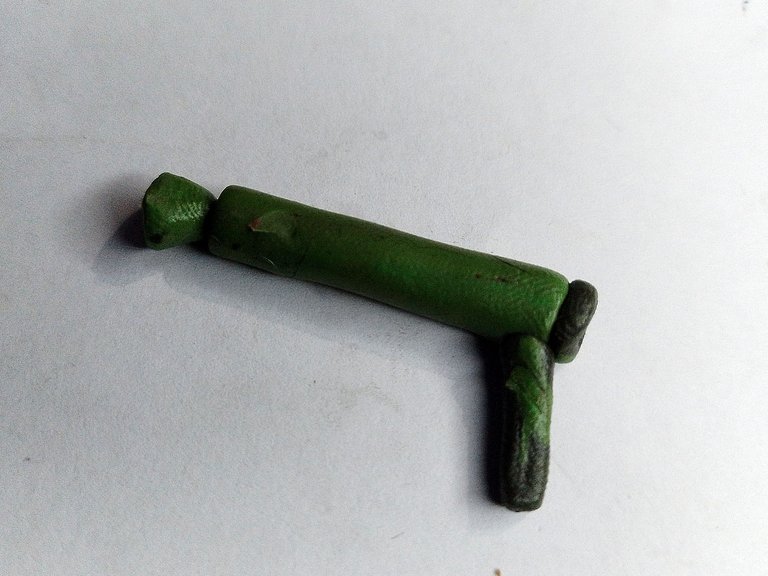
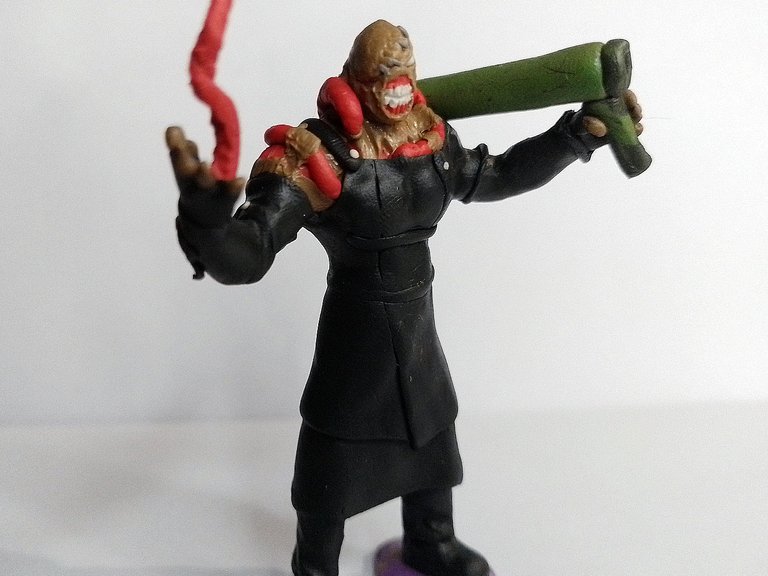
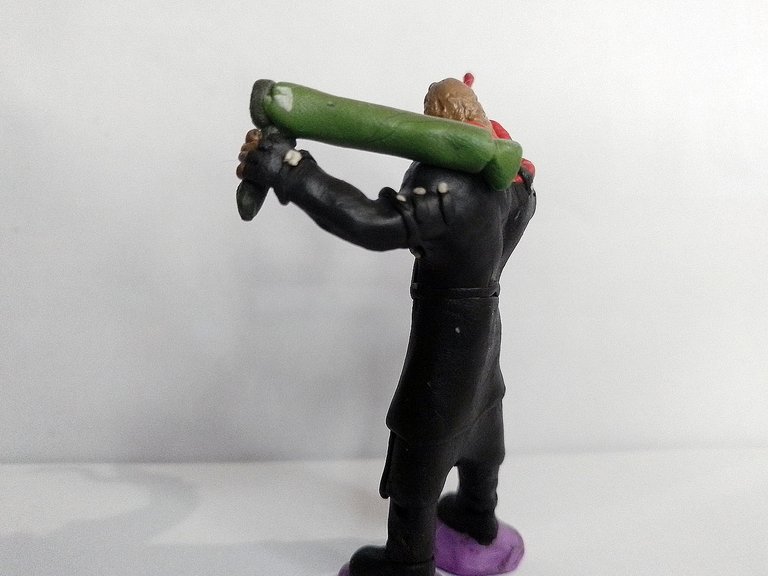
Now, in addition to the gut/vein that comes out of Nemesis' hands, I wanted to make one more accessory for this figure and that is his characteristic bazooka, which caused us so many problems in the game.
I placed this bazooka in his left hand, while in the right hand I showed a deadly weapon with which he must have defeated more than one player of this mythical game.
Ahora bien, además de la tripa/vena que le sale a Nemesis de las manos, quise hacer un accesorio más para esta figura y es su característica bazuca, la cual tantos problemas nos causó en el juego.
Esta bazuca se la coloqué en su mano izquierda, mientras que en la derecha mostraba un arma mortal con la que habrá derrotado a más de un jugador de este mítico juego.
 |  |
|---|
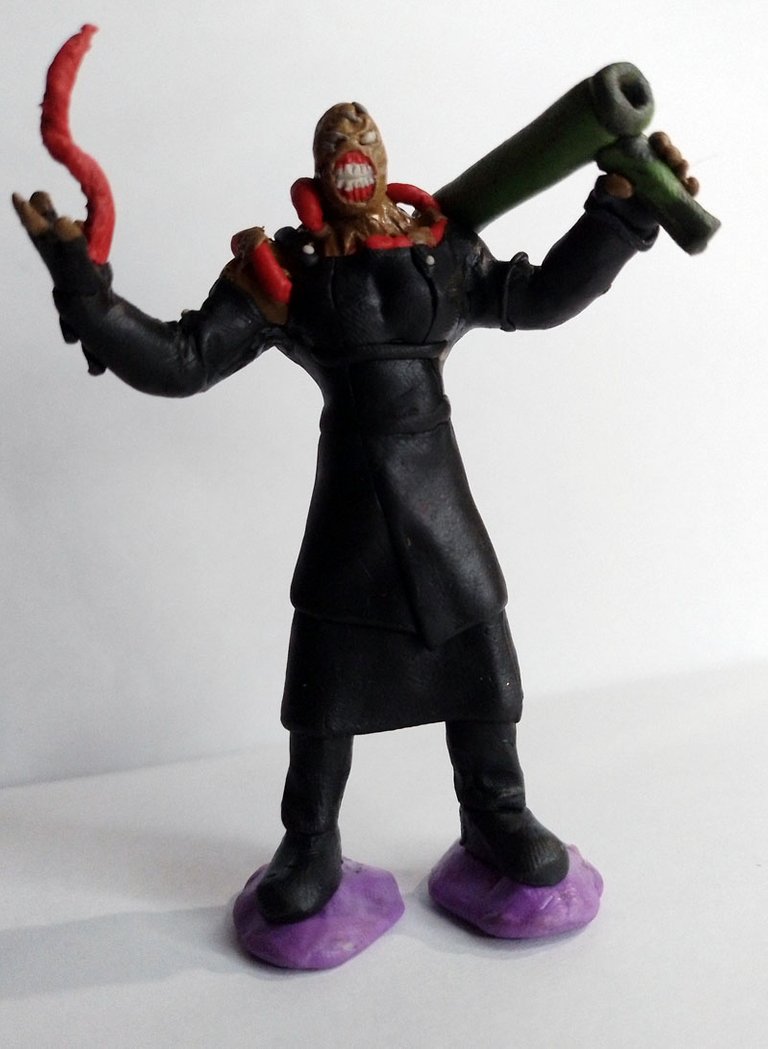
This is how this great sculpture of Nemesis was finished. Below I leave a series of photographs of the final result:
De esta manera quedó terminada esta genial escultura de Nemesis. A continuación dejo una serie de fotografías del resultado final:
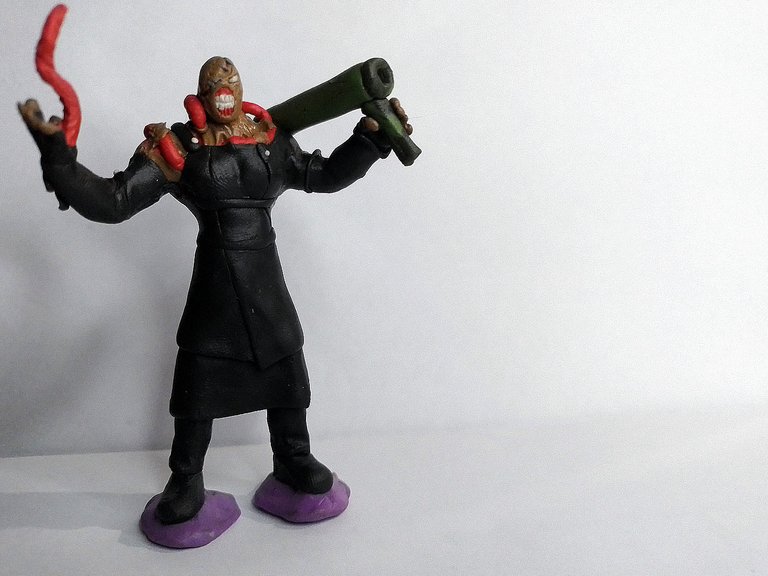
Well friends, what did you think? For me it has been a pleasure to have shared this figure with you. I feel very pleased with the result and I sincerely hope you liked it.
I invite you to leave your opinions below in the comments, as always I will be happy to read them. With nothing more to add, I'll say goodbye then...
See you next time!
Bien amigos, ¿Qué les ha parecido? Para mi ha sido un placer haber compartido esta figura con ustedes. La verdad me siento muy complacido con el resultado y espero de corazón que les haya gustado.
Los invito a dejar sus opiniones abajo en los comentarios, como siempre estaré encantado de leerlos. Sin más que agregar, me despido entonces...
¡Hasta la próxima!