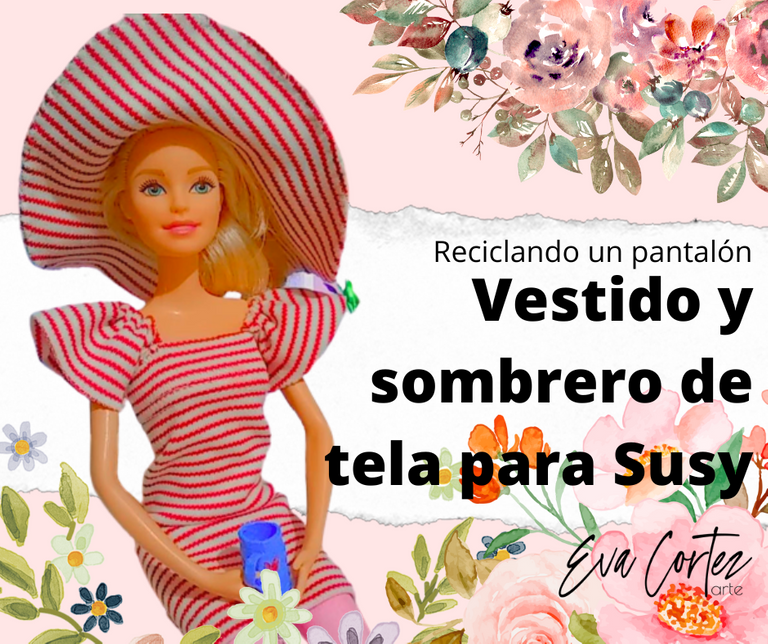
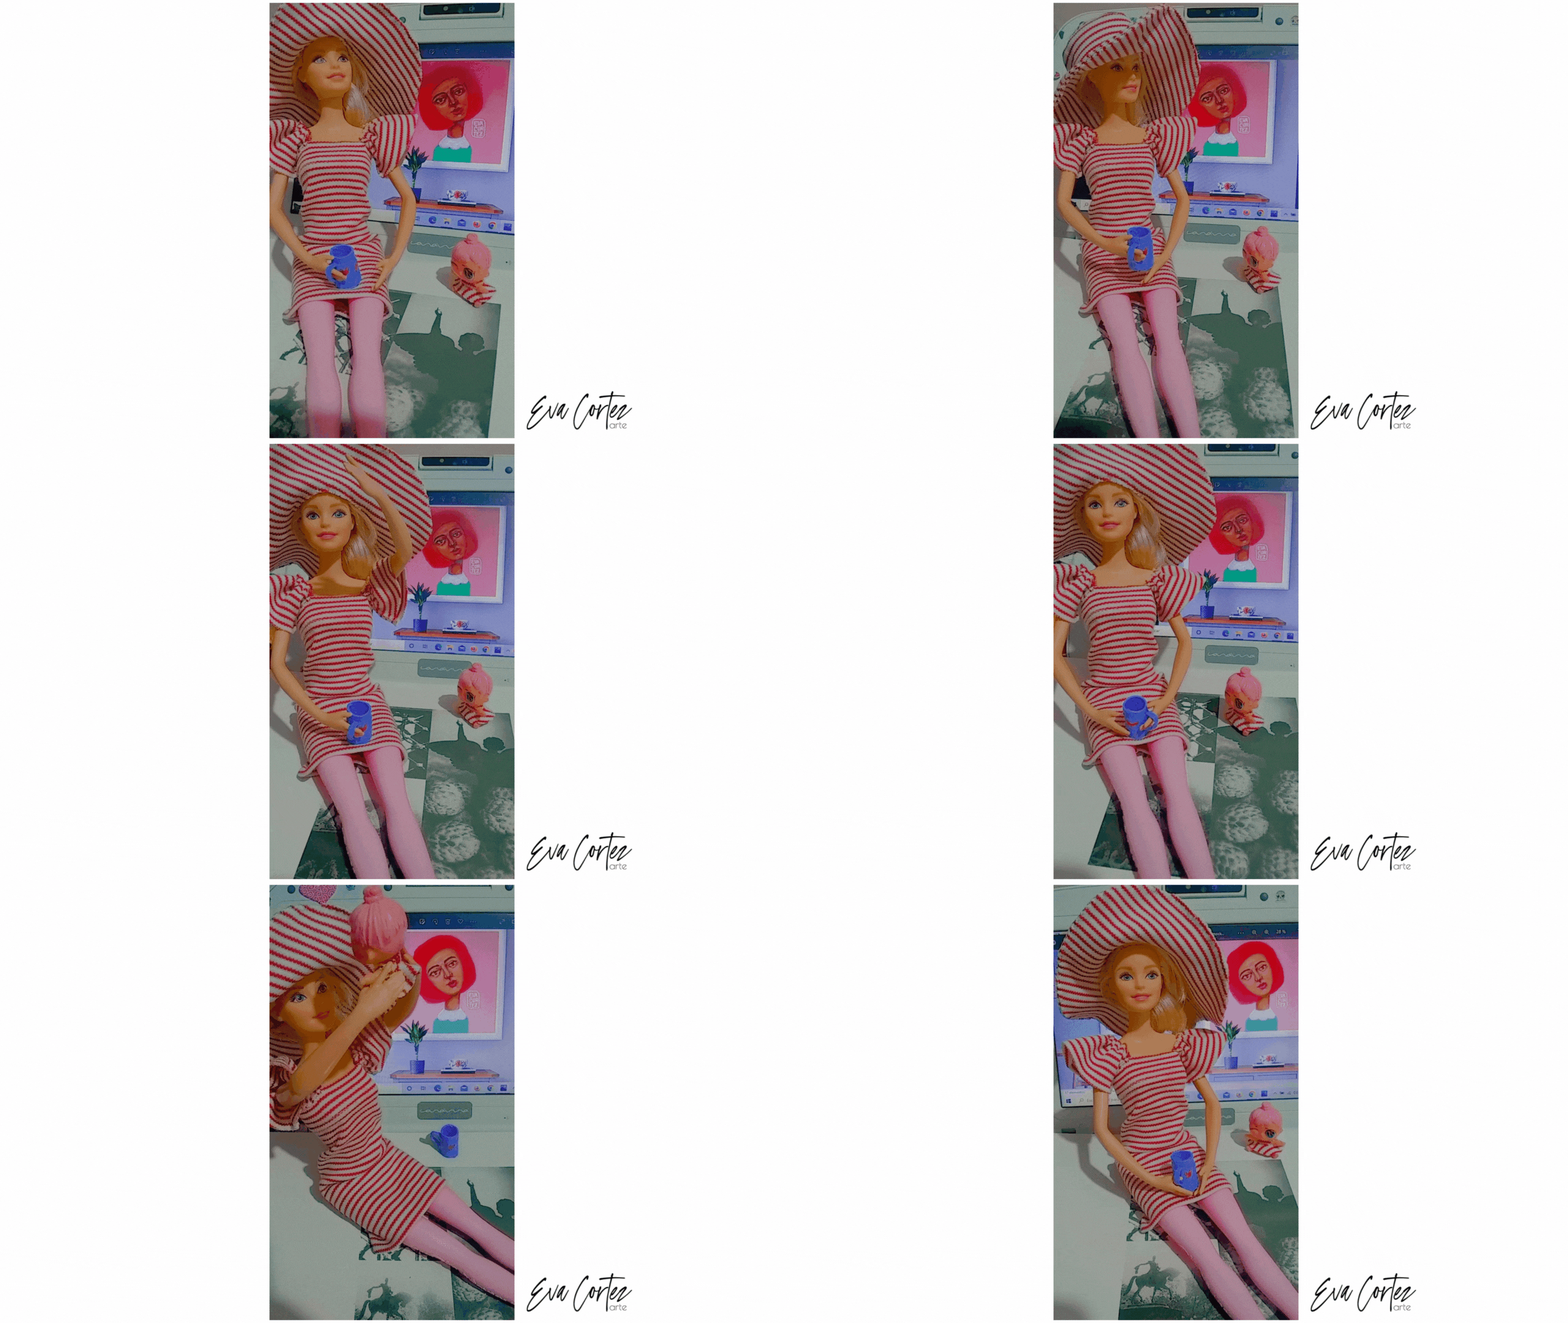
Susy wearing her new outfit :D // Susy luciendo su nuevo outfit :D
ENGLISH
An artist does more than just paint and draw:D Many times people think that we spend all day painting and it may be very true xD However, we are also fathers, mothers or do other activities.
In my case, I have a little daughter and I share with her the pleasure of creating clothes, accessories and objects for her dolls.
It is an activity that I love to do; it relaxes me, allows me to share with my daughter and spend a pleasant time together. After all, life is all about these little moments.
I think I'm a big girl at heart; I still paint, make clothes and things for dolls :D
I am going to show you the step by step of how my daughter, her doll Susy and I, made together a dress and a matching hat, for Susy to wear on her walks. We made it out of an old pair of pants.
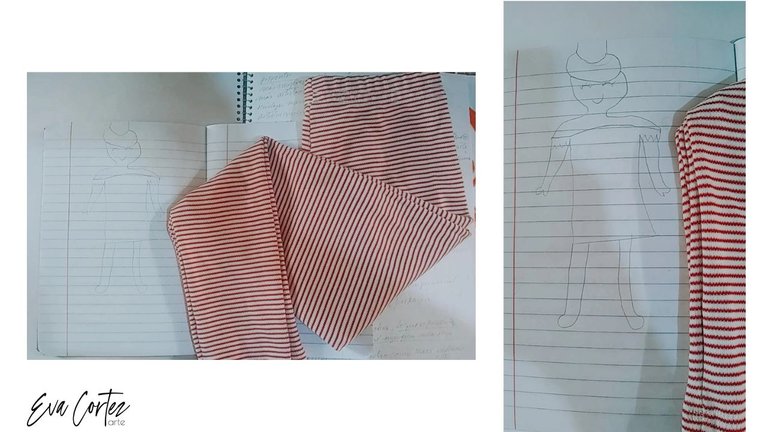
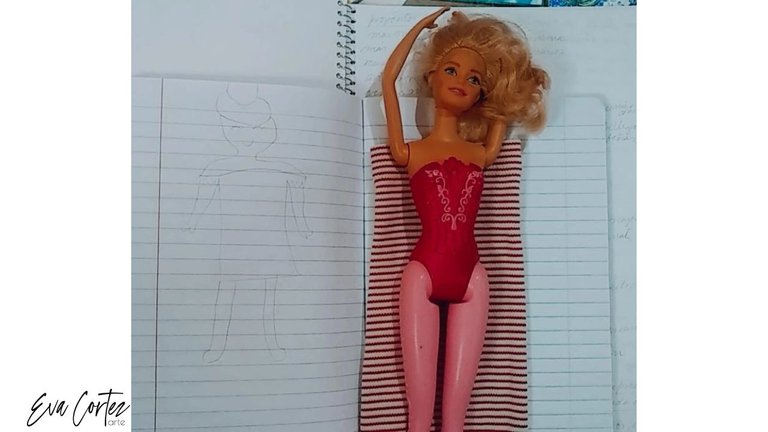
First, my daughter made a sketch of the dress she wanted for her doll :)
Do you see it? It's on the left side of the photo :)
ESPAÑOL
Un artista hace más que pintar y dibujar:D Muchas veces las personas piensan que nos pasamos todo el día pintando y puede que sea muy cierto xD Sin embargo, también somos padres, madres o realizamos otras actividades.
En mi caso, tengo una hija pequeña y comparto con ella el gusto por crear ropita, accesorios y objetos de uso para sus muñecas.
Es una actividad que me encanta realizar; me relaja, me permite compartir con mi hija y pasar juntas un rato agradable. Después de todo la vida son estos pequeños momentos.
Creo que en el fondo soy una niña grande; pues aun pinto, hago ropa y cositas para muñecas :D
Te voy a mostrar el paso a paso de cómo mi hija, su muñeca Susy y yo, hicimos juntas un vestido y un sombrero a juego, para que Susy lo luzca en sus paseos. Lo hicimos con un pantaloncito viejo.
Primeramente, mi hija realizó un boceto del vestido que quería para su muñeca :)
¿Lo ves? Está a la izquierda de la foto :)
I formally introduce you to Susy, my daughter's dancing doll :) she stood on top of one of the pant boots, so I could cut the fabric according to the length we wanted for the dress.
Te presento formalmente a Susy, la muñeca bailarina de mi hija :) ella se colocó encima de una de las botas del pantalón, para que yo cortara la tela de acuerdo al largo que deseábamos para el vestido.
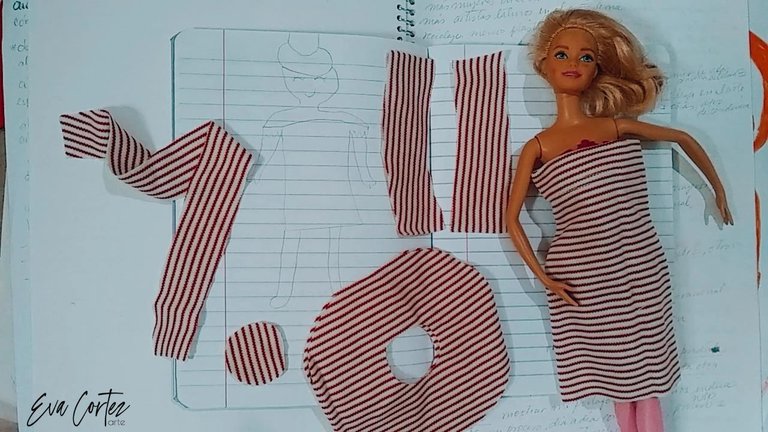
I cut several pieces. In the photo you can see from right to left the following pieces:
- The body of the dress: when I cut the trouser boot I am ready with the cylindrical shape of the dress.
- Two (2) small strips: for the sleeves.
- A large circle with a circular cut out in the center: actually they are 2 pieces of this, they are just one on top of the other and you can't see them. These pieces form the flap of the hat.
- Small circle: you see it next to the big circle. This small circle is for the top of the hat, the part that covers the head. In this photo you see a small circle; however, I later realized it was too small and had to cut another larger piece.
- Long strip: this strip is very long, I cut it like this to adjust it later. This piece is from the hat, it joins the flap with the small circle that covers the head.
Corté varias piezas. En la foto puedes observar de derecha a izquierda las siguientes piezas:
- El cuerpo del vestido: cuando corto la bota del pantalón me queda lista la forma cilindrica del vestido.
- Dos (2) tiras pequeñas: para las mangas.
- Un circulo grande con un corte circular en el centro: en realidad son 2 piezas de esta, sólo que están una encima de la otra y no se ven. Estas piezas forman la solapa del sombrero.
- Circulo pequeño: lo ves al lado del circulo grande. Este circulo pequeño es para la parte superior del sombrero, la parte que cubre la cabeza. En esta foto ves un circulo pequeño; sin embargo, luego me di cuenta que era muy pequeño y tuve que cortar otra pieza más grande.
- Tira larga: esta tira es muy larga, la corté así para ajustarla luego. Esta pieza es del sombrero, une a la solapa con el circulo pequeño que cubre la cabeza.
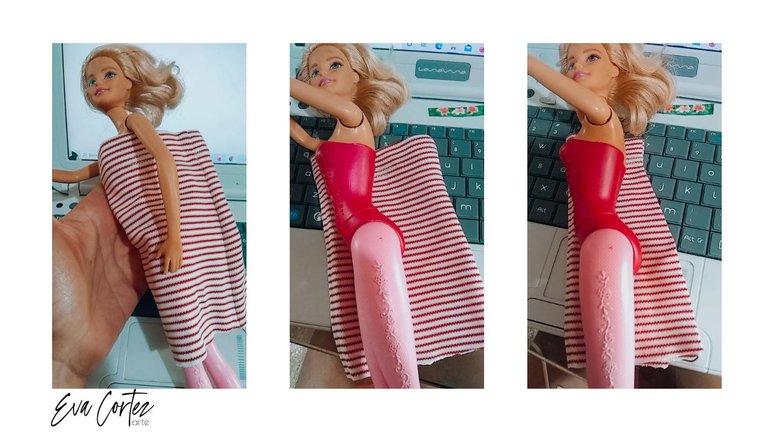
Here you can see how the first piece looks like, it is the trouser boot already cut to the length of the dress.
However, you can see that there is some fabric left over in the back of the dress, it's too big on the wrist and I want it to fit a little tighter to the body.
I cut it following the silhouette of the doll's body.
Aquí puedes ver cómo luce la primera pieza, es la bota del pantalón ya cortada al largo del vestido.
Sin embargo, puedes ver que sobra algo de tela en la parte de atrás del vestido, le queda grande a la muñeca y quiero que quede un poco más ajustado al cuerpo.
Lo corté siguiendo la silueta del cuerpo de la muñeca.
I sewed along the length of the dress, then grabbed a hem.
It was very easy, Susy the doll also collaborated with some stitches :D
Now let's make the sleeves, these will be ruched. Pass the needle with thread through one side of the sleeve. Short stitches that go up and down, then pucker it.
Something like this: - - - - - - - - - - - - - - - - - - - - - - - - - - - - - - - like some dashes :D
Cosí a lo largo del vestido, luego agarré un ruedo.
Ha sido muy fácil, Susy la muñeca también colaboró dando algunas puntadas :D
Ahora hagamos las mangas, estas serán ruchaditas. Pasa la aguja con hilo por uno de los lados de la manga. Puntadas cortas que suben y bajan, para luego fruncirlo.
Algo así: - - - - - - - - - - - - - - - - - - como unos guiones :D
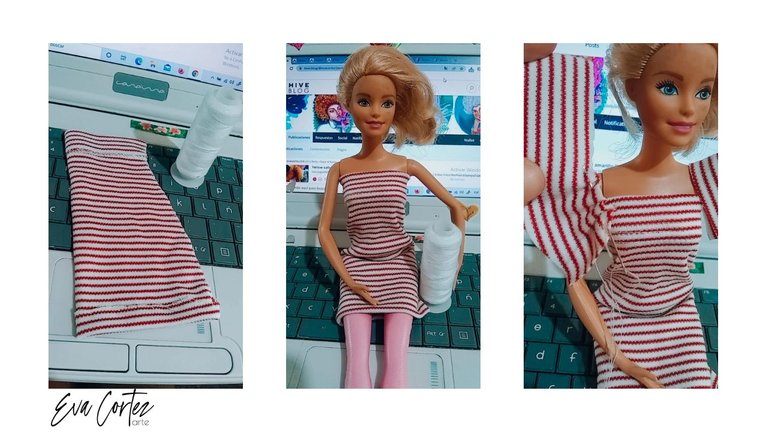
This part was made by Susy, because I was tired :D
We sew the sleeve to the dress. First one.
Then the other sleeve of the dress :)
Esta parte la hizo Susy, porque yo estaba cansada :D
Cosimos la manga al vestido. Primero una.
Luego la otra manga del vestido :)
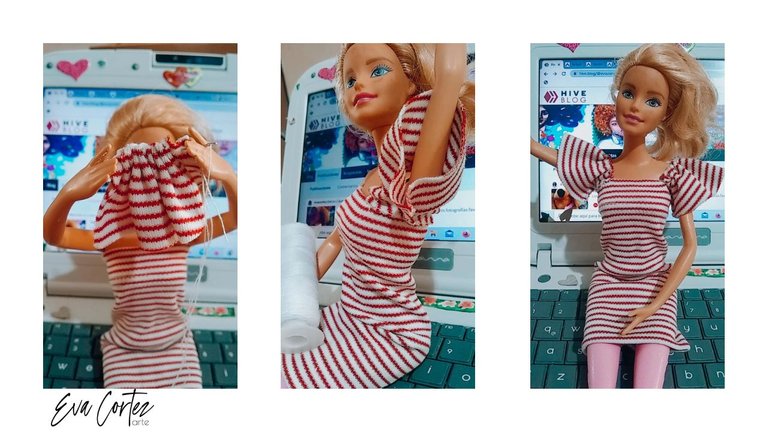
See how nice it turned out!
Susy got to work with the pieces of the hat :D
Here are the pieces of the hat. Let's continue :)
¡Ves qué lindo ha quedado!
Susy se puso manos a la obra con las piezas del sombrero :D
Aquí están las piezas del sombrero. Continuemos :)
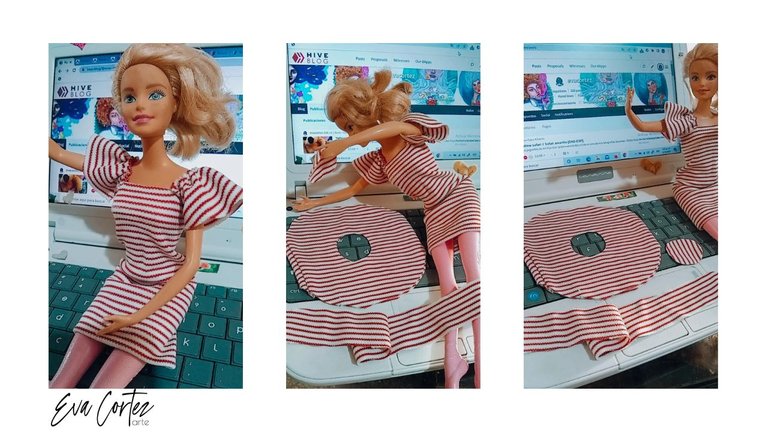
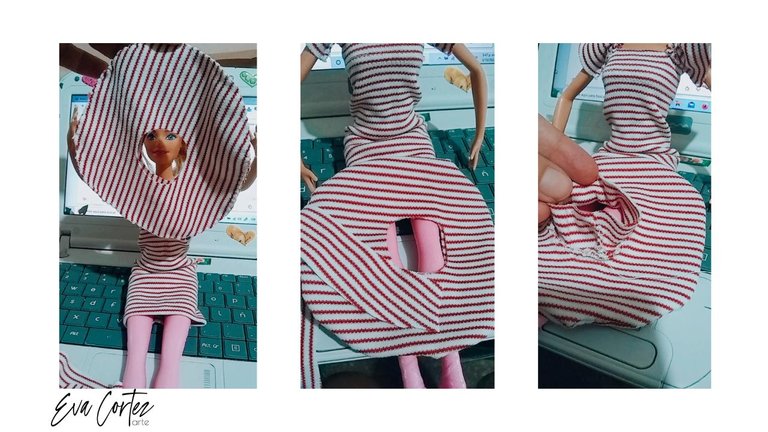
We are going to join the two (2) circular pieces that form the flap. We sew all around the outside of the circle, then flip it over so that the seams are on the inside.
Let's add the other piece of the hat. The long strip. We join it with the flap.
This is how the flap and the long strip are joined. As you can see, I cut off the excess of the long strip.
Vamos a unir las dos (2) piezas circulares que forman la solapa. Cosemos por toda la parte de afuera del circulo, luego lo volteamos para que las costuras queden por dentro.
Vamos a agregar la otra pieza del sombrero. La tira larga. La unimos con la solapa.
Así quedan unidas la solapa y la tira larga. Como ves, corté el excedente de la tira larga.
Susy tried on the hat to see how it looks :D it still lacks the top part.
Here we noticed that the small circular piece we had cut for the top was too small.
We cut a circular piece for the top of the hat, this time a little larger.
Susy se probó el sombrero a ver qué tal :D aun le falta la parte superior.
Aquí notamos que la pieza circular pequeña que habiamos cortado para la parte superior, era muy pequeña.
Cortamos una pieza circular para la parte de arriba del sombrero, esta vez un poco más grande.
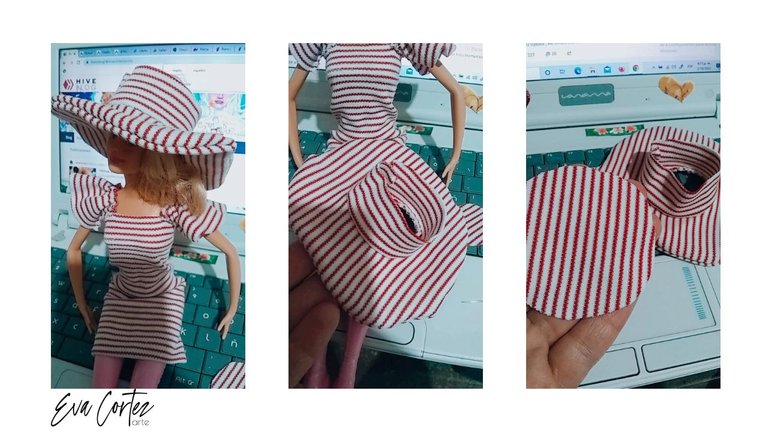
Here you can see the hat almost finished. We sewed the hat all around the edge of the flap to flatten that part of the hat.
Aquí ya puedes ver el sombrero casi terminado. Cosimos el sombrero por toda la orilla de la solapa para aplanar esa parte del sombrero.
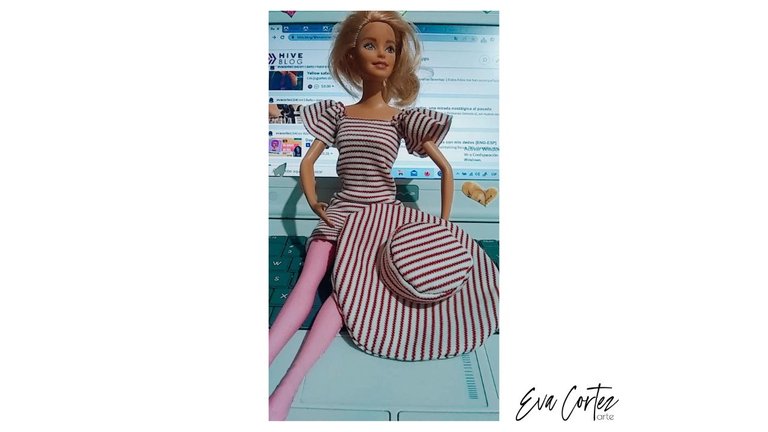
How beautiful this outfit turned out! :) Don't you think so?
My daughter has been very happy and Susy too! :D
¡Qué bonito ha quedado este conjunto! :) ¿No te parece?:D
¡Mi hija ha quedado muy contenta y Susy también! :D

I hope you liked this tutorial that shows a very important part of my life and my day to day life :)
Have a nice day.
Espero te haya gustado este tutorial que muestra una parte muy importante de mí vida y de mi día a día :)
Ten un bonito día.
