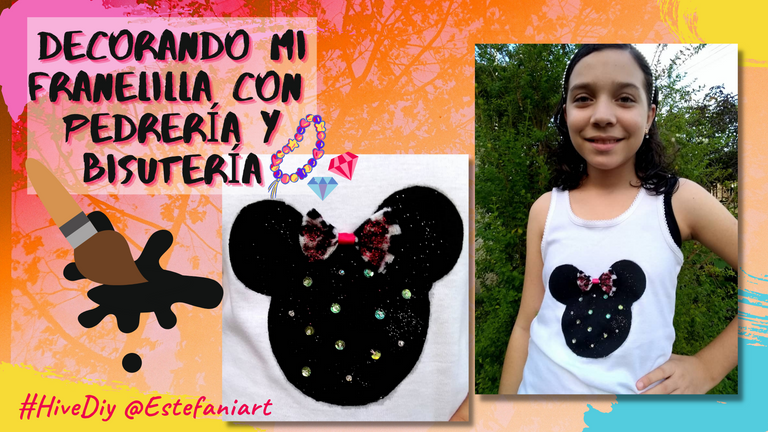
Hola amigos, bienvenidos a mi blog, me encanta dibujar, y quise aprovechar la oportunidad de participar en este concurso, con un dibujo de Minnie sobre tela y decorarlo con bisutería y pedrería. Me quedó genial, a pesar que es la primera vez que pinto sobre tela. Aquí les muestro el paso a paso de cómo lo hice.
Hello friends, welcome to my blog, I love to draw, and I wanted to take the opportunity to participate in this contest, with a drawing of Minnie on fabric and decorate it with jewelry and rhinestones. It turned out great, even though it is the first time I paint on fabric. Here I show you the step by step of how I did it.
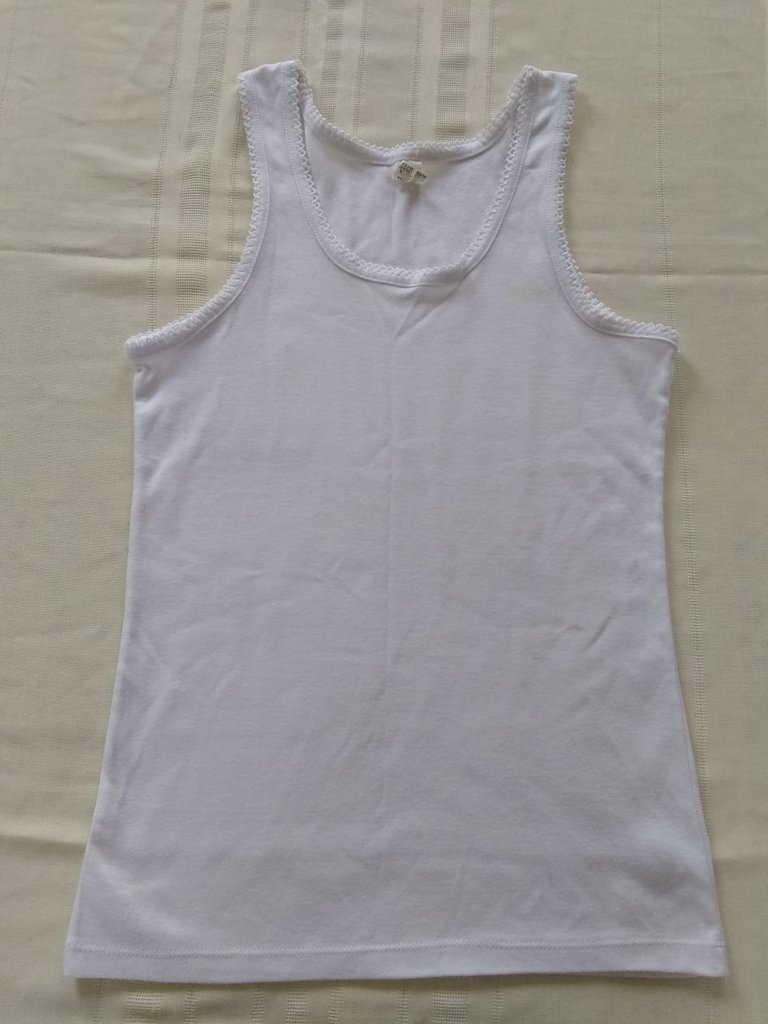
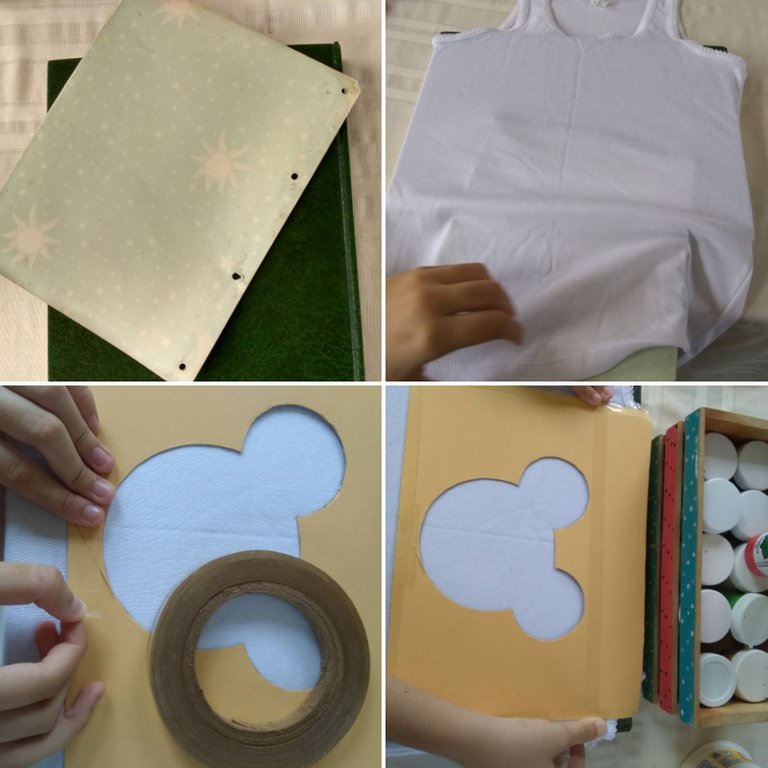
Para hacer mi dibujo, elegí una franelilla blanca. Aquí se las muestro.
To make my drawing, I chose a white flannelette. Here I show it to you.
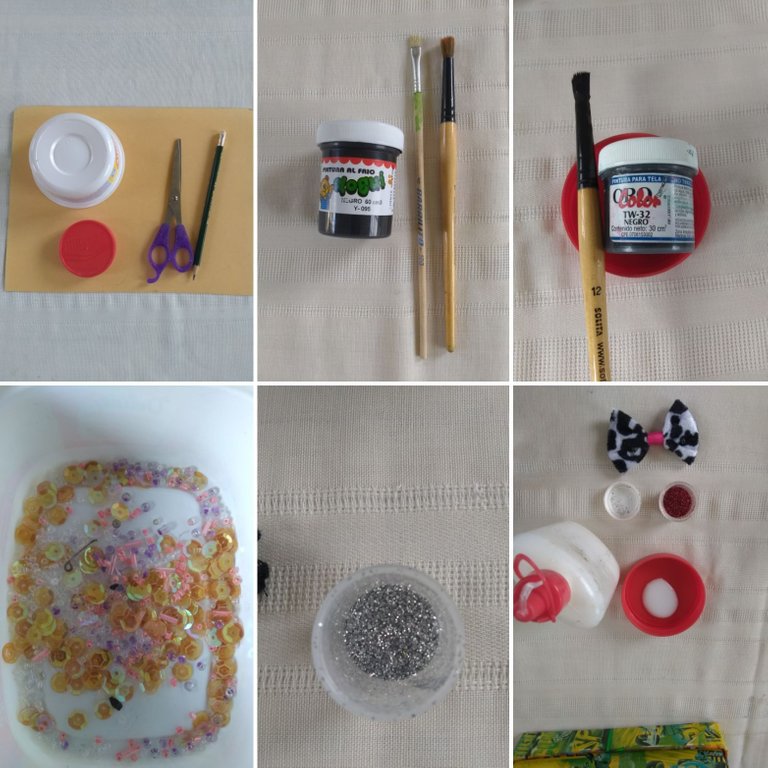
Los materiales que utilicé fueron los siguientes:
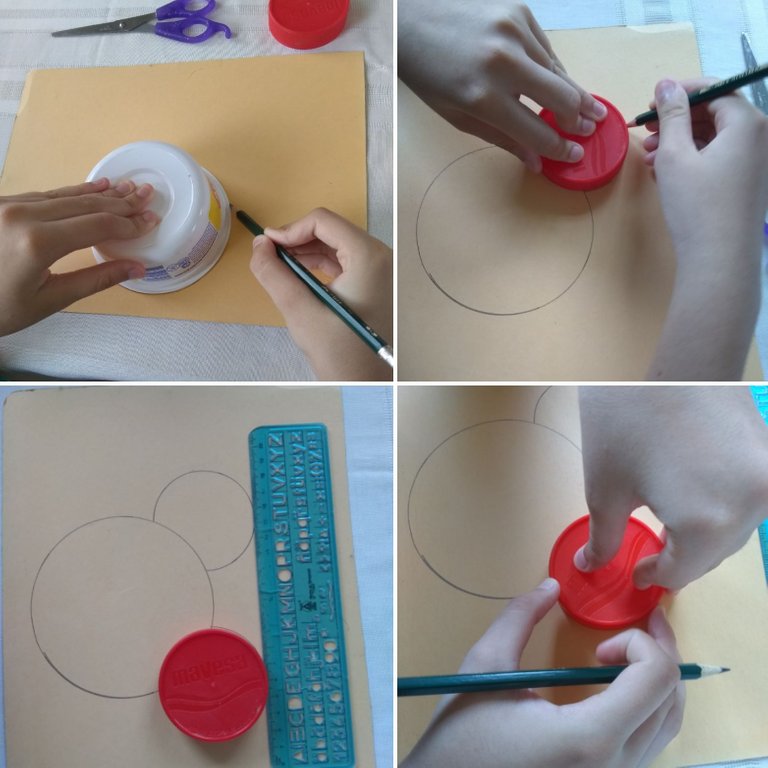
Una cartulina de 22 cm × 29 cm.
Un envase plástico redondo, para dibujar la cabeza de Minnie.
Una tapa plástica para dibujar las orejas.
Lapiz
Pinceles
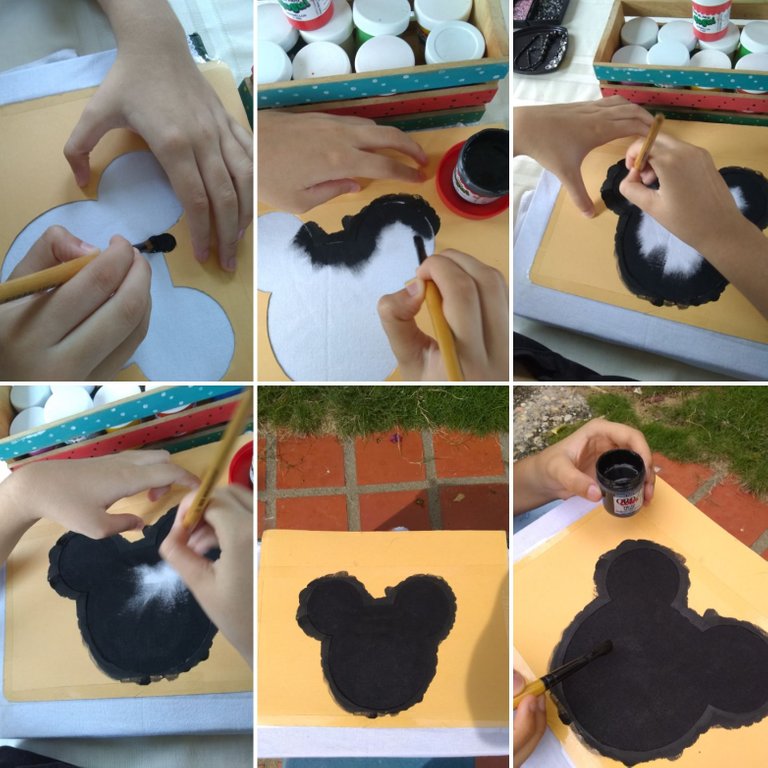
Pintura al frío de color negro.
Pintura para tela de color negro
Escarcha plateada
Escarcha roja
Goma blanca
Lentejuelas rosadas y canutillo blanco y rosado
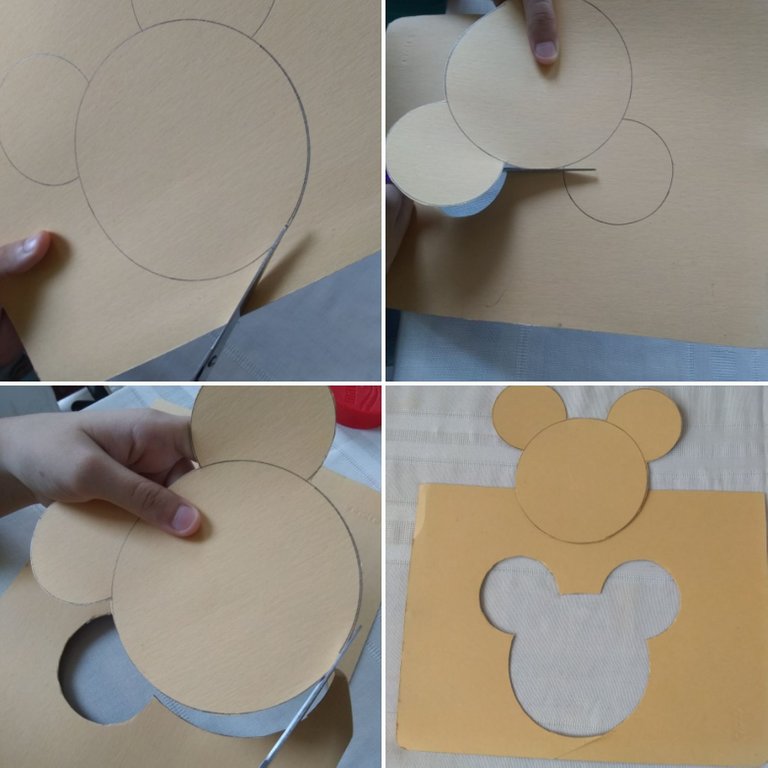
Tijera
The materials I used were the following:
A 22 cm × 29 cm cardboard.
A round plastic container, to draw Minnie's head.
A plastic lid to draw the ears.
Pencil
Brushes
Black cold paint.
Black fabric paint
Silver frosting
Red frosting
White glue
Pink sequins and white and pink beading
Scissors
Paso a paso
Sobre la cartulina dibuje la cara de Minnie con el envase plástico, y con la tapa plástica más pequeña dibuje las dos orejas. Un truco fácil para hacer la cabeza de Minnie.
On the cardboard draw Minnie's face with the plastic container, and with the smaller plastic lid draw the two ears. An easy trick for making Minnie's head.
Con la tijera recorte todo el contorno por la línea del dibujo, cuidando de hacer un solo corte, para que quedaran las dos partes como si fueran las piezas de un rompecabezas. O como un espacio negativo.
With the scissors cut out the whole contour along the line of the drawing, taking care to make a single cut, so that the two parts remain as if they were the pieces of a jigsaw puzzle. Or as a negative space.
Dentro de la franelilla, coloque un libro grande y una lámina plástica para proteger el libro, en la parte del frente de la franelilla, coloque la cartulina con el espacio negativo y con la ayuda de cinta adhesiva transparente la fijé para que no se desplazará.
Inside the flannelette, place a large book and a plastic sheet to protect the book, in the front part of the flannelette, place the cardboard with the negative space and with the help of transparent adhesive tape I fixed it so that it will not move.
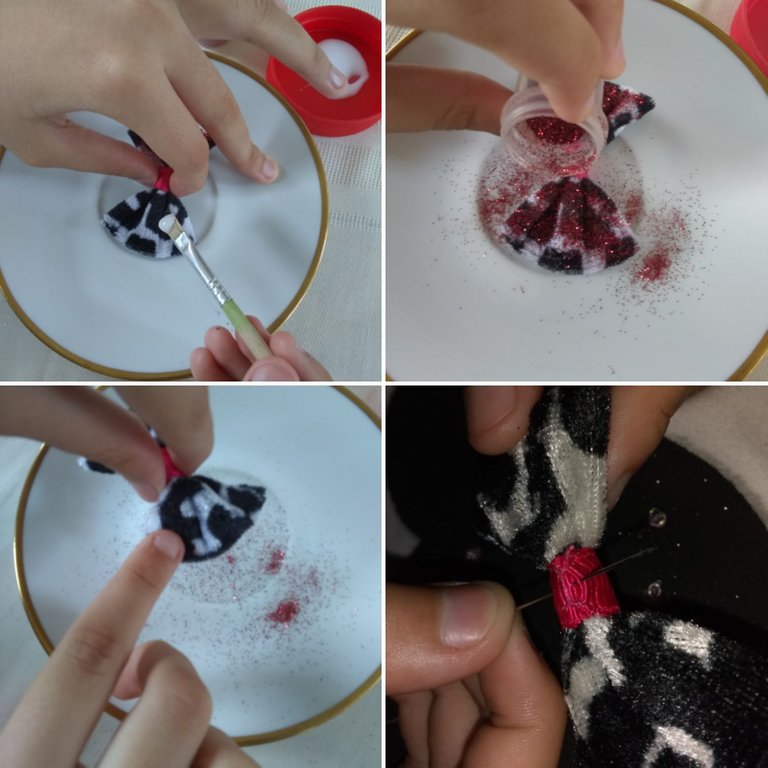
El siguiente paso fue pintar la cabeza de Minnie con la pintura al frío negra, cuidando de hacerlo desde el borde de la cartulina hacia el centro de la tela. Y cubriendo bien con la pintura. La puse a secar al sol y como a la media hora hice el mismo procedimiento pero con la pintura de tela negra.
Antes de que secara le coloque un poquito de la escarcha blanca para darle brillo.
The next step was to paint Minnie's head with the black cold paint, taking care to do it from the edge of the cardboard towards the center of the fabric. And covering it well with the paint. I put it to dry in the sun and about half an hour later I did the same procedure but with the black fabric paint.
Before it dried I put a little bit of the white frost to give it shine.
Cuando seco bien la pintura, le cosí lentejuelas con canutillo en el centro en diferentes partes de la cabeza. Así le di brillo a Minnie.
When the paint dried well, I sewed sequins with beading in the center in different parts of the head. This is how I gave Minnie a sparkle.

El último paso que hice fue tomar un lazo de un cintillo viejo y con un pincel le coloque un poquito de goma blanca y le puse una lluvia de escarcha roja. Espere que secara bien y le pegue el tradicional lazo a Minnie. Así quedó terminada mi decoración de la franelilla con motivo Minnie con mucho brillo.
The last step I did was to take a ribbon from an old headband and with a brush I put a little bit of white glue and put a shower of red frosting on it. I waited for it to dry well and then I glued the traditional bow to Minnie. That's how my flannel decoration with Minnie motif was finished with a lot of glitter.
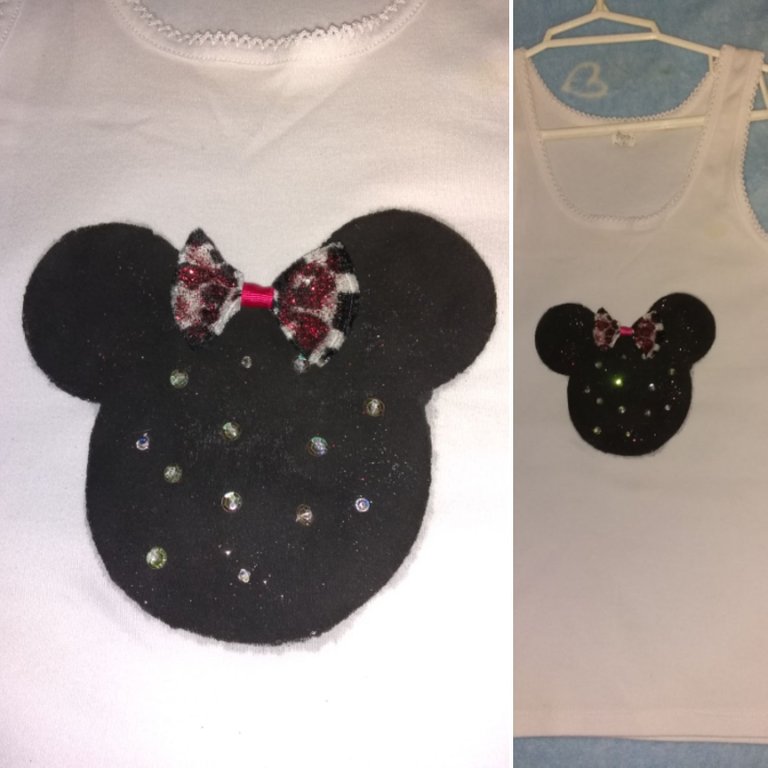
Esto que hice con mi franelilla me encantó, espero que a ustedes les guste y bueno no podía faltar una sesión fotográfica con mi creación.
I loved this I made with my flannel, I hope you like it and I couldn't miss a photo session with my creation.

Gracias por visitar mi blog. Todas las fotos las tomo mi mamá con su teléfono Motorola moto e5 play están editadas con Layout. La portada está diseñada en Canva.
Thanks for visiting my blog. All the photos were taken by my mom with her Motorola moto e5 play phone and are edited with Layout. The cover is designed in Canva.
Translated with www.DeepL.com/Translator (free version)