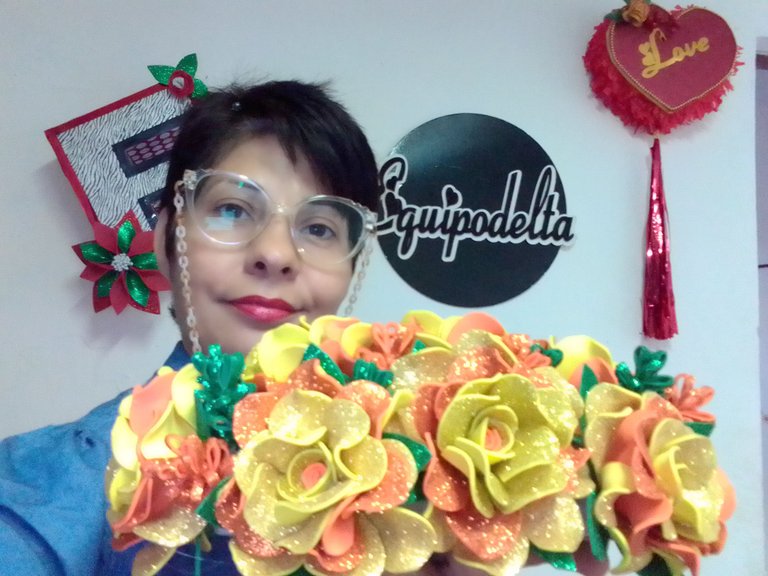


Greetings creative, artisan and artistic community, I have brought here a centerpiece made with pure EVA or fomi flowers that I hope you like.

I bought a new table for my dining room table, it is a rustic wooden table very country and I love it, who doesn't like to go shopping? I didn't have something to decorate it with, remember that I am starting to furnish my house and I decided to make a centerpiece of a very beautiful flowers, I applied an old technique to put it together that I was taught when I worked in the florist shop with natural flowers and it has turned out very nice, now I will show you how to do it.
I used some scrap materials for the base, I don't remember what I bought in which came two buckets of a plastic very similar to the floral foam blocks and that's where my inspiration came from.
As a curious fact I spent a lot of money on double letter fomi sheets, it was a little expensive but its finish is worth it, besides it adorns my table and is the center of all eyes.
I remember that before I used to decorate my house and my shop always had natural flower arrangements, I want to return to this practice, as the economy improves. The truth is that flowers give those details of harmony and beauty to the decoration of our home. In this case these flowers are artificial and you can have them all year long, even at Christmas time, since I used frosted fomi.

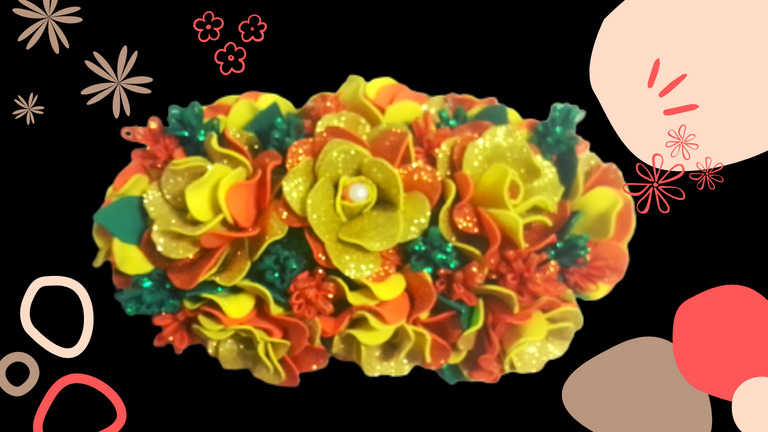


Saludos comunidad creativa, artesana y artística, he traído por aquí un centro de mesa hecho con puras flores de goma EVA o fomi que espero les guste.

Compré una mesa nueva para el comedor de mi casa, es una mesa de madera rústica muy country y me encanta ¿A quién no le gusta salir de compras? No tenía algo para ponerle de adorno, recuerden que estoy empezando a amoblar mi casa y decidí hacer un centro de mesa de una flores muy hermosas, apliqué una vieja técnica para armarla que me enseñaron cuando trabajaba en la floristería con flores naturales y ha quedado muy bonita, ahora te mostraré cómo se hace.
Utilicé algo de materiales de desecho para la base, no recuerdo qué compré en el que vinieron dos cubos de un plástico muy parecido a los bloques de espuma floral y por ahí vino mi inspiración.
Como dato curioso gasté mucho en láminas de fomi doble carta, fue algo costoso pero su acabado vale la pena además de que adorna mi mesa y es el centro de todas las miradas.
Recuerdo que antes decoraba mi casa y mi local comercial siempre tenían arreglos de flores naturales, deseo volver a esta práctica, conforme mejore la economía. La verdad que las flores les dan esos detalles de armonía y belleza a la decoración de nuestro hogar. En este caso estas flores son artificiales y podrás tenerlas por todo el año hasta en navidad ya que usé fomi escarchado.

 |  |
|---|---|
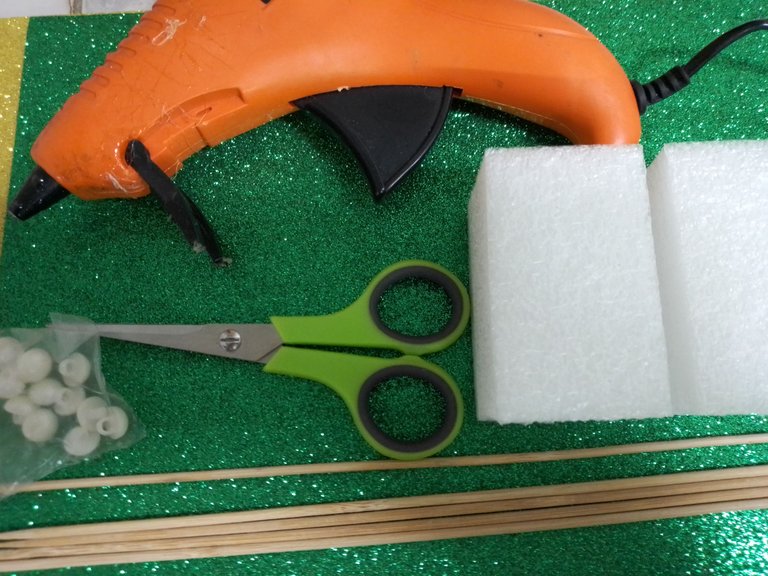
| - Sticks of height.- Scissors.- Iron. - Silicone gun.- Anime cube or floral foam block.- Fomi or EVA rubber of two different shades the amount you need to make the flowers. I used 6 yellow Fomi double card, 3 orange and 1 green. | - Palitos de altura.- Tijera. - Plancha. - Pistola de silicón.- Cubo de anime o bloque de espuma floral.- Fomi o goma EVA de dos tonos diferentes la cantidad que necesites para hacer las flores. Yo usé 6 Fomi doble carta color amarillo, 3 color naranja y 1 verde. |



Step 1️⃣
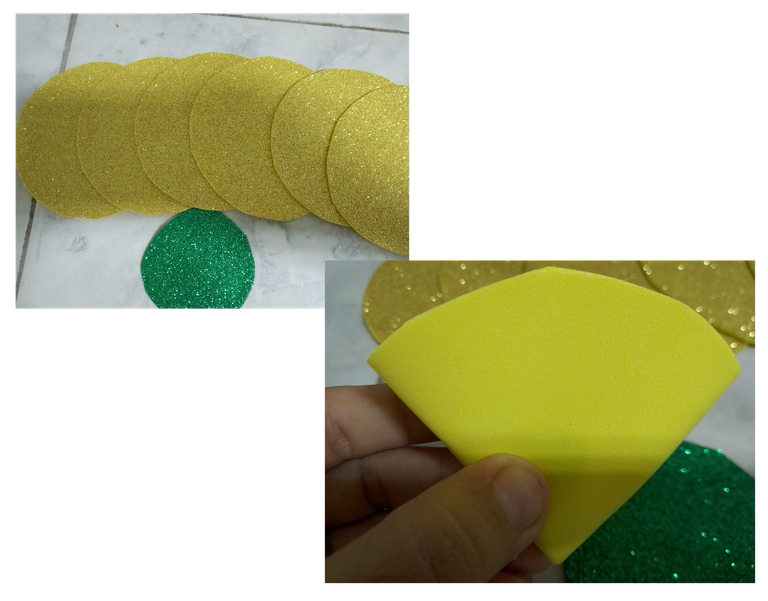
Mark the circles you need on the fomi, do not use pencil, colors or markers because the mark will be noticeable, use the same tip of the height stick to mark, with the help of any round object mark the circles and then cut them out.
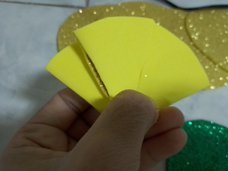
Once you have cut out a good amount of fomi circles in both colors fold in half and then fold again, now make some cuts that do not reach the center in each fold.

Paso 1️⃣
Marca los círculos que necesites en el fomi, no uses lápiz, colores ni marcadores ya que puedes la marca se notará, usa la misma punta del palito de altura para marcar, con ayuda de cualquier objeto redondo marca los círculos y luego recorta.
Una vez recortes una buena cantidad de círculos de fomi en ambos colores dobla por la mitad y luego vuelve a doblar, ahora has unos cortes que no lleguen al centro en cada doblez.



Step 2️⃣
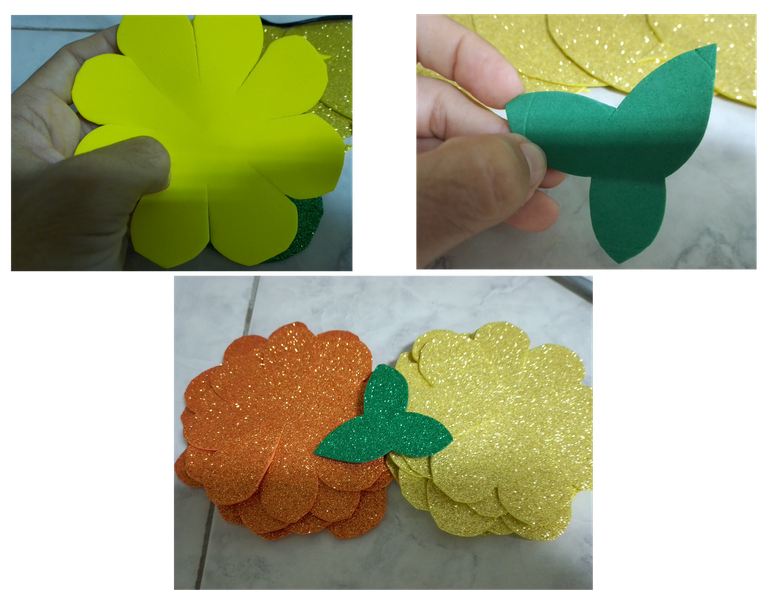
Take advantage of the cuts you have just made and cut out the shapes of the petals as shown in the image. Do this procedure with both colors. Then cut out the shape of some leaves with the green fomi.

Paso 2️⃣
Aprovecha los cortes que acabas de realizar y recorta las formas de los pétalos como indica la imagen. Realiza este procedimiento con ambos colores. Luego recorta la forma de unas hojas con el fomi color verde.



Step 3️⃣
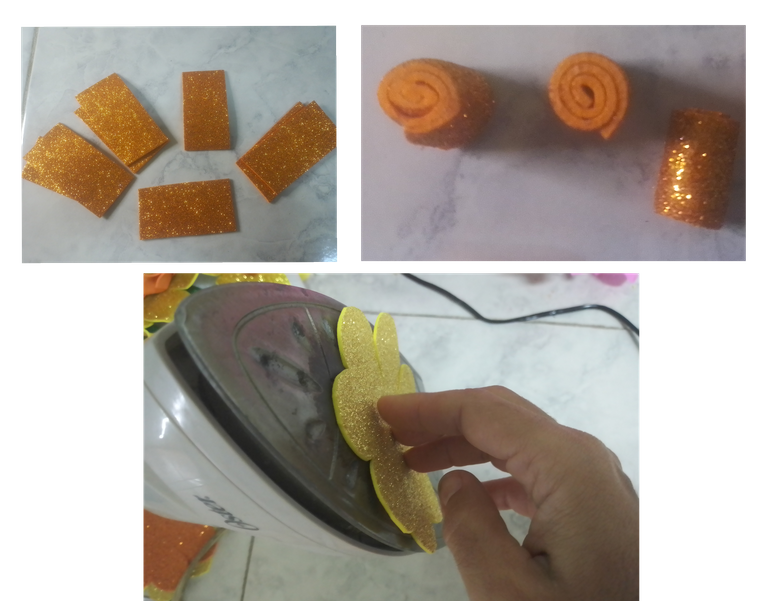
Cut out rectangles approximately 2 centimeters high by 5 centimeters long, place a dot of hot silicone on each end and roll up, these will be the center of our flower.
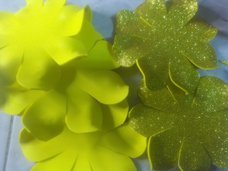
Heat the iron at a very low level that you can withstand the heat without burning yourself, do this procedure very carefully because it is dangerous, you can burn yourself or the fomi, it is important that it is warm. Once it has the right temperature place the fomi giving small touches, when it begins to bend by itself is the time to take it out and with your fingers mold the tips to give movement to each petal.

Paso 3️⃣
Recorta unos rectángulos de aproximadamente 2 centímetros de alto por 5 centímetros de largo, Coloca un punto de silicón caliente en cada extremo y enrolla, estos serán el centro de nuestra flor.
Coloca a calentar la plancha a muy bajo nivel que puedas soportar el calor sin quemarte, has este procedimiento muy cuidadosamente pues es peligroso, te puedes quemar o quemar el fomi, es importante que esté tibia. Una vez tenga la temperatura adecuada coloca el fomi dando pequeños toques, cuando este comience a doblarse por sí solo es el momento de sacarlo y con tus dedos moldea las puntas para darle movimiento a cada pétalo.

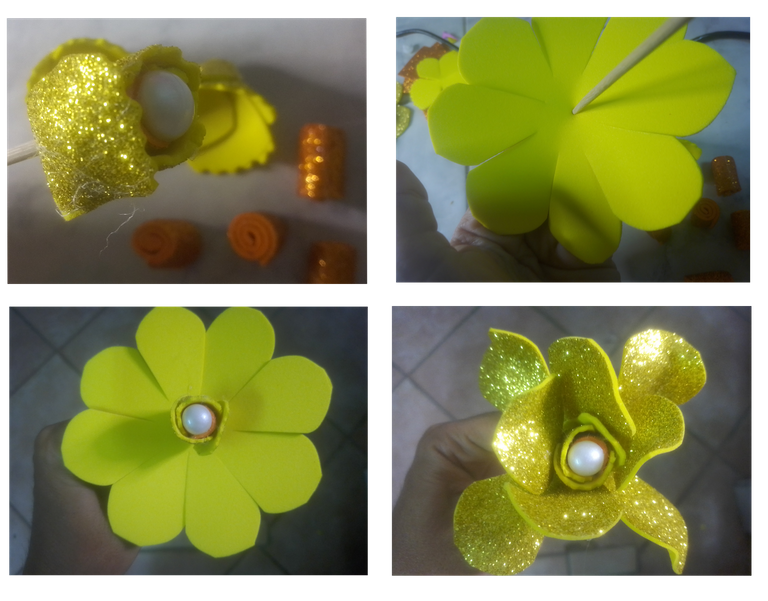


Step 4️⃣
Take the height stick, place a glue dot on the tip, insert the height stick through the center of the silicone roll you made earlier, if you like place a button on the tip, I did it only on the center flower.
Now glue the first petals to the center of the flower to cover the button. Then take another fomi and pass the height stick through the center, place a dot of glue and press it against the button until it dries, then glue each petal with a dot of hot silicone first the four corners and then the rest.

Paso 4️⃣
Toma el palito de altura coloca un punto de pega en la punta, introduce el palito de altura por el centro del rollo de silicón que hiciste anteriormente, si gustas coloca un botón en la punta, yo lo hice solo en la flor del centro.
Ahora pega los primeros pétalos al centro de la flor para cubrir el botón. Luego toma otro fomi y pasa el palito de altura por el centro, coloca un punto de pega y lo presionas contra el botón hasta que seque, seguidamente pega cada pétalo con un punto de silicón caliente primero las cuatro esquinas y luego el resto.

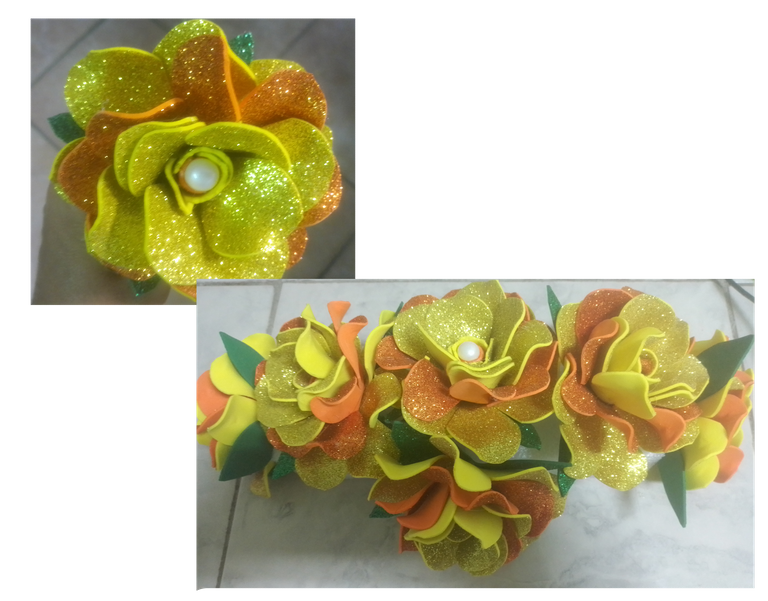


Step 5️⃣
Repeat the previous procedure but with a different color of fomi, now glue another one to which you will only give a little glue in the center to leave the petals open and free, to finish with the flower, glue the green leaves.
Once you have a good amount of flowers made it is time to place them in the anime cube or block of floral foam to turn it into the arrangement.
Start with the flower in the center, then the two on the sides and then the ones in the corners. Repeat these steps with the flowers on the sides to cover all the spaces.

Paso 5️⃣
Repite el procedimiento anterior pero con el fomi de otro color, ahora pega otro al que solo darás un poco de pega en el centro para dejar los pétalos abiertos y libres, para finalizar con la flor, pega las hojas verdes.
Una vez tengas una buena cantidad de flores hechas es hora de ir colocándolas en el cubo de anime o bloque de espuma floral para convertirlo en el arreglo.
Comienza por la flor del centro, luego con las dos de los lados y seguidamente las de las esquinas. Repite estos pasos con las flores de los lados que cubran todos los espacios.

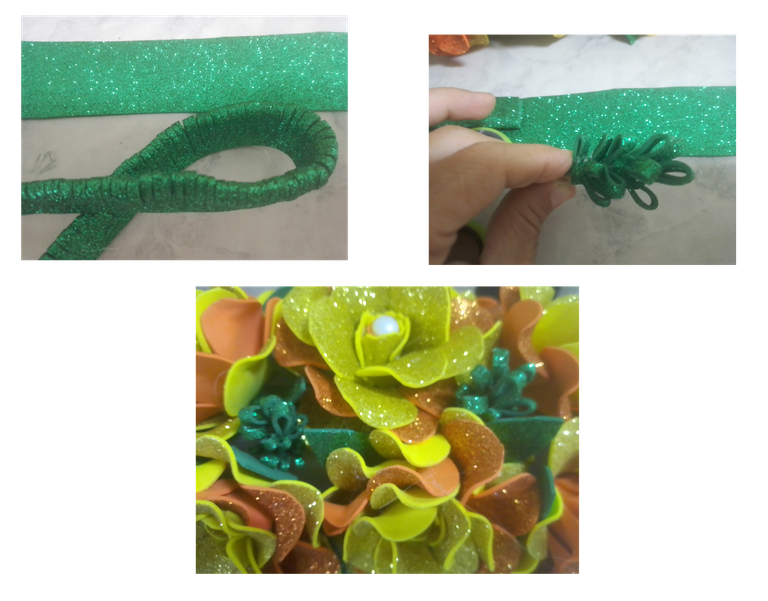


Step 6️⃣
If you have spaces left where you can see the anime we can recreate some foliage, I made this very simple one.
Cut out a strip of green fomi about 2 centimeters wide by the length of your fomi, fold and glue the thin ends with hot silicone, cut small strips without reaching the end then give a little shape.
Put a dot of hot silicone on a tall stick and glue the strip you just made giving at least three turns around it. Cut the strip and glue the other end to the height stick.
Then place the foliage you just made in those spaces that were left blank.
With this we have finished our centerpiece.
What did you think? I hope you like it.
My table looks spectacular.

Paso 6️⃣
Si te han quedado espacios donde se puede ver el anime podemos recrear algo de follaje, yo elaboré este muy sencillo.
Recorta una tira de fomi color verde de aproximadamente 2 centímetros de ancho por el largo que de tu fomi, dobla y pega los extremos delgados con el silicón caliente, recorta pequeñas tiras sin llegar al final luego da un poco de forma.
Pon un punto de silicón caliente en un palito de altura y pega la tira que acabas de realizar dando al menos tres vueltas al rededor de él. Corta la tira y pega el otro extremo al palito de altura.
Seguidamente coloca el follaje que acabas de hacer en esos espacios que quedaron en blanco.
Con ello hemos culminado nuestro centro de mesa.
¿Qué te pareció? Espero que te guste.
Mi mesa se ve espectacular.
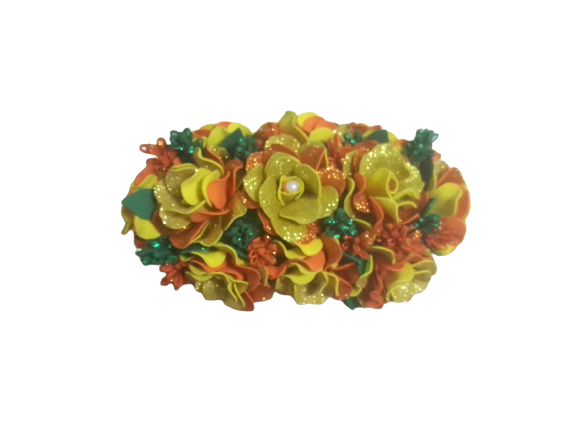

Editions:
Program: MediBang Paint Pro.
Graphics tablet: Huion (Usb Pen Tablet). Model 420.
The screenshots are from my game profile. / Los captures son desde mi perfil de juego.

I'm a contributor of royalty-free images
Soy contribuyente de imágenes libres de derechos de autor

My youtube channel - game Play
My youtube channel - arts and crafts

Hacks, DIY, Crafts, handmade arts Community
Discord


