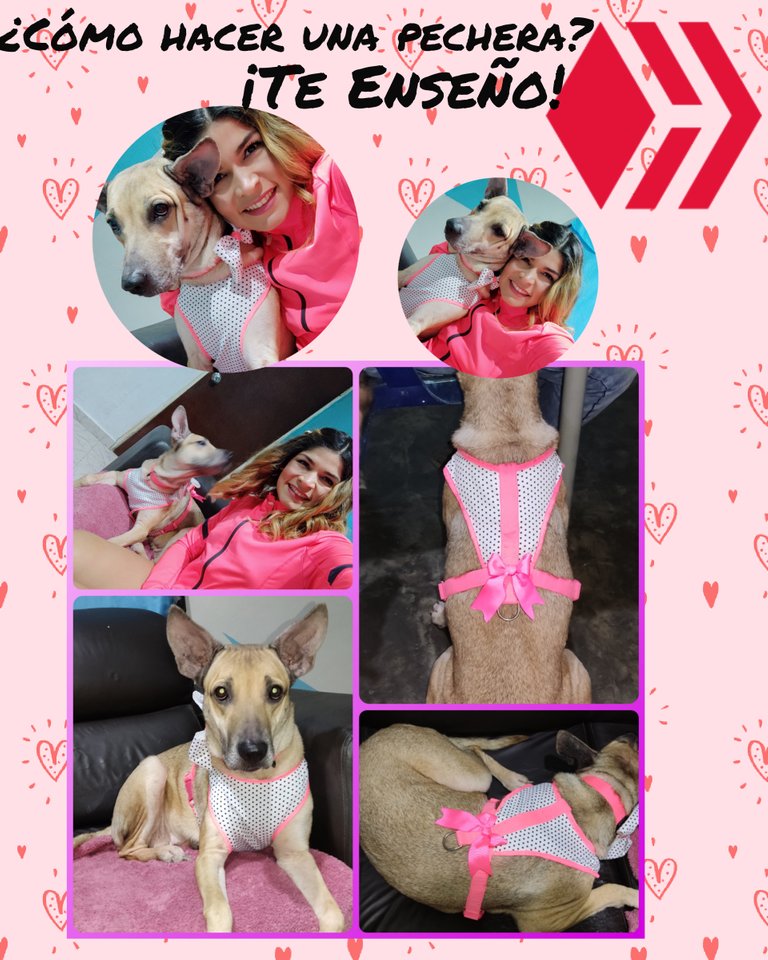
Hola amigos #hivers 🐝 espero que se encuentren muy bien y que tengan una excelente viernes, hoy quiero compartir con ustedes la manera de hacer nosotros mismos una pechera para nuestra mascota 🐶🐱 es súper hermosa y sin duda tu mascota quedará más hermosa con ella puesta, y más si la hiciste tú misma con mucho amor, mi hermosa Kila se ve más linda de lo que es con esta pechera que le hice con mucho cariño y amor. Así que sin más aquí les mostraré detalladamente cómo tú también puedes hacerla en casa.
Hello friends #hivers 🐝 I hope you are very well and have an excellent Friday, today I want to share with you how to make ourselves a breastplate for our pet 🐶🐱 is super beautiful and no doubt your pet will be more beautiful with it on, and more if you made it yourself with lots of love, my beautiful Kila looks cuter than it is with this breastplate that I made her with lots of love and affection. So without further ado, here I will show you in detail how you can also make it at home.
MATERIALES // MATERIALS
🐶 Tela
🐶 Sesgo o tela para hacerlo.
🐶 Cinta poli.
🐶 2 Aros de metales.
🐶 1 corredera.
🐶 1 tranca clic clac.
🐶 Tijeras.
🐶 Hilo y agujas.
🐶 Cuenta para lazo.
🐶 Fabric.
🐶 Bias or fabric to make it.
🐶 Poly tape.
🐶 2 Metal hoops.
🐶 1 slider.
🐶 1 click clack latch.
🐶 Scissors.
🐶 Thread and needles.
🐶 Bead for loop.
PROCEDIMIENTO // PROCEDURE
Patrón o Molde de la Pechera // Pattern or Breastplate Mold
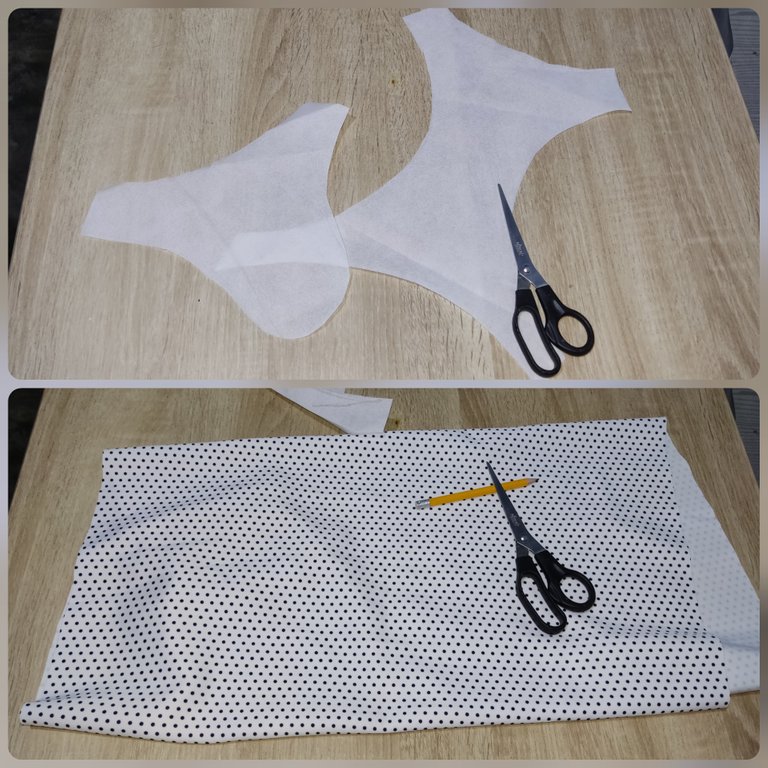
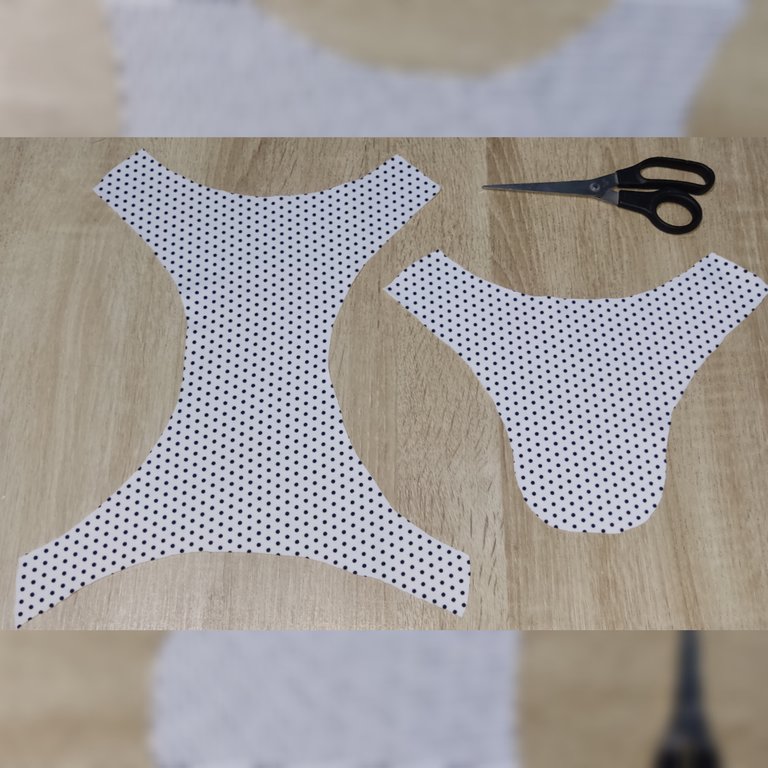
Empezaremos por sacar el patrón de la pechera que queremos hacer, este yo dibuje a mano alzada sobre una tela pop, fijándose de un patrón que ví por internet y fui ajustándolo a las medidas de mi perrita Kila. De igual forma lo pueden hacer ustedes con un poco de paciencia y sobre un papel copian este modelo y luego lo van agrandando poco a poco, según el tamaño de su mascota. También en esta imagen tenemos la tela que voy a usar, es una tela fuerte blanca con puntitos negros.
We will start by drawing the pattern of the breastplate we want to make, this I drew freehand on a pop fabric, looking at a pattern that I saw online and I was adjusting it to the measurements of my dog Kila. In the same way you can do it with a little patience and copy this pattern on a piece of paper and then enlarge it little by little, according to the size of your pet. Also in this image we have the fabric that I am going to use, it is a strong white fabric with black dots.
Con el patrón o molde listo, y sabiendo que tela es la que vamos a usar, posicionarnos el patrón o molde encima de la tela y vamos a marcar con un lápiz o una tiza.
With the pattern or mold ready, and knowing what fabric we are going to use, position the pattern or mold on top of the fabric and mark it with a pencil or chalk.
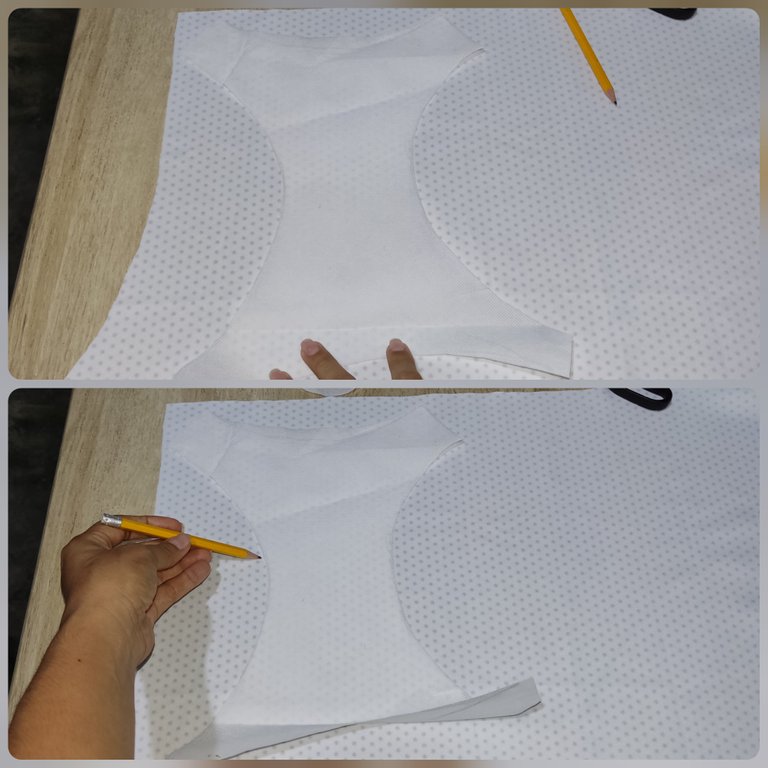
Recortamos nuestra tela siempre dejando un centímetro aproximadamente para realizar las costuras.
We cut our fabric always leaving about one centimeter to make the seams.
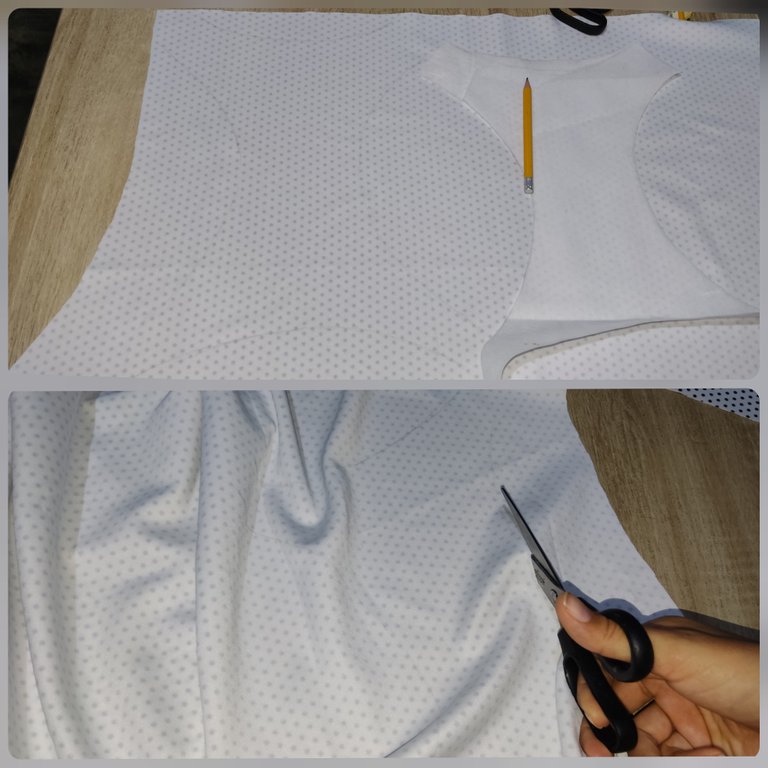
Así nos va a quedar el patrón o molde trasladado a la tela, podemos usar telas más suaves si vivimos en climas muy calurosos o usar telas más acolchados, gruesas o inclusive telas dobles si vivimos en climas muy fríos para así protejer a nuestra adorada mascota.
We can use softer fabrics if we live in very hot climates or use more padded, thick fabrics or even double fabrics if we live in very cold climates to protect our beloved pet.
Sesgo de Tela // Fabric Bias .
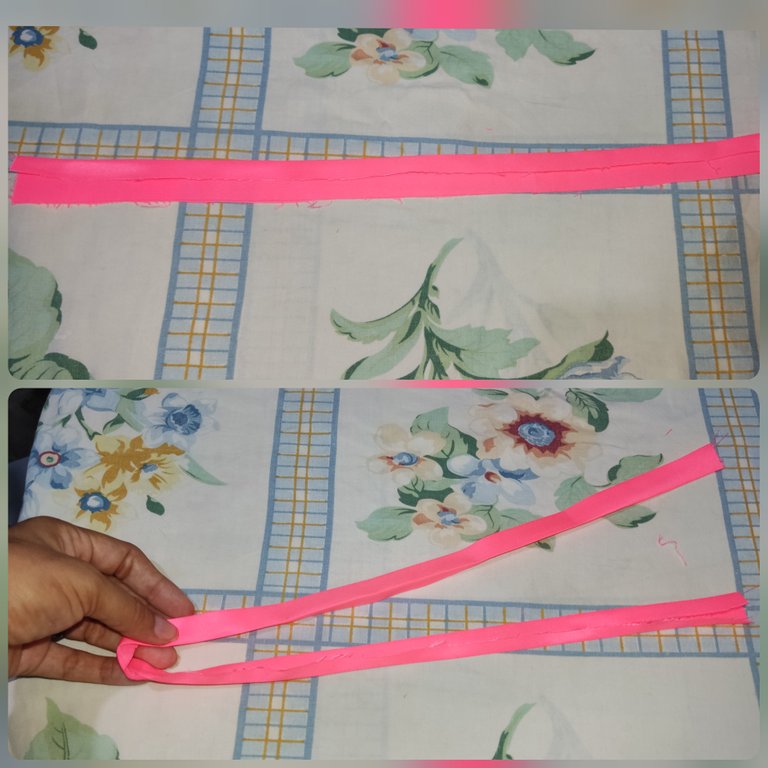
Para hacer el Sesgo yo use un trozo de tela que haría contraste con la tela principal de mi pechera, y hacerlo es muy fácil aunque también podemos comprarlo por metros en las tiendas de costuras, pero yo preferí hacerlo. Tome la tela y marque pedazos de 3 cm aproximadamente,
To make the Bias I used a piece of fabric that would contrast with the main fabric of my breastplate, and making it is very easy although we can also buy it by the meter in sewing stores, but I preferred to do it. Take the fabric and mark out pieces of 3 cm approximately.
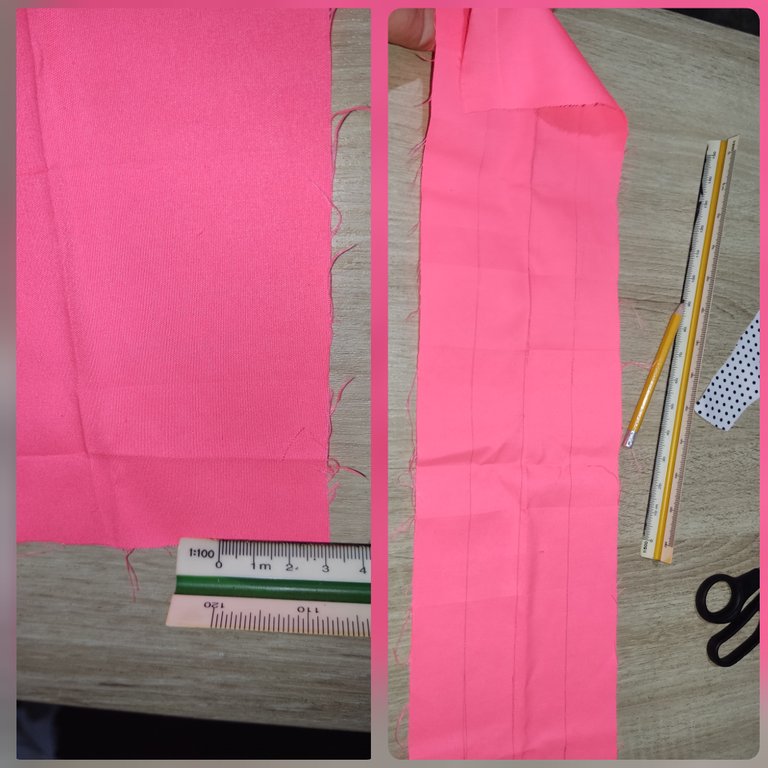
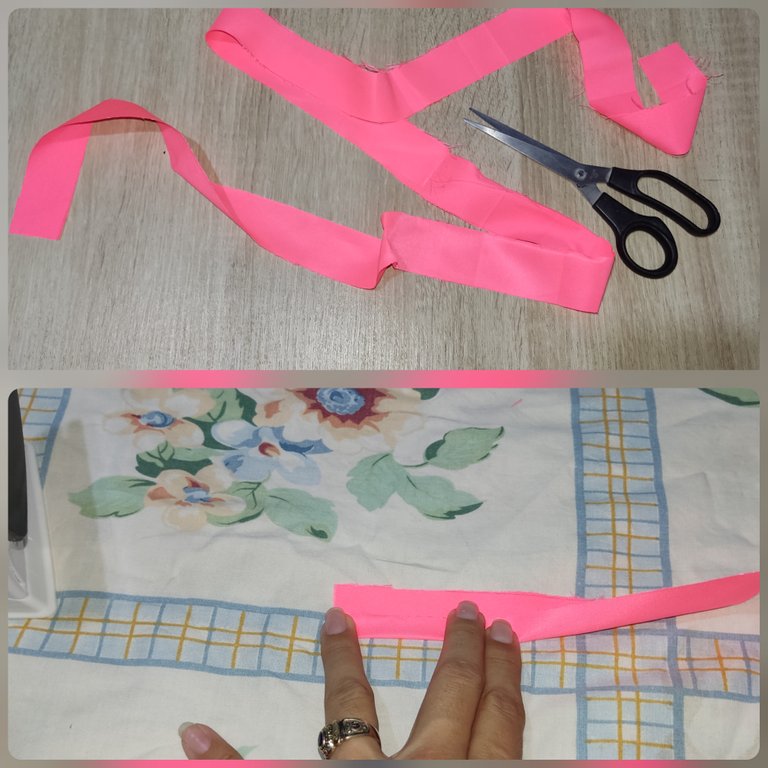
Luego los recorte, saque 4 tiras porque pensé que con esa cantidad era suficiente para bordear toda la pechera. Doble 1cm aproximadamente hacía adentro.
Then I cut them out, I took 4 strips because I thought that with that amount was enough to border the entire breastplate. Fold about 1cm inwards.
Y pase la plancha de ropa caliente para sacarle el filo y se quedará con ese dobles.
And pass the hot iron to remove the edge and it will stay with that double.
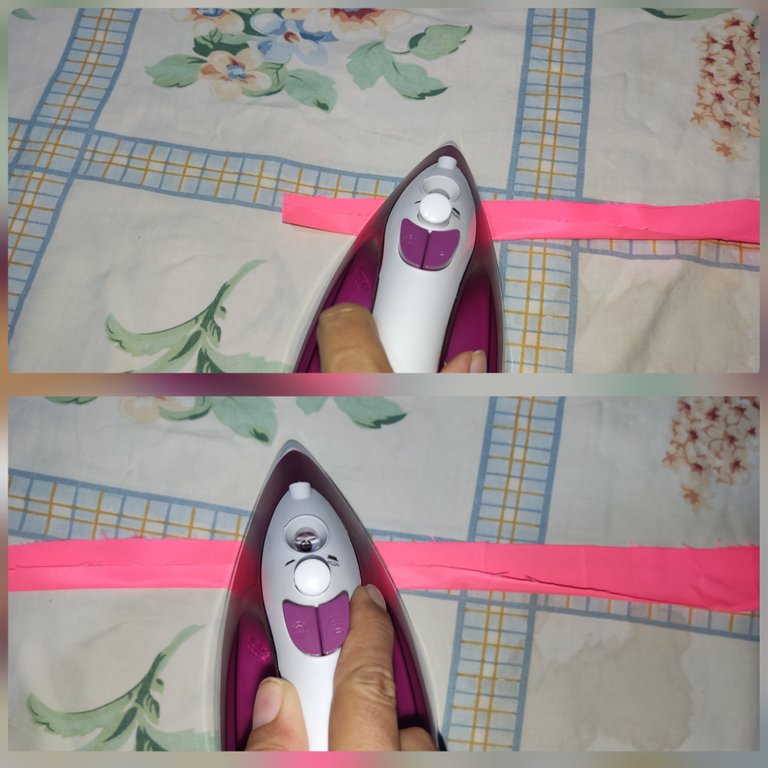
Hice el mismo procedimiento con el otro lado, procurando que las dos puntas se encontraran en el medio, para así tener un Sesgo hecho por nosotros mismos.
I did the same procedure with the other side, making sure that the two ends met in the middle, so that we would have a self-made bias binding.
Pegando el Sesgo a la Pechera // Basting the bias to the breastplate
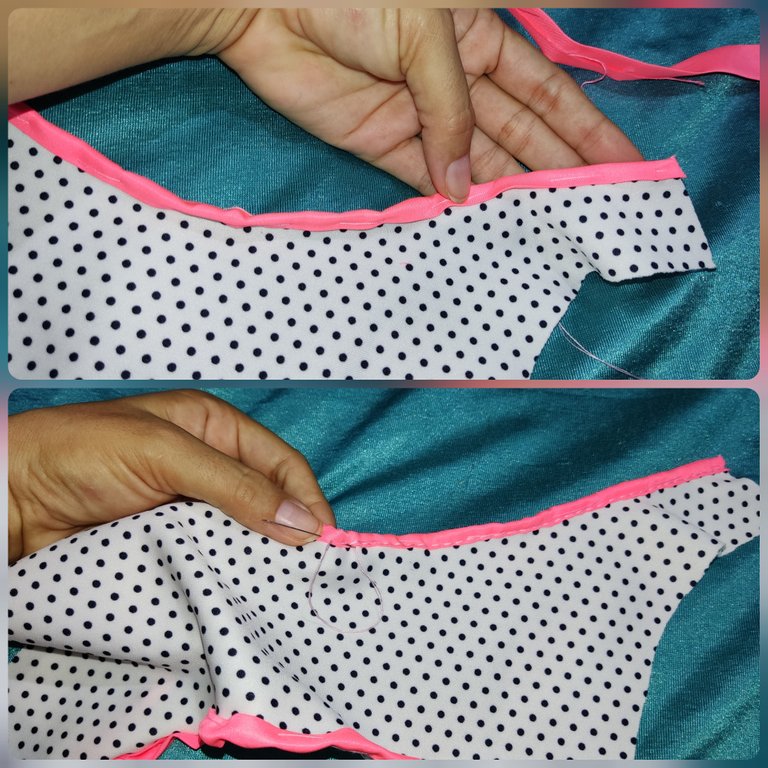
Empezaremos por ubicar el Sesgo en la tela, pondremos la tela en la mitad del Sesgo, es decir dónde se encuentran las dos puntas que planchamos, así como se nota en la imagen.
We will start by placing the bias on the fabric, we will put the fabric in the middle of the bias, that is to say where the two points that we ironed meet, as shown in the image.

Luego vamos a bastear con hilo y agujas para así sostener el Sesgo en su lugar y nos sea más cómodo ir cociendo, dónde termine el Sesgo vamos a sobreponer otra tira del Sesgo que hicimos y seguiremos basteando hasta cubrir toro el borde la da pechera. Luego haremos la costura con puntada atrás para que quede bien fuerte la costura.
Then we are going to baste with thread and needles to hold the bias in place and make it more comfortable to go cooking, where the bias ends we will overlap another strip of the bias that we made and we will continue basteing until we cover the edge of the breastplate. Then we will stitch the seam with a back stitch so that the seam is very strong.
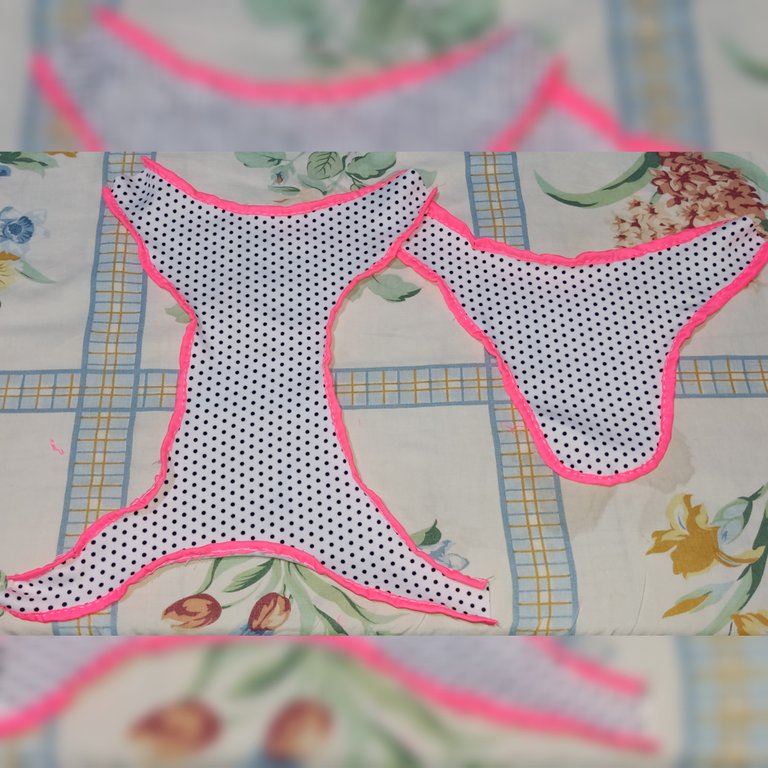
Debemos de cubrir con el Sesgo todos los bordes de las dos partes de la pechera y nos debe quedar algo así, como notamos en la imagen.
We must cover with the bias binding all the edges of the two parts of the breastplate and we should have something like this, as we can see in the image.
Ubicación de las Cintas Poli // Placement of the poly tapes
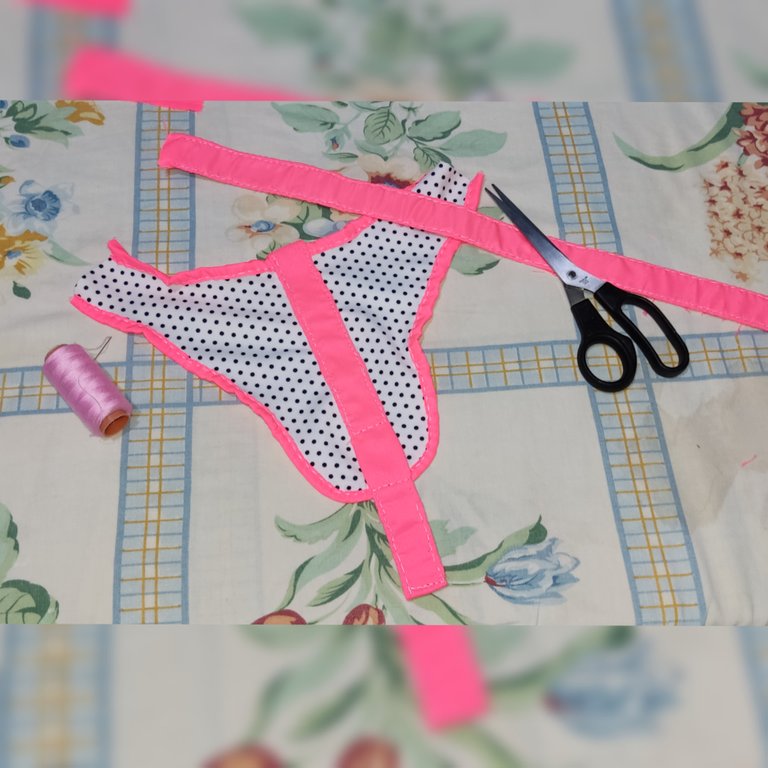
Las cintas poli que use yo las forre con tela de la que use para hacer el Sesgo porque no encontré un color de cinta que combinara con estos colores que estaba usando, así que opte por forrarlas ☺️. Use dos tiras de cinta poli, una que va en la parte de atrás de la pechera que será 4cm aproximadamente más larga que el largo total de la pieza. Y otra tira que es del grueso de la mascota, obviamente está si tiene que ser más larga del tamaño ideal porque esa uno la ajusta luego.
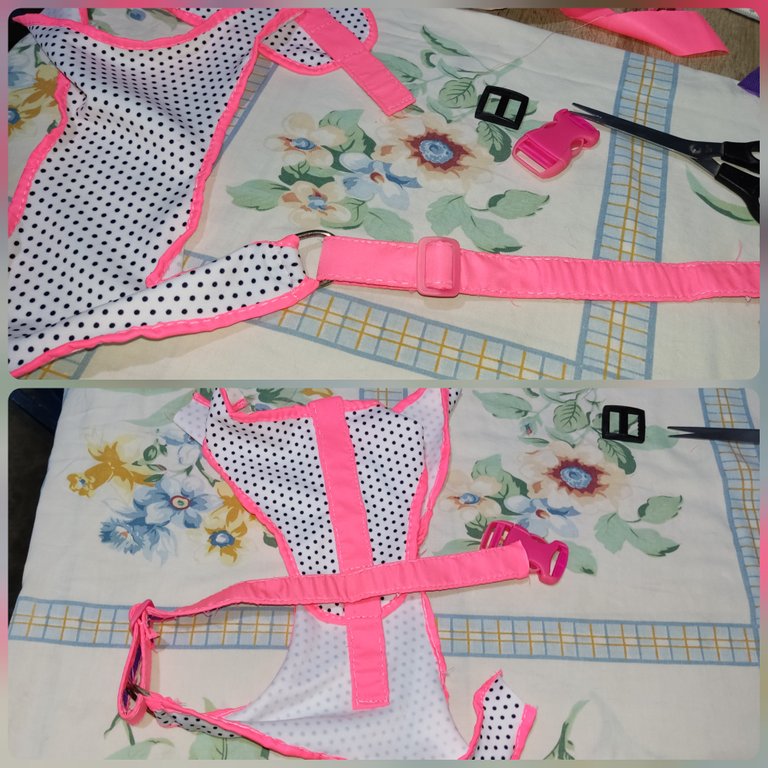
En el medio de la parte trasera de la pechera vamos a coser con costura doble la cinta poli, que quede bien justa, dejando una entrada para meter la cinta del pecho.
The poly ribbons I used I lined them with fabric from the one I used to make the Bias because I couldn't find a color of ribbon that matched these colors I was using, so I opted to line them ☺️. I used two strips of poly ribbon, one that goes on the back of the breastplate that will be about 4cm longer than the total length of the piece. And another strip that is the thickness of the pet, obviously this one if has to be longer than the ideal size because that one you adjust later.
In the middle of the back part of the breastplate we are going to sew with double stitching the poly tape, so that it is very tight, leaving an entrance to put the ribbon of the chest.
Luego tomamos la parte frontal de la pechera y en uno de los extremos que van hacía el pecho pegaremos uno de los aros de metales, cociendo con aguja e hilo.
Then we take the front part of the breastplate and in one of the ends that go towards the chest we will glue one of the metal rings, sewing with needle and thread.
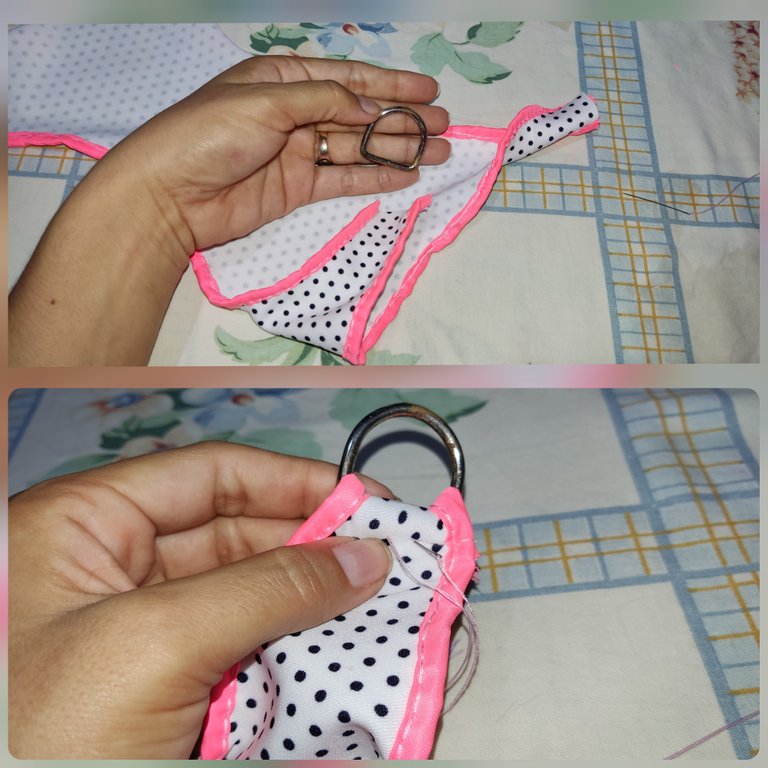
Tomamos la corredera le cocemos un extremo de la cinta poli, Luego pasamos la cinta poli por el aro de metal y luego por la corredera y ajustamos la cinta.
Then we take the slider and we sew one end of the poly ribbon. Then we pass the poly ribbon through the metal ring and then through the slider and adjust the ribbon.
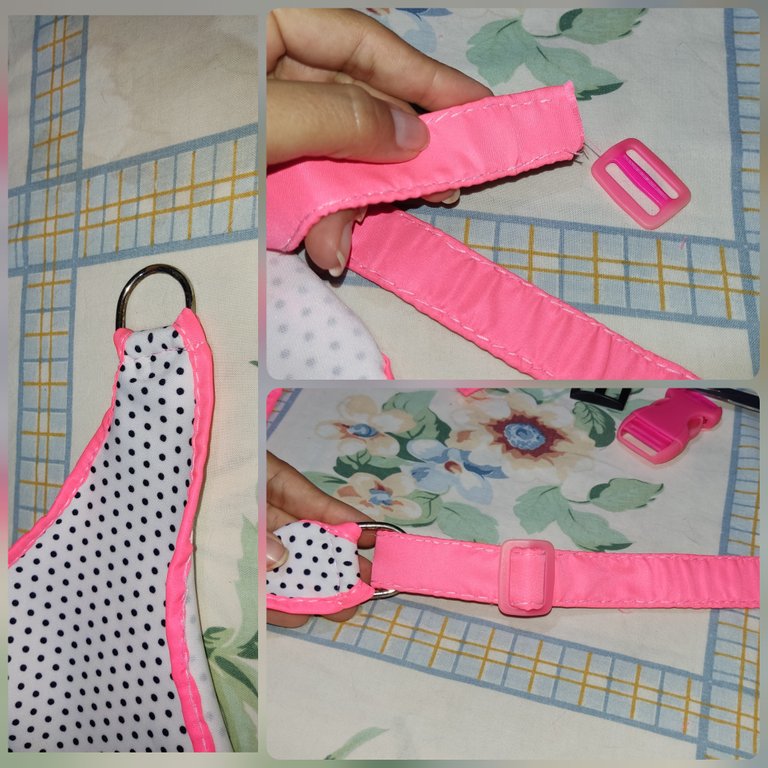
Nos debe de quedar así.
It should look like this.
Unión de las Piezas de la Pechera// Joining the pieces of the breastplate
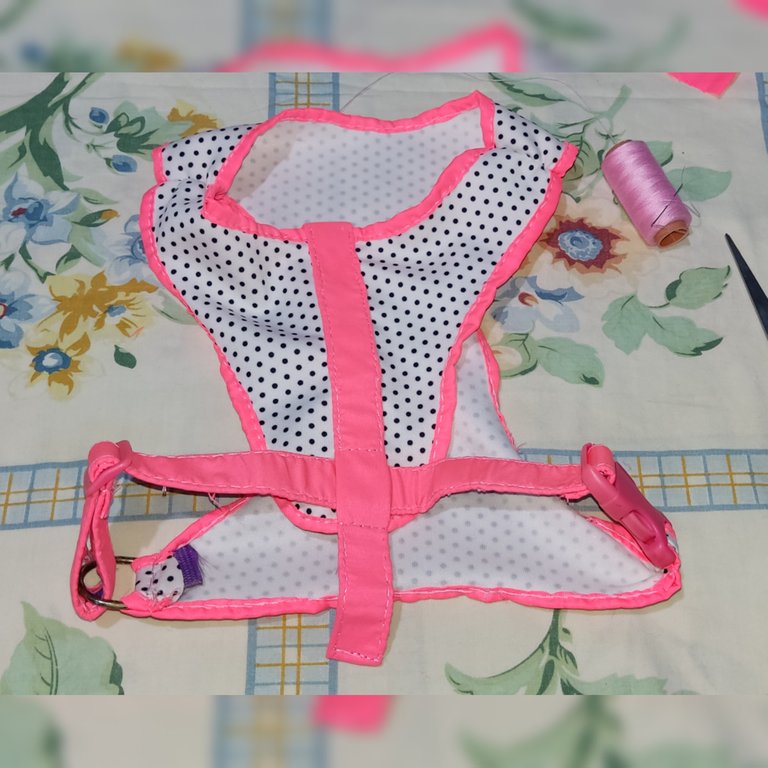
Ahora vamos a unir las piezas de la pechera para hacerla una, esto lo haremos uniendo las extremos que van hacía el cuello de la mascota. Con aguja e hilo, cosemos con puntadas resistentes las uniones.
Now we are going to join the pieces of the breastplate to make it one, we will do this by joining the ends that go towards the neck of the pet. With needle and thread, we sew with resistant stitches the joints.
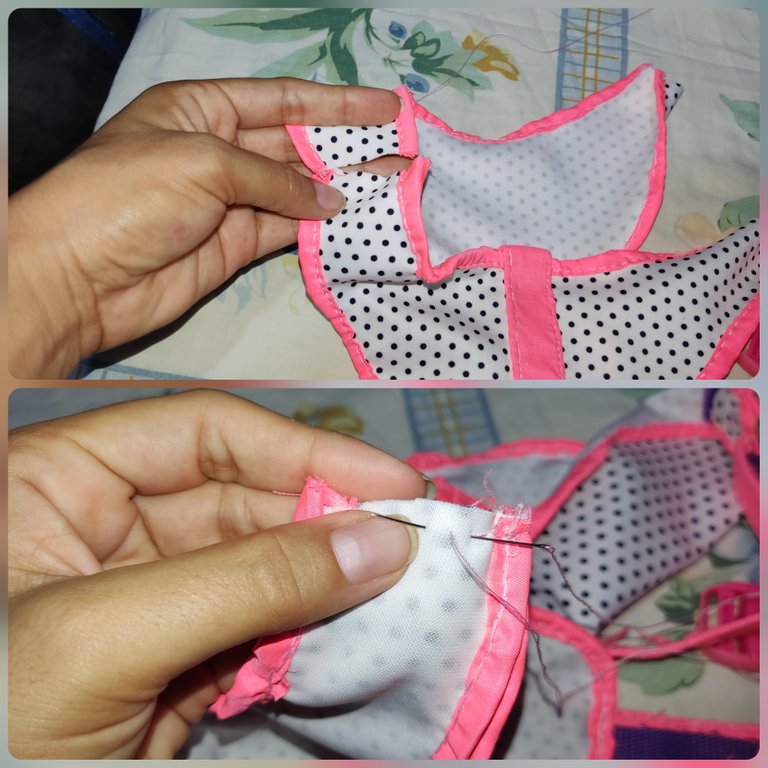
Nos quedará así como vemos en la imagen.
it will look like this as we see in the image.

Toques Finales // Finishing touches .
Para finalizar vamos a colocar la tranca clic clac, cociendo un extremo de la cinta a la tranca, y la otra parte de la tranca la cosemos directamente en el extremo de la Pechera.
To finish, we are going to place the clic clac strap, sewing one end of the ribbon to the strap, and the other part of the strap we sew it directly to the end of the breastplate.
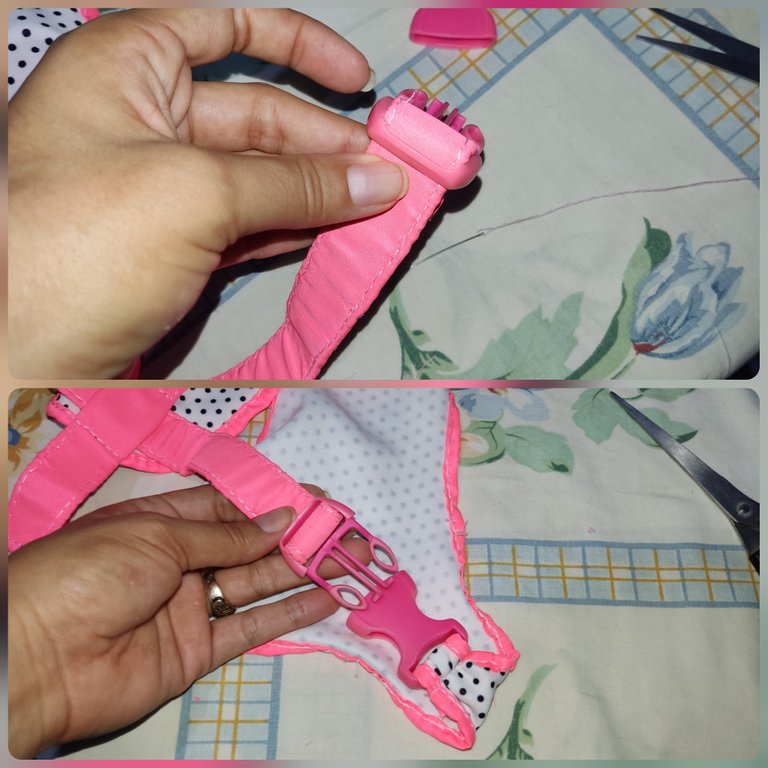
Nos quedará así.
It will look like this.
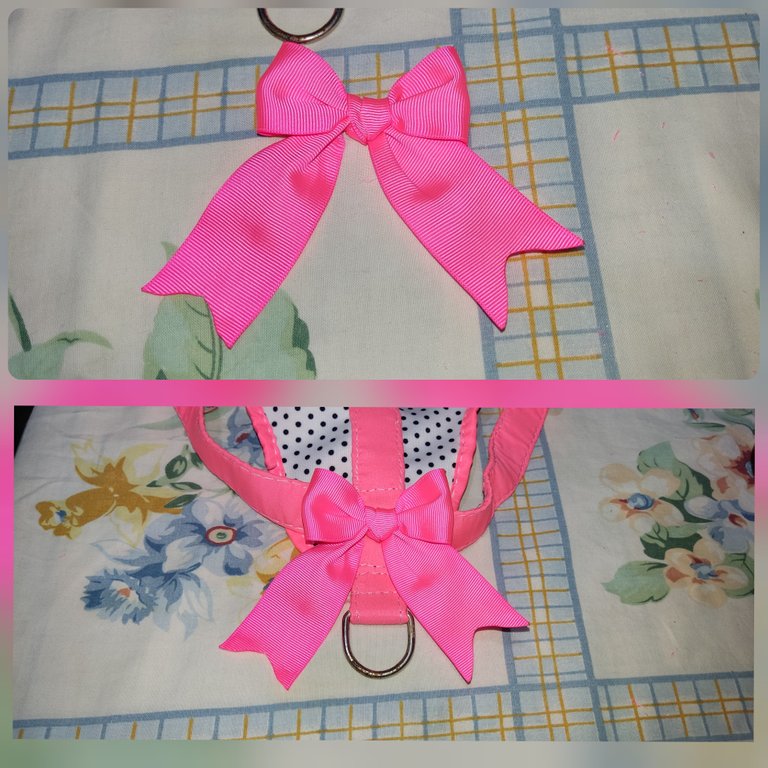
En los cuatro centímetros que nos quedó de la cinta que pegamos en la parte de atrás de la Pechera, pegaremos un aro que servirá para enganchar la correa cuando salgamos a pasear con la mascota.
In the four centimeters that we have left of the ribbon that we glued in the back of the breastplate, we will glue a ring that will serve to hook the leash when we go out for a walk with the pet.

Y cómo un toque decorativo y tierno le vamos a colocar un lazo que haga juego con los colores de la Pechera.
And as a decorative and tender touch we are going to place a ribbon that matches the colors of the breastplate.
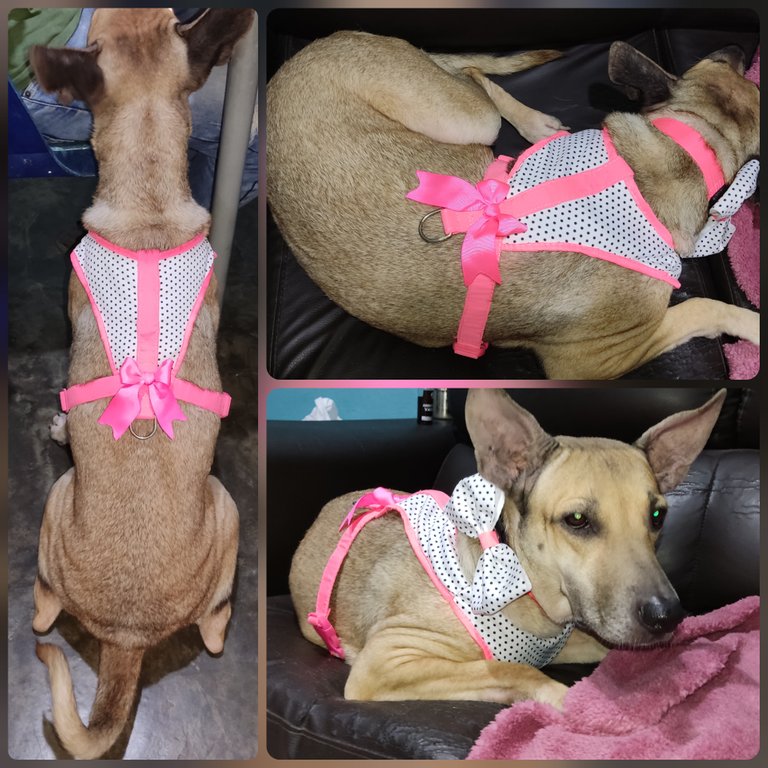
Así nos quedar está pechera super hermosa, que con mucha paciencia amor y cariño he hecho para mi hija perruna Kila.
This is how we have this beautiful breastplate, that with a lot of patience, love and affection I have made for my doggy daughter Kila.
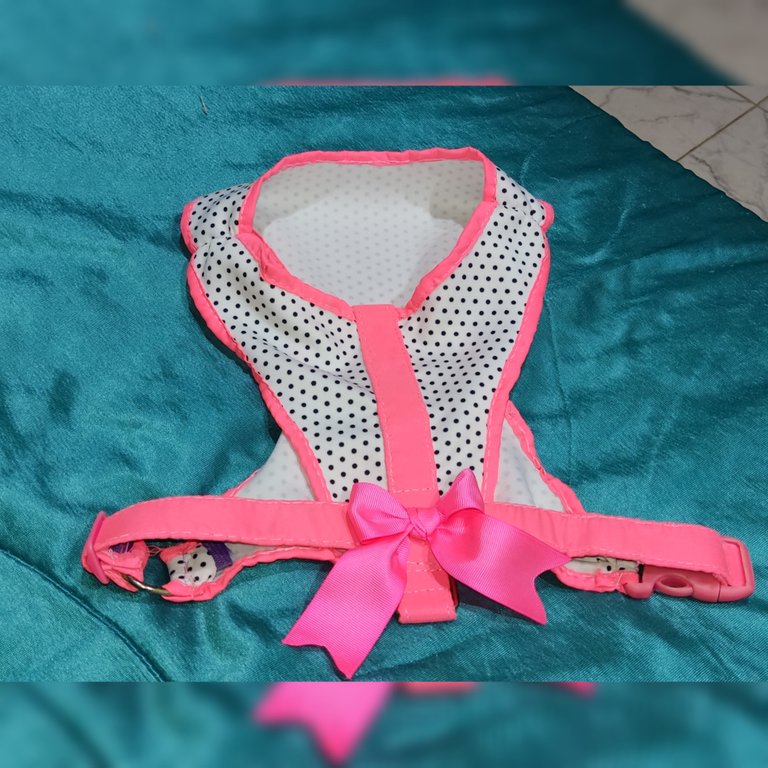
Ella luce hermosa con su pechera y a mí me encanta verla caminar así de bonita y cuando salimos siempre me la piropean jejeje y a mí me encanta, adicional le hice un collar con un súper lazo que la hacer ver más hermosa.
She looks beautiful with her bib and I love to see her walking so pretty and when we go out I always get complimented hehehe and I love it, in addition I made her a necklace with a super bow that makes her look more beautiful.
Espero que les halla gustado ☺️ y se animen a realizarla en casa🐶 ya saben que si tienen alguna duda o pregunta, los leo en los comentarios. Besos y abrazos nos vemos en la próxima 🤗 Bendiciones ❣️
I hope you liked it ☺️ and I encourage you to make it at home🐶 and you know that if you have any questions or doubts, I read them in the comments. Kisses and hugs see you next time 🤗 Blessings ❣️
Todas las imágenes son de mi propiedad, tomadas desde mi teléfono poco X3 y editadas con collage photo.
All images are my own, taken from my little X3 phone and edited with collage photo.