Hola amigos #Diy 😊 espero se encuentren muy bien y que este inicio de semana haya Sido excelente para todos ustedes.
Mi semana comenzó activa, hoy fue el día de baño de mis hijos perrunos, hoy los bañe y eso es un trabajo grande, porque primero los bien con su champú normal y luego que ya tienen la piel limpia debo hacerle un tratamiento para que cuando los saque a caminar no se les monten las garrapatas de la calle y pues si se les montan no le piquen al perrito sino que se quedan caminando por encima del pelo y así se la quito fácil y no llegan a hacer sus crías dentro de la casa. Así que cuando me toca ducharlos me tomo un día para hacer nada más que bañarlos.
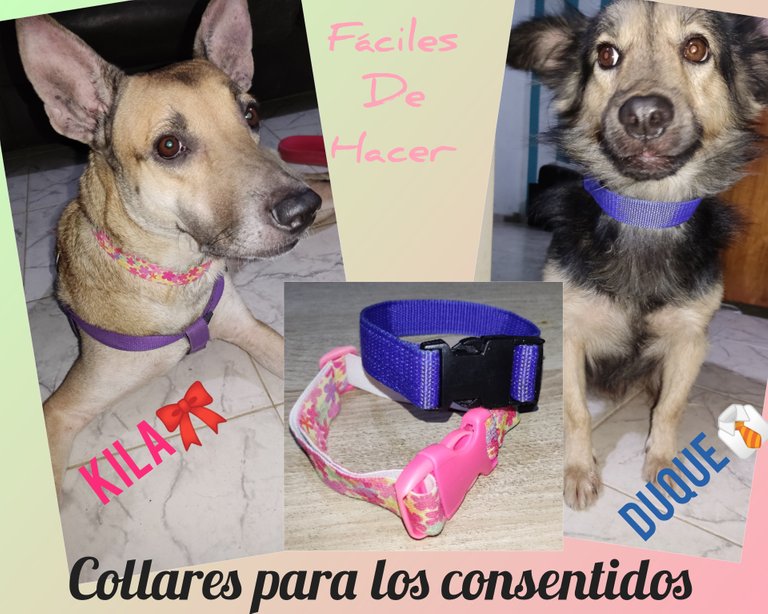
Pero cuando ya los tenía ya listos séquitos y todos pensé en hacerle unos collares nuevos, siempre se los hago yo misma porque los que venden en las tiendas son muy caros y a mí me gusta cambiarlos a cada rato. Entonces busque en mis cosas a ver si tenía con que hacerle unos y pues si encontré así que aquí les voy a dejar el paso a paso de como ustedes también pueden hacerle sus collares a sus perritos o gatitos en casa sin muchos materiales ya que son super fáciles y rápidos de hacer.
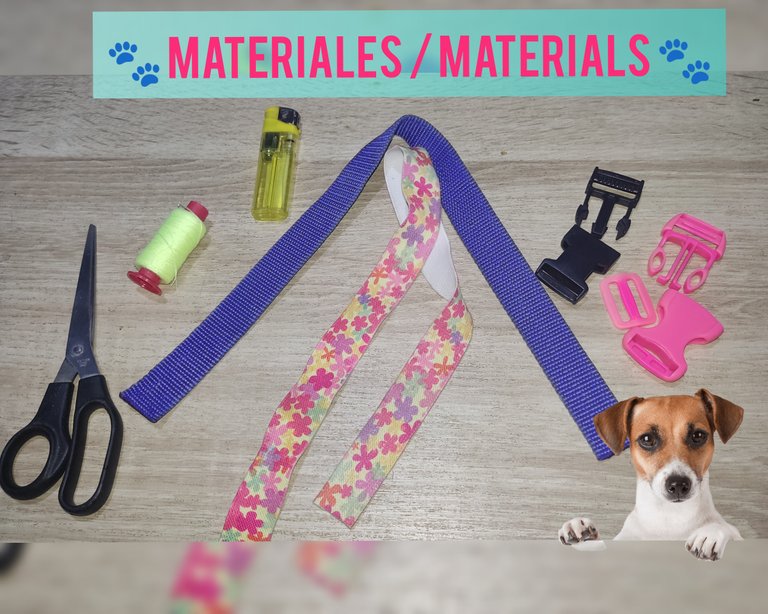
Entonces los materiales que vamos a necesitar son los siguientes:
- 50 cm de una cinta de nuestra preferencia.
- Una tranca clic clac.
- Una corredera.
- Aguja e hilo.
- Tijeras.
Empezaremos haciendo el collar de Kila, para ella use una cinta de tela elástica de florecitas. Me sirve esta de elástica por este collar es solo de adorno, porque ella tiene su pechera o arnés cuando la saco a caminar. Entonces lo primero será tomar uno de los extremos de la cinta y meterla por la corredera así como vemos en la foto.
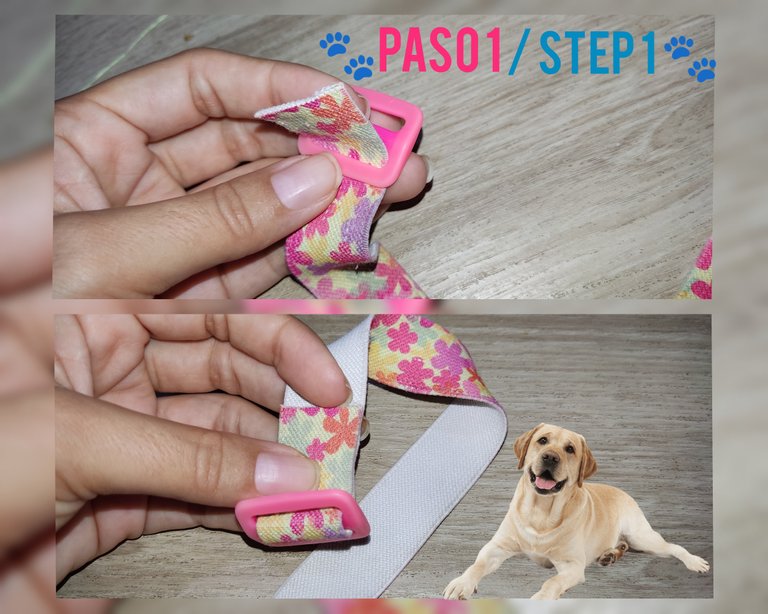
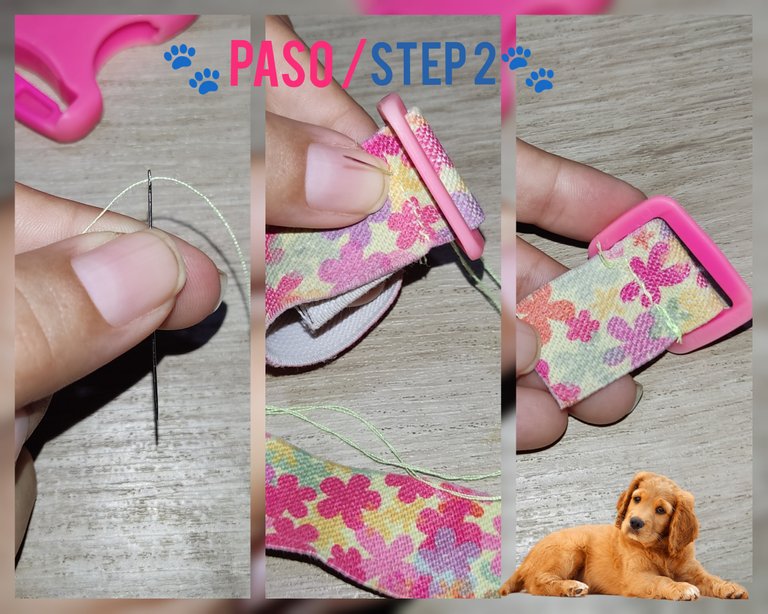
Luego vamos a ensartar el hilo en la aguja y vamos a coser muy bien la cinta en la carretera, en la imagen vemos cómo debe de quedar... El exceso de cinta lo podemos cortar o dejar así como queramos.
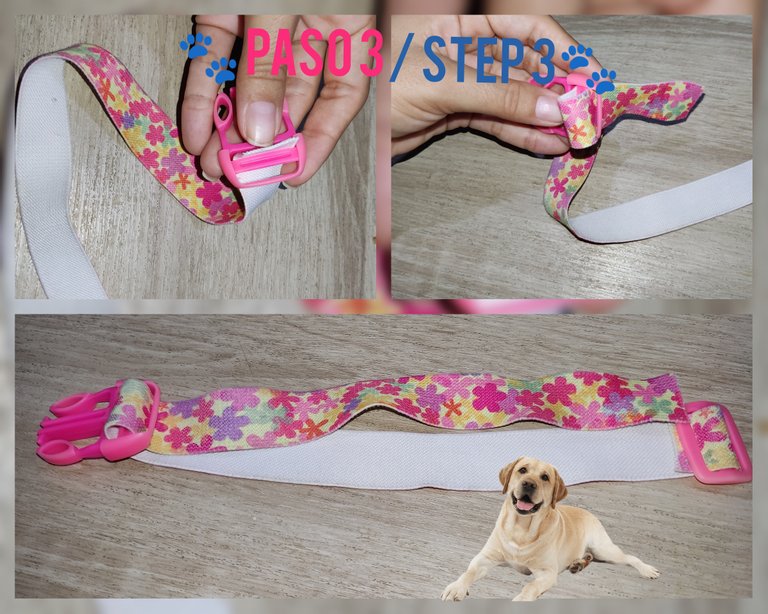
Ahora de la tranca clic clac vamos a tomar la parte que tiene los palitos y vamos a introducir la cinta de modo que nos quede revés con revés, así como vemos en la imágen.
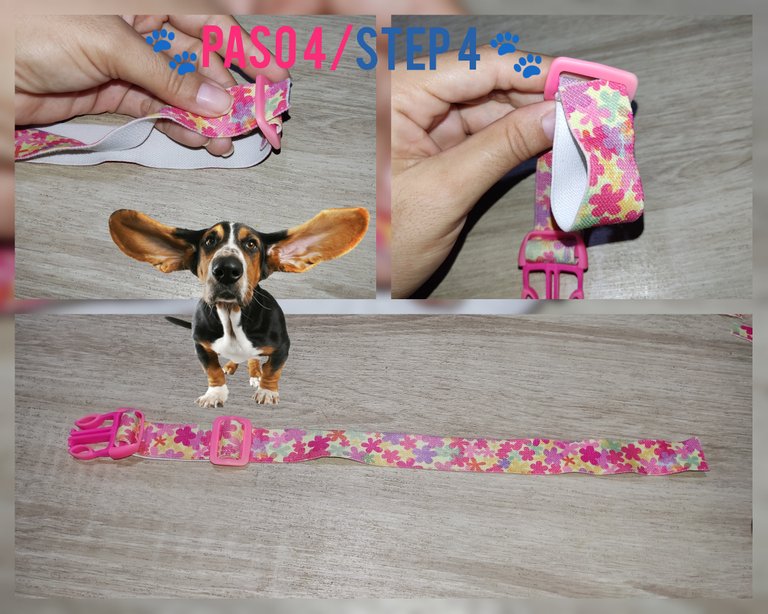
La punta que nos va quedando la vamos a meter por la corredera y vamos a mover la cinta. En la imagen podemos ver bien cómo hacer en este paso.
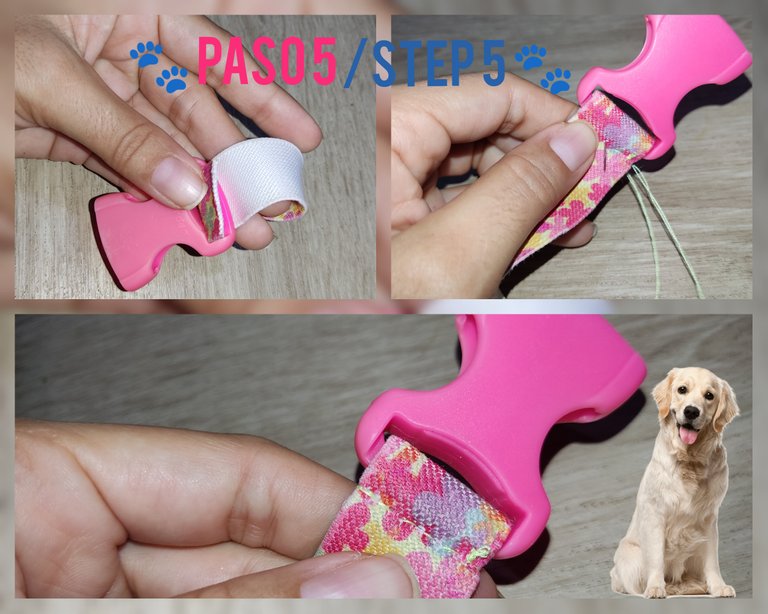
Luego en la punta que nos queda vamos a coser la otra parte de la tranca y así terminaríamos de hacer nuestro collar para nuestro perrito.
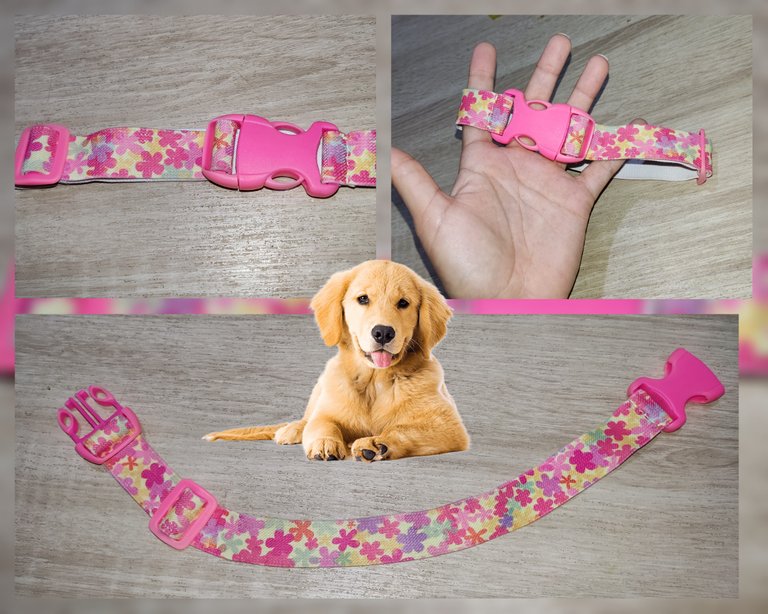
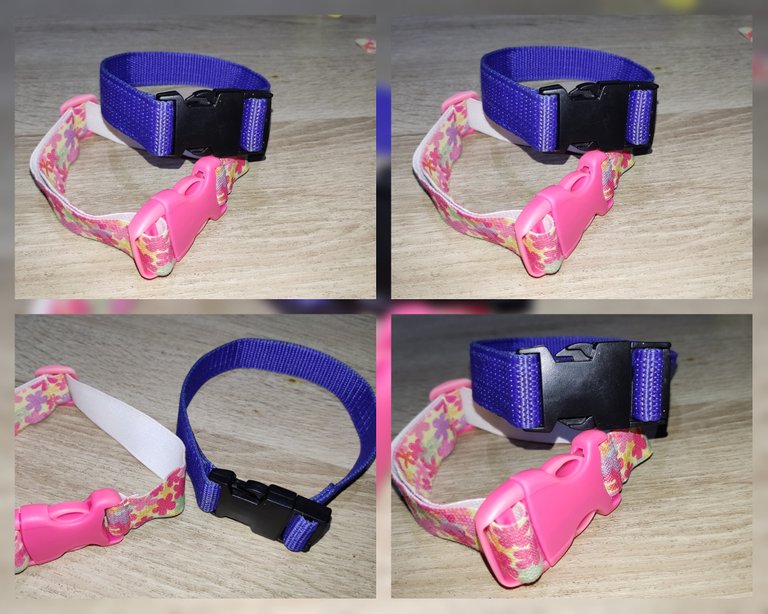
Este es el de Kila, y me gusta mucho como quedó. 😍
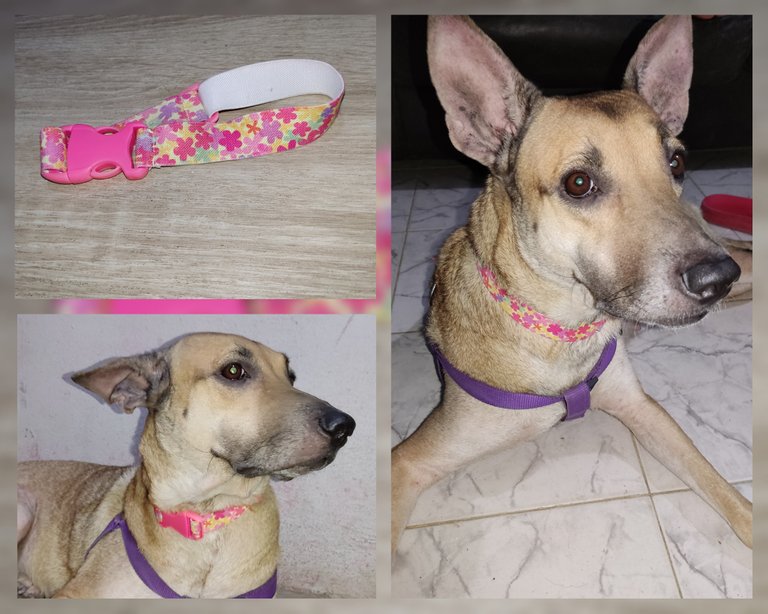
Ahora para hacer el de DUQUE haremos exactamente igual.
La única diferencia es que para duque voy a usar una cinta que es más dura, la cinta poli. Está cinta la podemos coser con aguja hilo pero también la podemos pegar.
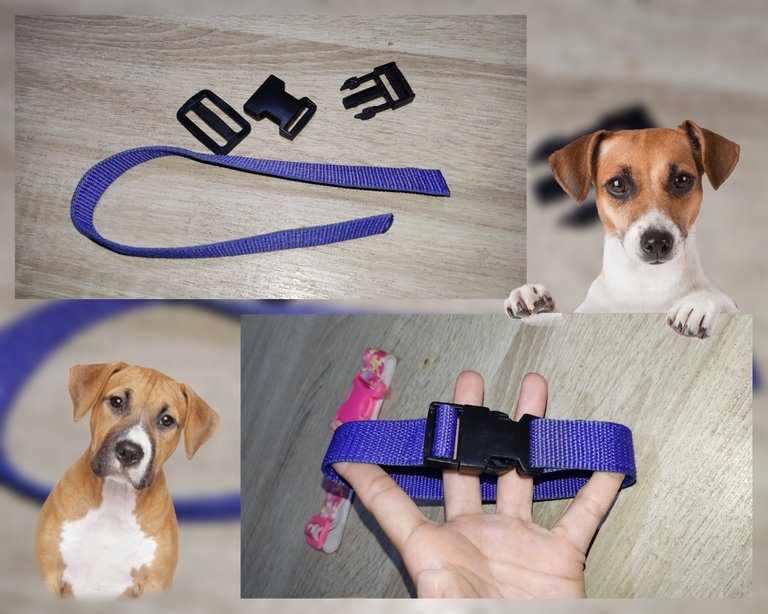
El collar de duque también quedó super lindo, duque tiene mucho pelo y los collares no los luce mucho porque el pelo se los tapa jejejejeje pero igual se los pongo.
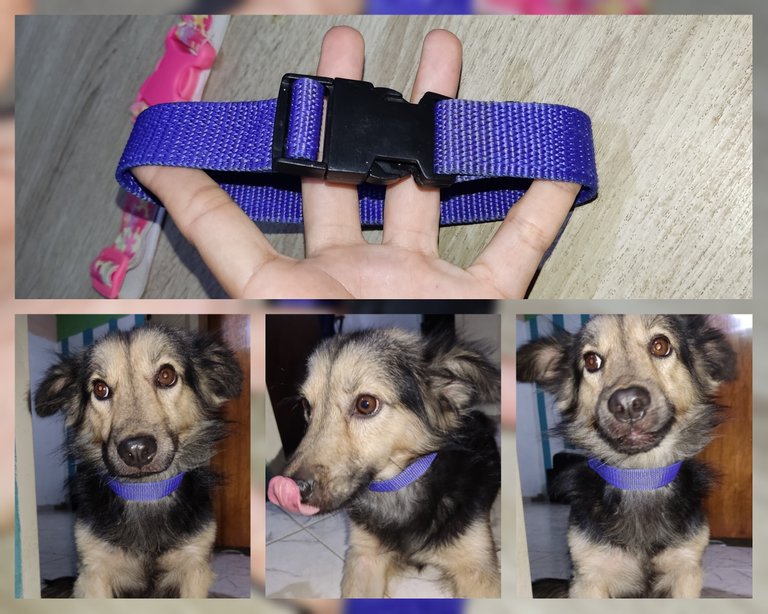
Espero les haya gustado mucho este paso a paso de como hacerle los collares a sus mascotas, en casa y con los materiales que tengamos a la mano. Espero que se animen a intentarlo ☺️

Nos vemos en la próxima, gracias por su apoyo. ❤️❤️
ENGLISH
Hello friends #Diy 😊 I hope you are feeling great and that this week has been excellent for all of you.
My week started active, today was the day of bathing my doggy kids, today I bathed them and that is a big job, because first the well with their normal shampoo and then that they already have clean skin I must do a treatment so that when I take them for a walk they do not mount the ticks from the street and if they mount them they do not bite the doggy but they stay walking on the hair and so I remove them easy and do not get to make their offspring inside the house. So when it's my turn to shower them I take a day to do nothing but bathe them.

But when I had them all ready, I thought of making them new collars, I always make them myself because the ones sold in the stores are very expensive and I like to change them all the time. So I looked through my things to see if I had something to make them with and I found some so here I am going to give you the step by step on how you too can make your own collars for your dogs or kittens at home without many materials since they are super easy and quick to make.

So the materials we are going to need are the following:
- 50 cm of a ribbon of our preference.
- A clic clac lock.
- A slider.
- Needle and thread.
- Scissors.

We will start making Kila's necklace, for her I used a ribbon of elastic fabric with little flowers. I use this elastic because this necklace is only for decoration, because she has her breastplate or harness when I take her out for a walk. So the first thing to do is to take one of the ends of the ribbon and thread it through the slider as shown in the photo.

Then we are going to thread the thread in the needle and we are going to sew very well the tape in the road, in the image we can see how it should be... We can cut the excess tape or leave it as we want.

Now we are going to take the part that has the sticks and we are going to introduce the ribbon so that it is back to back, as we can see in the image.

The remaining tip we are going to put it through the slide and we are going to move the tape. In the image we can see how to do this step.

Then we are going to sew the other part of the collar to the remaining end and thus we would finish making our collar for our little dog.


This is Kila's, and I really like how it turned out. 😍

Now to make the one for DUQUE we will do exactly the same.
The only difference is that for duque I'm going to use a harder ribbon, the poly ribbon. This ribbon can be sewn with a needle and thread but it can also be glued.

The duque's necklace was also super cute, duque has a lot of hair and he doesn't wear necklaces much because his hair covers them hehehehehehehehehe but I still wear them.

I hope you liked this step by step on how to make collars for your pets, at home and with the materials we have at hand. I hope you are encouraged to try it ☺️

See you next time, thanks for your support. ❤️❤️