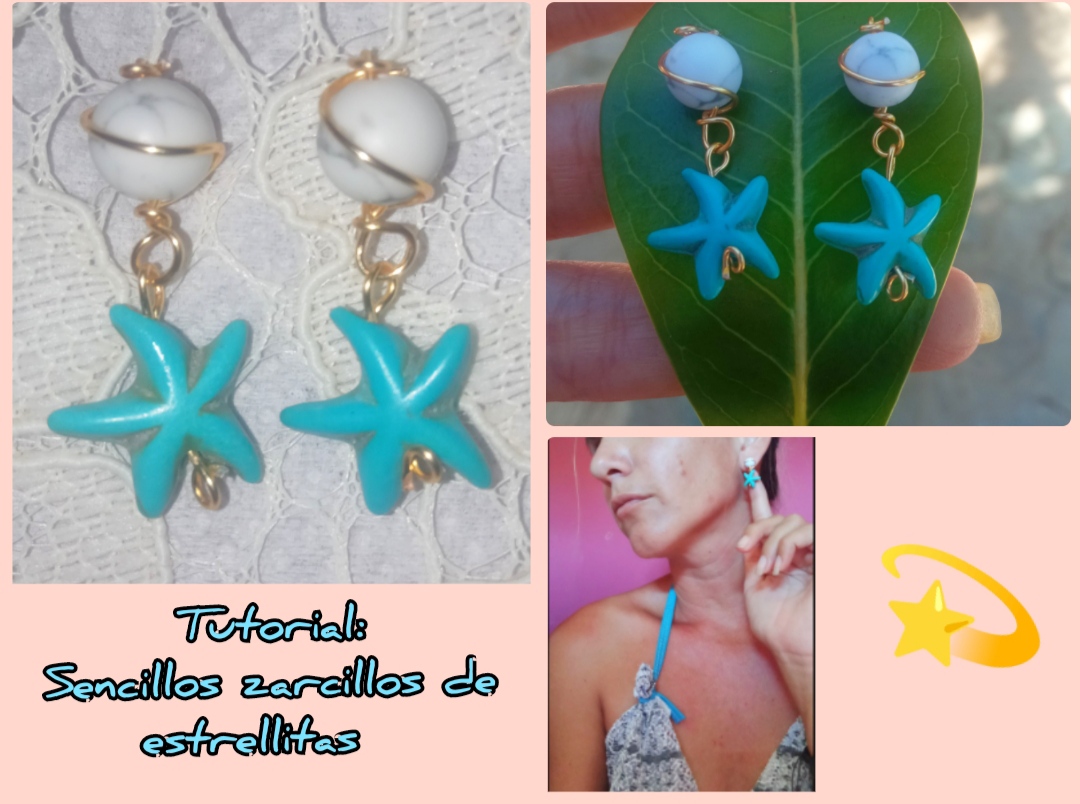
feliz y bendecido día tengan todos ustedes el día de hoy mis queridos amigos creativos, es un gran placer para mí de poder compartir una vez más con todos ustedes en este hermoso comunidad, en esta ocasión quiere compartir con ustedes un muy sencillo tutorial para la elaboración de unos creativos y sencillos zarcillos elaborados con la técnica de alambrismo la cual son ideal para todos aquellos que se están iniciando o desean aprender a elaborar sus propios accesorios mediante Esta técnica. Este es un diseño súper fácil y muy sencillo de elaborar y para todos ustedes he elaborado este sencillo tutorial que espero les pueda hacer de utilidad y provecho y al cual quiero invitarlos a acompañarme en este momento.
Happy and blessed day to all of you today my dear creative friends, it is a great pleasure for me to be able to share once again with all of you in this beautiful community, on this occasion I want to share with you a very simple tutorial for making of creative and simple tendrils made with the wire technique which are ideal for all those who are starting out or want to learn how to make their own accessories using this technique.
This is a super easy and very simple design to make and for all of you I have prepared this simple tutorial that I hope can be useful and beneficial to you and for which I want to invite you to join me at this moment.
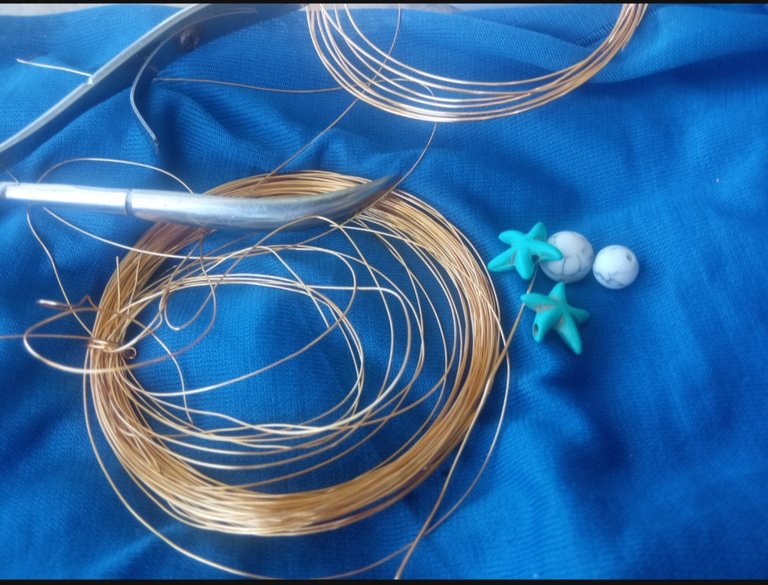
- alambre de bisutería calibre 20.
- piedras blancas.
- piedras Estrellitas marinas.
- Pinza de bisutería.
- 20 gauge jewelry wire.
- white stones.
- Starfish stones.
- Jewelry clamp.
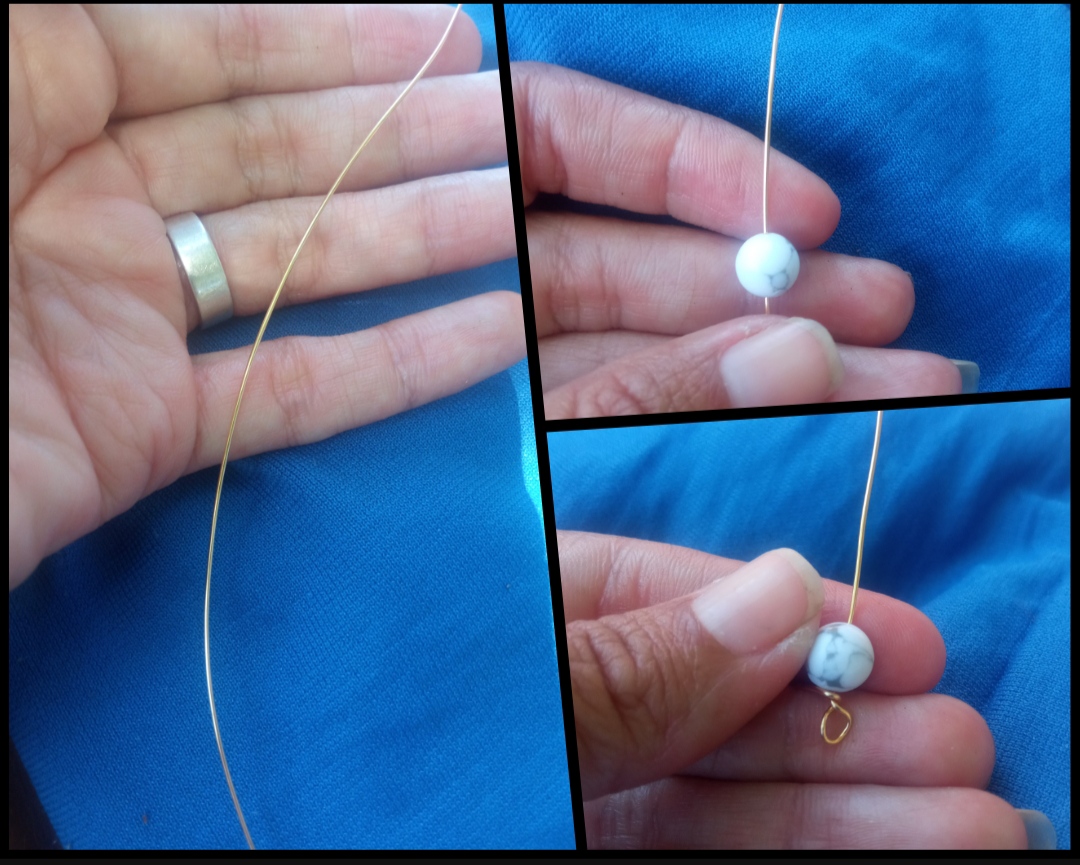
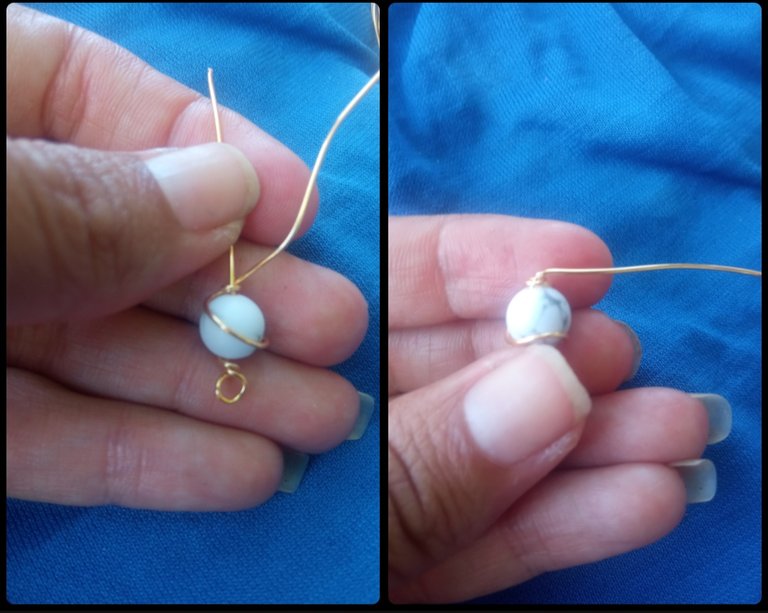
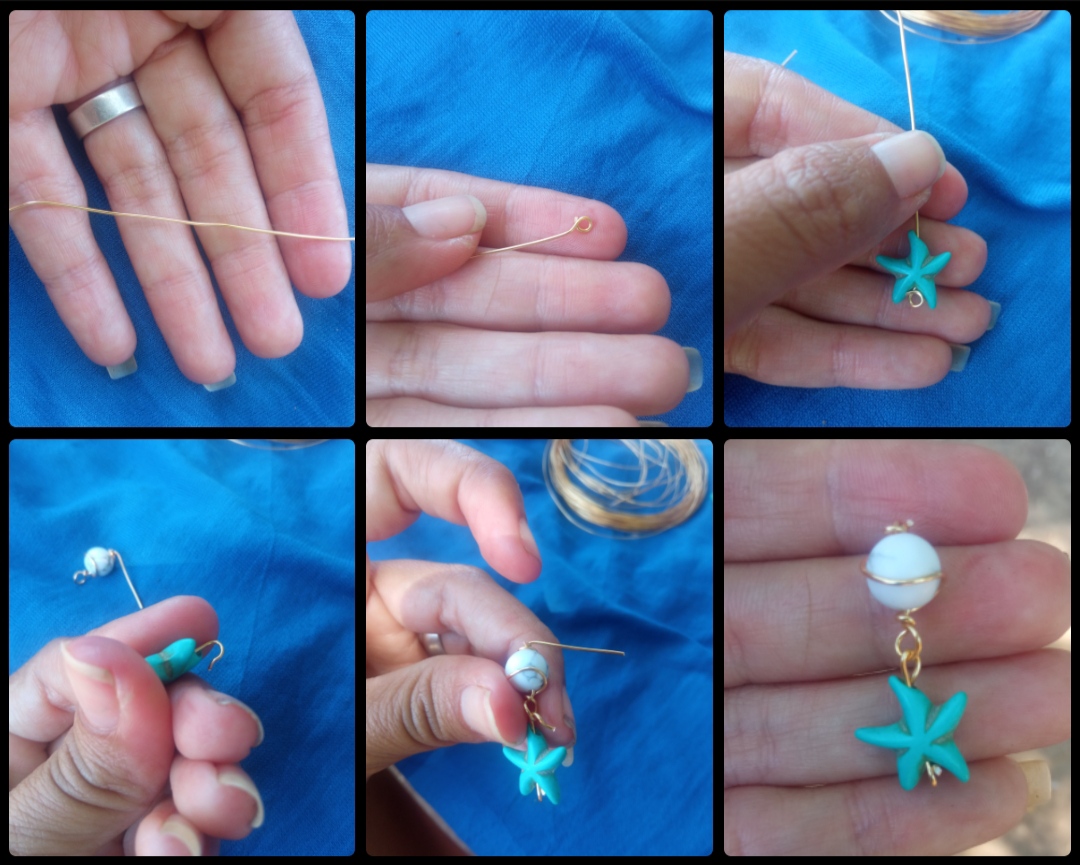
⭐ Paso 1: para iniciar la elaboración de lindo y creativo diseño lo primero que debemos realizar es tomar un pedazo de alambre de bisutería calibre 20 de aproximadamente 10 cm por el cual introduciremos la piedra blanca lisa la cual yo he seleccionado una muy hermosa pues tiene una hermosa pigmentación que la hace ver y resaltar, la colocaremos en el alambre dejando por encima de ella 3 cm de alambre, y tomando el alambre que nos queda por la parte posterior con ayuda de la pinza elaboraremos una pequeña argolla circular y con el exceso del alambre la pasaremos en forma cruzada por encima de la piedra realizando una muy hermosa decoración y llevando el alambre hasta la parte superior de la piedra blanca el cual sujetaremos elaborando un par de vueltas y cortando el exceso del mismo.
⭐ Step 1: to start making the beautiful and creative design, the first thing we must do is take a piece of 20 gauge jewelry wire approximately 10 cm through which we will introduce the smooth white stone which I have selected a very beautiful because it has a beautiful pigmentation that makes it look and stand out, we will place it on the wire leaving 3 cm of wire above it, and taking the wire that remains on the back with the help of the tweezers we will make a small circular ring and With the excess of the wire we will pass it crosswise over the stone making a very beautiful decoration and taking the wire to the top of the white stone which we will hold by making a couple of turns and cutting off the excess.
⭐ Paso 2: el alambre que dejamos por la parte superior de la piedra blanca la doblaremos hacia atrás para que nos quede la forma de un clavo para zarcillo el cual nos servirá para colocar este hermoso arete en nuestras lindas orejitas.
⭐ Step 2: We will bend the wire that we left at the top of the white stone back so that we have the shape of a tendril nail which will help us place this beautiful earring on our pretty little ears.
⭐ Paso 3: seguidamente tomaremos otro pedazo de alambre de bisutería calibre 20 de aproximadamente unos 6 cm y con ayuda de la pinza elaboraremos en uno de sus extremos una pequeña forma de argolla circular y seguidamente por el otro extremo del alambre introduciremos la linda estrella marina de color azul y encima de ella elaboraremos una forma de gancho la cual llevaremos hasta la argolla posterior de nuestra elaboración anterior y hundimos estas dos partes dándole forma así a nuestros bellos aretes de estrellas marinas.
⭐ Step 3: next we will take another piece of 20 gauge jewelry wire of approximately 6 cm and with the help of the tweezers we will make a small circular ring shape at one of its ends and then at the other end of the wire we will insert the cute blue sea star and on top of it we will make a hook shape which we will take to the back ring of our previous creation and we sink these two parts, thus giving shape to our beautiful sea star earrings.
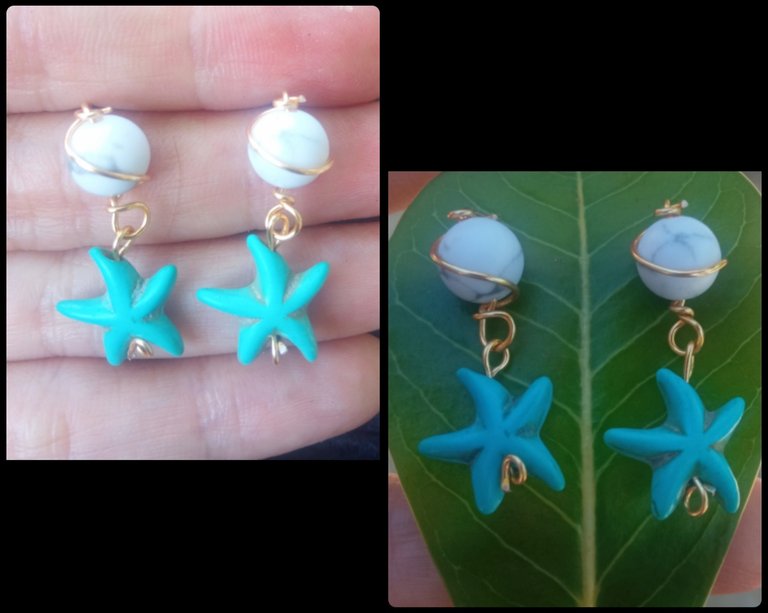

Todas las Fotos son de mi autoría y fueron tomadas con mi Celular Redmi 9.As you can see, this is a very creative design, simple but beautiful, and we can adapt it to the color and shape of our preference, because although I found this combination of this white stone with this beautiful blue sea star wonderful, we can combine them with other colors. that are of your preference.
It is a very easy and simple design to make at home without many materials and that can be very useful when making a nice detail or starting our venture.
Before saying goodbye, I would like to thank you for joining me today in this simple tutorial and I say goodbye hoping that it will be useful and beneficial for all of you.
All Photos are my authorship and were taken with my Redmi 9 Cellphone
