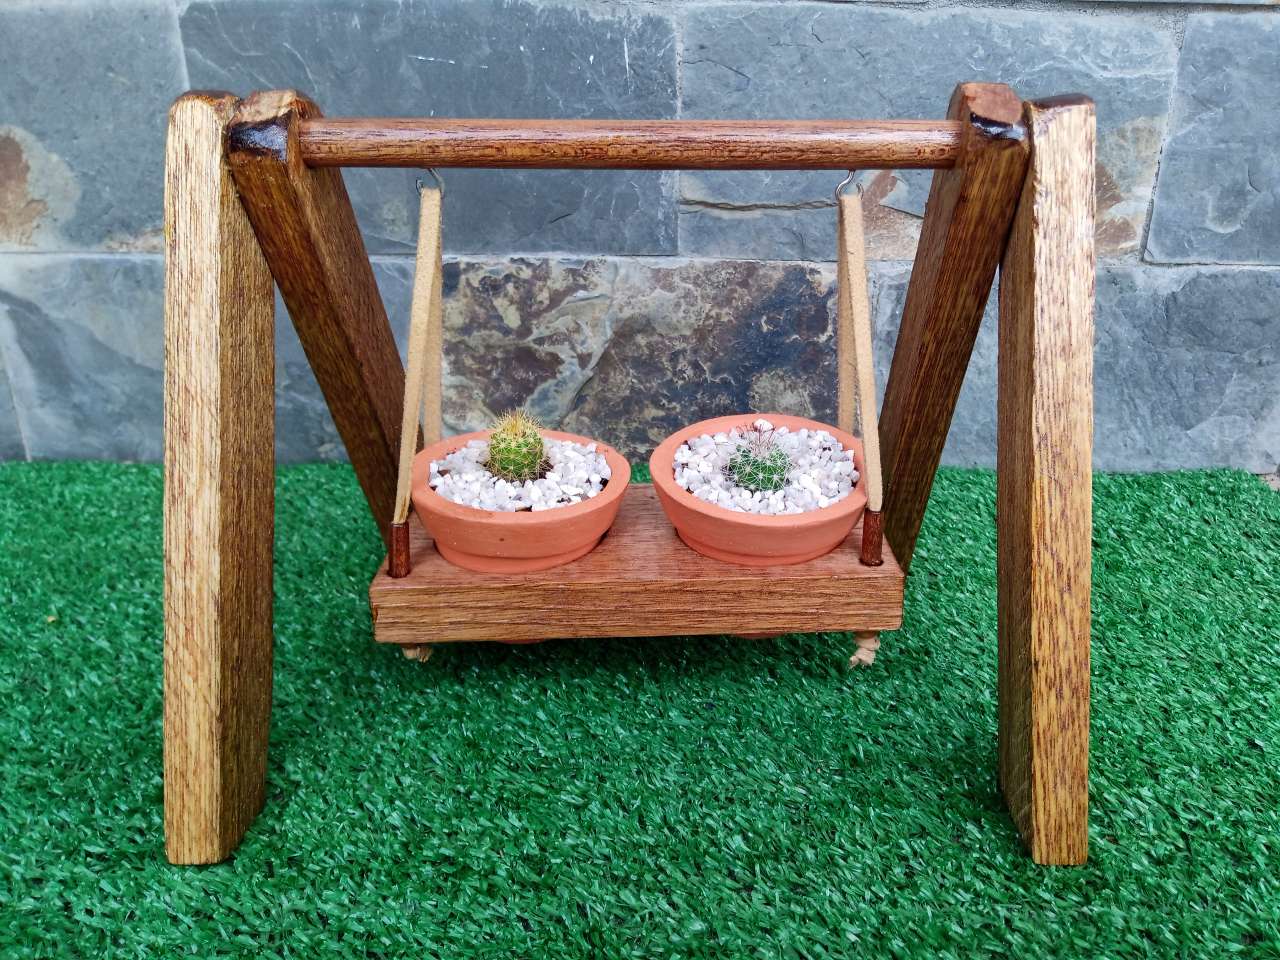
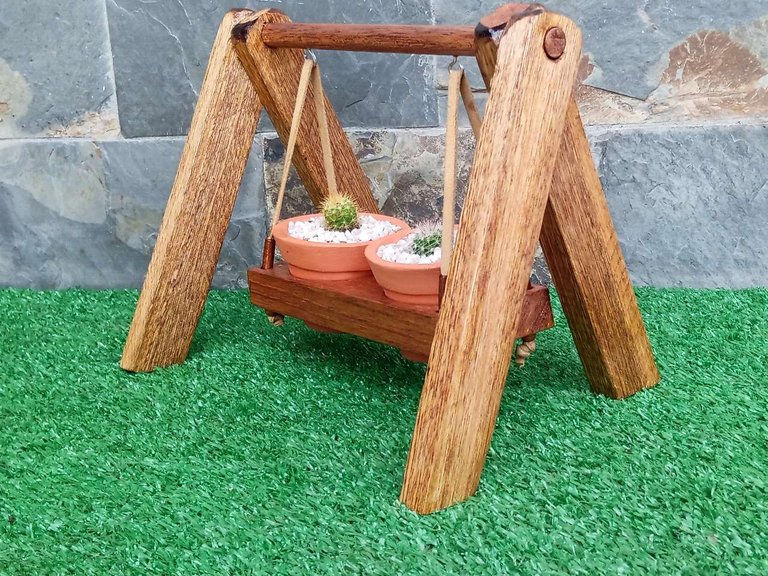
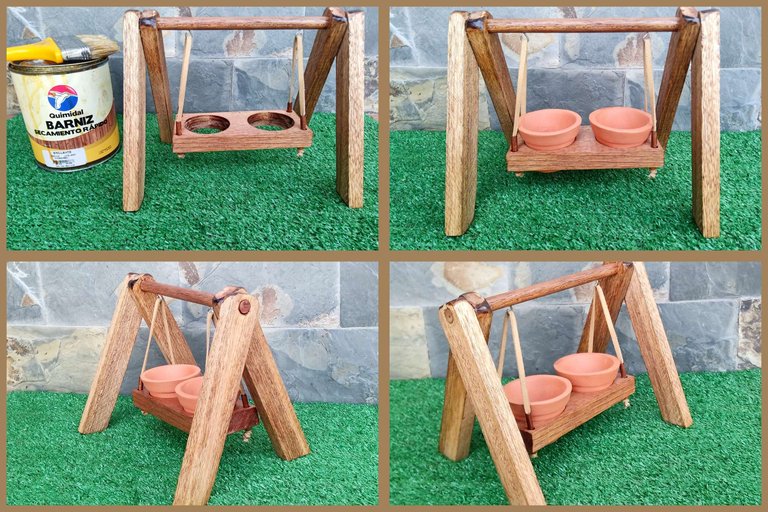
Cuando son proyectos pequeños como el que a continuación enseñaré en ésta entrada, igual debemos tener un diseño en la mente para aprovechar bien el tiempo. Tenía la idea de hacer un sofá macetero para especies de cactus y suculentas, tuve un desperfecto con la caladora electrica y tuve que modificar el diseño, así que hice un columpio macetero y estoy satisfecho con el resultado.
Quiero que por favor veas a continuación el paso a paso y lo disfrutes...
When they are small projects like the one that I will show in this entry, we must still have a design in mind to make good use of time. I had the idea of making a planter sofa for species of cacti and succulents, I had a problem with the electric jigsaw and I had to modify the design, so I made a planter swing and I am satisfied with the result.
I want you to please see the step by step below and enjoy it...

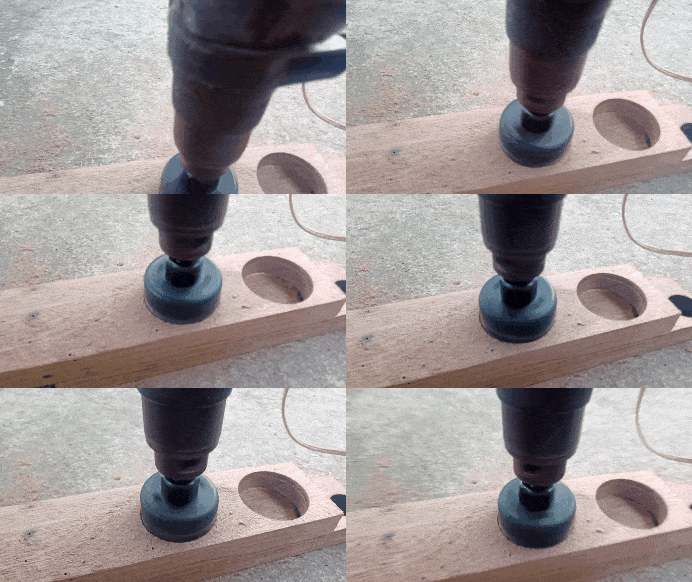
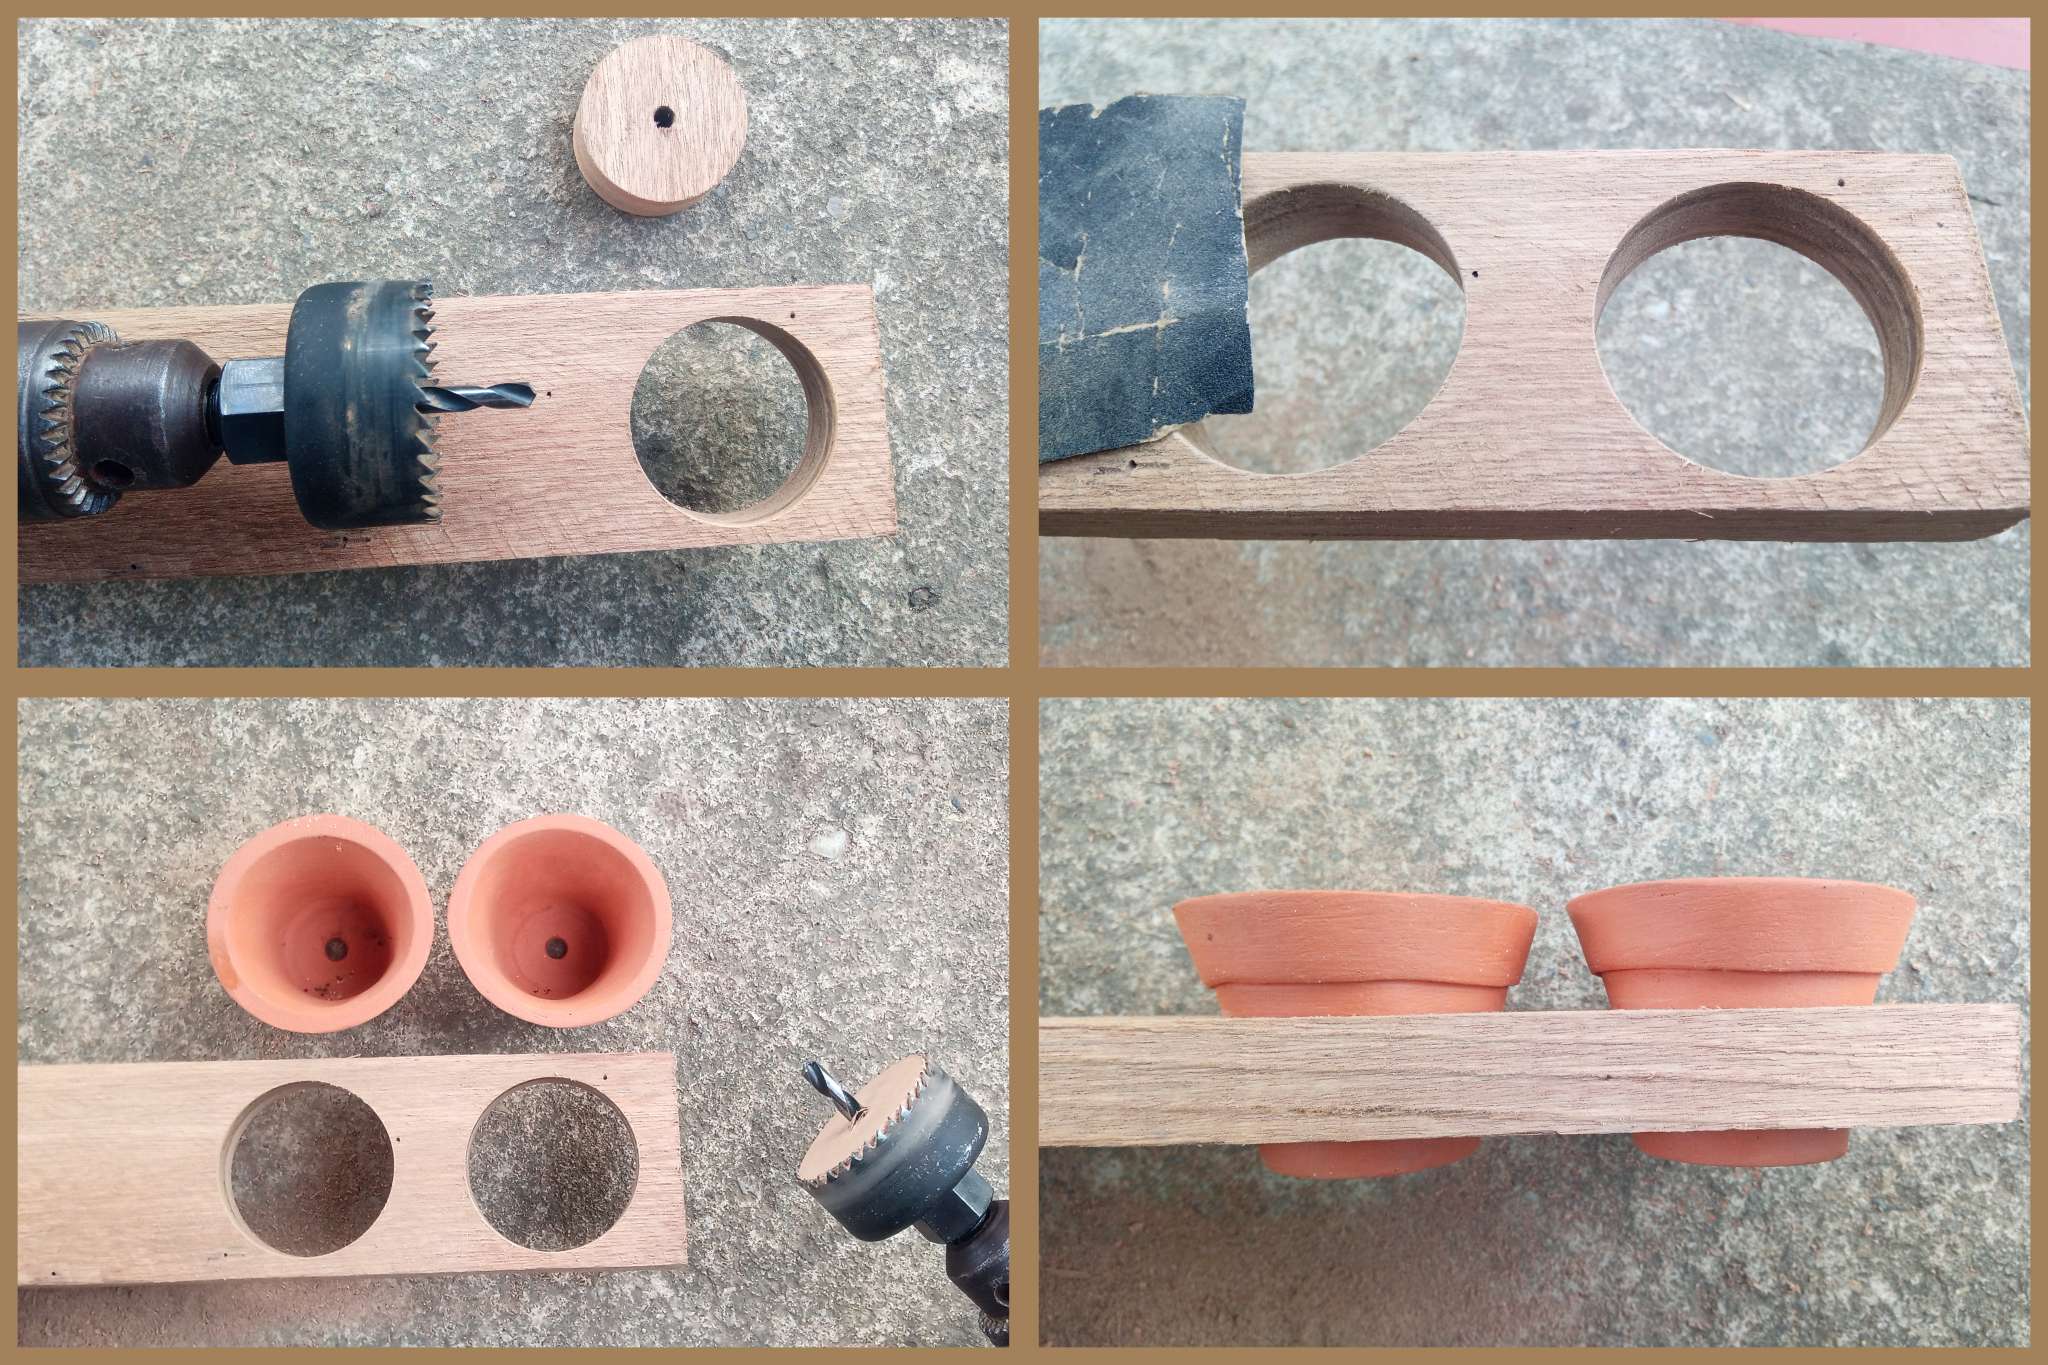
Con un taladro y una broca de 54 milímetros de diámetro perforamos dos orificios en el centro de la madera. Con anticipación debemos de tener la medida de los maceteros.
Siempre es bueno usar equipos de protección para así evitar accidentes laborales.
Aunque en éste proyecto estoy trabajando con una madera de cedro pulida anteriormente, siempre paso una lija para quitar algunos poros que quedan.
With a drill and a 54 mm diameter bit, we drill two holes in the center of the wood. In advance we must have the measure of the pots.
It is always good to use protective equipment to avoid accidents at work.
Although in this project I am working with previously polished cedar wood, I always use sandpaper to remove any remaining pores.

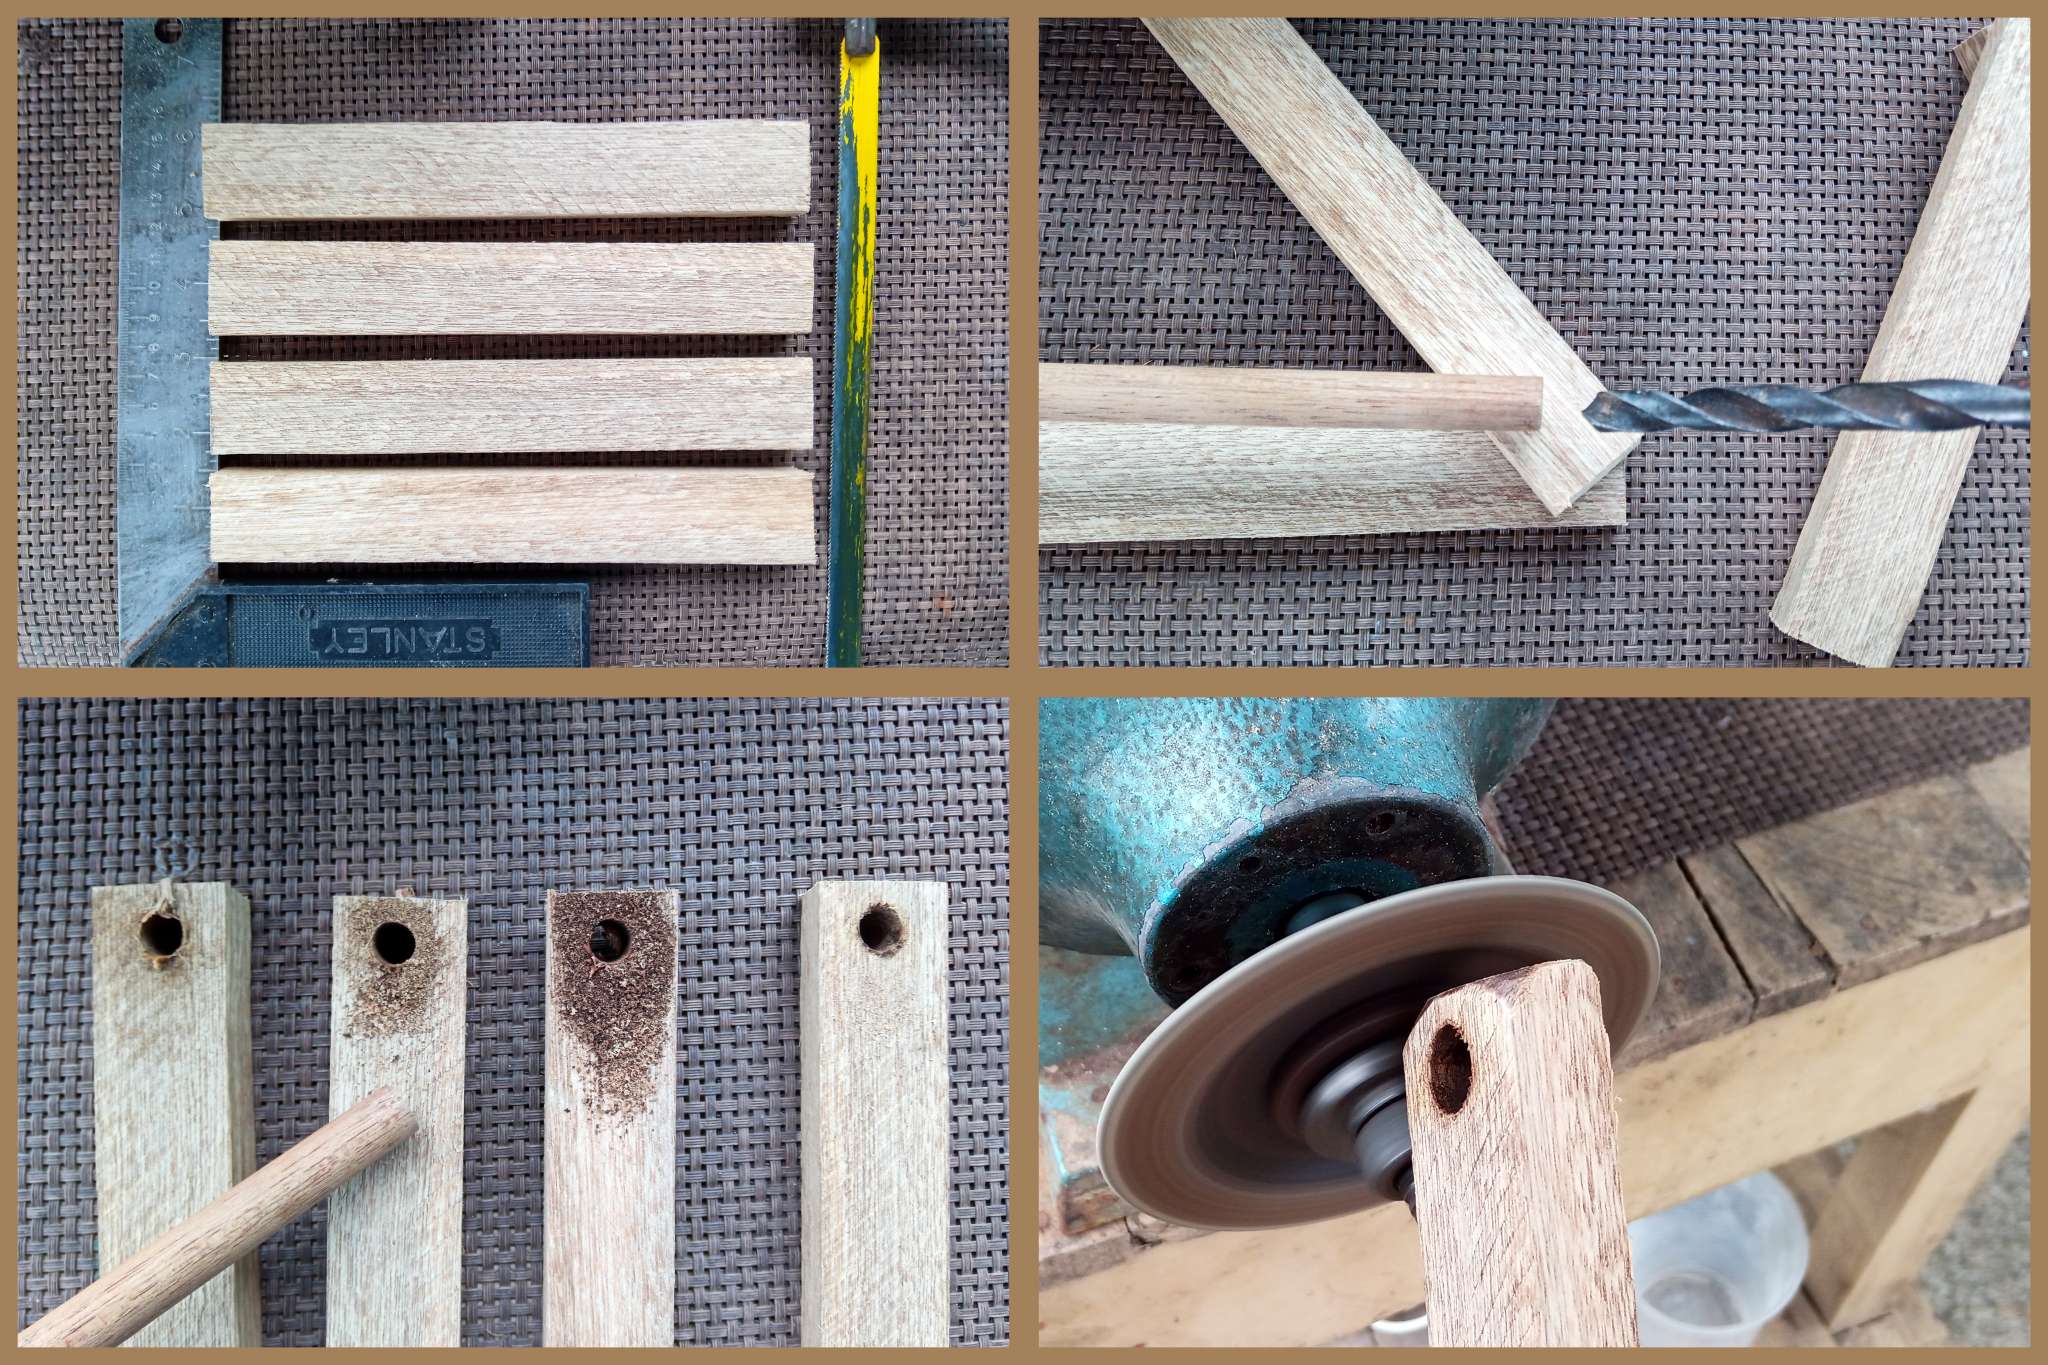
En el paso número dos, recortar 4 pedazos de madera de 20 centímetros cada uno para construir la base del columpio.
Con el taladro perforamos un orificio que será el eje central que sostendrá los ángulos laterales del columpio y dónde también se colgará las macetas.
Con la lijadora eléctrica redondee las puntas superiores de los ángulos laterales y con la sierra manual hice un corte 45 en la base inferior de cada listón del ángulo para una mayor estabilidad.
In step number two, cut 4 pieces of wood of 20 centimeters each to build the base of the swing.
With the drill we drill a hole that will be the central axis that will support the lateral angles of the swing and where the pots will also be hung.
With the electric sander I rounded the upper points of the side angles and with the hand saw I made a 45 cut in the bottom base of each angle slat for greater stability.

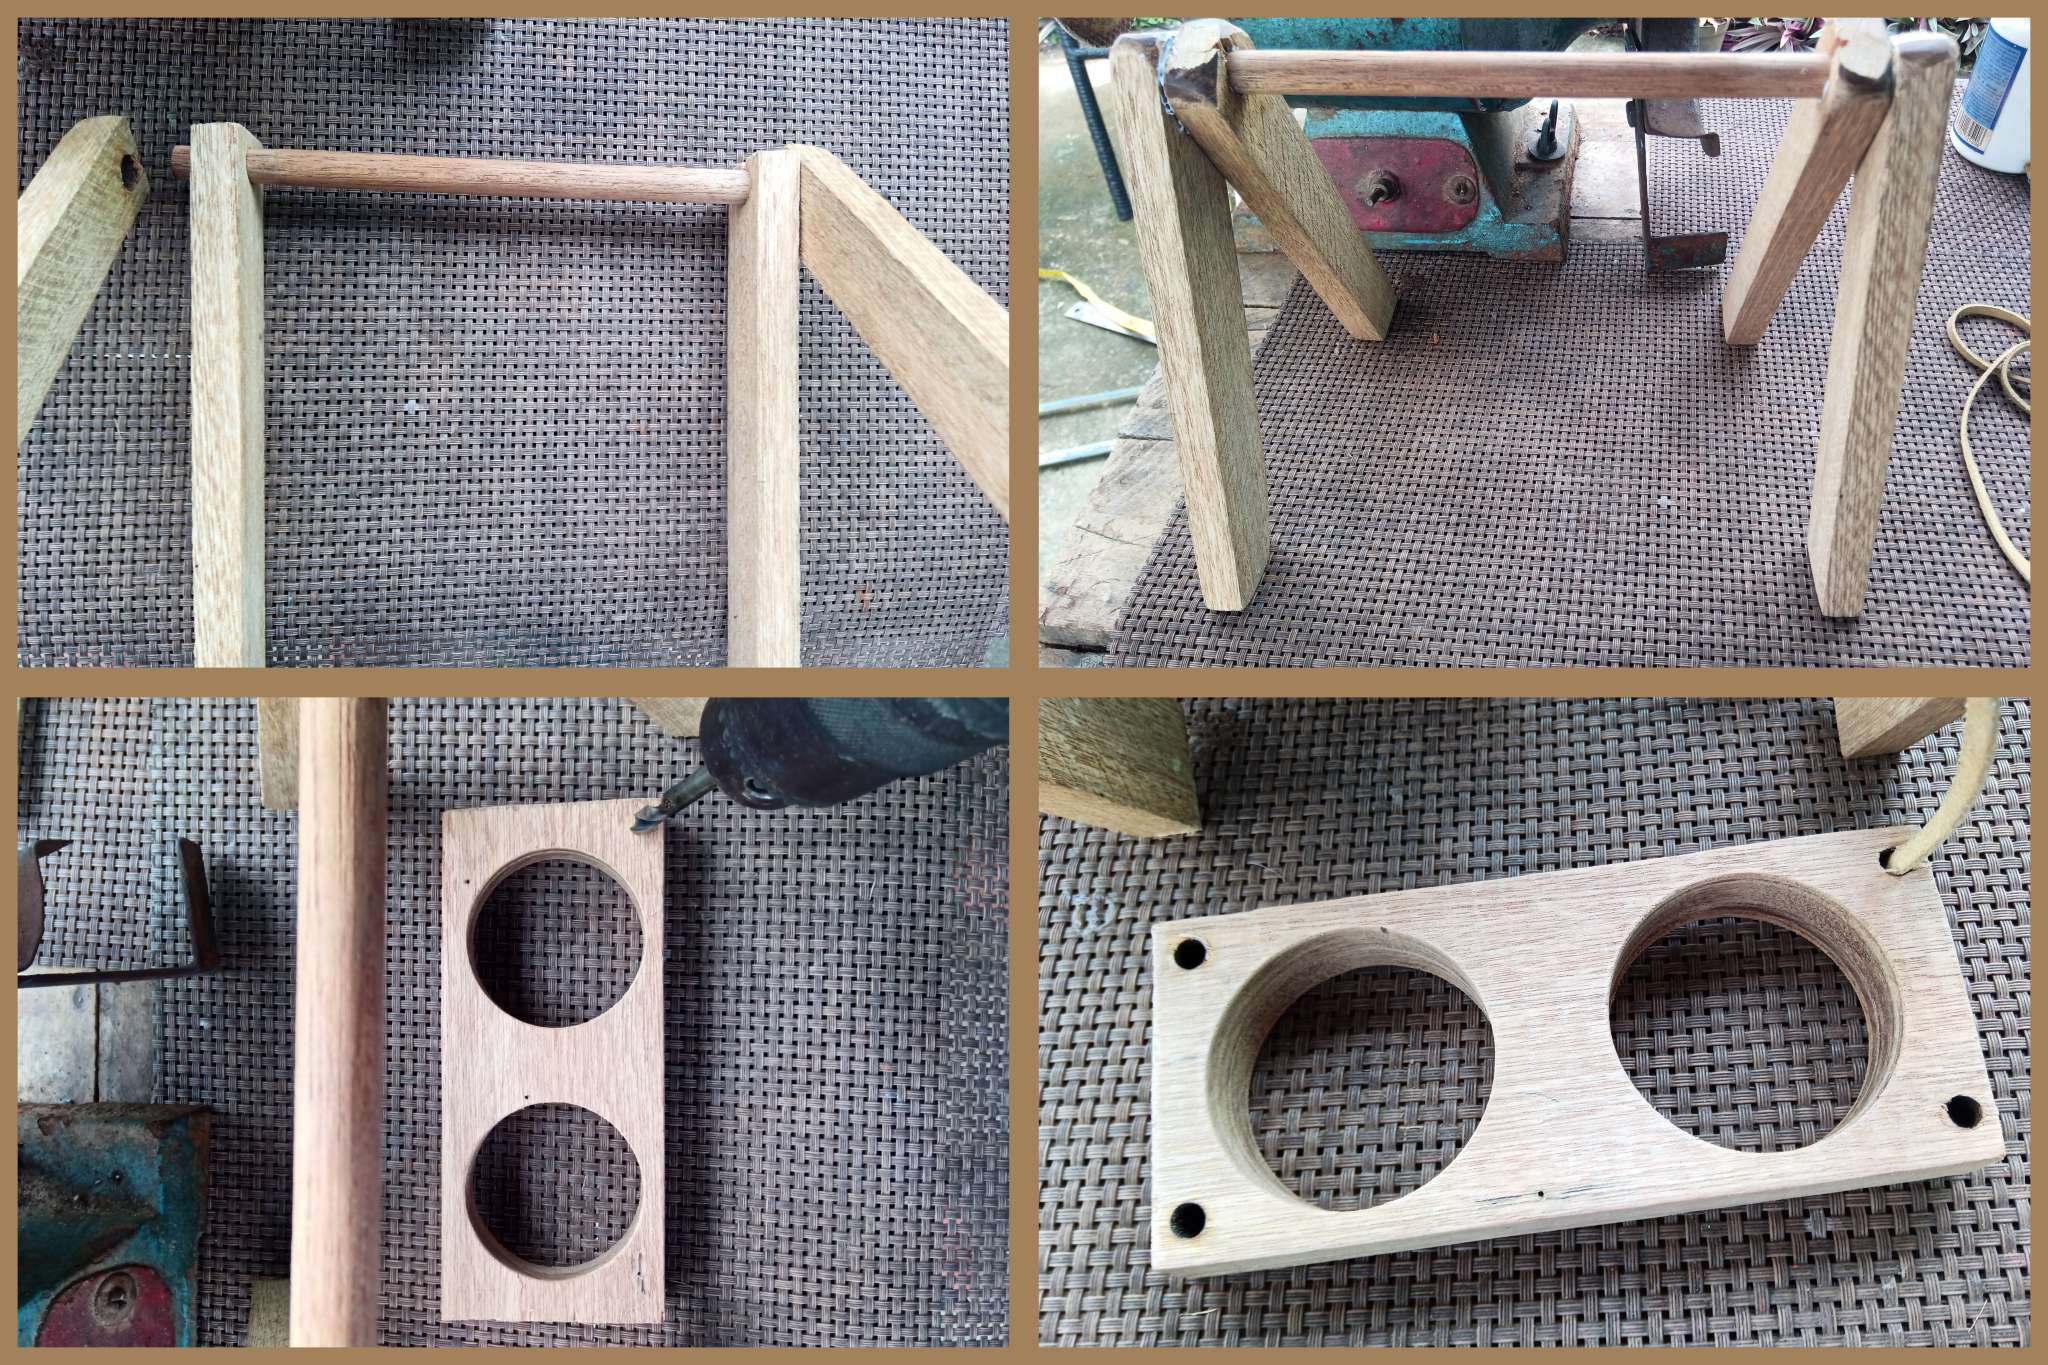
Ensamblaje del columpio
Sólo utilicé cola blanca de carpintería para unir el eje central y los ángulos, la dimensión de la mecha del taladro fue proporcional al diámetro del eje central para que entrara con cierta presión y así evitar usa tornillos o clavos.
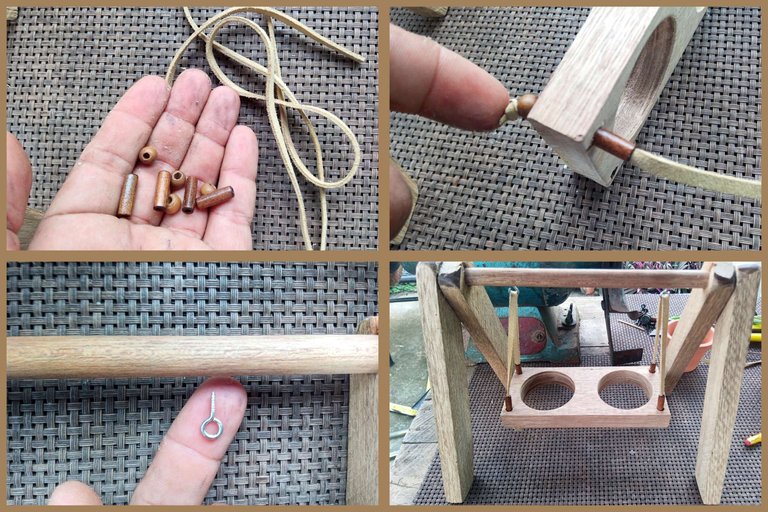
Con algunos accesorios de bisutería y un cordón de cuero logré colgar el columpio, lo sujeté con tornillos que poseen aro para así pasar el cordón y lograr un mejor balanceo.
Pasé las cuerdas por los 4 orificios hechos con el taladro en la base central del columpio e hice nudos en la parte inferior para que no se salga con el peso de las macetas.
Swing Assembly
I only used white carpentry glue to join the central axis and the angles, the dimension of the drill bit was proportional to the diameter of the central axis so that it entered with certain pressure and thus avoid using screws or nails.
With some jewelry accessories and a leather cord I managed to hang the swing, I fastened it with screws that have a ring to pass the cord through and achieve a better swing.
I threaded the ropes through the 4 drilled holes in the center base of the swing and tied knots at the bottom so it wouldn't come off under the weight of the pots.

La aplicación de barniz no es sólo una forma de embellecer el material, sino también una forma de mantenimiento, al fin y al cabo, el barniz aporta una serie de protecciones necesarias a la madera, ya que sirve de base contra la humedad, algo que tuve que tomar en cuenta porque son plantas naturales que requieren de agua y también por la incidencia de plagas como las termitas, o el moho, tan comunes en los hogares.
The application of varnish is not only a way of embellishing the material, but also a form of maintenance, after all, the varnish provides a series of necessary protections for the wood, since it serves as a base against humidity, something that I had to take into account because they are natural plants that require water and also because of the incidence of pests such as termites or mold, so common in homes.


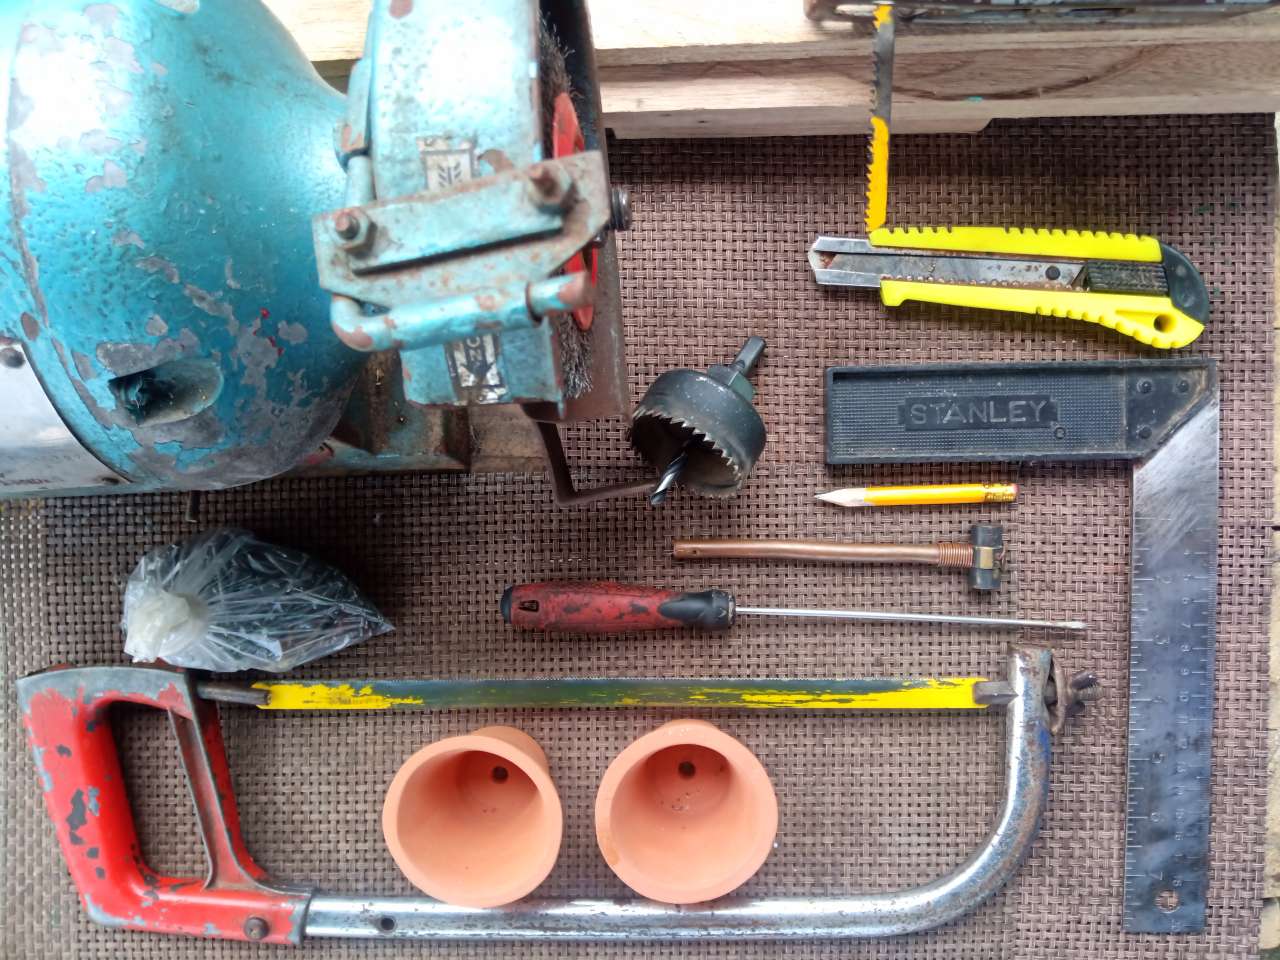
Materiales/ Materials
SPANISH
Madera, taladro, sierra manual, lijadora, cola blanca de carpintería, accesorios de bisutería, cordón de cuero, macetas de arcilla, cinta métrica, escuadra y lápiz.
ENGLISH
Wood, drill, manual saw, sander, white carpentry glue, jewelry accessories, leather cord, clay pots, tape measure, square and pencil.
Es/En
Todas las fotos son de mi propiedad, tomadas con la cámara de mi teléfono 📱 Bison 11 .
Traductor utilizado: Google Traductor.
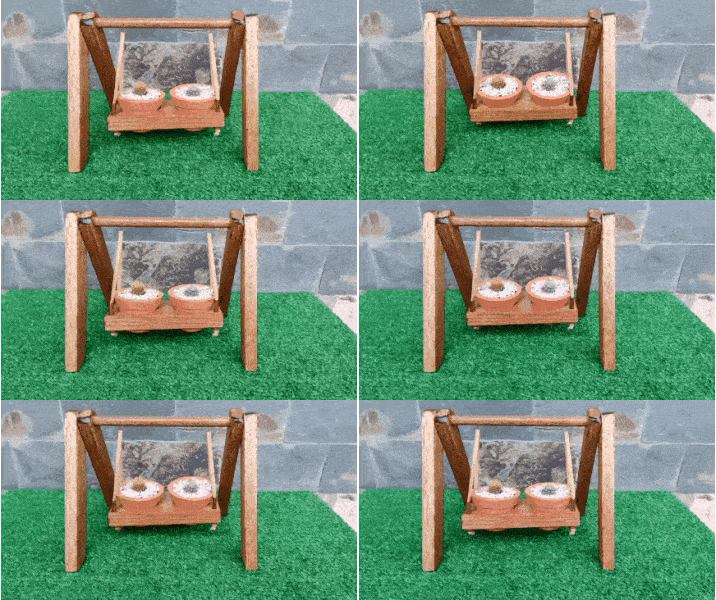
Los gif fueron editados con la app Creador y editor de GiF
Las imágenes fueron comprimidas con la app photo compresor.
All photos are my property, taken with my phone's camera 📱 Bison 11.
Translator used: Google Translator.
The gifs were edited with the GiF Creator and Editor app
The images were compressed with the photo compressor app.
Gracias por su atención, si desea ver más de mis publicaciones de bricolaje, siéntase libre de visitar mi blog. Saludos!
Thank you for watching, if you would like to see more of my DIY posts feel free to check out my blog. Greetings!
