Hola y bienvenidos sean todos los amigos que visitan mi Blog.
Ahora después de un poco de información, quiero invitarte a que me acompañes en el proceso y así puedas aprender como tú , lo puedes hacer.
Vas a necesitar:
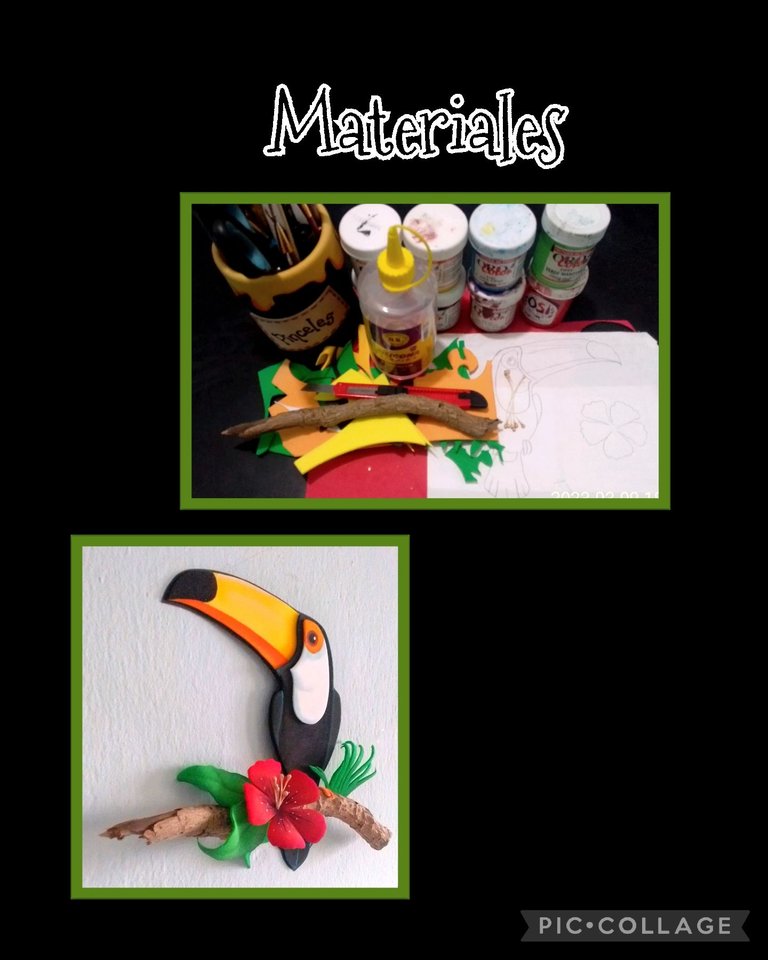
| Foami de colores | Cartulina escolar |
|---|---|
| Rama seca | pistilos |
| Pinturas y pinceles | Tijera |
| Lápiz | Silicón |
| Acocador | Esponja |
| Tiza | Molde |
Comencemos:
Paso 1:
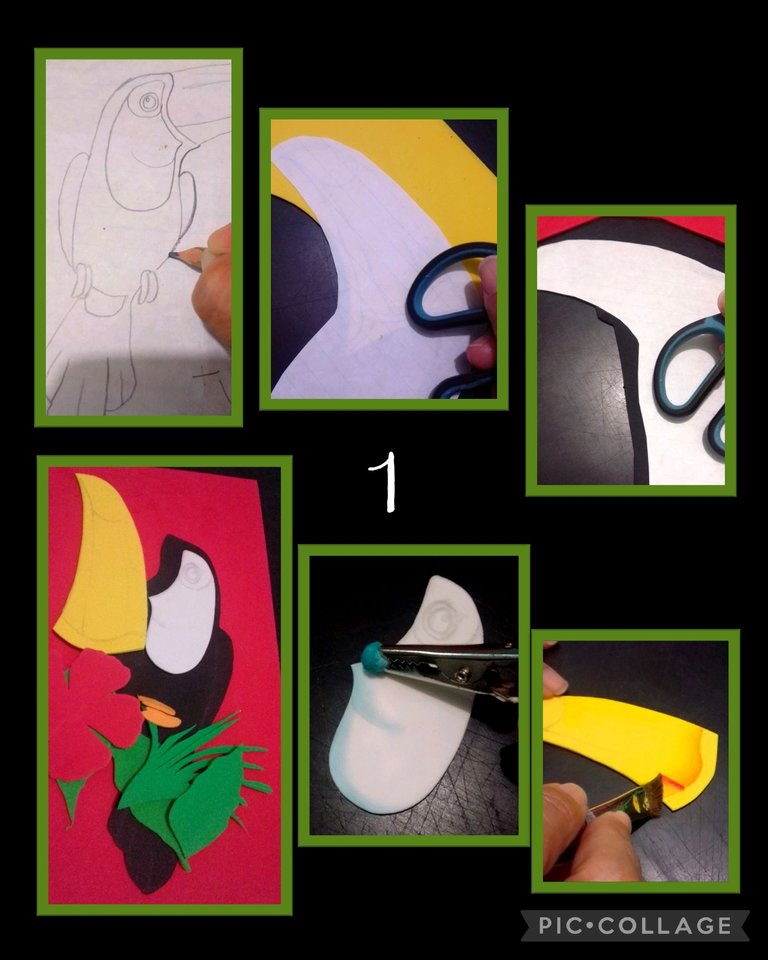
- Remarca el dibujo.
- Luego comienza a transferir colocando el dibujo sobre el foami y frota con la tijera hasta que se marque el dibujo,
así marca cada pieza en su color correspondiente. - Ahora recorta todas las piezas.
- Pasa un algodón por tiza azul y pasa por el contorno de la pieza blanca y con un pincel sombrea y delinea el pico, también lo puedes hacer con la tiza.
Paso 2:
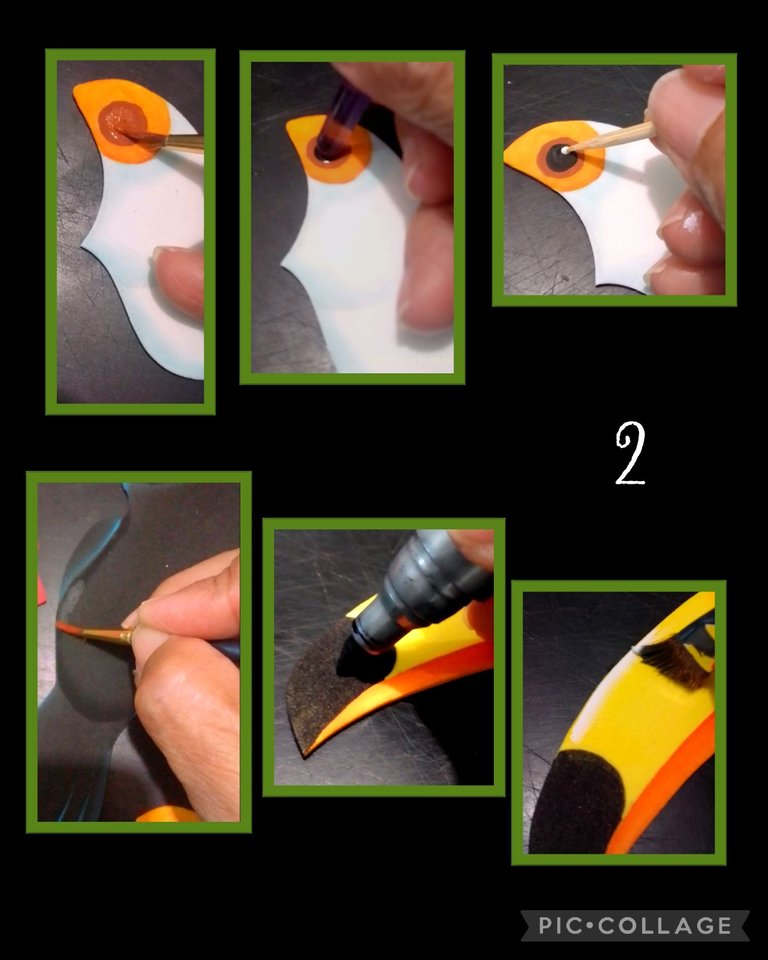
- Pinta el ojo rellenando con el color amarillo, deja secar, luego rellena con marrón, después moja la parte trasera del pincel y pinta el iris del ojo, deja secar y por último pon un punto de luz con pintura blanca.
- Seguimos con el cuerpo, delinea con pintura azul para marcar las alas y cola.
- Luego con pintura negra sombrea la parte de adentro de las alas, el cuerpo y deja secar.
- Ahora con el marcador rellena la punta del pico y pasa pintura blanca en el borde superior del pico.
Paso 3:
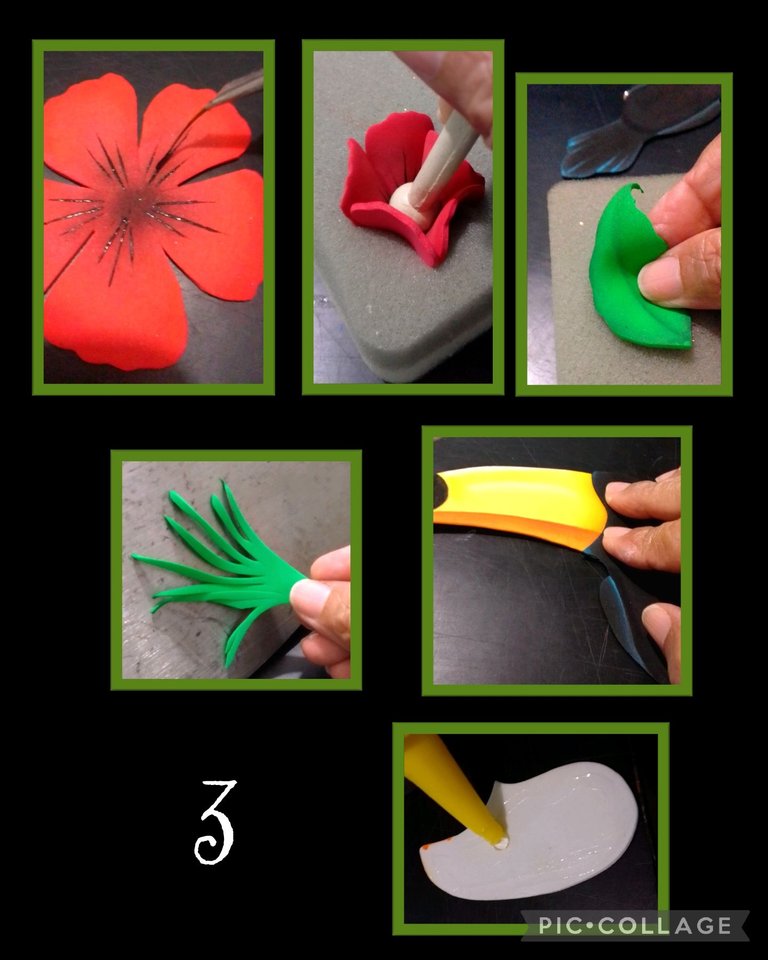
- Pinta el borde de los pétalos con tiza o pintura y dibuja líneas en el centro de la flor, también pinta las hojas y deja secar.
- Luego calienta la plancha a temperatura media y coloca la flor, cuando caliente pon sobre la esponja y presiona en el centro, igual calienta las hojas y da la forma que quieras.
- Ahora aplica silicón en el pico y comienza a pegar y armar el tucán.
Paso 4:

- Termina de pegar las piezas y deja secar, luego aplica silicón en la parte posterior del tucán y pega sobre cartulina negra y recorta dejando un borde de 2milímetros.
- Ahora aplica silicón el la rama y pega en la parte baja y después pega las patas.
Paso 5:
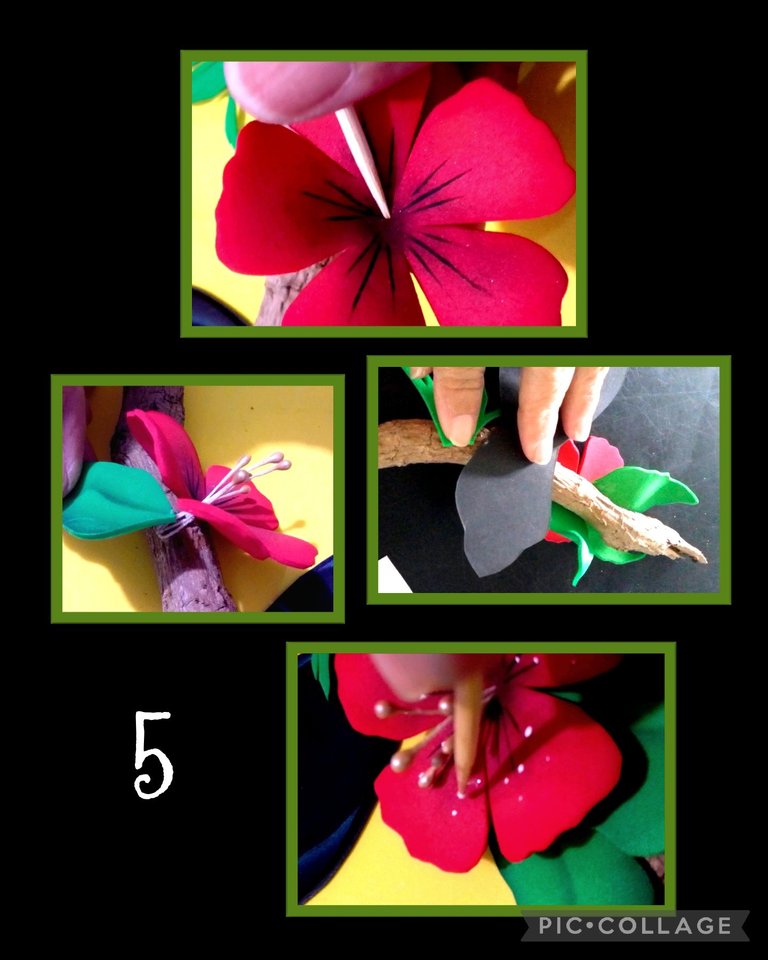
- Ahora introduce un palito para hacer un orificio en el centro de la flor e inserta los pistilos, luego aplica silicón y pega al tronco y pega las hojas.
- Luego pinta puntitos blancos en los pétalos.
Paso 6:
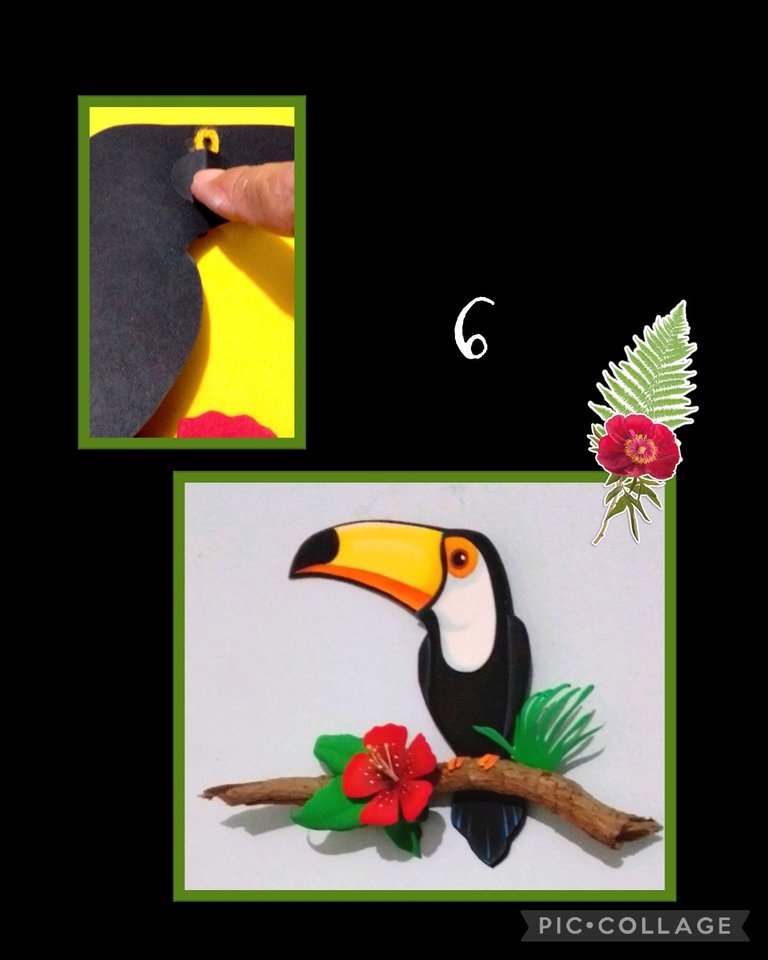
Y para terminar recorta un círculo en cartulina y haz una lazada con hilo o cinta y pega detrás para colgar.
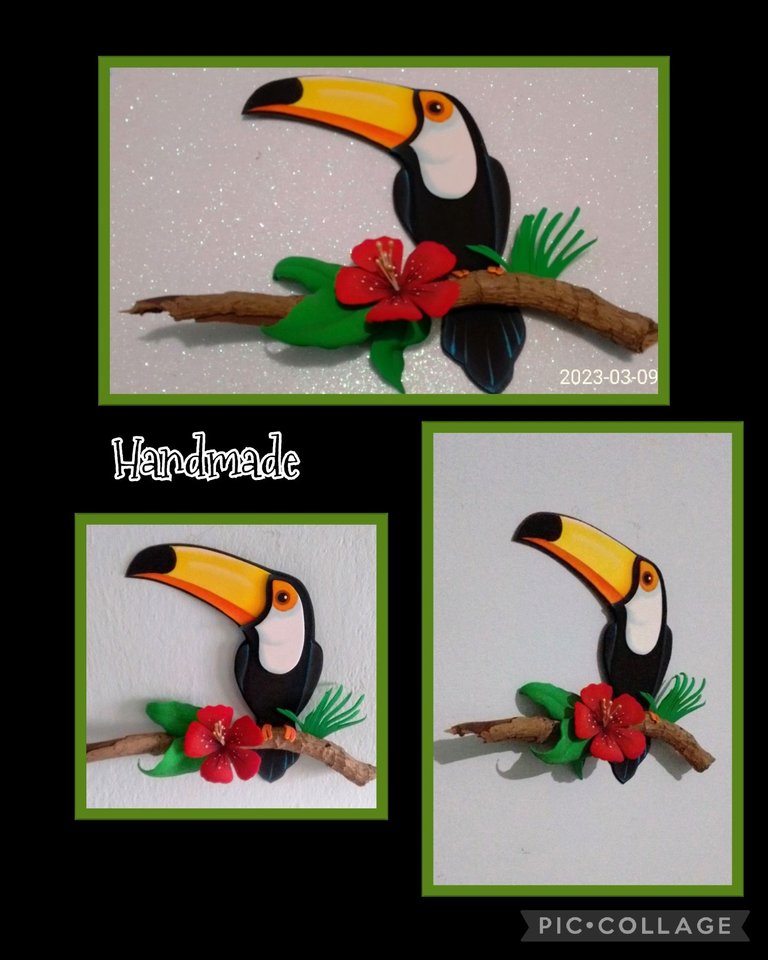
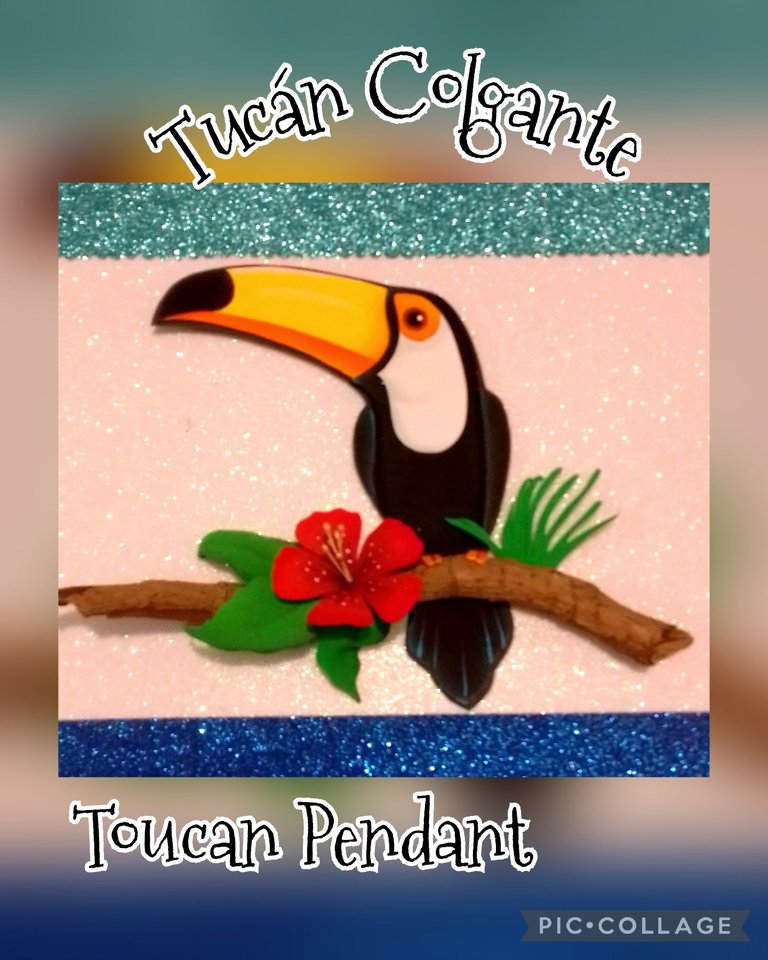
Y Listo! Así queda terminado este hermoso colgante!
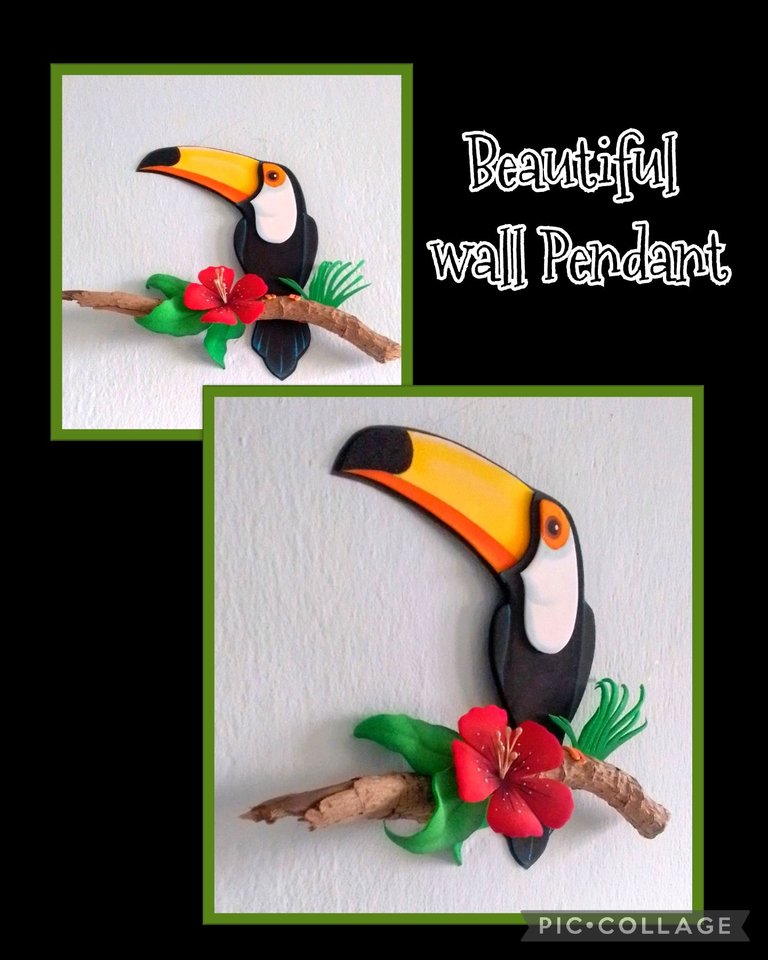
Aquí te dejo una fotos para que veas lo bonito que luce en la pared!

Fuentes:
https://es.wikipedia.org/wiki/Ramphastidae#Estado_de_conservaci%C3%B3n
https://www.pinterest.es/pin/476255729357771163/
Etiquetas: HTML
Traductor: DeepL
Teléfono: BLU G5
Editor de fotos: Pic Collage.

Y ahora me despido muy agradecida de tu visita, esperando te guste y sirva de guía y aprendizaje mi publicación.
Gracias por tu apoyo y hasta la próxima!
Saludos y bendiciones para todos.
English:


Hello and welcome to all my friends who visit my Blog!
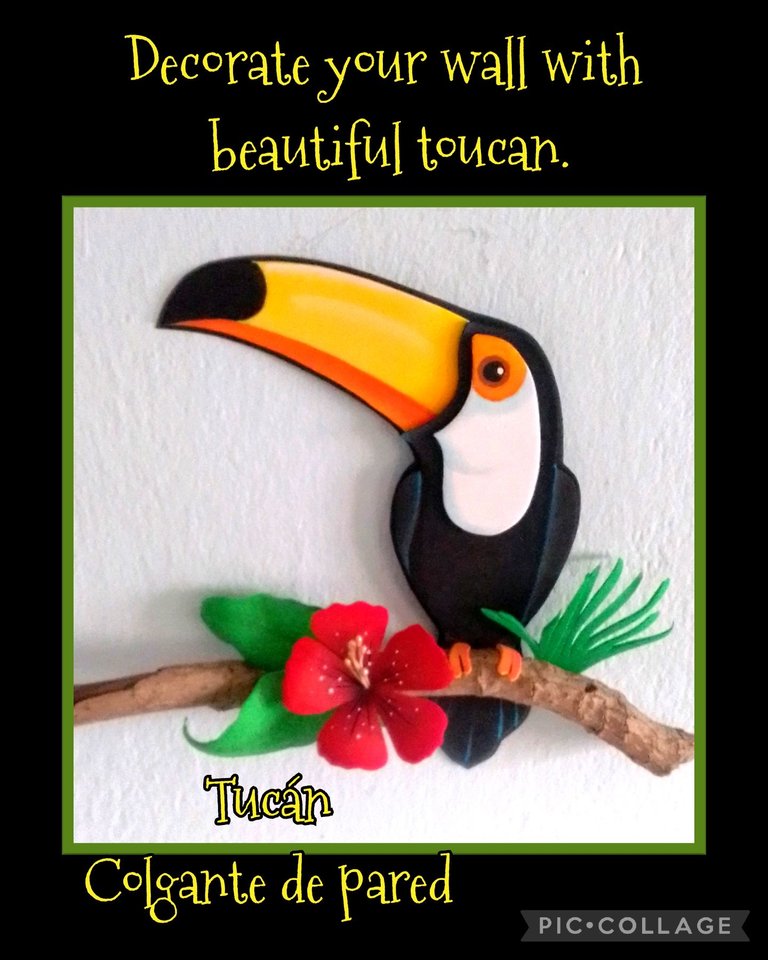
I made it using a dry branch and foami with which I made a Toucan, this is a very beautiful bird and known for its colorful plumage, the predominant color is deep black, also white and yellow, although there are a variety of them the color varies, both in the plumage and in its beak, measuring 65 centimeters including its beak which is 20cm long.
And it is a pity that today it is one of the animals in danger of extinction.
Now after a little information, I want to invite you to join me in the process and so you can learn as you , you can do it.
You will need:

| Colorful Foami | School cardboard |
|---|---|
| Dry branch | pistils |
| Paints and paintbrushes | Scissors |
| Pencil | Silicone |
| Hairsprayer | Sponge |
| Chalk | Mold |
Let's get started:
Step 1:

- Outline the drawing.
- Then start transferring by placing the drawing on the foami and rubbing with the scissors until the drawing is marked,
then mark each piece in its corresponding color. - Now cut out all the pieces.
- Pass a cotton ball through blue chalk and go around the outline of the white piece and with a brush shade and outline the beak, you can also do it with the chalk.
Step 2:

- Paint the eye filling with yellow color, let dry, then fill with brown, then wet the back of the brush and paint the iris of the eye, let dry and finally put a point of light with white paint.
- We continue with the body, outline with blue paint to mark the wings and tail.
- Then with black paint shade the inside of the wings, the body and let dry.
- Now with the marker fill the tip of the beak and pass white paint on the top edge of the beak.
Step 3:

- Paint the edge of the petals with chalk or paint and draw lines in the center of the flower, also paint the leaves and let dry.
- Then heat the iron to medium heat and place the flower, when hot put it on the sponge and press in the center, the same heat the leaves and give the shape you want.
- Now apply silicone on the beak and start gluing and assembling the toucan.
Step 4:

- Finish gluing the pieces and let dry, then apply silicone on the back of the toucan and glue on black cardboard and trim leaving a 2mm border.
- Now apply silicone on the branch and glue on the lower part and then glue the legs.
Step 5:

- Now insert a stick to make a hole in the center of the flower and insert the pistils, then apply silicone and glue to the trunk and glue the leaves.
- Then paint white dots on the petals.
Step 6:

And finally cut a circle in cardboard and make a loop with thread or ribbon and glue behind to hang.
And that's it! This is how this beautiful pendant is finished!
Here are some pictures so you can see how beautiful it looks on the wall!


Sources:
https://es.wikipedia.org/wiki/Ramphastidae#Estado_de_conservaci%C3%B3n
https://www.pinterest.es/pin/476255729357771163/
Tags: HTML
Translator: DeepL
Phone: BLU G5
Photo Editor: Pic Collage.


And now I say goodbye very grateful for your visit, hoping you like and serve as a guide and learning my publication.
Thank you for your support and until next time!
Greetings and blessings to all.

 )
)