
Buenas noches queridos amigos creadores y visitantes de esta gran comunidad.
Bienvenidos todos a mi Blog.
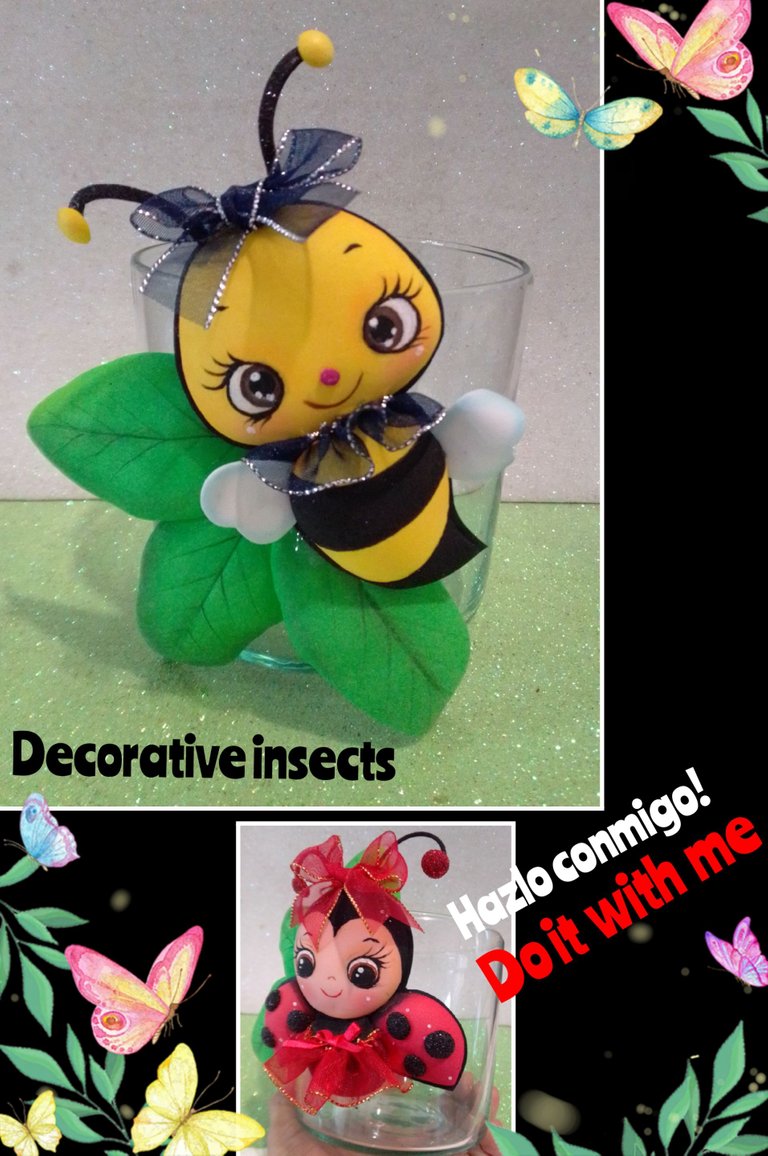
La verdad es que nuestra naturaleza es bella y maravillosa y viéndola me animé a hacer una y mientras buscaba imágenes conseguí también una abeja... entonces decidí hacerlas, y la mayoria de las veces cuando voy a realizar algún trabajo busco información sobre ello y en este caso, leí algo sobre ellas, aprendí que las mariquitas son insectos controladores de plagas,cosa que no sabía, se comen los pulgones, cocos, ácaros entre otros, existen más de 6000 especies y las hay en todo el mundo, te dejaré más adelante las fuentes de información para que conozcas más sobre estos insectos.
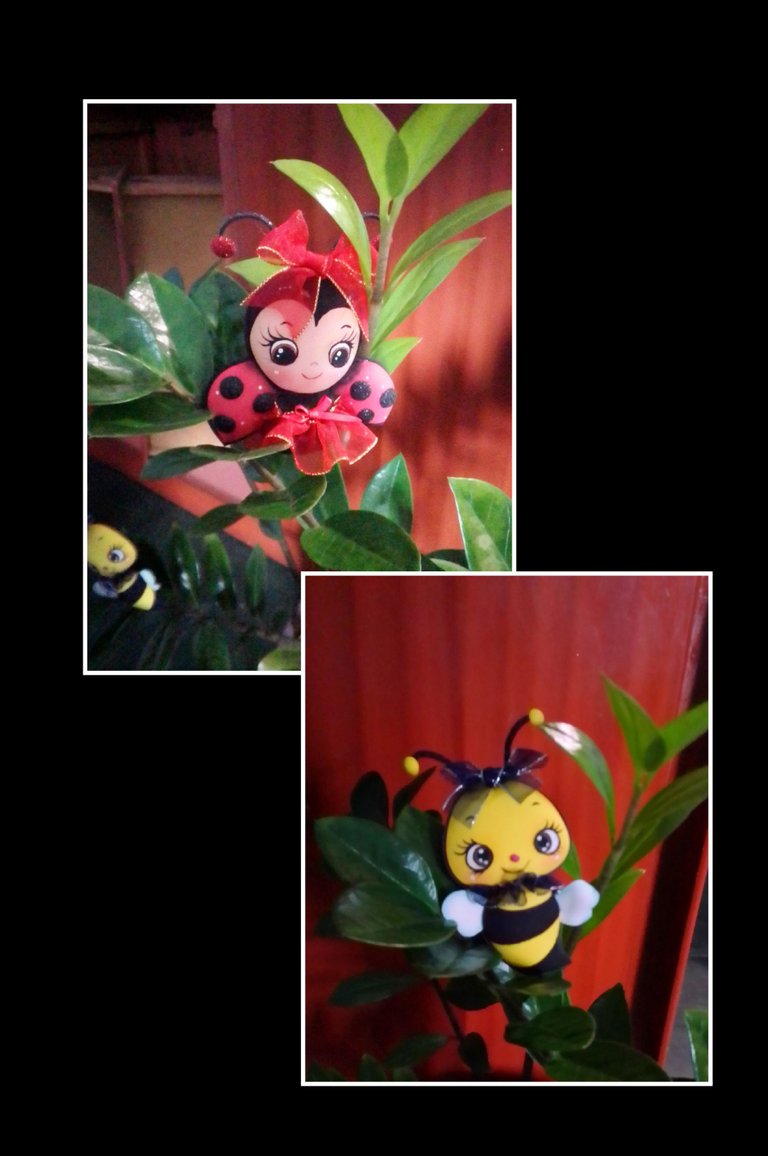
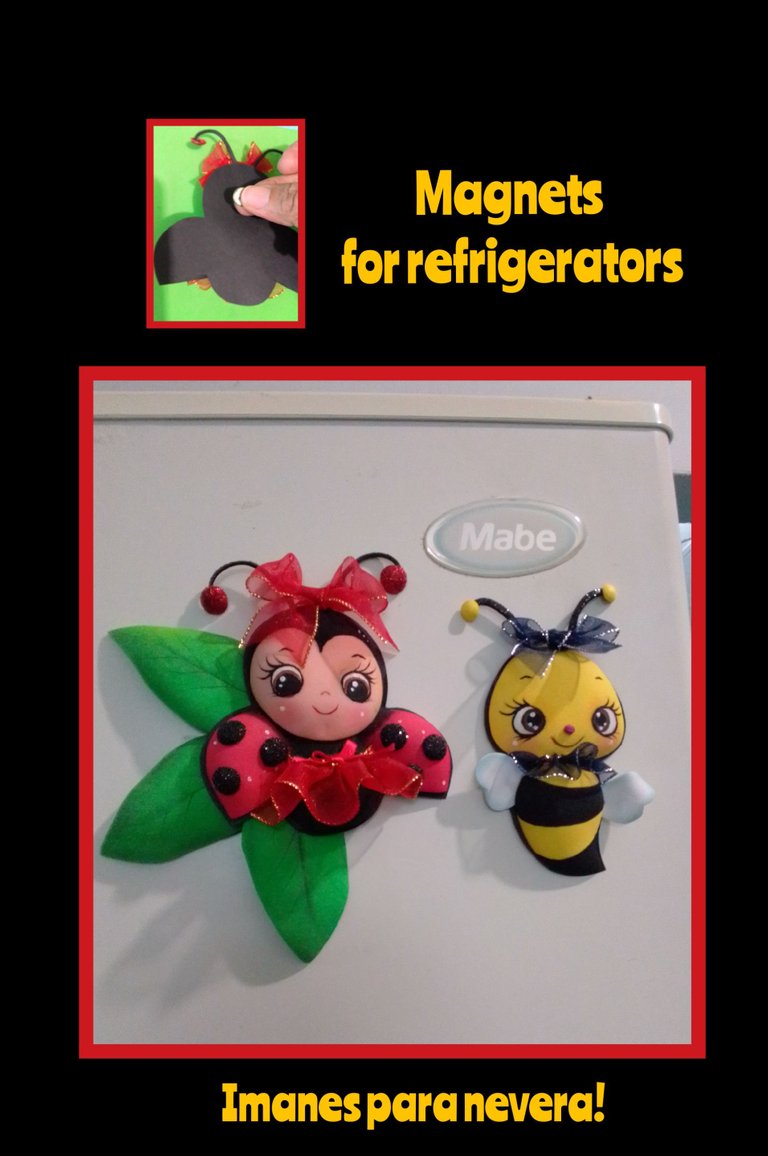
Bueno te cuento, los elaboré en foami y decoré con cinta de tela, quedan muy bonitos y te servirán para decorar objetos, neveras, plantas, en fín le puedes dar cualquier uso, así que te invito a que los hagamos.
Necesitas:
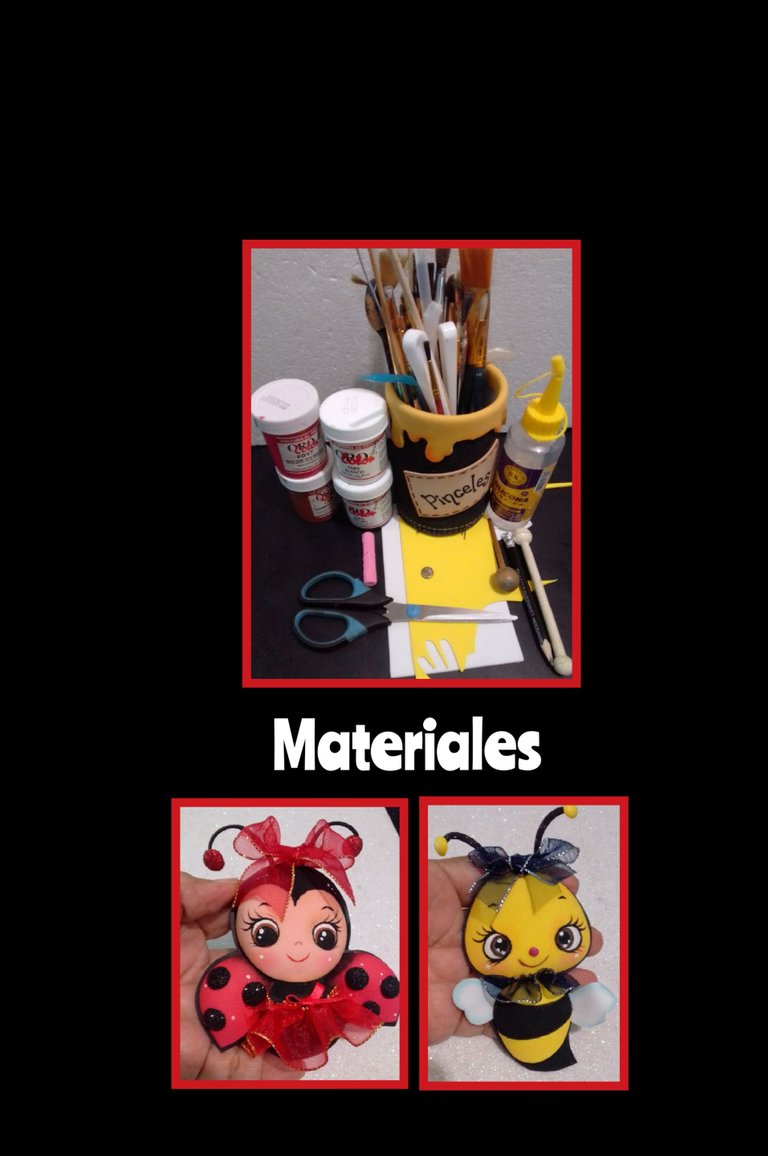
| Foami de colores mate y brillante | Cinta de organza |
|---|---|
| Pinturas y pinceles | Tizas |
| Lápiz | Tijera |
| Imán | Acocador |
| Goma espuma | Silicón |
| Molde | Hoja |
Paso 1:
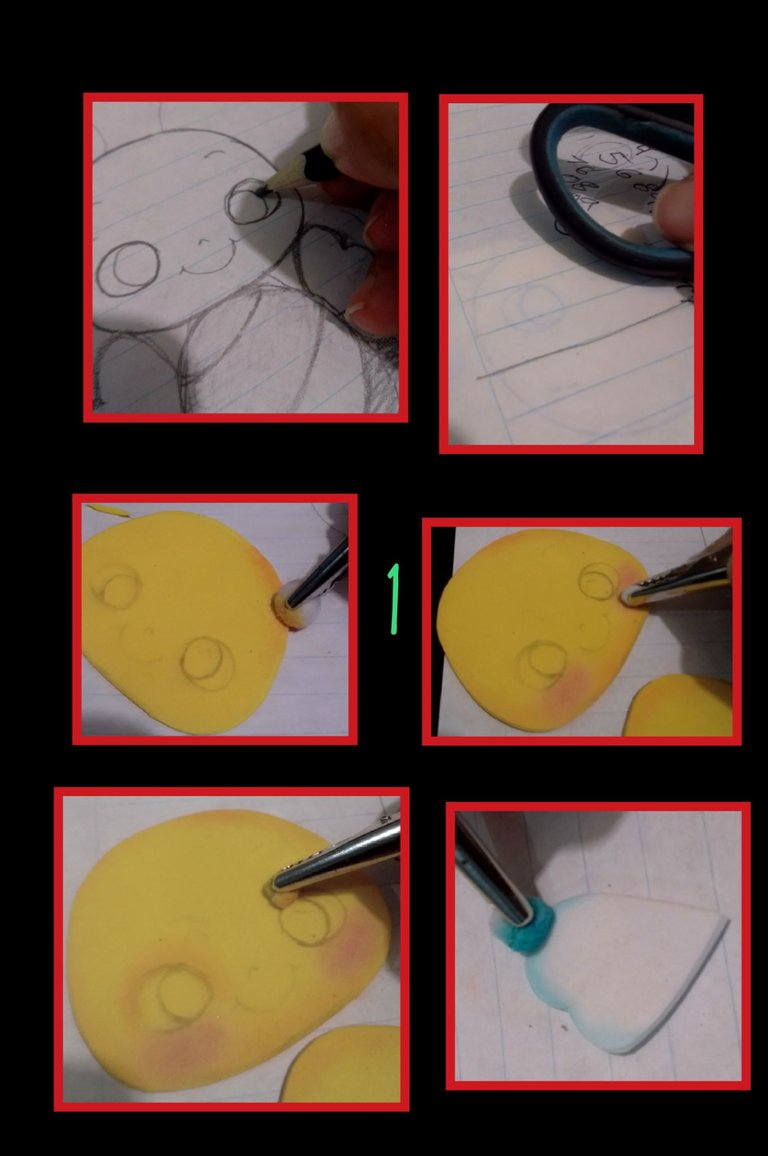
- Remarca el dibujo, voltea la hoja y coloca sobre el foami, luego con el asa de la tijera frota el papel para transferir el dibujo y recorta.
- Luego frota un algodón por tiza y pasa por el contorno de la carita de la abeja, las mejillas, el borde de los ojos y contorno de las alitas.
Paso 2:
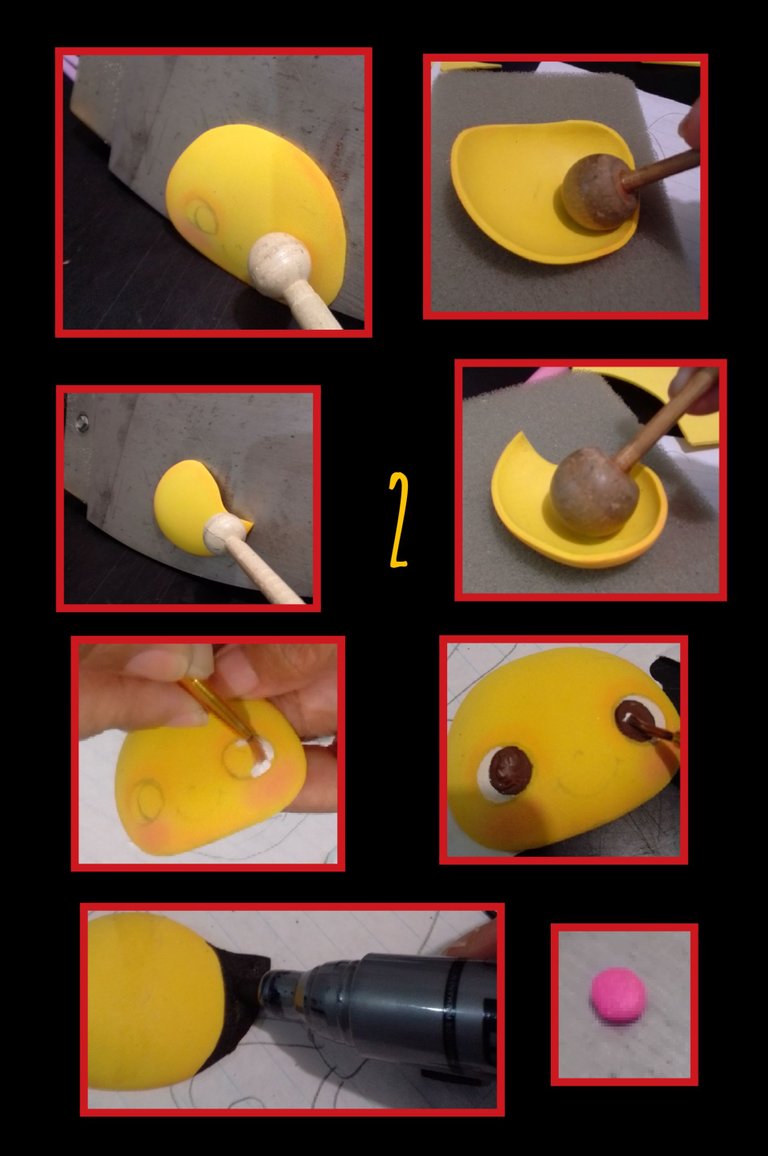
- Calienta la plancha y coloca una a una las piezas de foami y en lo que caliente, coloca sobre una esponja y frota con el acocador dando movimientos en forma circular.
- Ahora comienza a pintar rellenando los ojos con pintura blanca, deja secar después aplica pintura marrón y aún humeda, pon un punto de pintura blanca para bajar el color y deja secar.
- Con un marcador punta fina o pincel para ojos, pinta pestañas y borde de los ojos y boca.
Paso 3:
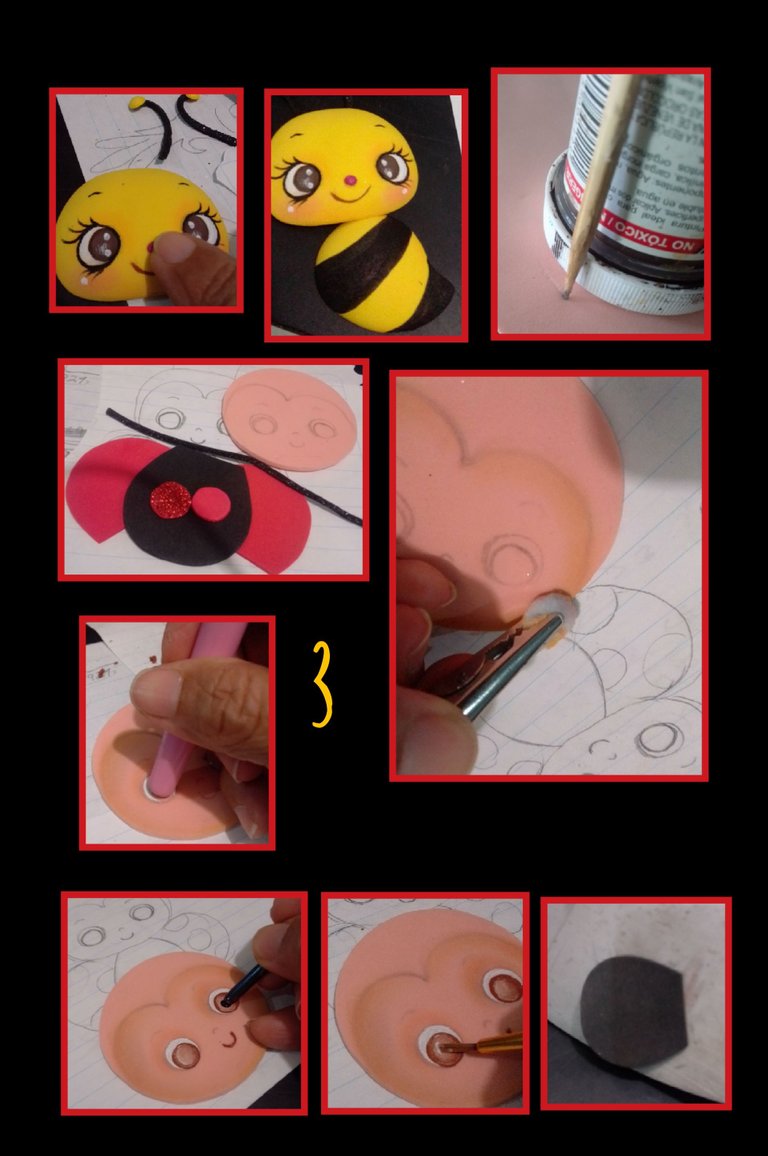
- Pega la nariz y antenas.
- Ahora recorta todas las piezas de la mariquita, luego pinta con tiza todo el contorno de la cara y ojos, luego rellena los ojos usando un objeto redondo, luego calienta la plancha y coloca el cuerpo de la mariquita para darle forma.
Paso 4:
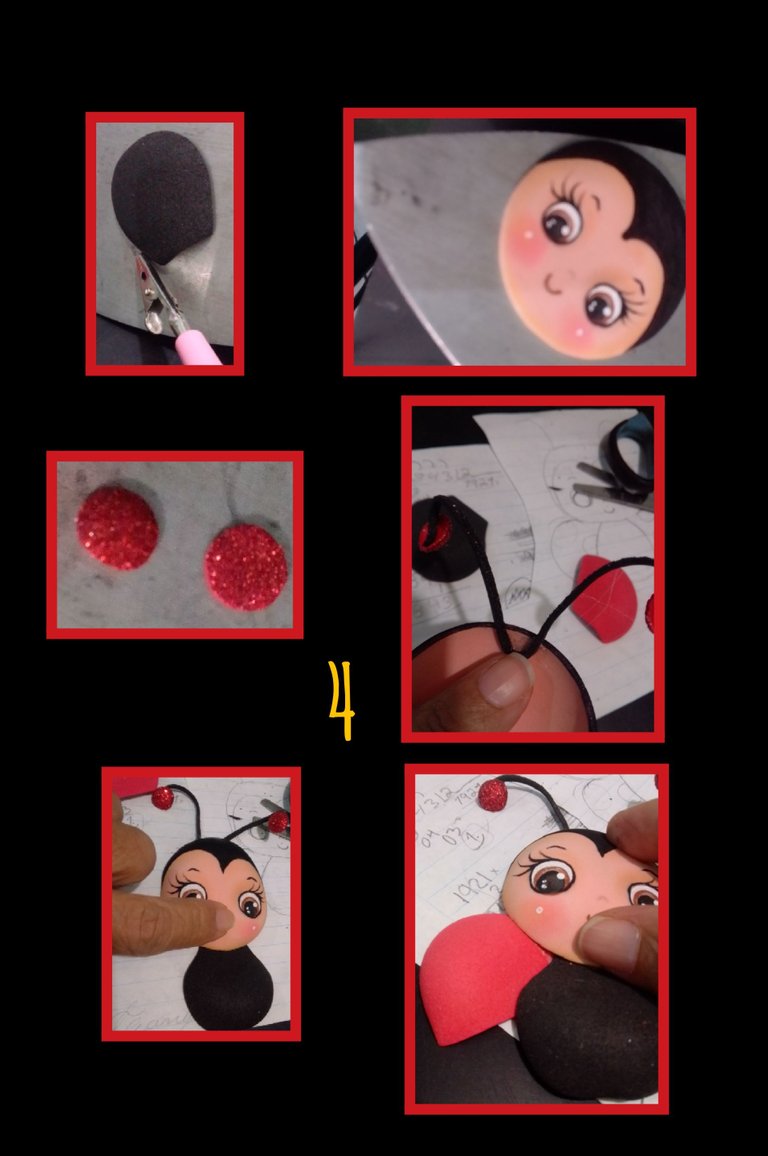
- Después que suba y tome forma, retira de la plancha y coloca ahora la cabeza y pasa el acocador, después termoforma las otras piezas.
- Ahora aplica silicón en la parte trasera y pega las antenas.
Luego aplica silicon en el cuello y pega la carita de la mariquita, y después pega las alas a la cabeza y cuerpo.
Paso 5:

- Llegó la hora de pegar la abeja, aplica silicon a la cabeza y pega sobre el cuerpo. asegurate que quede bien pegado.
- Hilvana una orilla de la cinta y hala el hilo hasta fruncir la cinta, aplica silicon y pega al cuello, después aplica silicon por todo el contorno de la abeja y pega sobre foami o cortulina, así harás también con la mariquita.
- Para vestir la mariquita hilvana cinta roja, frunce hasta hacer la faldita y pega a cada extremo del cuerpo, pega en el centro un lacito.
Paso 6:
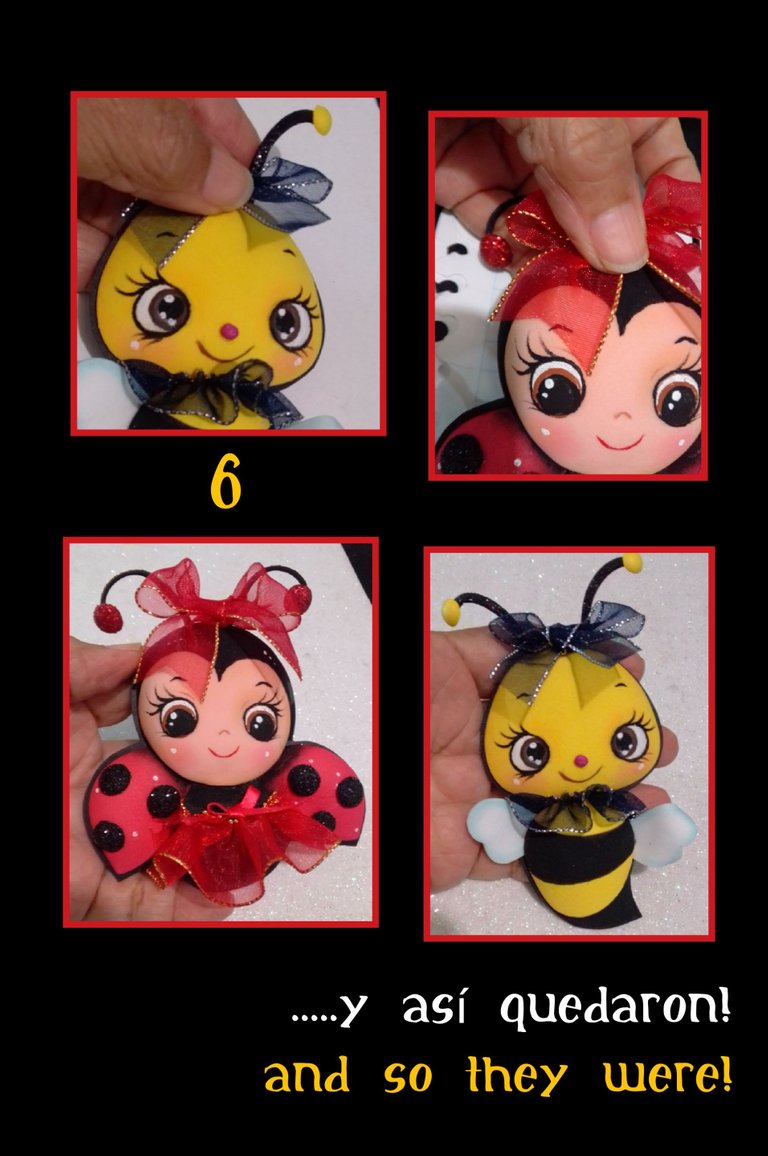
- Haz dos lazos y pega arriba en la cabeza uno a cada insectos.
Paso 7:
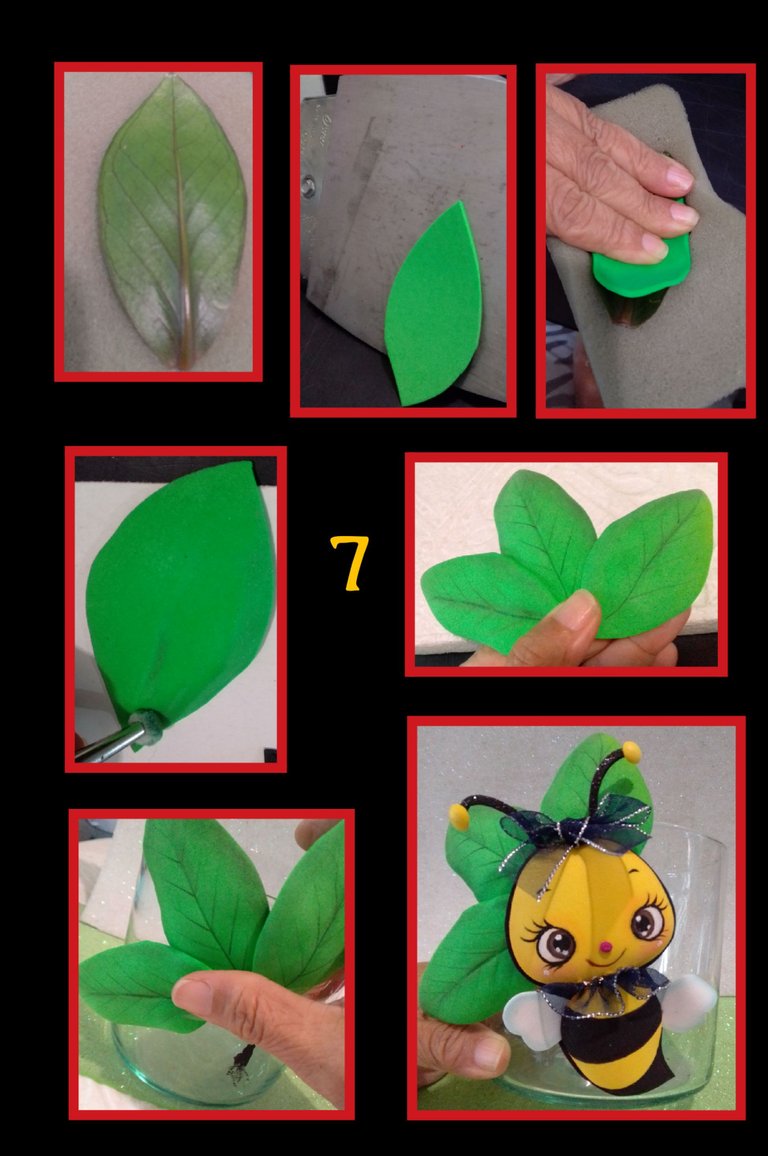
- Ahora con una hoja natural, marca el contorno sobre foami verde, haz 3, luego recorta, calienta la plancha y coloca a calentar.
- Cuando caliente coloca sobre la esponja y presiona sobre la hoja para marcar las nervaduras.
- Luego con tiza verde más oscura pasa por el borde y delínea.
- Ahora aplica silicón en la parte trasera y pega el imán.
- Luego pega a tu gusto sobre un bol o coloca en las plantas para decorar.

https://es.wikipedia.org/wiki/Coccinellidae
https://es.wikipedia.org/wiki/Anthophila
https://www.pinterest.es/pin/476255729358617872/
Espero les guste y osea de utilidad para todos.
Estas figuritas las puedes usar a tu antojo y decorar cualquier objeto u espacio.
Ahora me toca despedirme pero no sin antes mencionar que utilicé para mi publicación el traductor DeepL.
Las etiquetas HTML,
Teléfono marca BLU G5 y las fotos las edité con GridArt.
Ahora espero que te haya gustado mi tutorial y me alegra mucho que hayas llegado hasta aquí y si es tu gusto comentar, con gusto te responderé.
Gracias por tu apoyo.
Saludos.
English:


Good evening dear friends creators and visitors of this great community.
Welcome everyone to my Blog.
The truth is that our nature is beautiful and wonderful and seeing it I was encouraged to make one and while looking for images I also got a bee .... so I decided to make them, and most of the time when I am going to do some work I look for information about it and in this case, I read something about them, I learned that ladybugs are pest control insects, something I did not know, they eat aphids, coconuts, mites and others, there are more than 6000 species and there are all over the world, I will leave you later the sources of information so you can learn more about these insects.
Well I tell you, I made them in foami and decorated with fabric tape, they are very nice and will serve to decorate objects, refrigerators, plants, in short you can give any use, so I invite you to make them.
You need:

| Foami of matte and shiny colors | Organza ribbon |
|---|---|
| Paints and paintbrushes | Chalk |
| Pencil | Scissors |
| Imamel | Stencil |
| Foam rubber | Silicone |
| Mould | Sheet |
Step 1:

- Outline the drawing, turn the sheet over and place it on the foami, then with the handle of the scissors rub the paper to transfer the drawing and cut it out.
- Then rub a cotton swab over the chalk and go over the contour of the bee's face, the cheeks, the edge of the eyes and the contour of the wings.
Step 2:

- Heat the iron and place one by one the pieces of foami and as soon as it warms up, place it on a sponge and rub it with the brush giving circular movements.
- Now begin to paint filling the eyes with white paint, let dry then apply brown paint and still wet, put a dot of white paint to lower the color and let dry.
- With a fine tip marker or eye brush, paint eyelashes and the edge of the eyes and mouth.
Step 3:

- Glue on the nose and antennae.
- Now cut out all the pieces of the ladybug, then paint with chalk all the outline of the face and eyes, then fill in the eyes using a round object, then heat the iron and place the body of the ladybug to shape it.
Step 4:

- After it rises and takes shape, remove from the iron and place now the head and pass the heat press, then thermoform the other pieces.
- Now apply silicone on the back and glue the antennae.
Then apply silicone on the neck and glue the ladybug's face, and then glue the wings to the head and body.
Step 5:

- Now it's time to glue the bee, apply silicone to the head and glue it on the body, make sure it's well glued.
- Thread one edge of the ribbon and pull the thread until the ribbon puckers, apply silicone and glue to the neck, then apply silicone all around the bee and glue on foami or cortulina, you will do the same with the ladybug.
- To dress the ladybug, thread red ribbon, gather until you make the skirt and glue to each end of the body, glue a bow in the center.
Step 6:

- Make two loops and glue one to each insect at the top of the head.
Step 7:

- Now with a natural leaf, mark the outline on green foami, make 3, then cut out, heat the iron and place to heat.
- When hot, place on the sponge and press on the leaf to mark the veins.
- Then with darker green chalk go around the edge and outline.
- Now apply silicone on the back and glue the magnet.
- Then glue to your liking on a bowl or place on plants to decorate.


https://es.wikipedia.org/wiki/Coccinellidae
https://es.wikipedia.org/wiki/Anthophila
https://www.pinterest.es/pin/476255729358617872/
I hope you like it and I hope it is useful for everyone.
These figurines can be used as you wish and decorate any object or space.
Now it's my turn to say goodbye but not before mentioning that I used the translator DeepL for my publication.
The HTML tags, the phone is BLU G5 and the photos were edited with GridArt.
Now I hope you liked my tutorial and I'm glad you made it this far and if you like to comment, I'll be glad to answer you.
Thank you for your support.
Regards.

