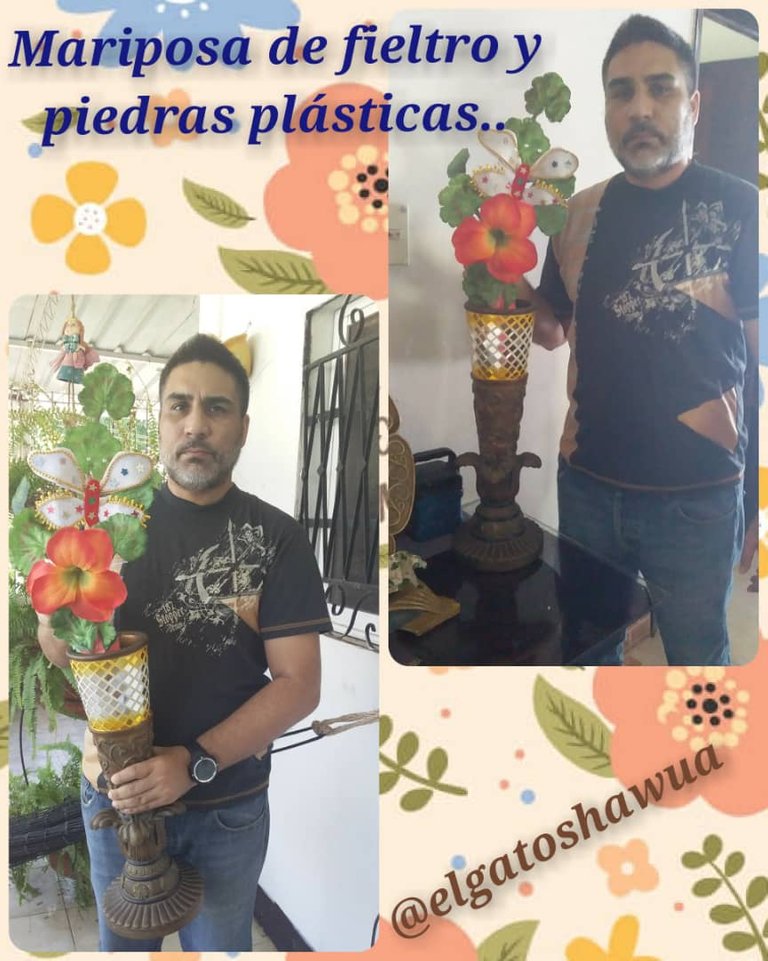
Happy evening my panitas of Hive tonight I want to introduce you to the very nice and practical craft work how is the elaboration of a nice decorative ornament making a butterfly with felt and flower, I encourage you to join me.
Feliz noche mis panitas de Hive la noche de hoy quiero presentarles al trabajo de manualidades muy bonito y práctico cómo es la elaboración de un bonito adorno decorativo elaborando una mariposa con fieltro y flor, les ánimo a que me acompañen.
Materials:
Wire, felt, cardboard, rhinestones, branch, fabric flower, leaves, scissors, silicone.
Materiales:
Alambre, fieltro, cartón, pedrerías, rama, flor de tela, hojas, tijera, silicón.
Step by step:
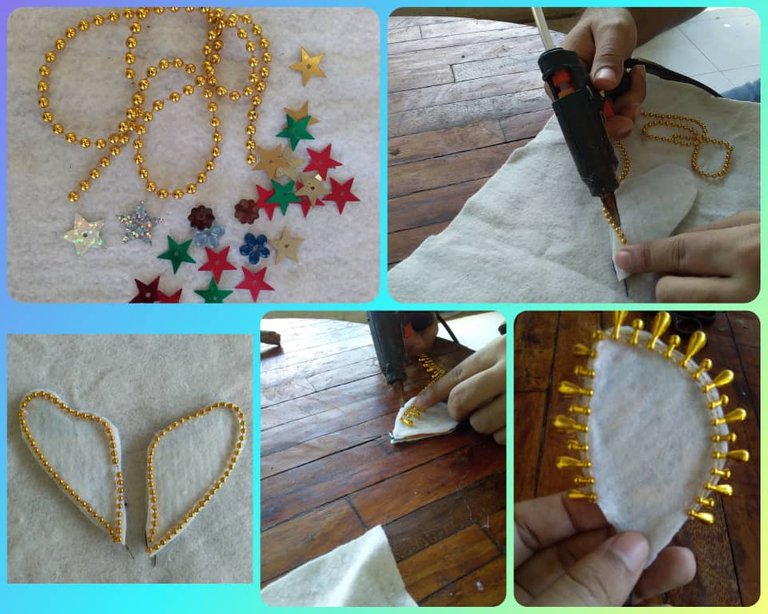
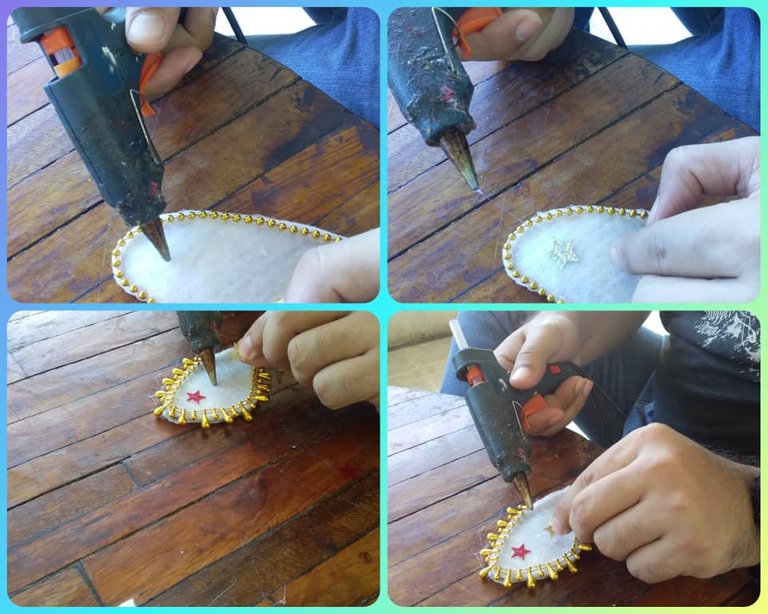
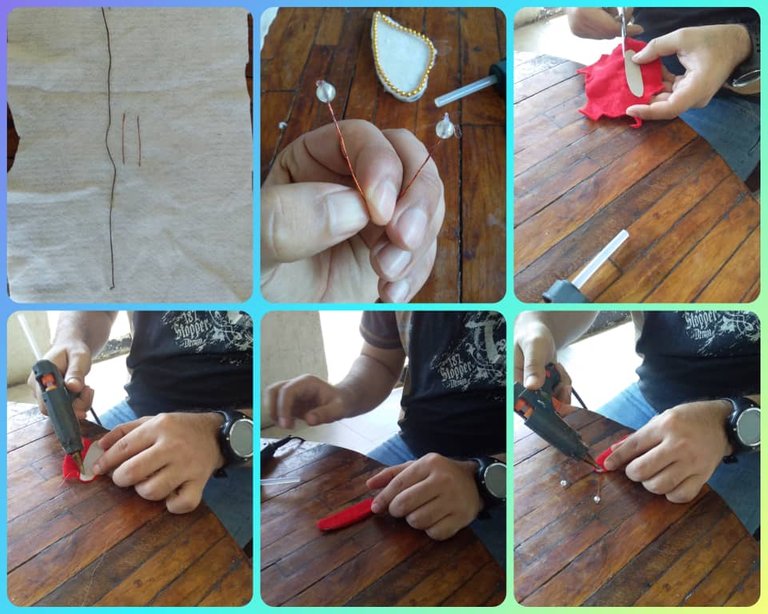
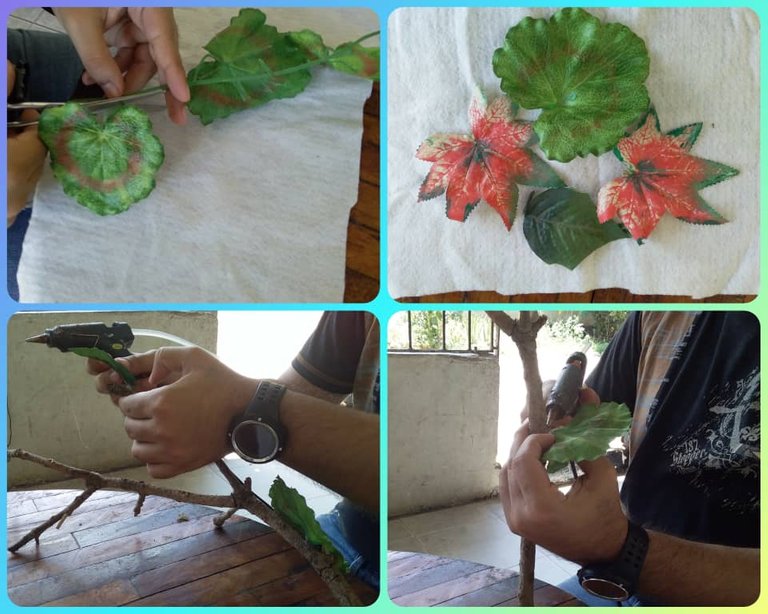
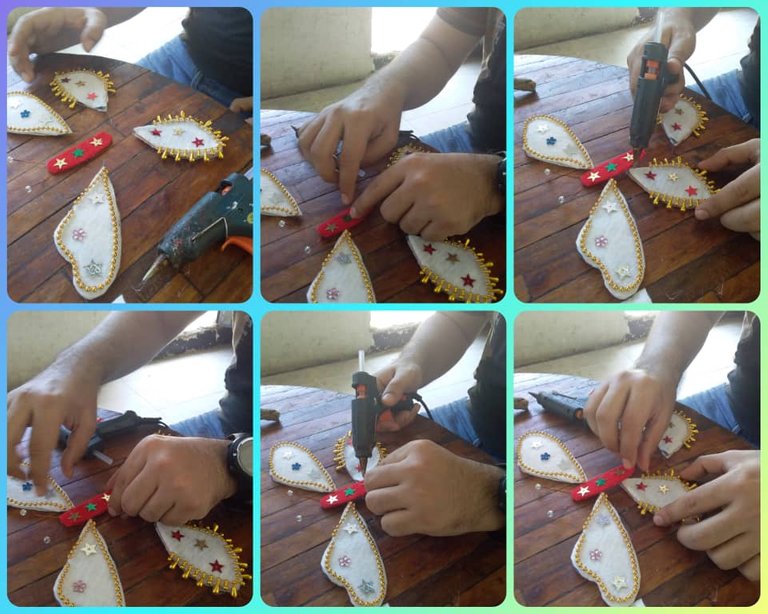
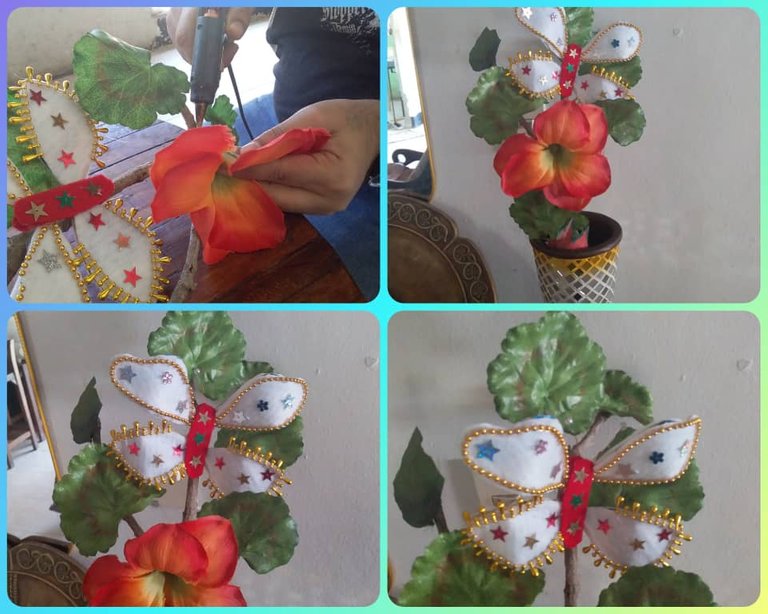
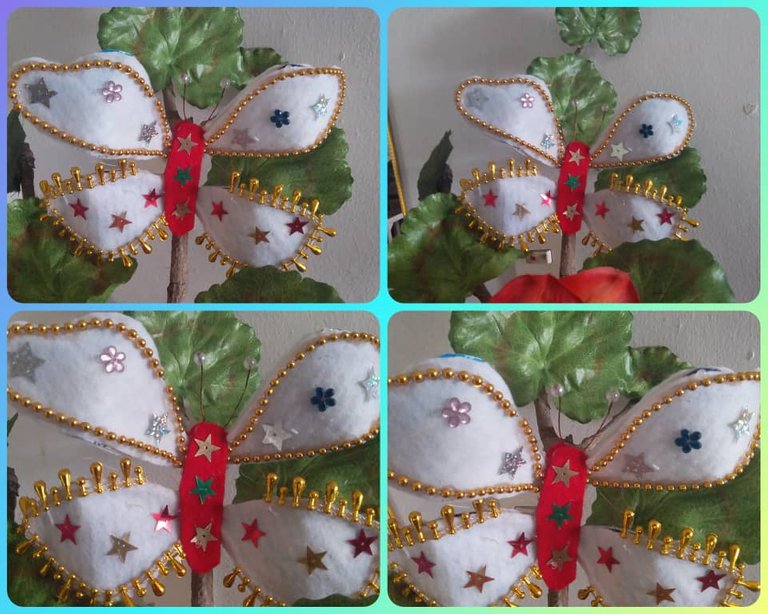
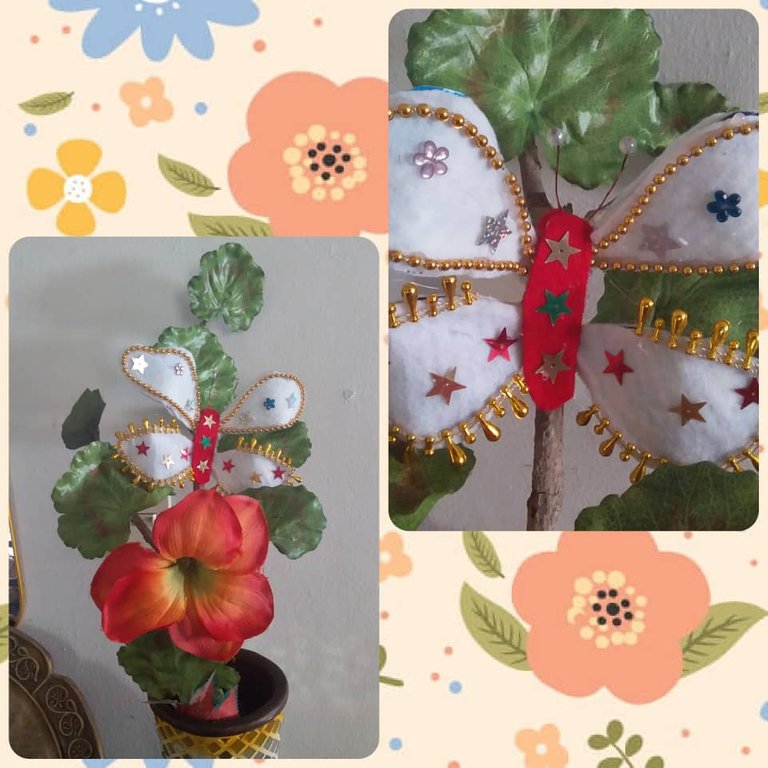
We start this work by making on a sheet the sketch of the petals of the butterfly also make the mold with wire and cover each petal with white felt then glue the rhinestones to give it a better life and with the cardboard we make the center or body of the butterfly then we cover it with red felt to give it a better life. We cover it with red felt when we have each and every one of the pieces ready we glue the petals to the body and we make the wire antenna and in each tip we glue transparent rhinestones when we have all this ready we proceed to glue to the branch with the leaves and the flower remaining in any way and as shown in the photos.

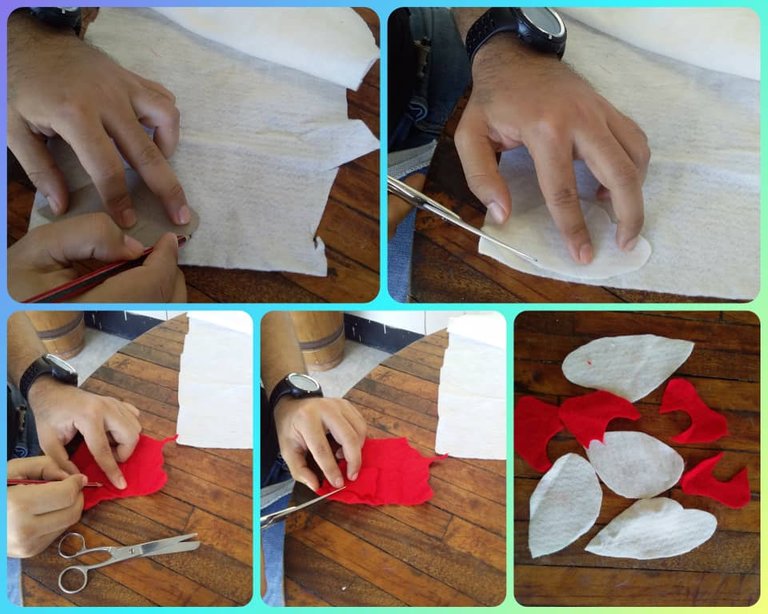
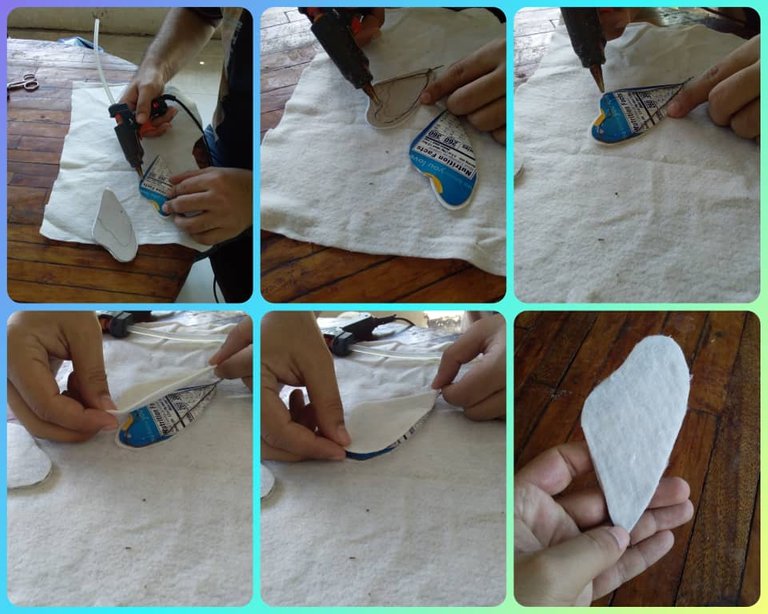
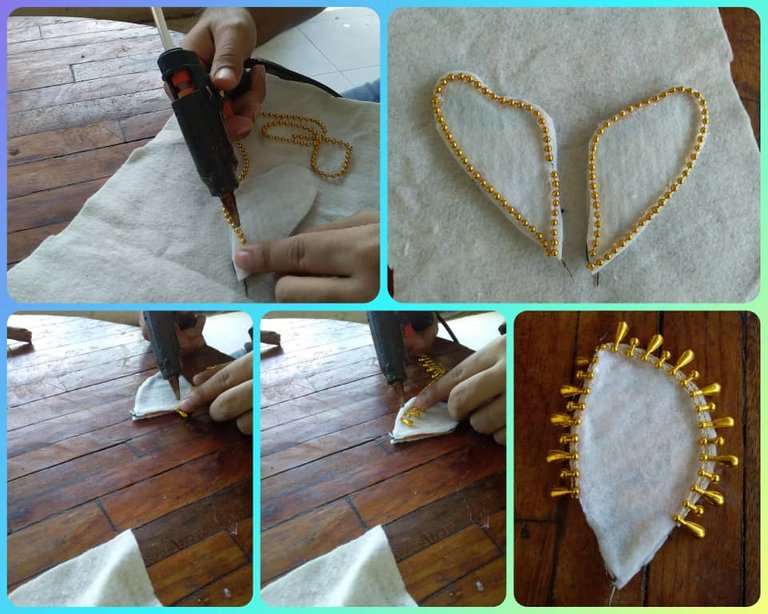
Paso a paso:
Iniciamos este trabajo realizando en una hoja el boceto de los pétalos de la mariposa igualmente hacemos el molde con alambre y lo forramos cada pétalo con el fieltro blanco seguidamente pegamos las pedrerías para darle una mejor vida y con el cartón hacemos el centro o cuerpo de la mariposa luego lo forramos con fieltro rojo al tener todas y cada una de las piezas lista pegamos los pétalos al cuerpo y realizamos la antena alambre y en cada punta pegamos pedrería transparente al tener todo esto listo procedemos a pegar a la rama con las hojas y la flor quedando de todas maneras y como muestran las fotos.
Photos by me @elgatoshawua.
Translated by DeepL.
Fotos de mi autoría @elgatoshawua.
Traducido por DeepL