Saludos comunidad hermosa, espero se encuentren muy bien, y estén pasando momentos maravillosa en la mejor compañía del mundo..
En estos últimos días se ha vuelto tendencia el mundo rosa 👚🌷, por la muñeca mas famosa del mundo, ya de por si amamos el color bueno quizás no todos lo aman pero la mayoría si... jaja y es por esto que cualquier pieza que contenga este color automáticamente entra en esta ola rosa de barbie..
y por supuesto no me iba a quedar atrás, para crear una pieza sencilla pero que le va muy bien a cualquier look que tenga este color o simplemente para dar un toque de color a tu outfit, para iniciar pues son piezas super fáciles de hacer así entremos en la moda 😍💗
Les enseñare a realizar un lindo chocker de mostacillón e inicial (E) elaborado con delica miyuki y unos lindos zarcillos estilo topito de cuarzo rosa.
Así que sigan leyendo para saber como lo haremos 🌷

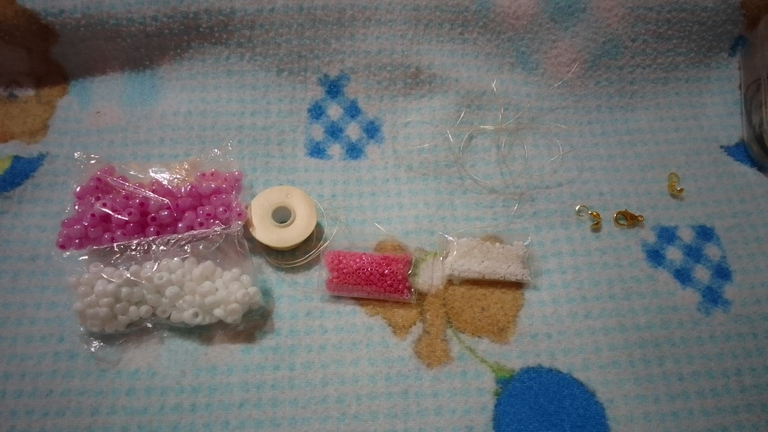
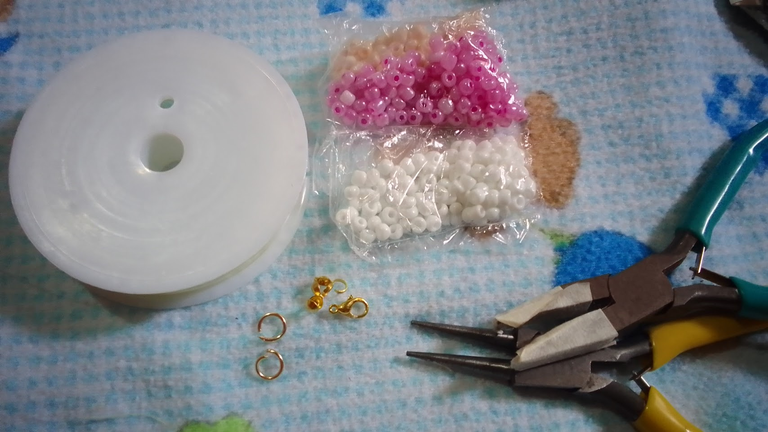
Para el dije de letra:
💗 Delica Miyuki blanco y rosado
💗 hilo nemo para delica
💗 aguja mostacillera
Para el collar
💗 Mostacillón blanco y rosado
💗 hilo nylon
💗 tapa nudos
💗 aros y trancadero pico de loro
Para los zarcillos
💗 cuarzo rosa
💗 alambre calibre 20
💗 herramientas de bisutería

💗 Vamos a hacer el dije de letra (e)
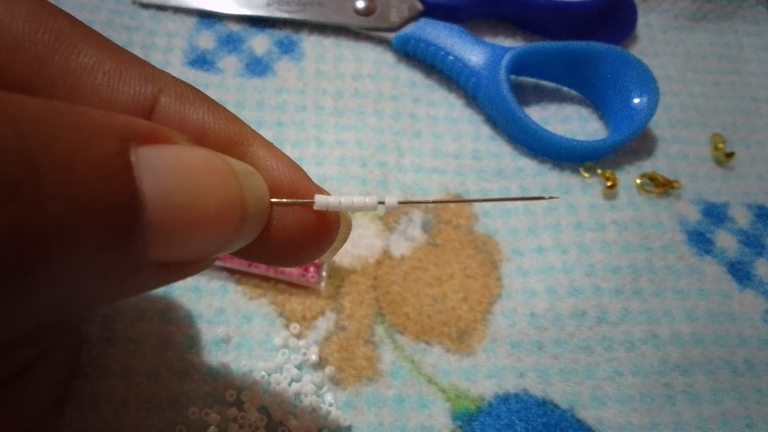
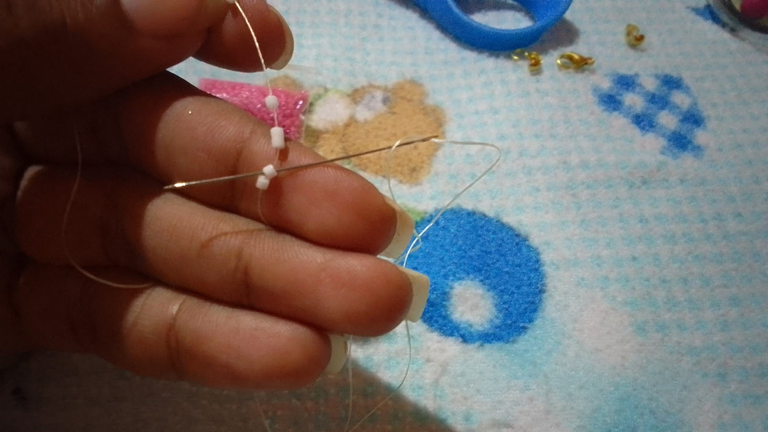
1- Enfilamos en nuestra aguja 6 mostacillas delicas, estas delicas las vamos a colocar con el orificio hacia arriba para poder realizar el tejido, la técnica que usaremos para este tejido es la Brick stitch, bajamos las mostacillas hasta el final del hilo dejando un excedente de 10 cm de hilo si es mas cómodo para ti puedes colocar una mostacilla mas grande al final para que las delicas no se te vayan a salir, en mi caso no utilice esta mostacilla.
 |  |
|---|
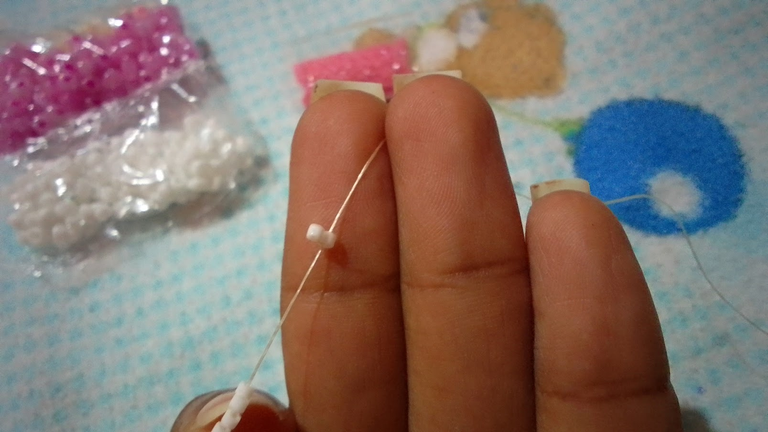
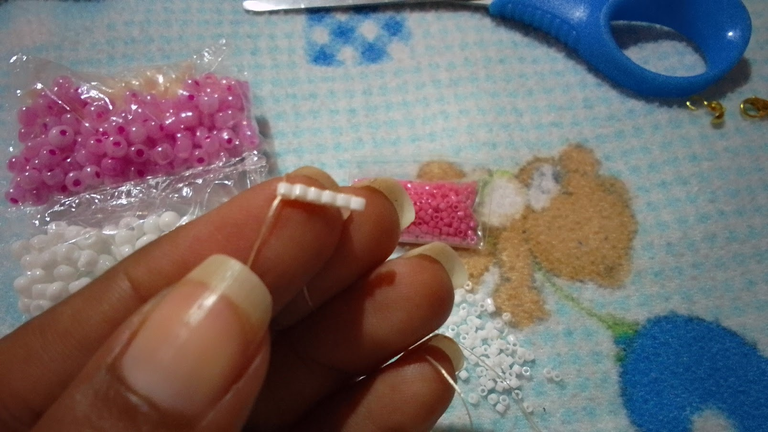
Con mis dedos sujeto el hilo la ultima mostacilla la bajo un poco y meto la aguja por la siguiente mostacilla como muestro en la imagen de arriba hacia abajo para juntarlas. Repito este procedimiento hasta juntar las 6 delicas
 |  |
|---|
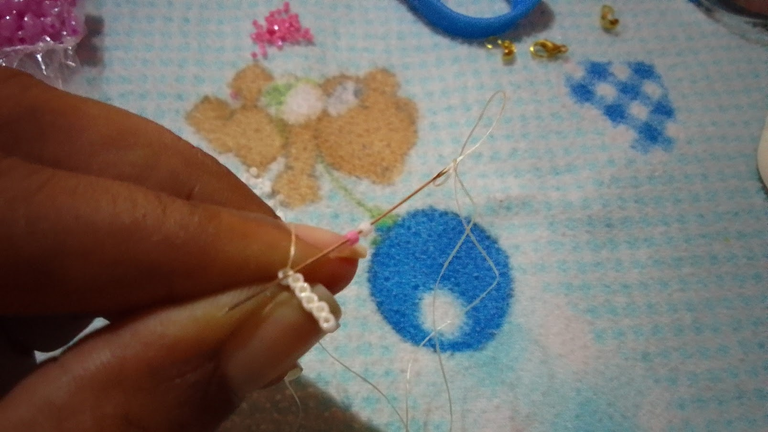
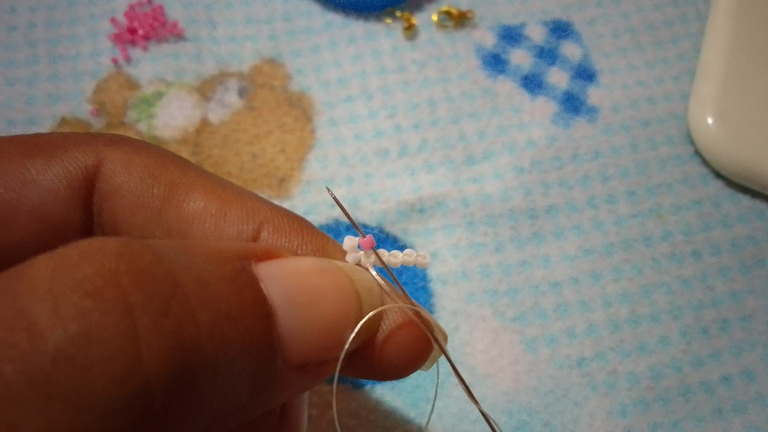
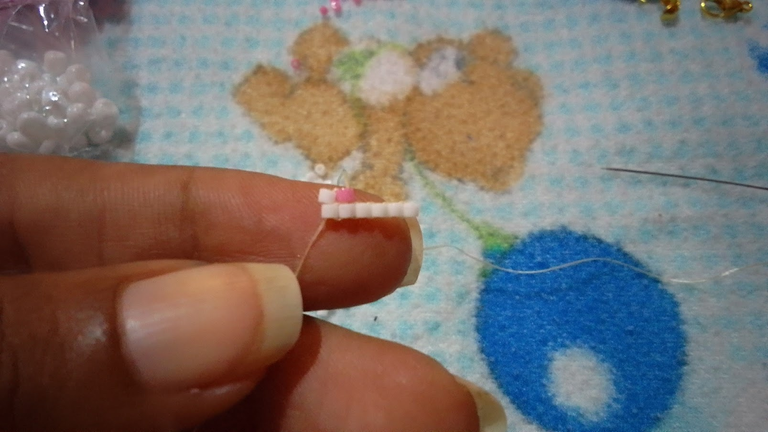
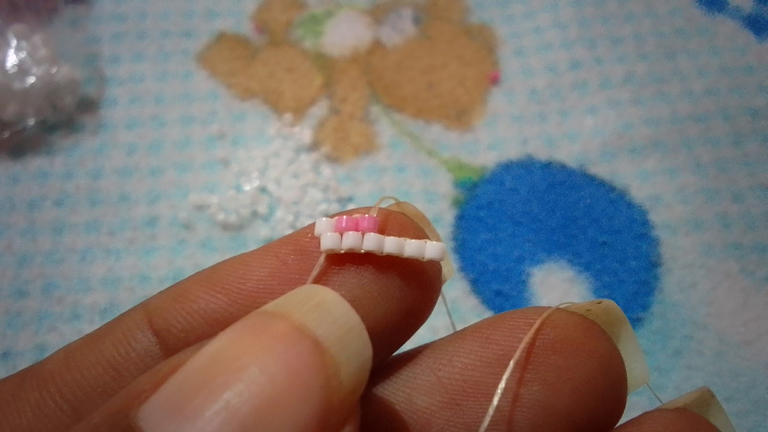
2- Ahora haremos la siguiente fila, en esta realizaremos un aumento en la cantidad de delicas que vamos a colocar, la primera fila fueron 6 en esta serán 7, para ello tomamos dos delicas una blanca y una rosa, pasamos la aguja por el hilo que esta (como se ve en la imagen) llevamos las delicas hasta esa posición encima de la fila anterior y devolvemos la aguja de abajo hacia arriba por la delica rosa para fijar.
 |  |  |
|---|
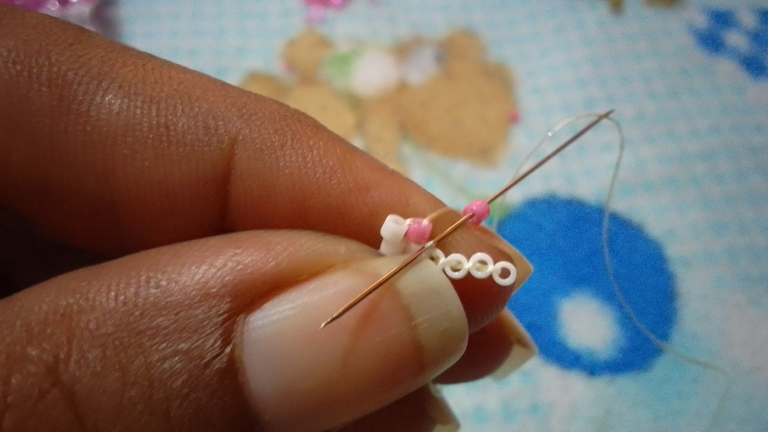
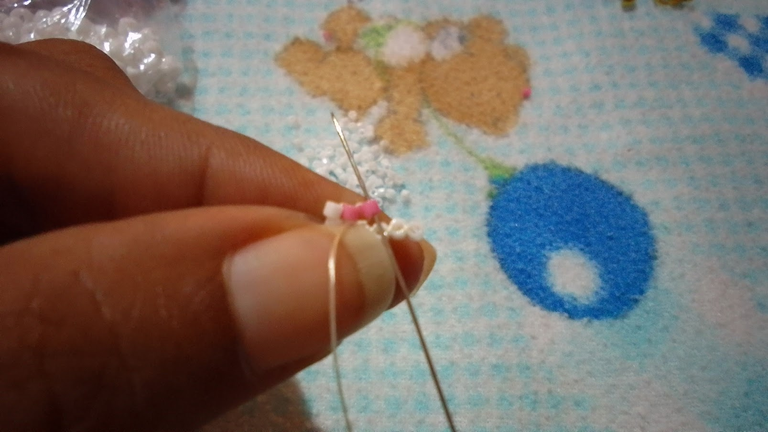
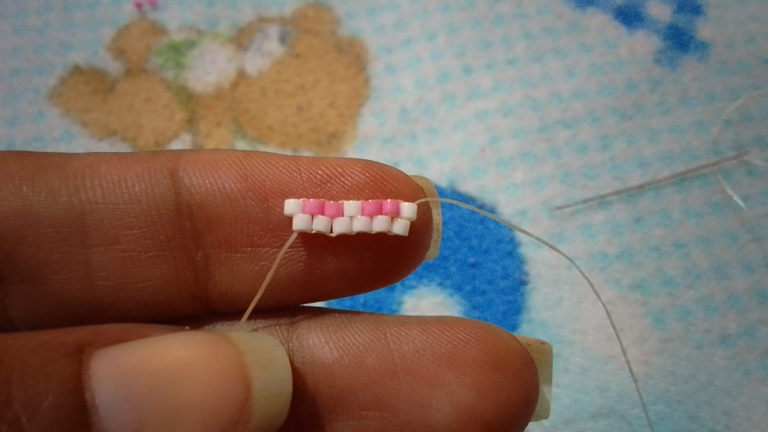
Para continuar y terminar la fila tomamos una delica, pasamos la aguja por el hilo mas cercado llevamos la delica encima de l fila anterior y devolvemos la aguja de abajo hacia arriba por la delica que acabamos de colocar, como se ve en las imágenes
 |  |
|---|---|
 |  |
3- Continuamos el tejido haremos otro aumento siguiendo el paso 2, hasta terminar la fila, al terminar, volvemos a repetir el paso 2 para culminar la ultima fila de aumento y queda así:
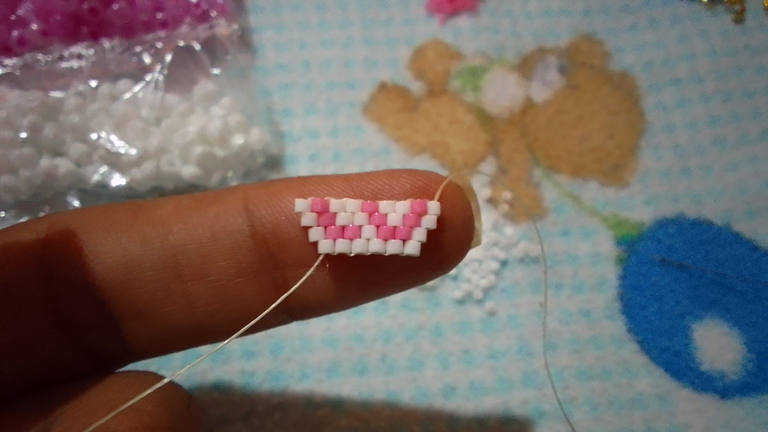
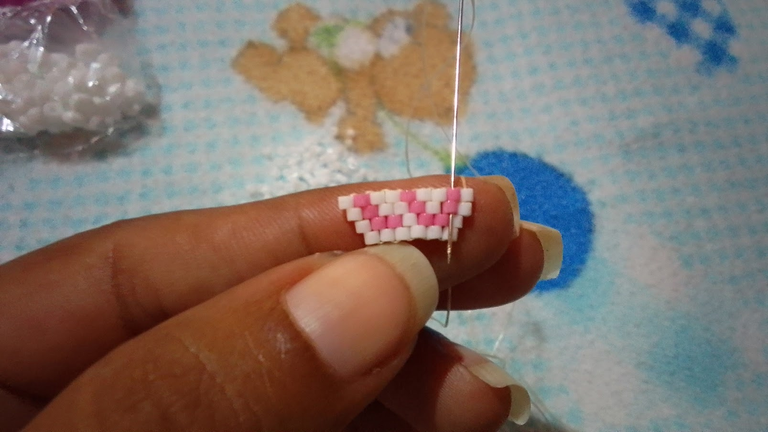
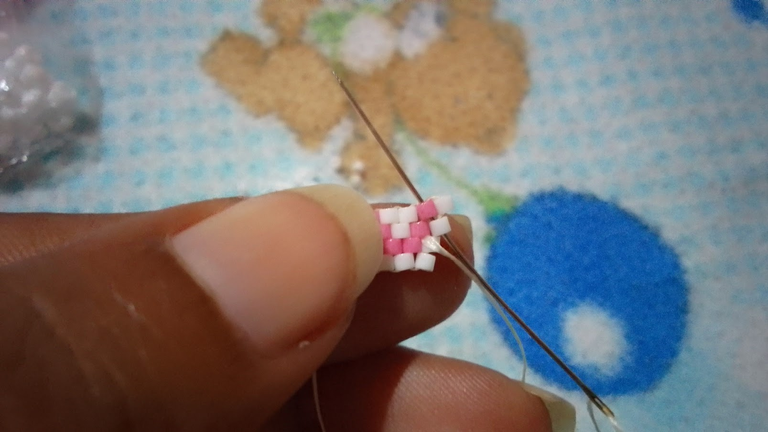
4- En este paso estamos a mitad de la figura, y haremos disminuciones, significa que colocaremos menos mostacillas que la fila anterior, para ellos debemos devolver el hilo y nos ubicaremos siguiendo la imagen anterior en la delica rosa,
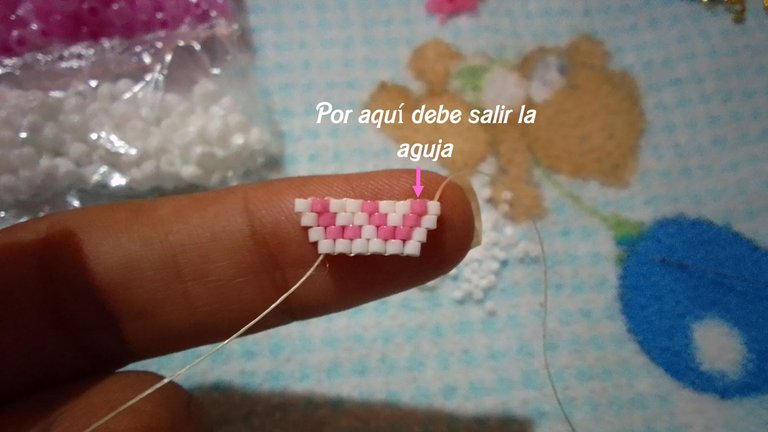
Pasamos la aguja por la delica rosa por donde debemos salir nuevamente, pasamos la delica rosa que le sigue, luego la blanca que esta al lado y luego la delica rosa por donde nos devolvimos y hemos hecho una disminución exitosa 🥰
 |  |
|---|
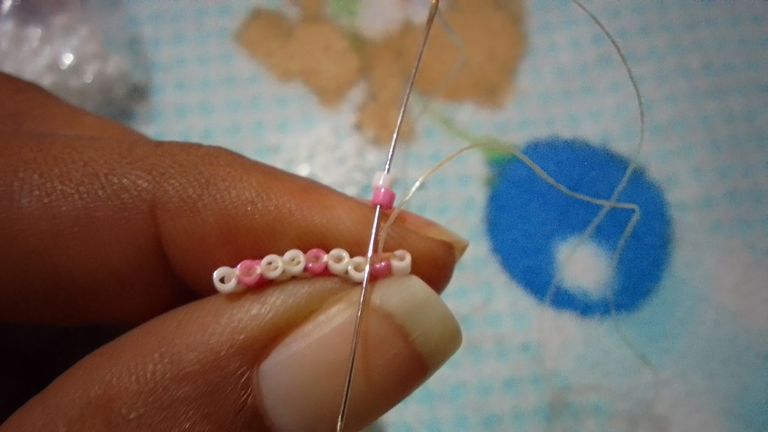
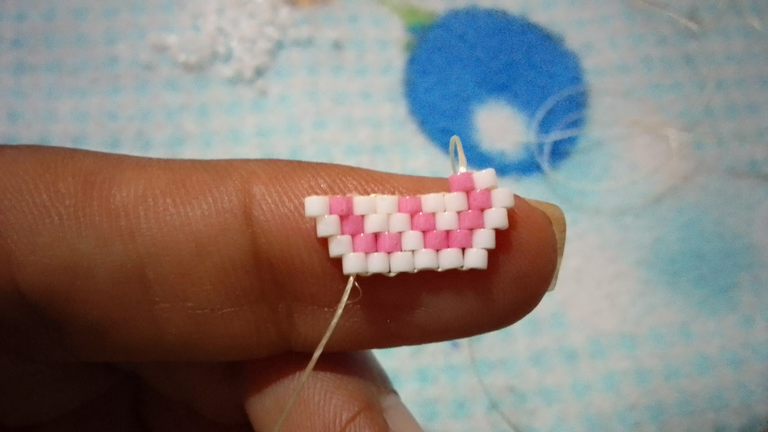
5- Luego comenzamos nuestro tejido colocando dos delicas y pasando el hilo por el mas cercano y devolvemos la aguja de abajo hacia arriba y fijamos, enfilamos una delica y repetimos el paso hasta completar la fila.
 |  |
|---|
6- Al terminar esa fila volvemos a realizar una disminución repitiendo el paso 4, lo haremos hasta culminar la pieza.
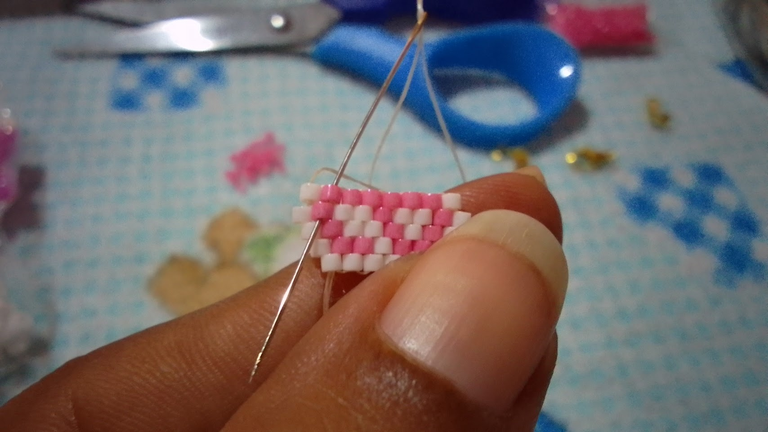 | 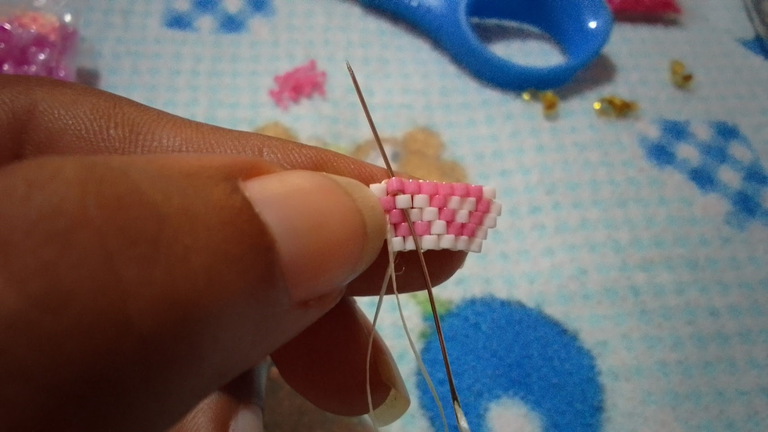 |
|---|---|
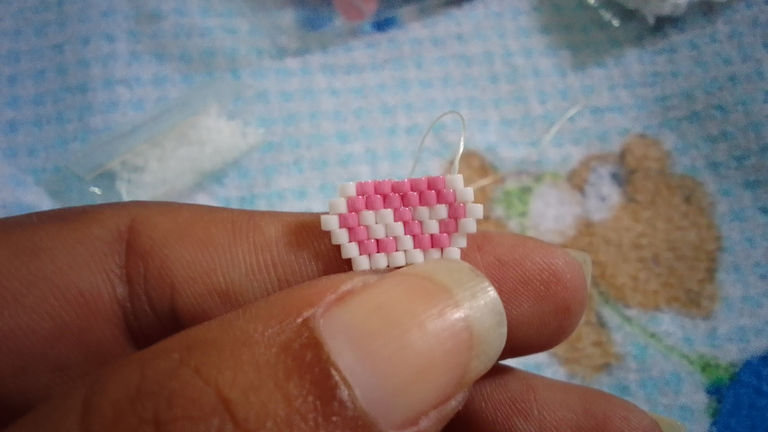 | 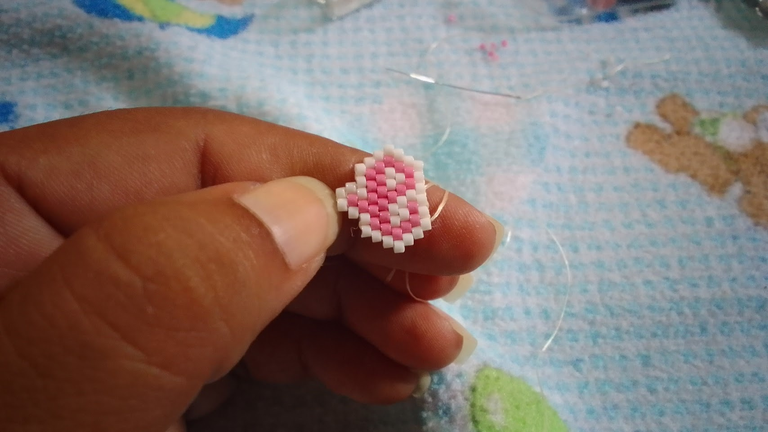 |
En la parte de arriba de la (e) le coloque 6 delicas para hacer una forma de aro para el dije.

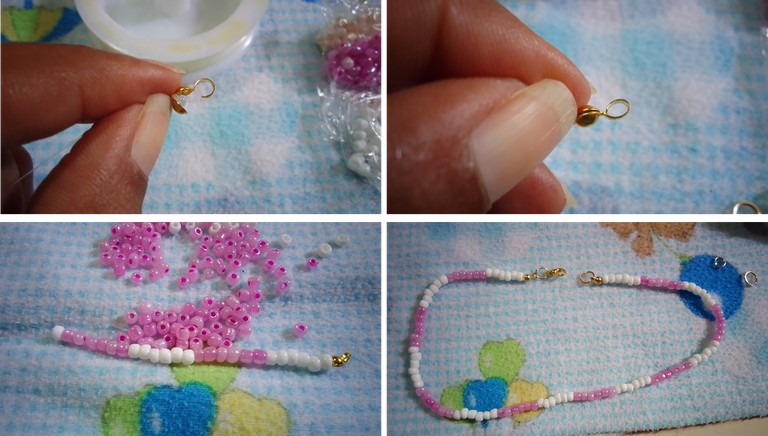
7- Para el choquer, utilice nylon aproximadamente 35 cm, para ello coloque primero un tapa nudo, coloque una mostacilla para amarrar y hacer el nudo, y con una pinza aplique presión y cerré, una vez finalizado agregue mostacillón 6 blancas 6 rosas hasta completar los 35 cm para cerrar, coloque el tapa nudo. coloque los aros y el gancho pico de loro
Luego le coloque el dije de letra (e) ...

8- Para realizar estos zarcillos estilo topito, tome alambre calibre 20 e introduje la piedra de cuarzo rosa, deje aproximadamente 3cm y con el alambre del otro extremo aun sin cortar del rollo, le di 4 vueltas alrededor de la piedra, luego entorche dando dos vueltas en el pedacito de alambre que había dejado anteriormente, corte y doble para hacer el pin del zarcillo.

Y así quedaron estas bellezas 💗💗
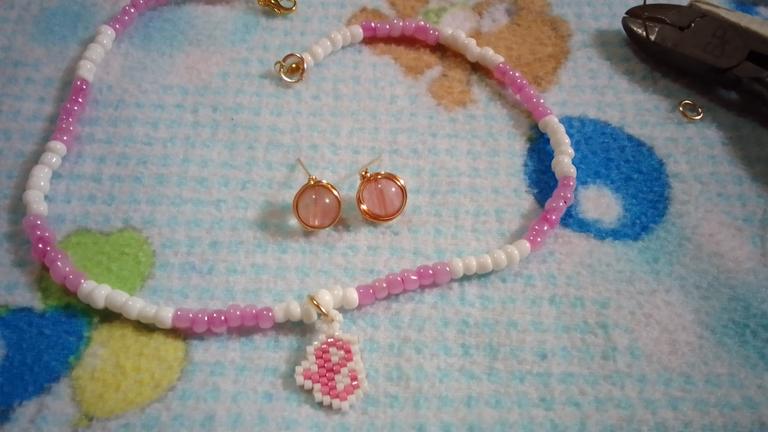
Se ven bien lindo 💗💗


Greetings beautiful community, I hope you are very well, and are having wonderful moments in the best company in the world ....
In recent days the pink world has become a trend 👚🌷, by the most famous doll in the world, and if we love the color well maybe not everyone loves it but most if ... haha and that is why any piece that contains this color automatically enters this pink wave barbie ...
and of course I was not going to stay behind, to create a simple piece but that goes very well to any look that has this color or just to give a touch of color to your outfit, to start because they are super easy pieces to do so let's get into fashion 😍💗
I'll show you how to make a cute chocker with beads and initial (E) made with miyuki delica and some cute rose quartz topito style earrings.
So read on to find out how we will do it 🌷.


For the letter charm:
💗 Delica Miyuki white and pink
💗 nemo thread for delica
💗 mustard needle.
For the necklace
💗 white and pink mustard
💗 nylon thread
💗 knot cover
💗 earrings and parrot's beak locker
For the tendrils
💗 rose quartz
💗 20 gauge wire
💗 costume jewelry tools

💗 Let's make the letter charm (e).
1- We thread on our needle 6 delicas beads, these beads we are going to place them with the hole facing up to be able to make the weave, the technique we will use for this weave is the Brick stitch, we lower the beads until the end of the thread leaving a surplus of 10 cm of thread if it is more comfortable for you you can place a bigger bead at the end so the delicas are not going to come out, in my case I did not use this bead.
 |  |
|---|
With my fingers I hold the thread and pull the last stitch down a little and put the needle through the next stitch as shown in the image from top to bottom to join them. I repeat this procedure until I have joined all the 6 stitches together.
 |  |
|---|
2- Now we will make the next row, in this row we will make an increase in the amount of delicas that we are going to place, the first row were 6 in this will be 7, for this we take two delicas one white and one pink, we pass the needle through the thread that is (as seen in the image) we take the delicas to that position above the previous row and return the needle from bottom to top by the pink delica to fix.
 |  |  |
|---|
To continue and finish the row, we take a delica, pass the needle through the closest yarn, bring the delica on top of the previous row and return the needle from the bottom up through the delica we just placed, as shown in the pictures
 |  |
|---|---|
 |  |
3- We continue knitting, we will make another increase following step 2, until we finish the row, when we finish, we repeat step 2 again to finish the last row of increase and it looks like this:

4- In this step we are in the middle of the figure, and we will make decreases, it means that we will place less beads than the previous row, for them we must return the thread and we will place ourselves following the previous image in the pink delica,
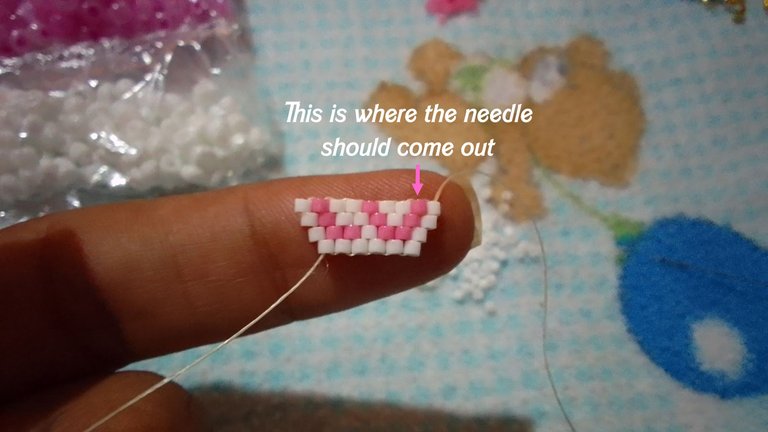
We pass the needle through the pink delica where we must exit again, we pass the pink delica that follows it, then the white one that is next to it and then the pink delica where we returned and we have made a successful decrease 🥰
 |  |
|---|
5- Then we start our knitting by placing two delicas and passing the yarn through the closest one and return the needle from the bottom to the top and fasten off, thread a delica and repeat the step until the row is completed.
 |  |
|---|
6- At the end of this row we make a decrease repeating step 4, we will do it until we complete the piece.
 |  |
|---|---|
 |  |
On the top of the (e) I placed 6 delicas to make a ring shape for the charm.

7- For the choker, use nylon approximately 35 cm, for this first place a knot cover, place a clay mustard to tie and make the knot, and with a clamp apply pressure and close, once finished add clay mustard 6 white 6 roses to complete the 35 cm to close, place the knot cover. place the rings and the parrot beak hook.

Then place the letter pendant (e) ...

8- To make these tendrils topito style, I took 20 gauge wire and introduced the rose quartz stone, I left about 3cm and with the wire at the other end still uncut from the coil, I gave 4 turns around the stone, then twist giving two turns in the piece of wire that had previously left, cut and bend to make the pin of the tendril.

And that's how these beauties turned out 💗💗

They look nice 💗💗💗


Cover and Banner made in canva
photos of my property
titles made in PowerPoint


