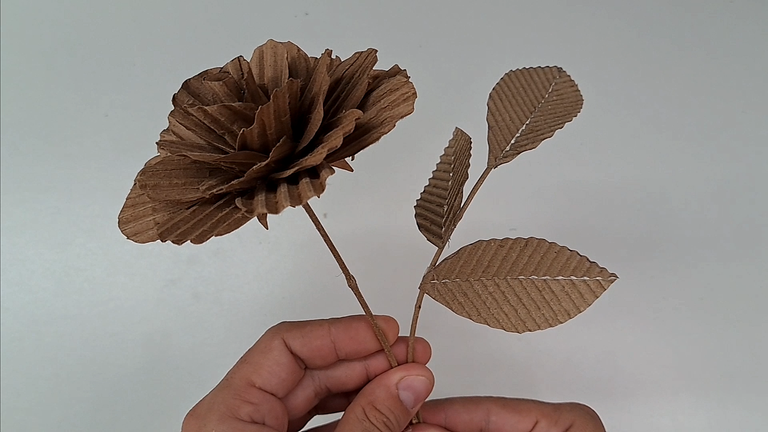
Greetings friends, crafters and craft lovers.
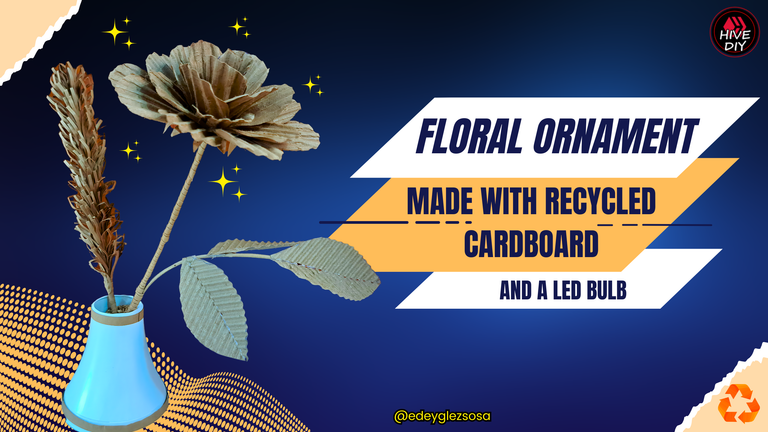
Today I have my green spirit soaring and I want to show you the power of recycling through a simple tutorial where I will show you how to make a beautiful floral ornament with a minimalist touch. The ornament is made from recycled corrugated cardboard and a medium LED bulb that I rescued from the junk. The corrugated cardboard I used is regular cardboard with the outer layers removed.
The ornament will not be accompanied by flashy colors, since the objective is to show the material it is made of and thus create awareness of the importance of recycling and second chances. In the tutorial I show some techniques that you can apply in your crafts, so I invite you to watch it. I hope you enjoy it. Let's start with the tutorial...
Saludos amigos, artesanos y amantes de las manualidades.
Hoy tengo el espíritu ecológico por las nubes y quiero mostrarles el poder del reciclaje a través de un simple tutorial donde les enseñaré a confeccionar un hermoso adorno floral con un toque minimalista. El adorno está elaborado a partir de cartón ondulado reciclado y un bombillo LED mediano que rescaté de la chatarra. El cartón ondulado que utilizo es cartón normal al cual le he retirado las capas exteriores.
El adorno no estará acompañado de llamativos colores, ya que el objetivo es mostrar el material del que está hecho y así crear conciencia de la importancia del reciclaje y las segundas oportunidades. En el tutorial enseño algunas técnicas que pueden aplicar en sus manualidades, así que los invito a verlo. Espero que lo disfruten. Comencemos con el tutorial…
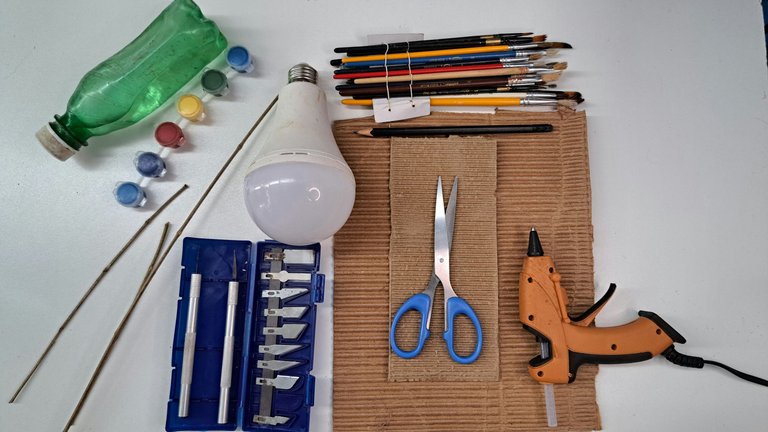
Materials // Materiales
| ✔️ Recycled corrugated cardboard | ✔️ Cartón reciclado ondulado |
| ✔️ LED bulb | ✔️ Bombillo LED |
| ✔️ Dry branches | ✔️ Ramas secas |
| ✔️ Paint and brushes | ✔️ Pintura y pinceles |
| ✔️ Scissors | ✔️ Tijeras |
| ✔️ Pencil | ✔️ Lápiz |
| ✔️ Cutting and milling set | ✔️ Set de corte y tallado |
| ✔️ Hot silicone | ✔️ Silicona caliente |
Step by step // Paso a paso
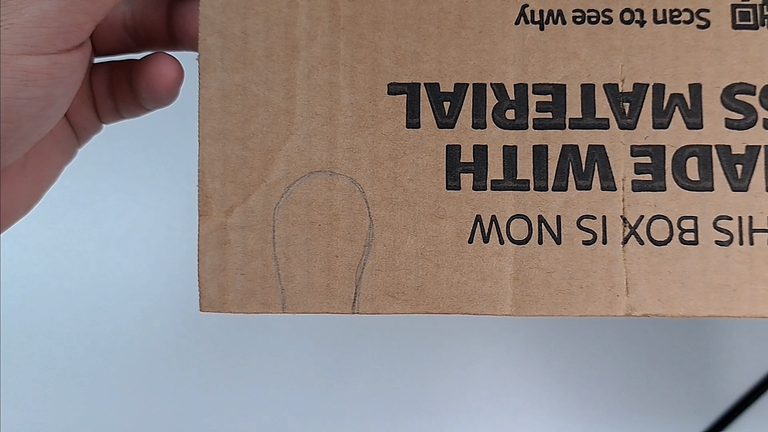
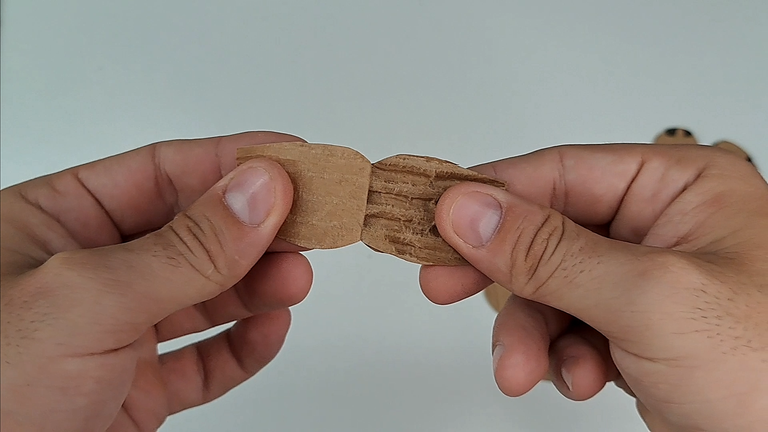
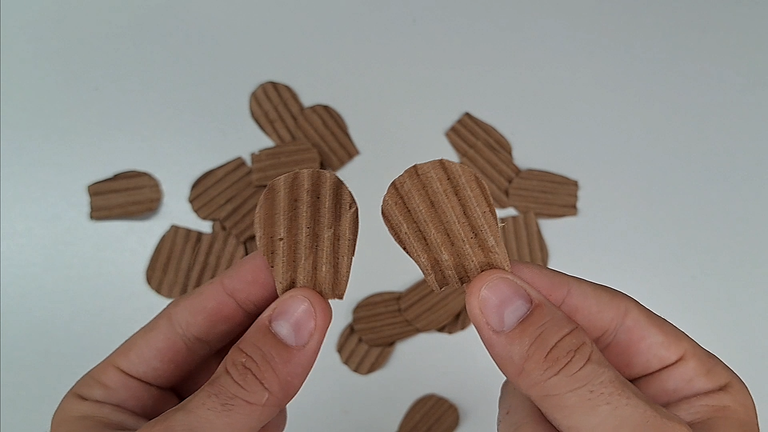
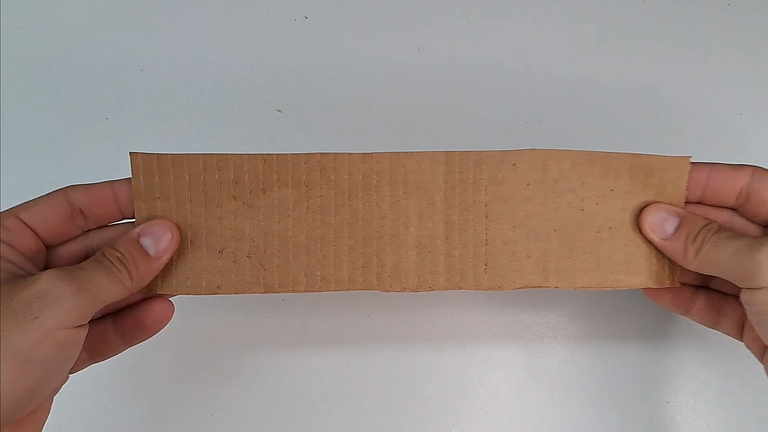
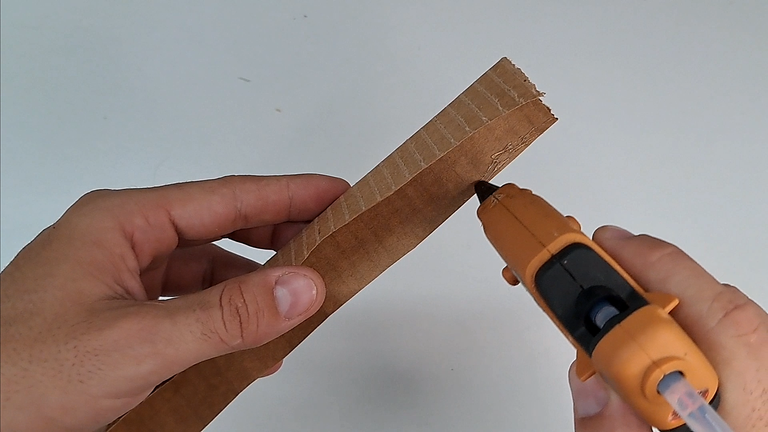
1️⃣ Mark and cut out 20 petals on a piece of corrugated cardboard. Remove the flat side of the cardboard to obtain petals that are corrugated on both sides. Be careful when separating the petals, as they become very fragile when the two smooth sides of the cardboard are removed.
Marcar y recortar 20 pétalos en una pieza de cartón ondulado. Retirar la parte plana del cartón para obtener pétalos ondulados en ambas caras. Tener cuidado al separar los pétalos, ya que se vuelven muy frágiles al retirarles las dos caras lisas del cartón.
 |
 |
 |
 |
 |
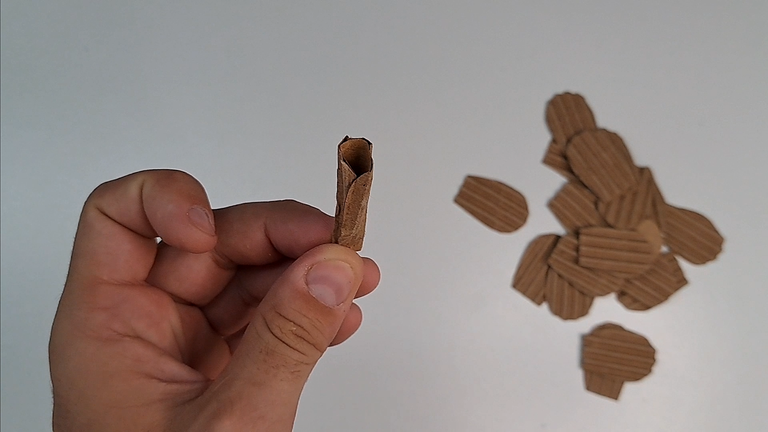
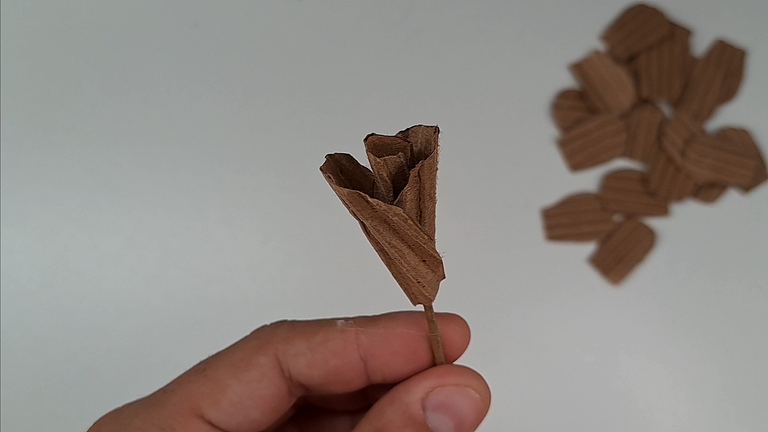
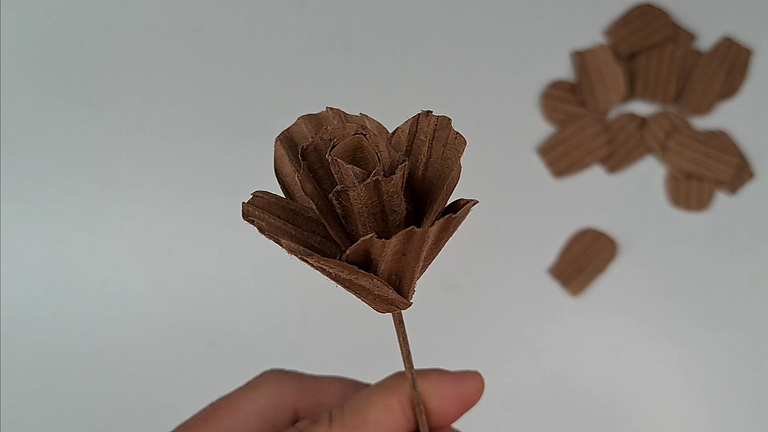
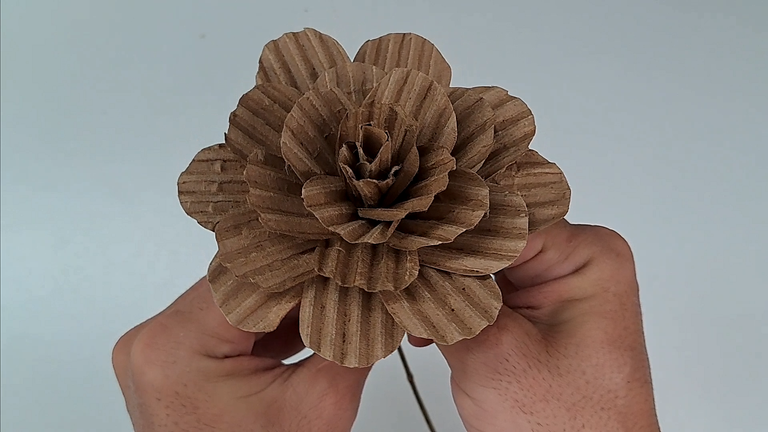
2️⃣ Roll up one of the petals and glue it to the end of one of the branches. Continue gluing the rest of the petals, layer by layer, and arch the petals so that the flower is open. Arch the outer petals to make the flower even more open.
Enrollar uno de los pétalos y pegarlo en el extremo de una de las ramas. Continuar pegando el resto de los pétalos, capa por capa e ir arqueando los pétalos para que la flor quede abierta. Arquear los pétalos exteriores para que la flor quede aún más abierta.
 |
 |
 |
 |
 |
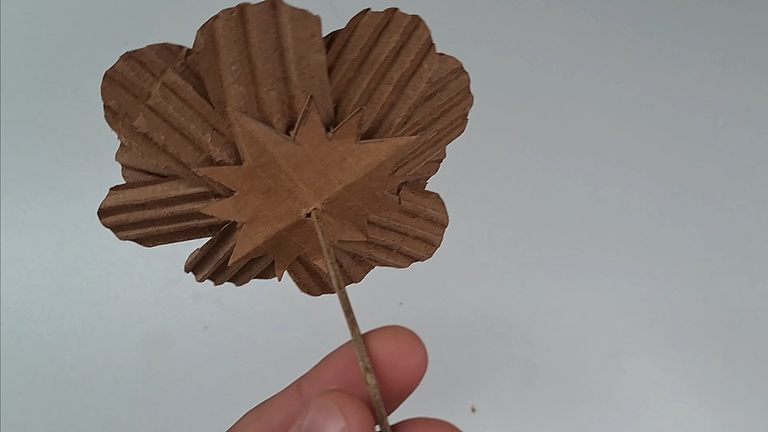
3️⃣ On one of the cardboards taken from the corrugated cardboard, mark and cut out the sepal. Pierce the sepal and insert it through the other end of the branch to the base of the flower to glue it. Arch the tips of the sepals so that they point downward.
En una de las cartulinas extraídas del cartón ondulado, marcar y recortar el sépalo. Agujerear el sépalo e introducirlo por el otro extremo de la rama hasta la base de la flor para pegarlo. Arquear las puntas de los sépalos para que apunten hacia abajo.
 |
 |
 |
 |
 |
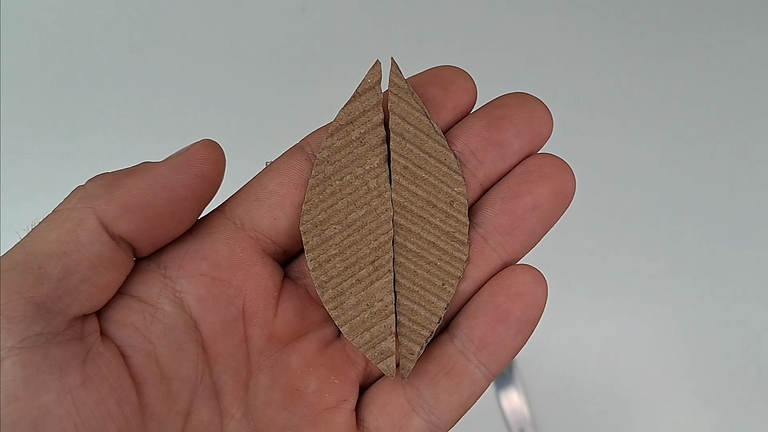
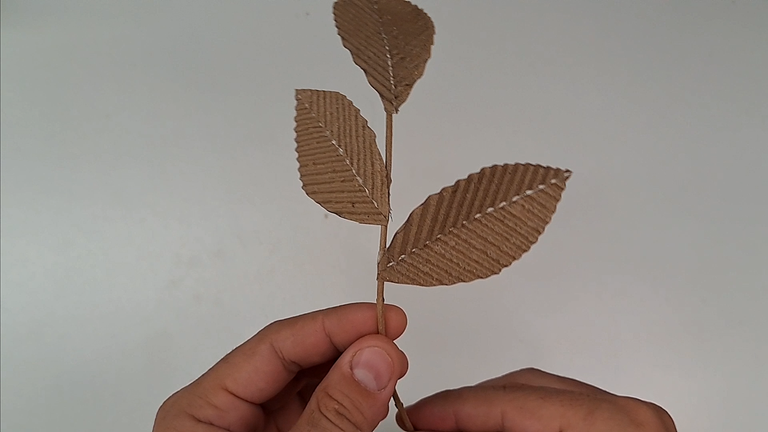
4️⃣ On corrugated cardboard, mark and cut out the outline of a leaf. Cut the leaves in half, invert one side and glue them back together. On another thinner branch, glue the leaves. Glue the branch with leaves to the stem of the flower and wrap with thin strips of cardboard or cardboard.
En cartón ondulado, marcar y recortar la silueta de una hoja. Cortar las hojas por la mitad, invertir uno de los lados y volver a pegarlas. En otra rama más fina, pegar las hojas. Pegar la rama con hojas al tallo de la flor y envolver con finas tiras de cartulina o cartón.
 |
 |
 |
 |
 |
 |
 |
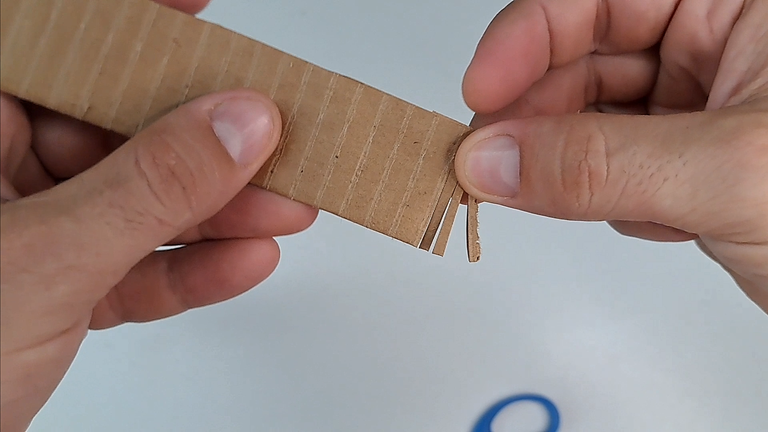
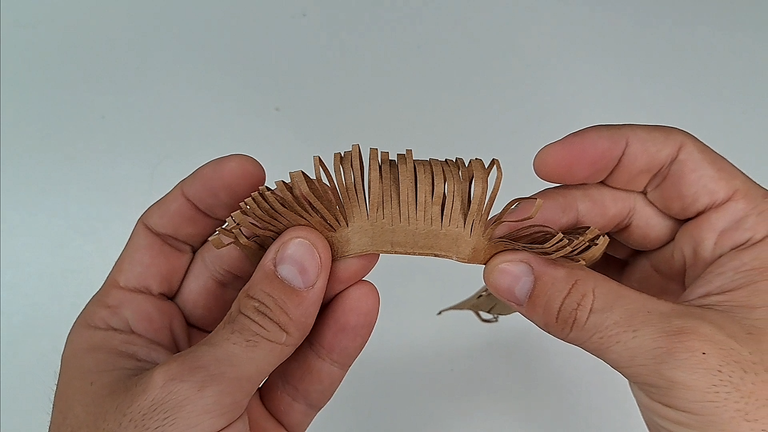
5️⃣ For the spike cut out a piece of cardboard or cardboard and glue it in half. Then make small cuts on the back of the cardboard and wrap it in a spiral around a thin branch.
Para la espiga recortar una pieza de cartulina o cartón y pegarla por la mitad. Luego hacer pequeños cortes en el reverso de la cartulina y enrollar en forma de espiral alrededor de una rama fina.
 |
 |
 |
 |
 |
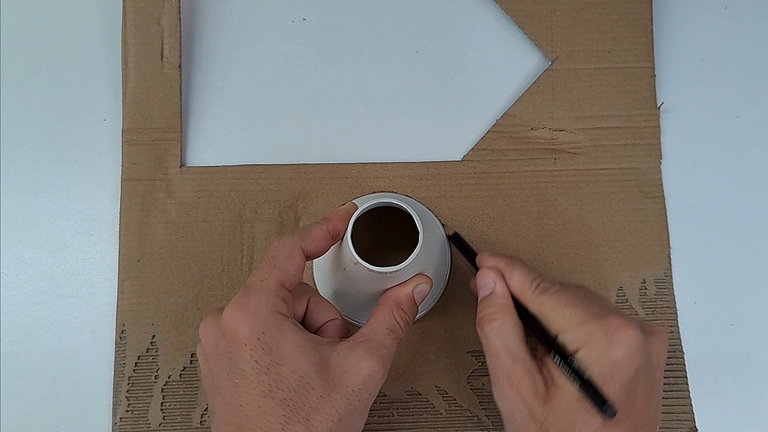
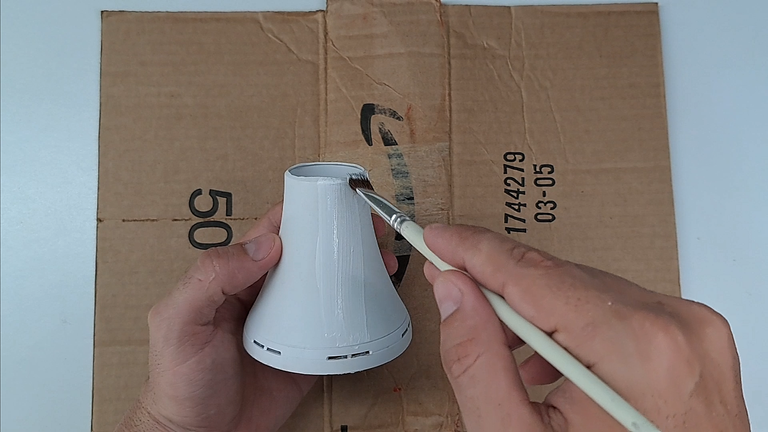
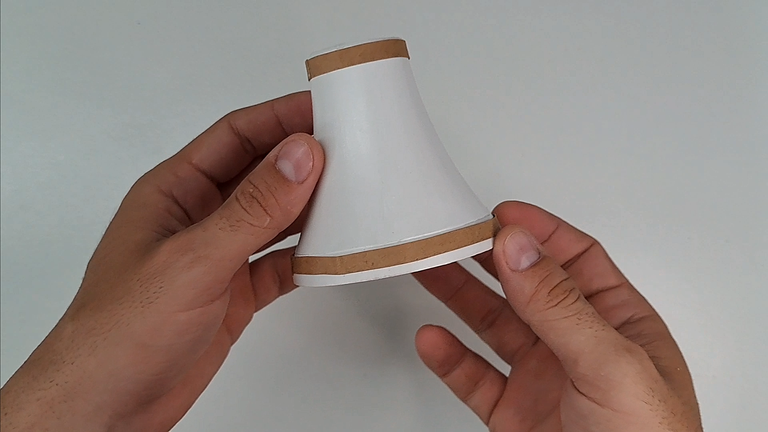
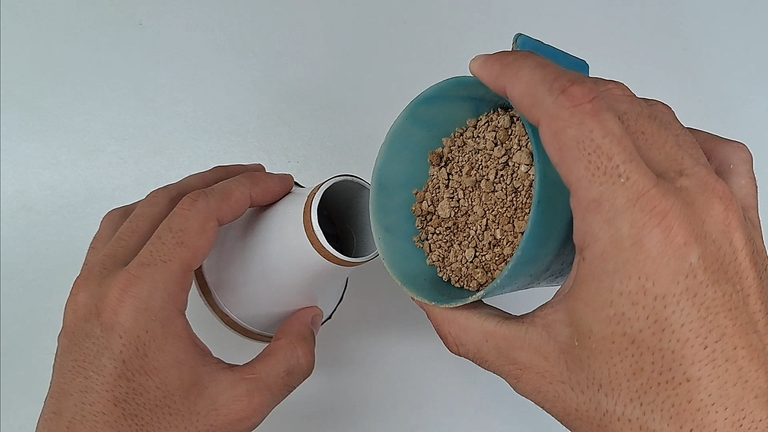
6️⃣ An LED bulb will be used for the base. Separate the bulb part and cut out the metal part. On a piece of cardboard, mark and cut out a circle that will be glued to the wide part of the socket to seal that end. Paint the baseboard white. Once dry, glue thin strips of cardboard on the ends and fill with sand or some heavy material.
Para la base se usará un bombillo LED. Separar la parte del foco y cortar la parte metálica. En una pieza de cartón, marcar y recortar un círculo que se pegará en la parte ancha del zócalo para sellar ese extremo. Pintar de blanco el zócalo. Una vez seco, pegar en los extremos unas finas tiras de cartulina y rellenar con arena o algún material pesado.
 |
 |
 |
 |
 |
 |
 |
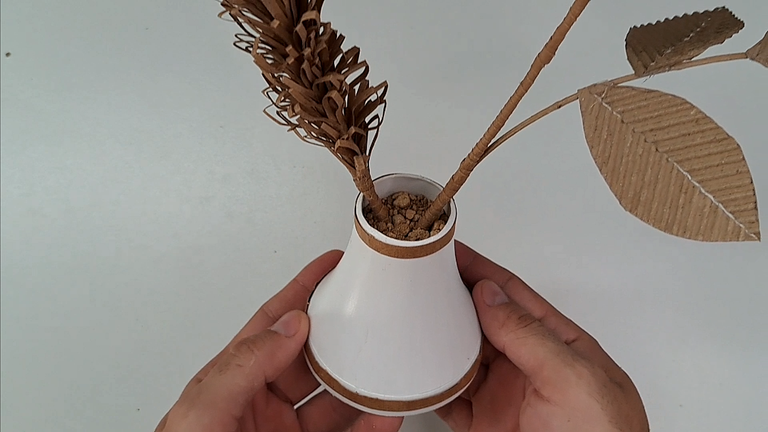
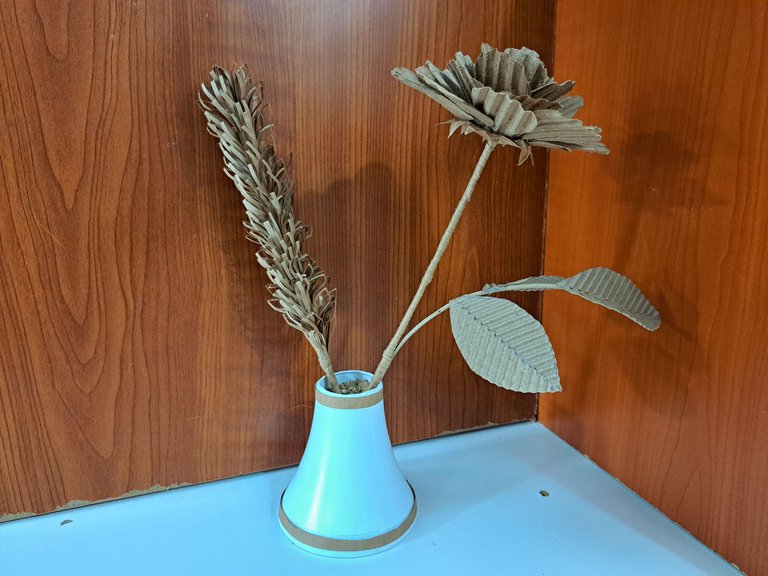
7️⃣ Put the flower and the spike in place. Be careful not to break the branches of the flower or the spike. Add more filler to the pot if necessary.
Coloca la flor y la espiga en su lugar. Ten cuidado de no quebrar las ramas de la flor o la espiga. Agrega más relleno a la maceta en caso de ser necesario.
 |
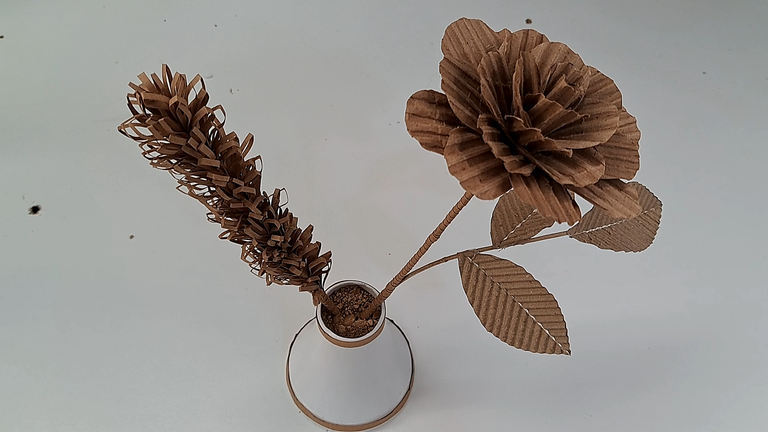 |
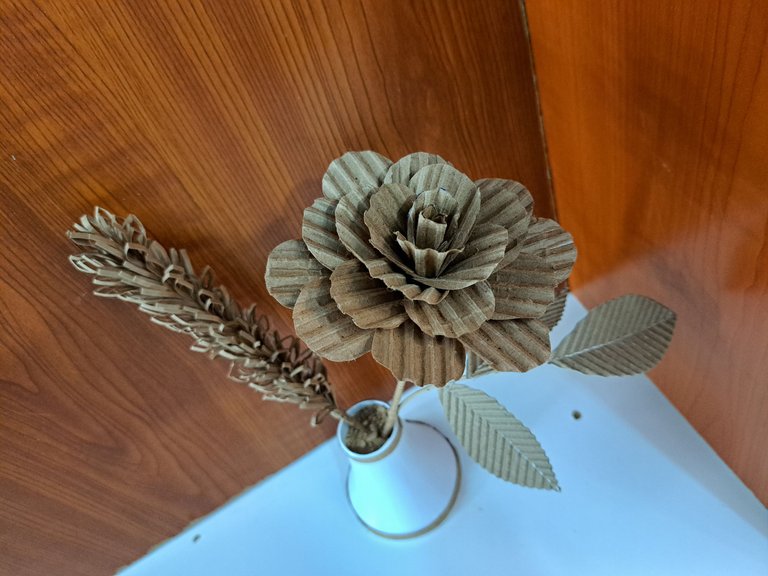
Finished Work // Trabajo Terminado
Once again, we come to the end of the tutorial. I hope it has been interesting as well as instructive. Don't forget that I encourage you to leave me any questions or suggestions in the comments. I wish you a happy and prosperous journey. See you soon.
Una vez más, llegamos al final del tutorial. Espero que haya sido interesante a la vez que instructivo. No olviden que los animo a dejarme cualquier duda o sugerencia en los comentarios. Les deseo una feliz y próspera jornada. Nos vemos próximamente.
 |
 |
 |
 |
 |

Thank you very much for reading my post. If you liked it, please leave a comment and consider following me so you don't miss my next posts. I'd love to know your opinion and your thoughts about the topic I discussed in this post, see you in the next one!
Credits and Resources // Créditos y Recursos
Cover page created in Canva
Translated by DeepL
Video and images captured with my Samsung Galaxy A53 5G
Edited in Wondershare Filmora 13
Music by Thomas Mwangi from Pixabay


▶️ 3Speak


