Greetings community.
In the gardening world there is a popular belief that in every garden lives a fairy who works all spring and part of the summer to make the flowers look beautiful. The point is that sometimes they work so hard that they don't have time to build themselves a shelter for the winter. That is why sometimes we can see tiny houses in some gardens and many people build these houses for the fairies in gratitude for the great work they do.
With this in mind, I decided to build a little house for the fairy in my garden. So today I bring you a tutorial where I will show you how to make a fairy house for the garden. I'll be using recycled materials and fomi cutouts.
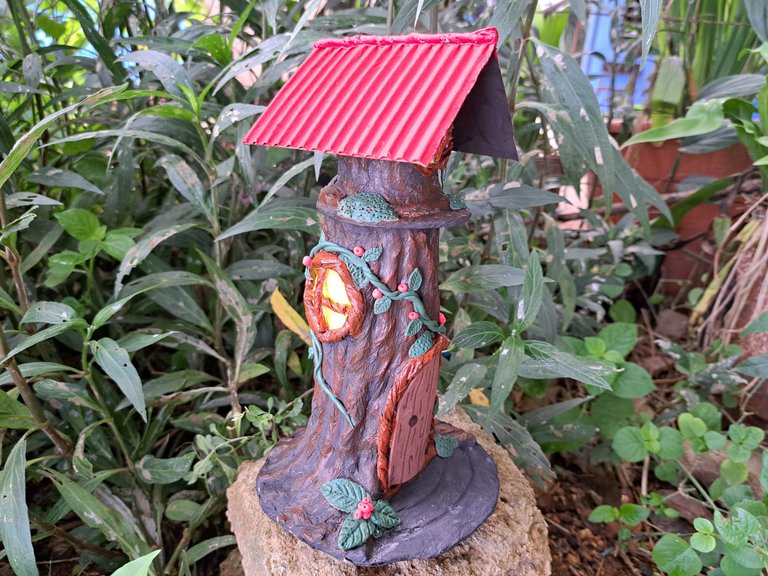
The design of the house is inspired by a tree trunk covered by some moss and a strawberry vine. I hope you like it. Let's start with the tutorial.
Saludos comunidad.
En el mundo de la jardinería existe una creencia popular de que en cada jardín vive un hada que trabaja toda la primavera y parte del verano para lograr que las flores luzcan hermosas. La cuestión es que a veces se esfuerzan tanto que no les da tiempo construirse un refugio para el invierno. Es por eso que en algunas ocasiones podremos ver casitas diminutas en algunos jardines y es que muchas personas construyen esas casas para las hadas en agradecimiento por el gran trabajo que realizan.
Teniendo esto en cuenta, decidí construir una pequeña casita para el hada de mi jardín. Así que el día de hoy les traigo un tutorial donde les mostraré cómo confeccionar una casa de hadas para el jardín. Estaré utilizando materiales reciclados y recortes de fomi.
El diseño de la casa está inspirado en un tronco de árbol cubierto por algo de musgo y una enredadera con frutilla. Espero que les guste. Comencemos con el tutorial.
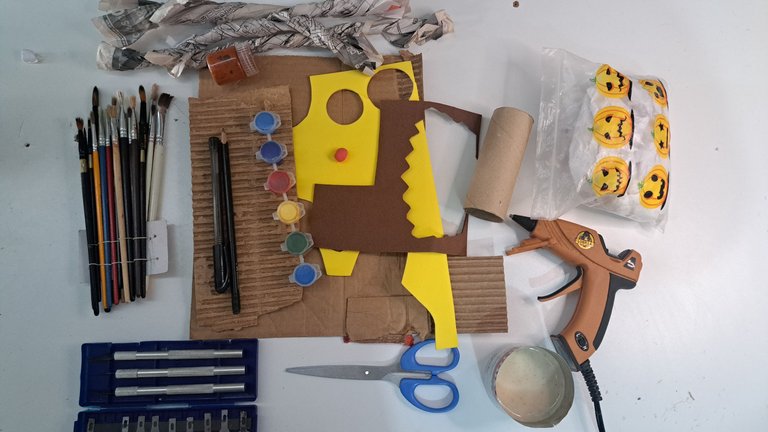
Materials // Materiales
| ✔️ Cardboard tubes | ✔️ Tubos de cartón |
| ✔️ Recycled cardboard | ✔️ Cartón reciclado |
| ✔️ Yellow and carmelite fomi | ✔️ Fomi amarillo y carmelita |
| ✔️ Magazine paper | ✔️ Papel de revista |
| ✔️ Kitchen paper | ✔️ Papel de cocina |
| ✔️ Green, black, red and carmelite paint. | ✔️ Pintura de color verde, negro, rojo y carmelita |
| ✔️ Brushes | ✔️ Pinceles |
| ✔️ Pencil and marker | ✔️ Lápiz y marcador |
| ✔️ Cutting and milling set | ✔️ Set de corte y tallado |
| ✔️ Scissors | ✔️ Tijeras |
| ✔️ Hot silicone | ✔️ Silicona caliente |
Step by step // Paso a paso
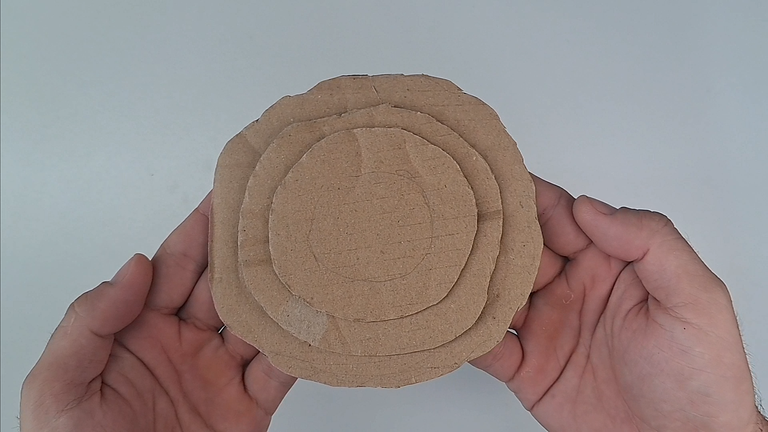
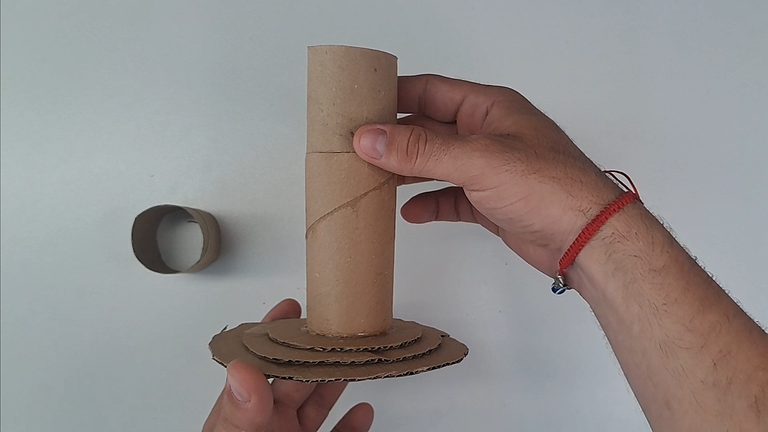
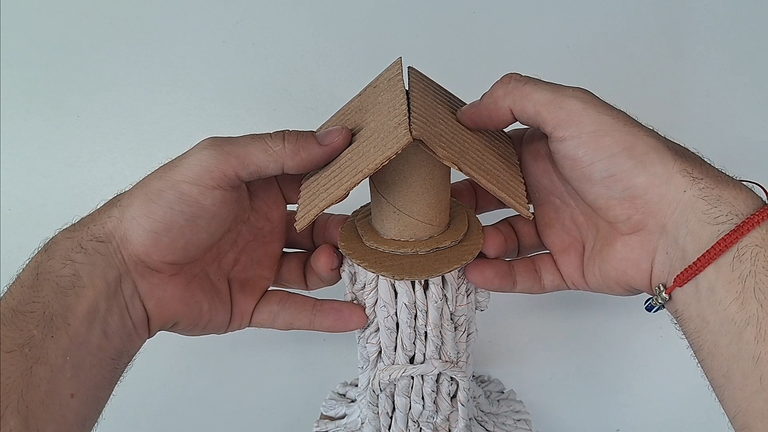
1️⃣ Mark and cut out three circles with irregular edges and staggered sizes. Glue them together to form the base and in the middle glue one and a half cardboard tubes. Repeat the process for the upper floor but on a smaller scale and glue both parts together.
Marcar y recortar tres circunferencias con bordes irregulares y de tamaños escalonados. Pegarlas para formar la base y en el medio pegar un tubo y medio de cartón. Repetir el proceso para el piso superior pero a menor escala y pegar ambas partes.
 |
 |
 |
 |
 |
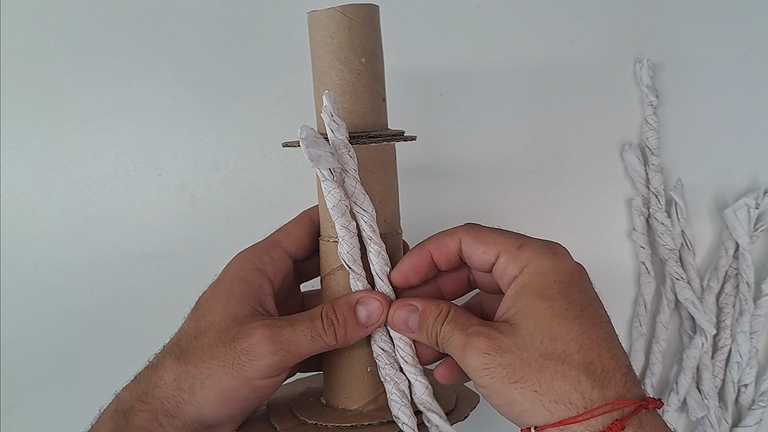
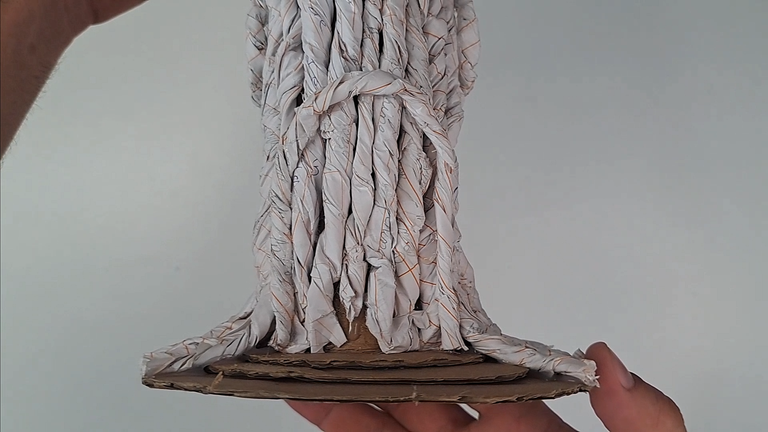
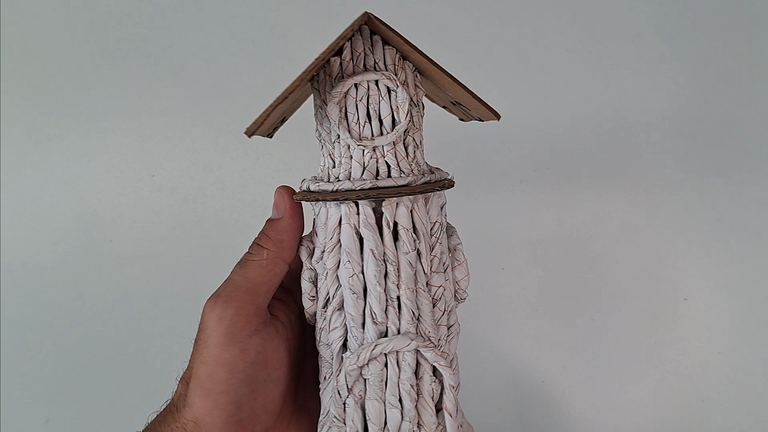
2️⃣ Twist several sheets of magazine paper and glue them around the bottom floor. Create the silhouettes of two windows and a door using the same twisted paper.
Torcer varias hojas de papel de revista y pegarlas alrededor del piso inferior. Crear las siluetas de dos ventanas y una puerta utilizando el mismo papel torcido.
 |
 |
 |
 |
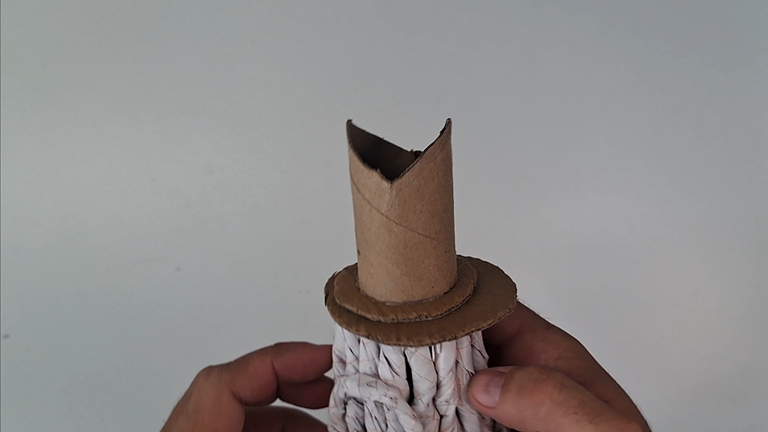
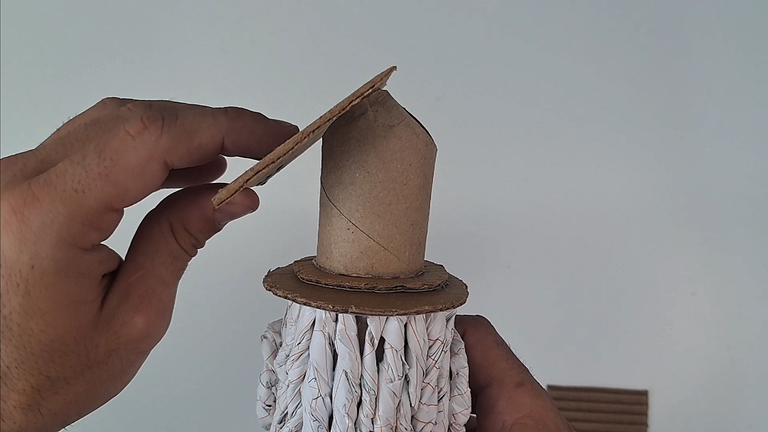
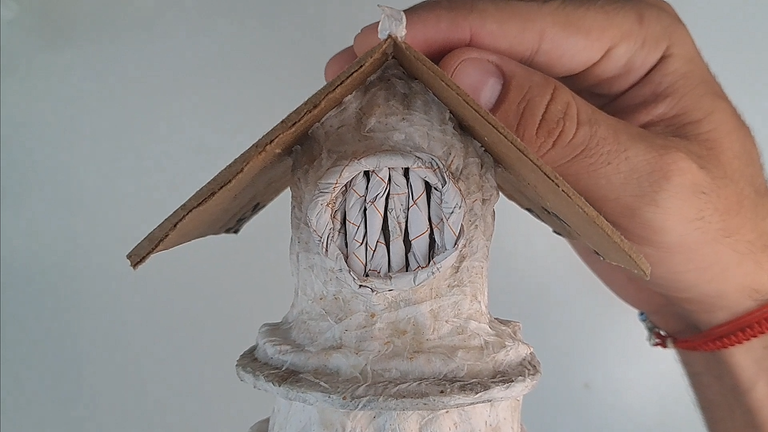
3️⃣ Place the roof on top using a few sheets of corrugated cardboard. Finish covering the entire structure with twisted paper and mark a smaller window on the front.
Colocar el techo en la parte superior utilizando unas láminas de cartón ondulado. Terminar de cubrir toda la estructura con papel torcido y marcar una ventana más pequeña en la parte frontal.
 |
 |
 |
 |
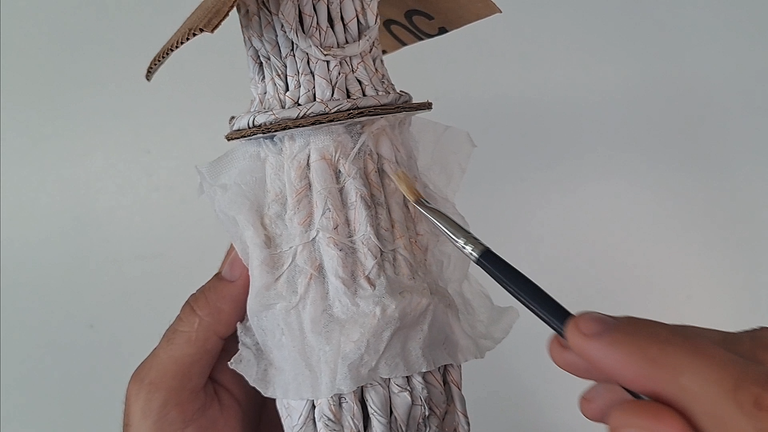
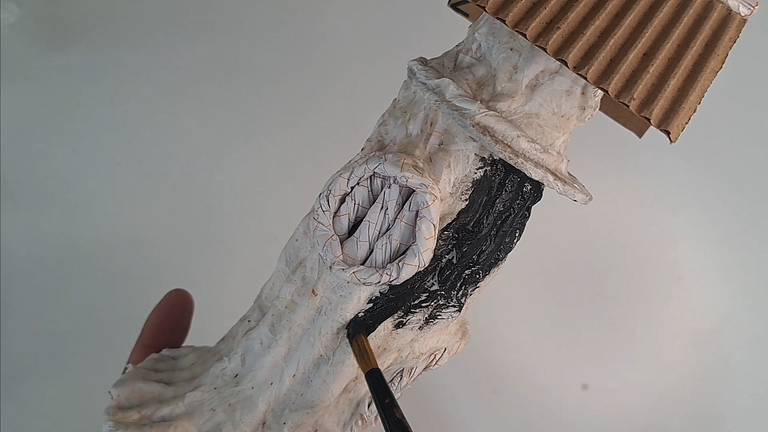
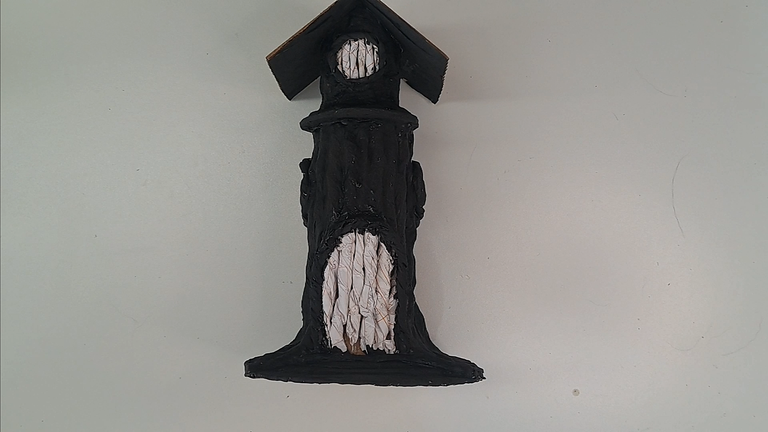
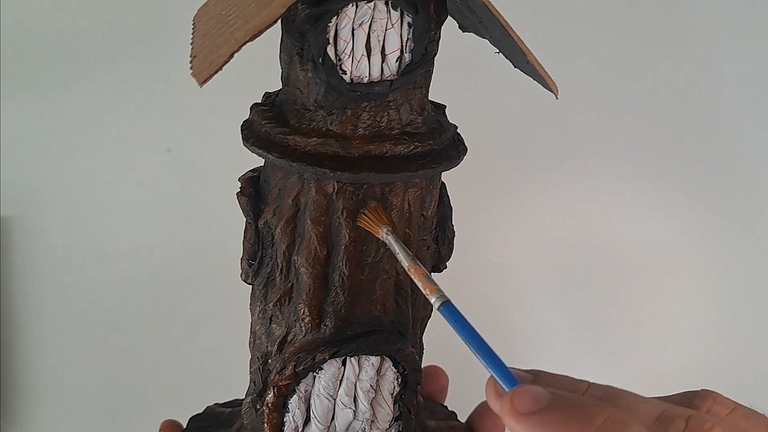
4️⃣ Apply an even coat of kitchen paper and flour glue to the entire structure except the ceiling. Paint all walls black. Using the dry brush technique, apply a light carmelite finish to the walls and with a stronger carmelite cover the edge of the windows and door. Paint the ceiling a deep red.
Aplicar una capa uniforme de papel de cocina y pegamento de harina a toda la estructura, excepto al techo. Pintar de negro todas las paredes. Con la técnica de pincel seco, aplicar un acabado de color carmelita claro a las paredes y con un carmelita más fuerte cubrir el borde de las ventanas y la puerta. Pintar de rojo intenso el techo.
 |
 |
 |
 |
 |
 |
 |
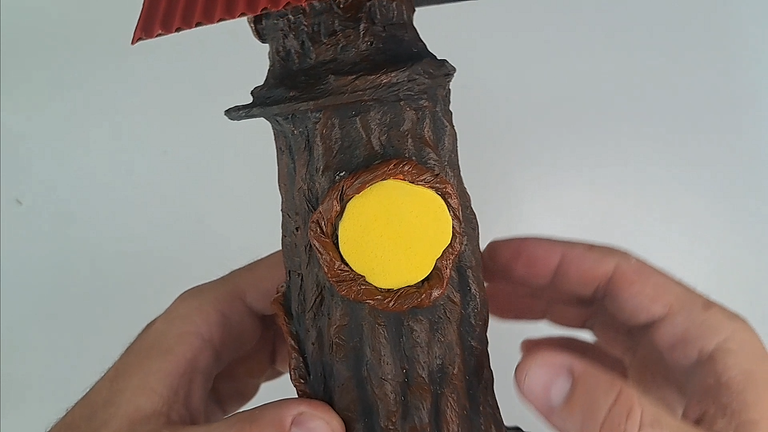
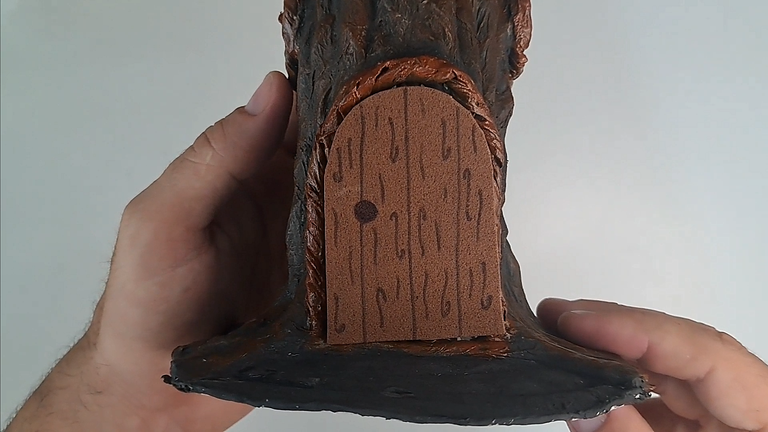
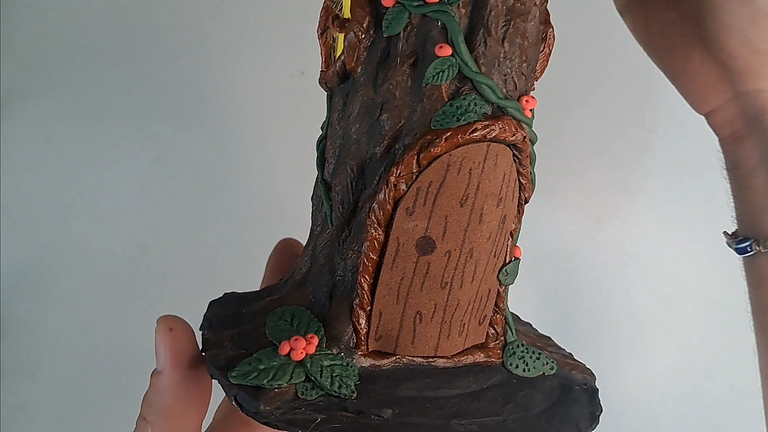
5️⃣ Twist thin sheets of paper and paint them brown. Cut out circles of fomi rubber and glue them on the windows. Glue the thin twisted sheets in the shape of a cross. Cut out the silhouette of the door in carmelite fomi and draw a wooden pattern using a fine tip black marker. Glue the door in place.
Torcer finas hojas de papel y pintarlas de color carmelita. Recortar círculos de goma fomi y pegarlos en las ventanas. Pegar en forma de cruz las hojas finas torcidas. Recortar la silueta de la puerta en fomi carmelita y dibujar un patrón de madera utilizando un marcador negro de punta fina. Pegar la puerta en su lugar.
 |
 |
 |
 |
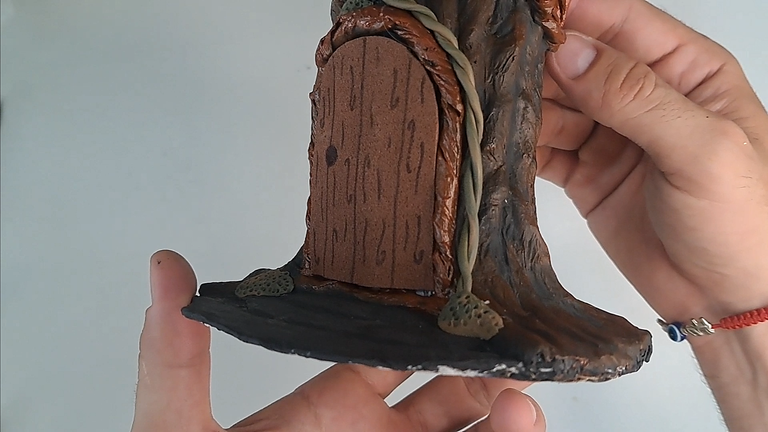
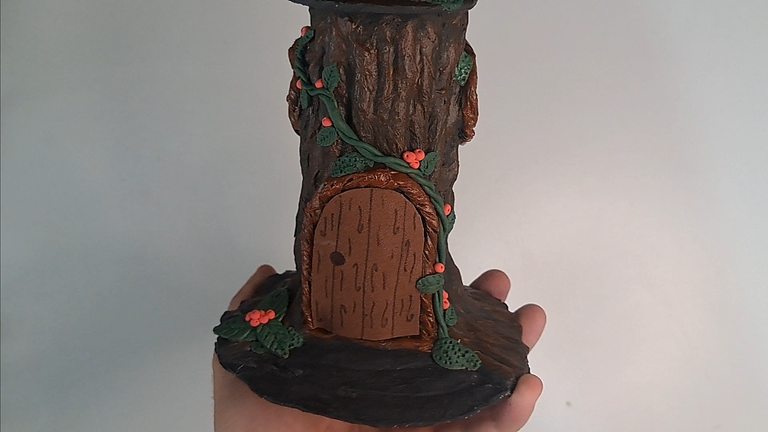
6️⃣ Using modeling clay, glue small pieces on top of the windows and doors, then poke holes in them using the tip of a marker. Create a clay vine and place it around the surface of the house and above the door. Attach leaves to the vine.
Utilizando arcilla para modelar, pegar pequeños trozos encima de las ventanas y puertas, y luego agujerearlos utilizando la punta de un marcador. Crear una enredadera de arcilla y colocarla alrededor de la superficie de la casa y encima de la puerta. Colocar hojas a la enredadera.
 |
 |
 |
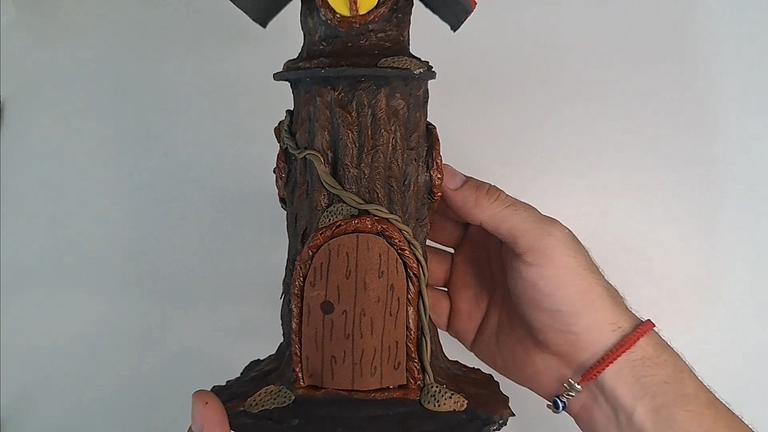 |
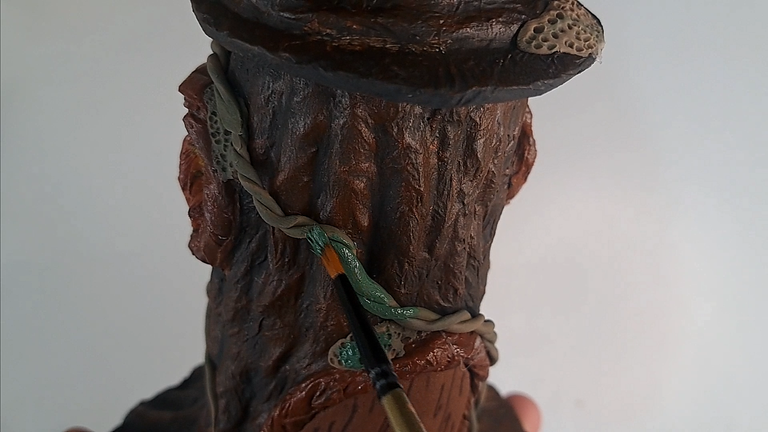
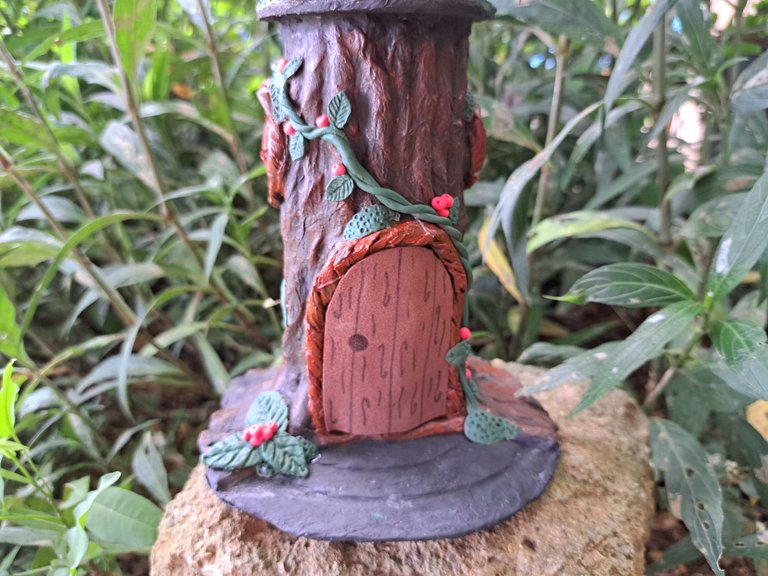
7️⃣ Paint the vine, leaves and fake moss green. Place small balls of red moldable fomi to simulate strawberries.
Pintar de verde la enredadera, las hojas y el falso musgo. Colocar pequeñas bolitas de fomi moldeable rojo para simular frutillas.
 |
 |
 |
 |
Finished Work // Trabajo Terminado
This way the fairy house for the garden is ready. I hope you liked the tutorial as much as the fairy in my garden liked it. I also hope you are encouraged to make your own fairy house. I'll say goodbye for now, but I'll be back soon to bring you another of my crafts. See you soon.
De esta forma estaría lista la casita de hadas para el jardín. Espero que el tutorial les haya gustado tanto como le gustó al hada de mi jardín. También espero que se animen a elaborar su propia casita. Por ahora me despido, pero próximamente estaré de vuelta trayéndoles otra de mis manualidades. Hasta pronto.
 |
 |
 |
 |
 |

Thank you very much for reading my post. If you liked it, please leave a comment and consider following me so you don't miss my next posts. I'd love to know your opinion and your thoughts about the topic I discussed in this post, see you in the next one!
Credits and Resources // Créditos y Recursos
Cover page created in Canva
Translated by DeepL
Video and images captured with my Samsung Galaxy A53 5G
Edited in Wondershare Filmora 13


▶️ 3Speak