Greetings, my creative friends.
I will start by saying that I really like bonsais as much as I like Japanese culture, and although they are not originally from Japan as such, this art is practiced a lot in that country. Another thing I also like is the look of Zakura trees or Japanese cherry trees, and with these things in mind, I decided to create my own version of an artificial bonsai. Every time I saw an image or a tutorial related to miniature trees, I imagined myself creating my own and, well, here is the result.
Today I bring you a tutorial in which I will show you how to make a miniature tree. This idea came from a request from my friend @tesmoforia, who asked me to include in my repertoire something related to Asian culture, and although it's not a temple or a pagoda, I think I'll start with this.
Saludos, mis creativos amigos.
Comenzaré diciendo que me gustan mucho los bonsáis tanto como la cultura japonesa, y aunque no son originarios de Japón como tal, se practica mucho este arte en dicho país. Otra cosa que también me gusta es el aspecto de los árboles Zakura o árboles cerezo japoneses, y teniendo en cuenta estas cosas, decidí crear mi propia versión de un bonsái artificial. Cada vez que veía una imagen o algún tutorial relacionado con los árboles en miniatura, me imaginaba creando el mío propio y, pues, he aquí el resultado.
El día de hoy les traigo un tutorial en el cual les mostraré cómo elaborar un árbol miniatura. Esta idea surgió a partir de una petición de la amiga @tesmoforia, la cual solicitó que incluyese en mi repertorio algo relacionado con la cultura asiática, y aunque no es un templo o una pagoda, creo que empezaré por esto.
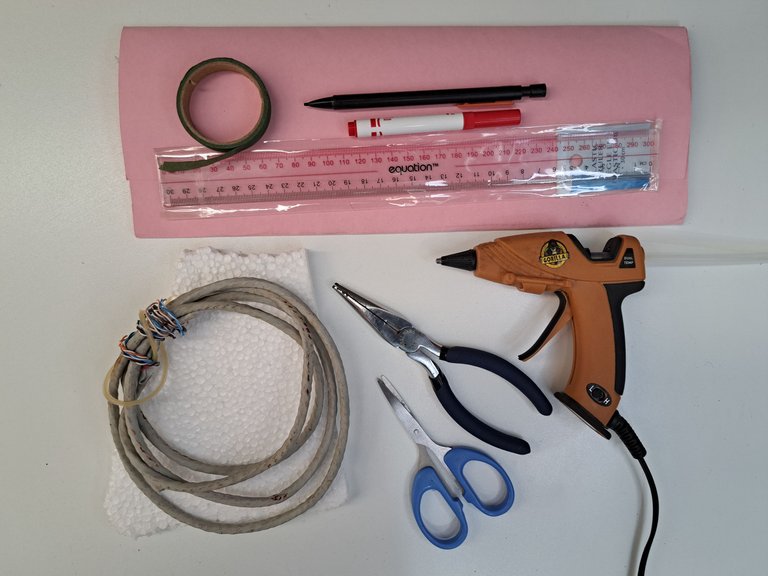
Materials // Materiales
| ✔️ RJ45 cable wire | ✔️ Alambre de cable RJ45 |
| ✔️ Pink poster board | ✔️ Cartulina rosada |
| ✔️ Polystyrene flat piece | ✔️ Pieza plana de poliestireno |
| ✔️ Pencil, ruler and red marker | ✔️ Lápiz, regla y marcador rojo |
| ✔️ Scissors | ✔️ Tijeras |
| ✔️ Cutting and gripping pliers | ✔️ Pinzas de corte y de agarre |
| ✔️ Floral ribbon | ✔️ Cinta floral |
| ✔️ Hot silicone | ✔️ Silicona caliente |
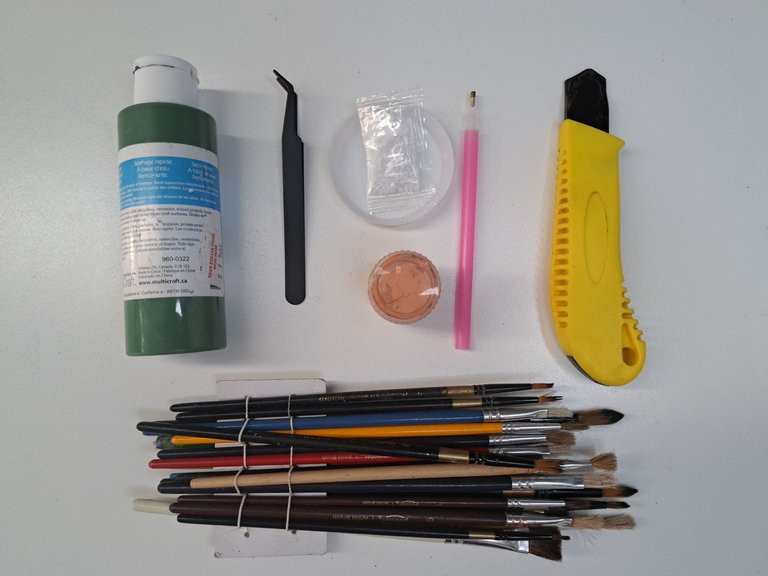
| ✔️ Green and light carmelite paint | ✔️ Pintura verde y carmelita claro |
| ✔️ Brushes | ✔️ Pinceles |
| ✔️ Straight cutter | ✔️ Cúter recto |
| ✔️ White semi-pearls | ✔️ Semi-perlas blancas |
 |  |
Step by step // Paso a paso
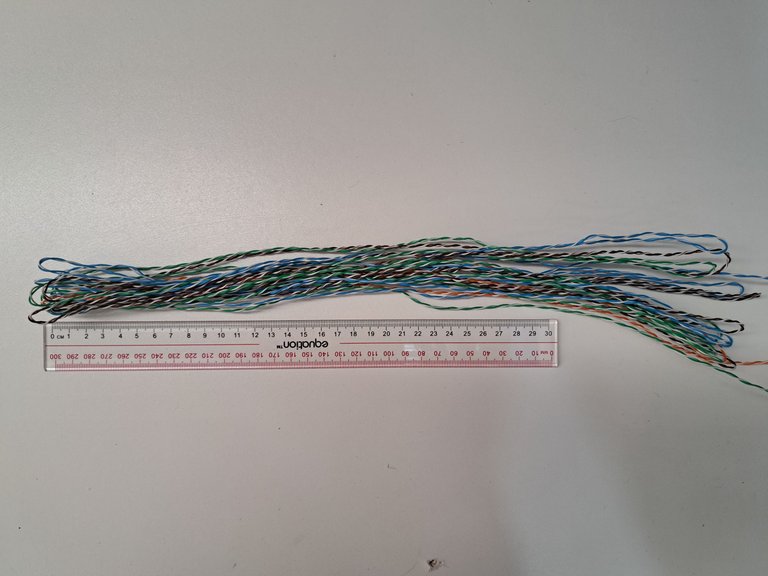
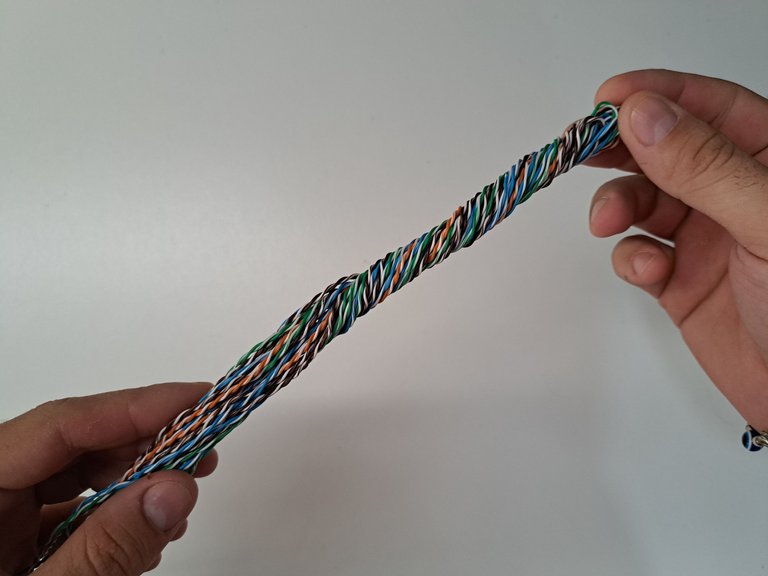
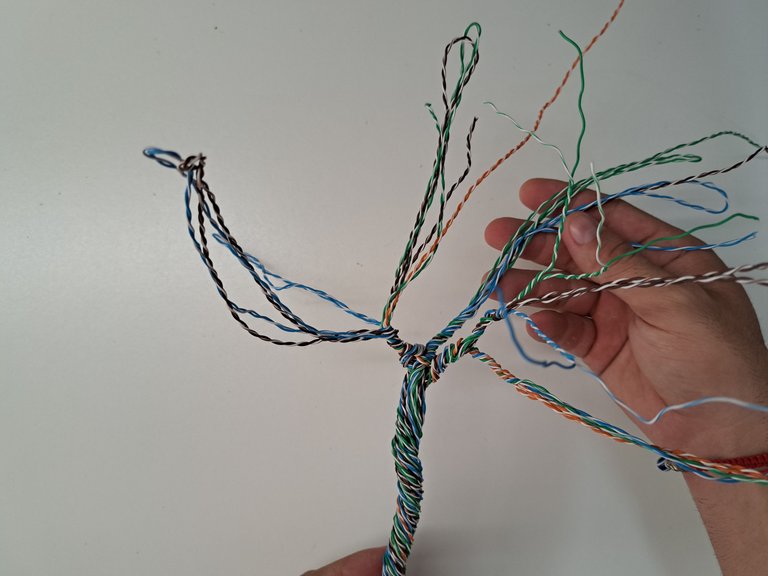
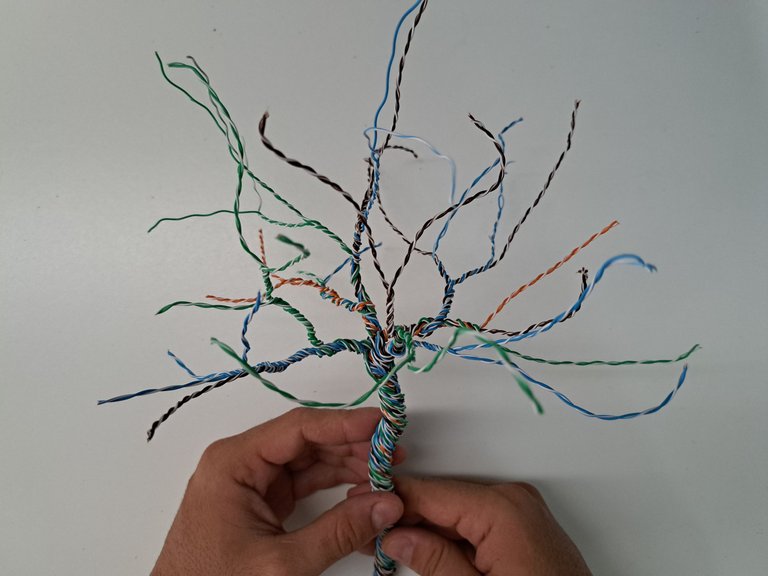
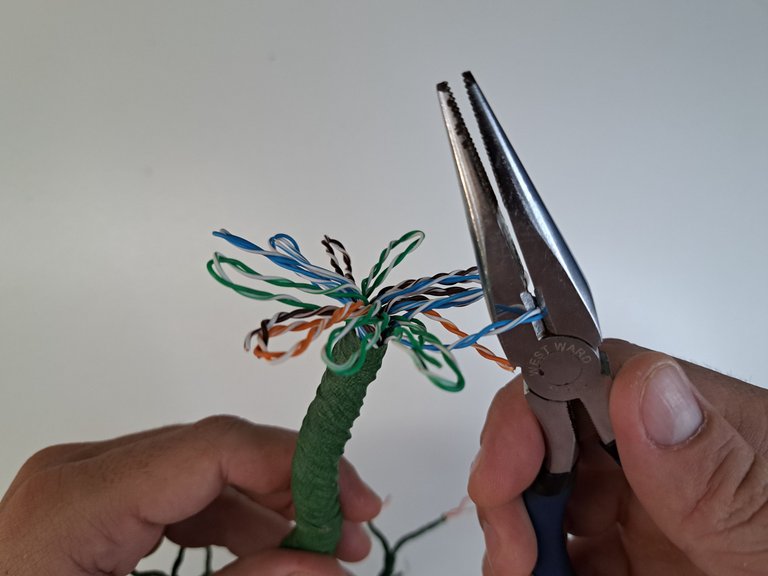
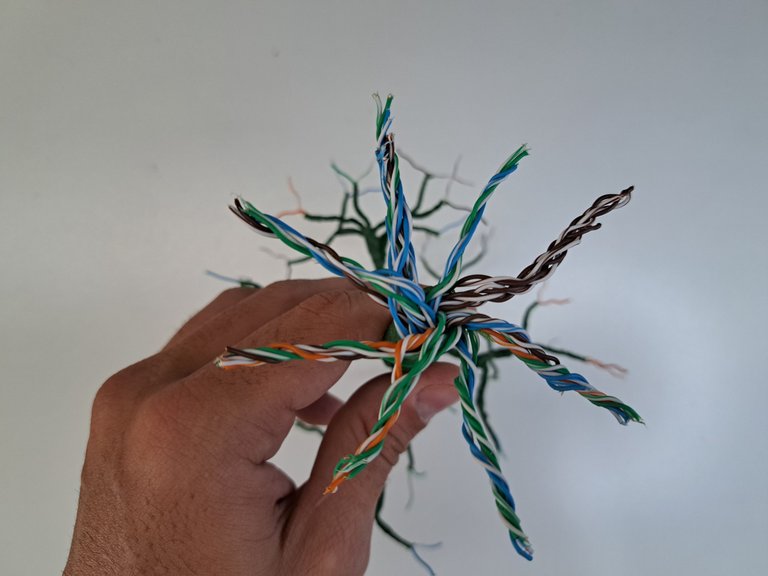
1️⃣ To begin with, it is necessary to bend several wires into sections of more than 30 cm. Twist as many times as possible. Separate the wires at one end and divide them into pairs. Start twisting the pairs and every 3 or 4 turns divide one of the pairs into two new thinner pairs and twist again. Repeat the process until you reach the ends of the wires and have only two pairs of a single wire on each branch.
Para empezar, es necesario doblar varios alambres en secciones de más de 30 cm. Tuerce la mayor cantidad de veces posible. Separa los alambres en uno de sus extremos y divídelos en parejas. Comienza a torcer las parejas y cada 3 o 4 vueltas divide una de las parejas en dos nuevas parejas más finas y vuelve a torcer. Repite el proceso hasta llegar a las puntas de los alambres y tener solo dos parejas de un solo alambre en cada rama.
 |  |
 |  |  |
 |  |
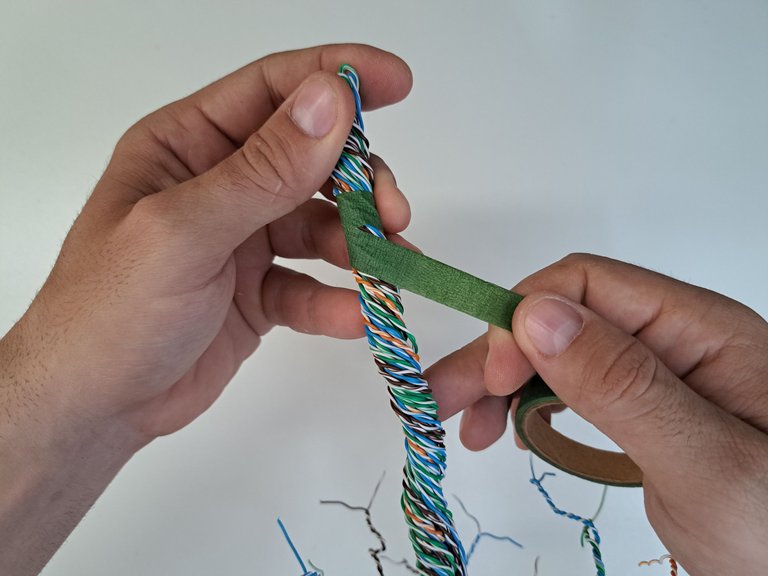
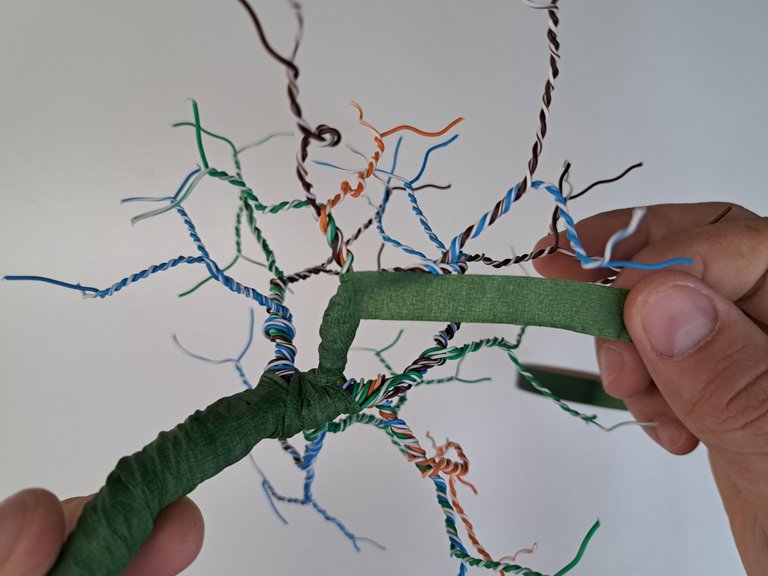
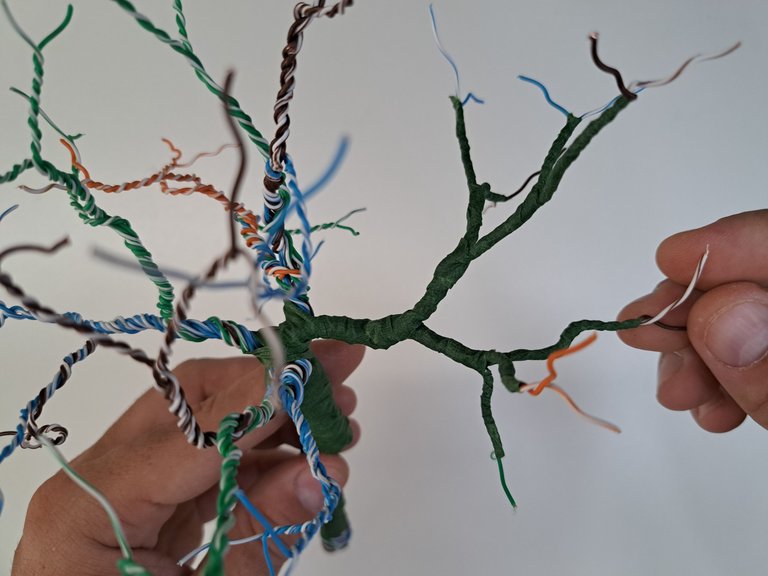
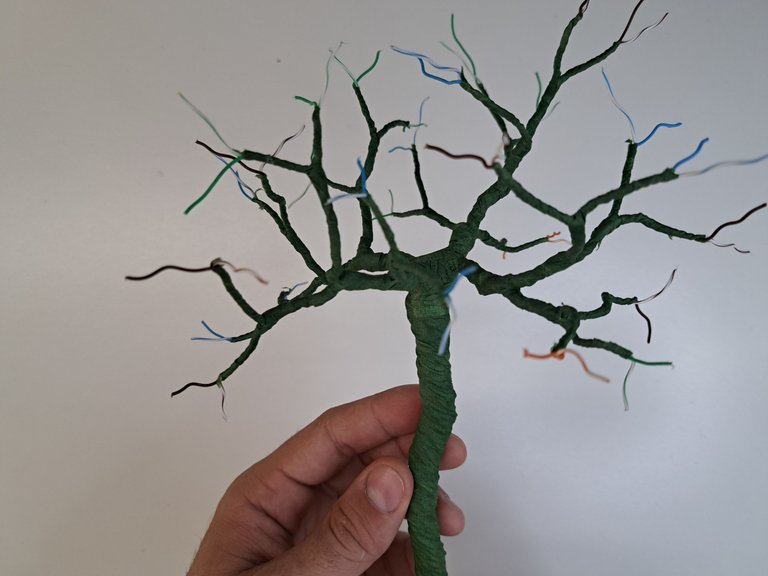
2️⃣ Once the wires are twisted, use a floral ribbon to wrap both the trunk and the branches of the tree. Preferably, use a brown floral ribbon; if you don't have one, you can use a green one, as I did, or cover the trunk with paper and then paint it.
Una vez torcidos los alambres, utiliza una cinta floral para envolver tanto el tronco como las ramas del arbolito. De preferencia, utiliza una cinta floral de color café; en caso de no tenerla, puedes usar una verde, como fue mi caso, o cubrir el tronco con papel y luego pintarlo.
 |  |
 |  |
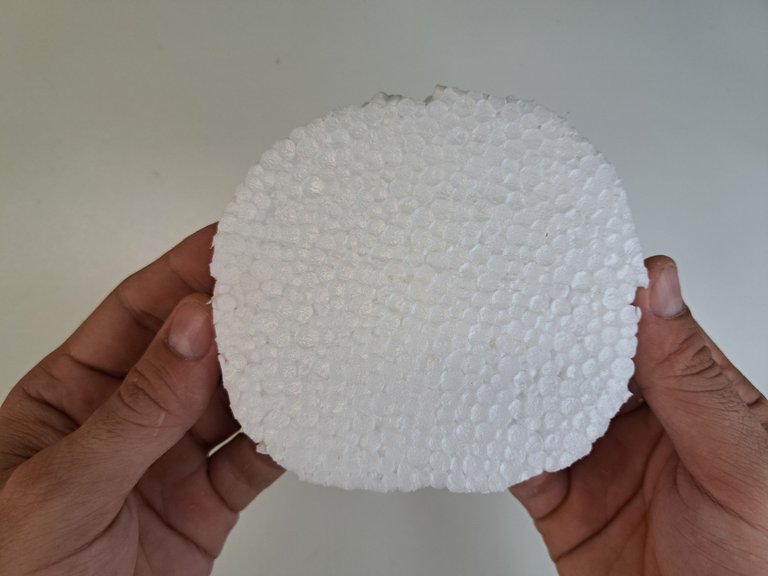
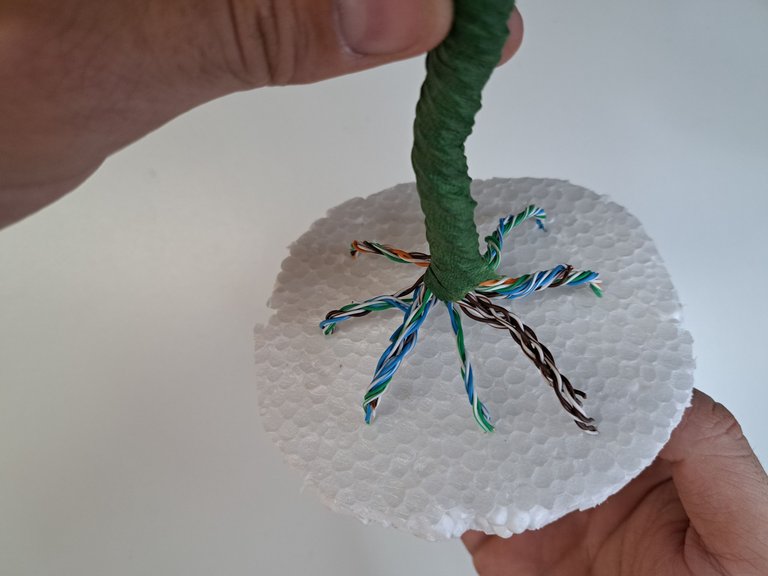
3️⃣ At the end opposite to the branches a part of the stem will develop and with the help of a tweezers the roots will be shaped. Cut out a piece of polyethylene in an oval shape and glue it to the base of the trunk. Once glued, insert the tips of the roots into the polystyrene.
En el extremo opuesto a las ramas se desarrollará una parte del tallo y con ayuda de una pinza se les dará forma a las raíces. Recorta una pieza de polietileno en forma ovalada y pégala a la base del tronco. Una vez pegada, introduce las puntas de las raíces en el poliestireno.
 |  |
 |  |  |
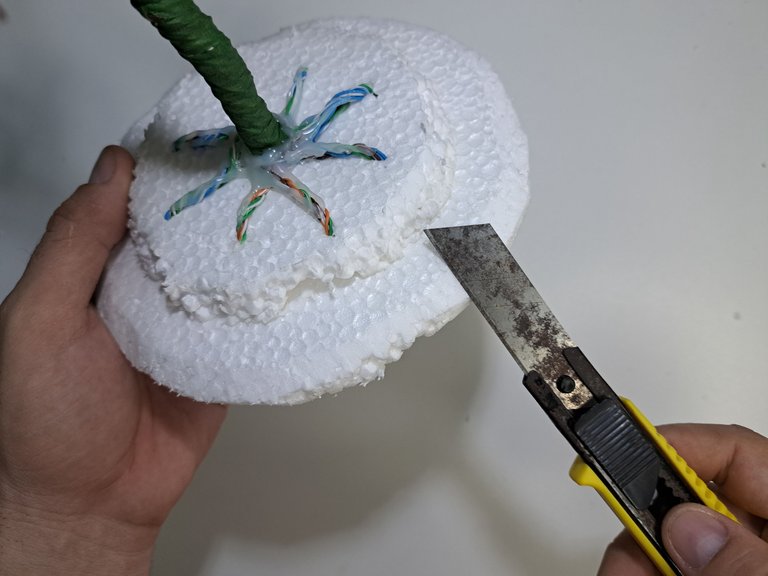
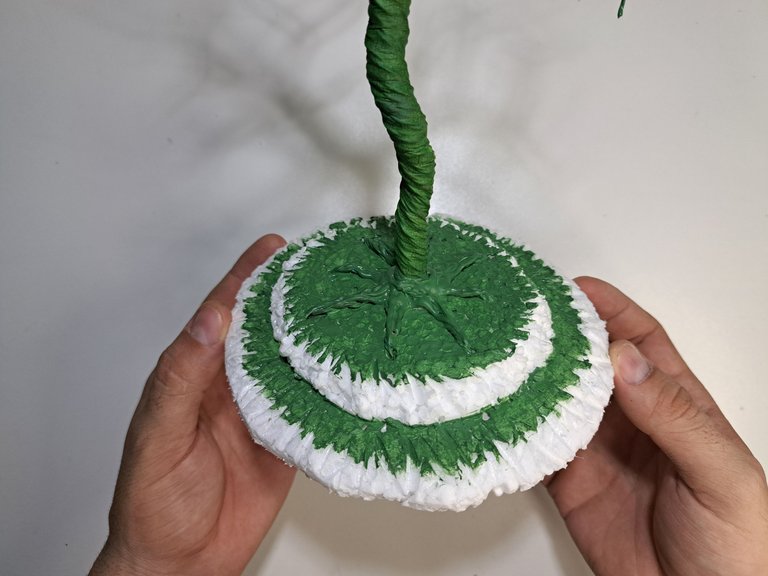
4️⃣ Cut out another larger piece of polyethylene and glue it underneath the previous one. Use hot silicone to cover the junction of the stem with the polystyrene and the roots. Using a razor blade, trim the edge of the base and make small irregular marks all around the base area. Next, paint the roots and the top of the base green, then paint the edges light brown.
Recorta otra pieza de polietileno más grande y pégala por debajo de la anterior. Utiliza silicona caliente para cubrir la unión del tallo con el poliestireno y las raíces. Utilizando una cuchilla, rebaja el borde de la base y haz pequeñas marcas irregulares por todo el área de la base. Posteriormente, pinta de verde las raíces y la parte superior de la base, y luego pinta de castaño claro los bordes.
 |  |  |
 |  |
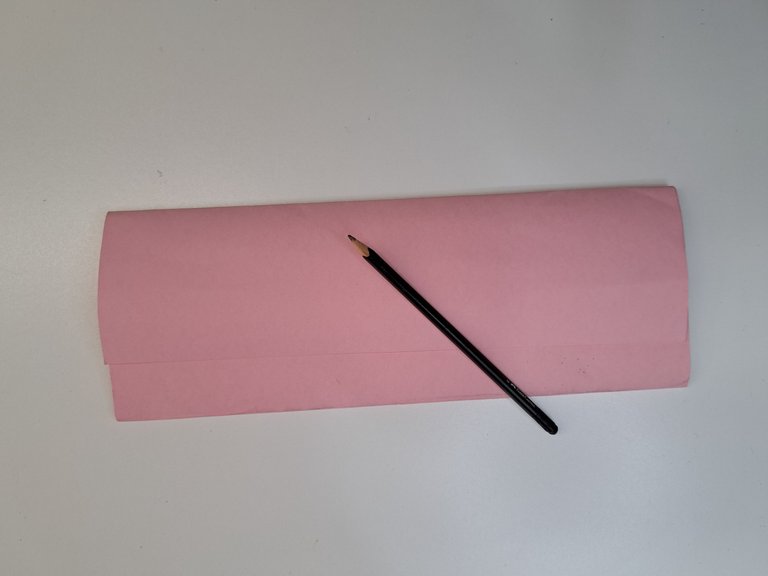
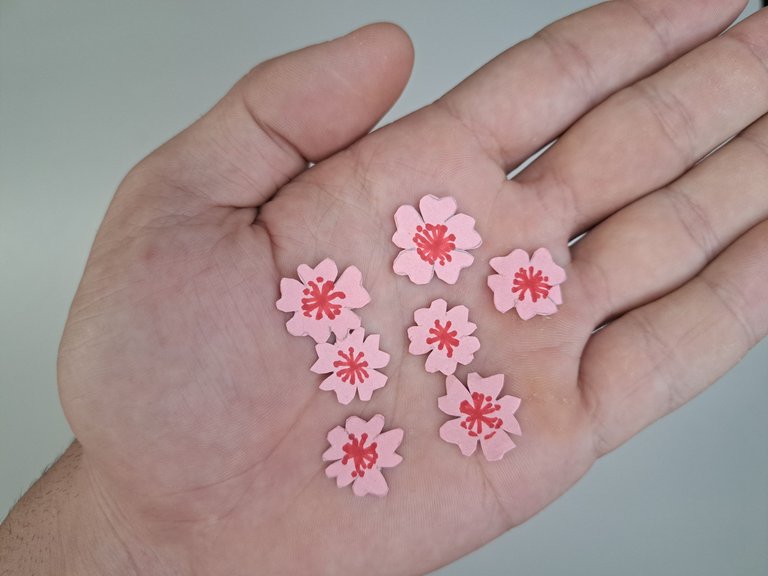
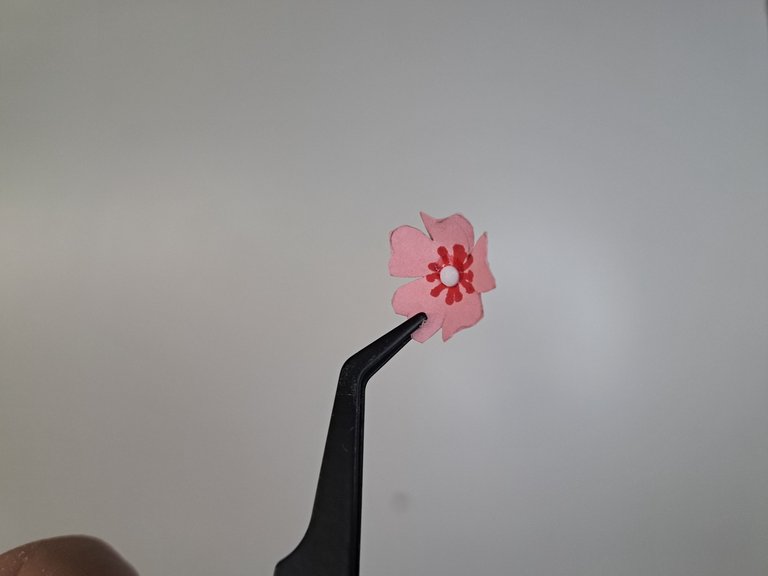
5️⃣ On pink cardstock, mark and cut out small flowers with 5 or 6 petals. You can use a mold or paint them freehand for more variety. Using a red marker, draw an asterisk in the center of each flower and then glue the white beads on them. At the end, fold the petals of the flowers using a pen or the handle of a paintbrush.
En una cartulina rosada, marca y recorta pequeñas florecitas de 5 o 6 pétalos. Puedes utilizar un molde o pintarlas a mano alzada para dar más variedad. Utilizando un marcador rojo, dibuja un asterisco en el centro de cada flor y posteriormente pégales las perlitas blancas. Al final, dobla los pétalos de las flores utilizando un bolígrafo o el mango de un pincel.
 |  |
 |  |  |
 |  |
6️⃣ Start gluing the flowers to the ends of the branch wires. Start gluing them from top to bottom and, if possible, glue the smallest ones on top. After gluing the flowers, use a tweezers to correct the position of the branches, ensuring that they do not all point in the same direction. If you notice empty spaces in the branches, you can glue some flowers directly on the joints of the branches.
Comienza a pegar las flores en las puntas de los alambres de las ramas. Comienza a pegarlas de arriba hacia abajo y, de ser posible, pega las más pequeñas arriba. Luego de pegadas las flores, utiliza una pinza para corregir la posición de las ramas, garantizando así que todas no apunten hacia un mismo lado. En caso de apreciar espacios vacíos en las ramas, puede pegar algunas flores directamente en las uniones de estas.
 |  |
 |  |
Finished Work // Trabajo Terminado
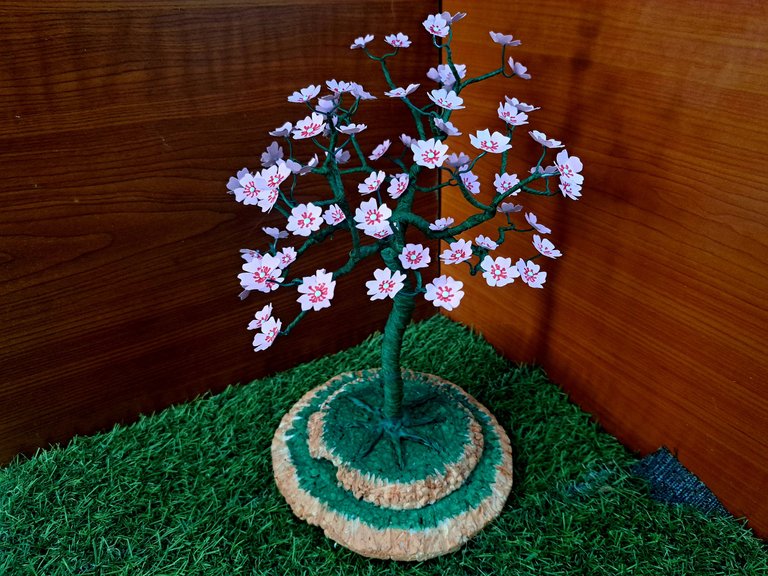
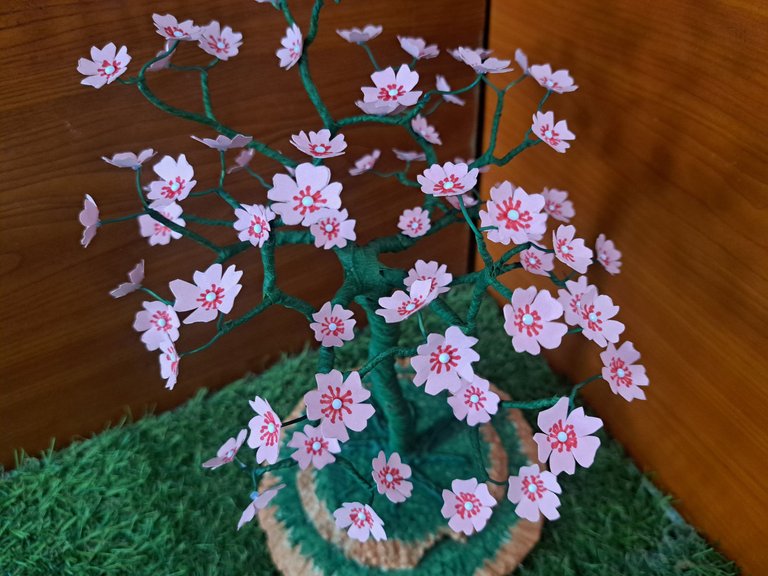
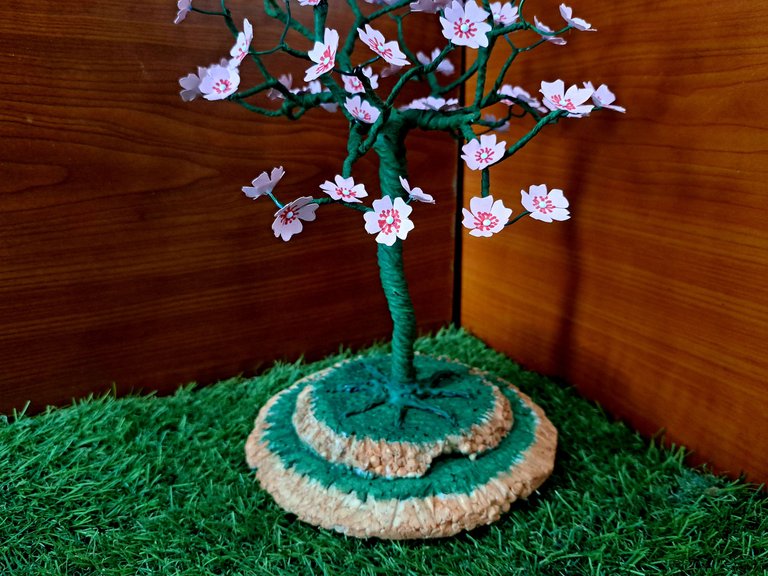
This way the little Sakura tree would be ready. I must admit that I loved the result and I am very motivated to create new species of bonsai with other forms and materials. I hope you found this tutorial useful and I encourage you to follow this guide to create your own artificial bonsai. I don't want to say goodbye without inviting you to leave me in the comments any suggestions or doubts about the craft, because I will be happy to read them and answer you. Bye...
De esta forma quedaría listo el pequeño arbolito de Sakura. Debo admitir que me encantó el resultado y estoy muy motivado a crear nuevas especies de bonsái con otras formas y materiales. Espero que te haya resultado útil este tutorial a la vez que te exhorto a seguir esta guía para crear tu propio bonsái artificial. No quiero despedirme sin invitarte a que me dejes en los comentarios cualquier sugerencia o duda sobre la manualidad, pues estaré encantado de leerlos y responderte. Chao…
 |  |
 |  |
 |  |

Thank you very much for reading my post. If you liked it, please leave a comment and consider following me so you don't miss my next posts. I'd love to know your opinion and your thoughts about the topic I discussed in this post, see you in the next one!
Credits and Resources // Créditos y Recursos
Cover page created in Canva
Translated by DeepL
Images captured with my Samsung Galaxy A53 5G


Posted Using InLeo Alpha
Cover page created in Canva
Translated by DeepL
Images captured with my Samsung Galaxy A53 5G
Posted Using InLeo Alpha