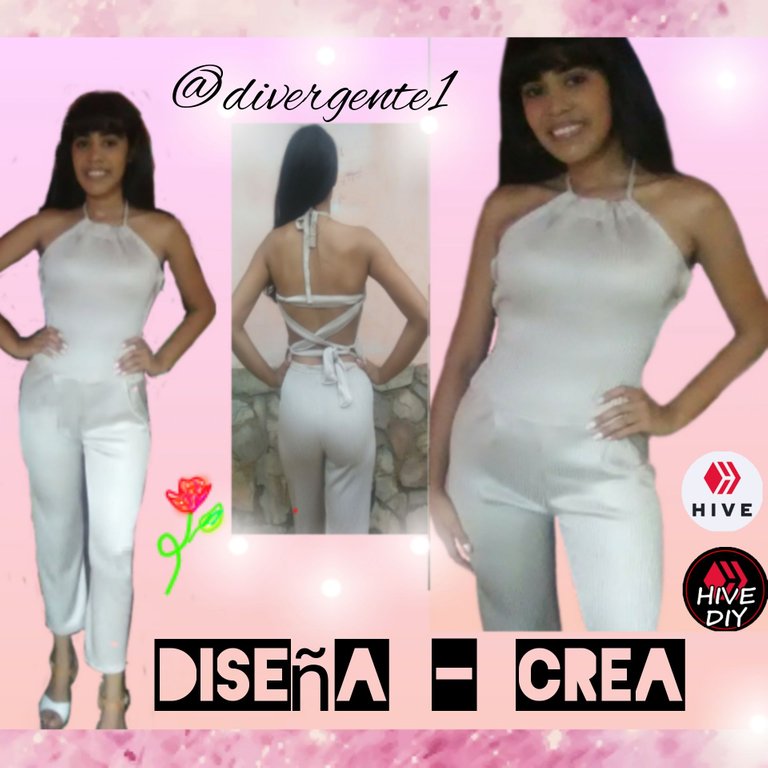
Design and Create this cute wardrobe. Jumpsuits, are in trend! Diseña y Crea este Lindo Vestuario. ¡Enterizos,estan en tendencia! (Eng - Esp)

in #hive-1305602 years ago

English


Hello friends of Hive and Hive Diy. It is a pleasure to greet you again and wish you all the good energy and success in all the proposals and post that you offer in each of the communities of Hive. Within the fashion trend undoubtedly the Jumpsuits are having much demand because they favor much the figure of women. in this way I wanted to design and create a Enterizo, showing the step by step using the mold of a pair of pants to achieve a simpler visualization at the time of making the enterizo.

Polish_20220927_175441579.jpg

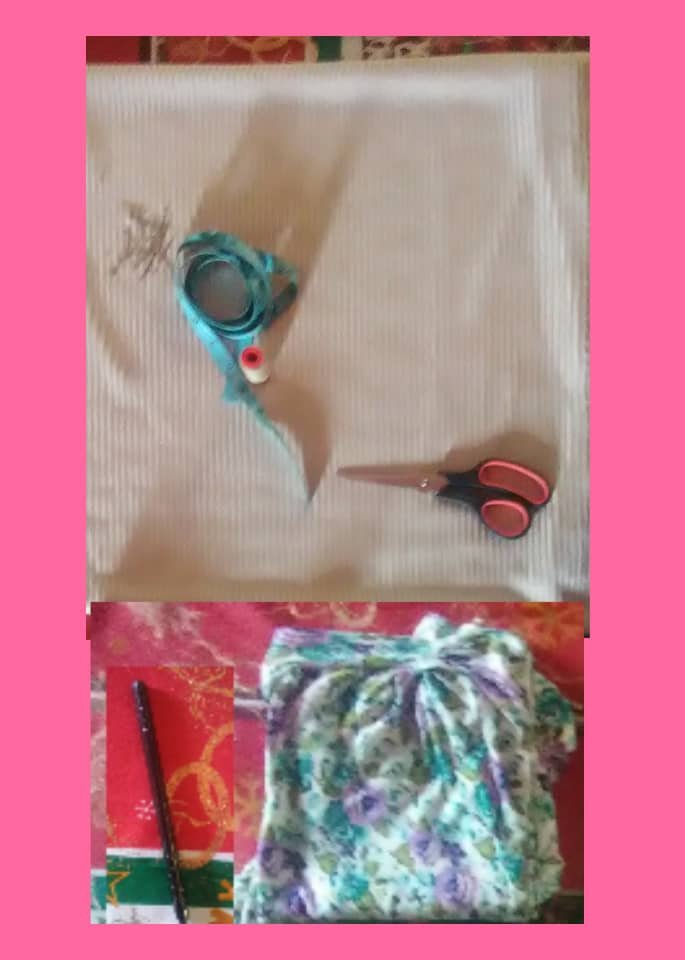
Materials used:

WhatsApp Image 2022-09-29 at 4.18.59 PM.jpeg

  • 60 inches or 1.52 meters Peach skin fabric.

  • Yarn

  • Scissors, pins and measuring tape.

  • Pants and blouse (only to be used as molds).

Step 1

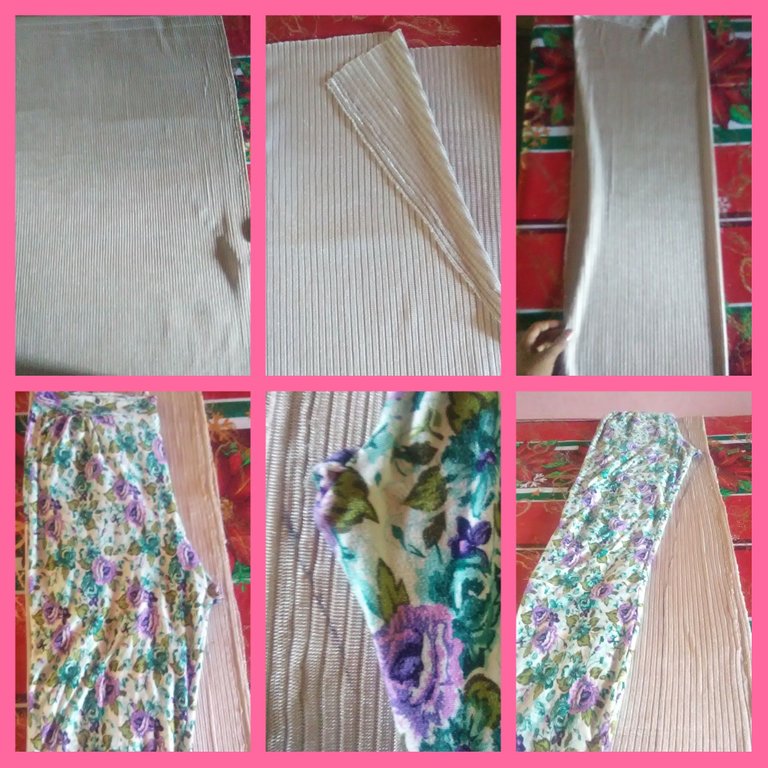
Cutting of the piece that forms the trousers of the Jumpsuits
Polish_20220927_203205342.jpg

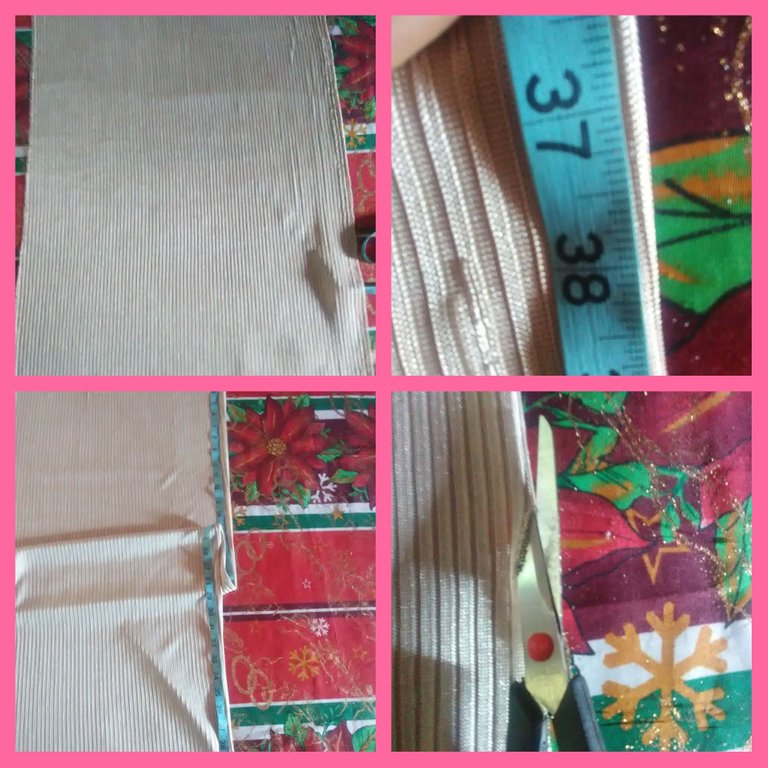
start by measuring the fabric to form the pants, we measure the length of the garment, always depending on the height of the person, in this case it is 38.5 inches. Then cut the fabric along this measurement.

Step 2

Pants on the fabric

Polish_20220927_203505912.jpg

Once the length of the fabric is cut, we obtain a rectangle of 15 inches wide x 38.5 inches long. proceed to fold the fabric in two equal parts so that it is the same length of the fabric, then fold the fabric again. take the flowered pants shown in the image and superimpose it on the fabric to mark the silhouette with a marker or chalk.

Step 3

Cut the pants

Polish_20220927_203740468.jpg

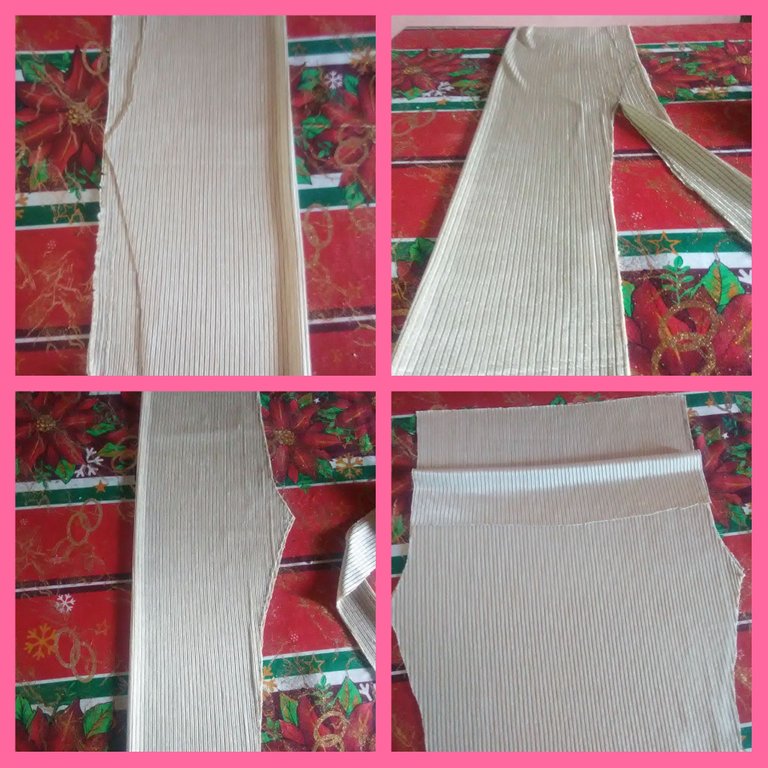
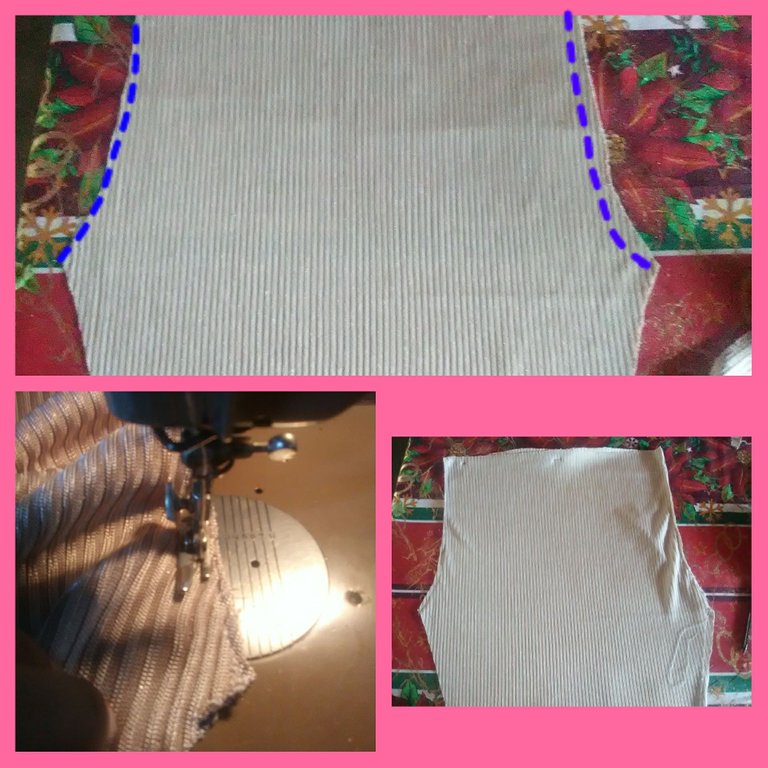
Cut the trousers with the scissors along the traced outline and use the scissors to give the desired silhouette to the fabric underneath. Two layers will be exactly the same as shown in the picture.

Step 4**.

Sewing of the trousers.
Polish_20220927_204205723.jpg

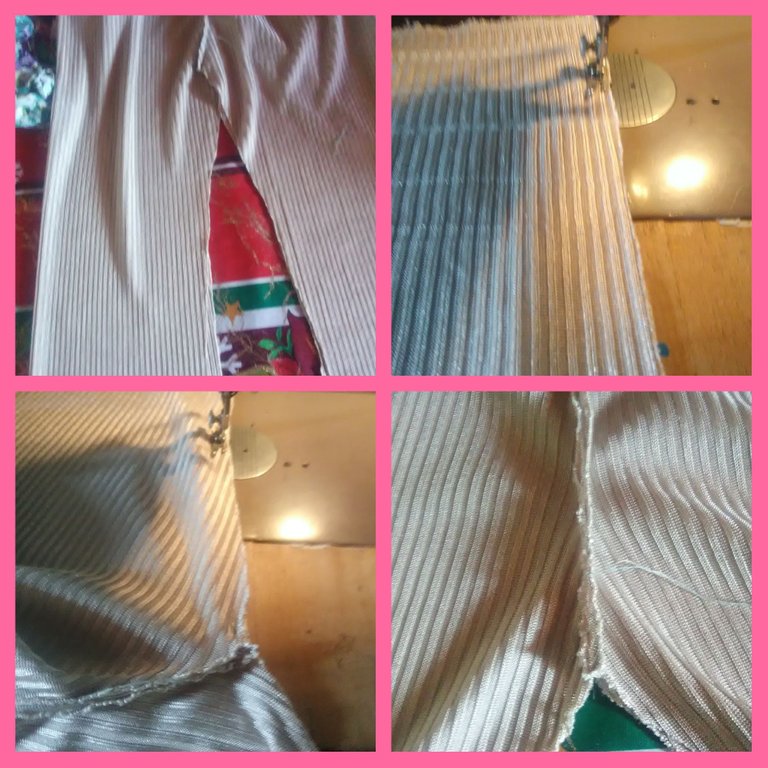
The seam of the piece should only be sewn exactly along the dotted blue line shown in the picture.
>

Polish_20220927_204620323.jpg

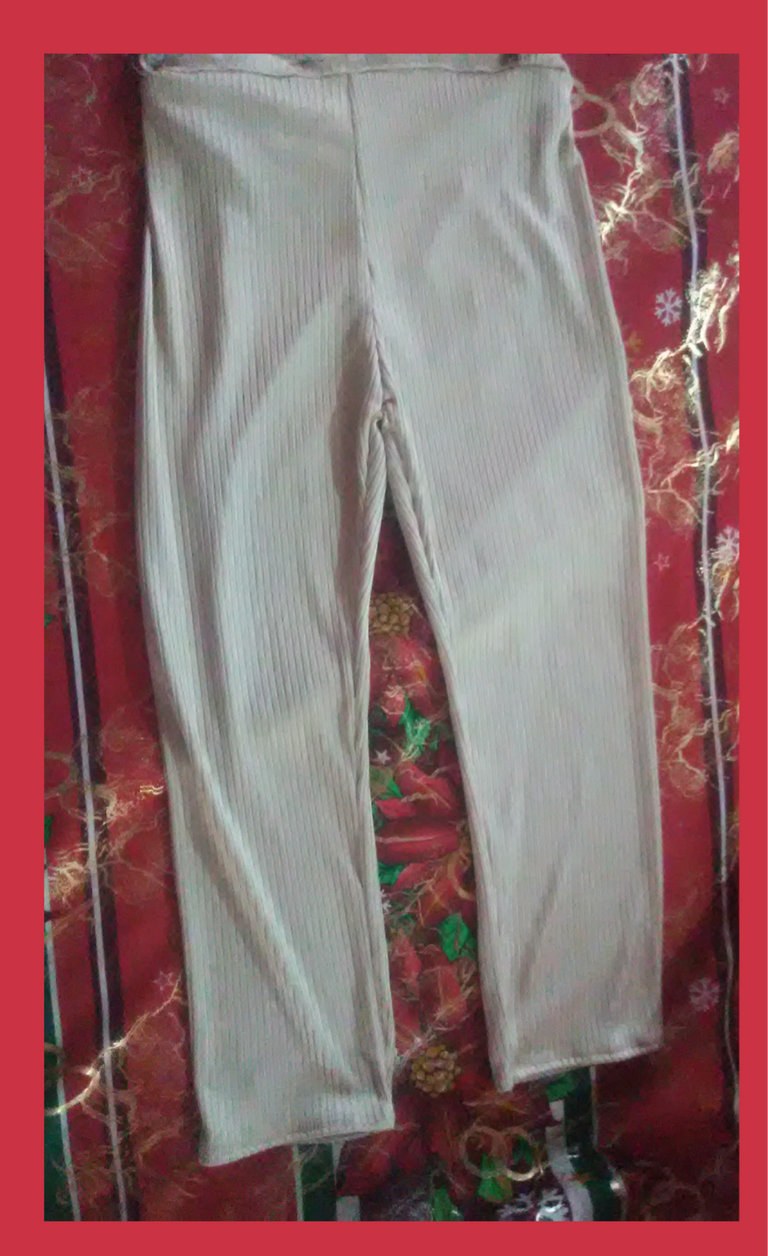
Then you should join the points that form a kind of triangle, so you will see the shape of the pants and then proceed to sew along the length of the garment. and also sew the boots of the pants.
Polish_20220929_101028952.png

Step 5

Cutting of the top piece of the one-piece suit.
Polish_20220927_210036832.jpg

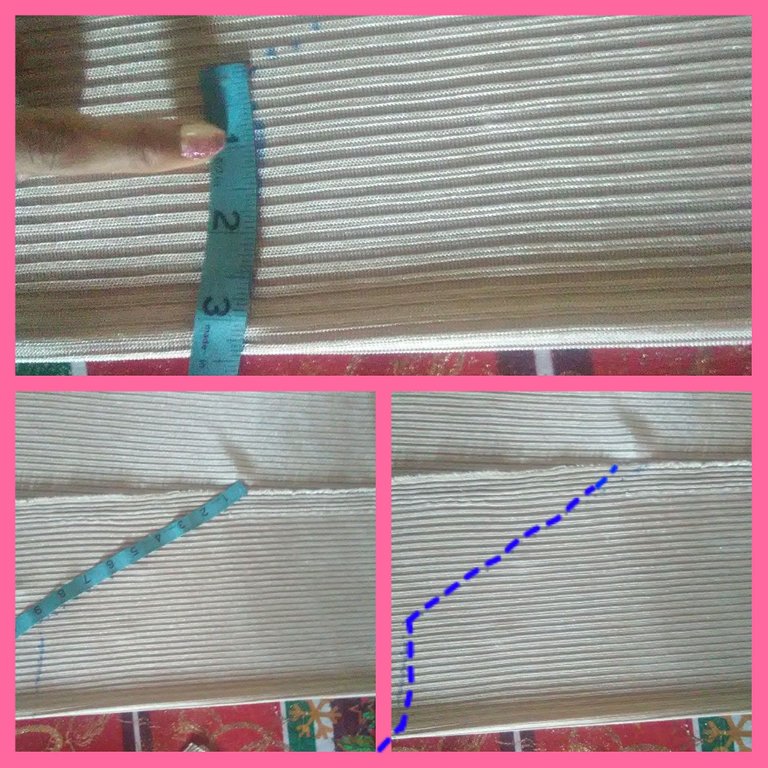
You need a rectangle 7 inches wide by 12.5 inches long. Fold the fabric in two equal parts and proceed to form what is the neck and the silhouette of the armhole (it is the line or curve that is made in the armpit area).
Polish_20220927_210552545.jpg

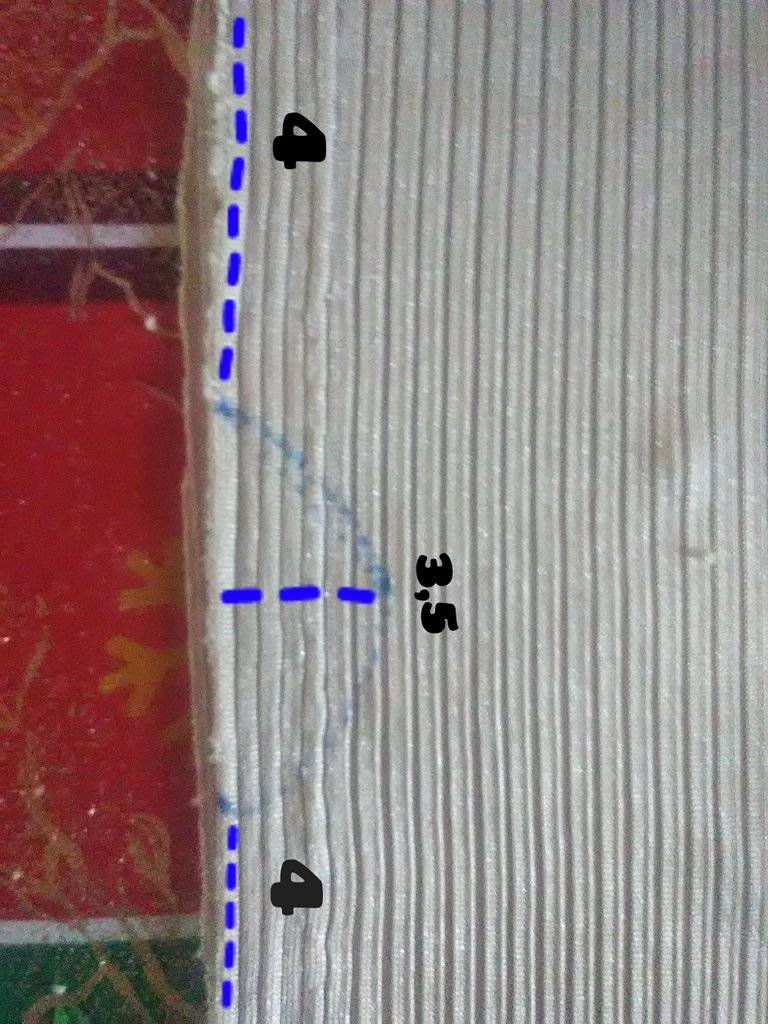
From the sloping line that is our armhole, we will form a semicircle from two points of 4 inches. The first point is measured from the armhole and the second point is taken from the end of the fabric. At the midpoint of the two points that were formed, draw a line perpendicular to this point with a distance of 3.5 inches.

Step 6

Cutting and sewing the top piece
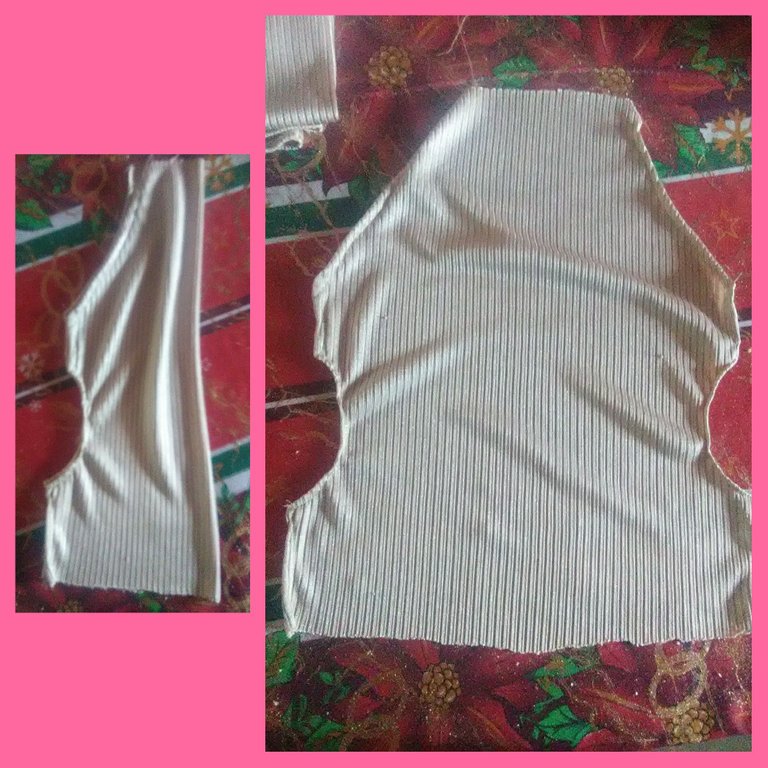
Cut the lines that have been formed and at the same time sew them in the sewing machine and it will look like this.
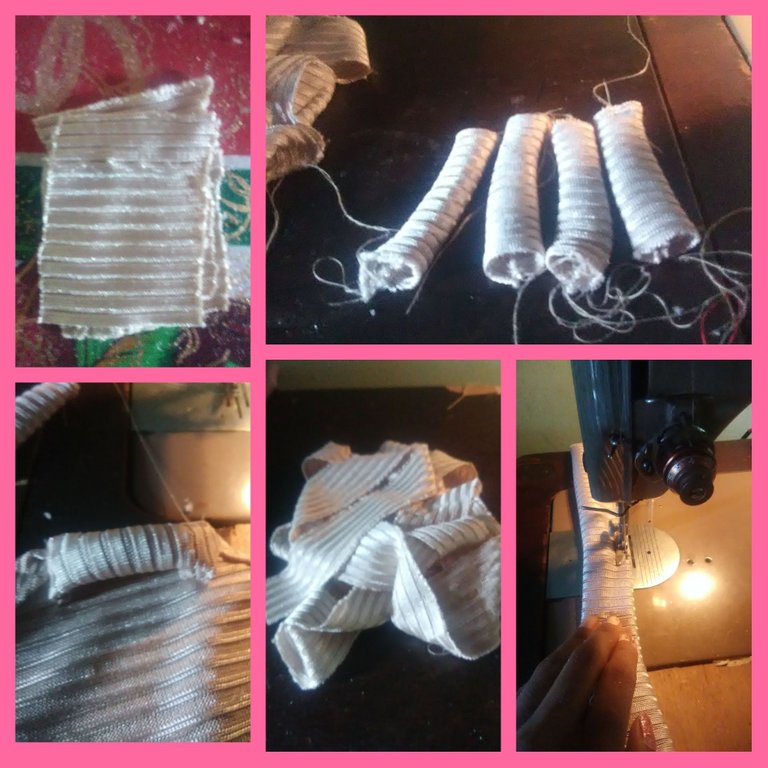
Polish_20220927_210835198.jpg
Cut 4 rectangles of fabric of 2 inches x 3 inches and sew them lengthwise. Four small circles will form the loops that will be fixed in the machine at the ends of the four final points of the blouse.
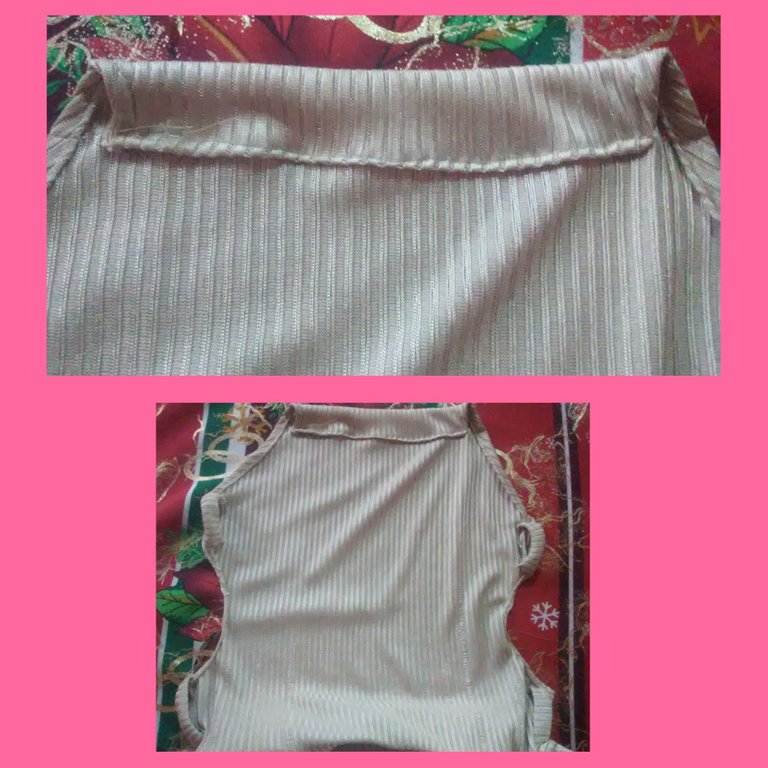
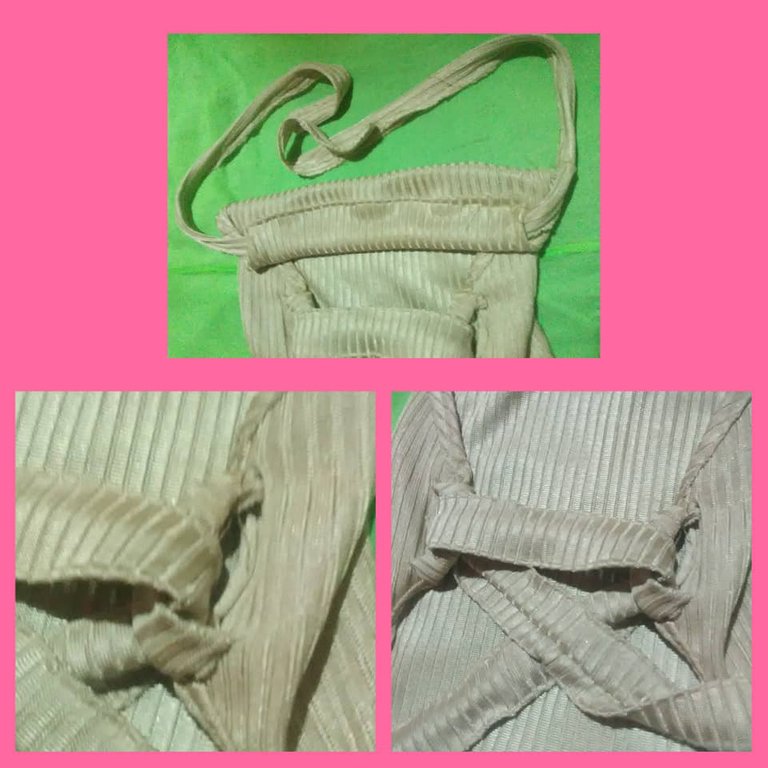
Polish_20220929_095652150.jpg

WhatsApp Image 2022-09-29 at 2.38.03 PM.jpeg

Then create two ribbons, one 2 inches x 22 inches long and the other 2.5 inches x 44 inches long, and sew them on the sewing machine.

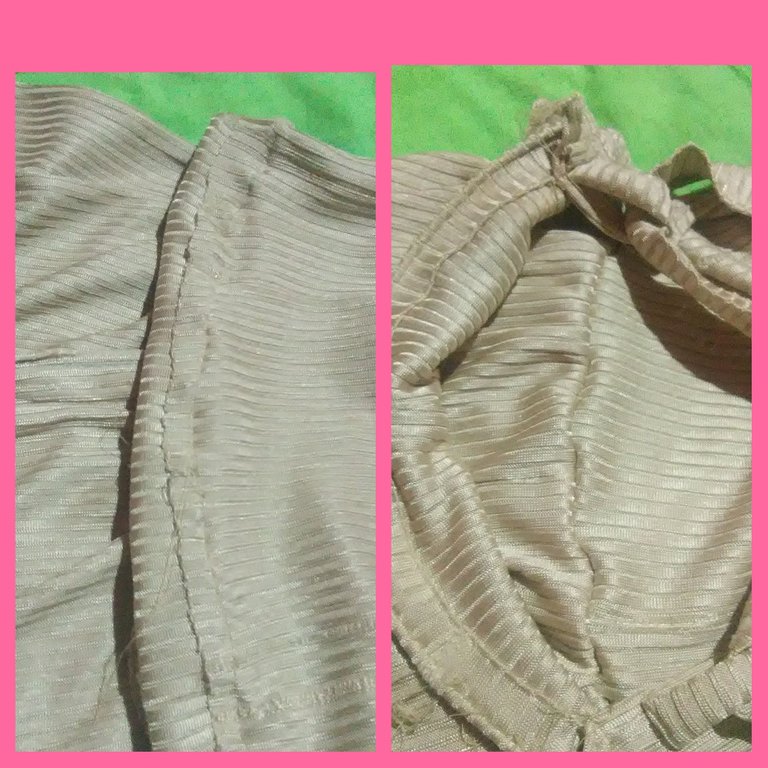
The top of the piece is folded over and stitched. The four loops are then attached to the blouse as shown in the picture.

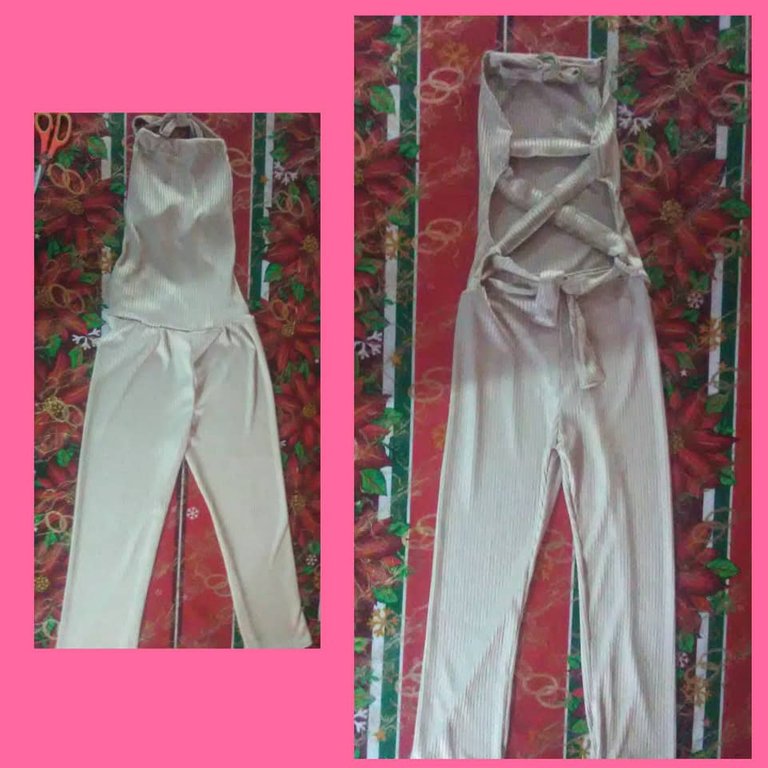
The ribbons that were previously created are inserted. The smaller one in the upper hole of the garment and the long one is crossed through each of the loops as shown in the image.

Step 7.

Joining the pieces.

Polish_20220927_212051946.jpg

Turn the pieces over on the side where the seams are marked and sew them together. Turn the pieces over and sew them together again in the sewing machine.

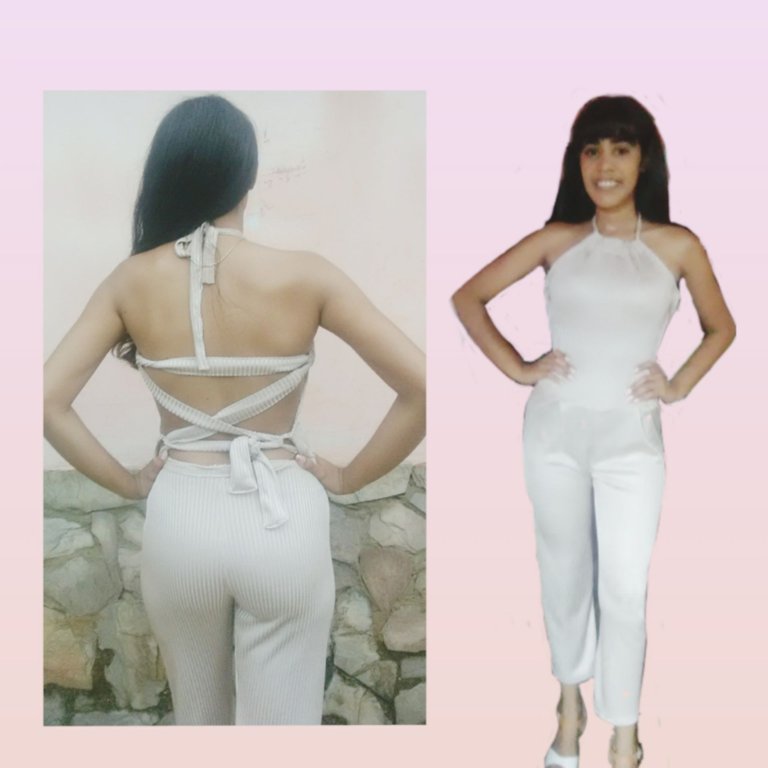
This is how we finished this easy to design and create outfit!
WhatsApp Image 2022-09-29 at 2.38.17 PM.jpeg

Polish_20220927_213707701.jpg

Credits:

  • The images are of my authorship and were taken through a ZTE BLADE Phone.

  • Translator used: Deepl

  • The editing of the photos was done using the Polish Photo Editor application.


Español


Hola amigos de Hive y Hive Diy. Es un gusto saludarlos nuevamente y desearles toda las buenas energias y exitos en todas las propuestas y post que ofrecen en cada una de las comunidades de Hive. Dentro de la tendencia de la moda sin duda alguna los enterizos estan teniendo mucha demanda porque favorecen mucho la figura de la mujer. de esta forma quise diseñar y crear un Enterizo, mostrando el paso a paso utilizando el molde de un pantalon para lograr una visualizacion más sencilla al momento de la confeccion del enterizo.

Materiales utilizados:

WhatsApp Image 2022-09-29 at 4.18.59 PM.jpeg

  • 60 pulgadas ó 1,52 metros Tela piel de durazno.

  • Hilo

  • Tijera, alfileres y cinta metrica.

  • Pantalon y blusa ( solo se utilizaran como moldes)

Paso 1

Corte de la pieza que forma el pantalon del enterizo.

Se inicia midiendo la tela para formar el pantalon medimos a lo largo de la prenda, siempre dependiendo de la estura de la persona, en este caso es 38,5 pulgadas. Luego se corta la tela a lo largo de esta medida.

Polish_20220927_203205342.jpg

Paso 2

Figura Pantalon sobre la Tela

Polish_20220927_203505912.jpg

Una vez cortado el largo de la tela, obtenemos un rectangulo de 15 pulgadas de ancho x 38,5 pulgadas de largo. se procede a doblar la tela en dos partes iguales de manera que quede el mismo largo de la tela, luego se vuelve a doblar la tela. se toma el pantalon floriado que se muestra en la imagen y se sobrepone en la tela para marcar la silueta con un marcador o una tiza.

Paso 3

Corte del pantalon

Polish_20220927_203740468.jpg

Se corta con la tijera a lo largo de la figura que se trazó y esta se utiliza para darle la silueta deseada a la tela que ha quedado debajo de esta. quedaran dos capas exactamente iguales como se muestra en la figura.

Paso 4

Costura del pantalon

La costura de la pieza solo se deben coser exactamente por toda la linea azul punteada que se muestra en la imagen.

Polish_20220927_204620323.jpg

Luego se deben juntar las puntas que forman especie de un triangulo, asi se vera la forma del pantalon y de esta forma se procede a coser a lo largo de la prenda. y se cosen ademas las bo0tas del pantalon.

Polish_20220929_101028952.png

Paso 5

Trazo de la pieza superior del enterizo

Se necesita un rectangulo de 7 pulgadas de ancho por 12,5 pulgadas de largo. Se dobla la tela en dos partes iguales y se procede a formar lo que es el cuello y la silueta de la sisa ( es la linea o curva que se hace en la zona de la axila)

Polish_20220927_210552545.jpg

Desde la linea inclinada que es nuestra sisa se va a formar un semicirculo desde dos puntos de 4 pulgadas. El primer punto se mide desde la zisa y el segundo punto se toma desde la terminación de la tela. En el punto medio de los dos puntos que se formaron se traza una linea perpendicular a este punto con una distancia de 3,5 pulgadas.

Paso 6

Corte y costura de la pieza superior

Se corta las lineas que se han formado y a la vez esta se cosen en la maquina de coser. y quedaria de esta forma.

se deben cortar 4 rectangulos de tela de 2 pulgadas x 3 pulgadas y esta se deben coser a lo largo. quedarán cuatro circulitos que formaran las trabillas que se fijaran en la maquina en los extremos de los cuatro puntos finales de la blusa.

Polish_20220929_095652150.jpg

WhatsApp Image 2022-09-29 at 2.38.03 PM.jpeg

Luego se deben crear dos cintas una de 2 pulgadas x 22 pulgadas de largo y otra de 2,5 pulgadas x 44 pulgadas de largo y luego se cosen en la maquina de coser.
Se dobla y se cose la parte superior de la pieza. Luego se fijan las cuatro trabillas en la blusa como se muestra en la imagen.
Las cintas que anteriormente se crearon se insertan. La mas pequeña en el orificio superior de la prenda y la larga se cruza por cada una de las trabillas como se muestra en la imagen.

Paso 7

Union de las piezas

Polish_20220927_212051946.jpg

Se voltean las piezas por el lado donde se marcan la costura y se cosen ambas. Se vuelve hacer un dobles y se cose nuevamente en la maquina de coser.

Asi terminamos este Enterizo, muy facil de diseñar y crear

WhatsApp Image 2022-09-29 at 2.38.17 PM.jpeg

Polish_20220927_213707701.jpg

Creditos:

  • Las imagenes son de mi autoria y fueron Tomadas a traves de un Telefono ZTE BLADE.

  • Traductor utilizado: Deepl

  • La edicion de las fotos la realicé mediante la aplicaciones Editor de Fotos Polish.

Sort:  

Me gustó como quedó este traje, es muy bonito y se ajusta bien q la silueta. Buen trabajo, y buena elección con el color. Es muy elegante.

Gracias @bleuclair 🤗

Tienes un gran talento ❤️

Gracias @aularjavier 🤗

Wow Mi amor pero que usted es toda una diseñadora de moda...tienes mucho talento.

Gracias corazon. 🤗

Thank you for sharing this amazing post on HIVE!
  • Your content got selected by our fellow curator @rezoanulvibes & you just received a little thank you via an upvote from our non-profit curation initiative!

  • You will be featured in one of our recurring curation compilations and on our pinterest boards! Both are aiming to offer you a stage to widen your audience within and outside of the DIY scene of hive.

Join the official DIYHub community on HIVE and show us more of your amazing work and feel free to connect with us and other DIYers via our discord server: https://discord.gg/mY5uCfQ !

If you want to support our goal to motivate other DIY/art/music/homesteading/... creators just delegate to us and earn 100% of your curation rewards!

Stay creative & hive on!

Que bueno que pueda diseñar su propio vestuario, la felicito. Saludos

Quedó muy lindo, ideal para varias ocasiones... Claro que ayuda mucho la tela que se ajusta bien al cuerpo y no necesitas pinzas ni mayores patrones, y también ayuda tener un cuerpazo... jajaja
Felicitaciones, todo está lindo...

Muchas Gracias Amiga. ♥


Colmena-Curie.jpg

¡Felicidades! Esta publicación obtuvo upvote y fue compartido por @la-colmena, un proyecto de Curación Manual para la comunidad hispana de Hive que cuenta con el respaldo de @curie.

Si te gusta el trabajo que hacemos, te invitamos a darle tu voto a este comentario y a votar como testigo por Curie.

Si quieres saber más sobre nuestro proyecto, acompáñanos en Discord: La Colmena.


Congratulations @divergente1! You have completed the following achievement on the Hive blockchain and have been rewarded with new badge(s):

You got more than 100 replies.
Your next target is to reach 200 replies.

You can view your badges on your board and compare yourself to others in the Ranking
If you no longer want to receive notifications, reply to this comment with the word STOP

Check out the last post from @hivebuzz:

Hive Power Up Day - October 1st 2022
Support the HiveBuzz project. Vote for our proposal!