Hola, Hola 👋 amigos de esta creativa comunidad @Hivediy espero que se encuentren muy bien!!!🤗
Hoy por acá trayéndole un nuevo proyecto que les encantara pues estamos en la época más colorida de todas "CarnavaL"🤡 🎉🎉🎉 que quiere decir disfraces, comparsa, papelillos, a mi me encanta el carnaval!!! y lo disfruto al máximo pues me gusta tanto disfrazarme 😊 lo único malo es que es muy cortito.
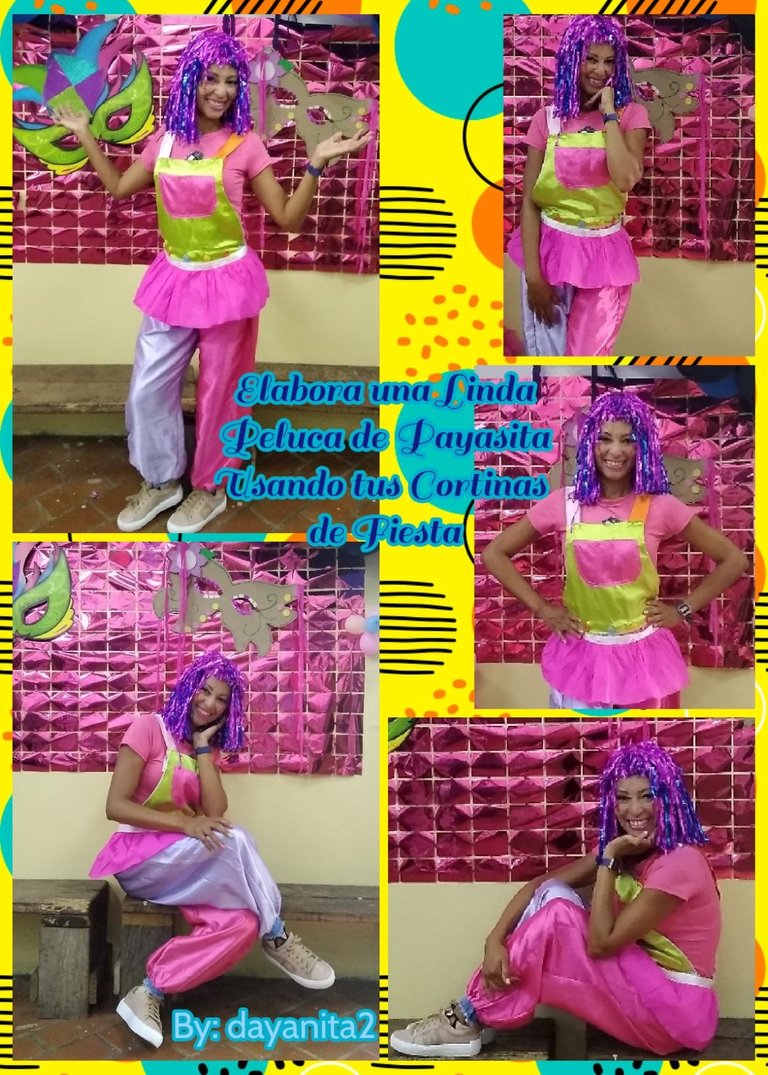
Este año para la fiesta de carnaval de mi escuela donde soy maestra, decidí disfrazarme de payasita pero tenia un pequeño inconveniente contaba con el traje pero no con la peluca, es por ello que se me ocurrió la idea de realizarla ya que tenia unas cortinas de fiesta que estaban dañadas y las guarde precisamente por si las necesitaba más adelante para algún proyecto y llego el día de darles un nuevo uso.
Es por ello que te invito a este sencillo paso a paso para que elabores tu peluca de payasita, sin necesidad de gastar tu dinero y al mismo tiempo estarás reciclando y el resultado que obtendrás te encantara 😊 te lo aseguro
Vamos a utilizar los siguientes materiales:
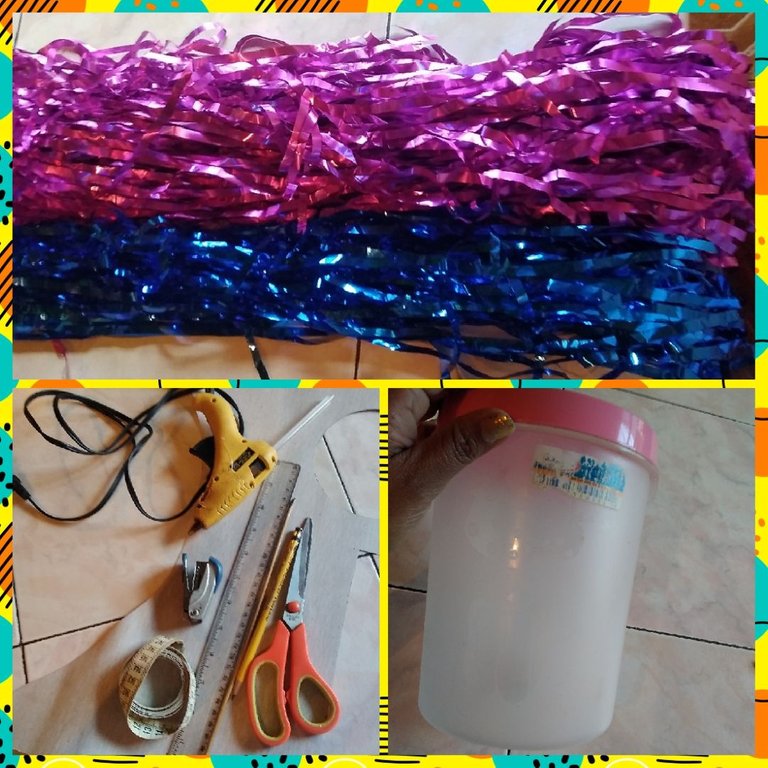
🎉 2 Cortinas tipo lluvia fucsia y azul rey
🎉 Pistola de silicón o pega
🎉 Tijera, cinta métrica, engrapadora, lápiz y regla
🎉 1 Envase plástico para apoyar la peluca
🎉 Cartulina o cartón
🎉 Palito de altura
Hello, Hello 👋 friends of this creative community @Hivediy I hope you are very well!!!🤗
Here today bringing you a new project that you will love because we are in the most colorful time of all "CarnavaL"🤡 🎉🎉🎉 which means costumes, comparsa, little papers, I love carnival!!! and I enjoy it to the fullest because I like dressing up so much 😊 the only bad thing is that it's very short.
This year for the carnival party at my school where I am a teacher, I decided to dress up as a clown but I had a small inconvenience: I had the costume but not the wig, which is why I came up with the idea of doing it since it had some curtains of party that were damaged and I saved them precisely in case I needed them later for a project and the day came to give them a new use.
That is why I invite you to this simple step by step to make your clown wig, without spending your money and at the same time you will be recycling and you will love the result you will get 😊 I assure you
We are going to use the following materials:
🎉 2 Fuchsia and royal blue rain curtains
🎉 Silicone gun or glue
🎉Scissors, tape measure, stapler, pencil and ruler
🎉 1 Plastic container to support the wig
🎉 Cardboard or cardboard
🎉 Height stick
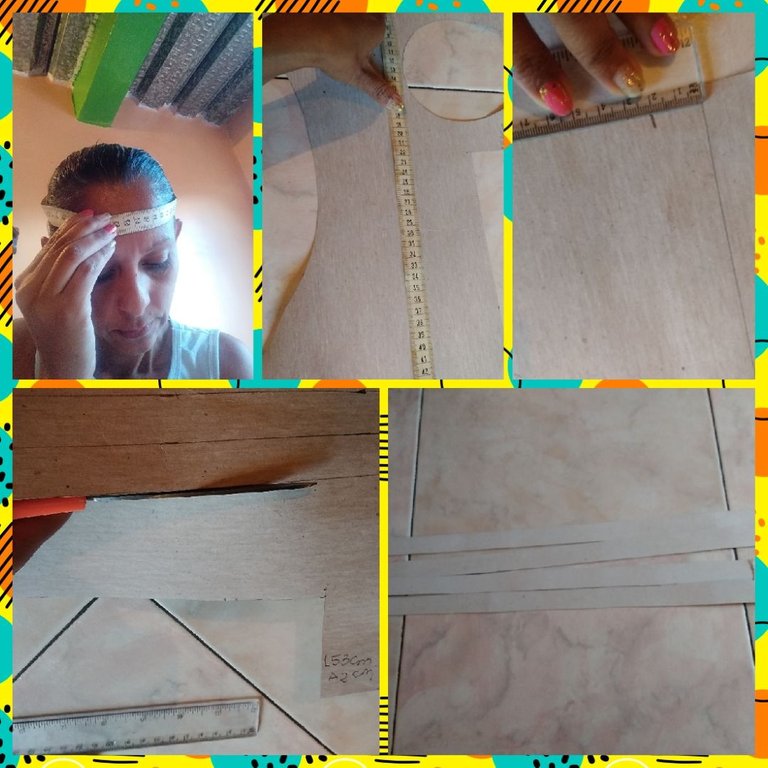
Lo primero que harás es tomar la medida de tu cabeza con la cinta métrica, la mía mide 98cm con esta medida sacaremos la tira que será nuestra base, tomamos la cartulina y marcamos con la regla estas medidas 98cm de largo x 2cm de ancho.
Seguidamente marcaremos 3 tiritas de las mismas medidas para armar el caparazón de la peluca, con ayuda de la tijera recortamos las mismas.
The first thing you will do is take the measurement of your head with the tape measure, mine measures 98cm with this measurement we will remove the strip that will be our base, we take the cardboard and mark these measurements with the ruler 98cm long x 2cm wide.
Next we will mark 3 strips of the same measurements to assemble the shell of the wig, with the help of scissors we cut them.
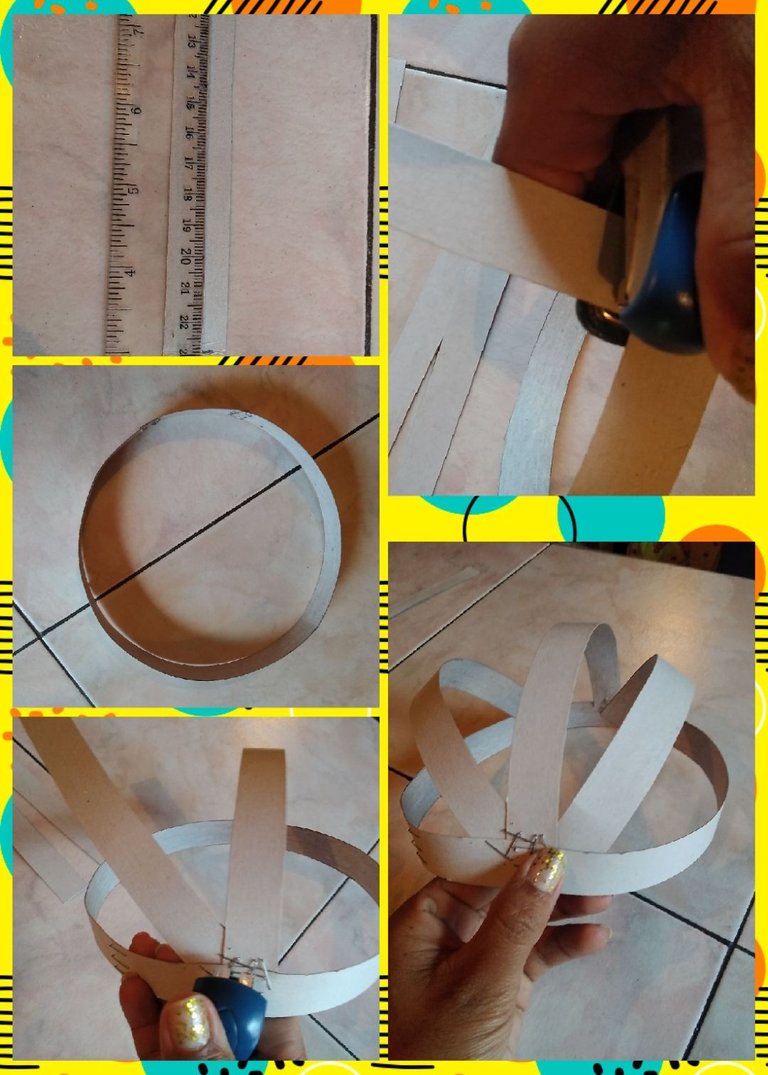
🎉 Tomamos nuestras tiras que sacamos en el paso anterior, armaremos un aro con la engrapadora procedemos a grapar para cerrar al hacerlo asegurarnos que no nos quede flojo.
🎉 En el aro visualizaremos cual es el centro alli engraparemos una tira de forma vertical le daremos una pequeña curvatura y se engrapara al otro extremo.
🎉 La siguiente tira se engrapara de igual manera en el centro del aro, detrás de la anterior esta se le dará una pequeña caida hacia un lado y se engrapara en el otro extremo dejando una pequeña distancia de la otra.
🎉 Para la tercera tira se repite el paso anterior y listo ya nuestro caparazón o esqueleto de nuestra peluca esta listo.
Nota: en mi caso para la parte de arriba use 3 tiras ya que mi cabeza no es tan ancha de eso va a depender la cantidad de las mismas.
🎉 We take our strips that we took out in the previous step, we will assemble a ring with the stapler, we proceed to staple to close by making sure that it is not loose.
🎉 In the hoop we will visualize which is the center, there we will staple a strip vertically, we will give it a small curvature and it will be stapled to the other end.
🎉 The next strip will be stapled in the same way in the center of the ring, behind the previous one it will fall slightly to one side and it will be stapled at the other end, leaving a small distance from the other.
🎉 For the third strip, the previous step is repeated and our shell or skeleton of our wig is ready.
Note: in my case for the upper part I used 3 strips since my head is not that wide, the amount of them will depend on that.
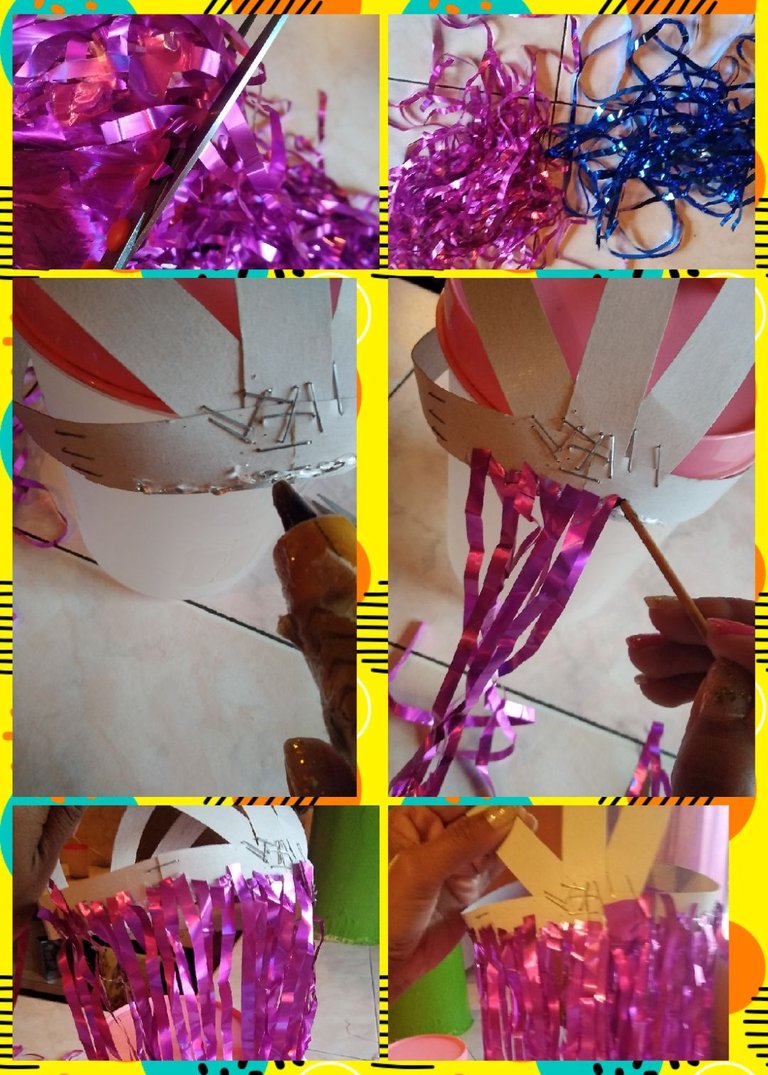
🎉 Ahora tomaremos las cortinas y con ayuda de la tijera cortamos una gran cantidad de tiritas de cada color.
🎉 Apoyaremos nuestro esqueleto de la peluca en el envase plástico para que el trabajo sea más fácil, se comenzara por la parte delantera se le coloca silicón y se van pegando las tiritas de color fucsia por todo el aro en la orilla del mismo y para evitar quemarnos se utiliza el palito de altura. Seguiremos pegando las tiritas fucsia hasta terminar todo el aro.
🎉 En las tiras laterales la de la izquierda y derecha pegaremos primero una tira de color azul luego fucsia asi seguiremos hasta culminar las tiras laterales.
🎉 En la tira del centro le pegue solo fucsia ya que la azul se me término, el procedimiento de esta es comenzar pegando en la orilla de un lado y del otro hasta tapar toda la cartulina cuidando de no dejar espacios y que nuestra peluca nos quede toda cubierta.
🎉 Now we will take the curtains and with the help of the scissors we will cut a large number of band-aids of each color.
🎉 We will support our skeleton of the wig in the plastic container so that the work is easier, it will begin at the front, silicone is placed and the fuchsia band-aids are glued all over the ring on the edge of it and to avoid burn us the height stick is used. We will continue gluing the fuchsia band-aids until the entire hoop is finished.
🎉 On the lateral strips, the one on the left and right, we will first glue a blue strip, then fuchsia, so we will continue until the lateral strips are finished.
🎉 In the center strip I only glued fuchsia since the blue one is over, the procedure for this is to start gluing on the edge of one side and the other until all the cardboard is covered, taking care not to leave spaces and that our wig fits us all covered.
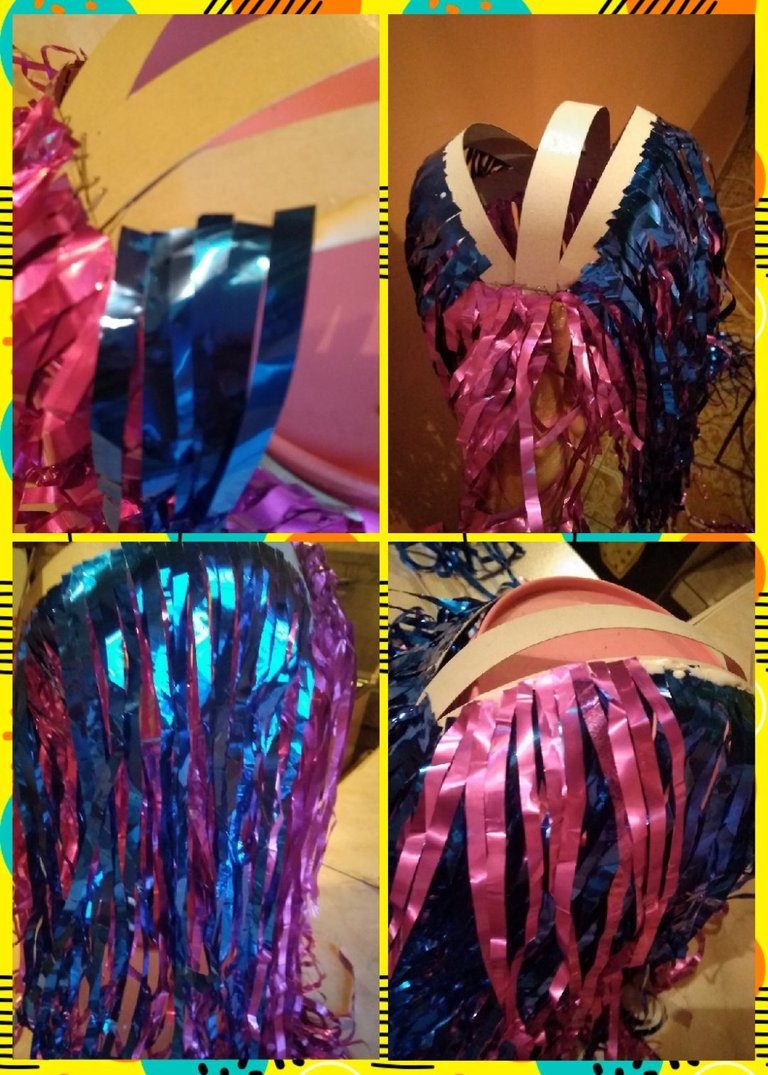
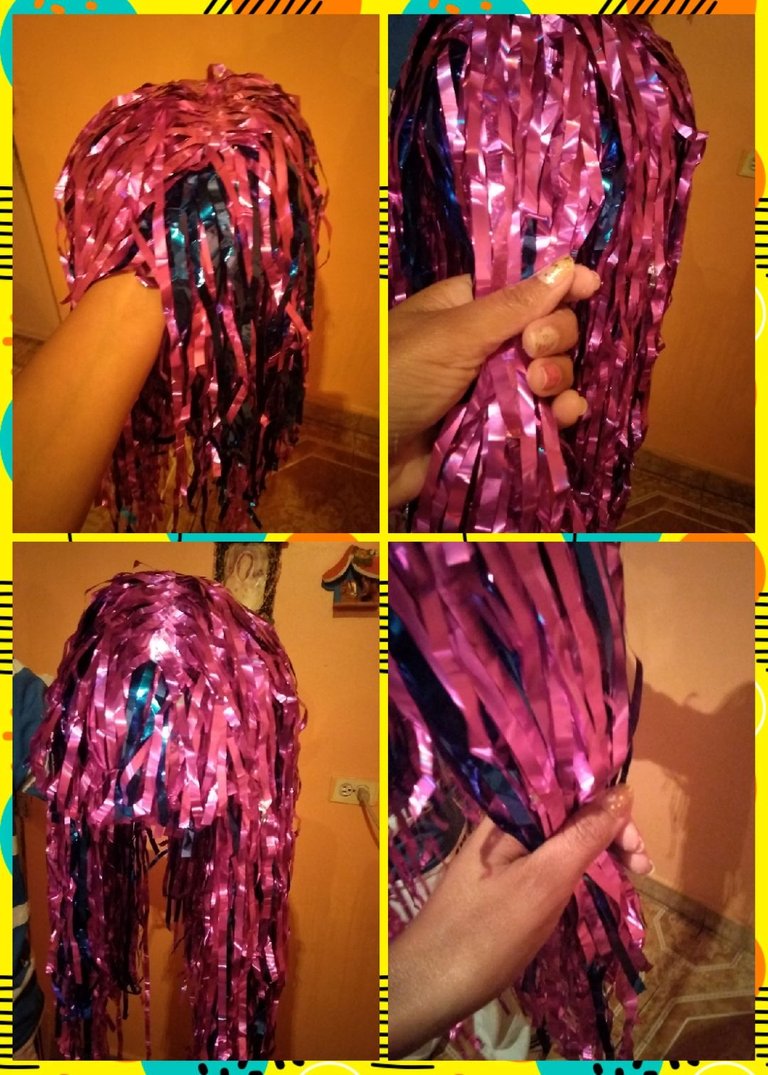
🎉 En el paso anterior terminamos de pegar las tiritas de colores para obtener nuestra peluca, ahora tomaremos la tijera para primero dar forma a la pollina o flequillo, tomaremos la cantidad deseada cortamos a la altura necesaria que nos nos tape nuestros ojos al usarla para ello midetela para no quede ni muy larga ni muy corta.
🎉 ahora haremos n corte de cabello a nuestra peluca para ello cortaremos el largo deseado de nuestra peluca en mi caso la deje a la altura de mis hombros, al realizar el corte hazlo cuidando que nos quede de la misma medida.
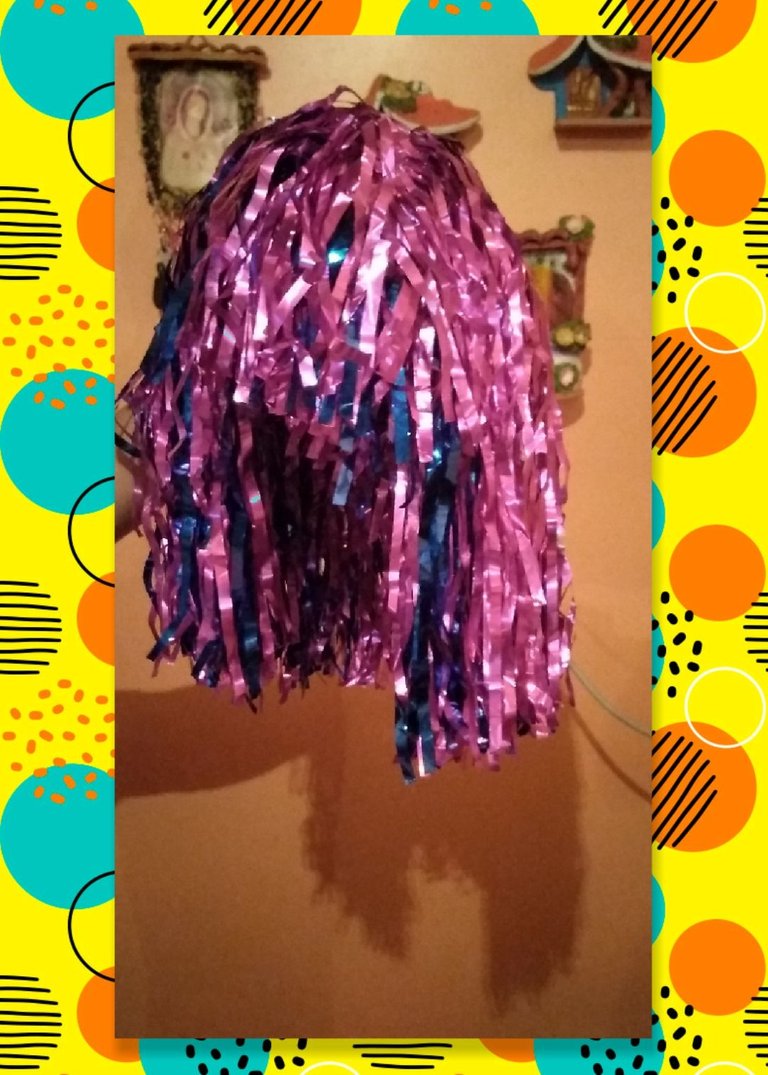
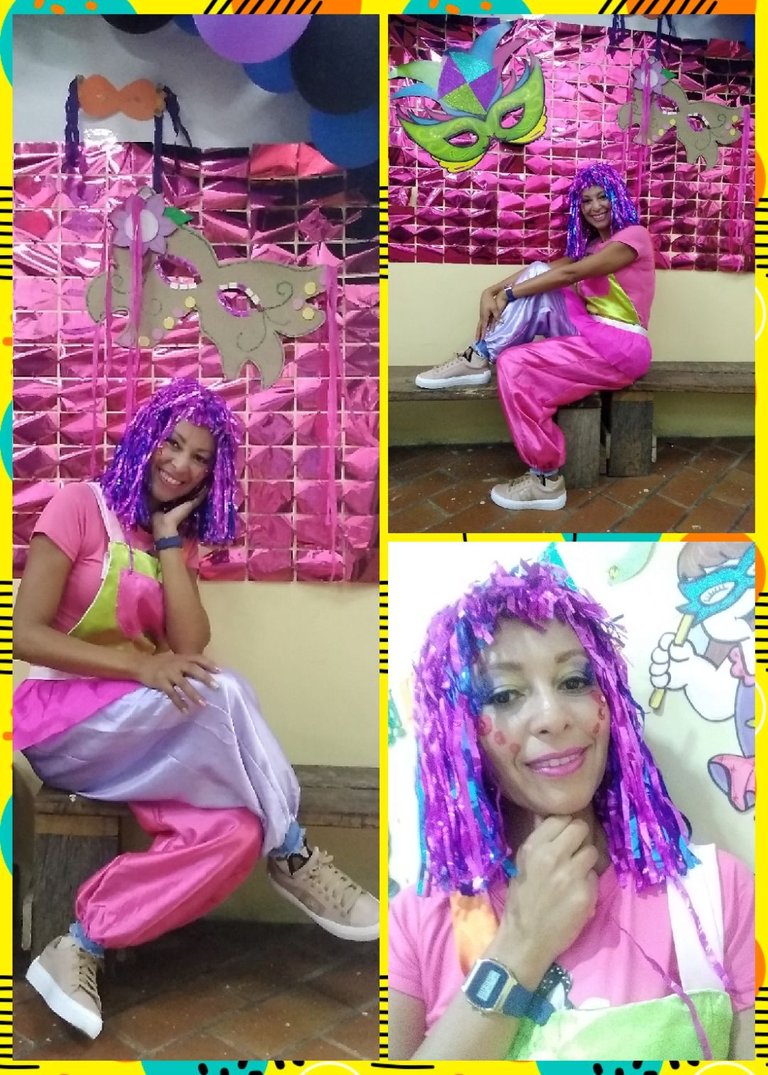
Ya la peluca esta lista para usar y terminar de complementar nuestro disfraz de payasita, el resultado me encanto quedo tal como la visualice, recibí muchos halagos y lo mejor de todo no gaste 💵 recicle reuse y cree, espero a ti te guste y te animes hacerla para ti o para los pequeños de la casa y a divertirse representando un lindo payasito o payasita.
🎉 In the previous step we finished gluing the colored strips to obtain our wig, now we will take the scissors to first shape the chicken or bangs, we will take the desired amount and cut at the necessary height that covers our eyes when using it for it Measure it so that it is neither too long nor too short.
🎉 now we will do a haircut to our wig for this we will cut the desired length of our wig in my case leave it at the height of my shoulders, when making the cut do it taking care that it fits us the same size.
Now the wig is ready to wear and finish complementing our clown costume, I loved the result, it was just as I visualized it, I received many compliments and best of all, I didn't spend 💵 recycle, reuse and create, I hope you like it and encourage yourself Make it for yourself or for the little ones in the house and have fun representing a cute little clown or clown.
Mi Hermoso Resultado 😘
Gracias a ti que te detienes a leer cada uno de mis post que tengas un lindo día lleno de colores y que pases un "Feliz Carnaval"🎉🎊🎈🎈🤡
Las fotos fueron tomadas y editadas con mi celular
use la aplicación "Foto Collage"
La traducción la realice con el traductor de google
Hasta un Próximo Encuentro!!!
🤗😘
Thanks to you who stop to read each of my posts, have a nice day full of colors and have a "Happy Carnival"🎉🎊🎈🎈🤡
The photos were taken and edited with my cell phone.
use the "Photo Collage" app
The translation is done with google translator
Until a Next Meeting!!!
🤗😘
