Hola, hola espero se encuentren bien 🤗!!!
Hoy por aquí con nuevo proyecto para la cocina unos de los rincones que me encanta tener en orden y que luzca hermoso. Como en casi todas las cocinas hay un espacio para colocar los huevos, en la mía no lo tenia 😨 y dije que más que una gallinita porta huevos, dado a que tenia un guacal sin uso (esto es una cajita hecha de madera) la use para este fin y como me encanta trabajar con foami (goma eva)así la realice.
Los invito a seguirme en mi paso a paso:
Materiales:
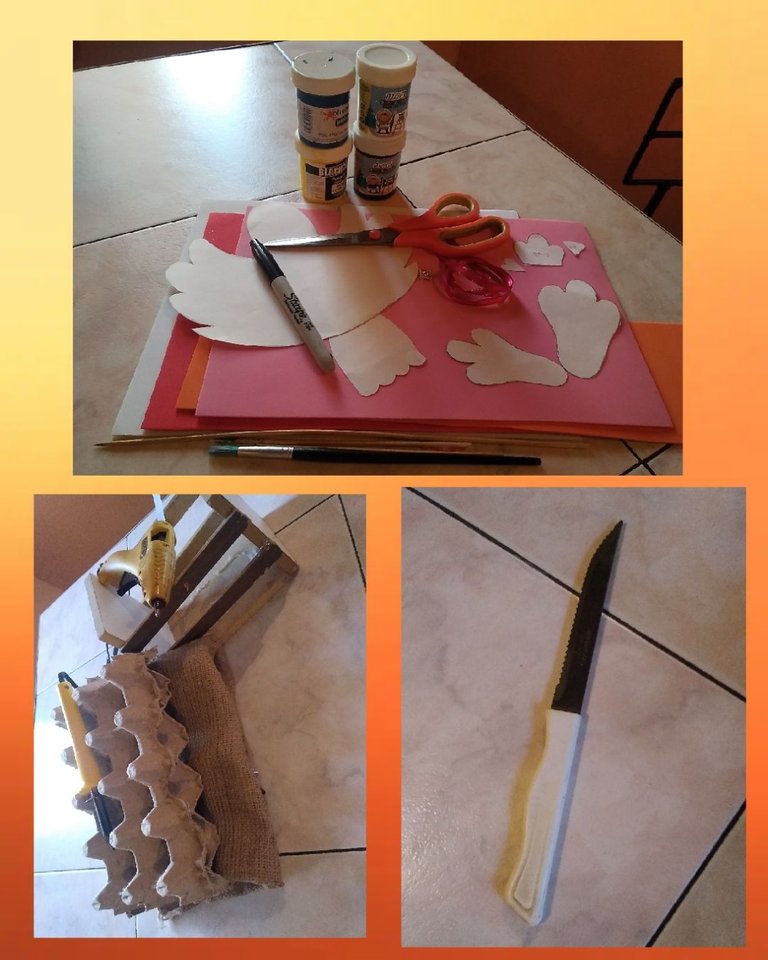
📌 Foami (goma eva) color: rosado, blanco, rojo y naranja.
📌 Pinturas al frío: blanco, negro, amarillo y azul.
📌 Tijera, marcador fino negro, palitos de altura, pincel, cuchillo.
📌 1 guacal mediano, cartones de huevo y yute.
📌 Pistola de silicón y cautíl.
📌 Patrones, cinta de raso delgada fucsia con borde dorado y un botón dorado.
Hello, hello I hope you are well 🤗!!!
Here today with a new project for the kitchen, some of the corners that I love to have in order and that look beautiful. As in almost all kitchens there is a space to place the eggs, in mine I did not have it 😨 and I said that more than an egg-carrying hen, since I had an unused crate (this is a box made of wood) I used it for this purpose and since I love working with foami (eva rubber) so I did it.
I invite you to follow me in my step by step:
Materials:
📌 Foami (eva rubber) color: pink, white, red and orange.
📌 Cold paintings: white, black, yellow and blue.
📌 Scissors, black fine marker, height sticks, brush, knife.
📌 1 medium guacal, egg cartons and jute.
📌 Silicone gun and captive.
📌 Patterns, thin fuchsia satin ribbon with a gold edge and a gold button.
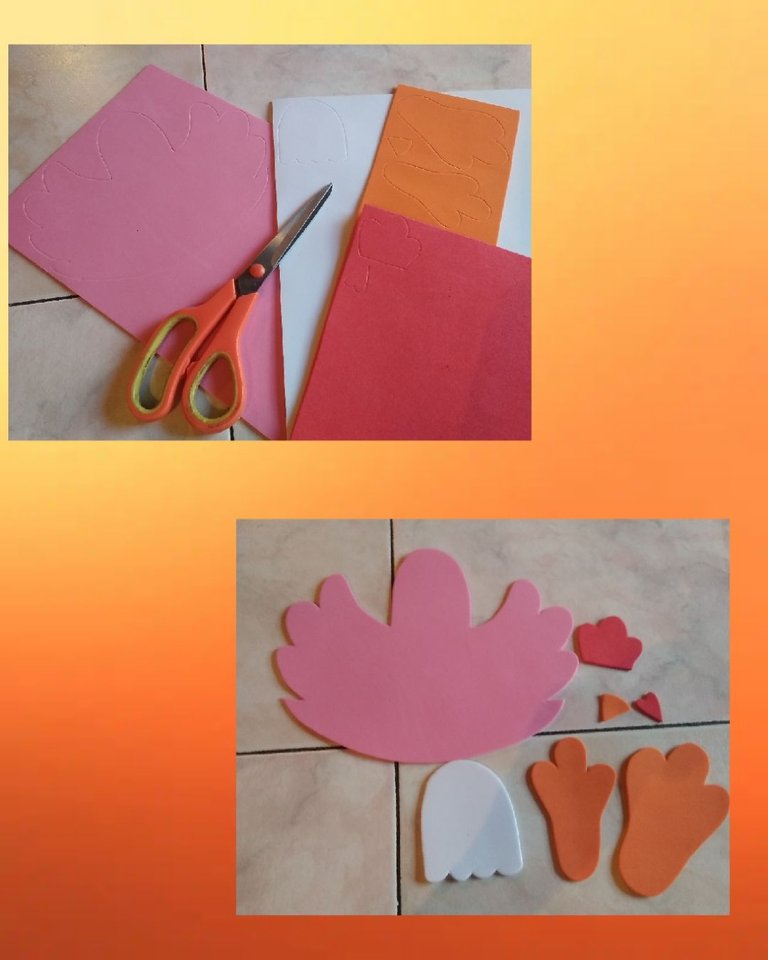
Iniciaremos pasando al foami (goma eva) los patrones de la gallinita usaremos el palito de altura, la silueta de la misma se sacara en rosado ya que esta será la ropa de la misma, la cabeza en el blanco, las dos patitas en naranja y el pico, la cresta y la otra parte que va debajo del pico en rojo.
We will start by going to the foami (eva rubber) the patterns of the little chicken we will use the height stick, the silhouette of the same will be taken in pink since this will be the clothes of the same, the head in white, the two legs in orange and the beak, the crest and the other part that goes under the beak in red.
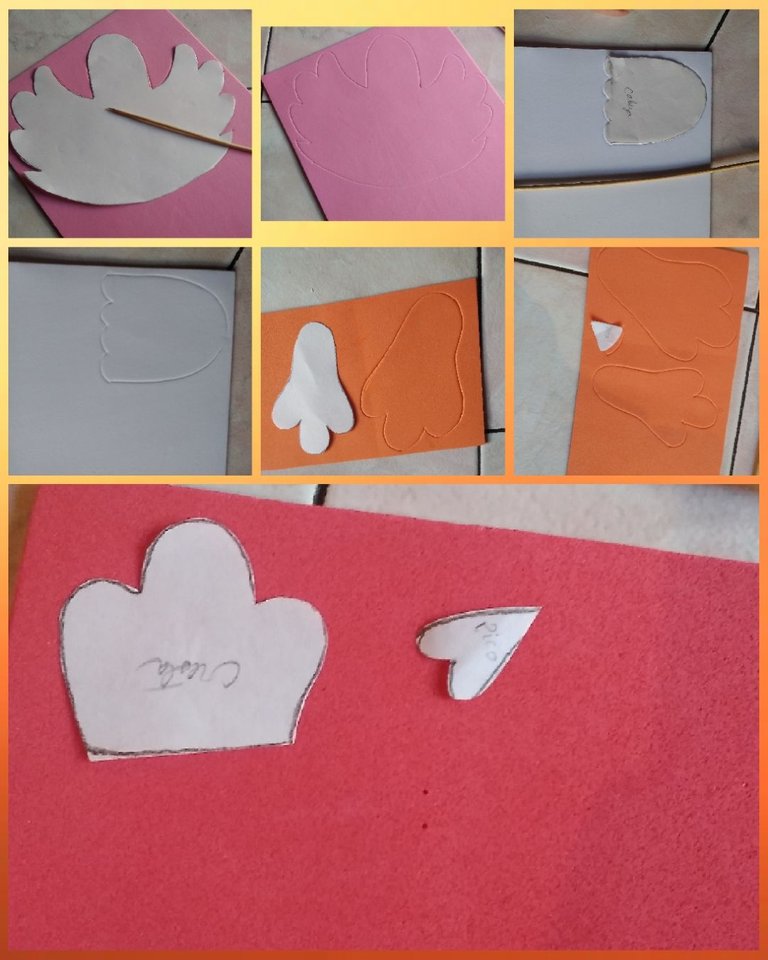
✂️ hora de recortar para ello es primordial que al hacerlo cuidar de hacer los cortes con precisión evitando picotear el foami (goma eva).
✂️ time to cut for this it is essential that when doing it take care to make the cuts accurately avoiding pecking the foami (eva rubber).
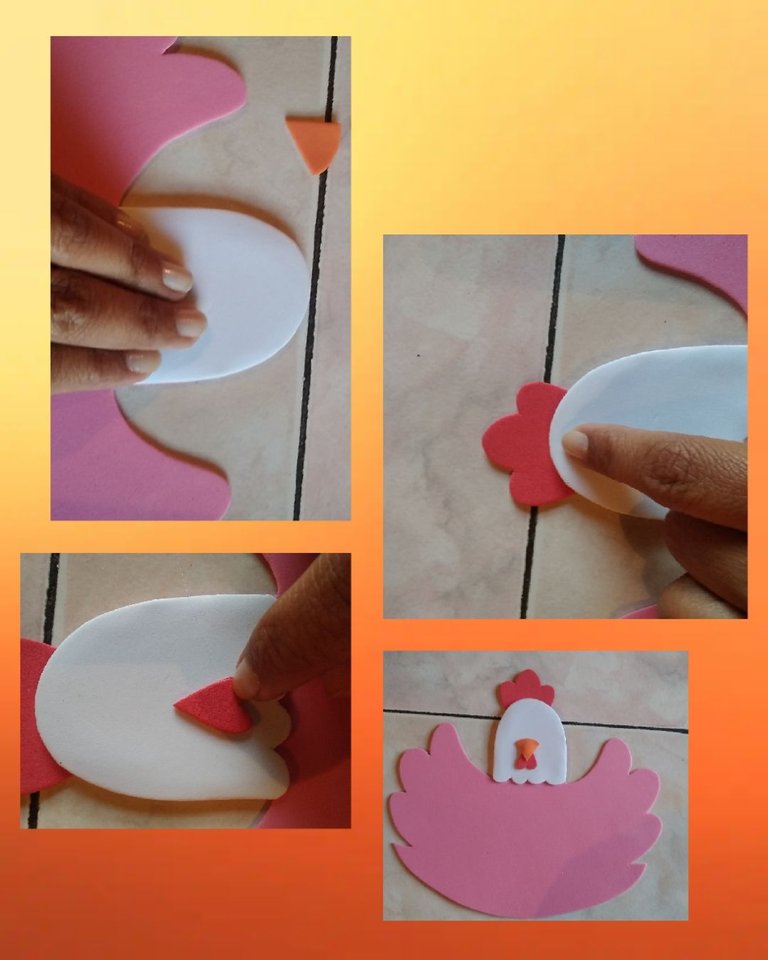
Tomamos la silueta de la gallinita que sacamos en el foami (goma eva) rosado y pegaremos la cabeza usando la pistola de silicón, la cresta se pegara en la cabeza detrás de la misma, también se pegara la pieza que sacamos en rojo que va debajo del pico y encima de esta se pegara el pico.
We take the silhouette of the chicken that we took out in the pink foami (eva rubber) and we will glue the head using the silicone gun, the crest will be glued on the head behind it, the piece that we took out in red that goes below will also be glued of the beak and on top of this the beak will be glued.
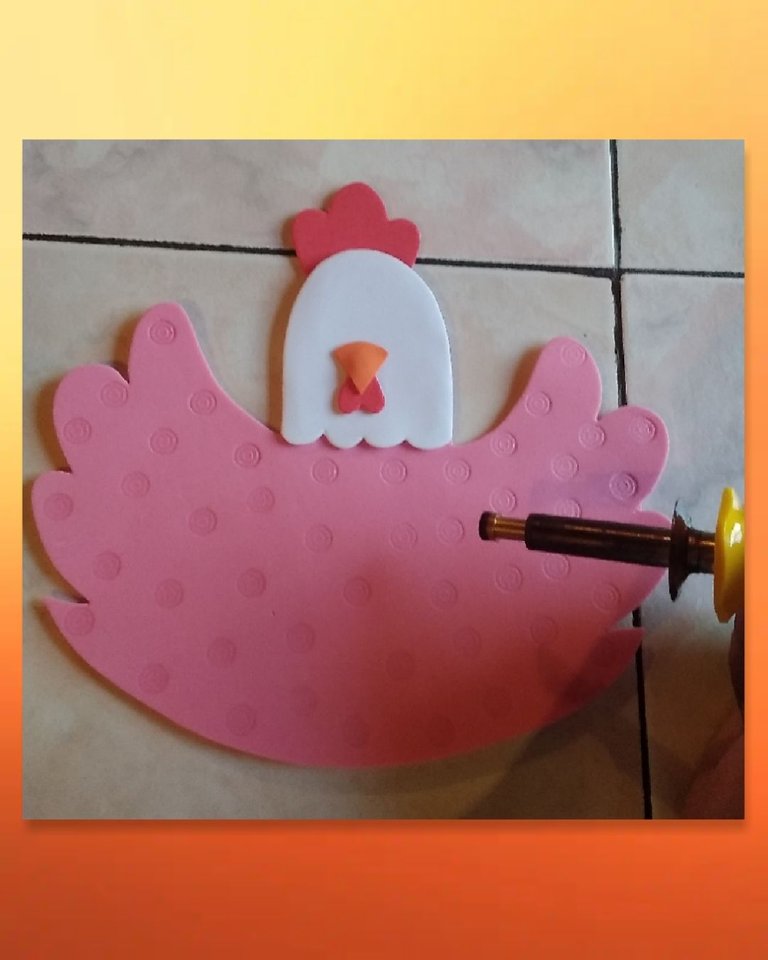
Con el cautíl de formas se maracara por toda la pieza en rosado para asemejar que es el diseño del vestido de la gallinita.
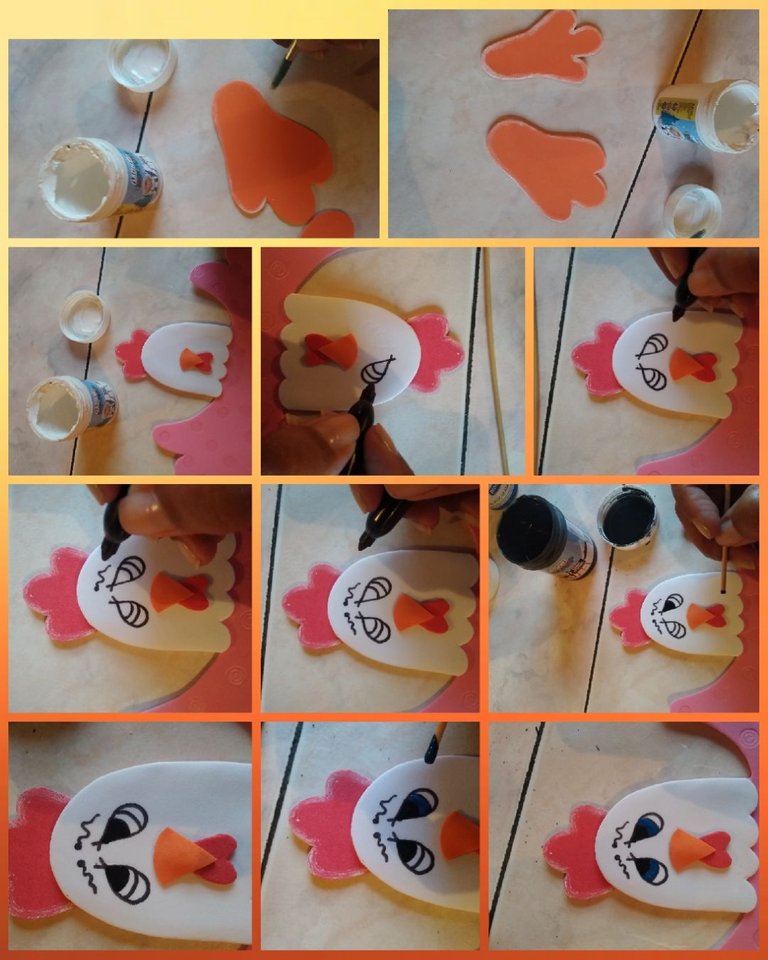
En este paso con la pintura al frío blanca y el pincel difuminaremos las dos patitas y la cresta.
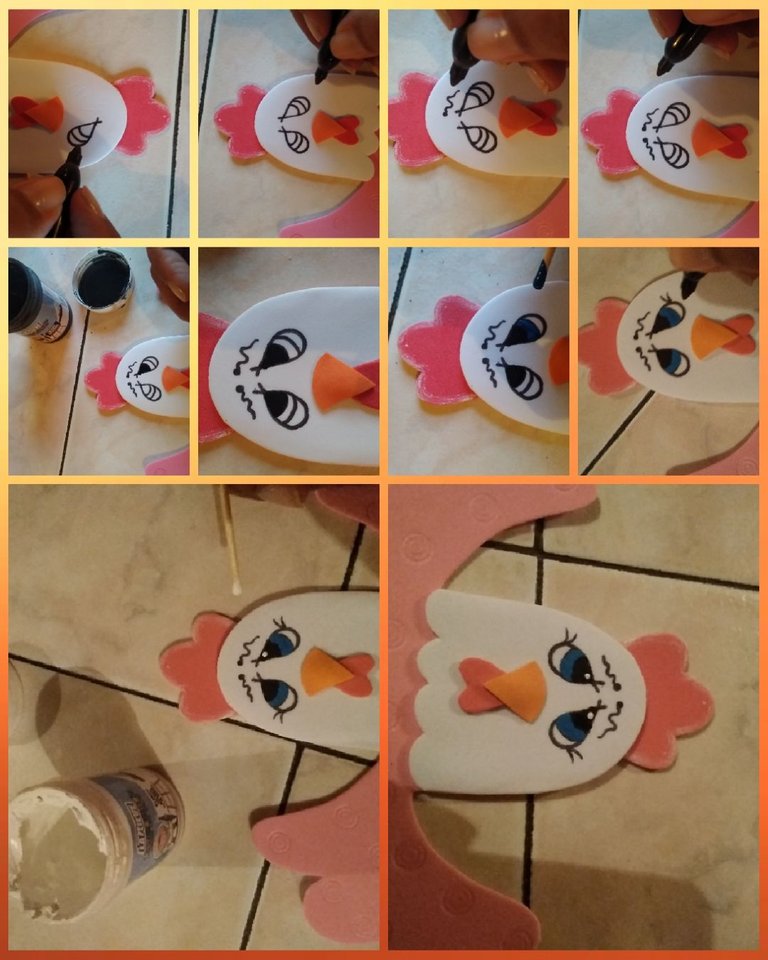
Ahora con el marcador negro fino, dibujaremos los ojos de la gallina y las cejas. Seguidamente pintaremos los mismo primero la parte de arriba del ojo con negro para ello use el palito de altura, continúe con el azul en la franja del medio del ojo, dejaremos secar para luego en la parte del ojo que pintamos en negro con la pintura frío blanca y el palito de altura le haremos un puntito en cada ojo para luego dejar secar al aire libre.
In this step, with the white cold paint and the brush, we will blur the two legs and the crest.
Now with the fine black marker, we will draw the chicken's eyes and eyebrows. Next we will paint the same first the upper part of the eye with black for this use the height stick, continue with the blue in the strip in the middle of the eye, we will let it dry and then in the part of the eye that we paint in black with the cold paint white and the tall stick we will make a dot in each eye and then let it dry in the open air.
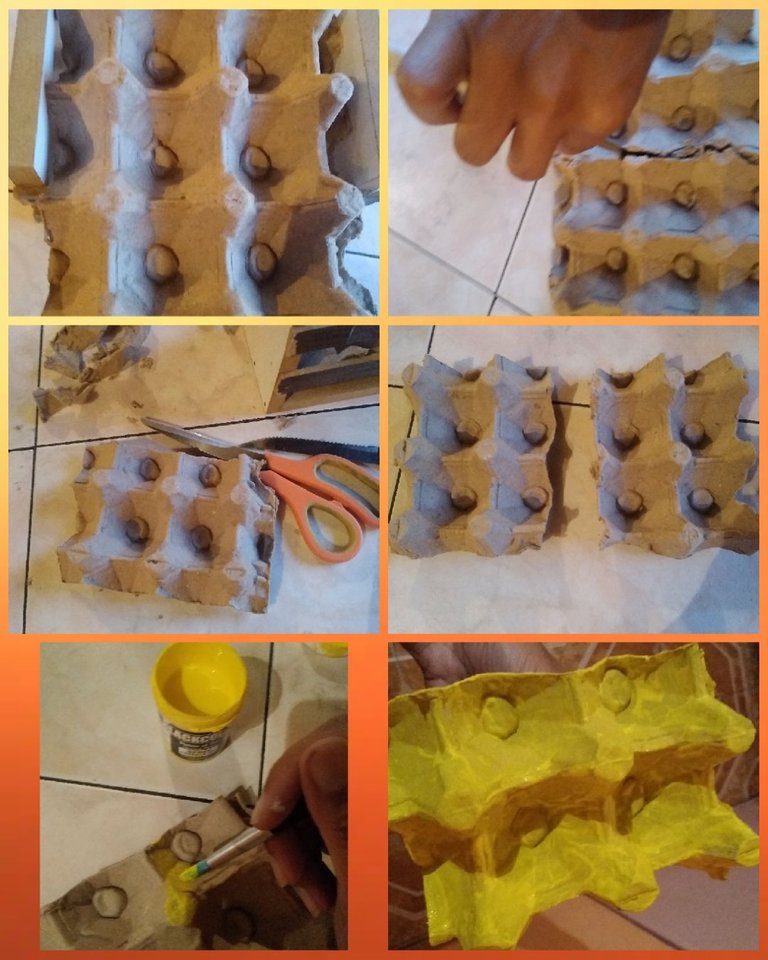
Procederemos a picar los cartones de huevo primero con el cuchillo para que sea más fácil terminar con la tijera, para ello tomaremos la medida del guacal, en mi caso pique dos uno para rellenar y el otro que pinte con la pintura al frío amarilla ya que allí se colocarán los huevos y será visible.
We will proceed to chop the egg cartons first with the knife so that it is easier to finish with the scissors, for this we will take the measure of the gourd, in my case chop two one to fill and the other to paint with the yellow cold paint since there the eggs will be placed and it will be visible.
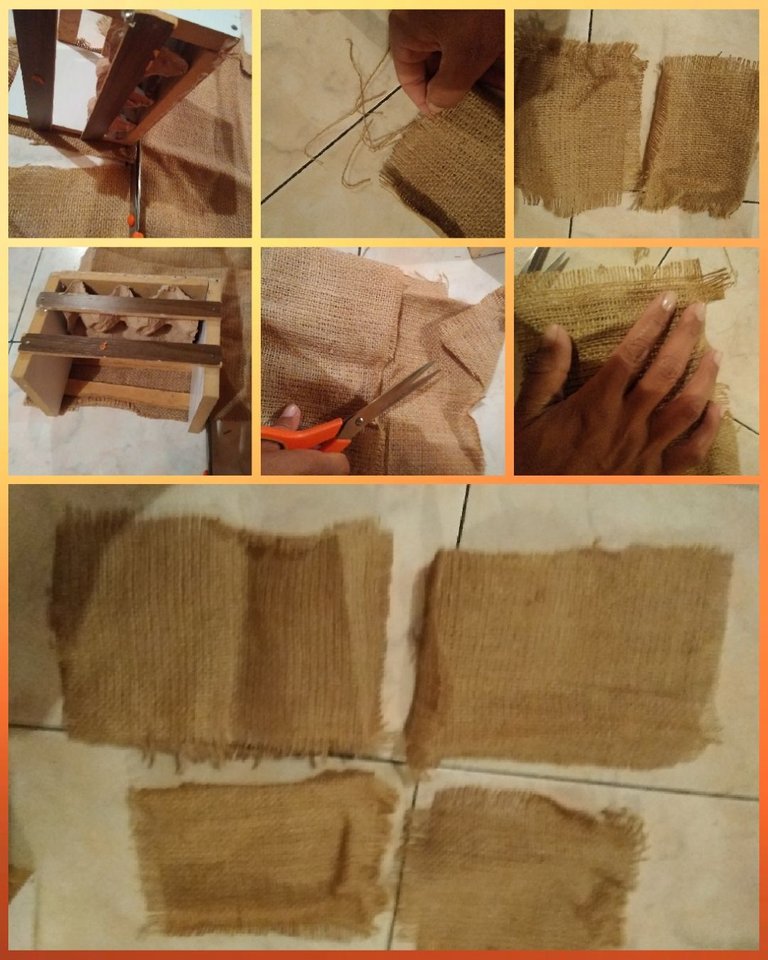
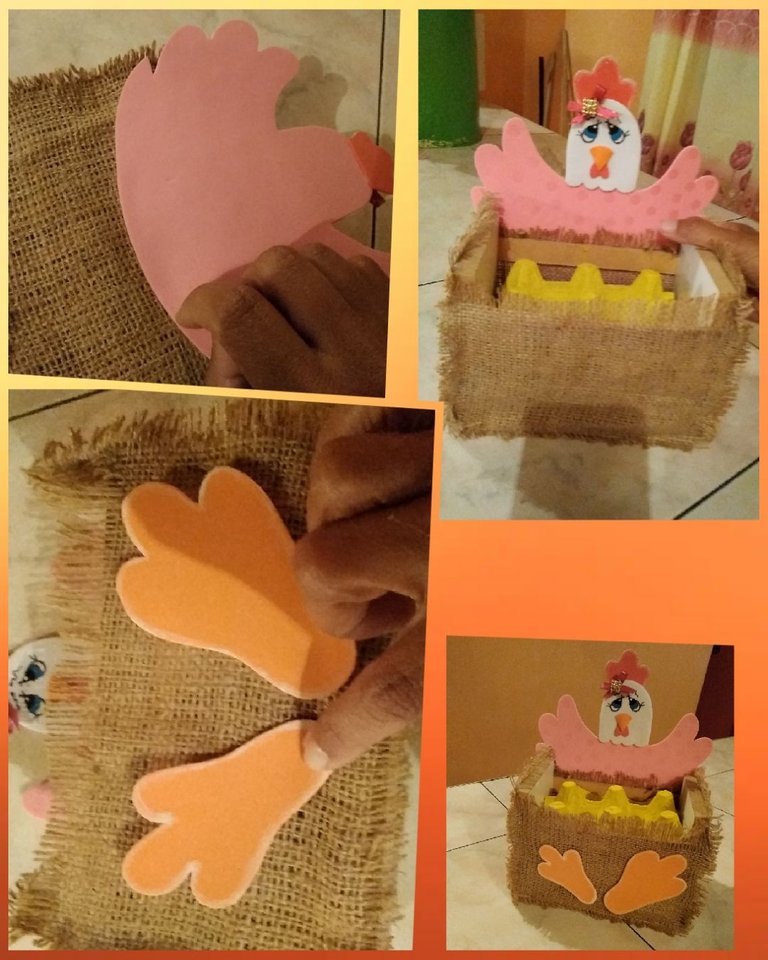
📌En este paso usaremos el yute para forrar el guacal, tomaremos la medida de cada uno de los lados colocando el mismo encima y se recortara con la tijera. Al tener los cortes como el yute se puede hilachar le retiraremos algunos de sus hilos para que al pegarlo quede el hilachado hacia afuera y lucira aún más hermoso.
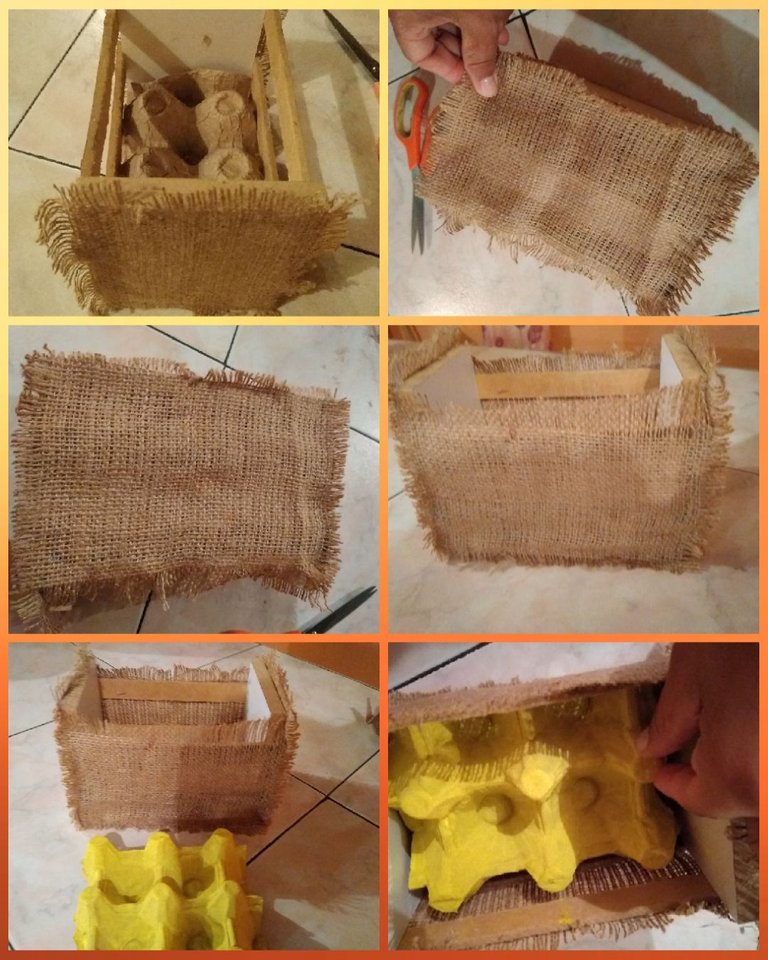
📌Ahora pegaremos con silcón el yute para forrar cada uno de los lados del guacal primero meteremos el cartón de huevo sin pintar, cuando ya quede forrado meteremos el cartón de huevo que esta pintado de amarillo.
📌In this step we will use the jute to line the guacal, we will take the measure of each one of the sides placing it on top and it will be cut with scissors. By having the cuts like jute, it can be spun, we will remove some of its threads so that when it is glued, the spun is left out and it will look even more beautiful.
📌Now we will glue the jute with silicone to cover each of the sides of the guacal. First we will put the unpainted egg carton, when it is lined we will put the egg carton that is painted yellow.
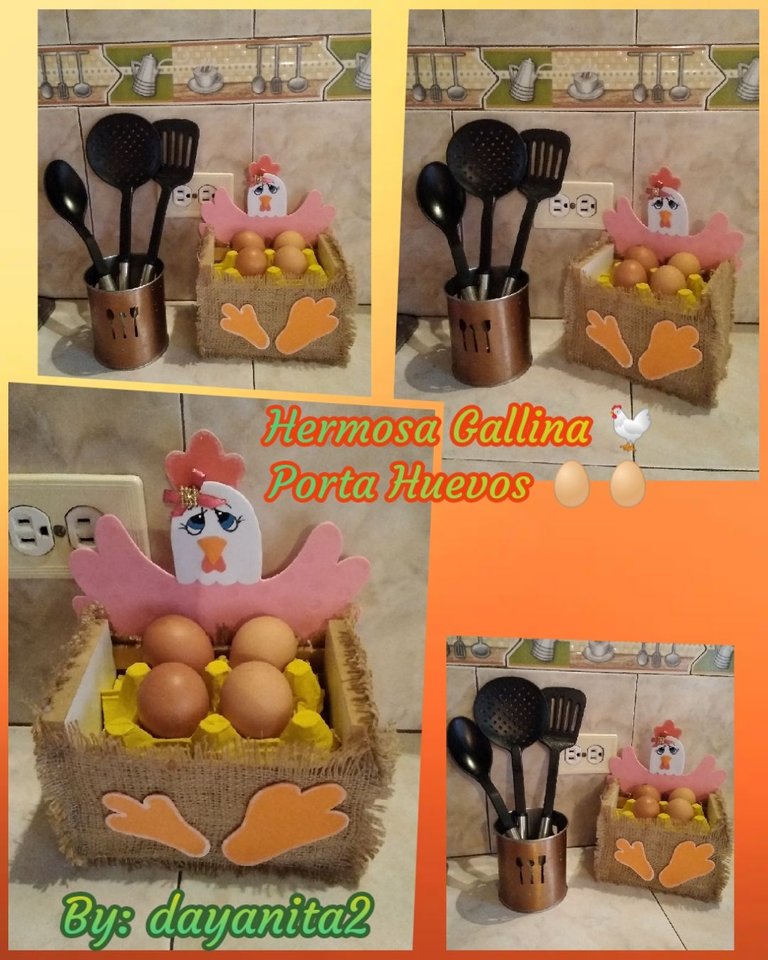
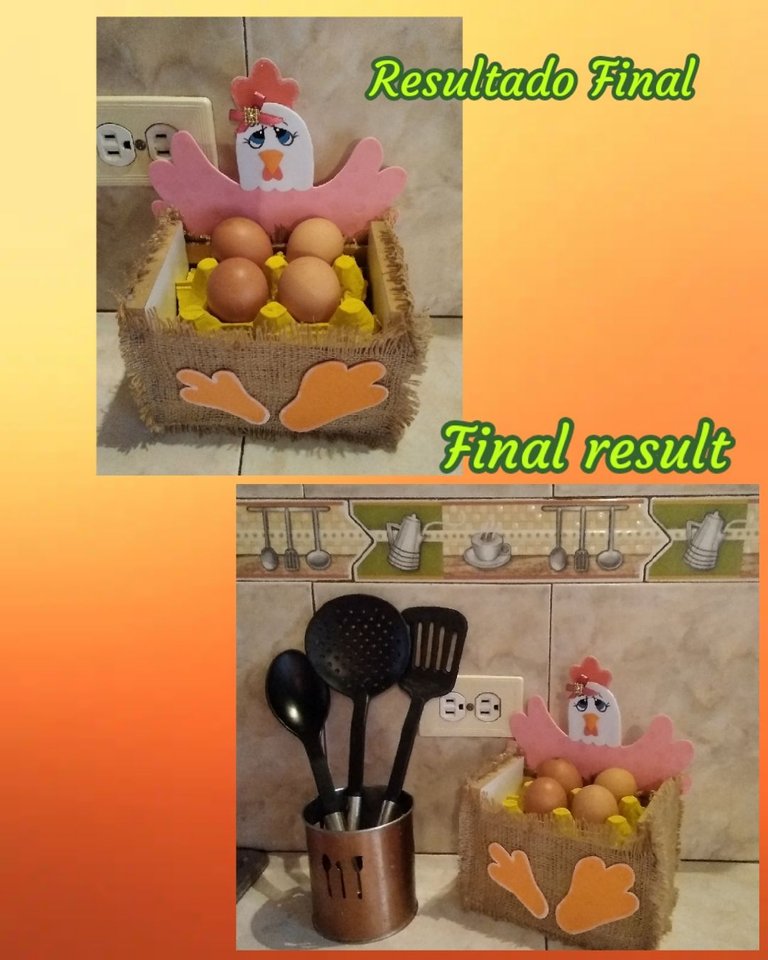
Tomaremos el guacal que forramos con yute y la gallinita la pegaremos en uno de los lados del mismo quedandonos como esta en la imágen para ello usaremos abundante silicón, en la parte delantera pegaremos las dos patitas y lista para usar nuestra gallinita porta huevos, a mi me encanto el resultado en mi cocina luce hermosa y combina perfectamente.
Ahora te invito a ti a realizarla para que combine con la decoración de tu cocina y tengas tus huevos a la mano cuando los necesites.
Aquí te dejo mi lindo resultado 😘
We will take the crates that we lined with jute and we will glue the chicken on one side of it, staying as it is in the image, for this we will use plenty of silicone, on the front we will glue the two legs and ready to use our egg-carrying chicken, to my I loved the result in my kitchen looks beautiful and combines perfectly.
Now I invite you to make it so that it matches the decoration of your kitchen and you have your eggs at hand when you need them.
Here I leave you my beautiful result 😘
Gracias a ti que te detienes a leer cada una de mis publicaciones, que tengas un lindo día lleno de energías positivas!!! ✨🙏
Las fotos fueron tomadas y editadas con mi celular
use la aplicación "Foto Collage"
La traducción la realice con el traductor de google
Hasta un Próximo Encuentro!!!
🤗😘
Thanks to you who stop to read each of my posts, have a nice day full of positive energy!!! ✨🙏
The photos were taken and edited with my cell phone.
use the "Photo Collage" app
The translation is done with google translator
Until a Next Meeting!!!
🤗😘
