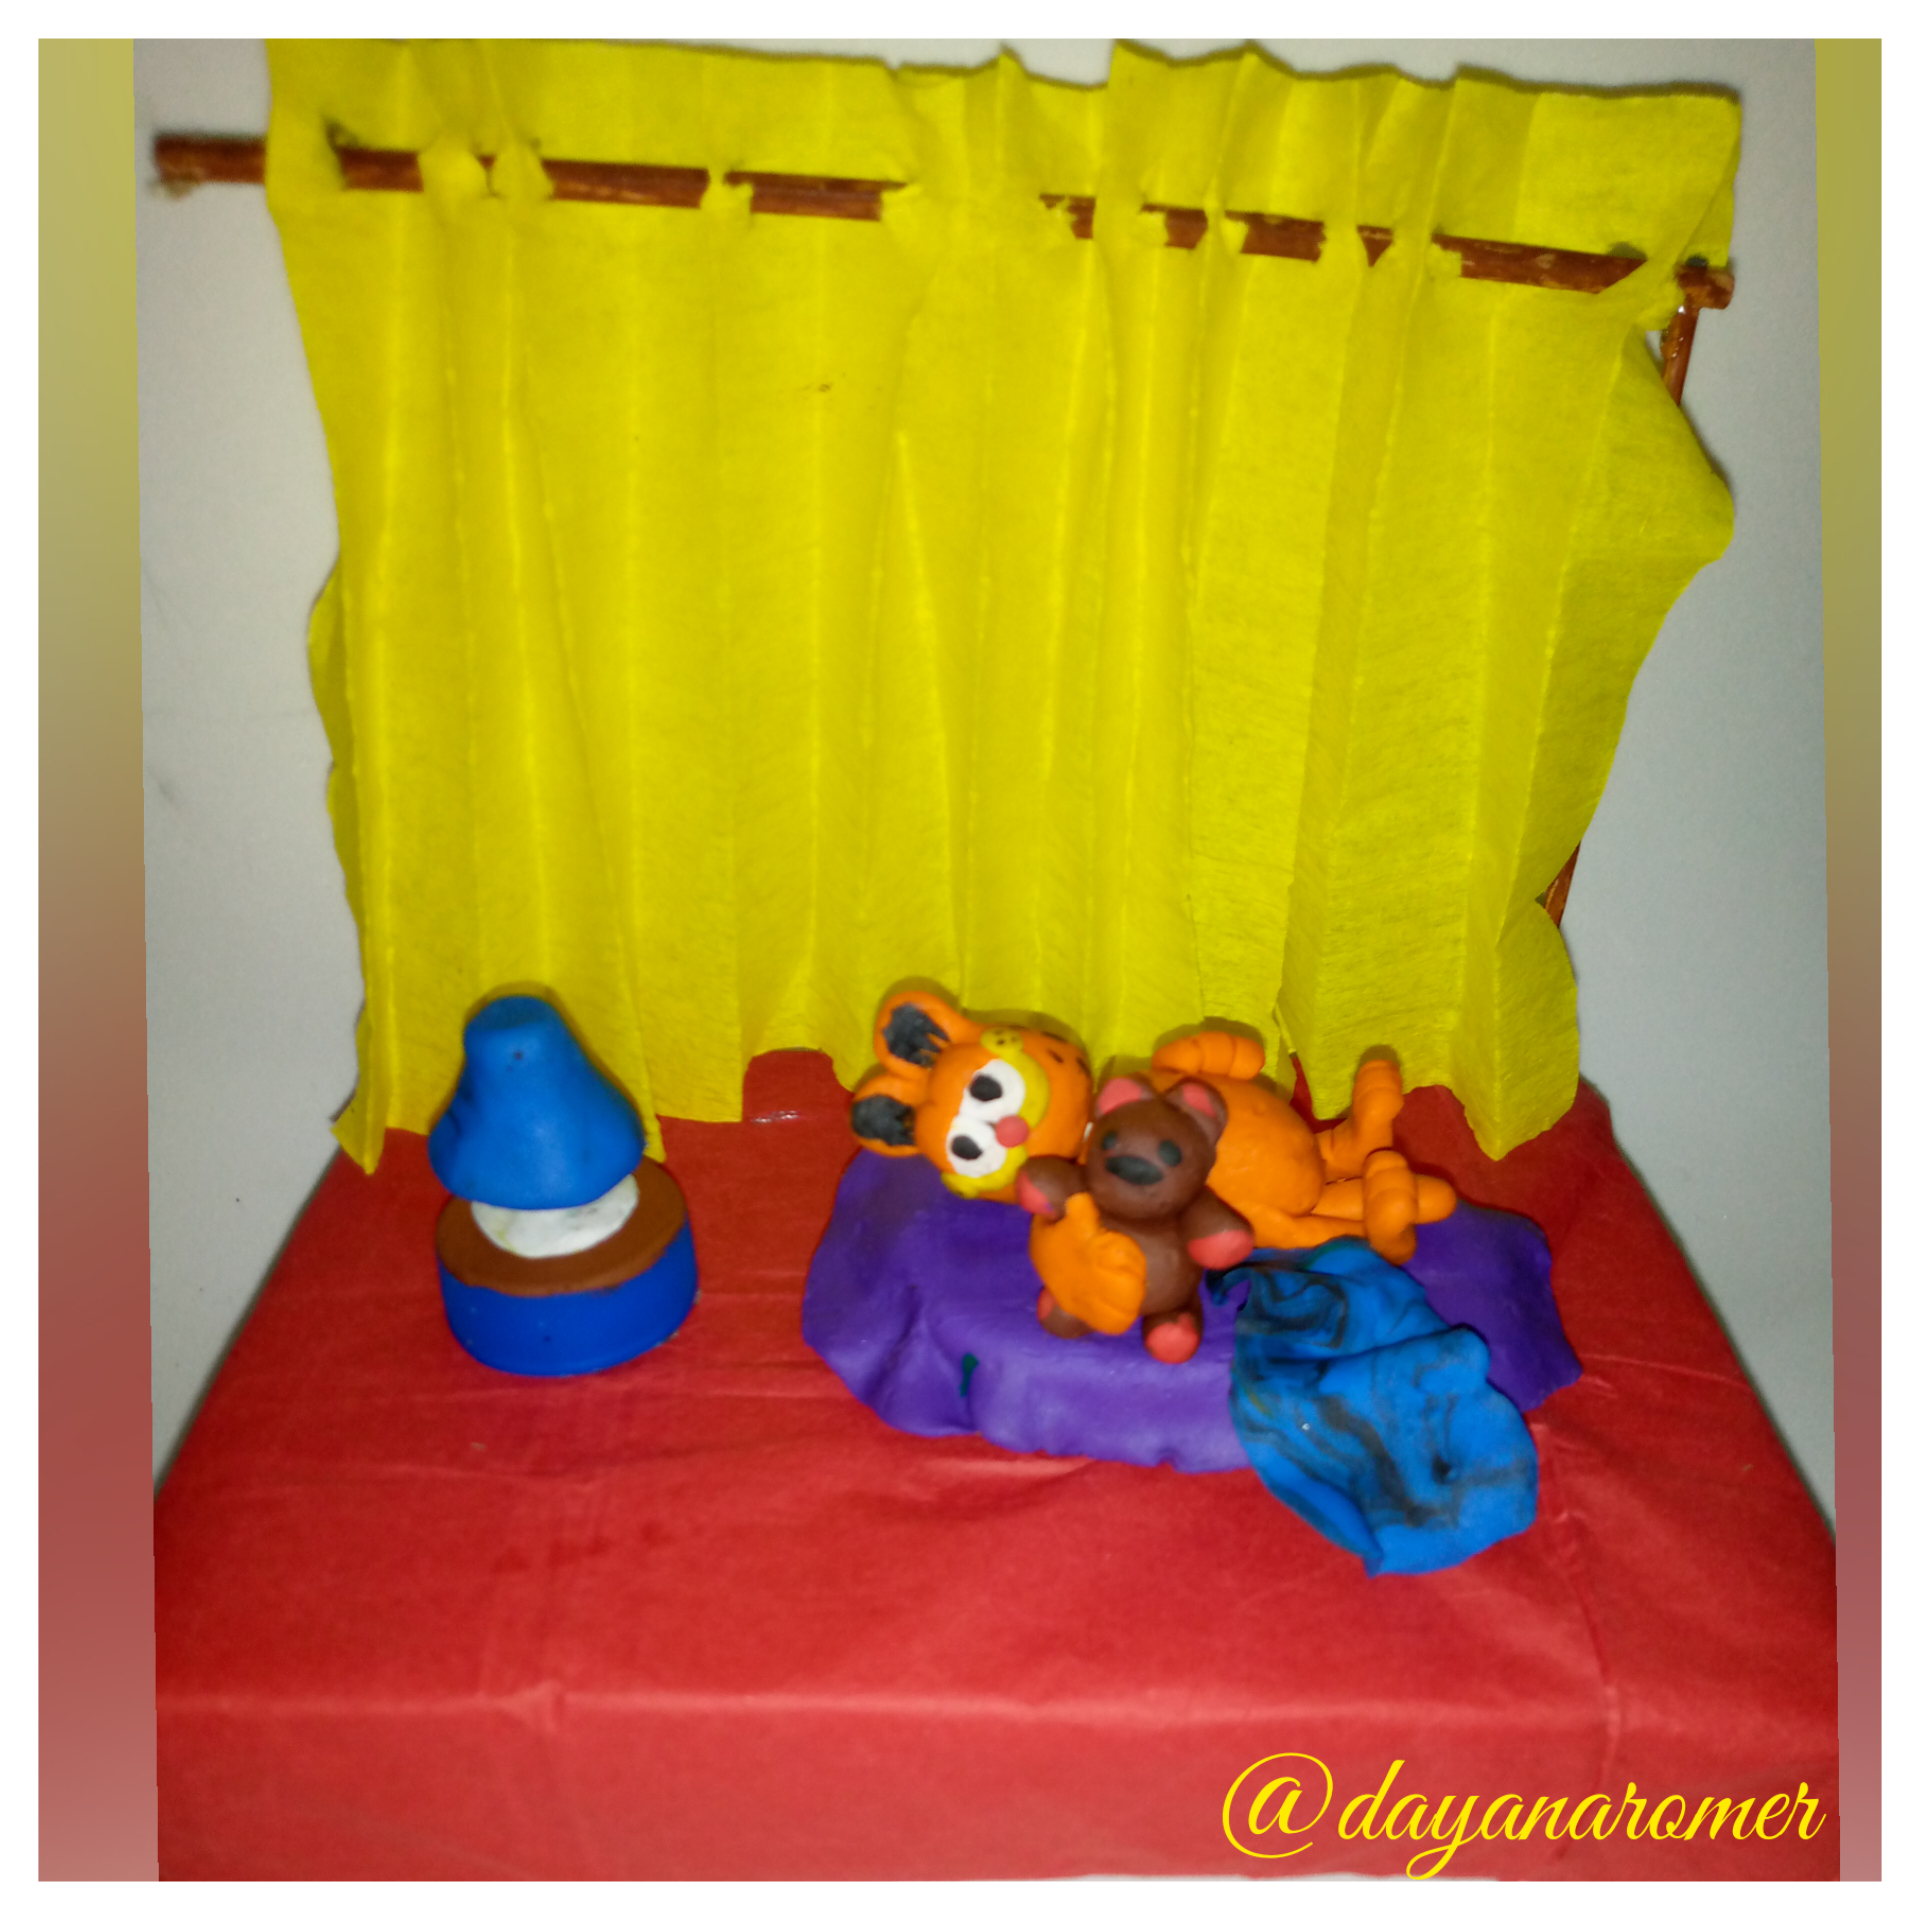
Muy buenas tardes estimados amigos creativos espero estén pasando un excelente domingo en salud y unión familiar.
Very good afternoon dear creative friends, I hope you are having a great Sunday in health and family togetherness.
Les presento mi participación en el nuevo concurso de Diorama de plastilina a cargo de nuestro amigo y nuevo moderador @GaboAMC2393 , les confieso que este concurso ha sido un reto para mí, no tenía la menor idea de que hacer, bueno de como hacer, porque los únicos muñecos que he hecho con plastilina son las muñecas que le hago a mi hija cuándo jugamos que constan de una bolita para la cabeza, un triángulo para el vestido y tubitos para las piernas y brazos, ah y la cesta con 12 bolitas que son los huevos jejeje.
I present my participation in the new contest of Plasticine Diorama by our friend and new moderator @GaboAMC2393, I confess that this contest has been a challenge for me, I had no idea what to do, well how to do, because the only dolls I have made with plasticine are the dolls that I make my daughter when we play that consist of a ball for the head, a triangle for the dress and tubes for the legs and arms, oh and the basket with 12 balls that are the eggs hehehe.
Estuve pasando por las publicaciones de nuestro moderador y dije Wuao como podré hacer eso que es tan perfecto, y entre mucho pensar y buscar la idea llegó sola a mi.
I was going through the publications of our moderator and I said Wuao how can I do that is so perfect, and after much thinking and searching the idea came to me alone.
Mi pequeña coloco un especial en la tv de Garfield, hace mucho que no lo veía, ese gato realmente me encanta, su única afición es comer lasaña y dormir, con cualidades humanas como caminar en dos patas, ser sarcástico y tomar café, en entre otros como tener un osito de peluche que no suelta para dormír, su osito Pooky, y de alli salió mi inspiración para realizar este trabajo que que quizás no es perfecto, pero lo hice con mucho amor y entusiasmo, espero les guste.
My little girl put a Garfield special on TV, I haven't seen him for a long time, I really love that cat, his only hobby is to eat lasagna and sleep, with human qualities like walking on two legs, being sarcastic and drinking coffee, among others like having a teddy bear that does not let go to sleep, his Pooky bear, and from there came my inspiration to make this work that may not be perfect, but I did it with love and enthusiasm, I hope you like it.
Materiales.
- Plastilina colores varios, especialmente el color anaranjado.
- Palitos de altura
- Silicón caliente
- Papel de seda de color terracota
- Papel crepé de color amarillo
- Tijera
- Pintura de color marrón
- Pintura de color negro
-Pincel - Goma espuma gruesa
- Cutter
- Tapa de refresco
Materials.
- Plasticine of various colors, especially orange.
- Sticks of height
- Hot glue
- Terracotta colored tissue paper
- Yellow crepe paper
- Scissors
- Brown paint
- Black paint
-Brush- Thick foam rubber
- Cutter
- Soda cap
Paso a paso
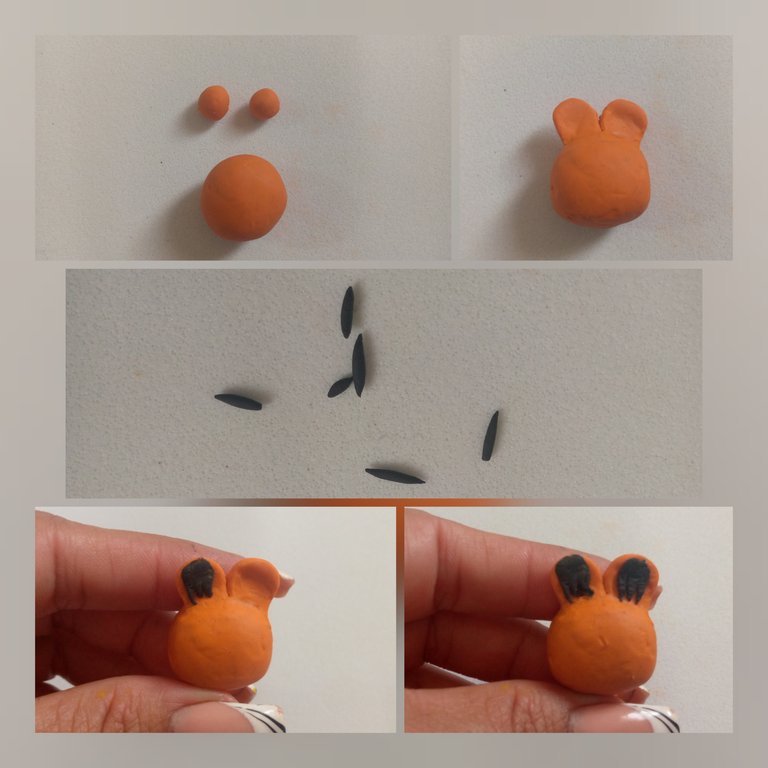
1- Con la plastilina color naranja realiza 3 circunferencias, una para la cabeza y dos pequeñas para las orejas, luego con plastilina negra haz pequeñitos tubitos y adhiere en las orejas.
Step by step
1- With the orange plasticine make 3 circles, one for the head and two small ones for the ears, then with black plasticine make small tubes and stick them on the ears.
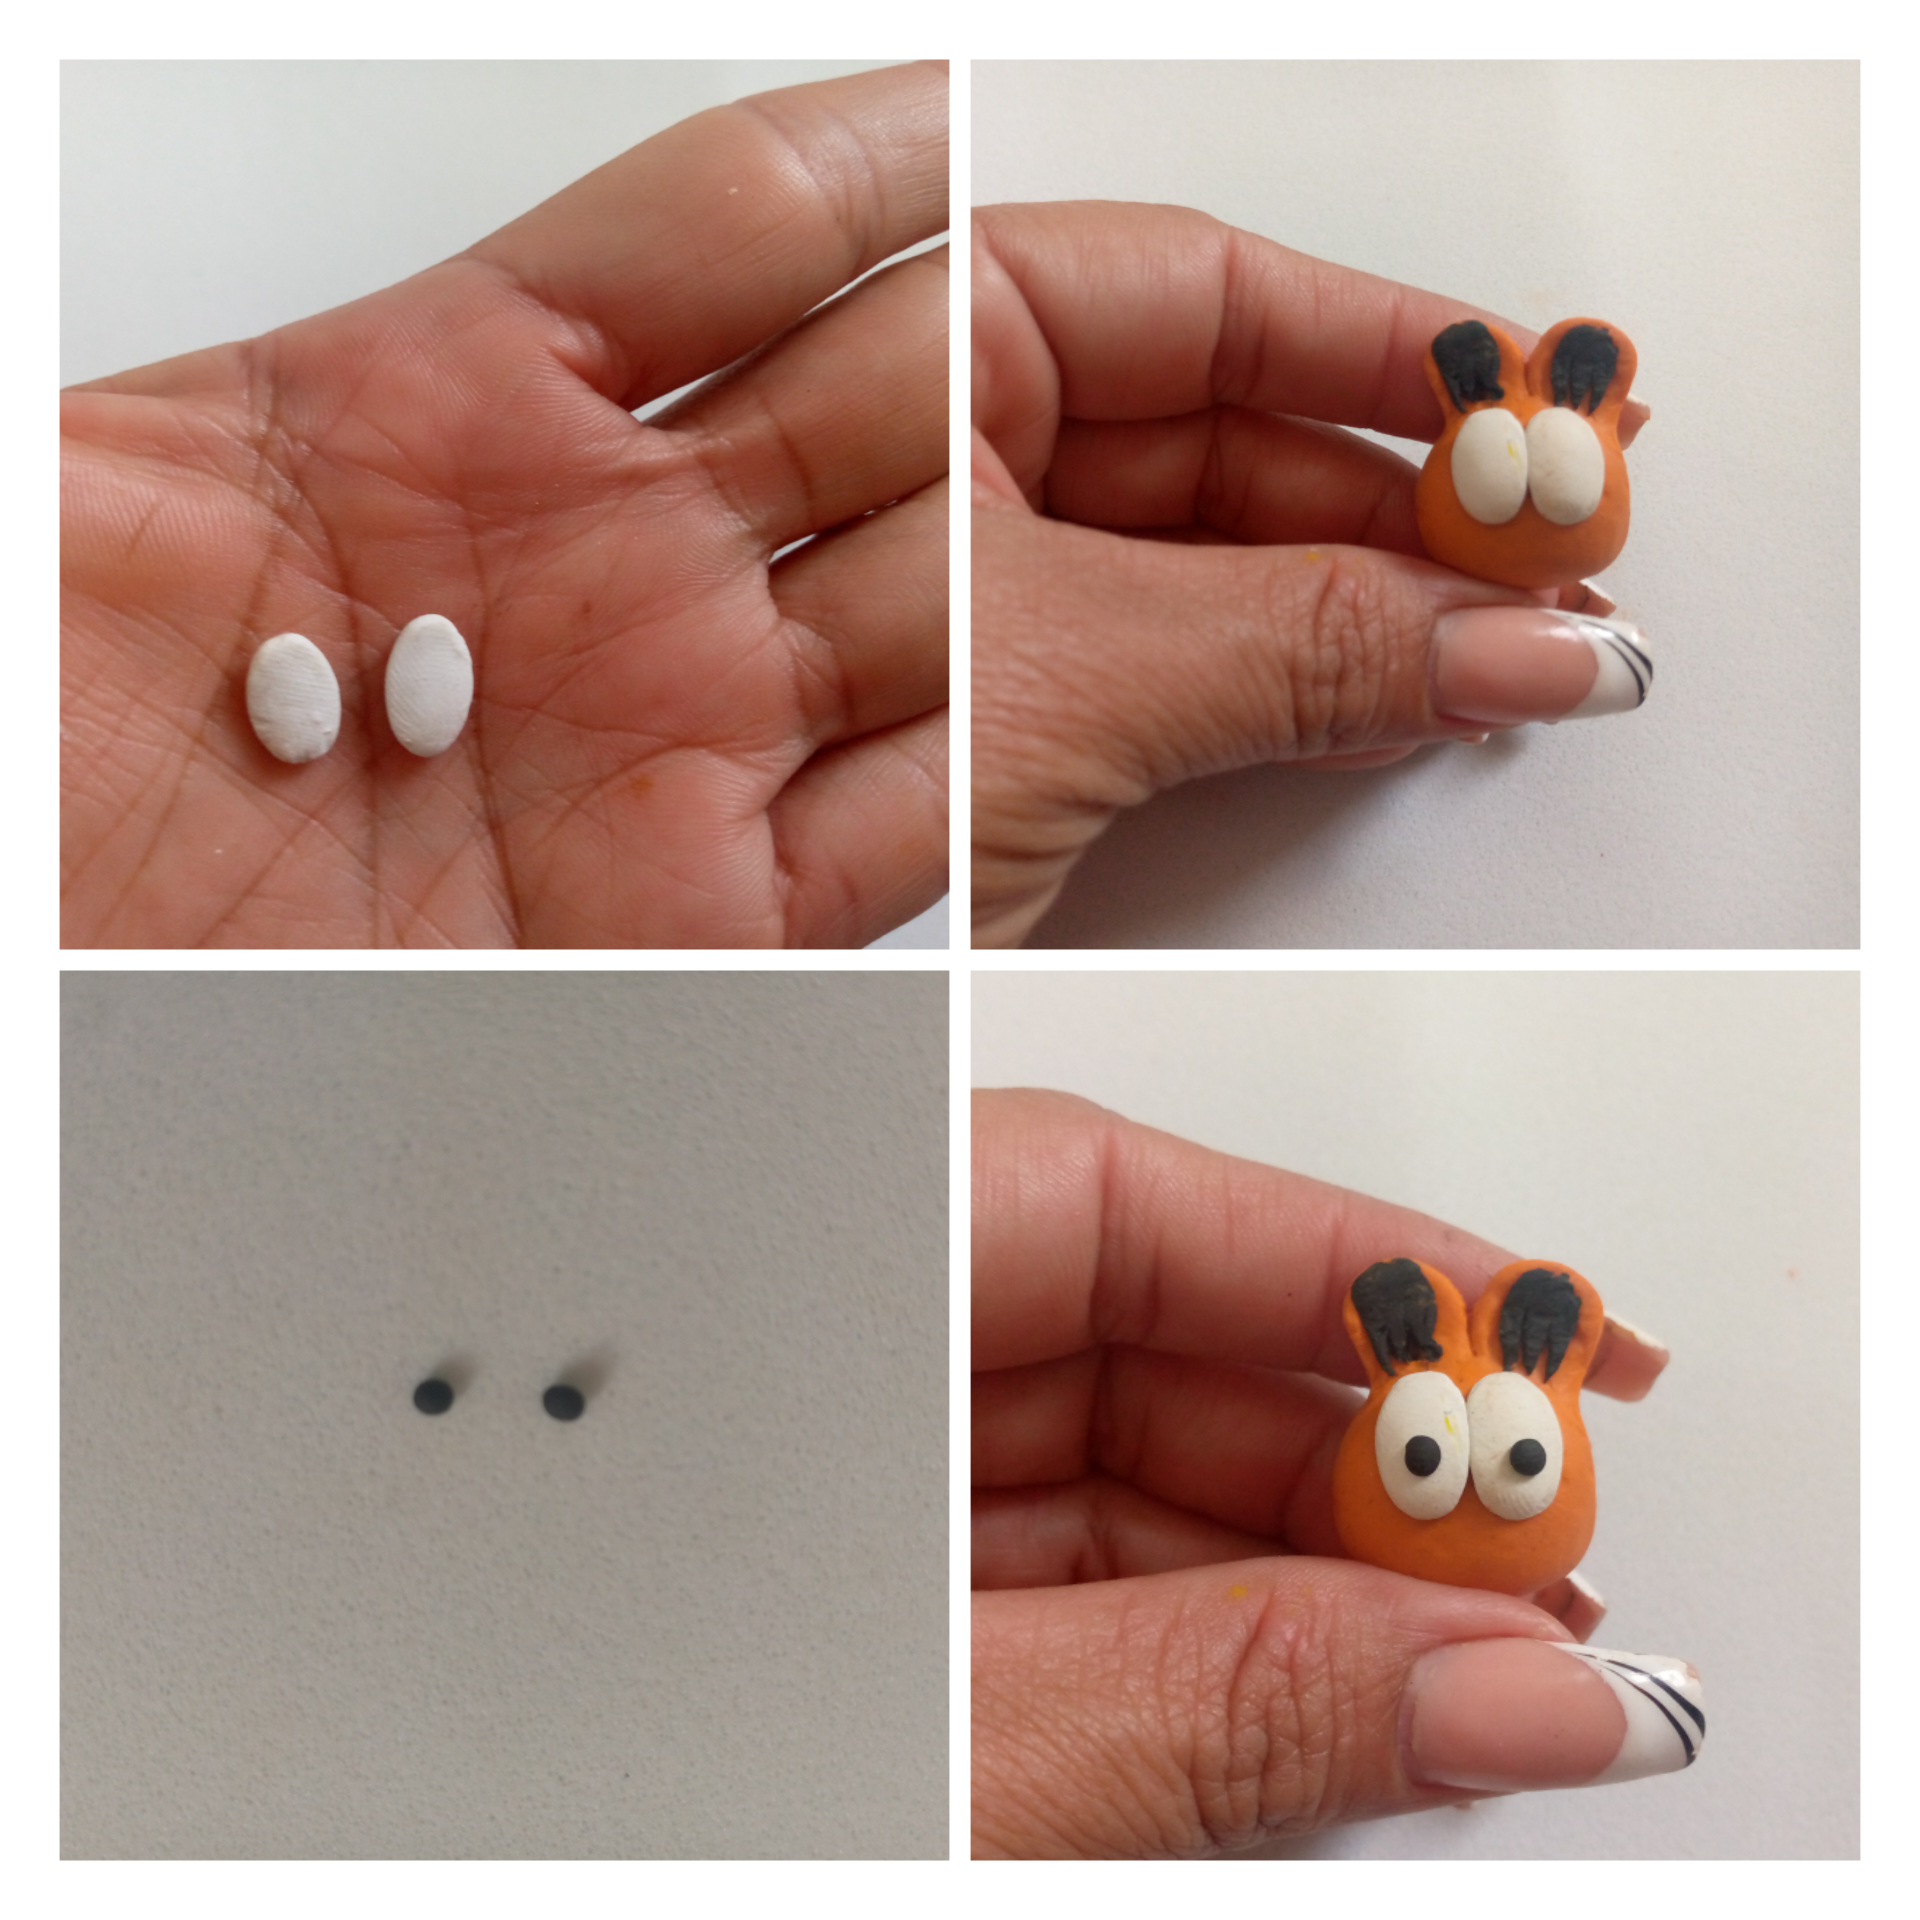
2- Con plastilina blanca realiza dos círculos ovalados, serán sus ojos, aplasta, adhiere y haz también dos bolitas muy pequeñas y pega en el centro se los ojos.
2- With white plasticine make two oval circles, they will be the eyes, flatten, stick and also make two very small balls and stick them in the center of the eyes.
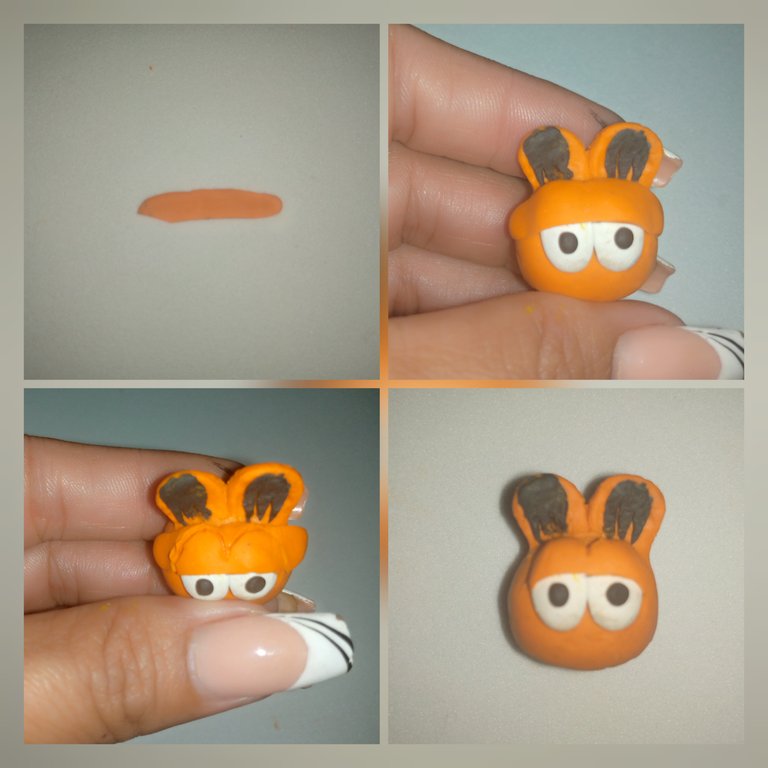
3- Luego aplana un pedacito de plastilina anaranjada, que la parte inferior quedé recta, y adhiere sobre la mitad de los ojos en la parte superior, recorta con el cutter siguiendo la figura se loa ojos y retirá la plastilina restante.
3- Then flatten a small piece of orange plasticine, so that the lower part is straight, and stick it on half of the eyes on the upper part, cut with the cutter following the figure of the eyes and remove the remaining plasticine.
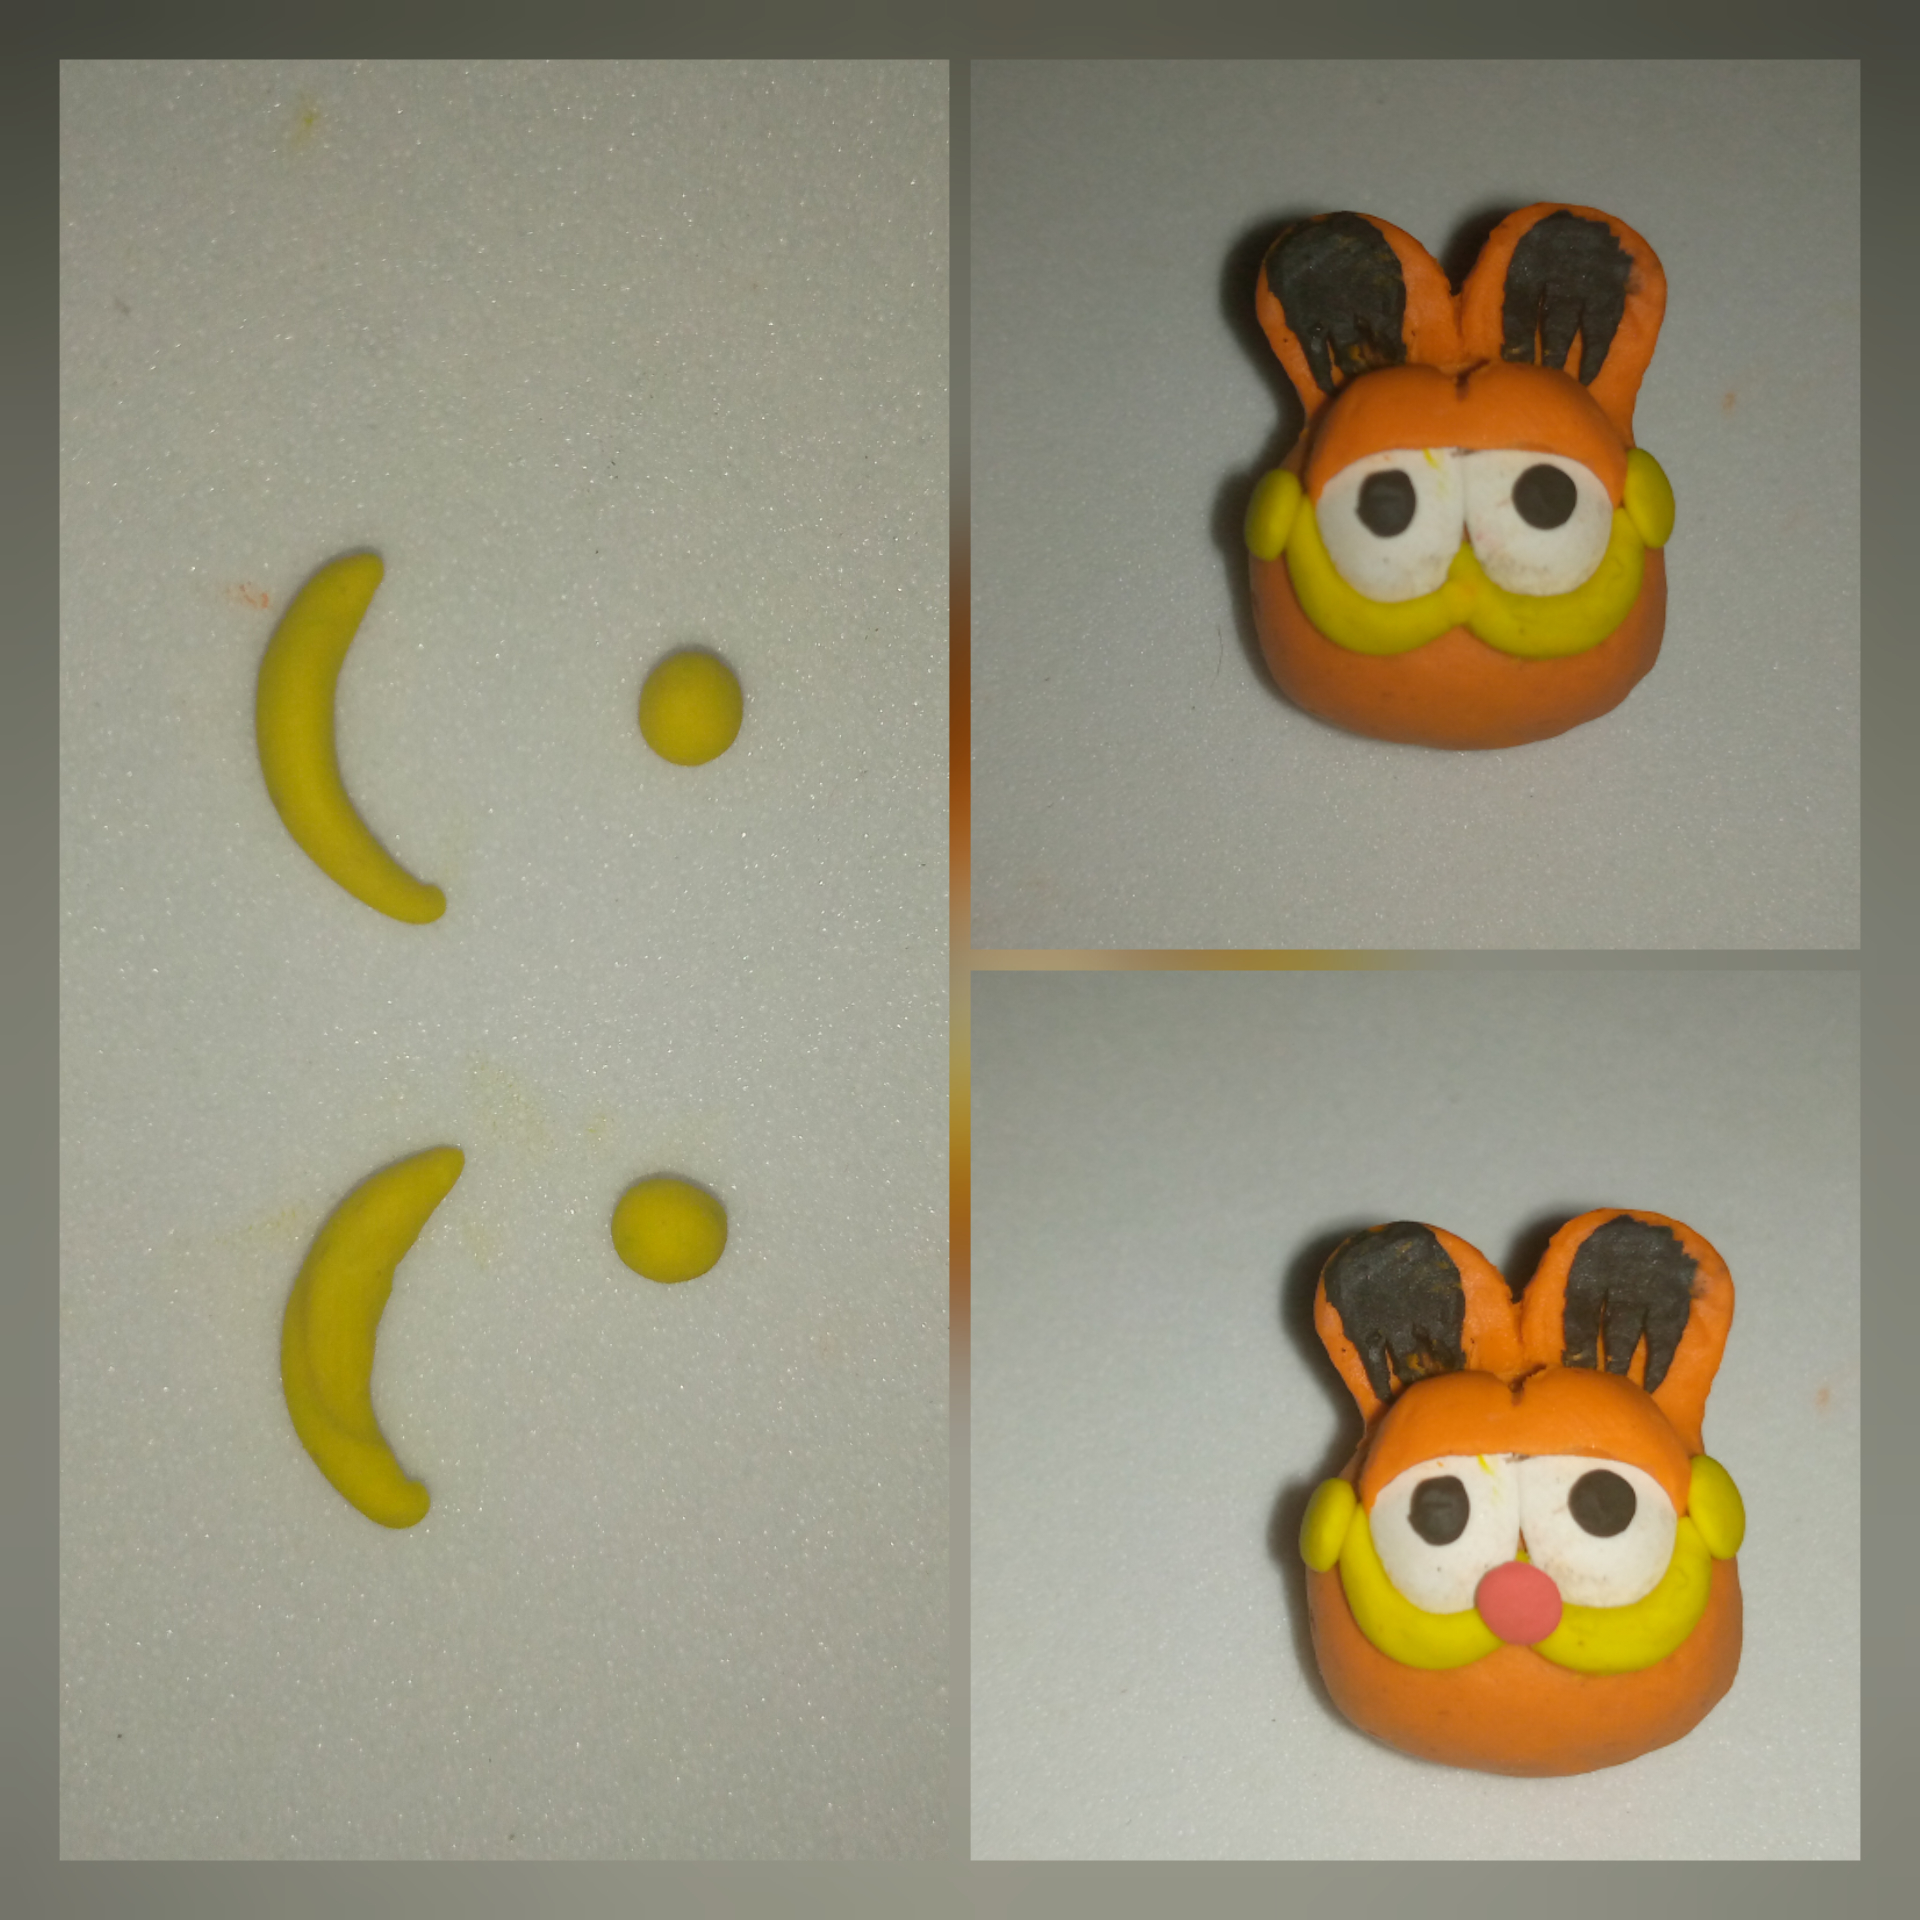
4- Haremos sus bigotes, con plastilina se color amarillo haz dos medias lunas y dos circulos pequeños, pega cada una debajo de los ojos, adhiere en los extremos los circulos y agrégale una linda nariz.
4- We will make his whiskers, with yellow plasticine make two half moons and two small circles, glue each one under the eyes, glue the circles at the ends and add a nice nose.
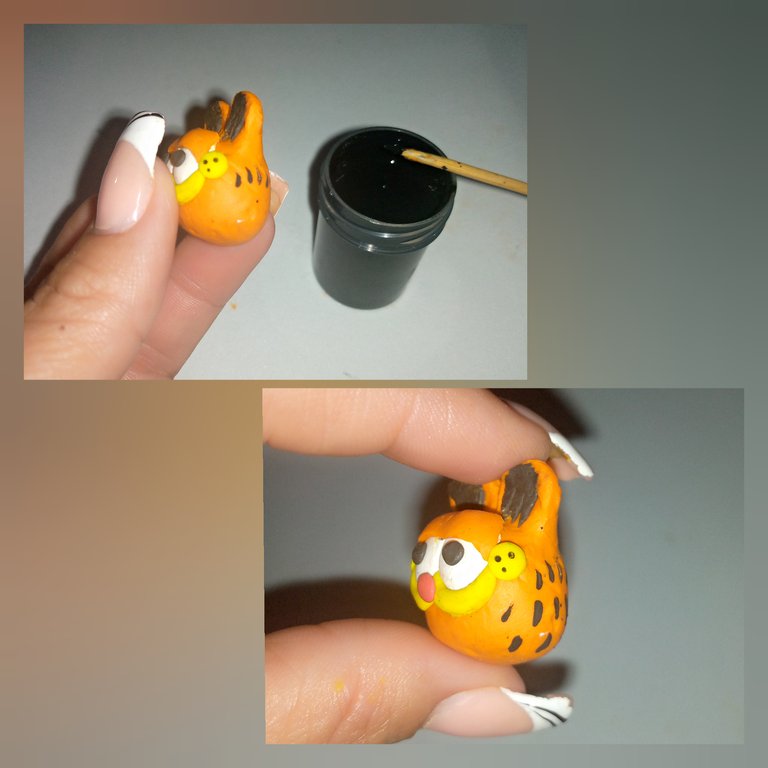
5- Pinta puntitos negros en sus mejillas y pelitos alrededor de su cabeza.
5- Paint black dots on her cheeks and little hairs around her head.
6- Haremos el cuerpo, como nuestro gatito estará acostado, formaremos una barriga hacia arriba y dejamos plano la parte de la espalda, en uno de los extremos estiramos in poco la plastilina para que pose la cabeza, y unimos la cabeza con el cuerpo ayudándonos con un palito de altura, nos permitirá girarla.
6- We will make the body, as our kitten will be lying down, we will form a belly upwards and we leave flat the part of the back, in one of the ends we stretch a little the plasticine so that it poses the head, and we join the head with the body helping us with a stick of height, it will allow us to turn it.

7- Ahora realizamos la cola dejando un extremo más ancho y las patas haciendo un tubito y dejando un extremo con una bolita que vamos a aplanar y le haremos dos cortes en la punta con el cutter formando sus dedos y pies.
7- Now we make the tail leaving a wider end and the legs making a little tube and leaving an end with a little ball that we are going to flatten and we will make two cuts in the tip with the cutter forming its fingers and feet.
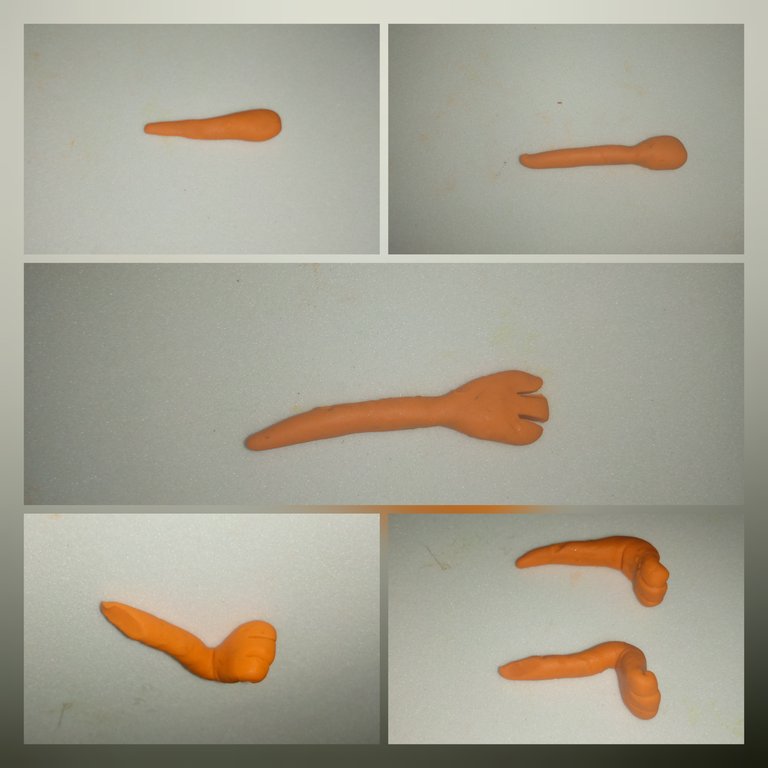
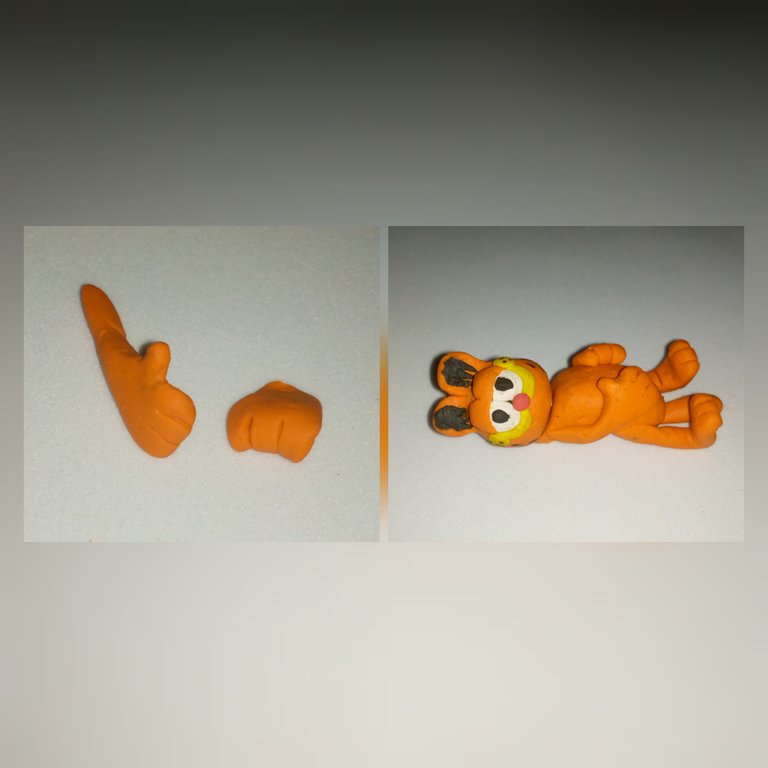
8- Pegamos la cola y las patas al Garfield.
8- Glue the tail and legs to the Garfield.
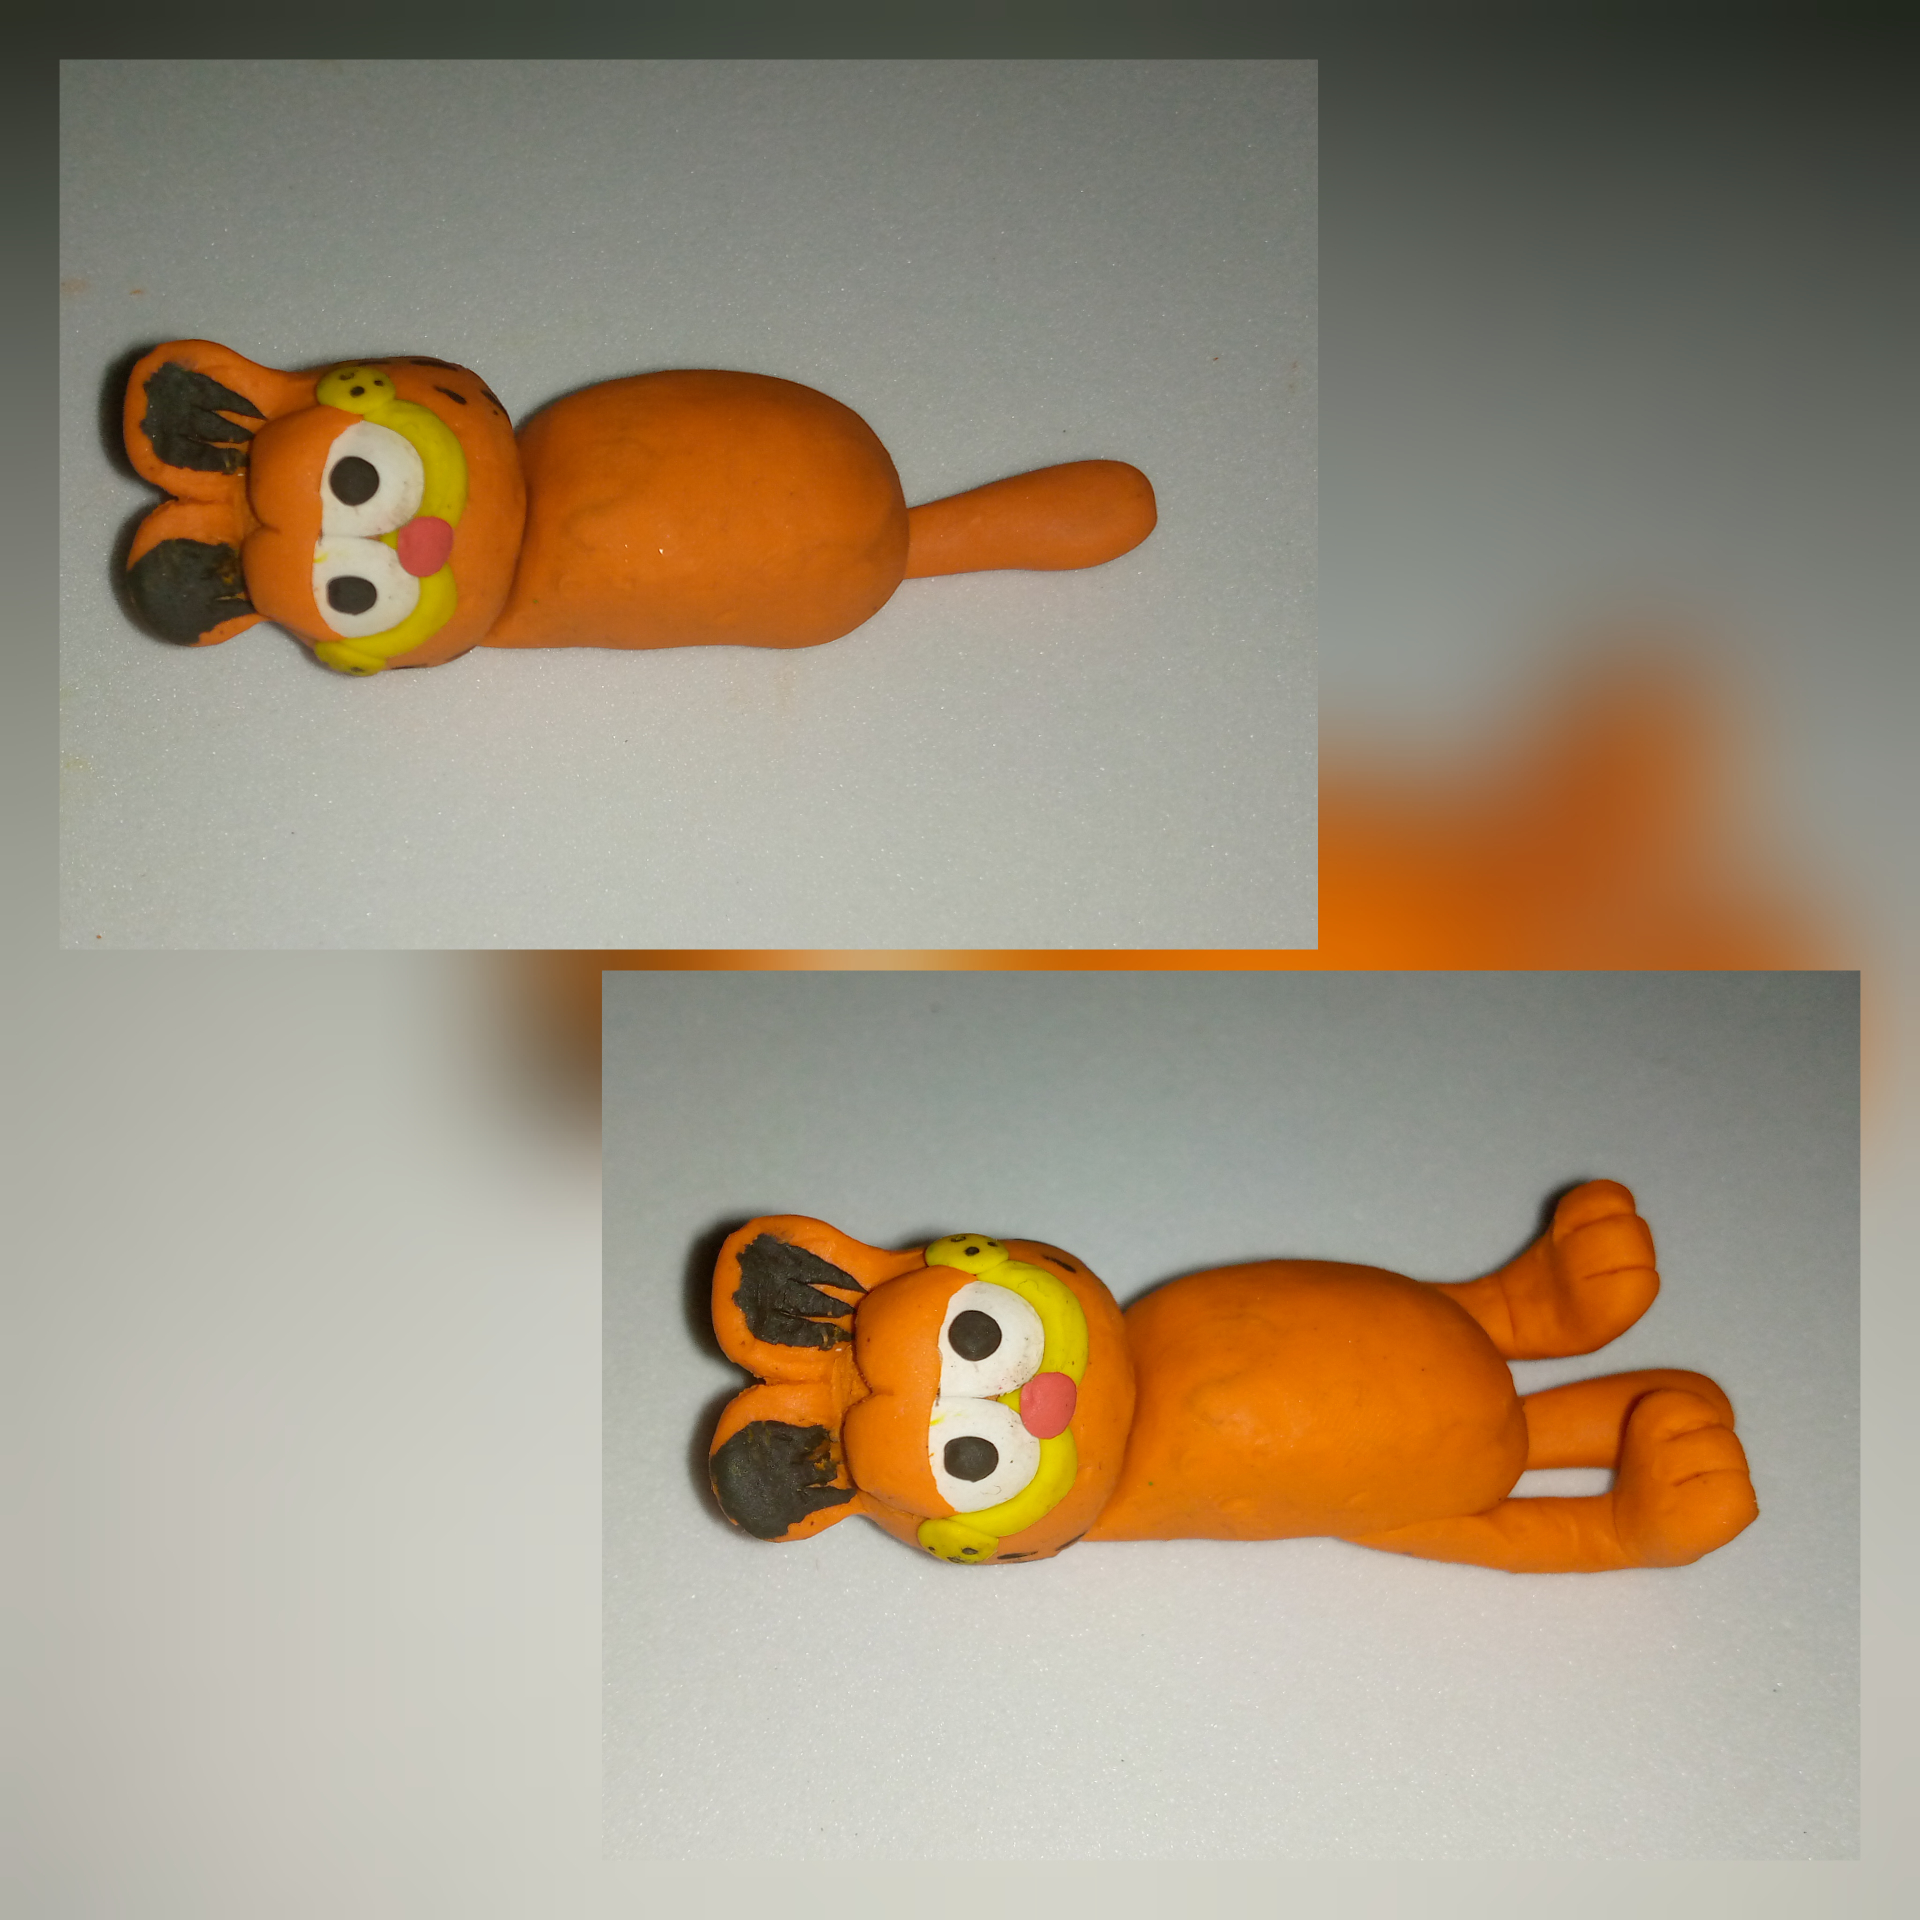
9- Realiza las patas delanteras igual a laa trasera dándole otra otra forma, haremos una con brazo y la otra solo la mano y las adherimos al gato sobre su pancita.
9- Make the front paws the same as the back one giving it another shape, we will make one with an arm and the other one with just the hand and we will glue them to the cat on his tummy.
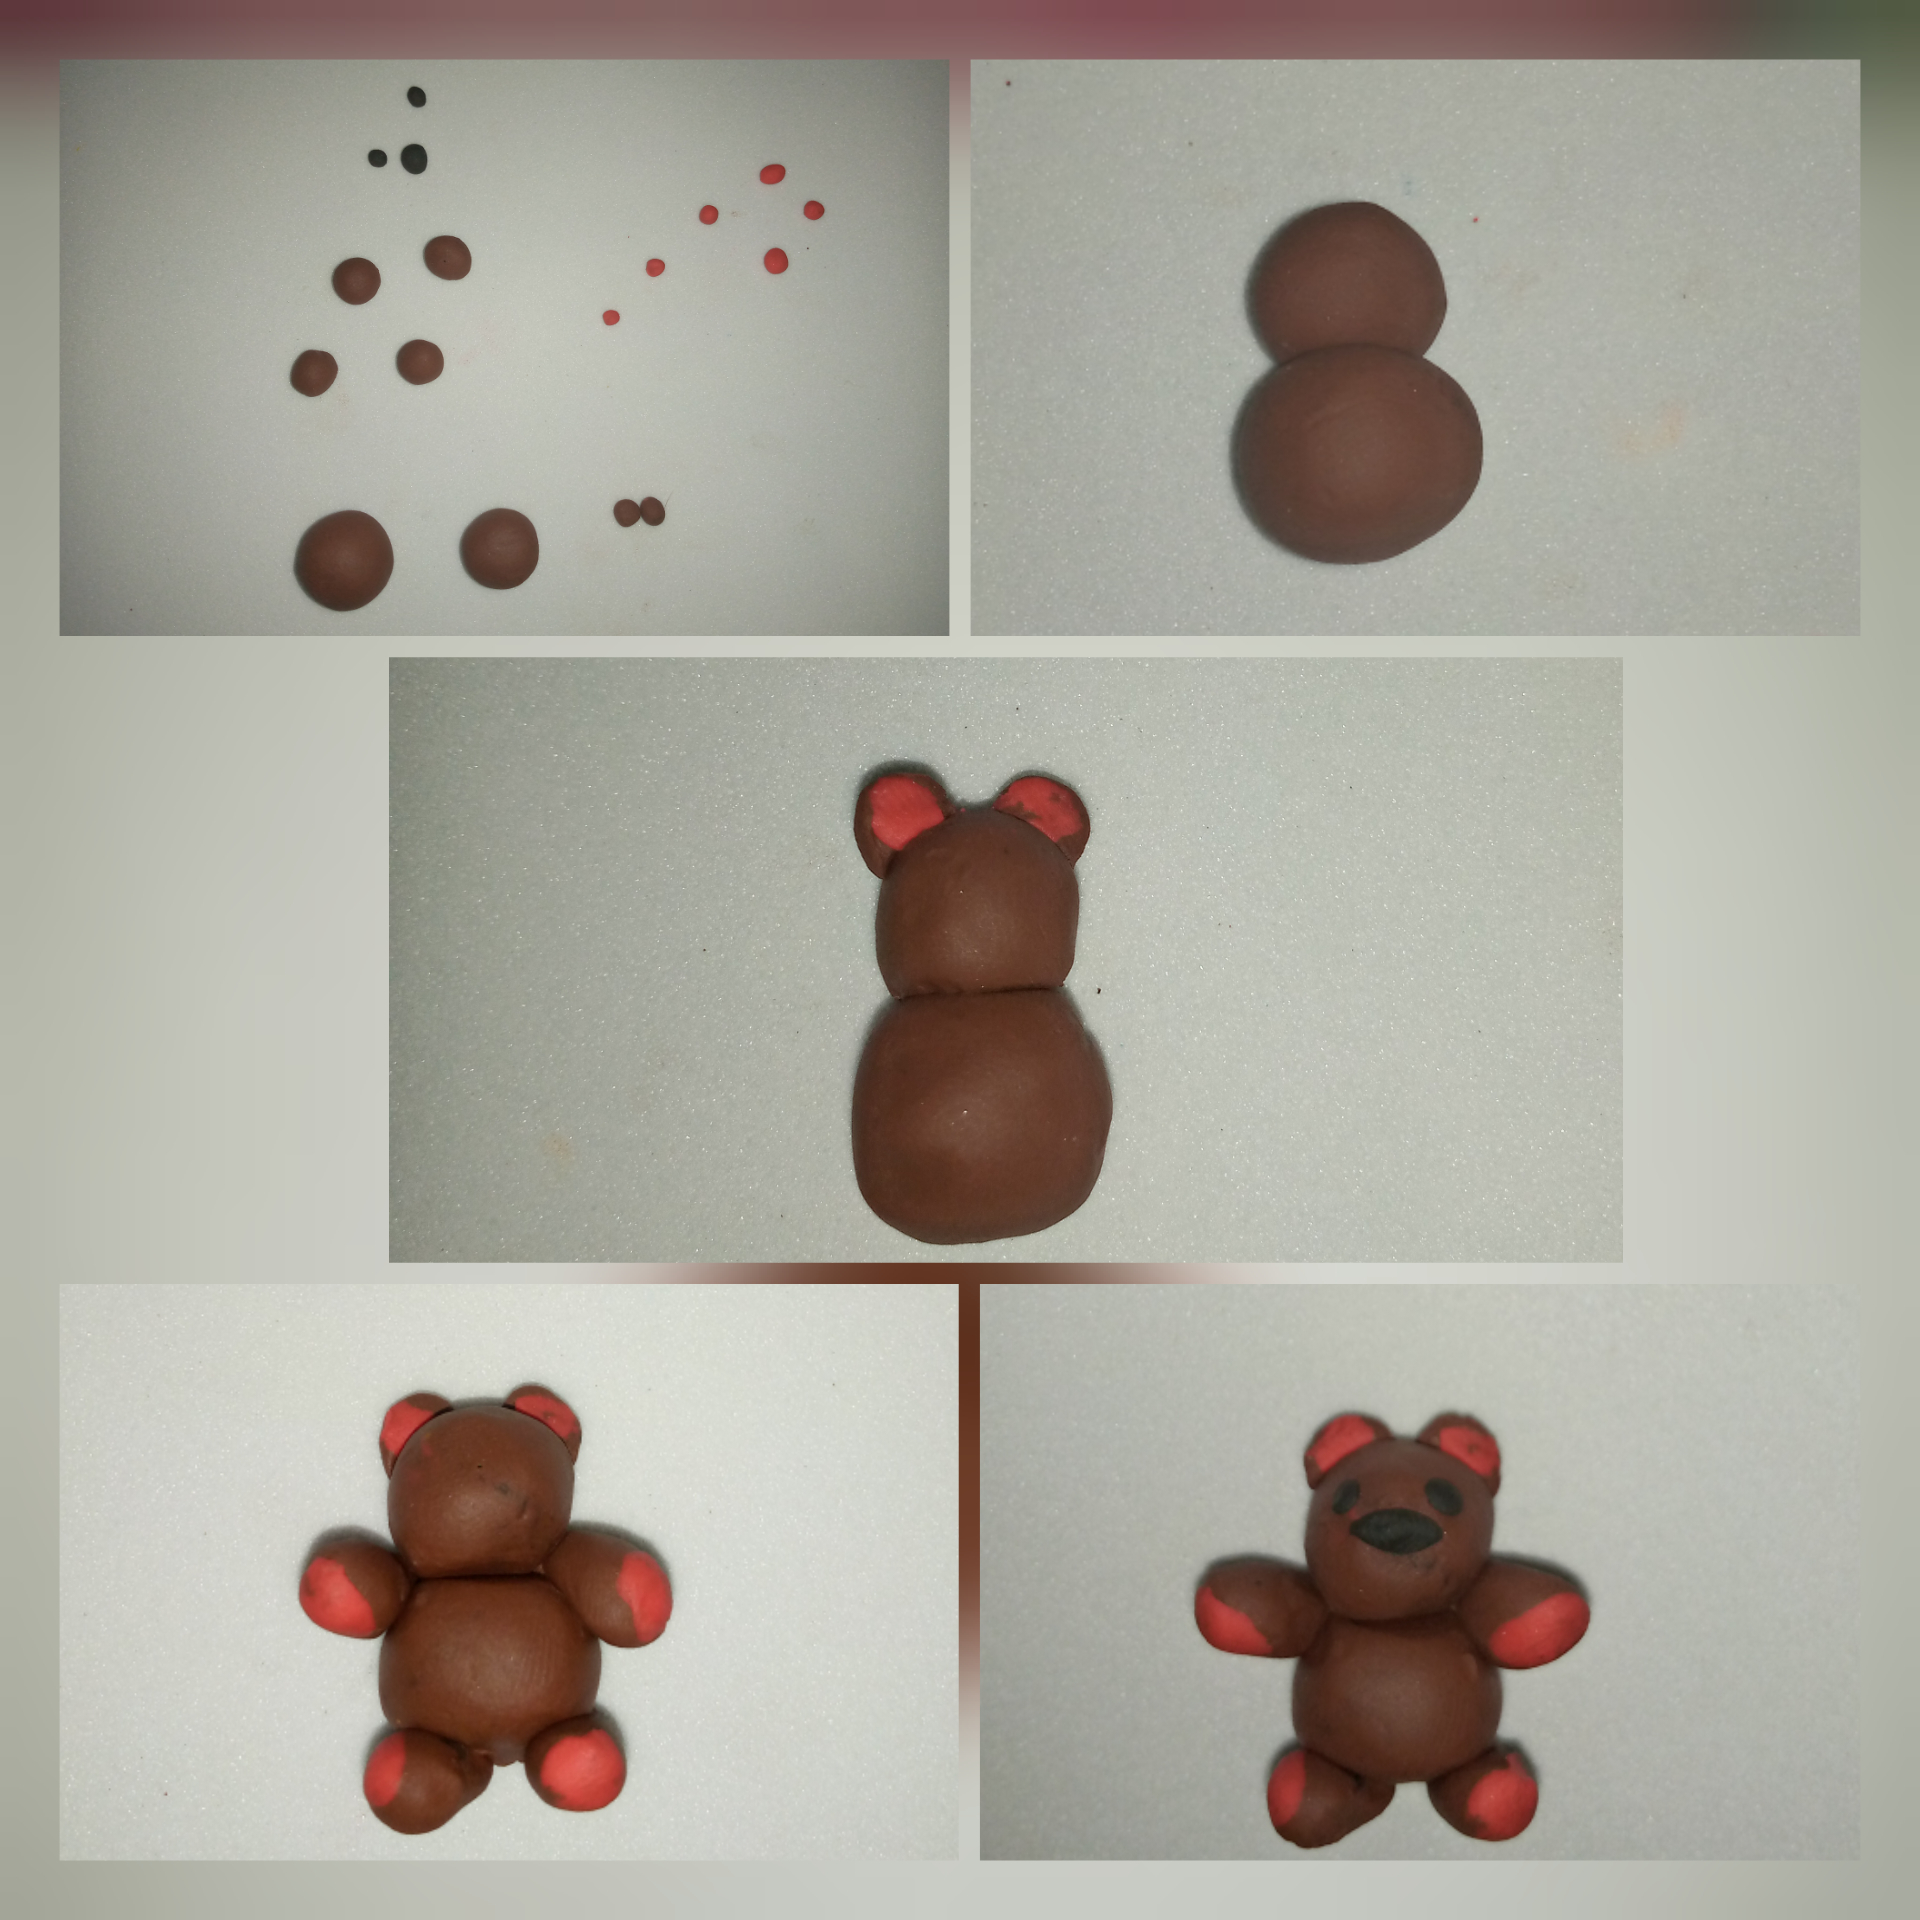
10- Vamos ahora con el peluche Pooky, haremos varios círculos de diferentes tamaños y colores y empezamos a armar, coloca un círculo arriba de otro para el cuerpo, luego la orejas y sus 4 patas colocando un toque rosado, y por último agrega el rostro.
10- Let's go now with the Pooky stuffed animal, we will make several circles of different sizes and colors and start assembling, place a circle on top of another one for the body, then the ears and its 4 paws placing a pink touch, and finally add the face.
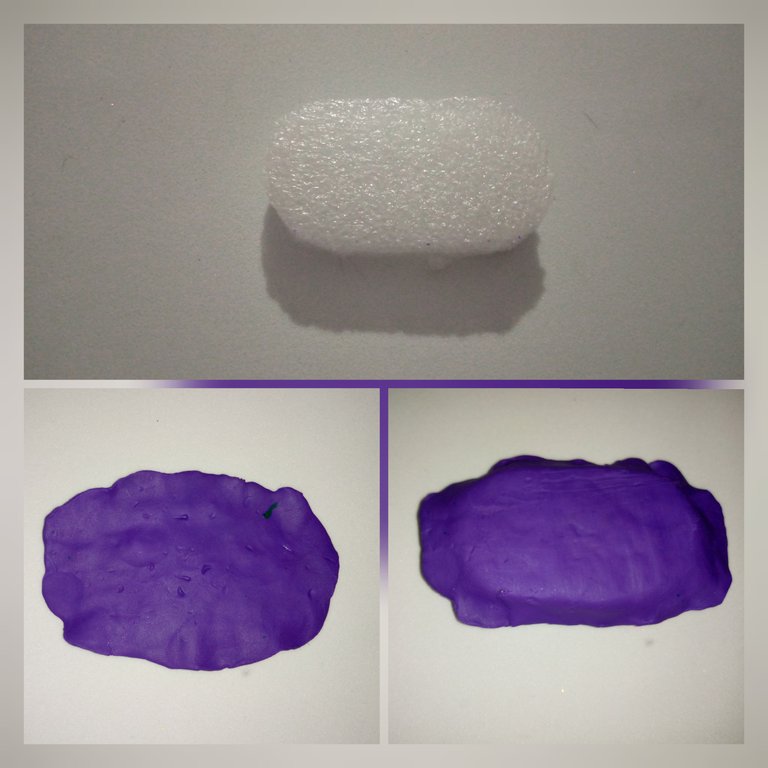
11- Recorta un trozo de goma espuma para su cama, aplana plastilina de color morado y cubre la goma espuma.
11- Cut out a piece of foam rubber for his bed, flatten purple plasticine and cover the foam rubber.
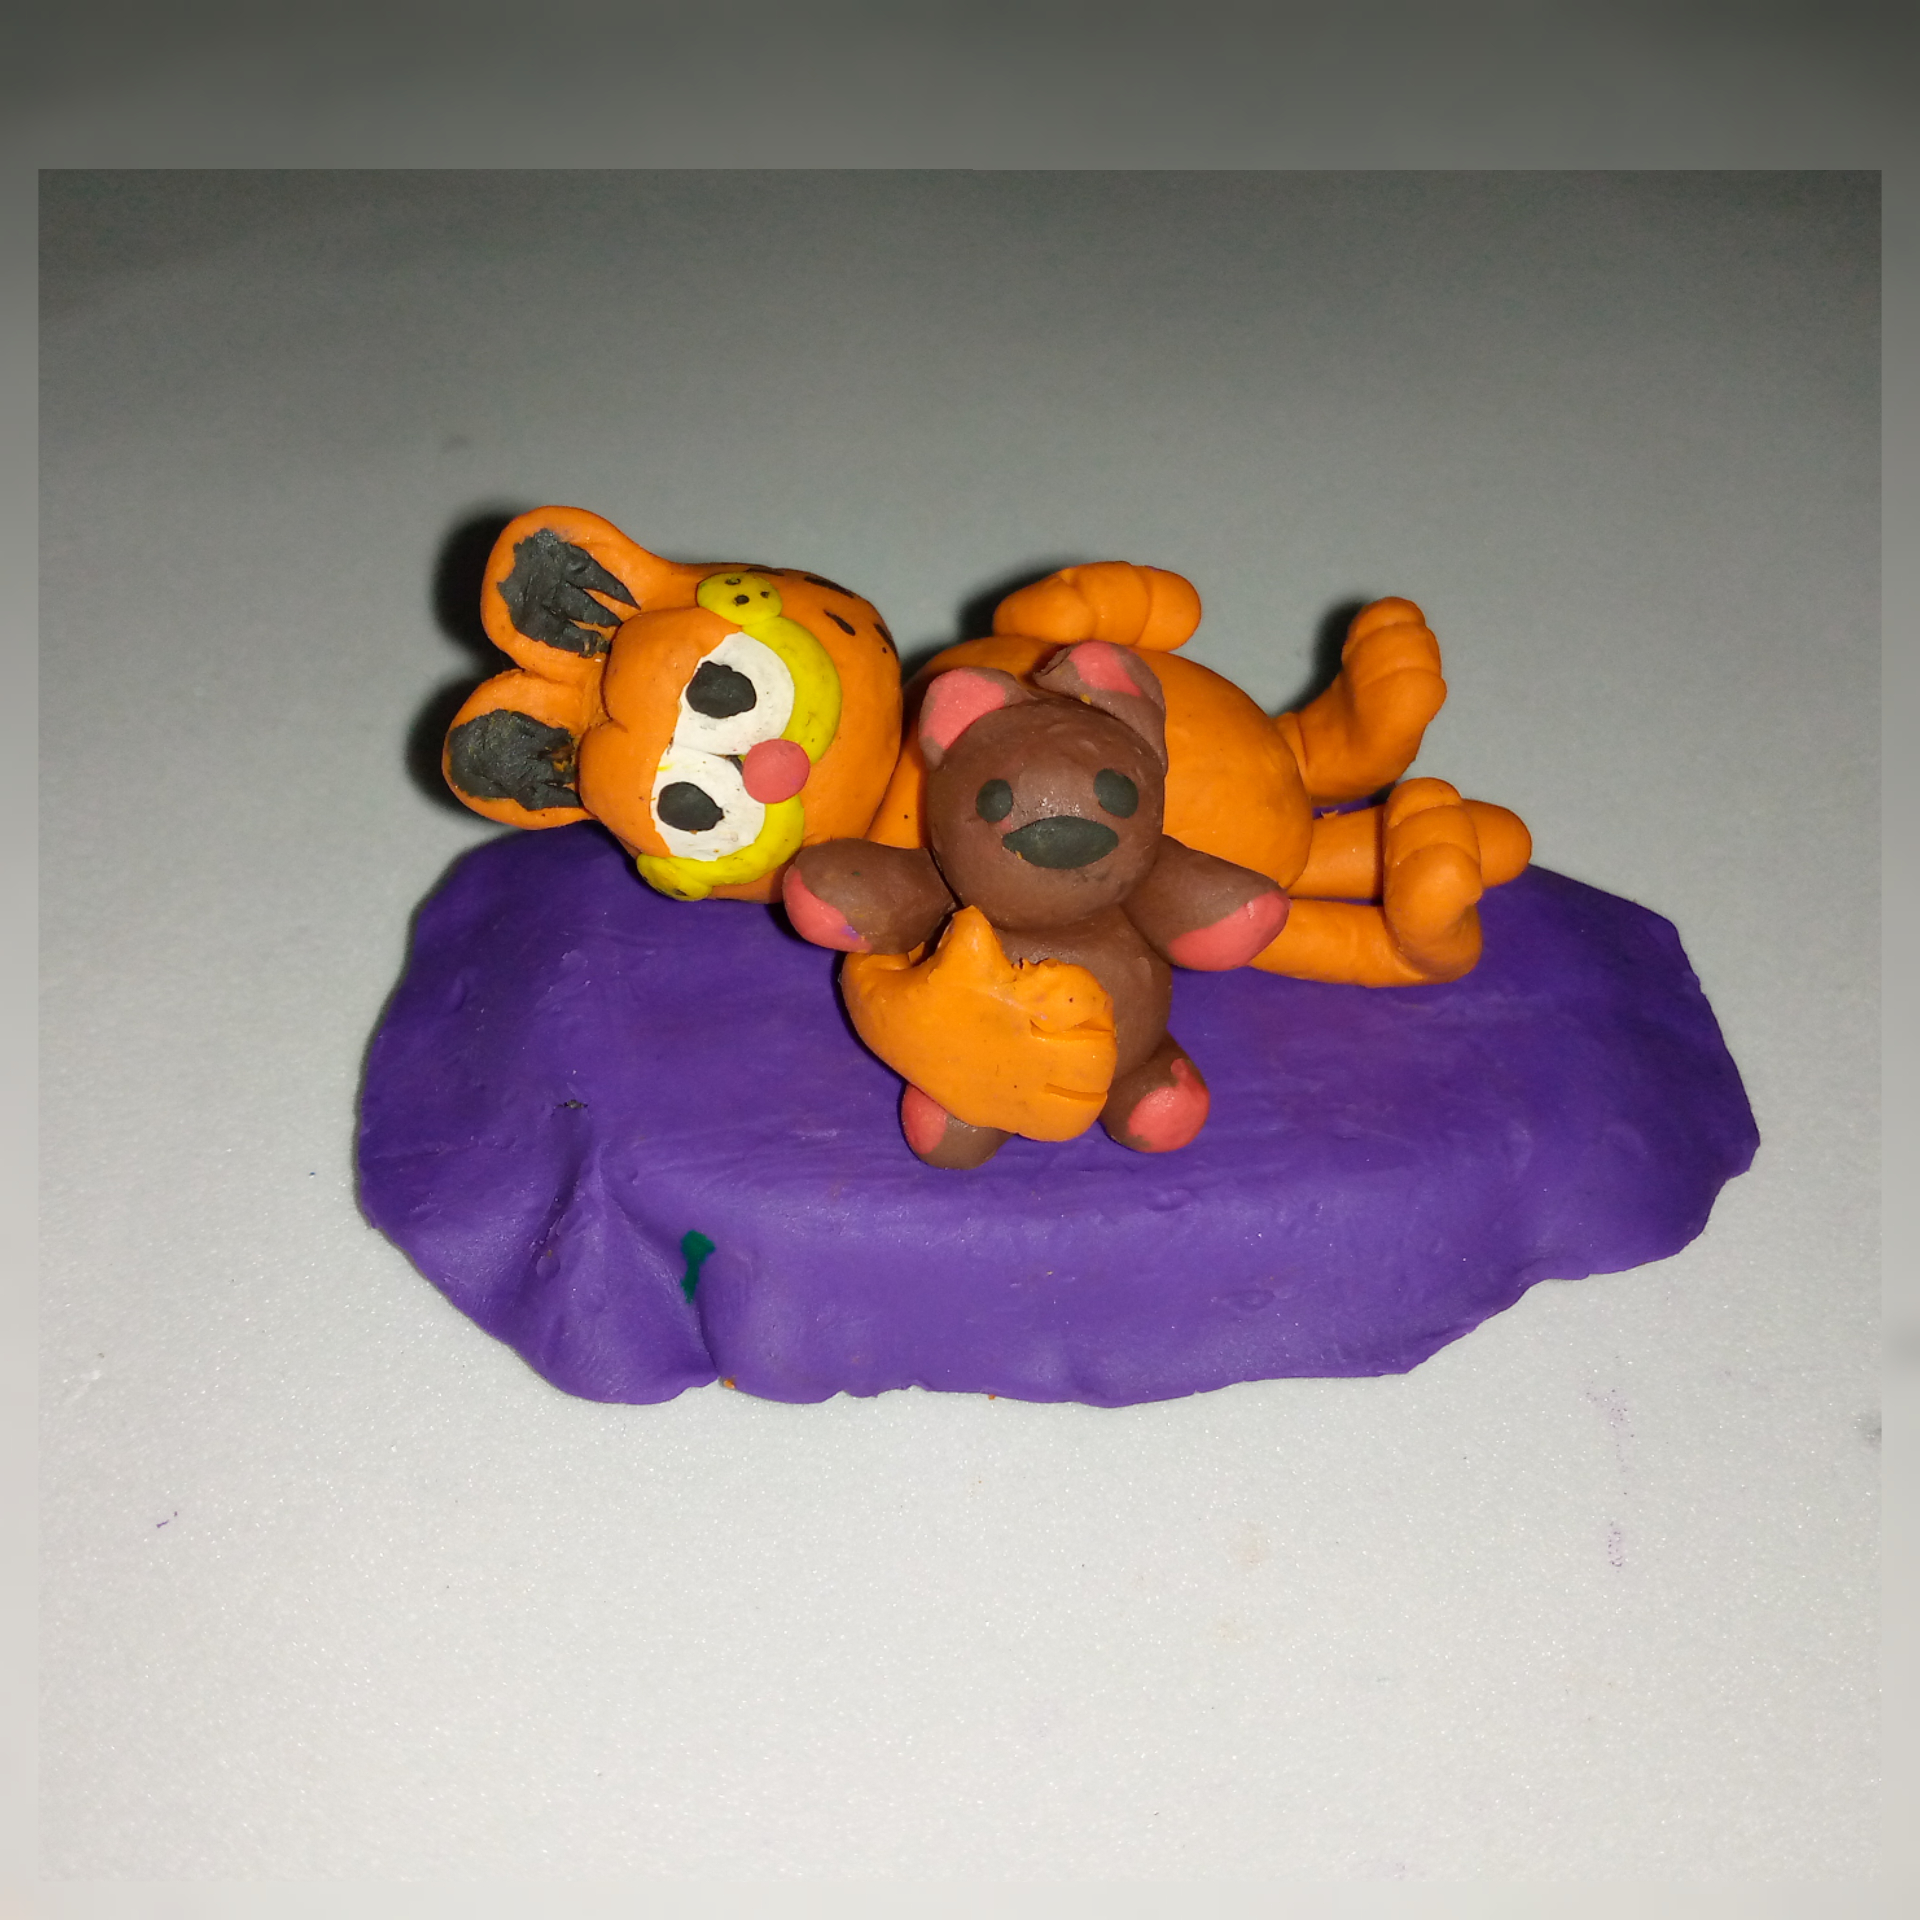
12- Coloca a Garfield con su tierno osito.
12- Place Garfield with his cuddly bear.
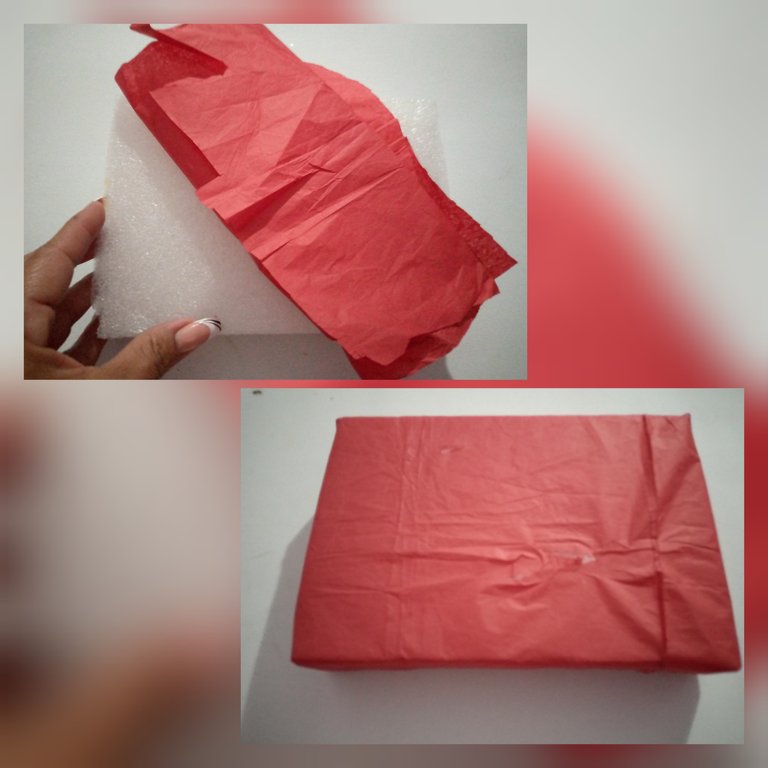
13- Ahora hagamos su habitación, forra la goma espuma de forma rectangular con el papel de seda de color terracota.
13- Now let's make his room, line the foam rubber in a rectangular shape with the terracotta colored tissue paper.
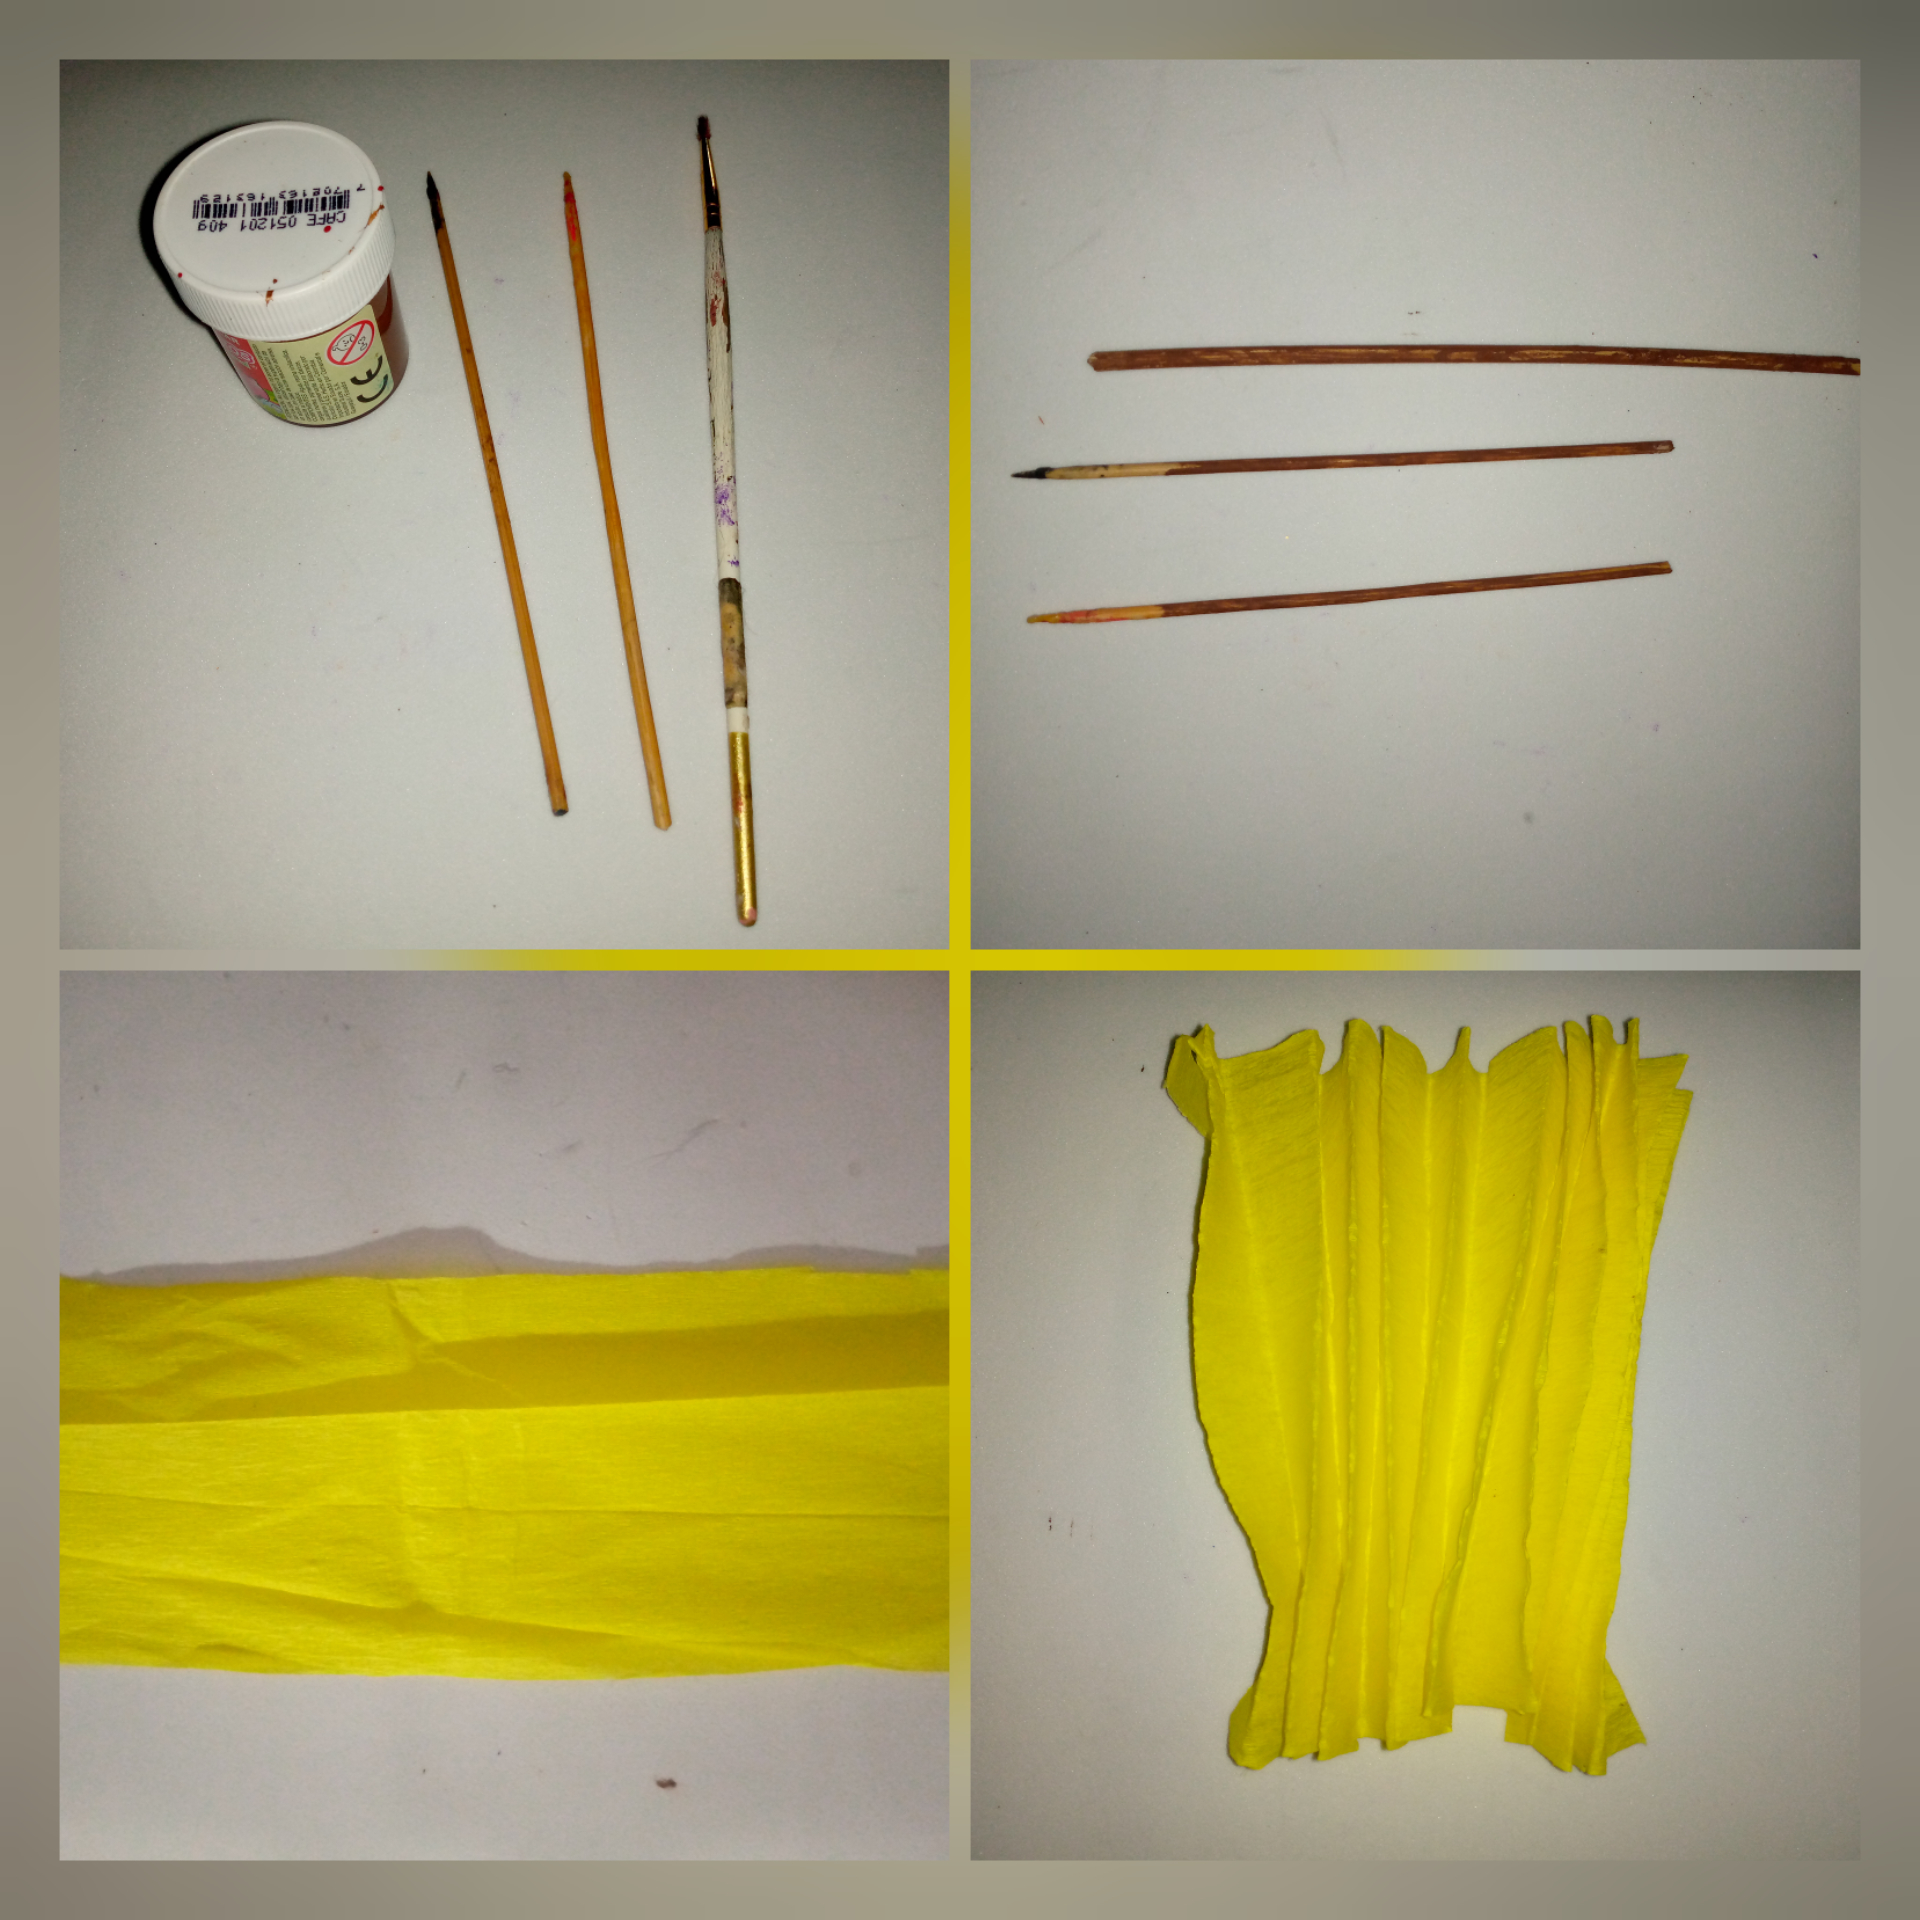
14- Corta 3 palitos de altura y pinta se color marrón, solo coloca algunas pinceladas, mientras secan, recorta una tira del papel crepé de 36x12cm y dobla como una acordeón.
14- Cut 3 sticks high and paint them brown, just place a few strokes, while they dry, cut a strip of crepe paper 36x12cm and fold it like an accordion.
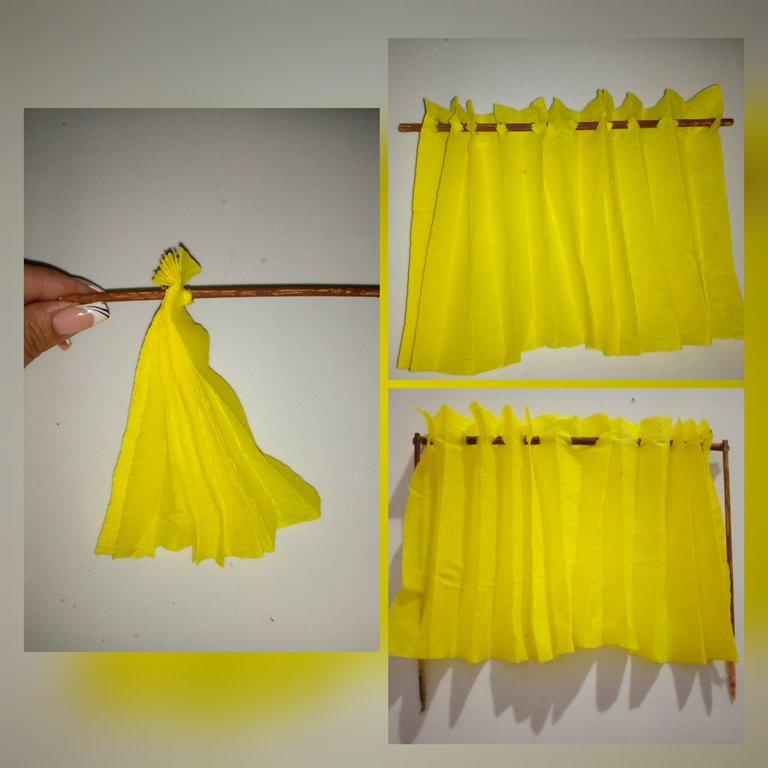
15- Introduce uno de los palos de altura se forma horizontal en la parte superior del papel crepé, pega los otros dos a los lados y abre, obtenemos una cortina.
15- Insert one of the sticks horizontally in the upper part of the crepe paper, glue the other two to the sides and open, we obtain a curtain.
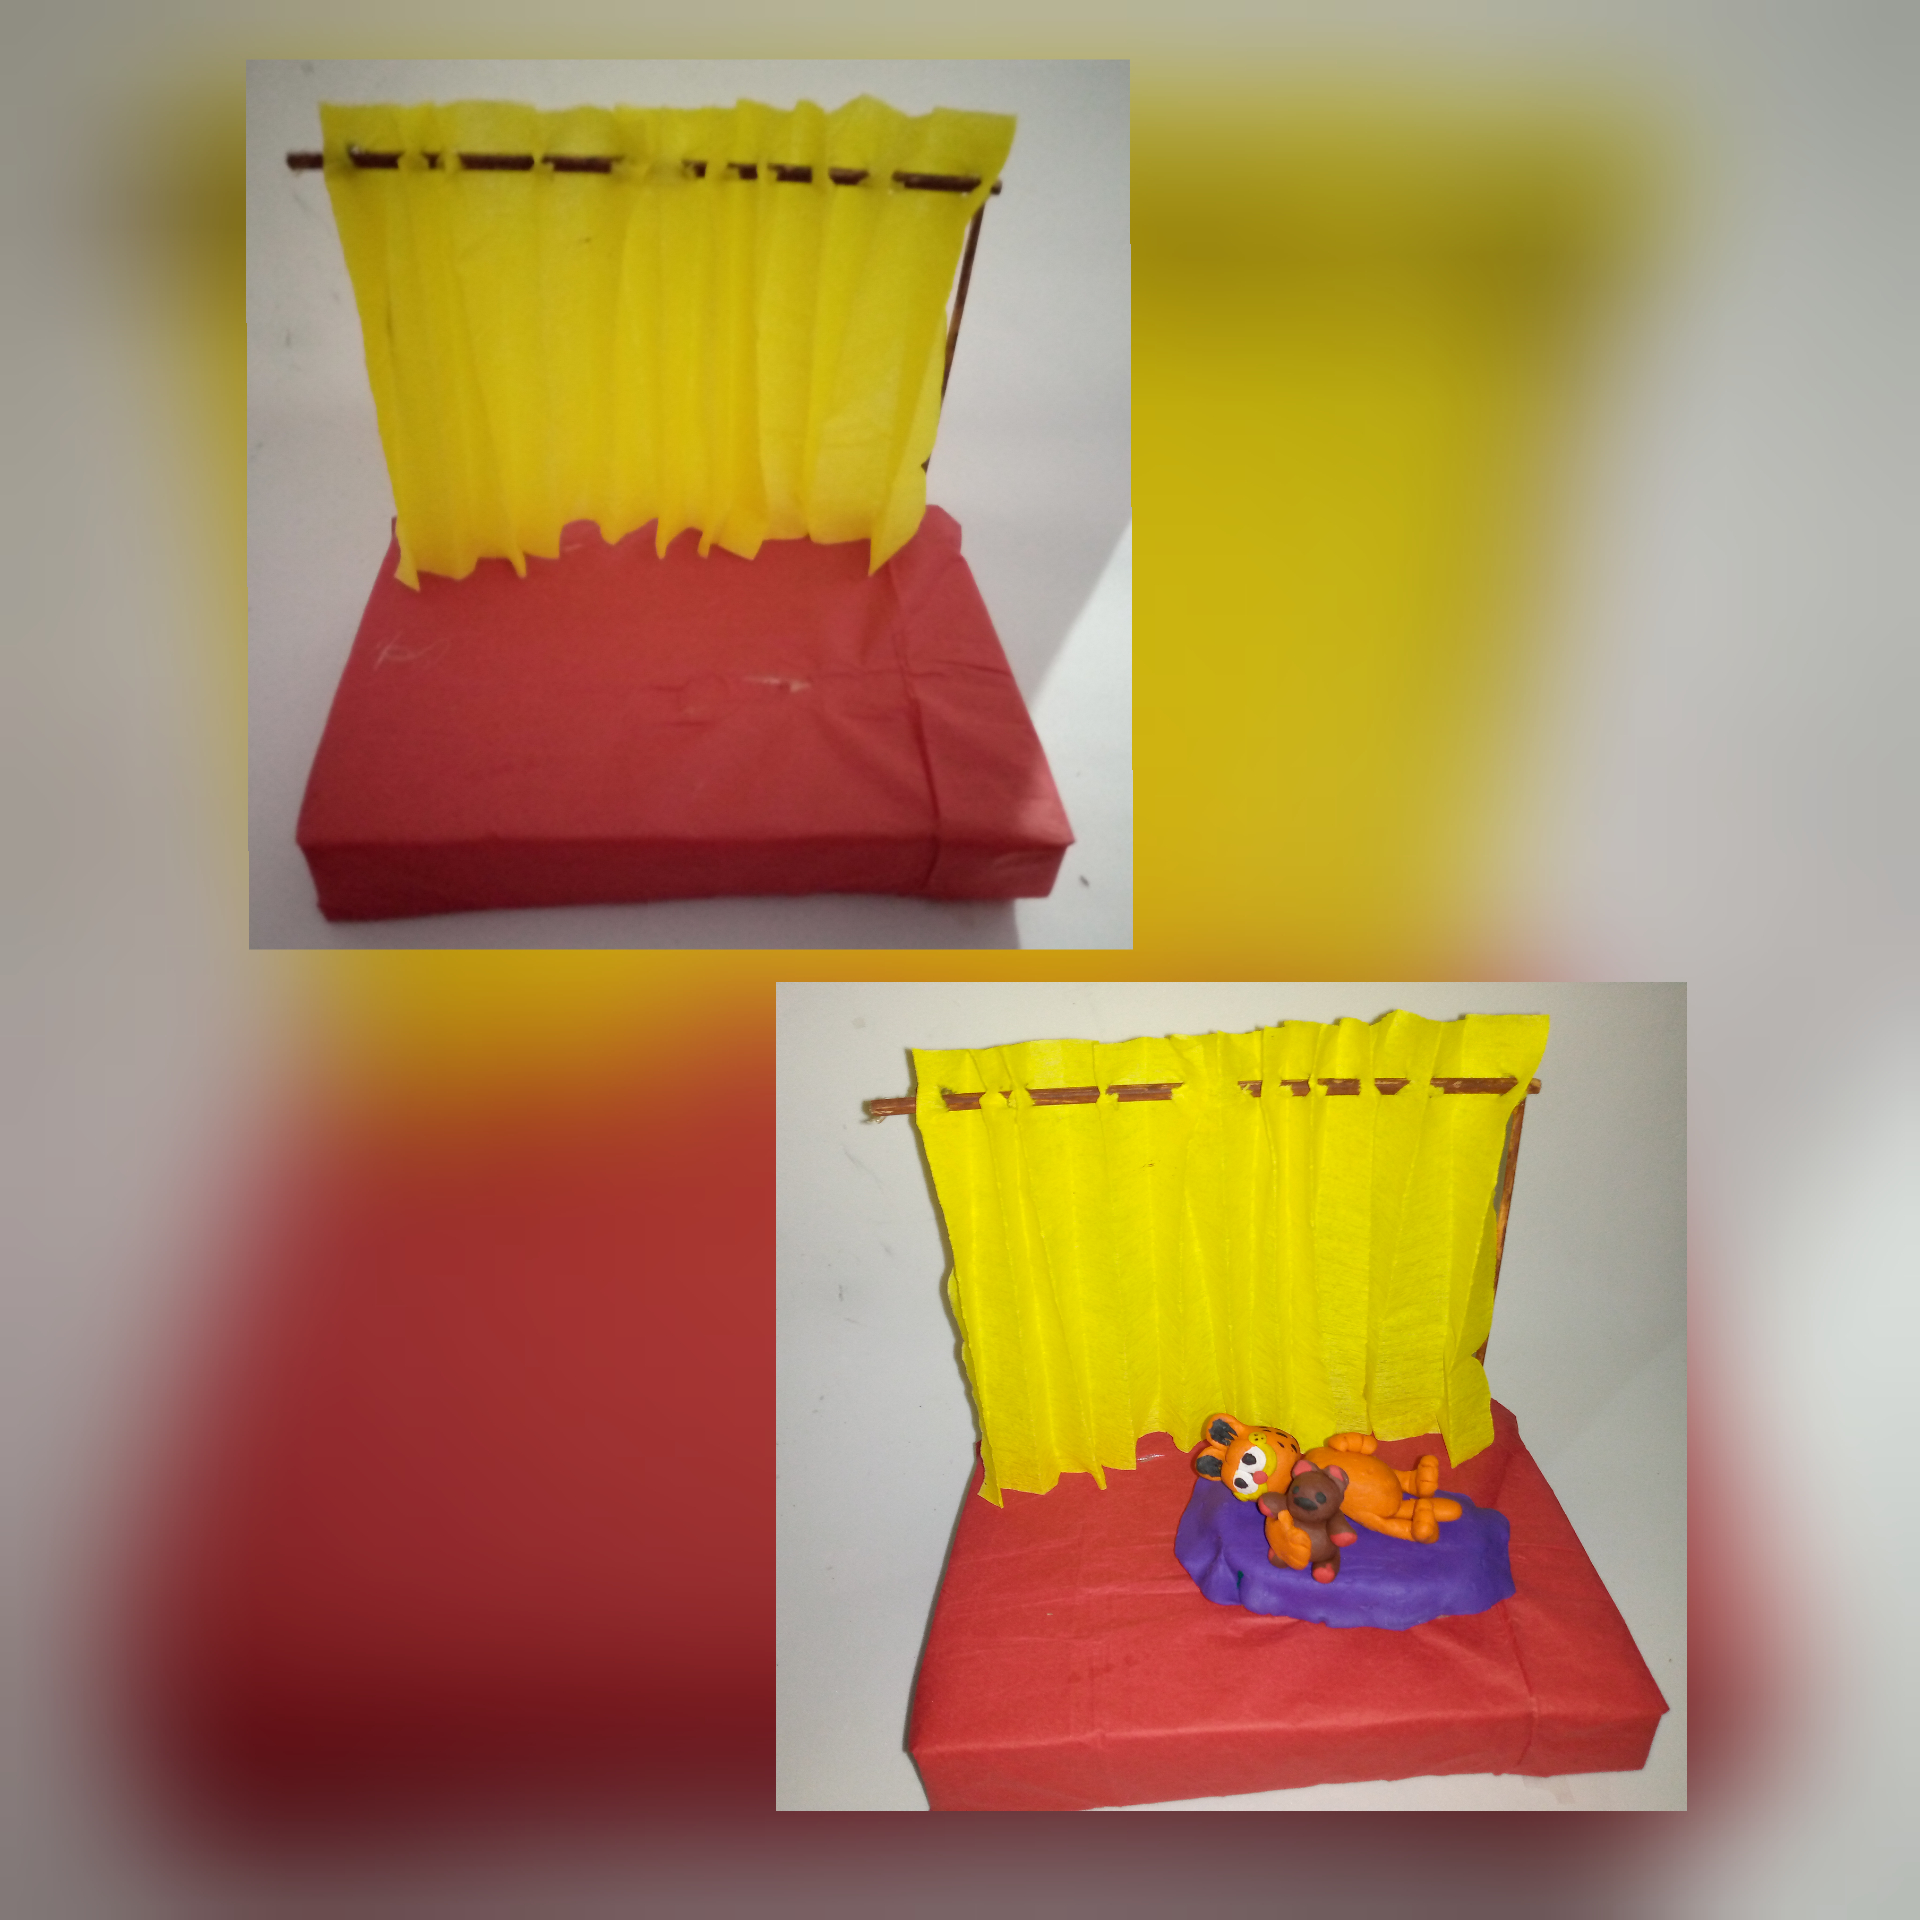
16- Coloca la cortina en la base de goma espuma y coloca también a Garfield con su cama y su osito.
16- Place the curtain on the foam base and also place Garfield with his bed and his teddy bear.
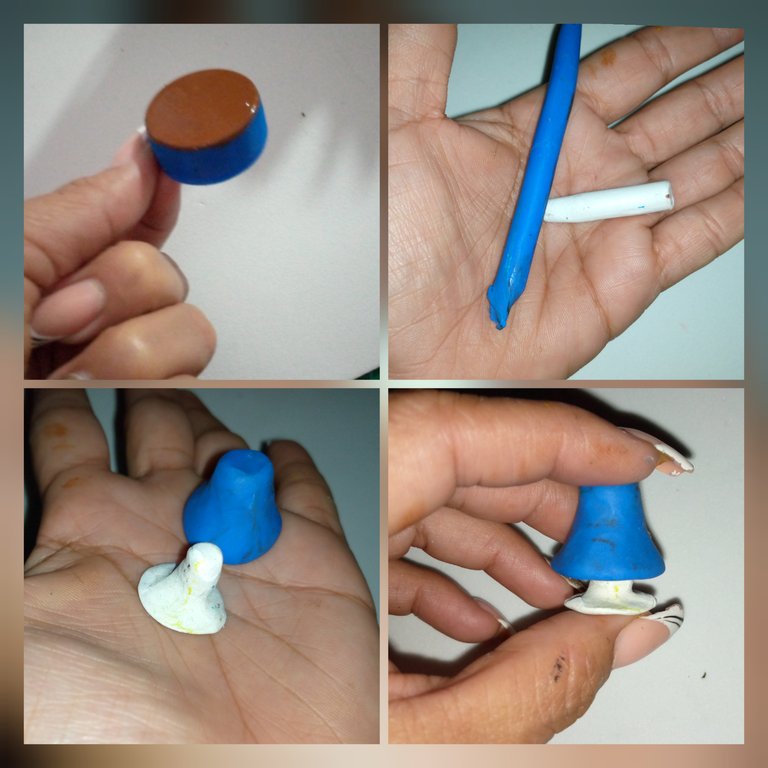
17- Pinta solo la parte superior de la tapa de refresco de color marrón, mientras seca, realiza una lámpara con plastilina blanca ha la base y con azul la lámpara, une las dos piezas y con plastilina azul mezclada con un poquito de negro haz una cobija.
17- Paint only the upper part of the soda lid brown, while it dries, make a lamp with white plasticine for the base and blue for the lamp, join the two pieces and with blue plasticine mixed with a little bit of black make a blanket.
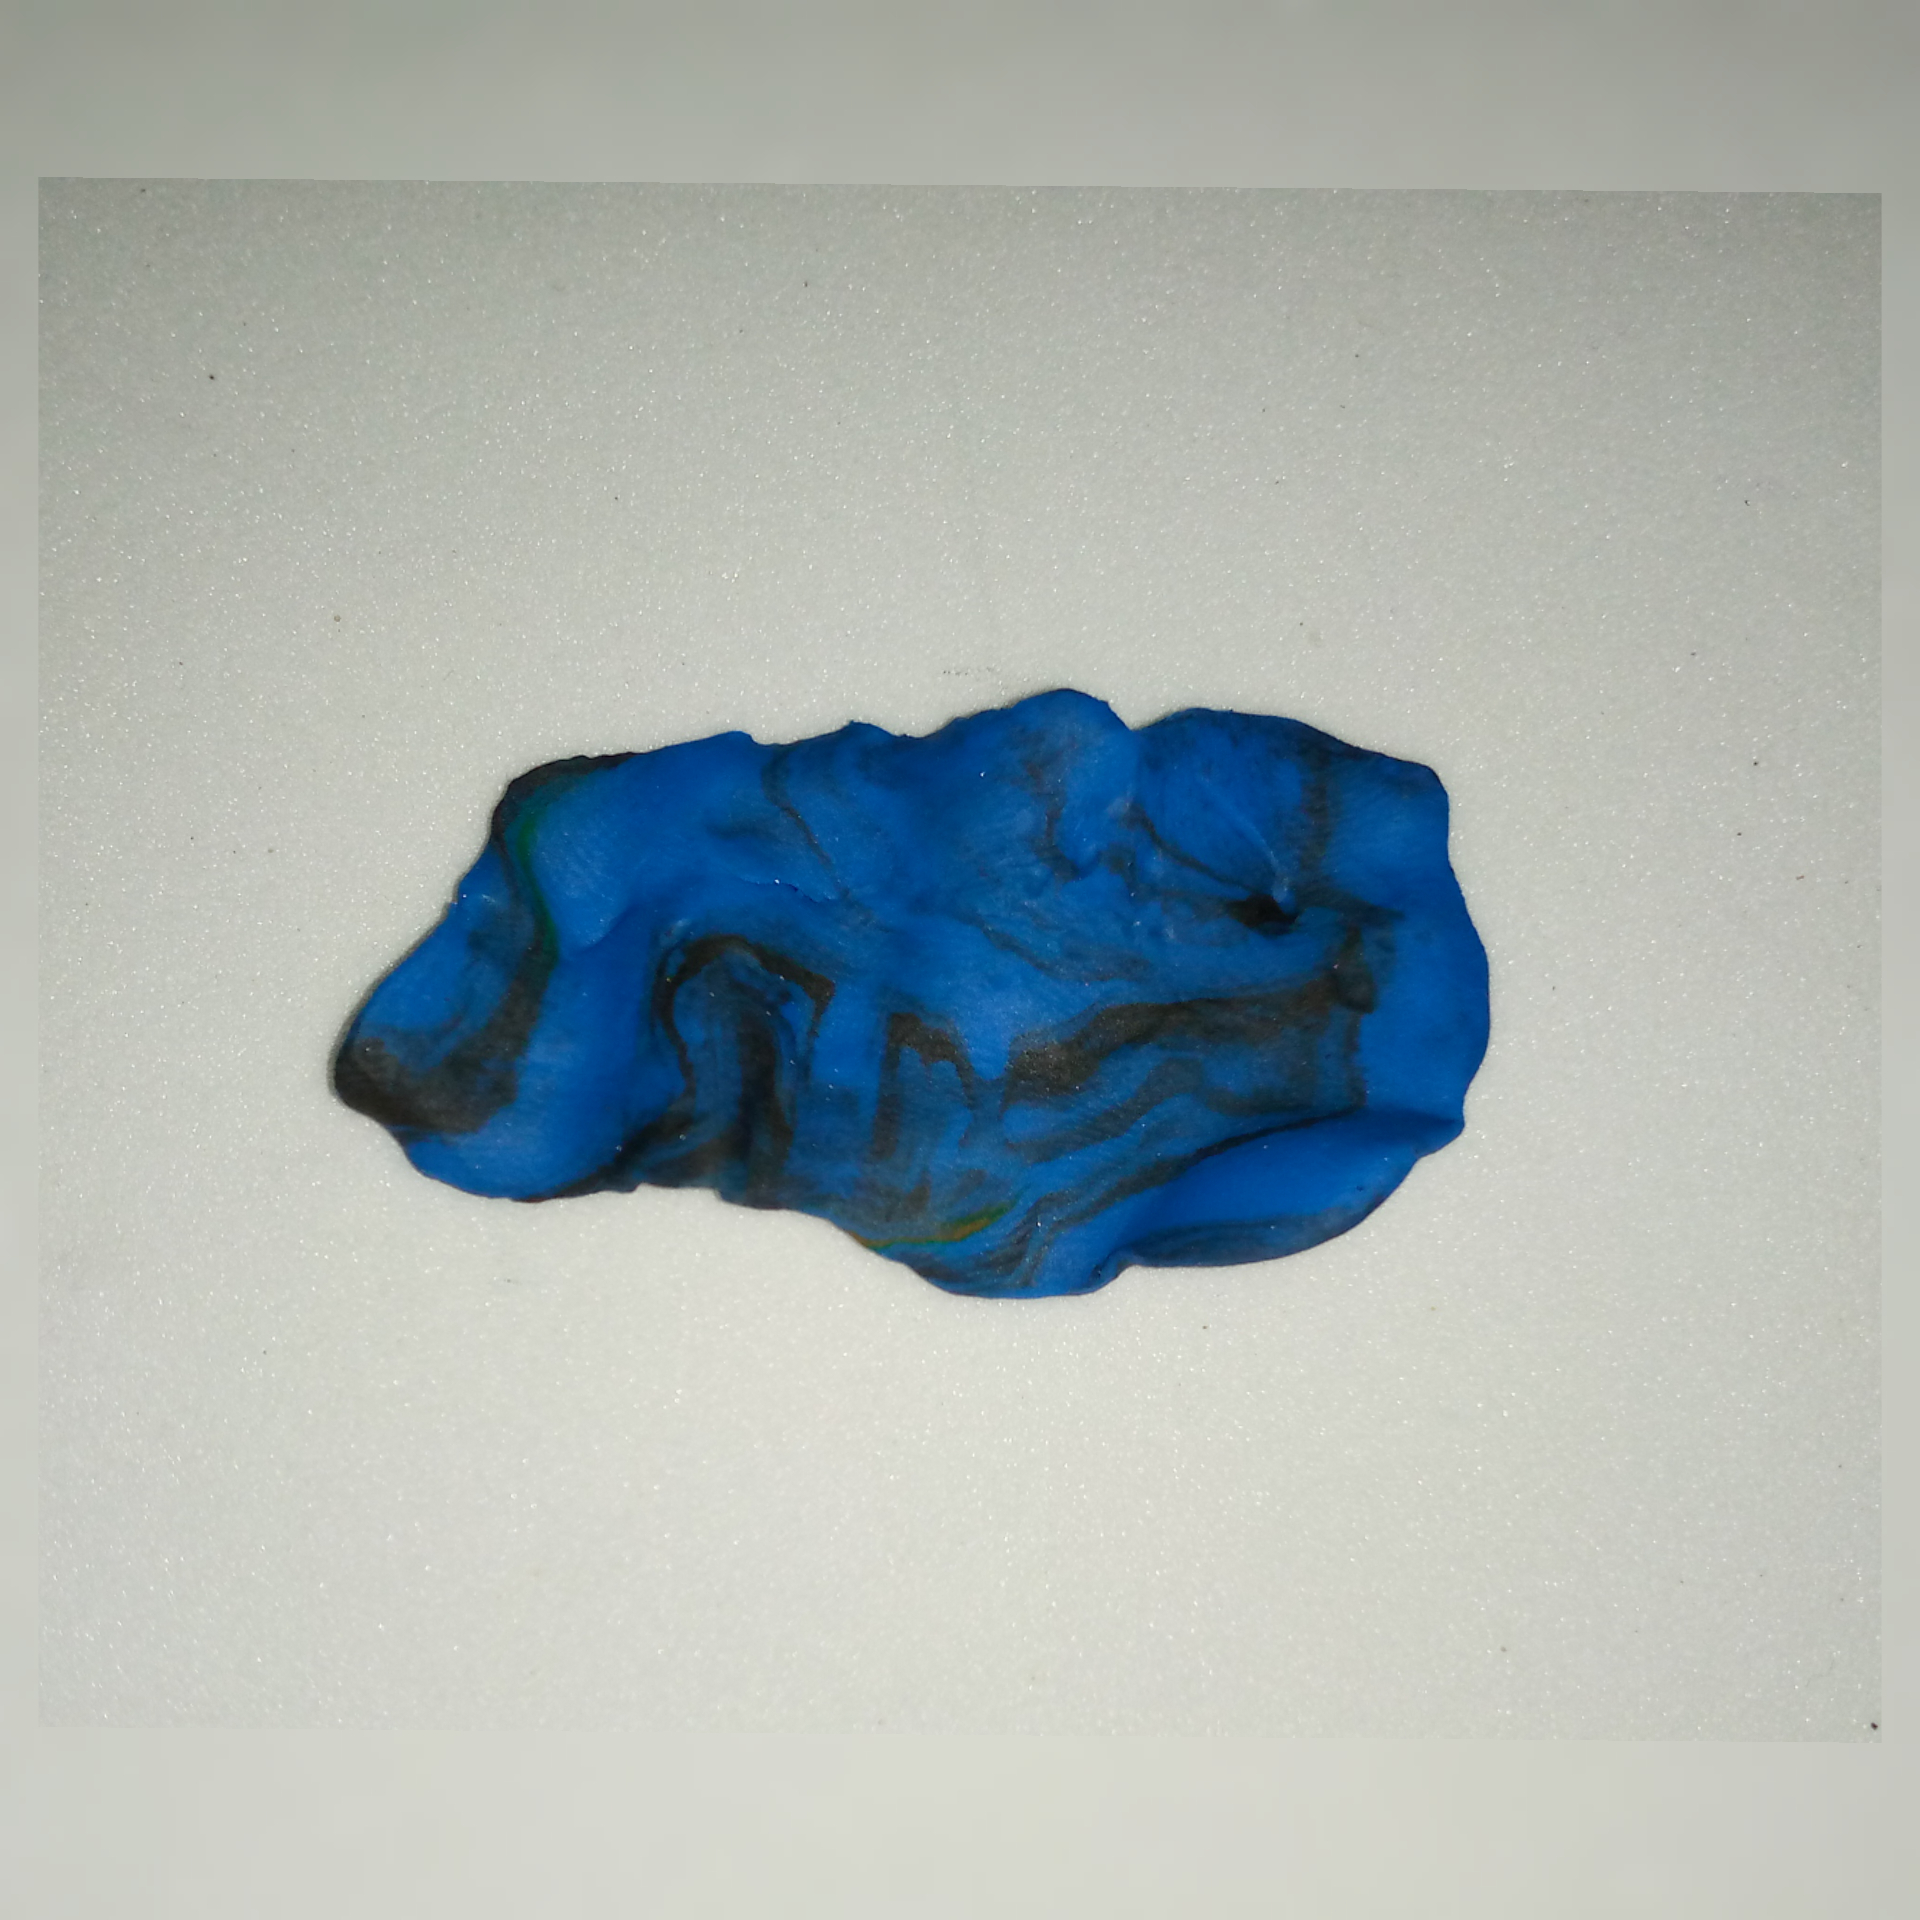
18- Para finalizar coloca la lámpara en la base y la cobija al pie de la cama, y hemos terminado querido amigos # Hive diy.
18- Finally place the lamp on the base and the blanket at the foot of the bed, and we have finished dear friends # Hive diy.
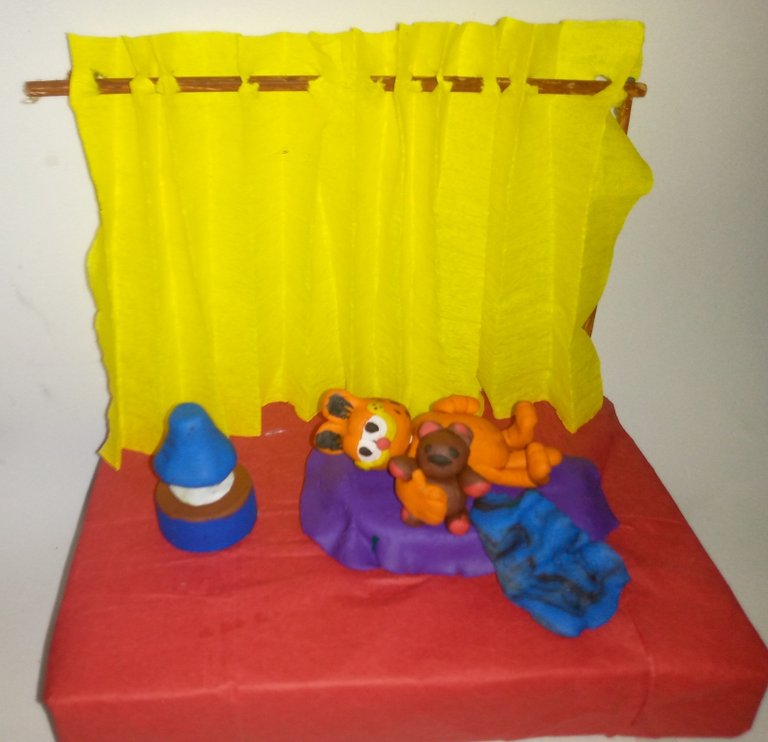
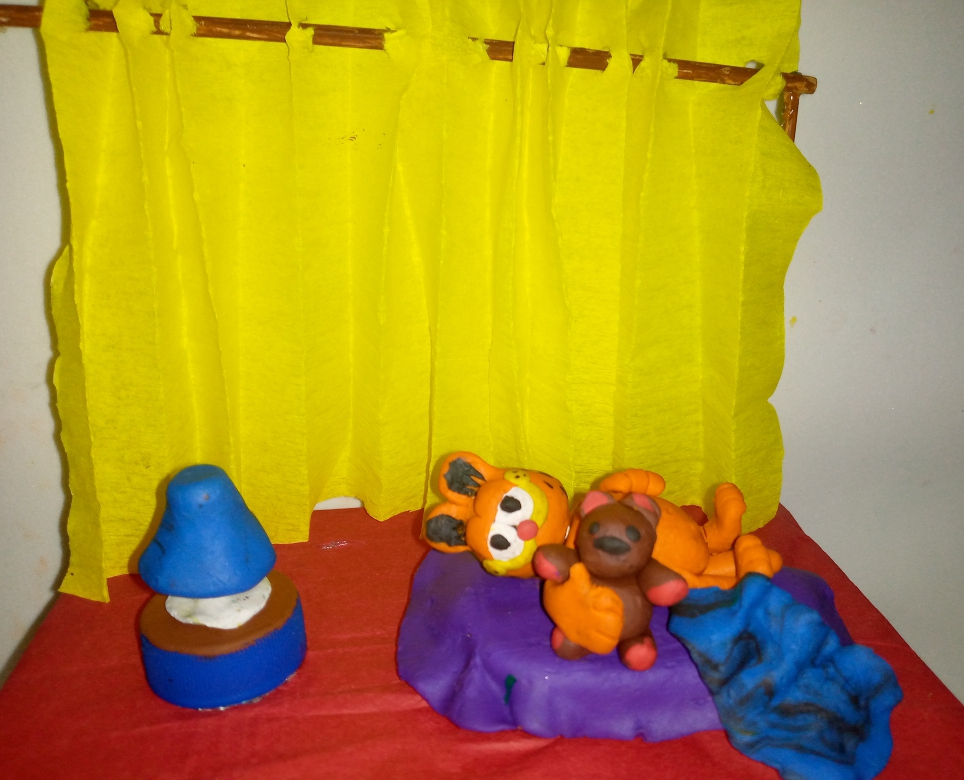
Espero que haya sido de su agrado, tarde un poco en hacerlo pero creo que valió la pena el resultado.
I hope you liked it, it took me a while to do it but I think it was worth the result.
Invito a la amiga @nadeurdaneta participar, acá el link
I invite my friend @nadeurdaneta to participate, here is the link
Muchas gracias por visitar mi blog, nos vemos pronto, Dios les bendiga!
Thank you very much for visiting my blog, see you soon, God bless you!
@dayanaromer
Editadas con inShop.
Traducido con Deepl traductor.
All photos are my own, taken with my Tecno Spark 6 go cell phone.
Edited with inShop.
Translated with Deepl translator.


