Buenas tardes estimados amigos # Hive diy, excelente domingo para todos, espero estén muy bien, principalmente en salud.
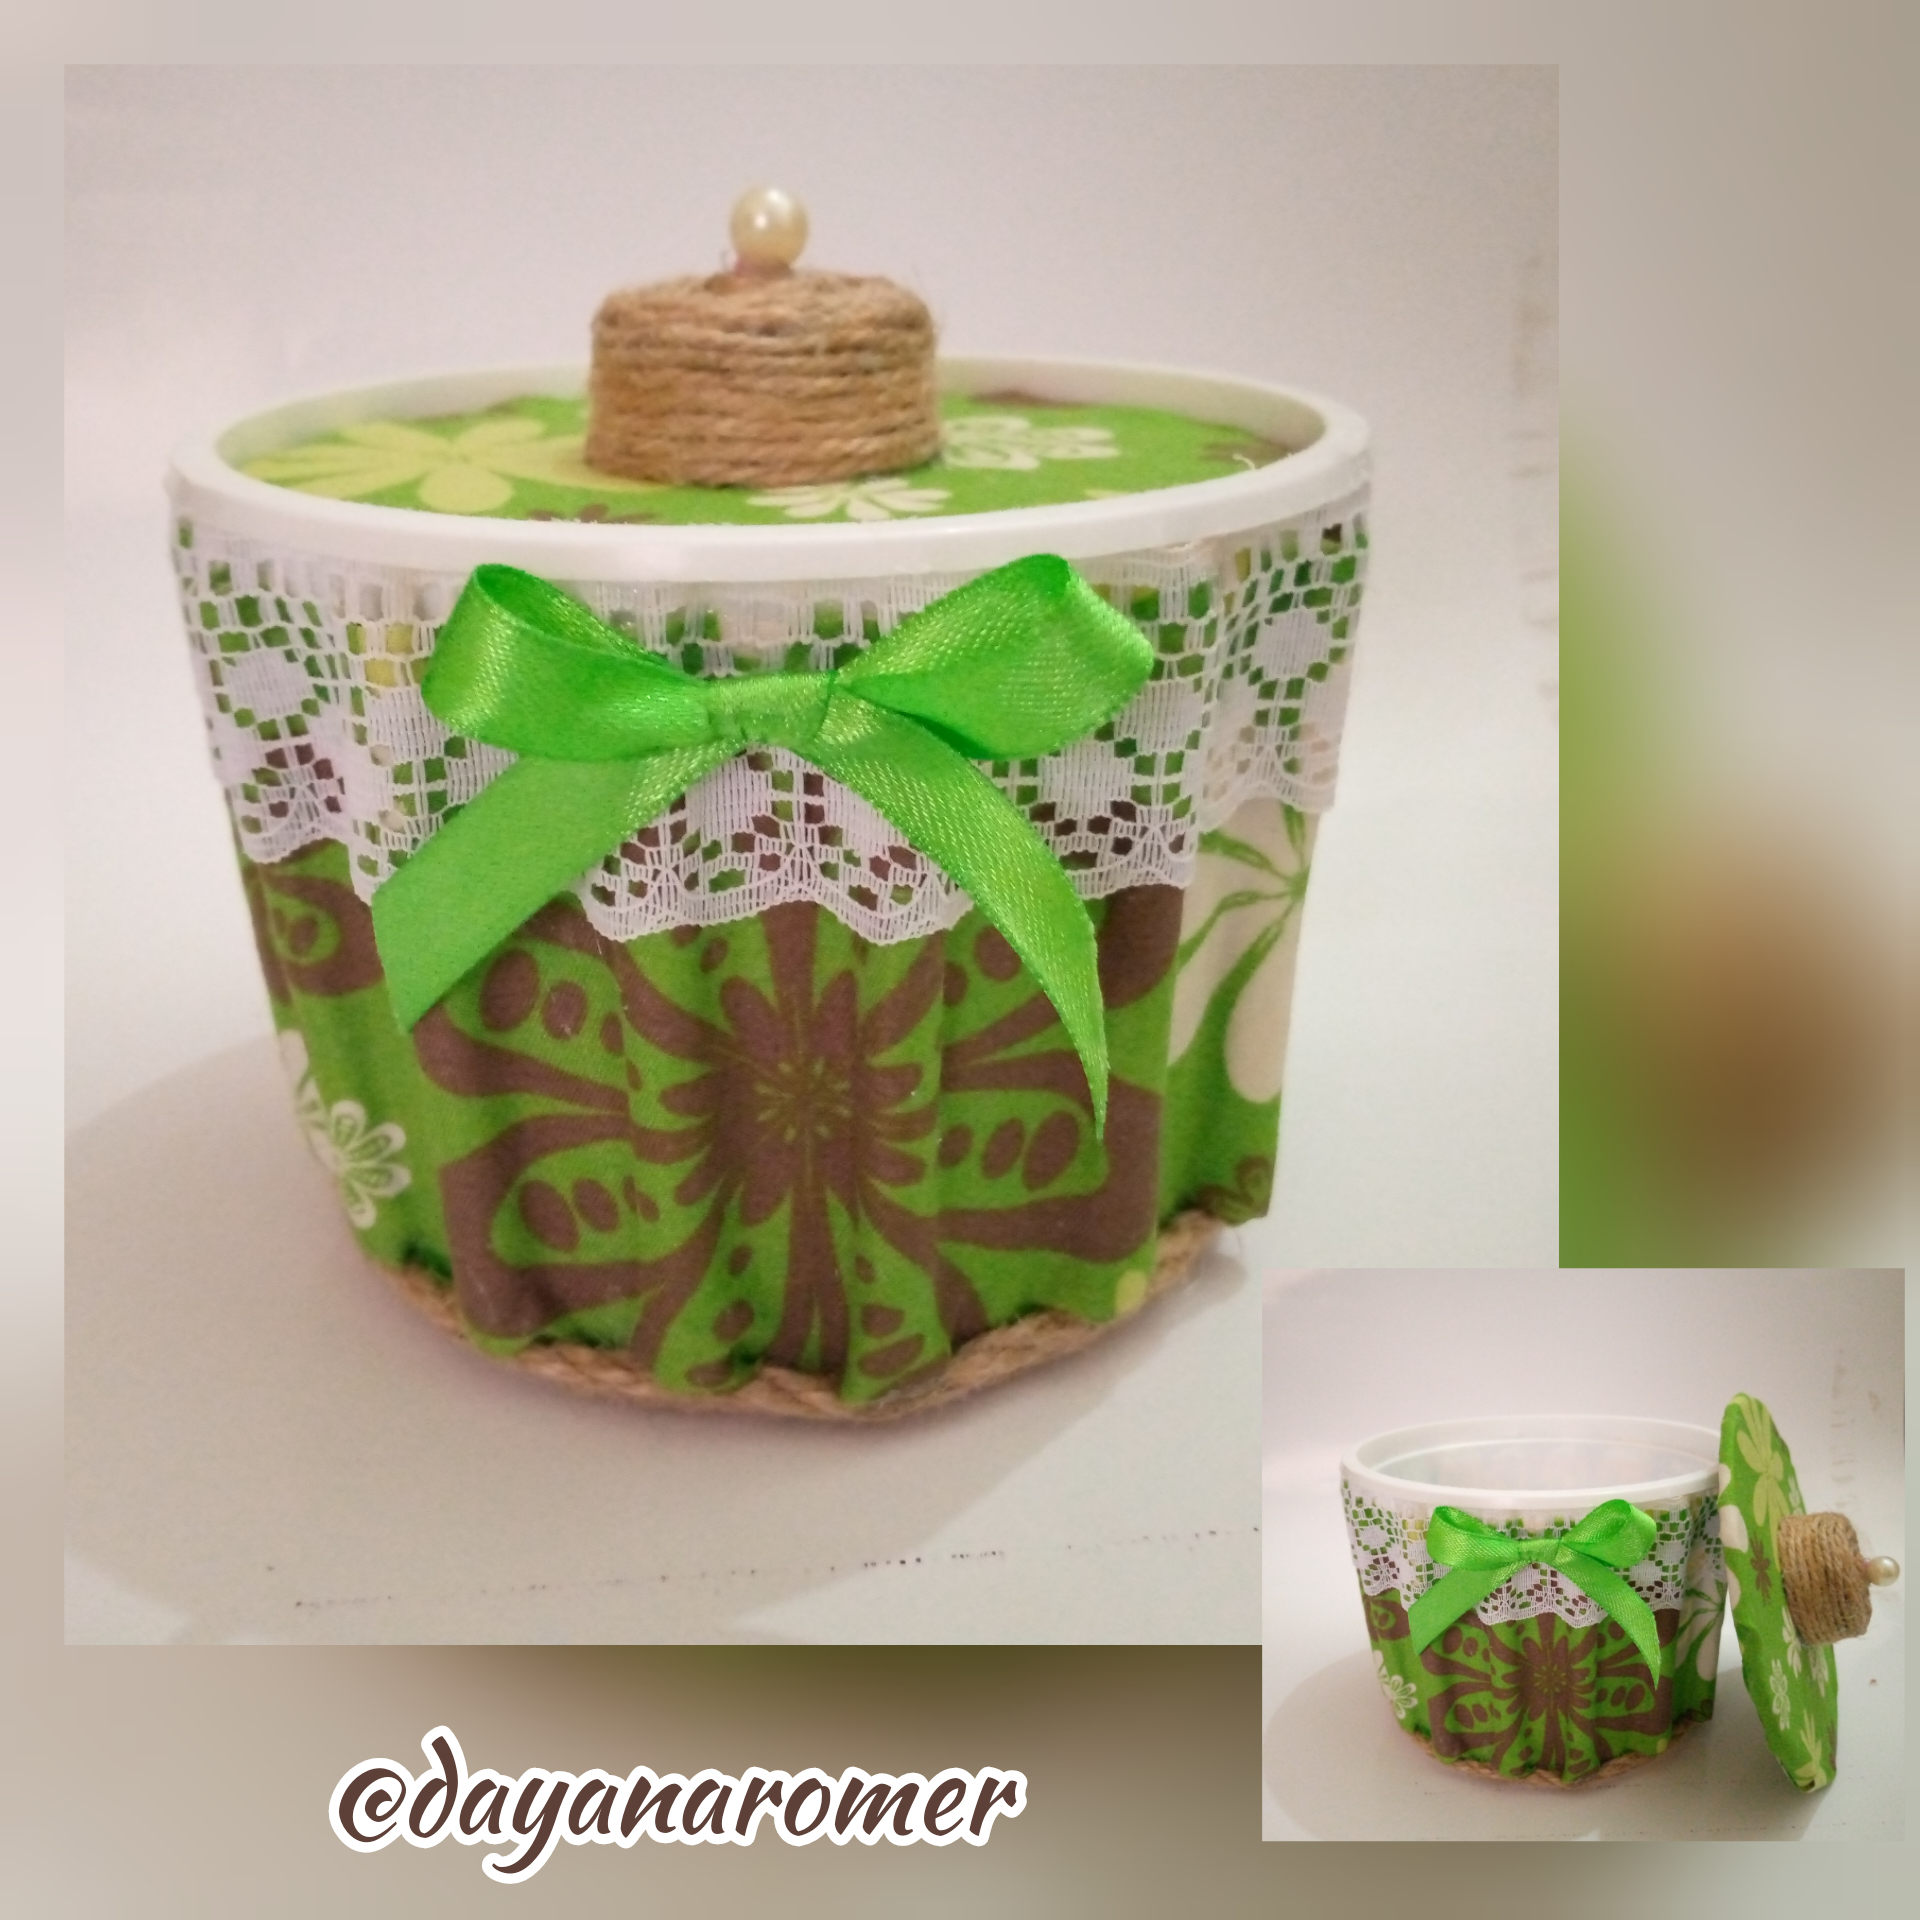
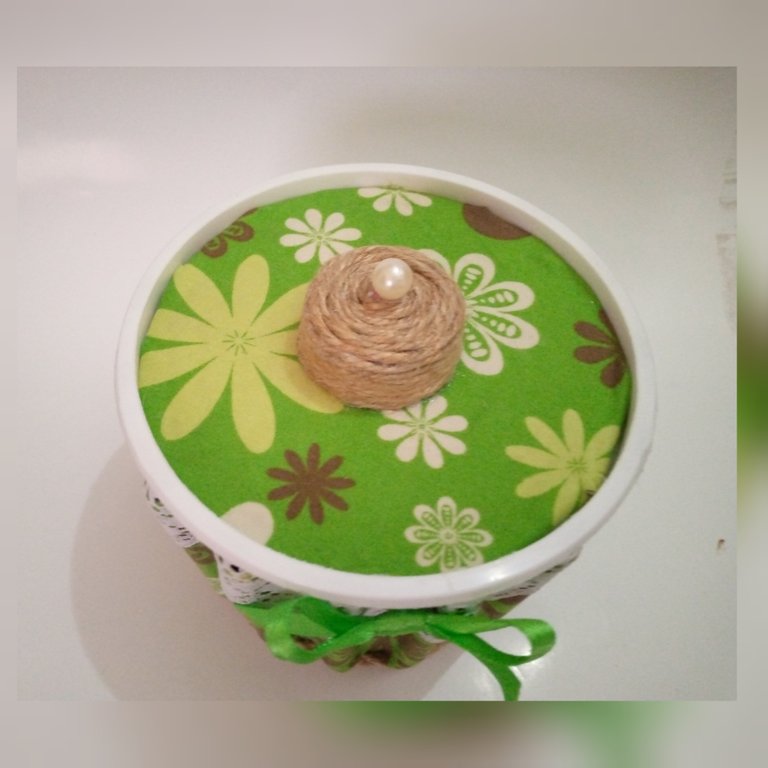
Bienvenidos a un nuevo post, es un placer compartir con ustedes mi trabajo a través de esta linda comunidad que cada vez crece más, hoy he realizado un lindo neceser hecho con un recipiente de mantequilla, cartón, tela y hojas de revistas, puedes darle la función que prefieras, colocar joyas, hilos, bisutería, moños entre otros.
Les muestro como lo podemos realizar y espero que les guste.
Good afternoon dear friends # Hive diy, excellent Sunday to all, I hope you are very well, mainly in health.
Welcome to a new post, it is a pleasure to share with you my work through this beautiful community that is growing more and more, today I have made a nice toiletry bag made with a butter container, cardboard, fabric and magazine sheets, you can give it the function you prefer, place jewelry, threads, jewelry, bows among others.
I show you how we can make it and I hope you like it.
Materiales
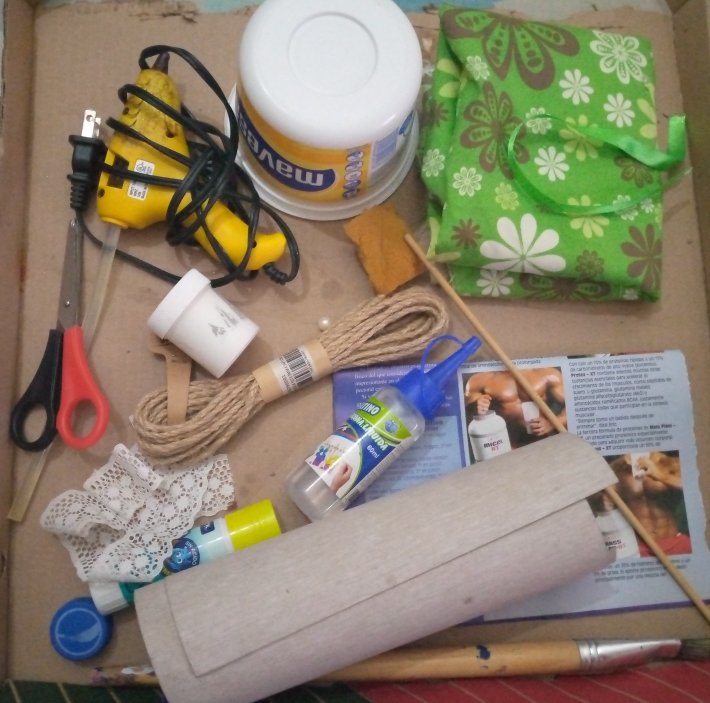
✓ Un recipiente de mantequilla
✓ Cartón
✓ Una tapa de refresco
✓ Hojas de revista en desuso l
✓ Tela estampa
✓ Cinta bordada
✓ Listón de color verde
✓ Hilo de yute
✓ Silicón liquido
✓ Silicón caliente
✓ Pegamento
✓ Tijera
✓ Perla
✓ Pintura al frío color blanca
✓ Pincel
✓ Palo de altura
Materials
✓ A butter container
✓ Cardboard
✓ A soda cap
✓ Disused magazine sheets l
✓ Printed fabric
✓ Embroidered ribbon
✓ Green ribbon
✓ Jute thread
✓ Liquid silicone
✓ Hot glue
✓ Glue
✓ Scissors
✓ Pearl
✓ Cold paint in white color
✓ Brush
✓ Height stick
Paso a paso
Step by step.
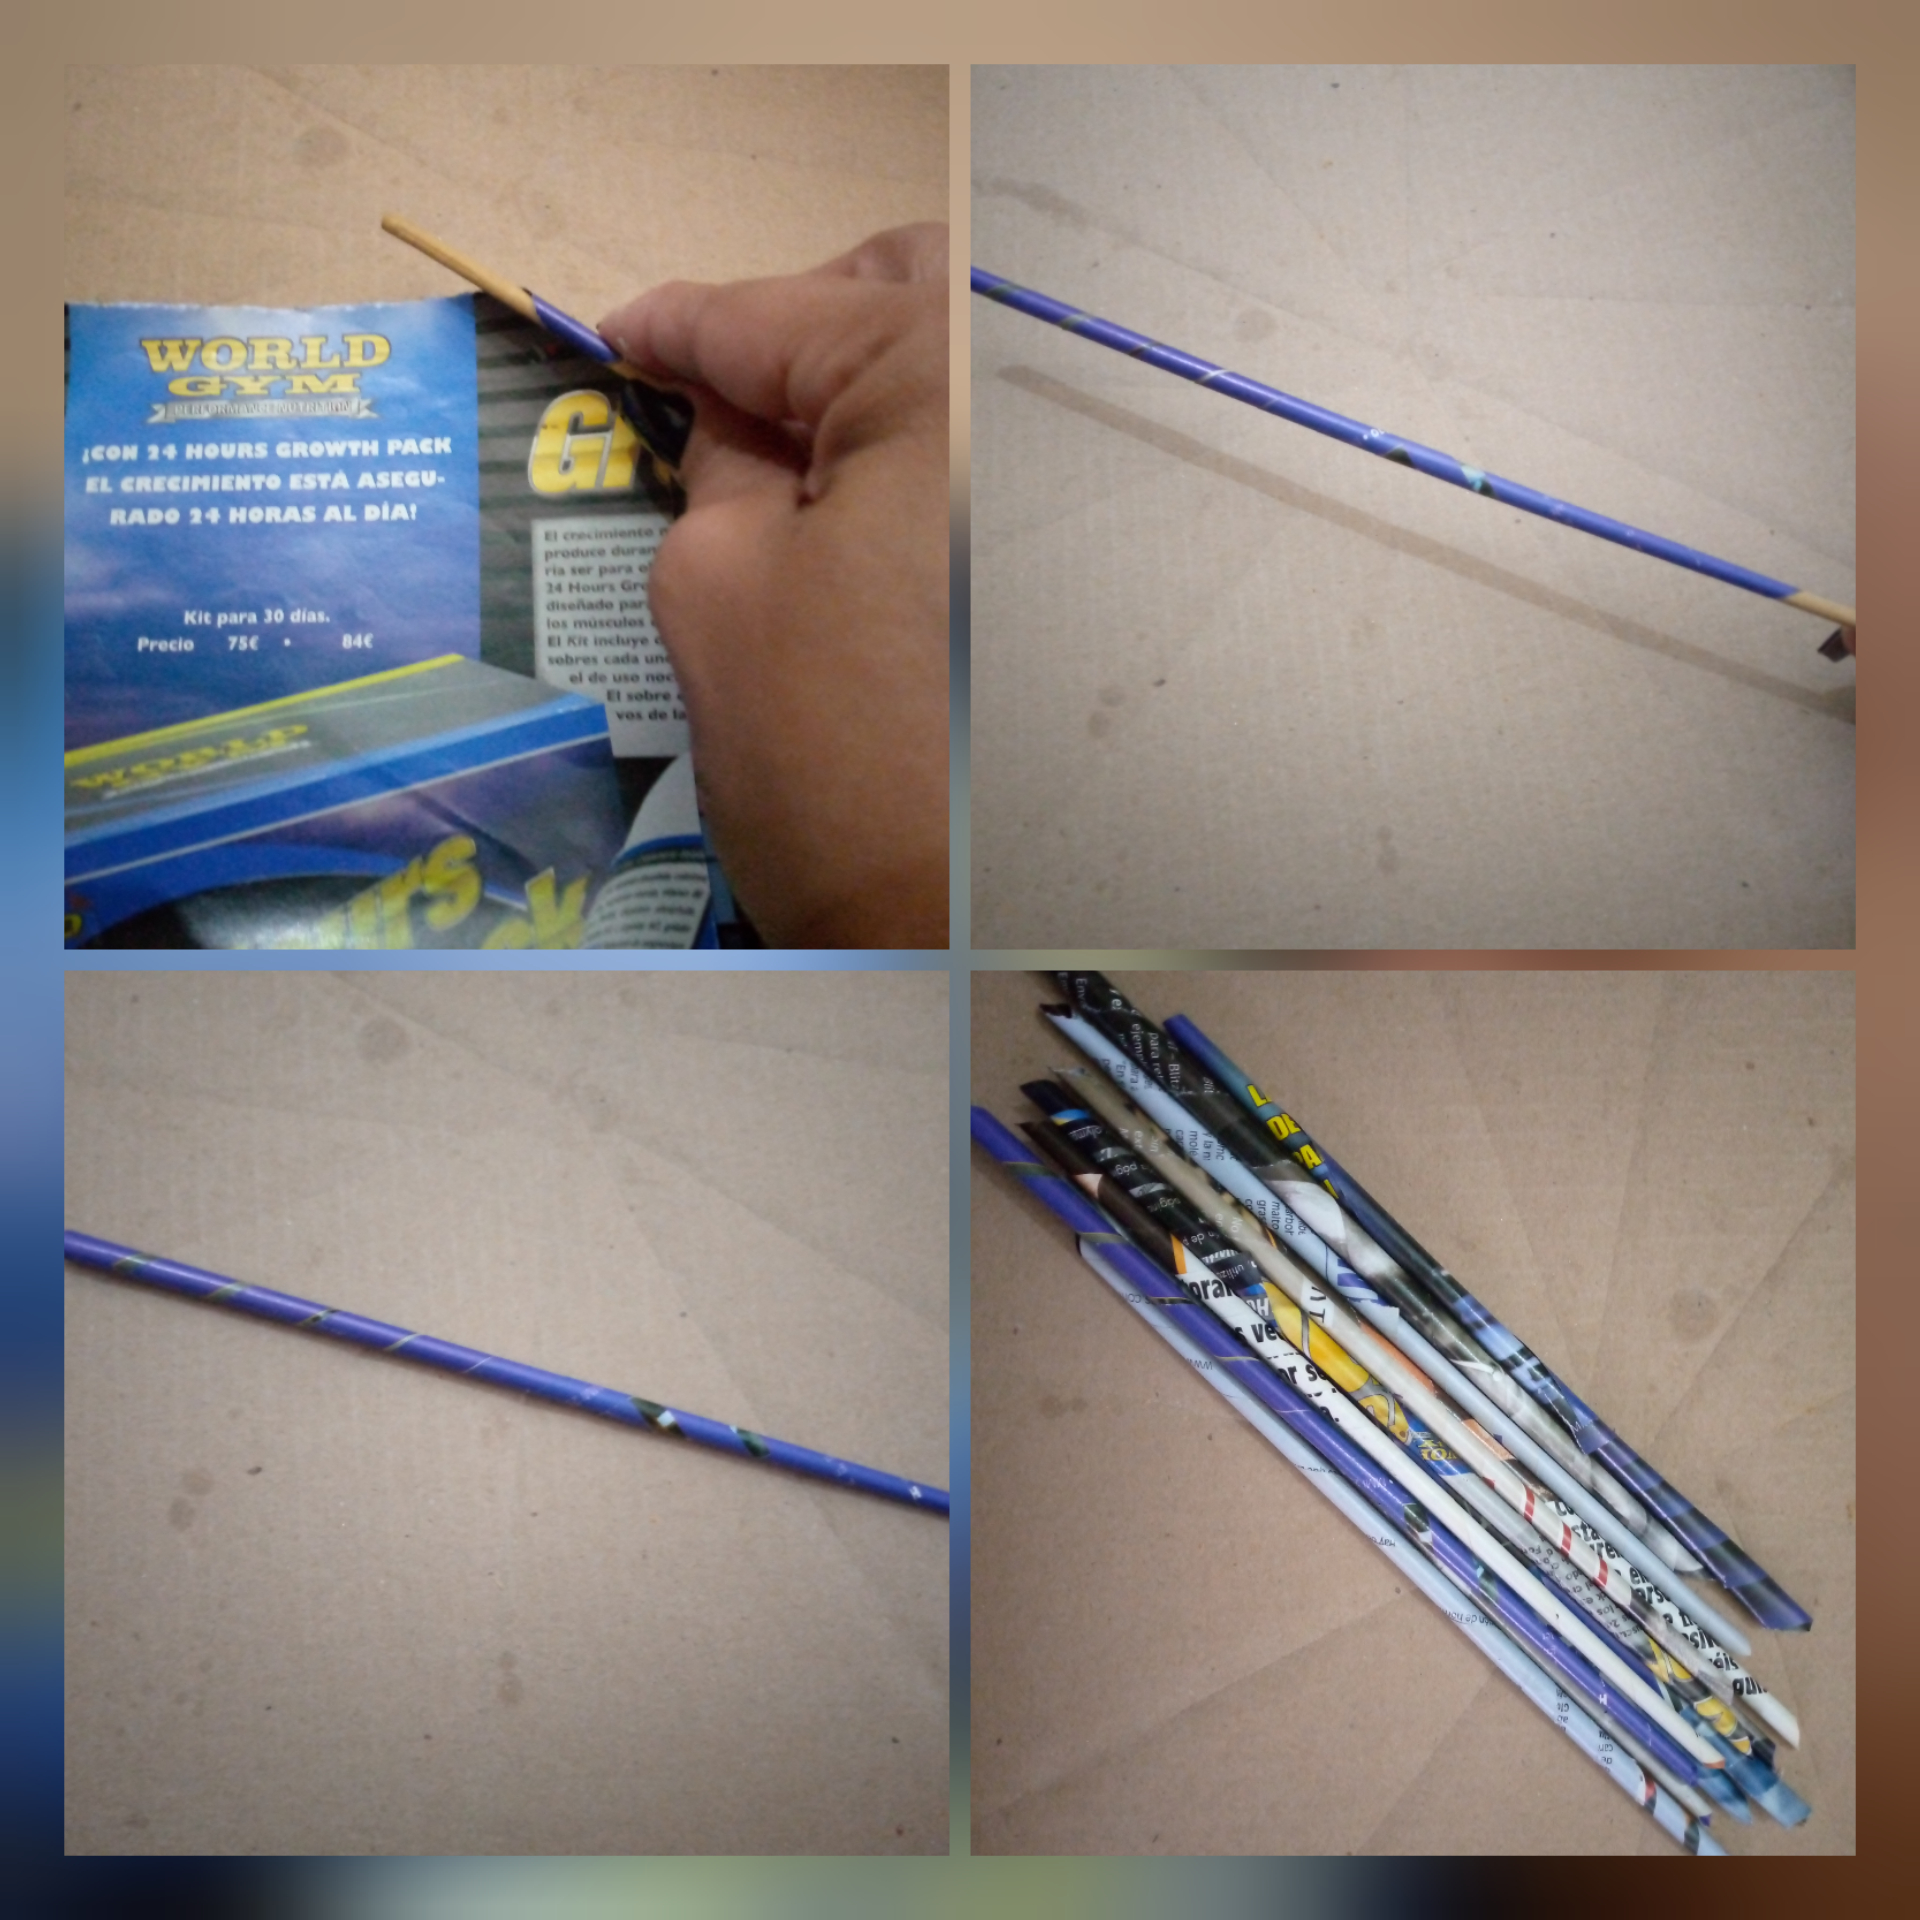
1- Corta la hoja de revista a la mitad y enrolla una de las puntas con ayuda del palo de altura, formando un tubo fino, pega al final, haremos varios.
1- Cut the magazine sheet in half and roll one of the ends with the help of the height stick, forming a thin tube, glue at the end, we will make several.
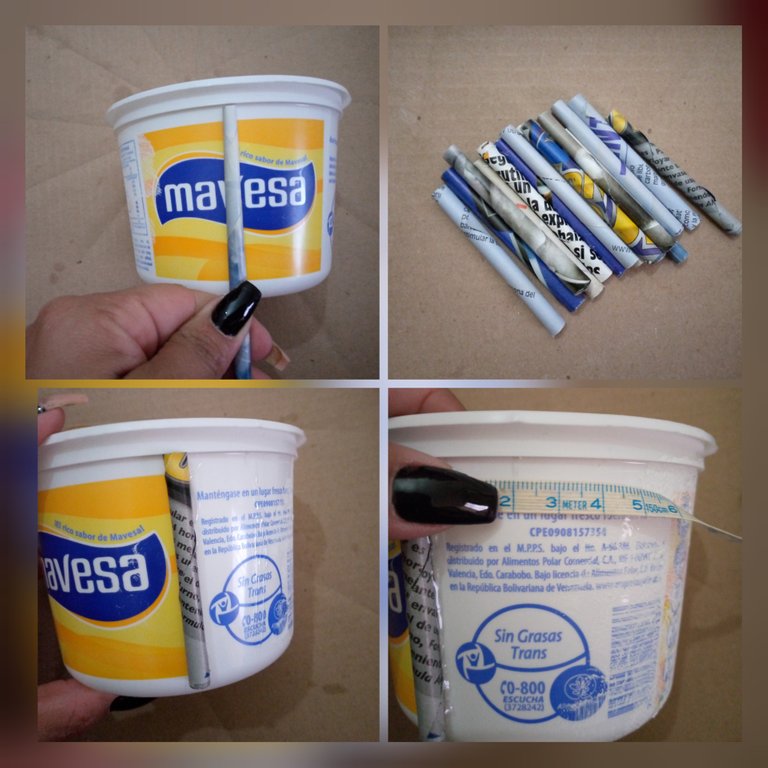
2- Mide y corta los tubitos a la altura deseada del envase, luego pega de forma vertical y a partir de allí mide 2 cm de separación para los siguientes tubitos.
2- Measure and cut the tubes to the desired height of the container, then glue vertically and from there measure 2 cm apart for the following tubes.

3- Pega los tubos en cada marca al rededor del envase, posteriormente cubre un poco con la pintura blanca para opacar un poco el color del envase.
3- Glue the tubes at each mark around the container, then cover a little with white paint to slightly dull the color of the container.
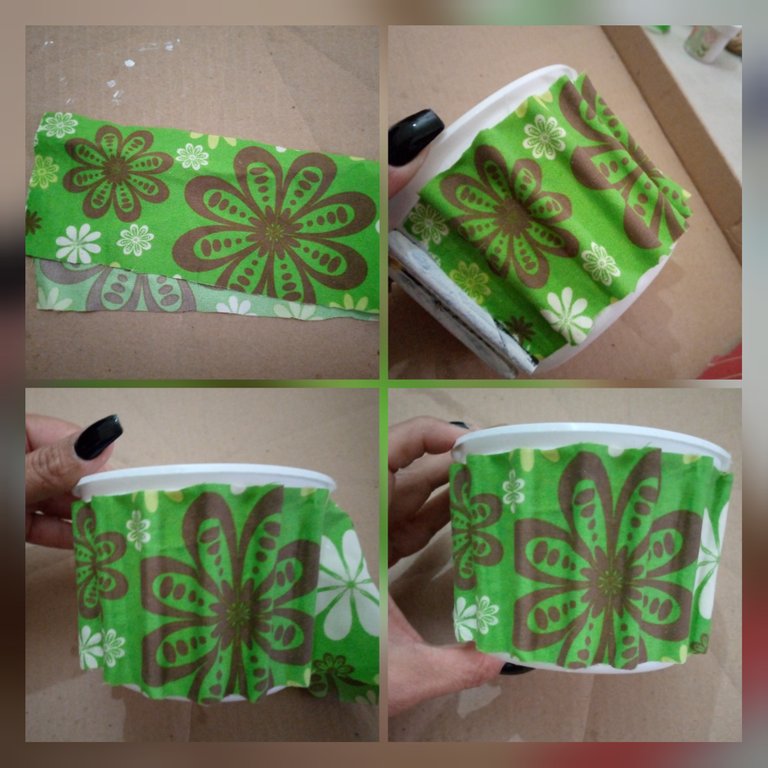
4- Recorta un trozo de tela a la medida central del envase, adherimos al rededor muy bien al mísmo y a los tubitos tomando su forma.
4- Cut out a piece of fabric to the central measurement of the container, adhere it to the surrounding area very well and to the little tubes taking its shape.
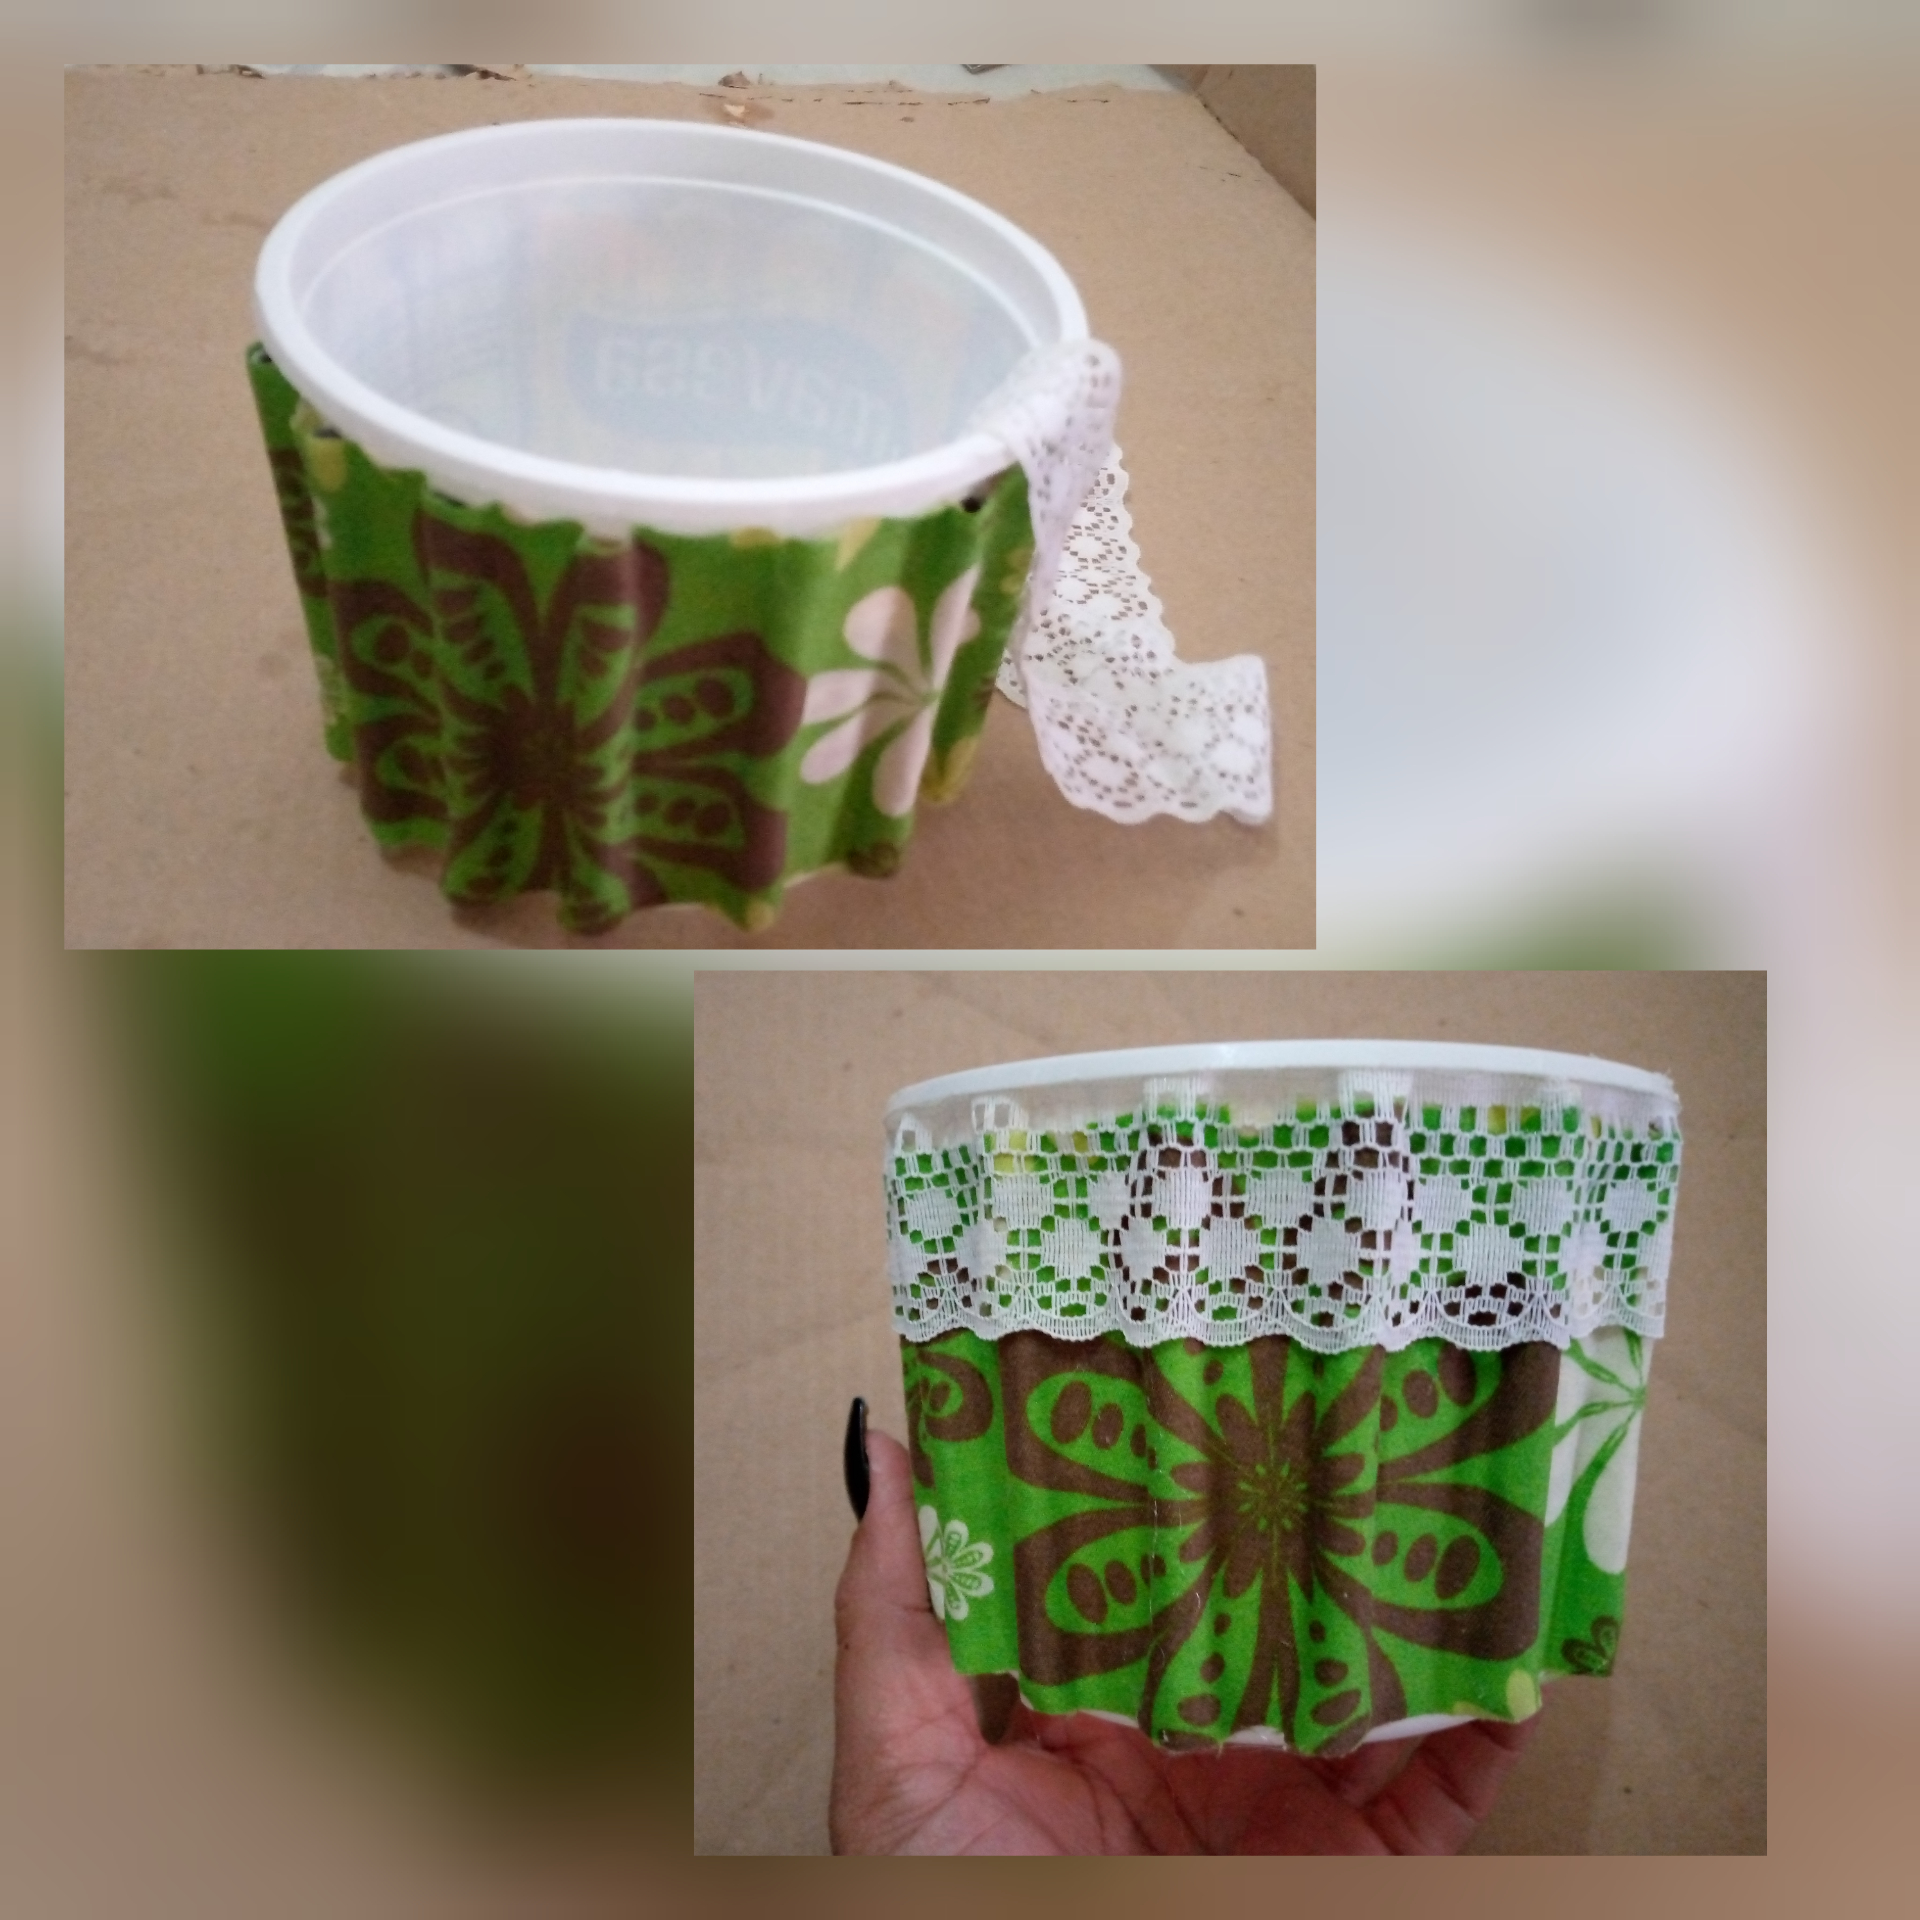
5- Luego pega la cinta de encaje en la parte superior.
5- Then glue the lace ribbon on the top.
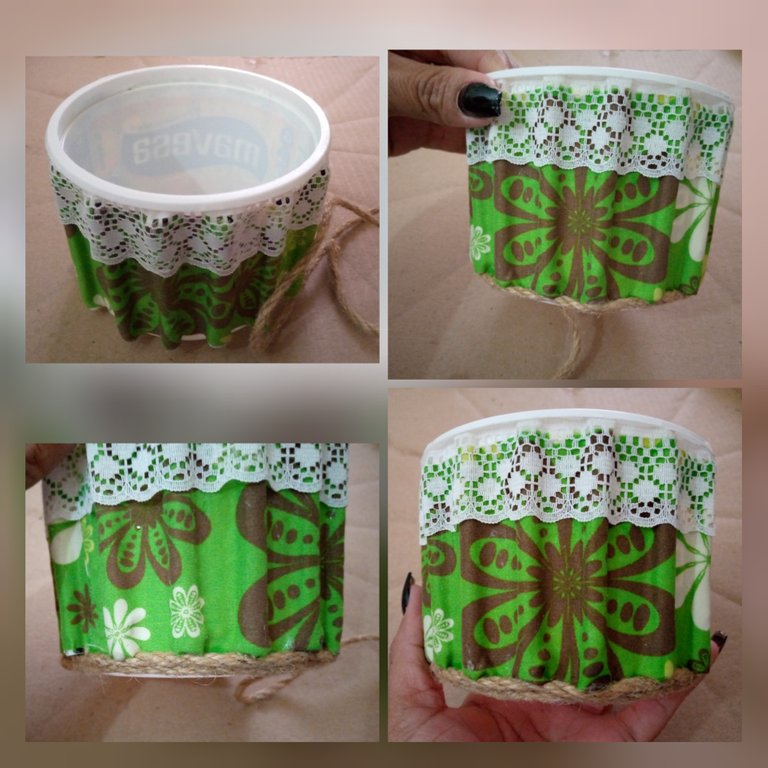
6- Continúa pegando en la parte inferior el hilo de yute, le daremos dos vueltas, y tenemos lista la parte inferior del neceser.
6- Continue gluing the jute thread on the lower part, we will give it two turns, we have ready the lower part of the toiletry bag.
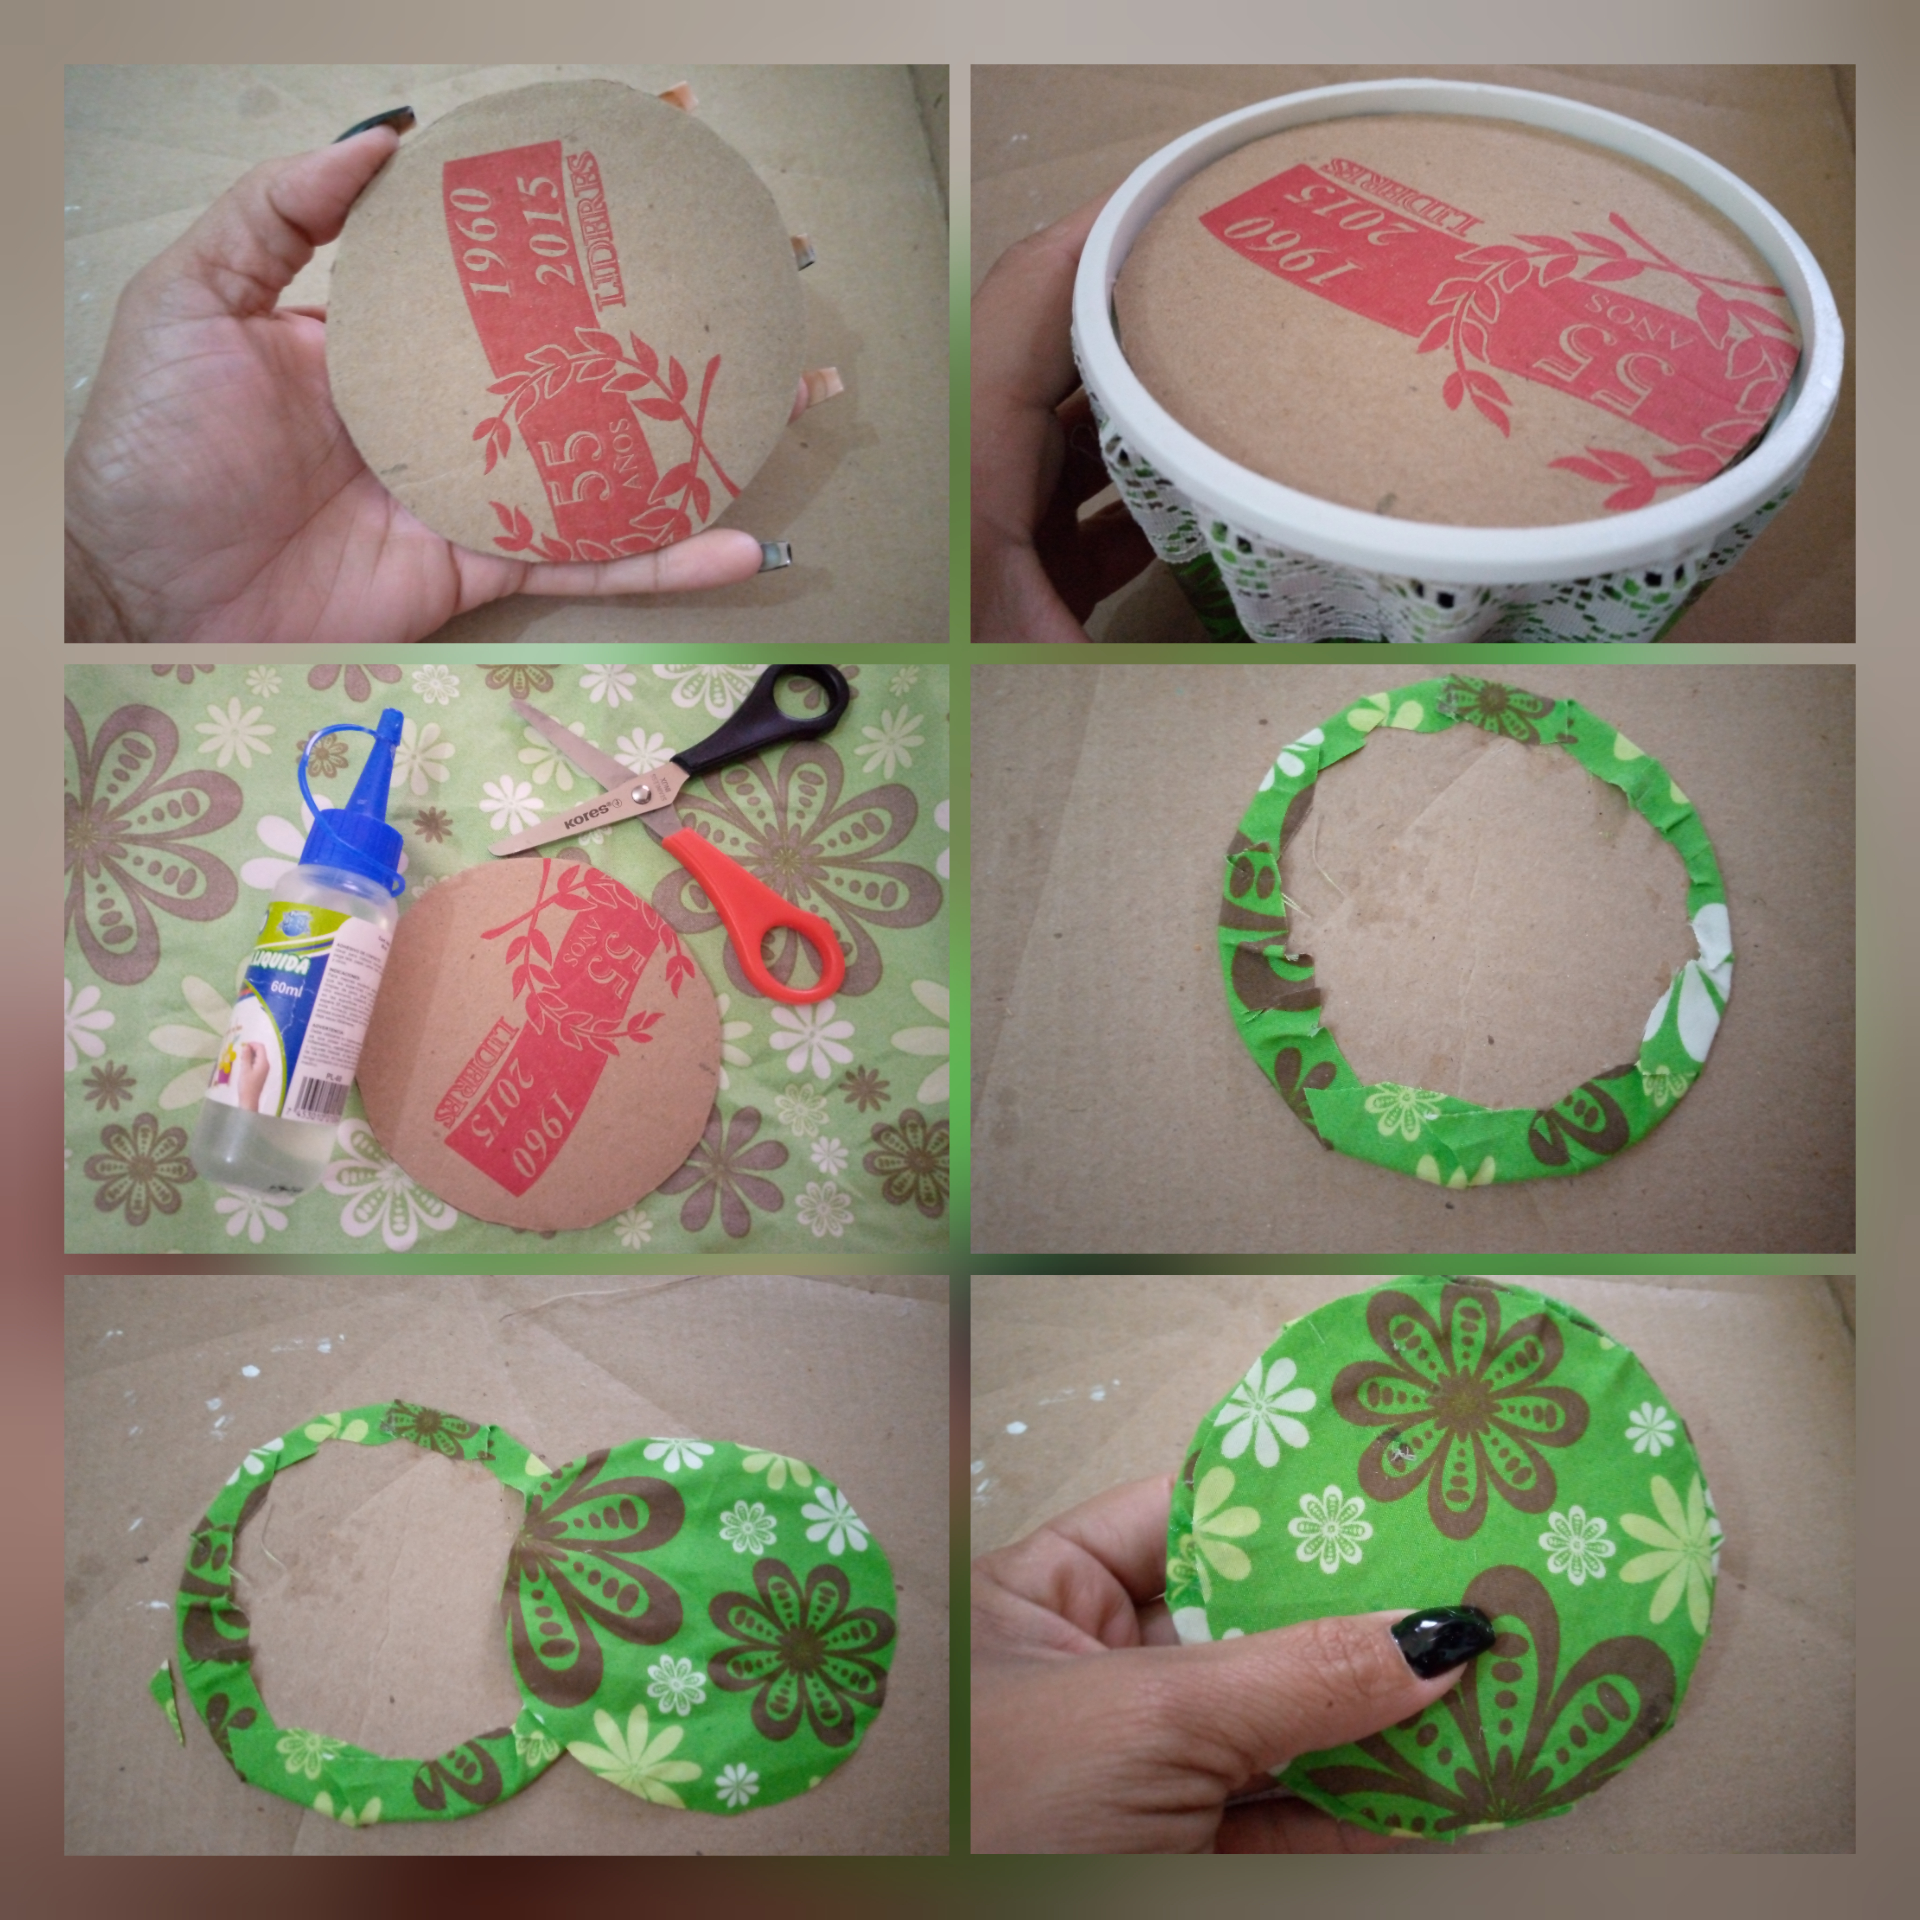
7- Recorta una circunferencia del cartón, que encaje perfectamente en el envase, luego pega y recorta sobre la tela, deja unos centímetros de más, haz unos cortes y pega, posteriormente recorta una circunferencia de la tela y pega cubriendo el cartón por completo.
7- Cut out a circumference of the cardboard, so that it fits perfectly in the container, then glue and cut out the fabric, leave a few extra centimeters, make some cuts and glue, then cut out a circumference of the fabric and glue covering the cardboard completely.
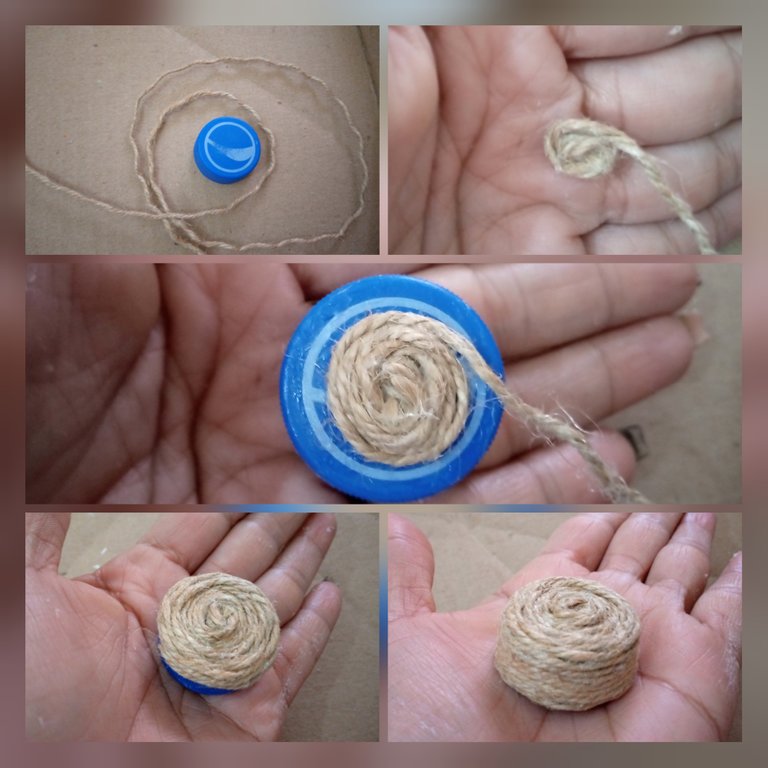
8- Forra la tapa de refresco con el hilo de yute, empieza enrollando un poco el hilo, pega en el centro de la tapa y sigue enrollando hasta finalizar.
8- Cover the soft drink lid with the jute thread, start by winding the thread a little, glue in the center of the lid and continue winding until the end.
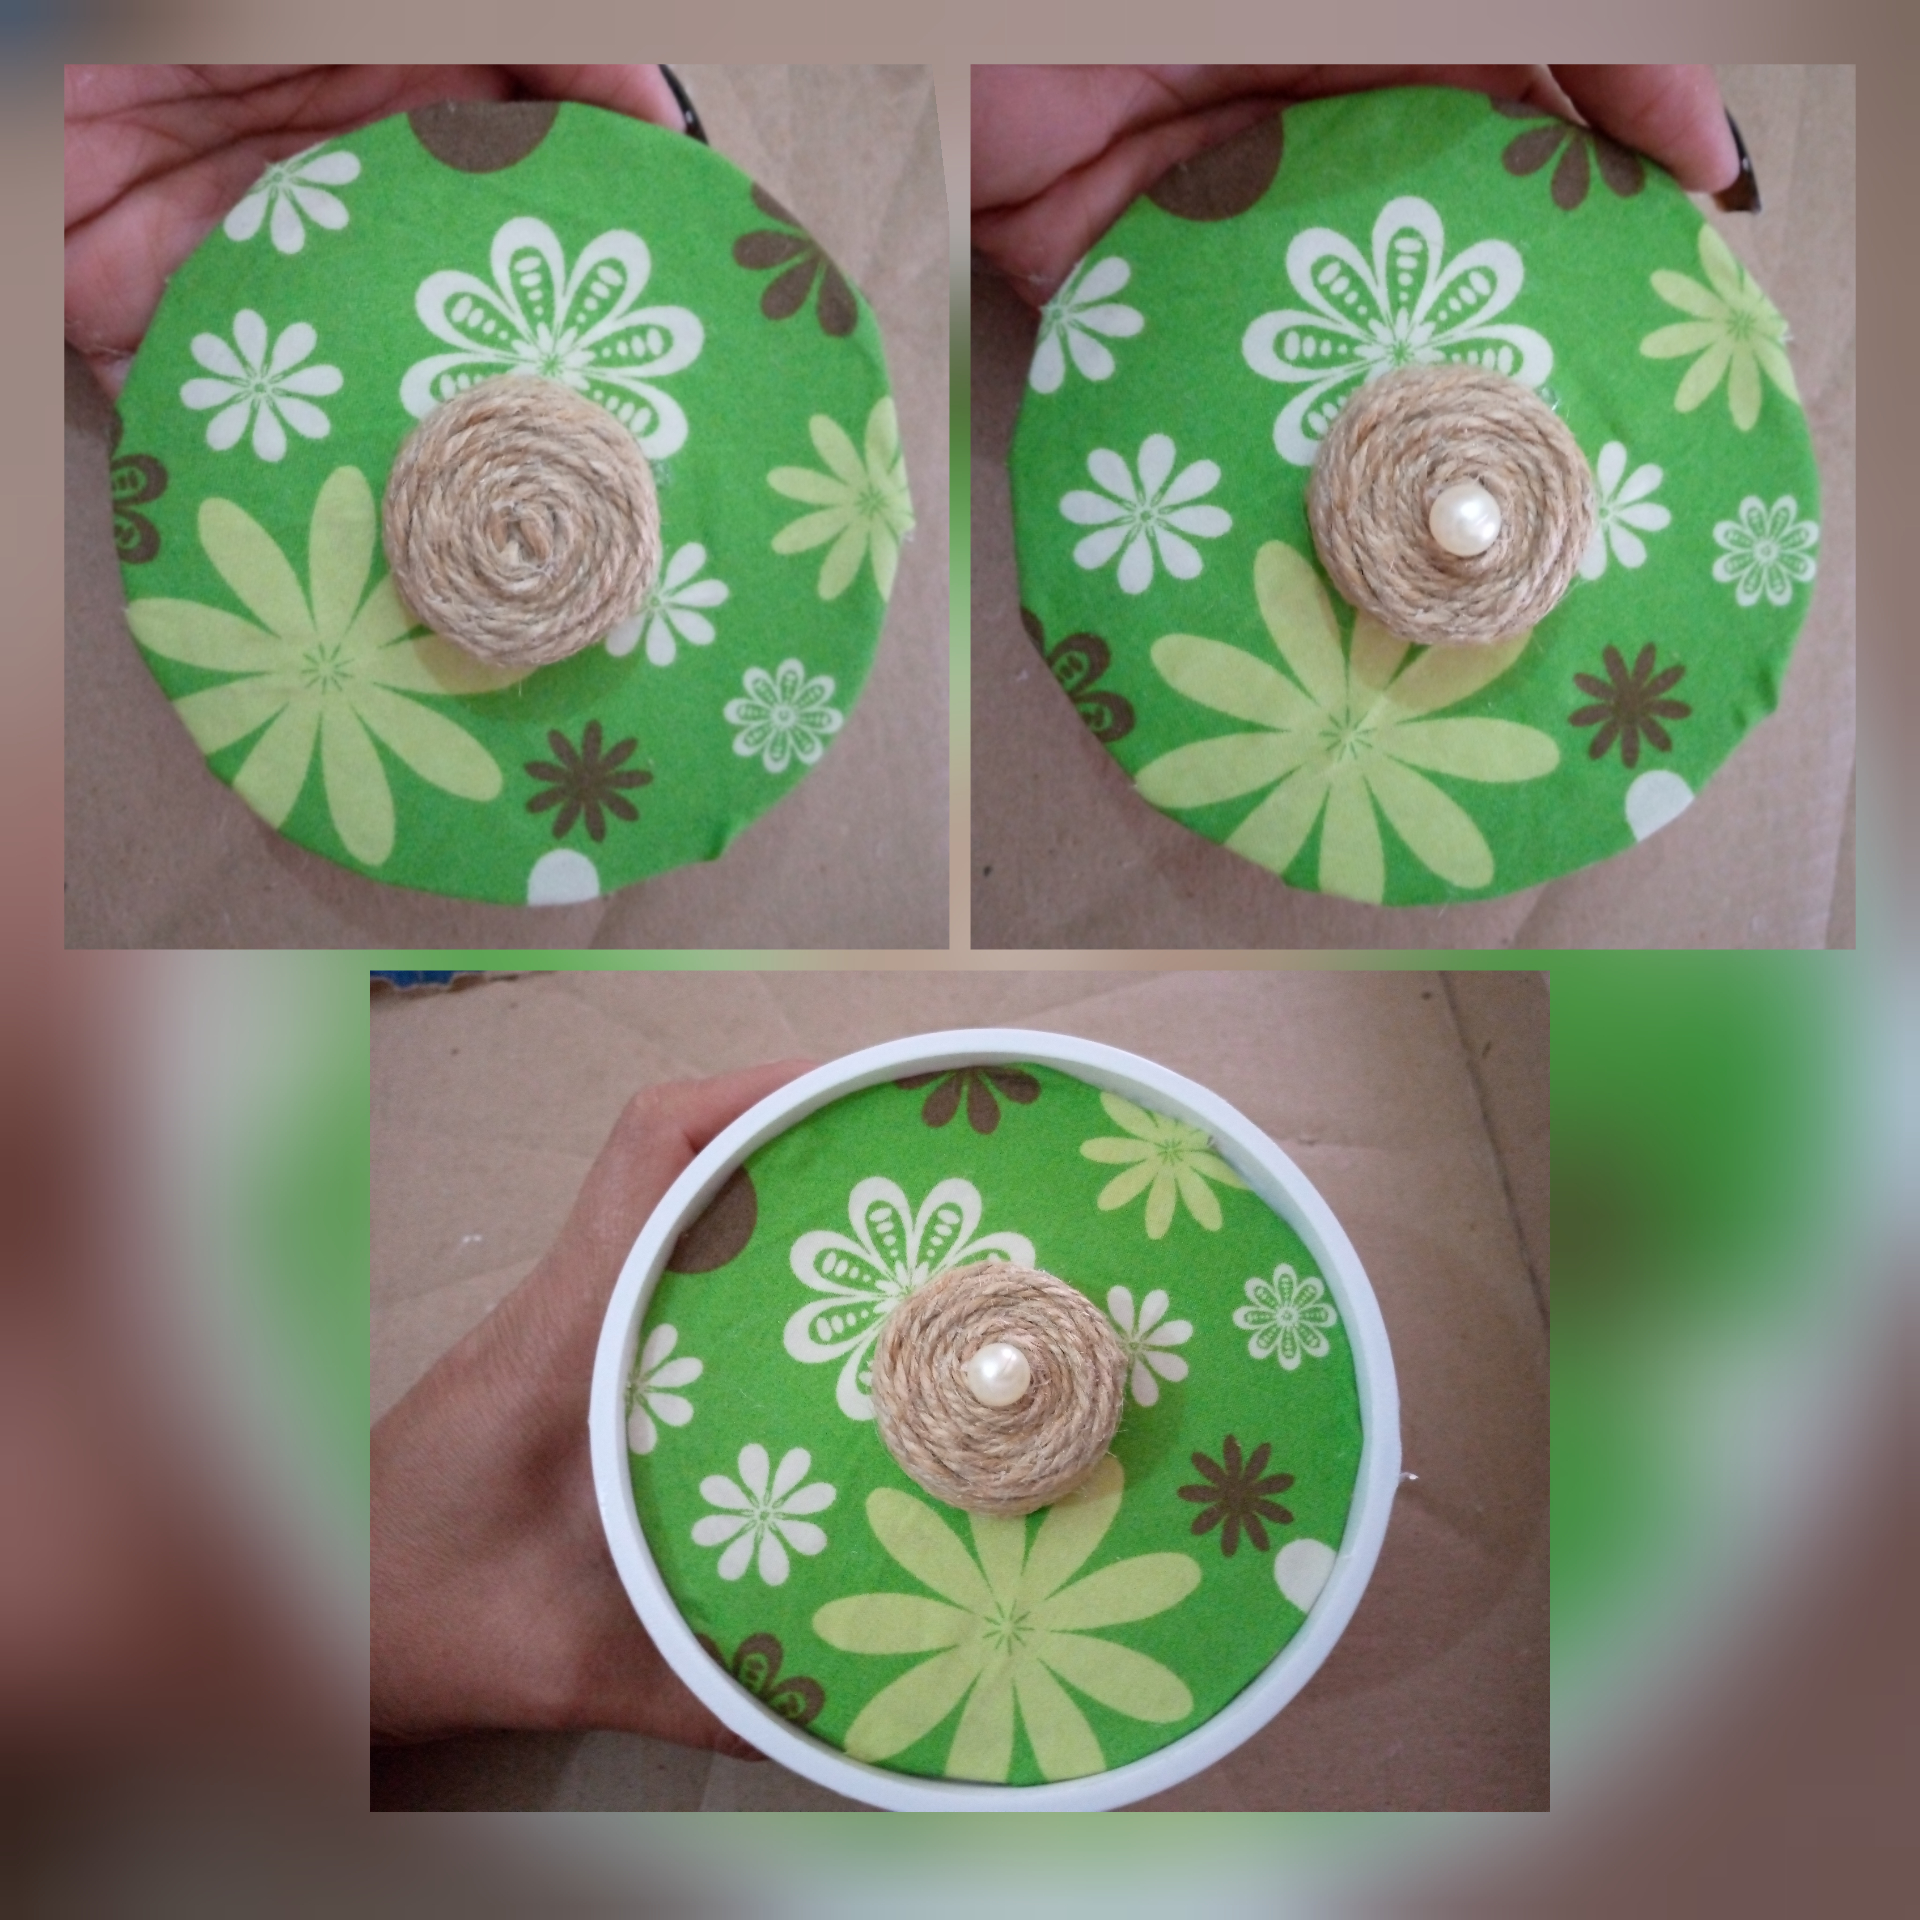
9- Pega la pieza en el centro de la circunferencia del cartón forrada, agrega la perla y coloca la tapa obtenida sobre el neceser.
9- Glue the piece in the center of the circumference of the lined cardboard, add the pearl and place the obtained lid on the vanity case.
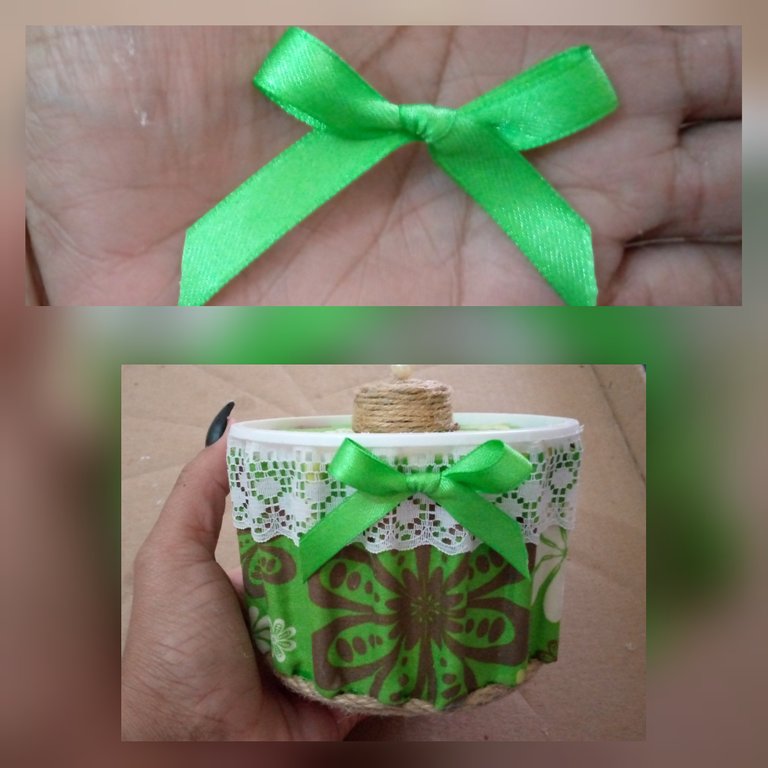
10- Para finalizar realiza un lindo lazo con el listón de y pega en la parte frontal superior del neceser.
10- To finish, make a pretty bow with the ribbon and glue it on the upper front part of the toiletry bag.
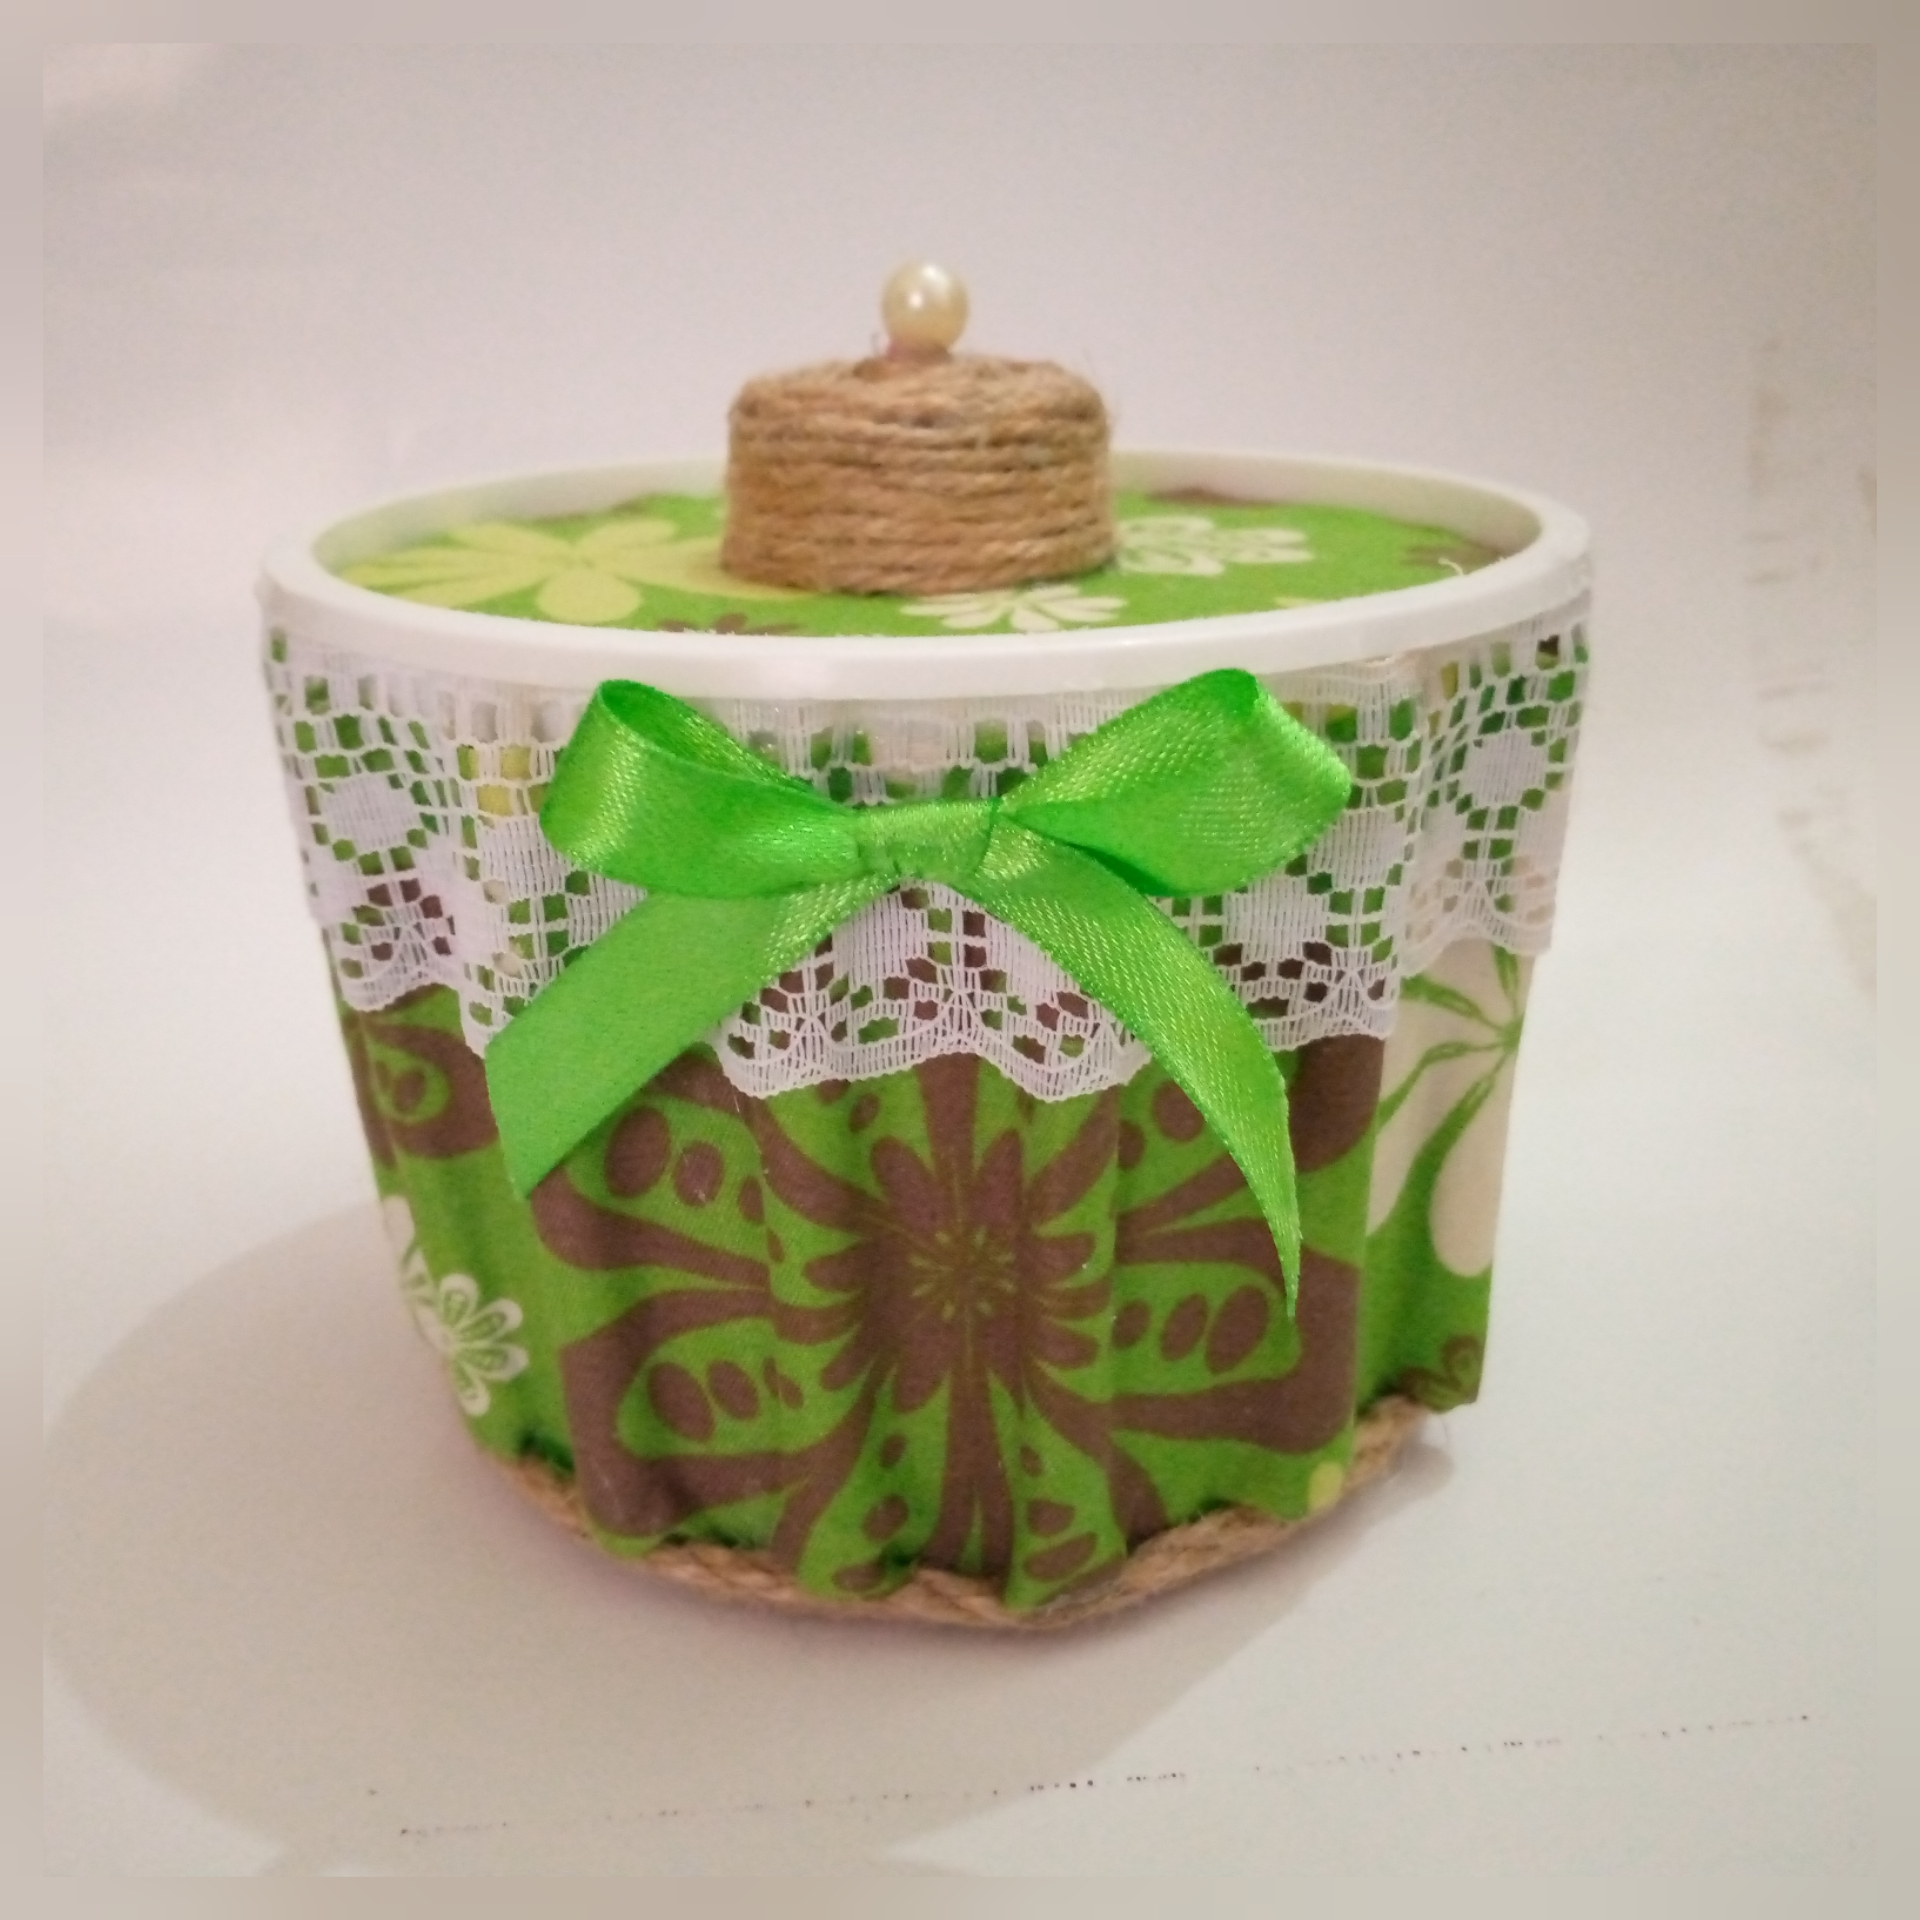
Hemos terminado está linda manualidad mi gente bella, espero les sea de gran utilidad y haya sido de su agrado.
We have finished this beautiful craft my beautiful people, I hope you find it very useful and that it has been to your liking.
Resultado
Result

Muchas gracias por visitar mi blog, nos vemos en una próxima oportunidad, Feliz y bendecido día!
Thank you very much for visiting my blog, see you next time, Happy and blessed day!
@dayanaromer
Editadas con inShop.
Traducido con Deepl traductor.
All photos are my own, taken with my Tecno Spark 6 go cell phone.
Edited with inShop.
Translated with Deepl translator.