Hello everyone... ✨
Hello to my dear Hivers and the dear community of artists #HiveDIY, after being absent for some time I'm here to show you a work that I hope will be useful, helpful or thoughtful for many of you.
I'm back, maybe some of you have noticed my absence, I really don't want to make a catharsis although I really need it to drain a lot, but it's simply not the place and it would be so long that the purpose of this post would be lost, which is to show a craft. However, I will add something relatively brief, to put it in context.
I have been through a lot throughout my life, however this year I feel it was the happiest I have lived despite certain circumstances, I repeat the happiest "HAPPIEST OF MY LIFE”, I got motivation, inspiration, desire for so much, thanks to this I grew, and achieved a lot that I did not think would happen just like that, here in my beautiful place Hive, they supported me, they opened doors for me, and I think I owe an apology if I let someone or many people down because I had to continue humbly supporting everyone who needs me with the work I have been doing here, just as they have supported me.
On the more personal side in other aspects outside of Hive, I gave a lot or maybe everything to get my happiness was not partial, but complete, or maybe I should have waited, or maybe I did not give everything I should have?
The point is that life changes us in a way that you can't even imagine, without giving more details, at this moment I am back to ashes, too many things happened to me, added to what I already lived in previous years, that's why I was happy, because before what happened I thought that if a new rebirth was coming or was already happening, now I have no desire or will to do anything, I hope this is a nightmare from which I can wake up and that when I open my eyes, I am living that happiness I was looking for and not partially, if not fully.
Well the purpose of this work or to carry out a Phoenix Bird in the quilling technique, (many know the meaning of this bird if not I invite you to visit this link), is a question I ask myself, can you be reborn when you feel dead, can you rise from the ashes in which you have become, I honestly do not know. Many have supported me have given me beautiful words, but maybe I am a weak person, unfortunately life made me this way, but I will make the greatest of efforts both to continue here, working, supporting, but I will also continue to have the faith to return to where my heart is..... 💙
I do not want to transmit bad vibes to anyone, every heart, soul and personality is different, everyone knows what they live, Blessings to all, I will continue what I came back to.
I hope you like my work, I leave you my creative process.
Let's start:

Hola a Todos...✨
Hola a mis queridos Hivers y a la querida comunidad de artistas #HiveDIY, después de estar algún tiempo ausente estoy por aquí para mostrarles un trabajo que espero sea para muchos de utilidad, ayuda o reflexión.
Volví, quizás algunos habrán notado mi ausencia, realmente no quiero hacer una catarsis aunque realmente la necesito para drenar mucho, pero sencillamente ni es el sitio y seria tan extenso que se perdería el propósito de este post que es mostrar una manualidad, igual si añadiré algo relativamente breve, para entrar en contexto.
He pasado por mucho a lo largo de mi vida, sin embargo este año siento que fue el mas feliz que he vivido pese a ciertas circunstancias, vuelvo y repito el mas "FELIZ DE MI VIDA", conseguí motivación, inspiración, ganas de tanto, gracias a ello crecí, y logre mucho que no pensé que pasaría así como así, aquí dentro de mi lugar bonito Hive, me apoyaron, me abrieron puertas, y creo que por ello debo una disculpa si defraude a alguien o a muchos porque tenia que seguir apoyando humildemente a todo el que me necesita con el trabajo que venia haciendo por acá, así como me han apoyado a mi.
En la parte personal en otros aspectos fuera de Hive, di mucho o quizás todo para conseguir que mi felicidad no fuera parcial, si no completa, o posiblemente debí esperar, o sera que no di todo lo que debía?
El Punto es que la vida nos cambia de una manera que ni te imaginas, sin dar mayor detalle, en este momento estoy vuelta cenizas, fueron demasiadas cosas juntas las que me pasaron, aunado a lo ya vivido en años anteriores, por eso era feliz, porque antes de lo ocurrido pensé que si venia un nuevo renacer o ya estaba pasando, ahora no tengo ganas ni voluntad de hacer nada, espero que esto sea una pesadilla de la cual pueda despertar y que cuando abra mis ojos, este viviendo esa felicidad que buscaba y no de manera parcial, si no plena.
Pues el propósito de este trabajo o de llevar a cabo un Ave Fenix en la tecnica de quilling, (muchos conocen el significado de esta ave si no los invito a visitar este link), es una pregunta que me hago, se puede renacer cuando te sientes muerto, puedes resurgir de las cenizas en las que te has convertido?, sinceramente no lo se. Muchos me han apoyado me han dado bellas palabras, pero quizás soy una persona débil, lamentablemente la vida me hizo así, pero haré el mayor de los esfuerzos tanto de seguir aquí, trabajando, apoyando, pero también seguiré teniendo la fe de volver a donde esta mi corazón... 💙
No deseo trasmitir malas vibras a nadie, cada corazón, alma y personalidad es diferente, cada quien sabe lo que vive, Bendiciones para todos, seguiré a lo que volví.
Esperando les guste mi trabajo, les dejo mi proceso creativo.
Comencemos:

• Cintas de quilling de 3mm rojas y naranja.
• Aguja para quilling.
• Cartulina de hilo blanca.
• Hoja blanca.
• Lápiz de color.
• Pega blanca extra fuerte.
• Tijera.
- Quilling ribbons 3mm red and orange.
- Quilling needle.
- White cardboard thread.
- White sheet.
- Colored pencil.
- Extra strong white glue.
- Scissors.

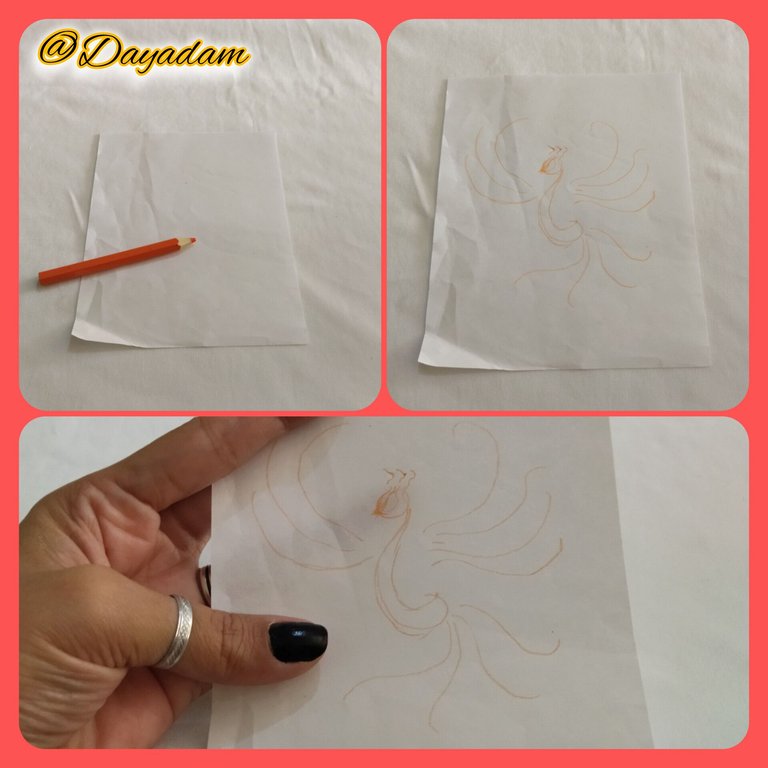
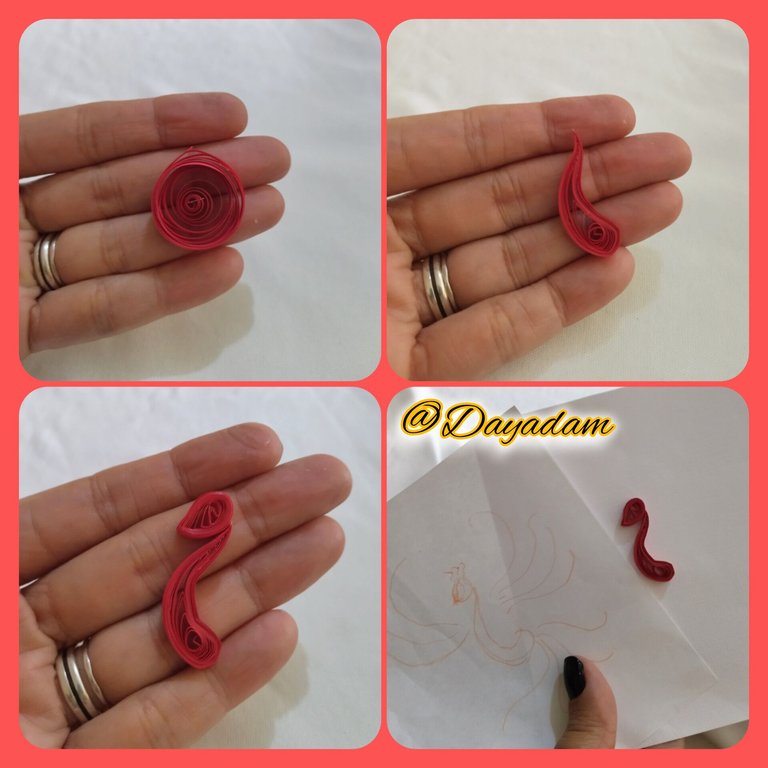
- I began by taking a piece of white paper and an orange color, I drew a small sketch of the figure that more or less I wanted to get, to guide me and go materializing pieces and go molding each of them, of course that in the process much will change.
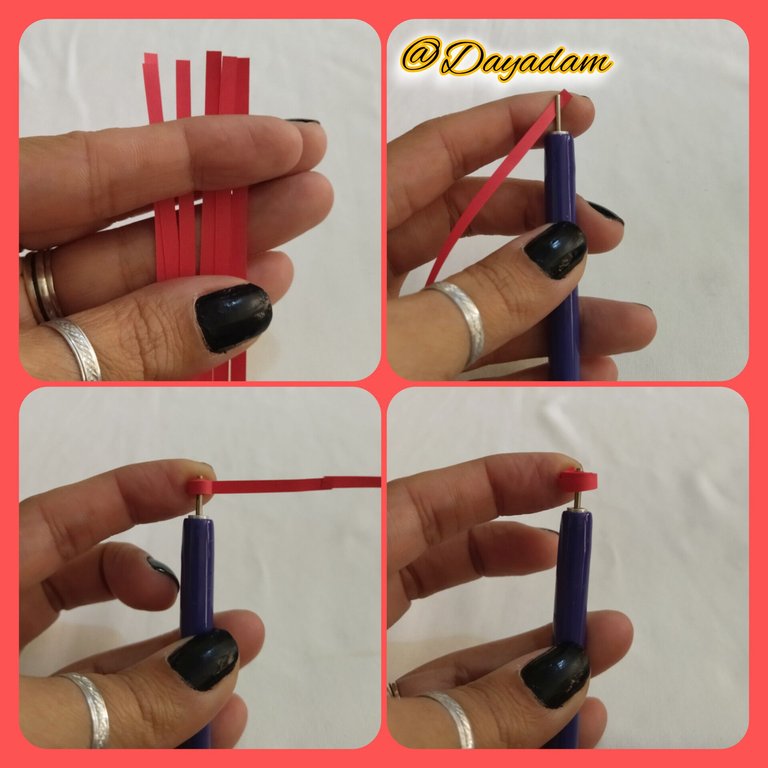
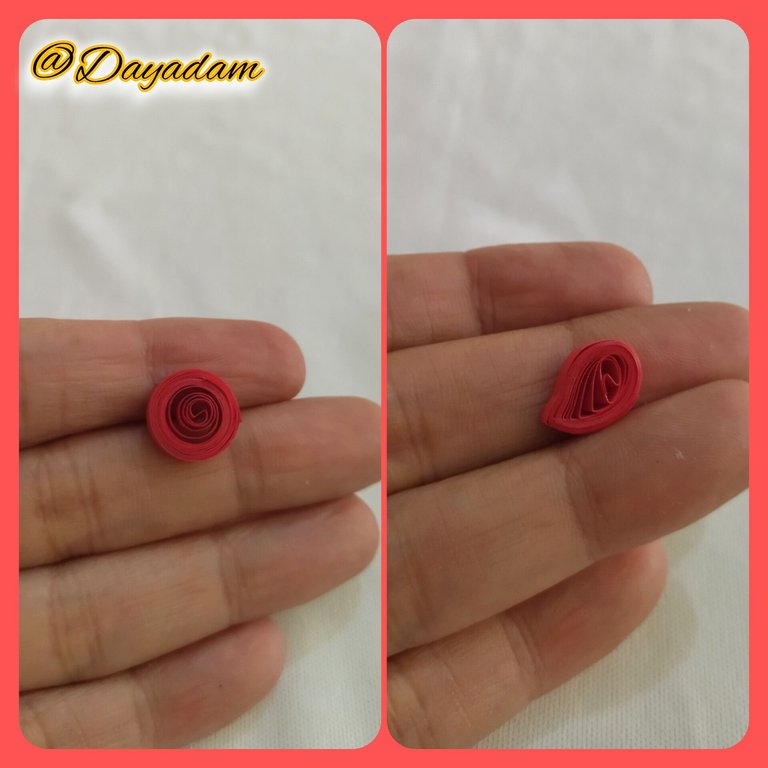
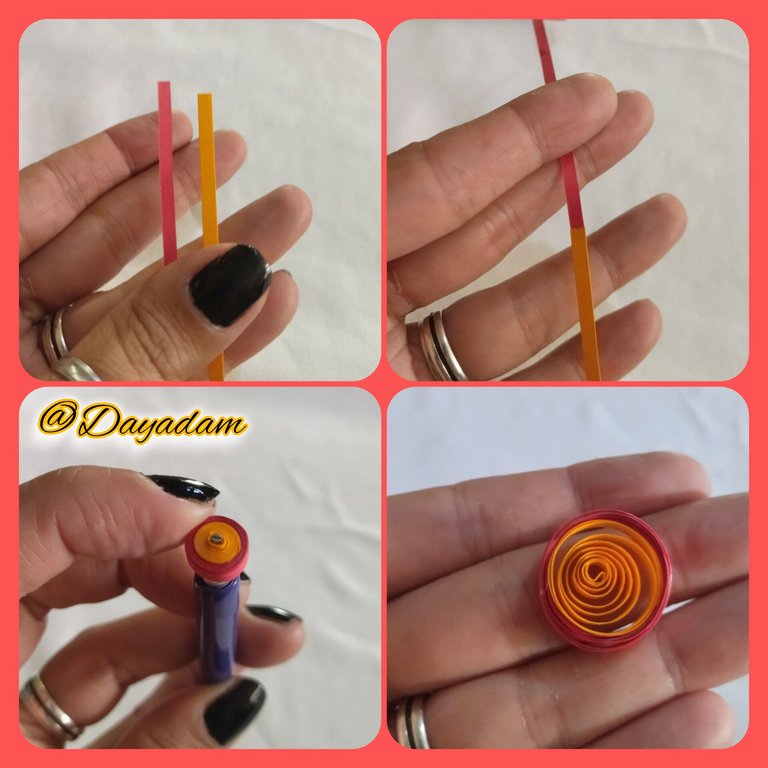
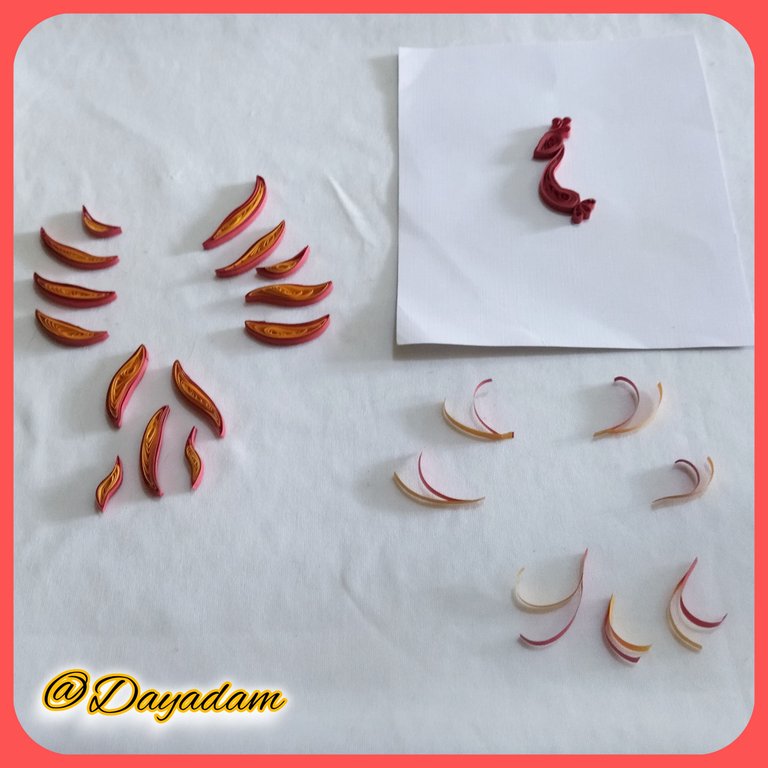
- I started making the figures taking red quilling tape 3mm wide, with the quilling needle I rolled up to the end of the tape, I took out the needle, loosen a little and sealed with extra strong white glue, I got an open circle, which I molded as a kind of leaf.
- To continue with the pieces I made a larger open circle with 3mm red tape, which I molded as you can see in the image, glued it to the previous piece.
- At this point I took a piece of cardboard thread, I started gluing this initial piece according to my sketch.
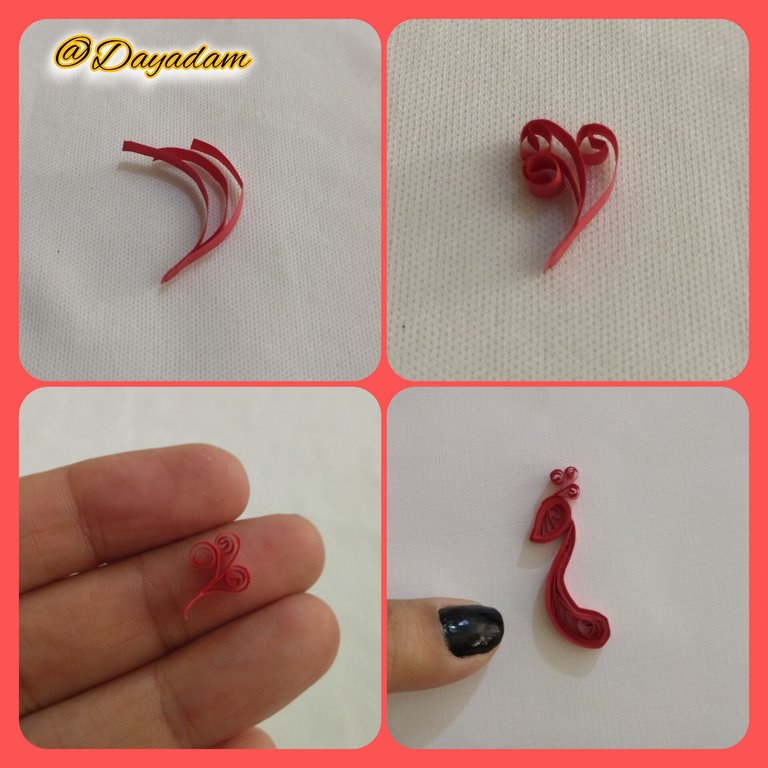
- I took 3 small pieces of red ribbon which I glued to the cardboard, these will be the feathers of the bird's head.
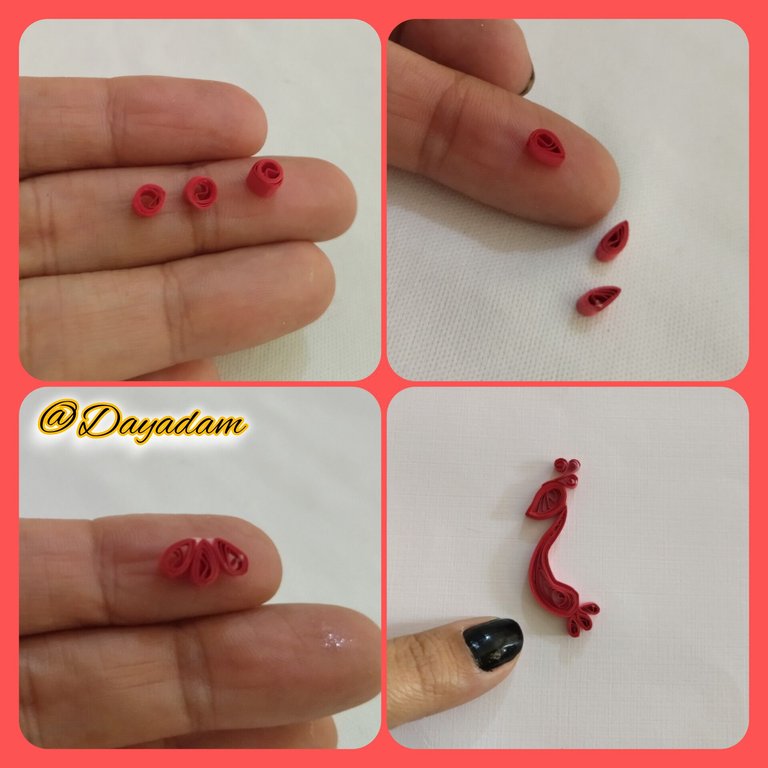
- I made 3 small red circles, shaped them into a drop shape, joined them with white glue and glued them to the bottom of the body.

• Comencé tomando un trozo de hoja blanca y un color naranja, dibuje un pequeño boceto de la figura que mas o menos quería obtener, para guiarme e ir materializando piezas e ir moldeando cada una de ellas, por su puesto que en el proceso mucho va cambiando.
• Inicie realizando las figuras tomando cinta para quilling de color roja de 3mm de ancho, con la aguja para quilling enrolle hasta llegar al final de la cinta, saque de la aguja, solté un poco y selle con pega blanca extra fuerte, obtuve un círculo abierto, el cual moldee como una especie de hoja.
• Para seguir con las piezas realice un circulo abierto mas grande con cinta roja de 3mm, el cual moldee tal como pueden ver en la imagen, pegue a la pieza anterior.
• En este punto tome un trozo de cartulina de hilo, comencé pegando esta pieza inicial según mi boceto.
• Tome 3 pequeños trozos de cinta roja los cuales pegue entre si e hice con la aguja espirales en las puntas pegue en el cartón, estas serán las plumas de la cabeza del ave.
• Realice 3 pequeños círculos rojos, moldee en forma de gota, lo uní con pega blanca y pegue en la parte de abajo del cuerpo.
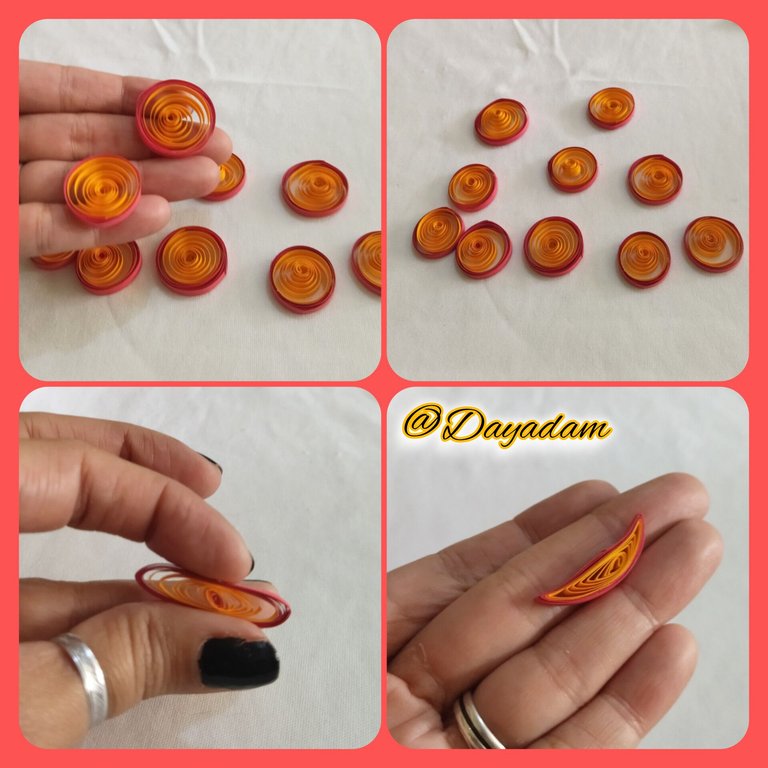
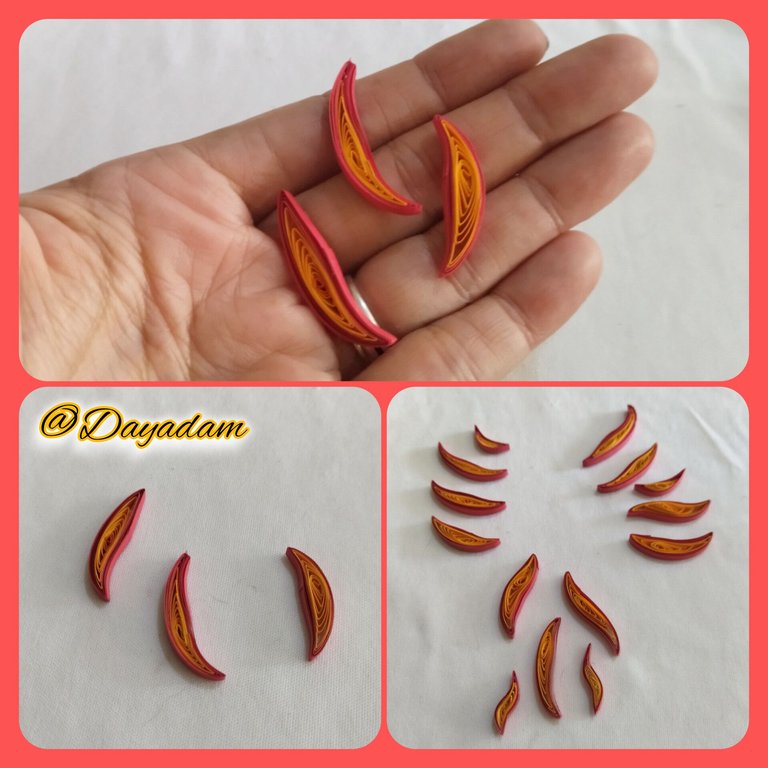
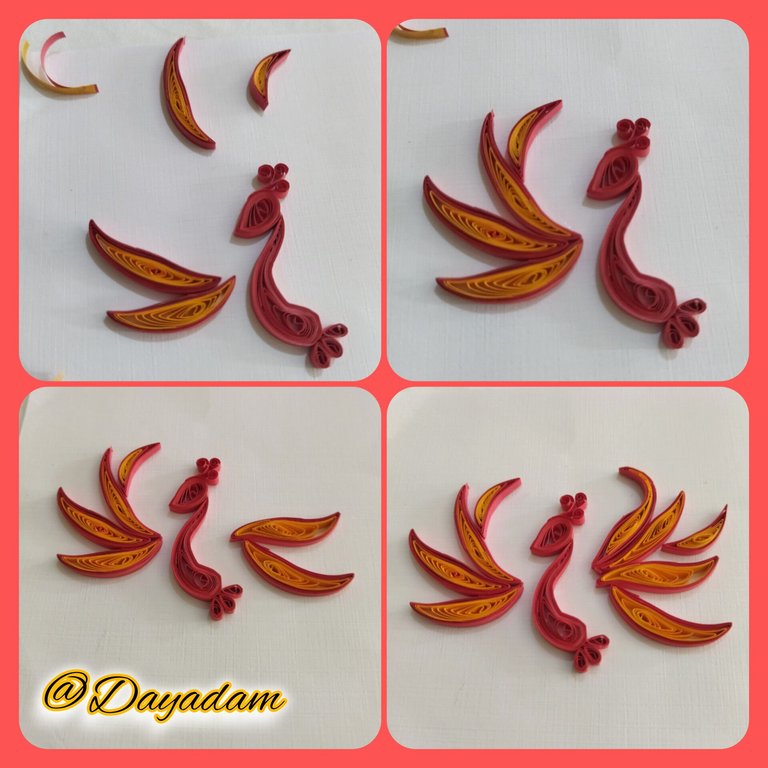
- To carry out the feathers of the wings and tail, I took 3mm wide red and orange quilling tape of different sizes, I joined pieces of both colors forming a single tape, roll with the quilling needle forming open circles basically of different sizes, and we will mold flatten with our fingers each one of them, creating figures to our liking and join them harmoniously to form those wings.
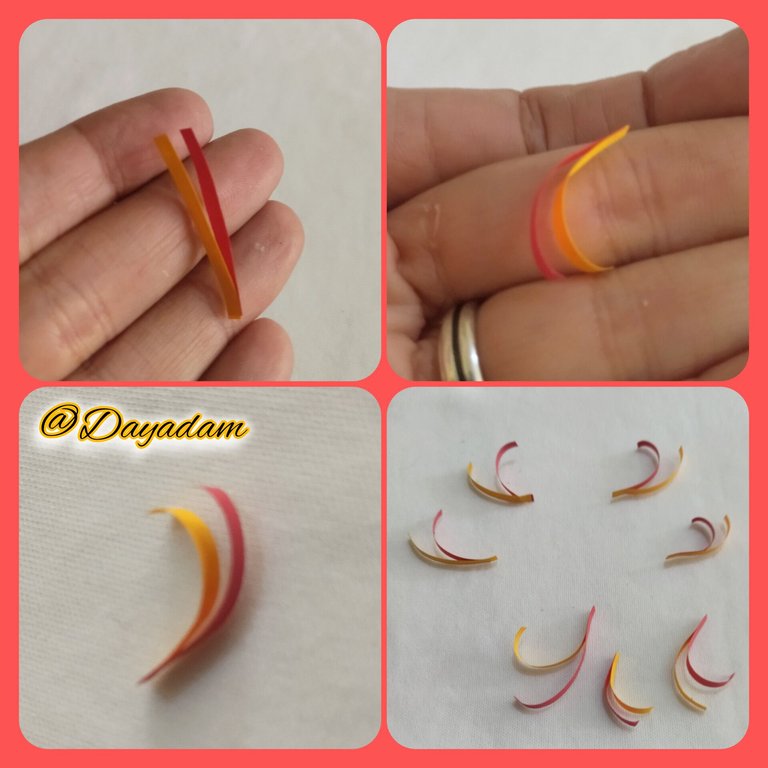
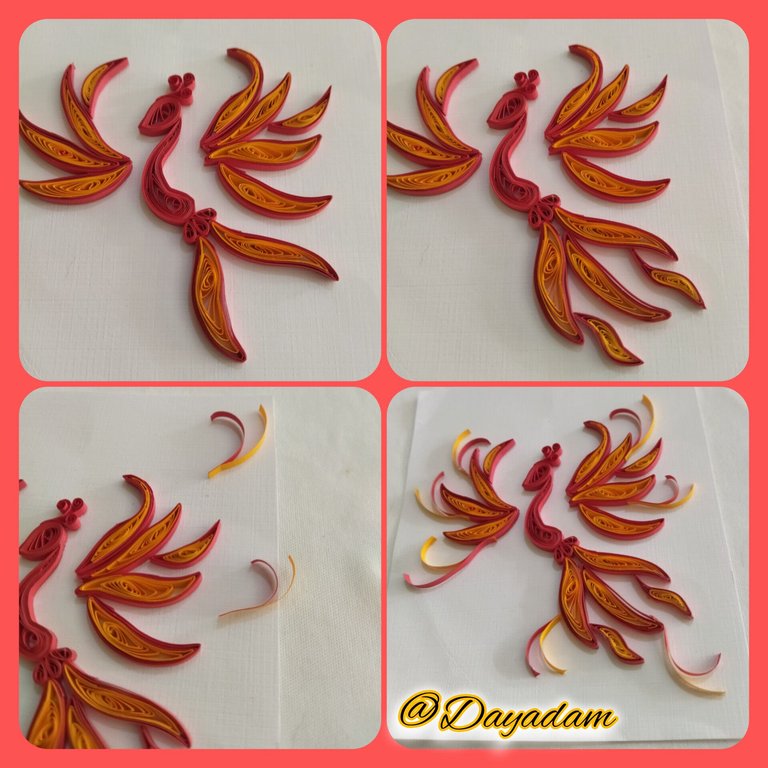
- I wanted to complement by joining small pieces of ribbon of both colors, giving them a rounded shape at the tips.
- I began to join all the pieces to my liking with extra strong white glue, as you can see in the images.
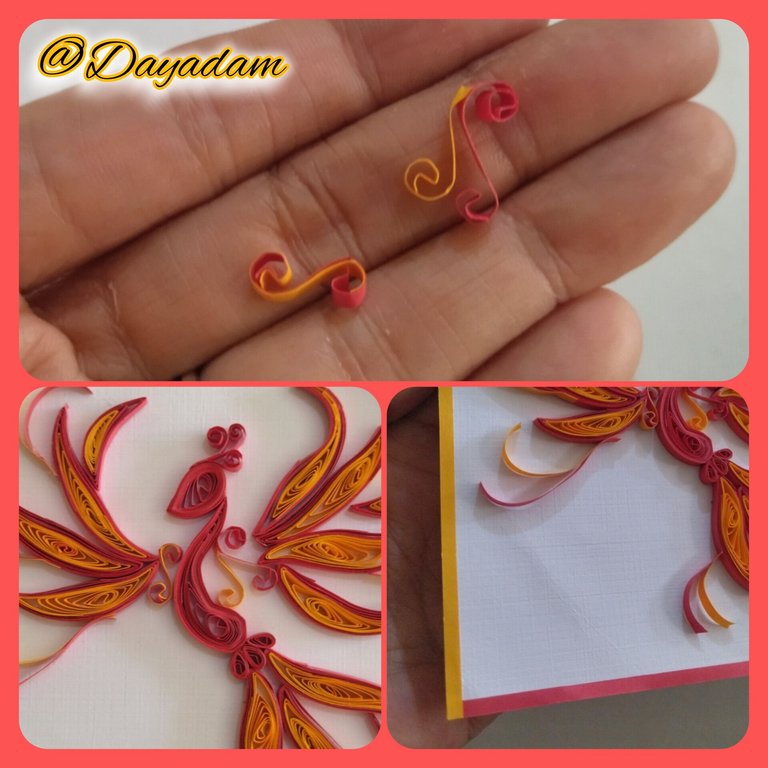
- Along the way I thought of making 2 spirals with both colors to complement the body.
- Once I finished gluing, on the ends of the cardboard I glued ribbons in a linear way to make the work look neater.
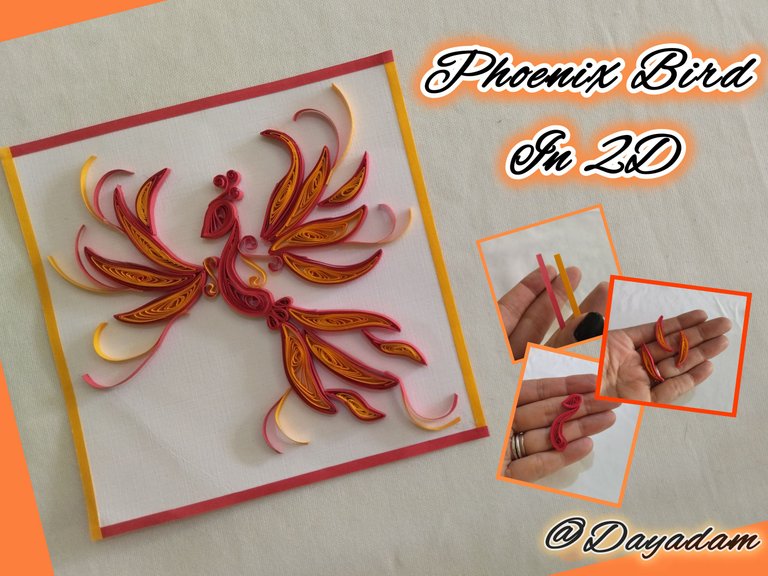
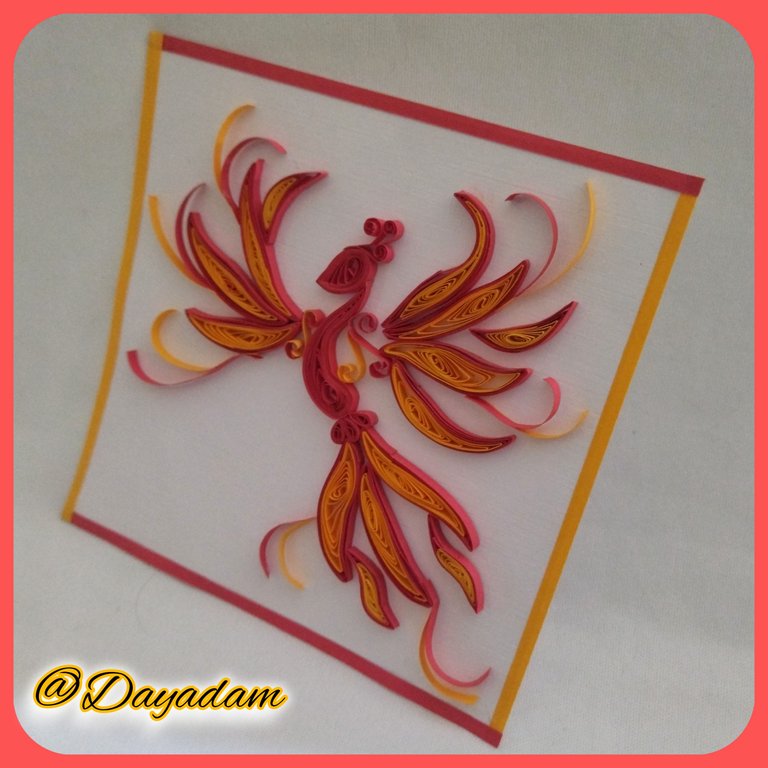
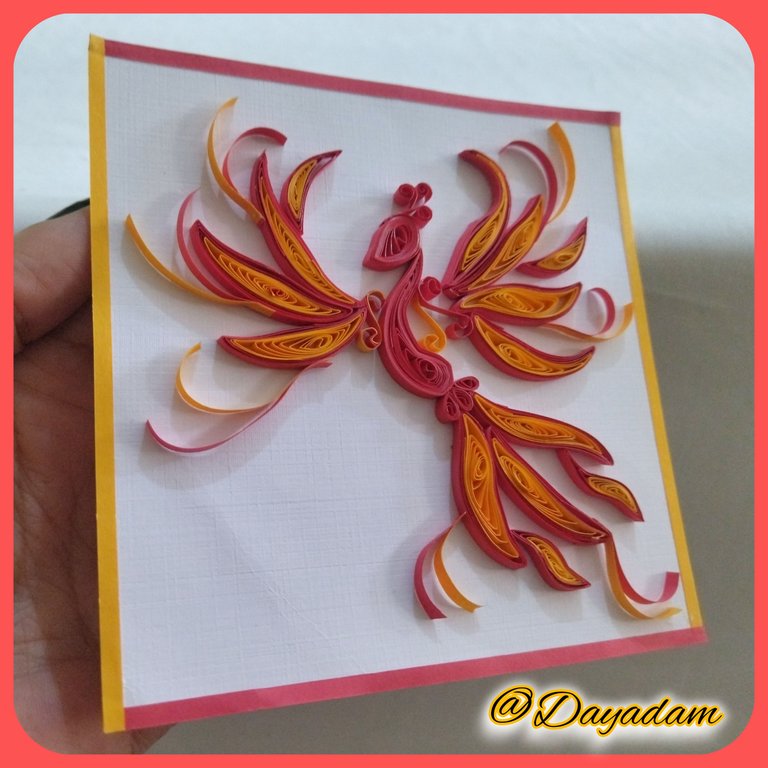
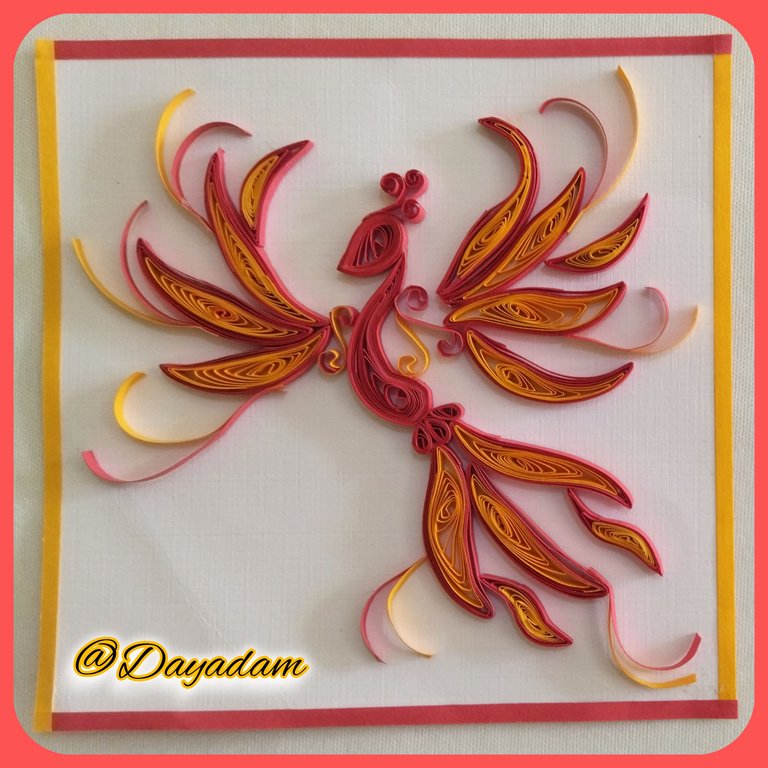
In this way I was able to materialize this Phoenix Bird in 2D, in the quilling technique.

• Para llevar a cabo las plumas de las alas y cola, tome cinta para quilling de color roja y naranja de 3mm de ancho de diversos tamaños, uní trozos de ambos colores formando una sola cinta, enrolle con la aguja para quilling formando círculos abiertos básicamente de diferentes tamaños, y vamos a moldear aplanando con los dedos cada uno de ellos, creando figuras a nuestro gusto y unirlas de manera armónica para formar esas alas.
• Quise complementar uniendo pequeños pedazos de cinta de ambos colores, dándoles una forma redondeada en las puntas.
• Comencé a unir todas las piezas a mi gusto con pega blanca extra fuerte, como pueden ver en las imágenes.
• En el trayecto de me ocurrió realizar 2 espirales con ambos colores para complementar el cuerpo.
• Una vez que termine de pegar, en las puntas de la cartulina pegue cintas de manera lineal para que se observara mas prolijo el trabajo.
De esta manera pude materializar esta Ave Fénix en 2D, en la tecnica de quilling.


What did you think, did you like it?
I hope you did, I hope you liked my explanation, procedure and photos, I made them with love for you.
"Let out that muse that inspires you, and let your imagination fly".
Thank you all, see you next time.

¿Qué les pareció, les gustó?
Espero que sí, que les haya gustado mi explicación, procedimiento y fotos, los hice con mucho cariño por y para ustedes.
"Deja salir esa musa que te inspira, y deja volar tu imaginación".
Gracias a todos, nos vemos en la próxima.


Posted Using InLeo Alpha
