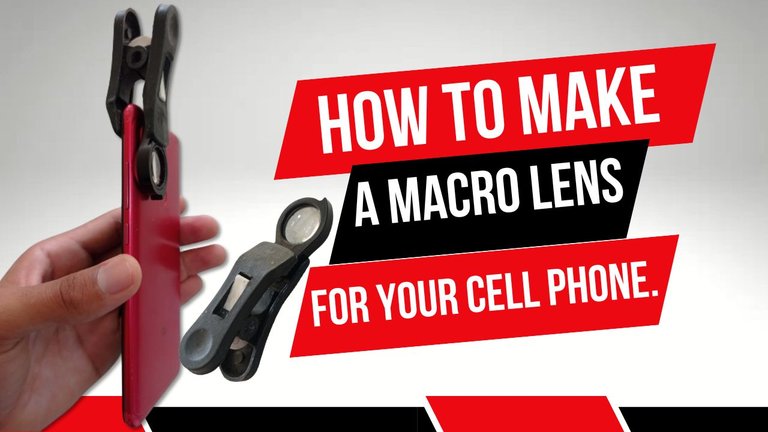
ESPAÑOL
Hola amigos, hoy les quiero mostrar cómo construir un pequeño gadget para nuestro celular que pude ser de mucha utilidad en nuestras vidas, todo depende del uso que puedas darle.
Una de las cosas que más hago durante mis reparaciones en electrónica es realizar la inspección ocular de la tarjeta electrónica; sin embargo, en la actualidad con el avance de la microelectrónica se ha logrado que los componentes sean cada vez más pequeños lo que trae como consecuencia que sea necesario utilizar alguna herramienta que nos permita ver con claridad dichos componentes en busca de desperfectos e incluso algo tan importante como poder ver su numeración para poder identificarlo. La herramienta perfecta sería un microscopio, trinocular preferiblemente, pues además de la observación te permite trabajar al mismo tiempo en la placa, pero como toda herramienta de calidad, estos microscopios son caros y actualmente no puedo cumplir el sueño de tener el mío, tendrá que esperar jj, Pero como dice el dicho" A falta de pan, casabe ", yo uso mi propia herramienta con estos fines que les comento.
Tengo una lupa plegable de bolsillo con 7X de aumento, pero trabajar con ella sola en ocasiones no me era suficiente debido al nivel de compactación del componente, así que la combino con la cámara del celular, obteniendo resultados notablemente mejores, así que decidí modificar la estructura de la lupa, logrando una herramienta más práctica y fácil de usar, empleando materiales reciclados y de fácil acceso.

Lupa plegable de bolsillo
Fabricando una lente Macro para el celular.
Con esta lente 7X se podrá aumentar 7 veces el tamaño del objeto a fotografiar y sumándole el aumento del zoom digital de la cámara del celular se podrán obtener resultados mucho mejores e imágenes más nítidas en el punto donde el zoom del celular pierde calidad.
Para contruir la lente macro empleé los siguientes materias y herramientas
-Lente de aumento 7X
-Presilla plástica para tender ropa.
-Pegamento
-Fosforera
-Cutter
-Destornillador de punta plana
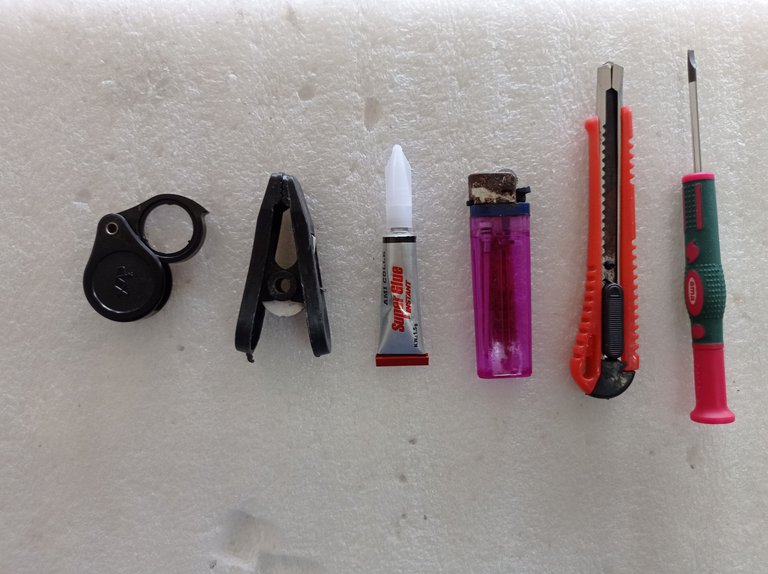
Materiales y herramientas
Proceso de fabricación
El primer paso consiste en separar las piezas de la lupa. Para esto utilicé el destornillador, cómo se muestra en las siguientes imágenes.
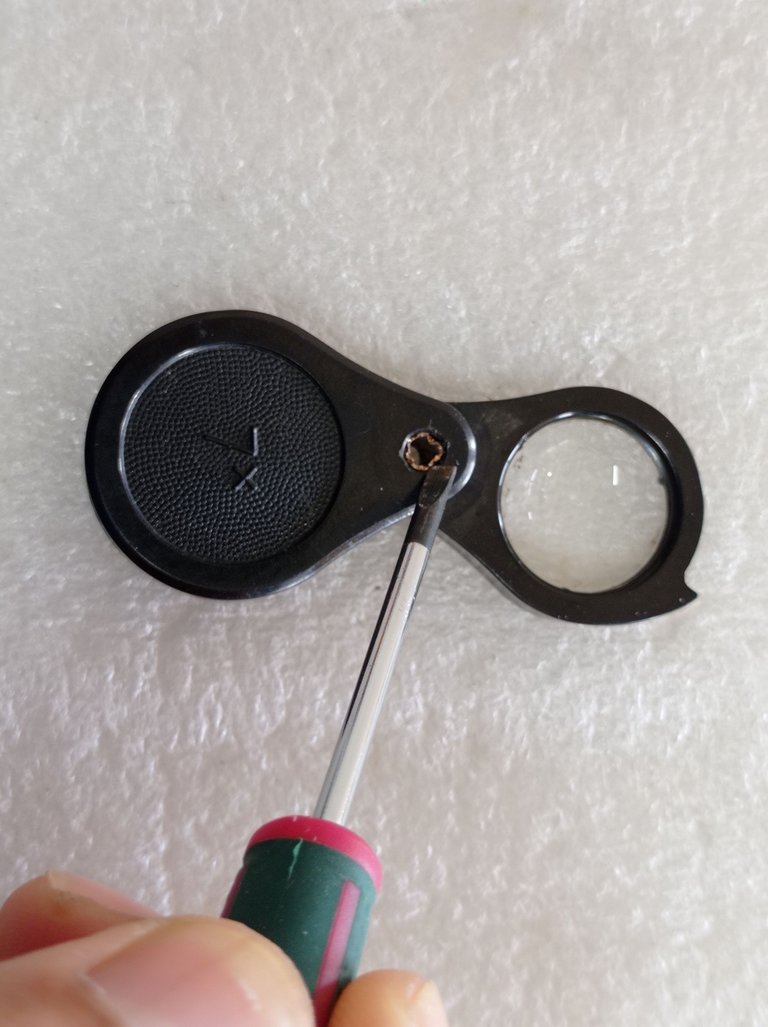
Forzar los bordes del remache central que une las dos piezas
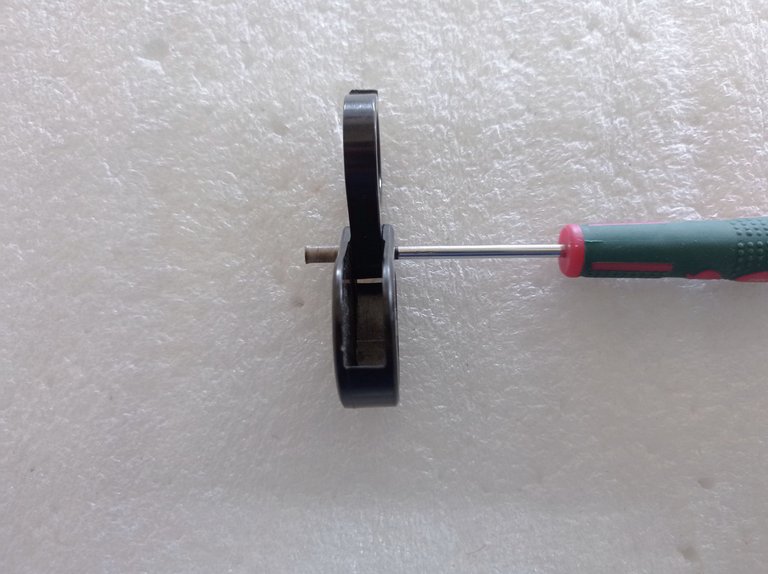
Sacar el remache central empujando con el destornillador
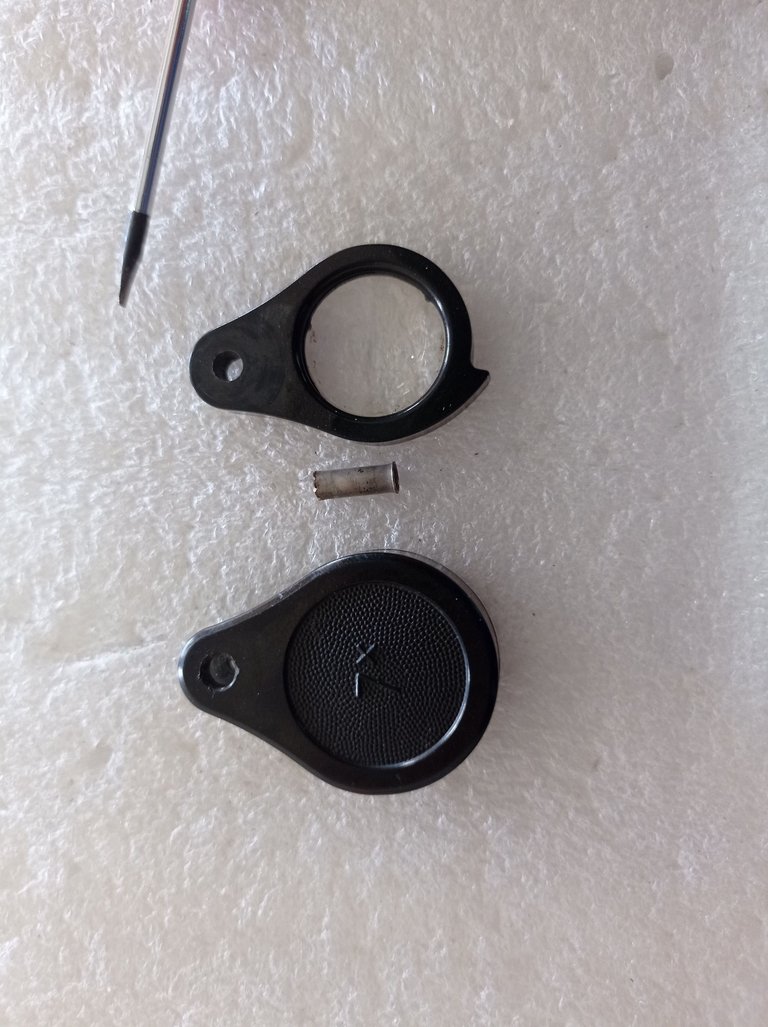
Separar la lente de su carcasa protectora
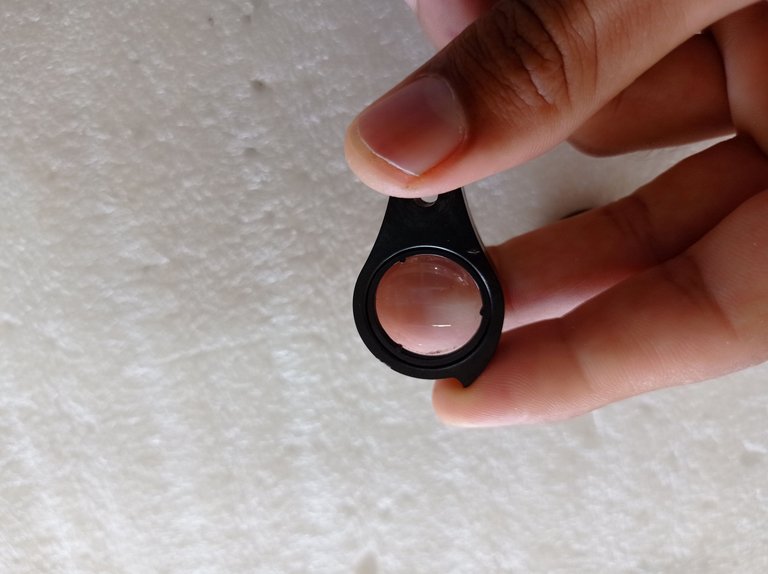
Ésta es la lente que utilizaremos
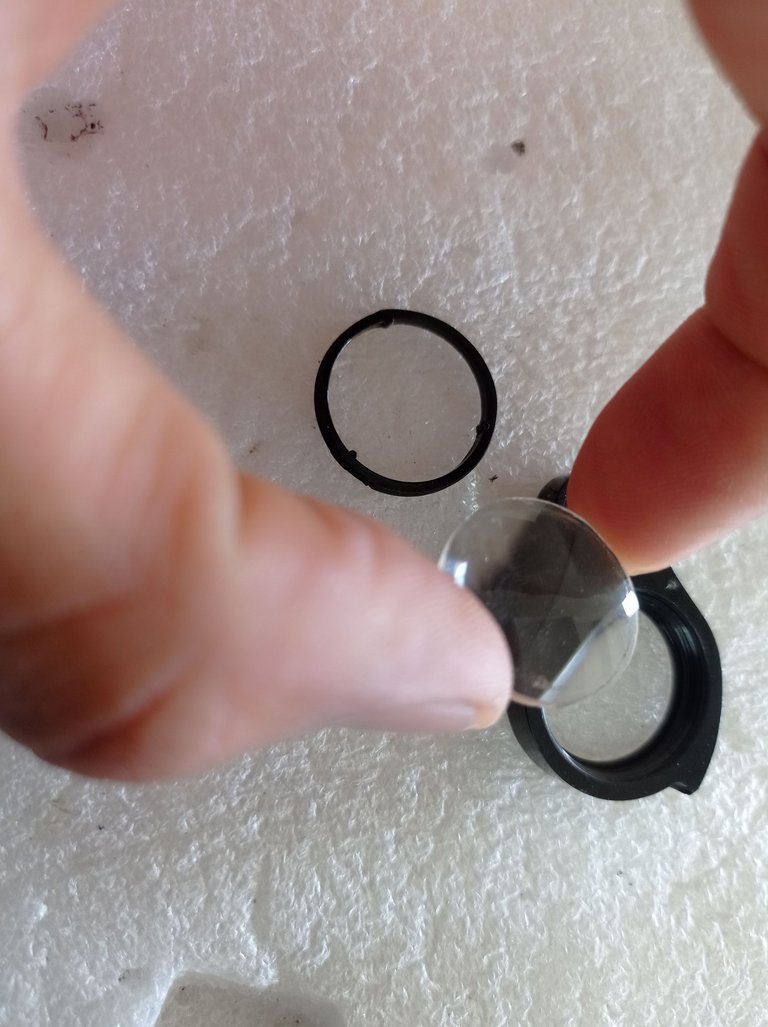
La lente se puede extraer de su soporte , lo que permite cambiarla por una mejor si fuera posible para mejorar la herramienta
-El segundo paso consiste en preparar la presilla de tender ropa para que se le pueda agregar la lente y que se pueda colocar en el celular sin que ésta le ejerza demasiada presión y quede lo más plana y firme posible.
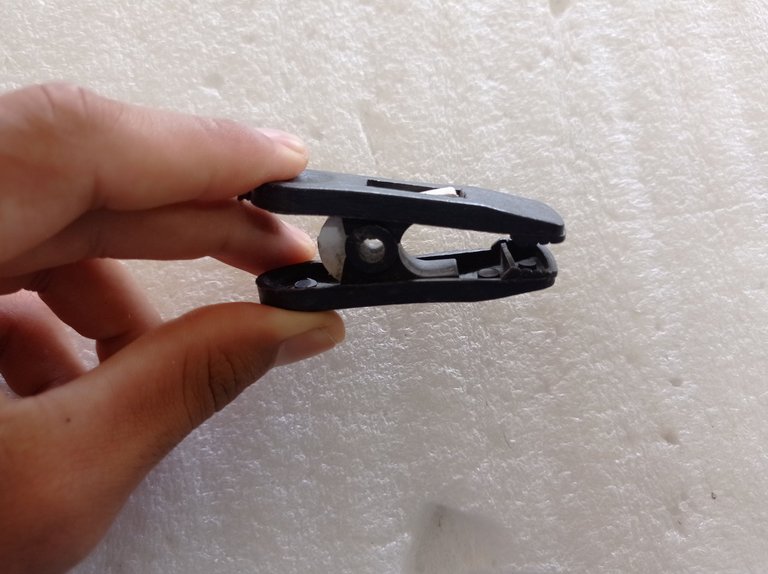
Presilla de tender ropa
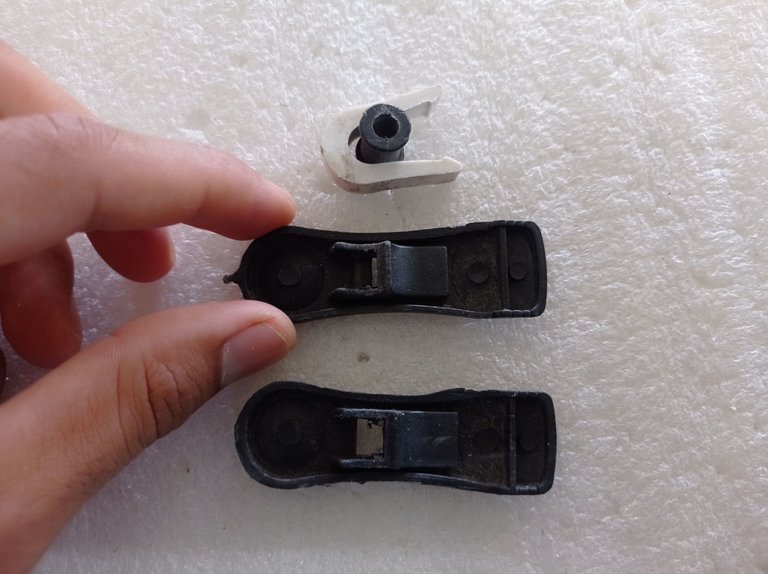
Separar las piezas de la presilla
Con el cutter y teniendo cuidado de no cortarnos, se extraen los bordes de la presilla para lograr una superficie plana que permita pegar el lente. En las siguientes imágenes se muestra el proceso.
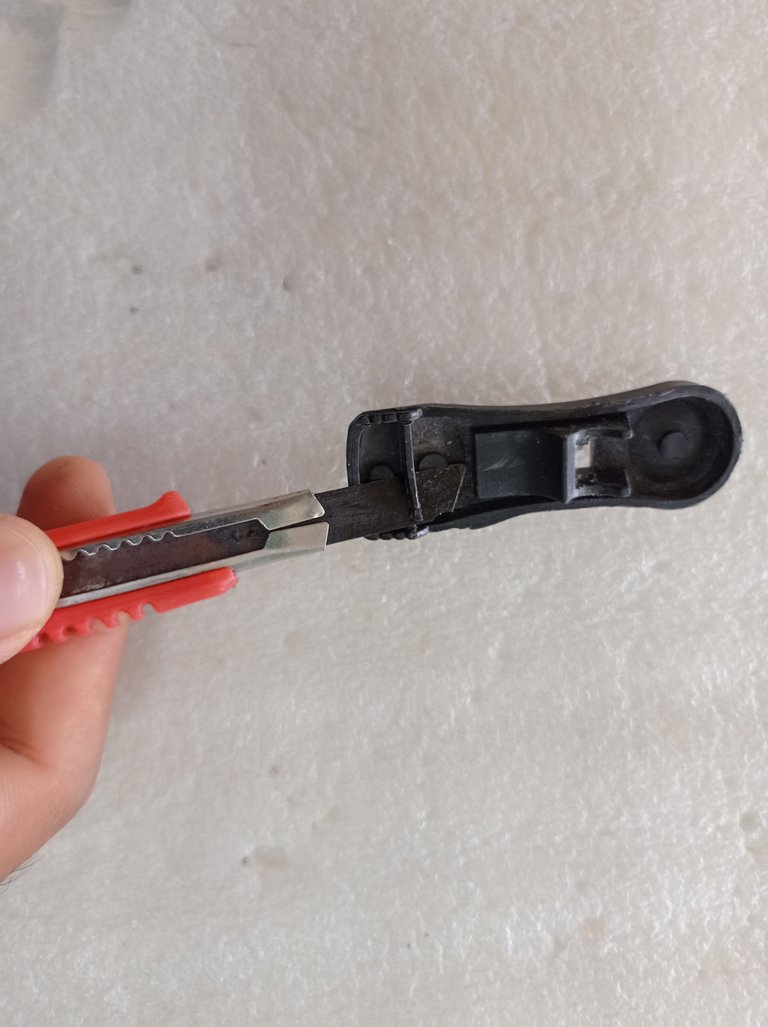
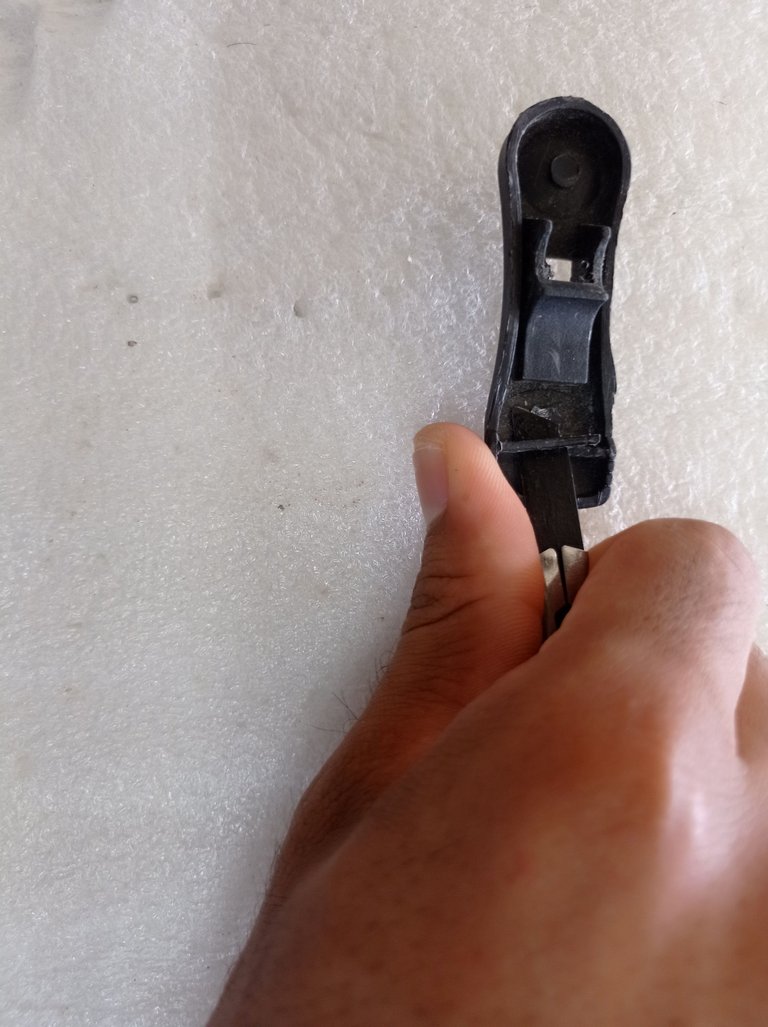
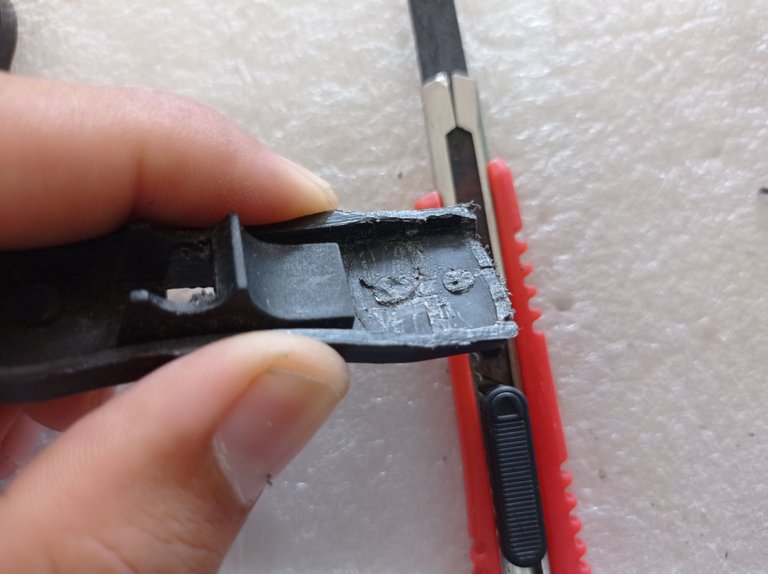
El tercer paso será aplicar calor con la fosforera para moldear la pieza de la presilla que portará la lente, esto con el objetivo de que la lente quede plana a la superficie de la cámara del celular.
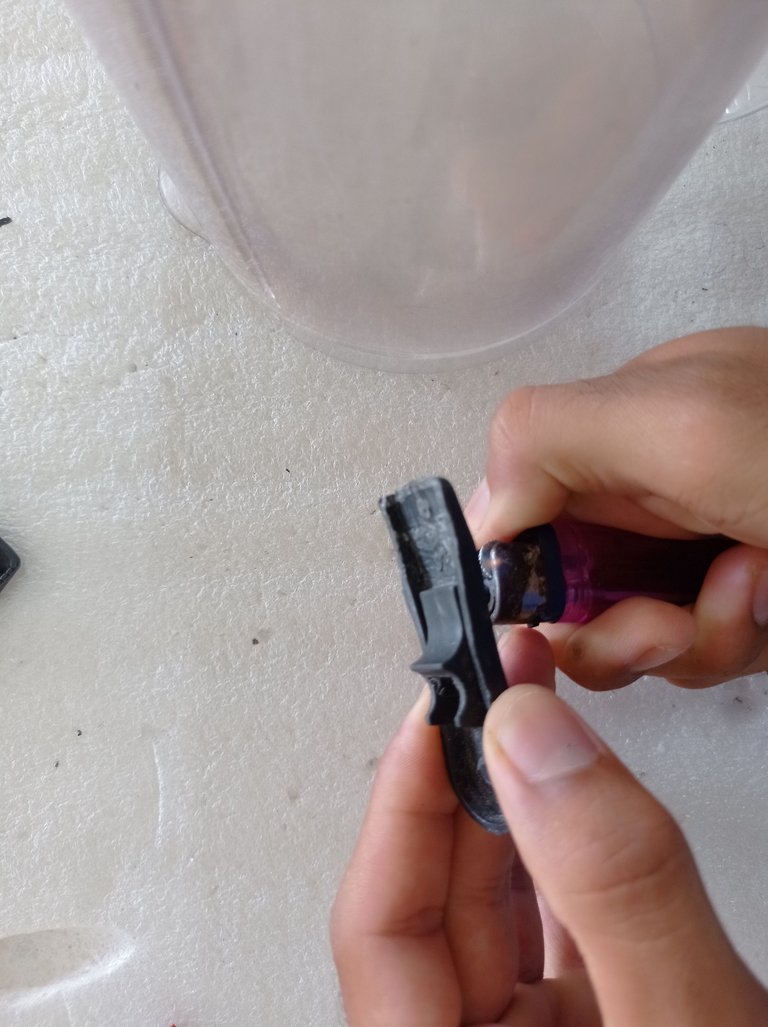
Aplicar calor
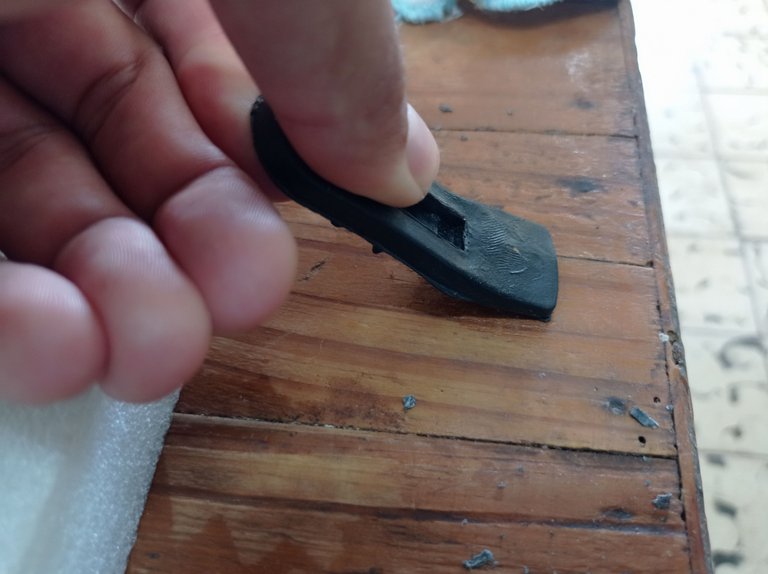
Ejercer presión contra una superficie para arquear un poco la pieza
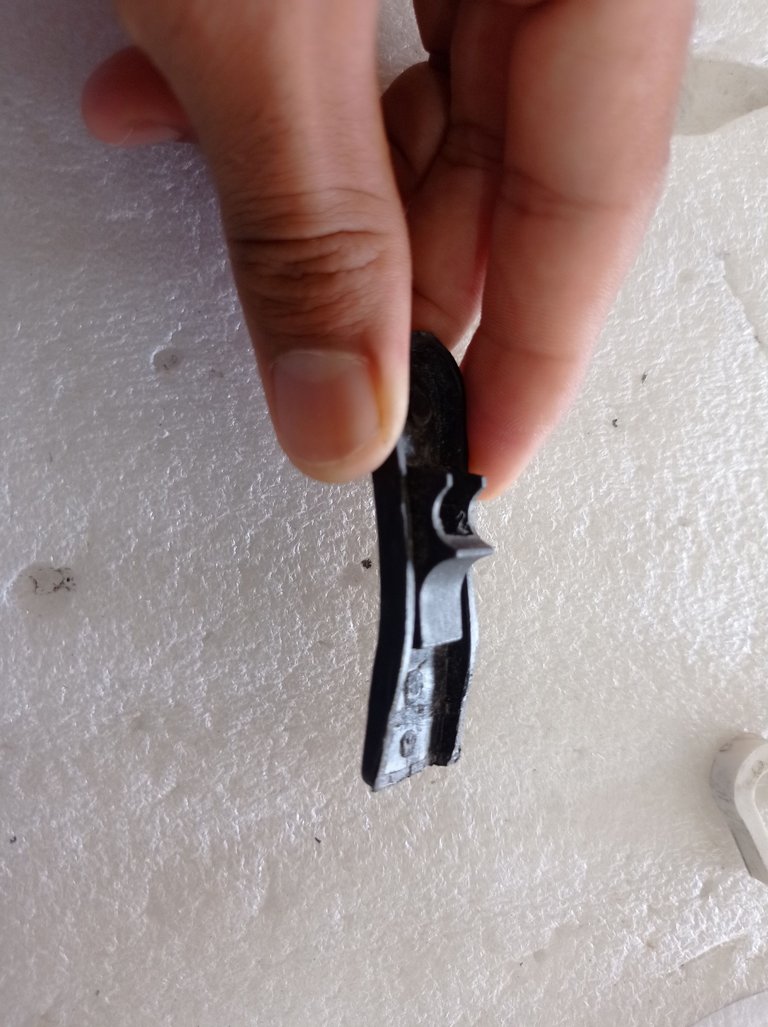
Resultado final
- El cuarto paso consiste en pegar la lente a la pieza de la presilla que acabamos de modificar. Para esto utilicé el pegamento.
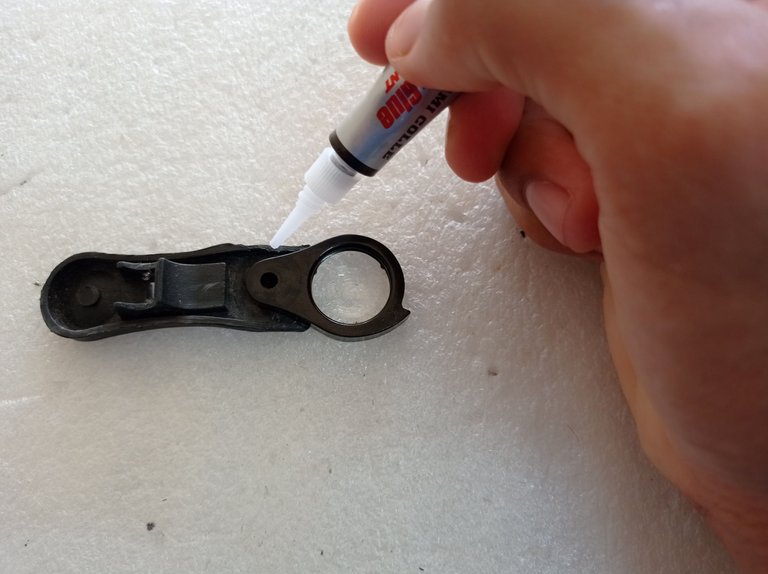
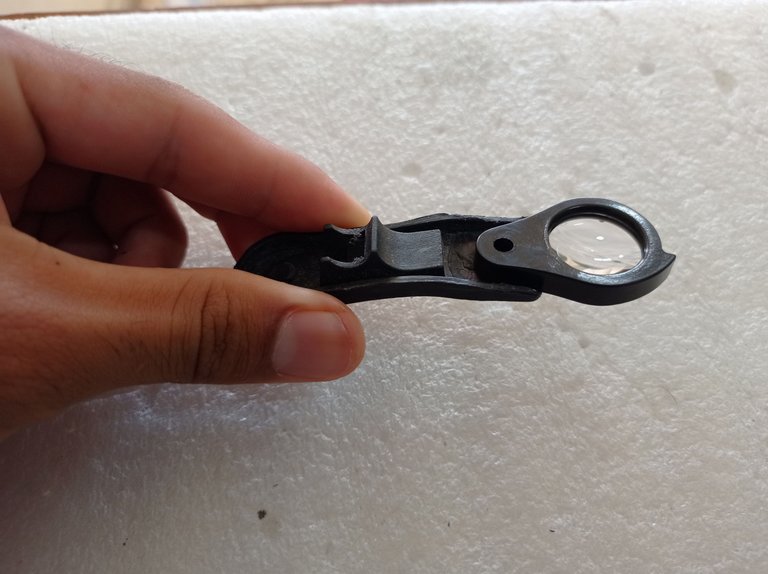
-El quinto paso será aplicar calor a la otra pieza de la presilla para doblarle la punta hacia adentro, logrando un agarre plano y firme al celular.
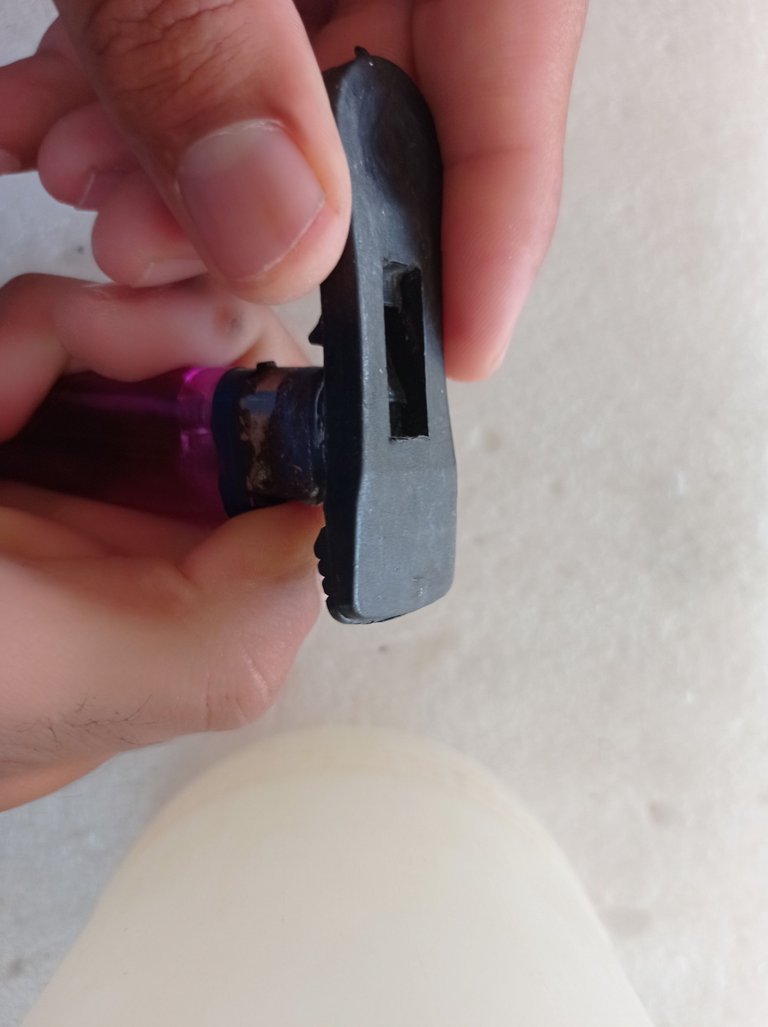
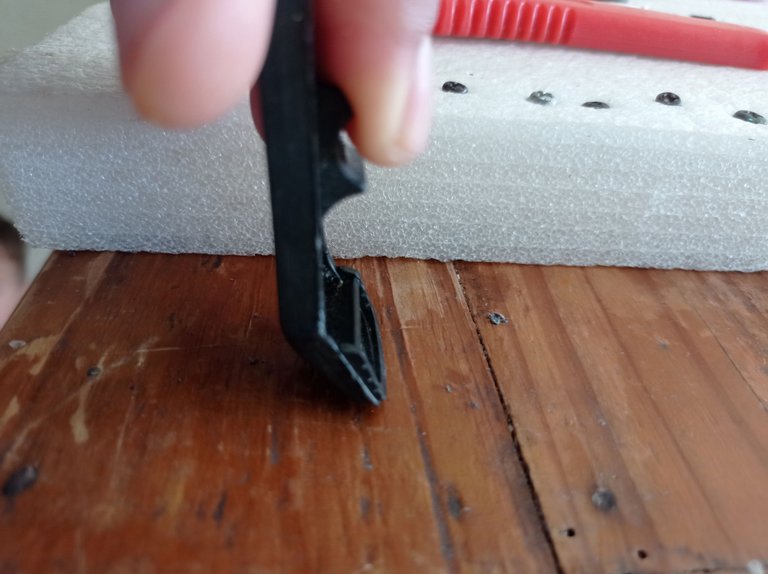
Aplicar presión hacia adentro para moldear un poco la punta
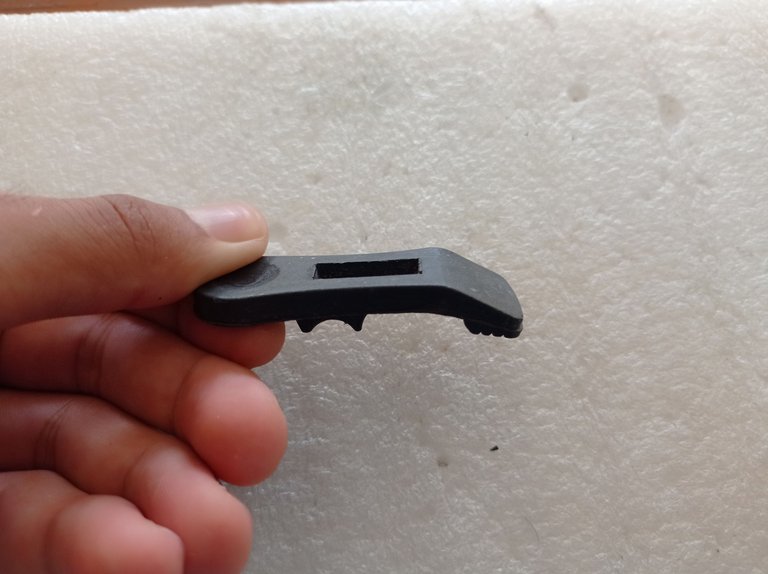
Resultado final
- Hasta este punto están listas todas las partes, solo queda armar la presilla nuevamente.
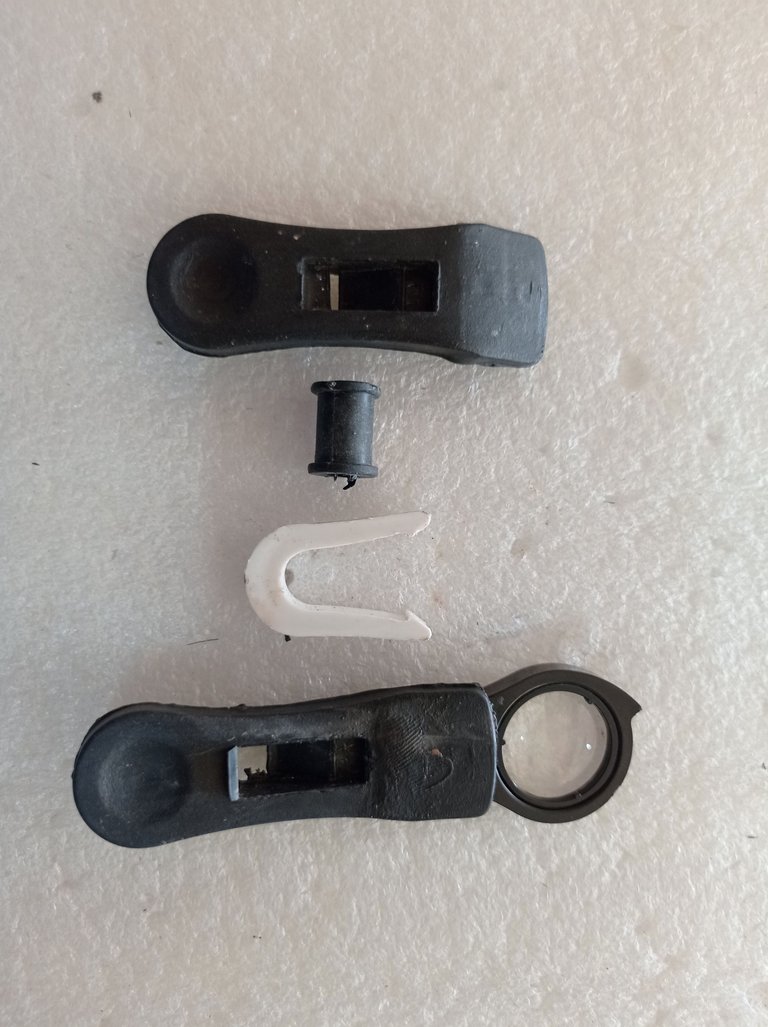
Piezas de la lente macro
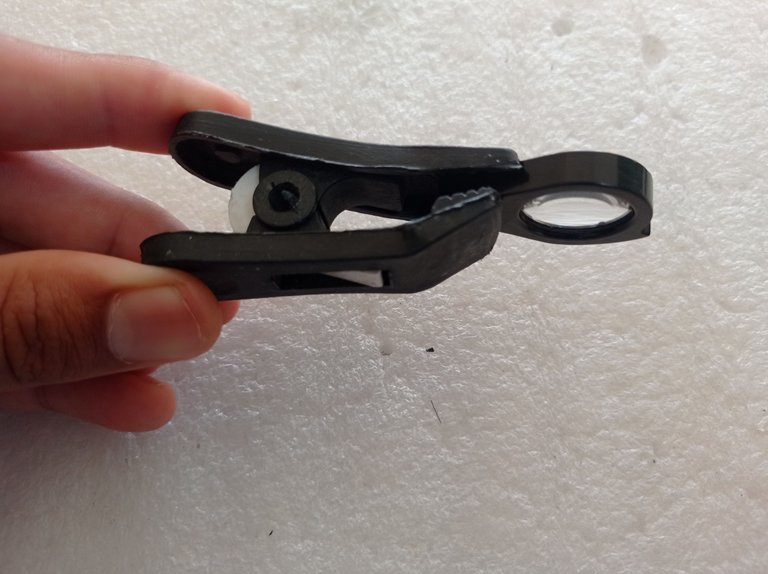
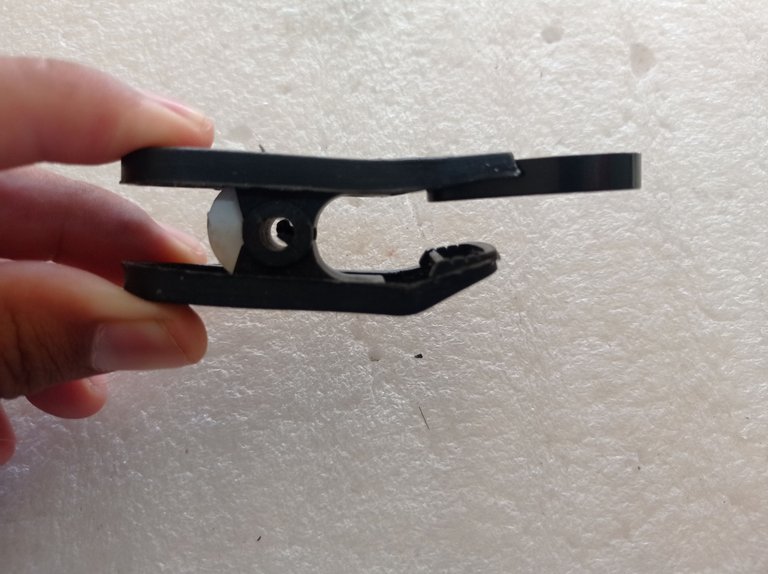
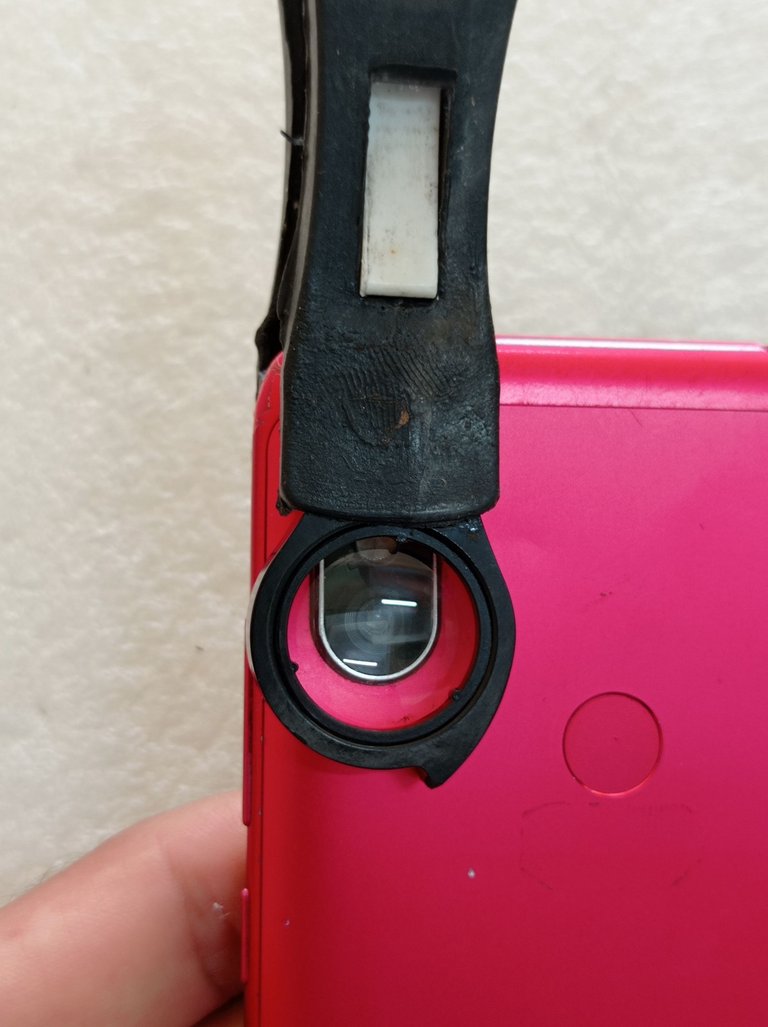
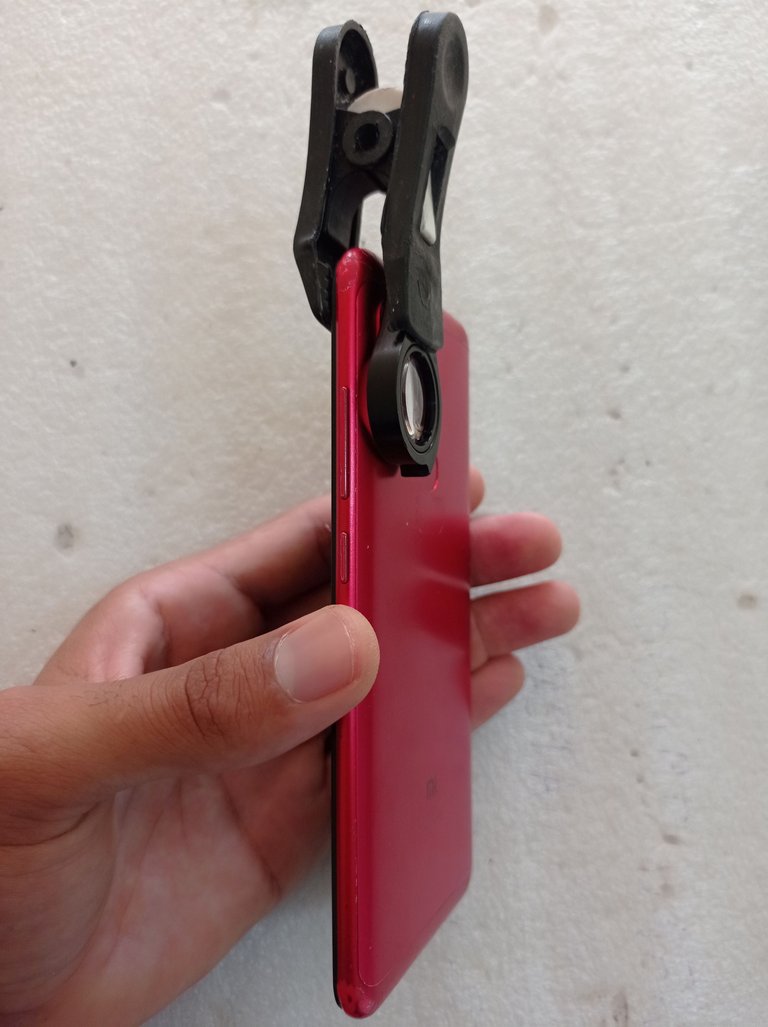
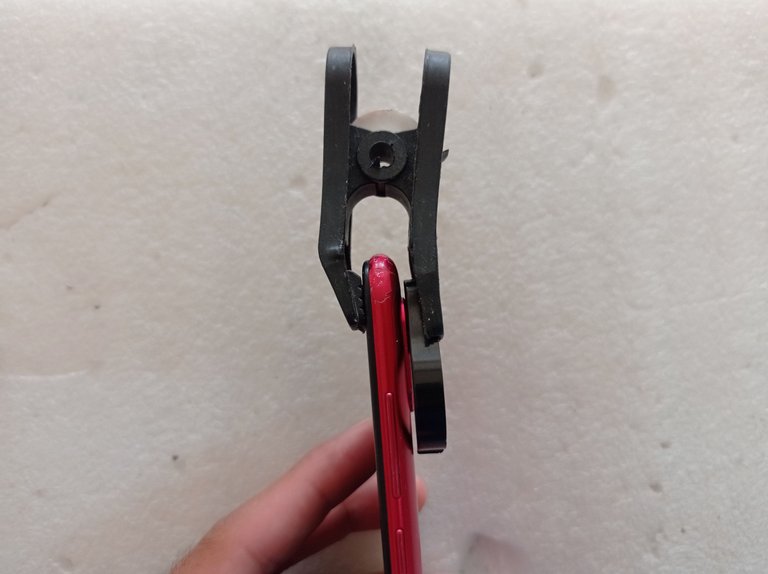
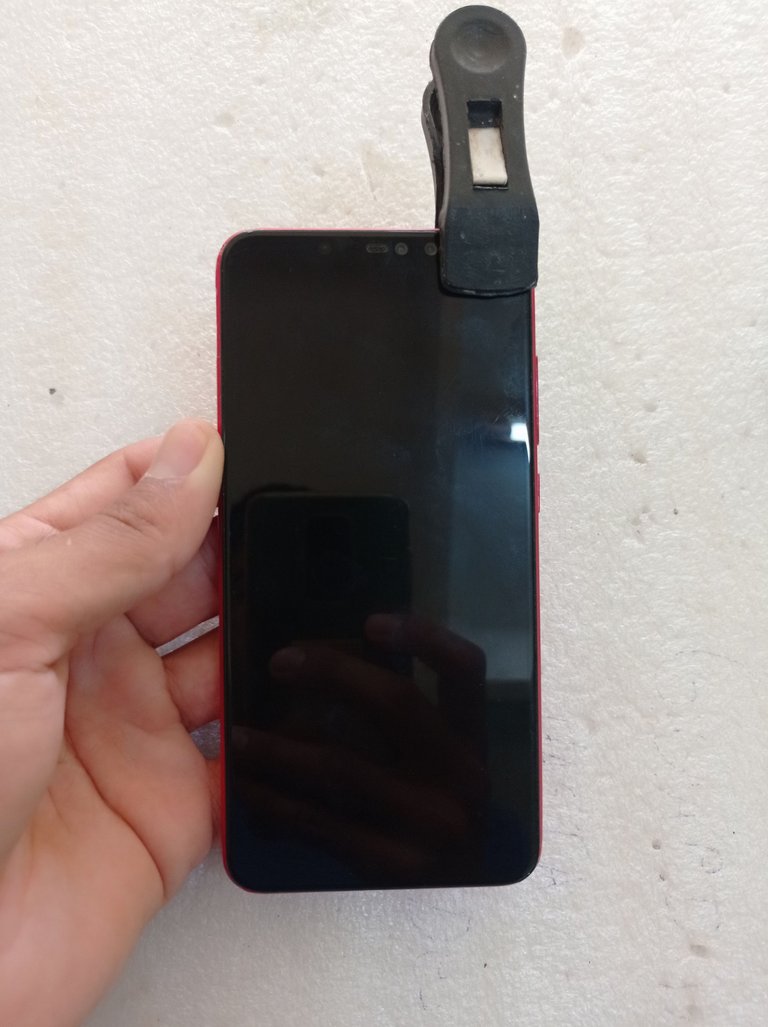
Haber utilizado una presilla de plástico permite un agarre suave pero firme y que no ralla la pantalla.
Después de colocarla en el celular lo siguiente es abrir la aplicación de la cámara e ir probando con el zoom digital y la distancia focal hasta el punto donde se obtenga la imagen lo más enfocada y nítida posible, lograr esto es un poco complicado debido a que como la distancia para enfocar es tan pequeña , es decir tendremos que acercar bastante el teléfono al objeto a fotografiar, cualquier movimiento por muy pequeño que sea tiende a desenfocar la imagen, por lo que es aconsejable utilizar un trípode si se quieren obtener los mejores resultados.
También se puede utilizar una aplicación más dedicada a este fin, cómo son las app Lupa Plus y Magnifier Camera, existen muchas más que se pueden descargar desde la Play Store, solo hay que ir probando hasta encontrar la que mejor resultados nos de con nuestro celular.
Aquí les dejo las pruebas y resultados obtenidos con el celular Xiaomi redmi note 9, todas las imágenes las tomé a pulso sin la ayuda de un trípode pero los resultados de igual manera fueron satisfactorios logrado una mejora notable en las fotografías.
Primeramente se muestra una foto tomada con la cámara del celular y un zoom de 10X sin la lente macro y después se muestra la fotografía tomada con un zoom de 10x y con la lente Macro para que puedan comparar y notar las diferencias.
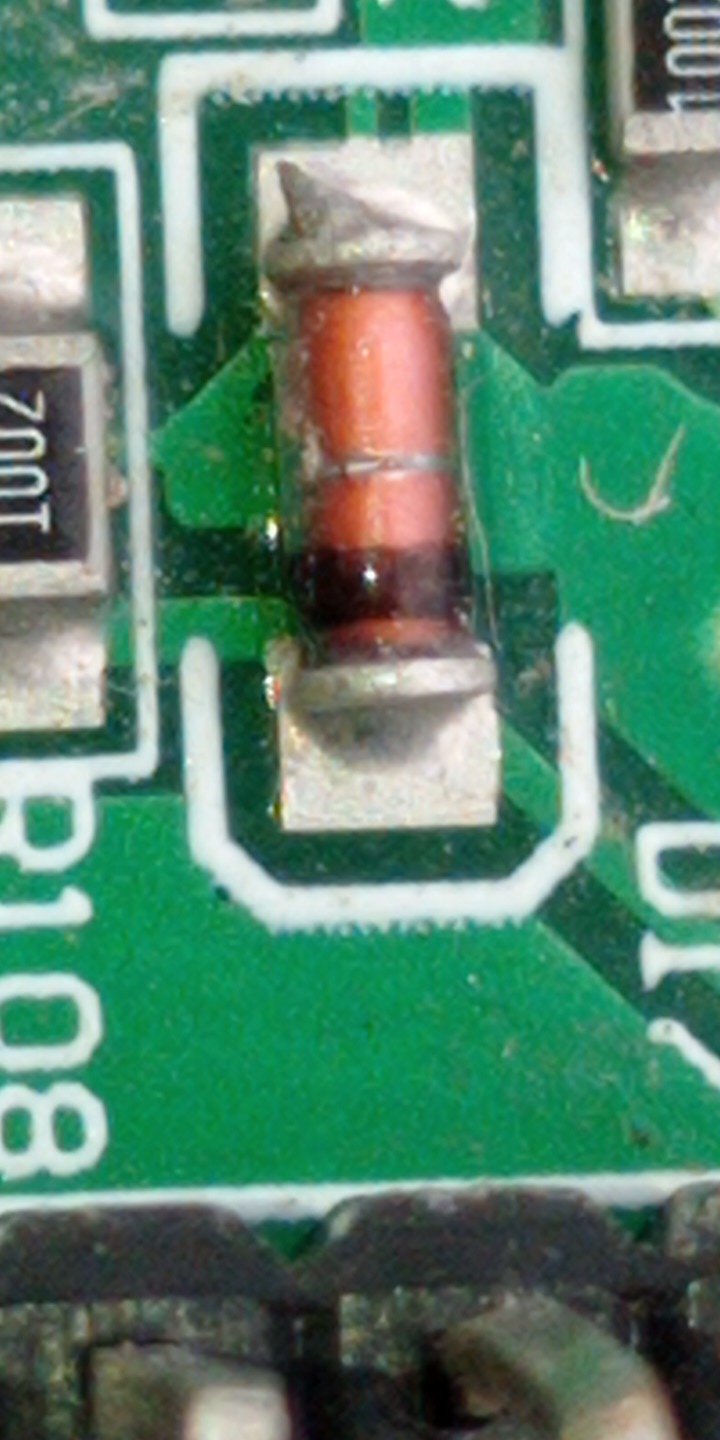
Zoom 10X
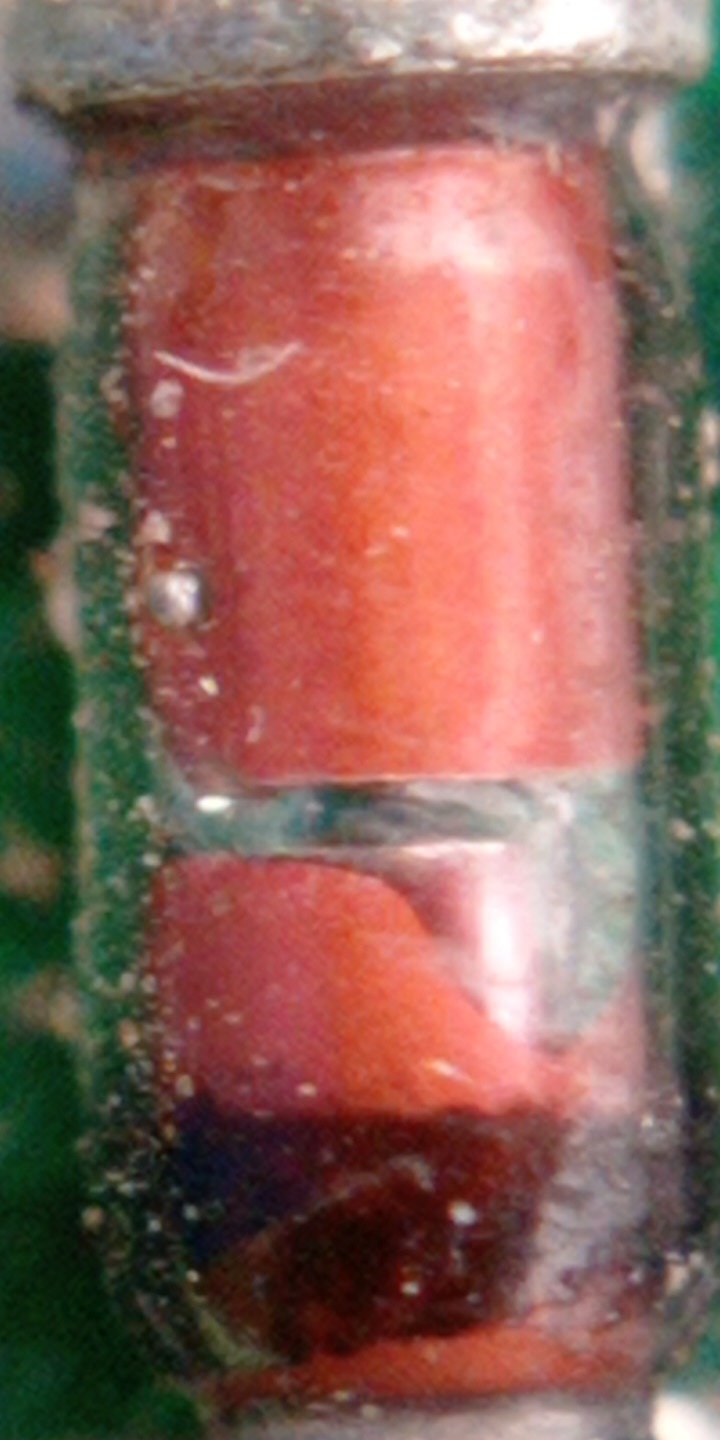
Zoom 10X + lente macro
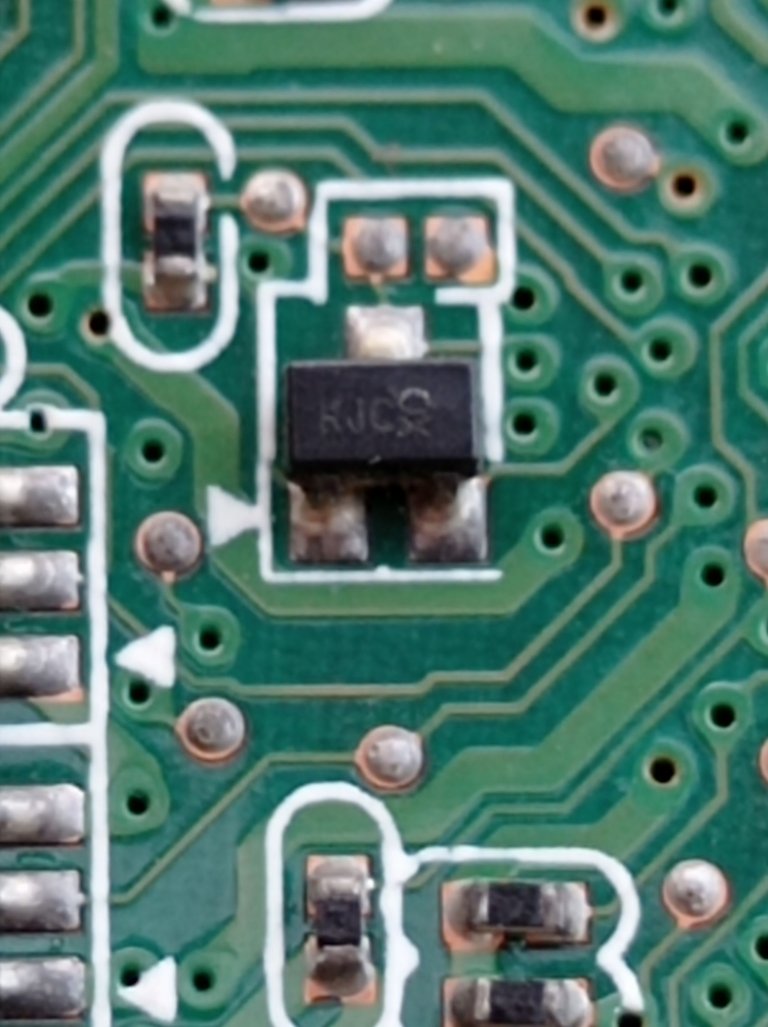
Zoom 10X
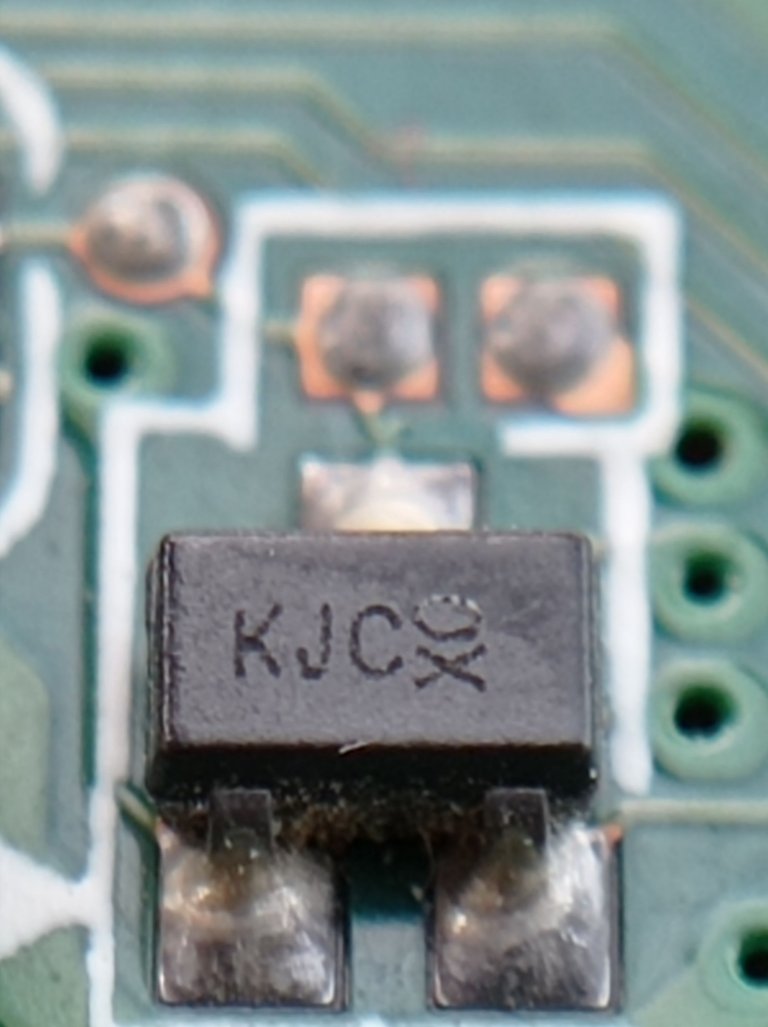
Zoom 10X + lente macro
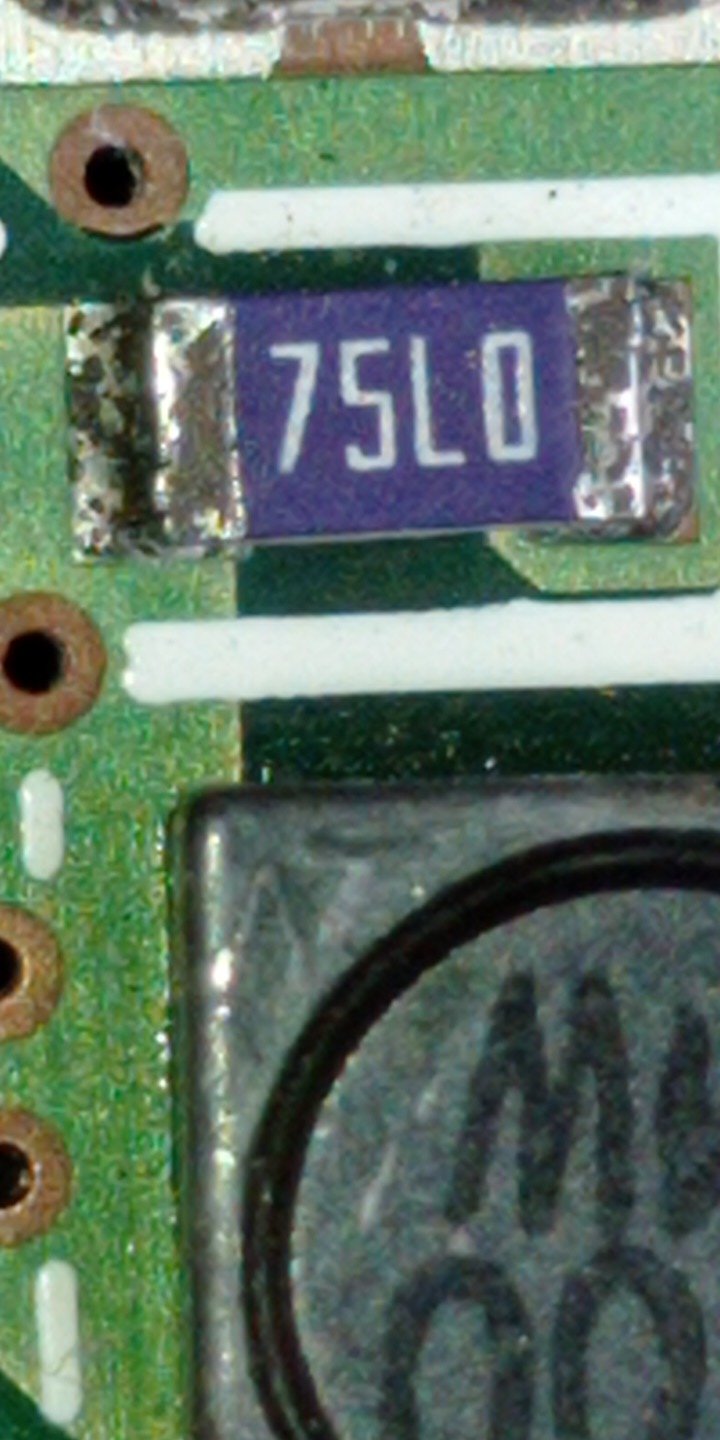
Zoom 10X
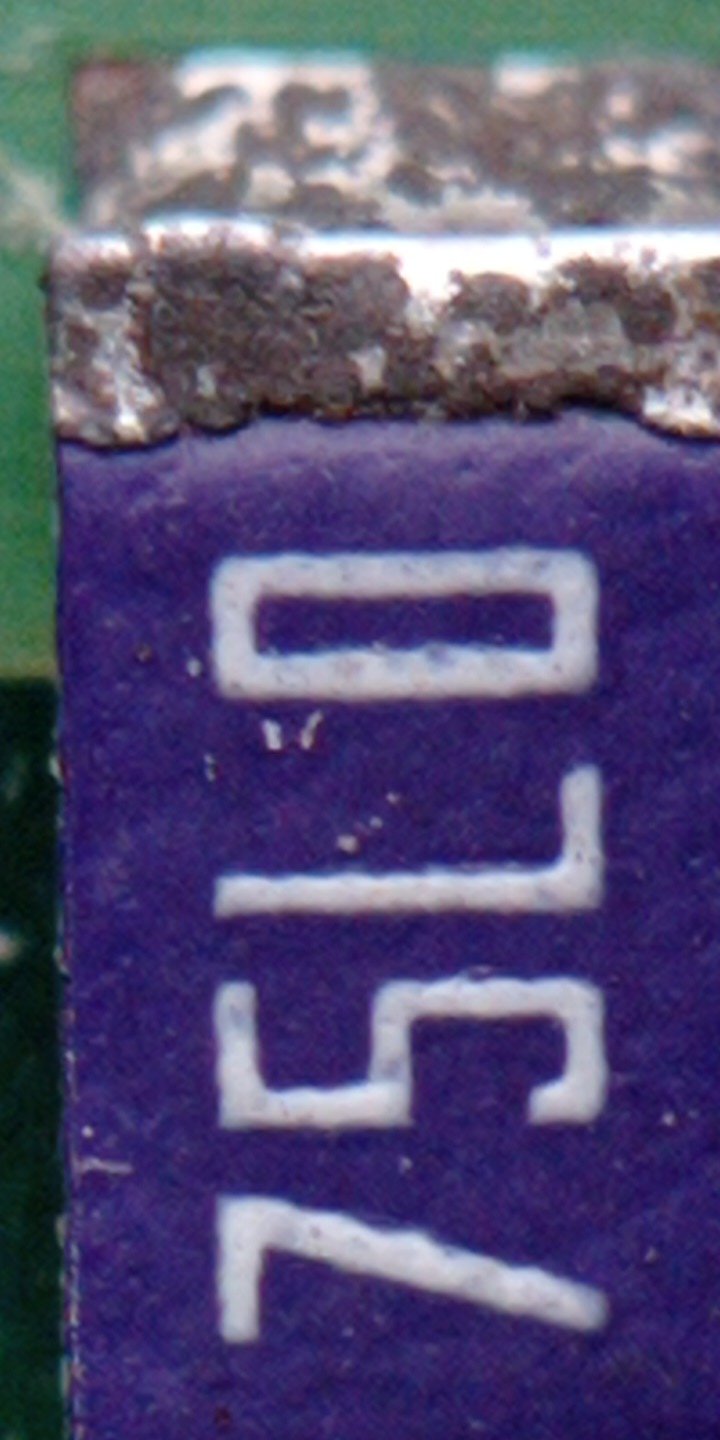
Zoom 10X + lente macro
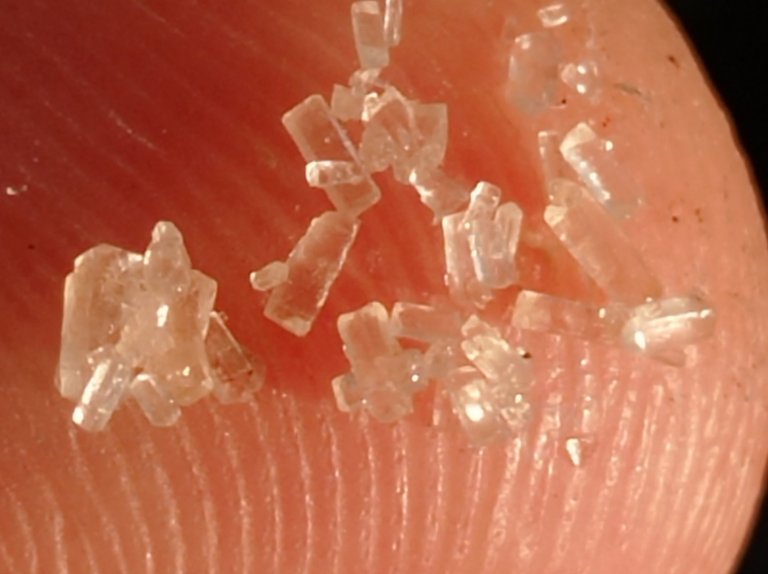
Granos de azúcar con zoom 10X
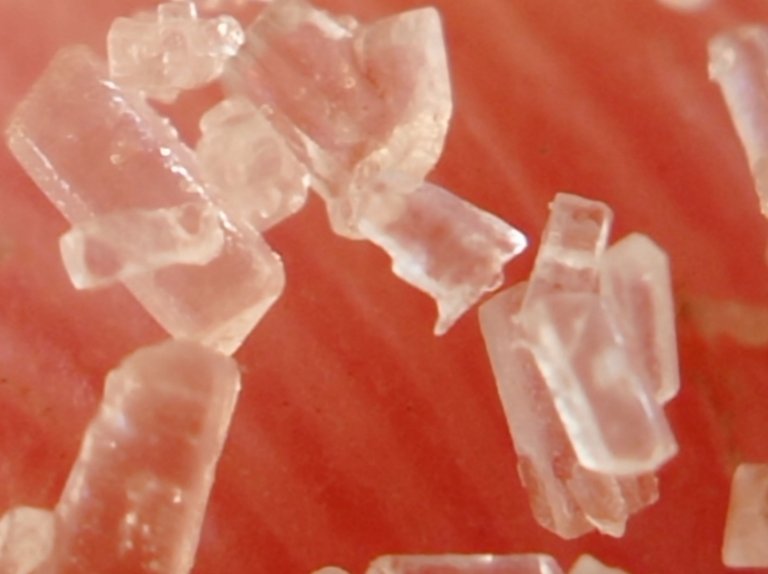
Zoom 10X + lente Macro
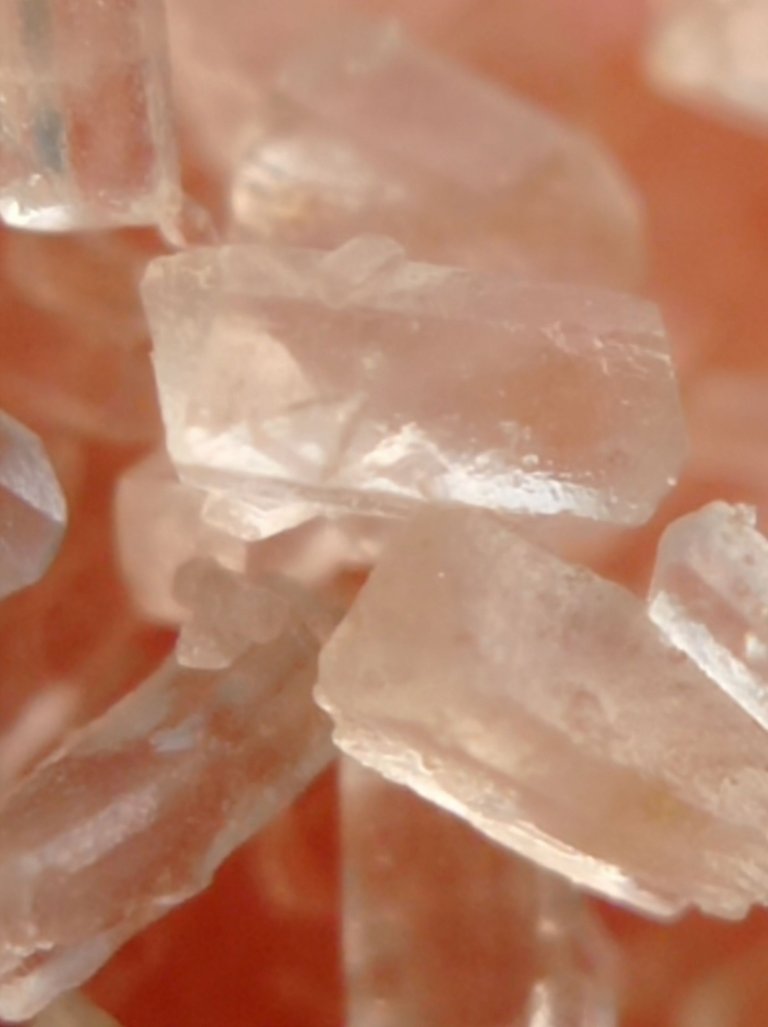
Zoom 10X + lente Macro
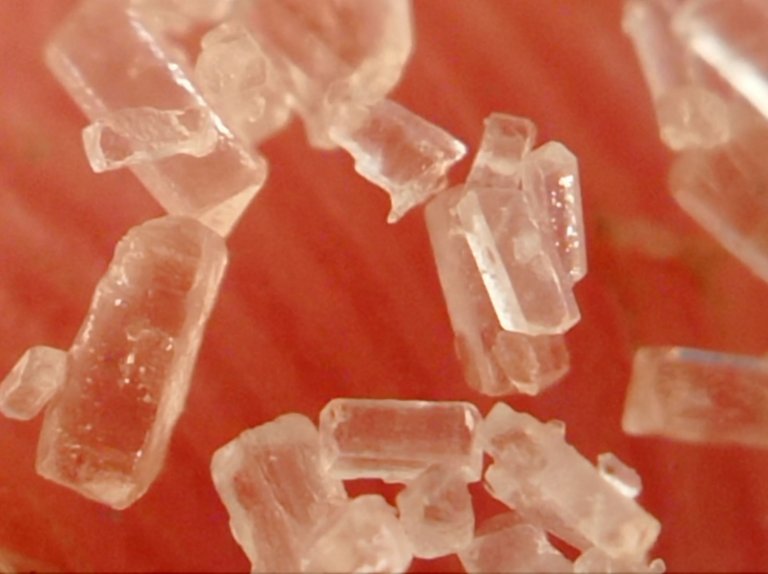
Zoom 10X + lente Macro
Estos son algunos de los resultados que pudieron haber sido mejores si hubiese empleando un trípode, sin embargo estoy satisfecho con los resultados, en un futuro pretendo mejorar el gadget adicionando algunas luces LED por los bordes para mejorar la claridad de las imágenes en condiciones de poca iluminación, además adicionarle otros tipos de lentes, recicladas de cámaras fotográficas en desuso.
Bueno amigos esto lo pueden hacer empleando los medios y materiales que tengan a mano, y el uso pude ser variado, incluso para hacer fotografías macro a los insectos y plantas, y mientras mejor sea la cámara del celular mejores resultados se obtendrán en las fotografías.
Saludos a todos y hasta la próxima 😉.
Fotografías tomadas con el celular Xiaomi Redmi note 9
Puedes verme en Facebook
Portada creada en Canva
ENGLISH
Traducción
Hello friends, today I want to show you how to build a small gadget for our cell phone that could be very useful in our lives, it all depends on the use you can give it.
One of the things I do the most during my electronic repairs is to make the ocular inspection of the electronic card; however, nowadays with the advance of microelectronics it has been achieved that the components are getting smaller and smaller which brings as a consequence that it is necessary to use a tool that allows us to see clearly these components in search of flaws and even something as important as being able to see their numbering to identify it. The perfect tool would be a microscope, preferably trinocular, because in addition to the observation allows you to work at the same time on the plate, but like any quality tool, these microscopes are expensive and currently I can not fulfill the dream of having mine, will have to wait jj, But as the saying goes" For lack of bread, cassava ", I use my own tool for these purposes that I comment.
I have a pocket folding magnifying glass with 7X magnification, but working with it alone sometimes was not enough due to the compactness of the component, so I combine it with the cell phone camera, obtaining notably better results, so I decided to modify the structure of the magnifying glass, achieving a more practical and easy to use tool, using recycled and easily accessible materials.

Foldable pocket magnifier
Making a Macro lens for the cell phone.
With this 7X lens you can increase 7 times the size of the object to be photographed and adding the increase of the digital zoom of the cell phone camera you can obtain much better results and sharper images at the point where the cell phone zoom loses quality.
To build the macro lens I used the following materials and tools
-7X magnifying lens
-Plastic clothespin.
-Glue
-Puncher
-Cutter
Flat-blade screwdriver

Materials and tools
Manufacturing process
The first step consists of separating the pieces of the magnifying glass. For this I used the screwdriver, as shown in the following images.

Forcing the edges of the center rivet that joins the two pieces together

Remove the central rivet by pushing it out with the screwdriver.

Separating the lens from its protective housing

This is the lens we will use

The lens can be removed from its holder, allowing it to be exchanged for a better one if possible to improve the tool.
-The second step is to prepare the clothespin so that the lens can be added and placed on the cell phone without putting too much pressure on it and so that it lies as flat and firm as possible..

Clothespin

Separate the parts of the clip
With the cutter and taking care not to cut ourselves, the edges of the clip are removed to achieve a flat surface that allows the lens to be glued. The following images show the process.


The third step will be to apply heat with the phosphor to mold the piece of the clip that will hold the lens, so that the lens is flat to the surface of the cell phone camera.

Apply heat

Apply pressure against a surface to slightly arch the part.

Final result
- The fourth step is to glue the lens to the clip piece we just modified. For this I used the glue.


-The fifth step will be to apply heat to the other piece of the loop to bend the tip inward, achieving a flat and firm grip on the cell phone.


Apply inward pressure to slightly shape the tip.

Final result
- At this point all the parts are ready, the only thing left to do is to assemble the clip again.

Macro lens parts


The use of a plastic loop allows for a soft but firm grip that does not scratch the screen.
After placing it on the cell phone the next thing to do is to open the camera application and try the digital zoom and the focal distance until the point where you get the image as focused and sharp as possible, achieving this is a bit complicated because as the distance to focus is so small, ie we will have to bring the phone quite close to the object to be photographed, any movement however small tends to blur the image, so it is advisable to use a tripod if you want to get the best results.
You can also use an application more dedicated to this purpose, how are the app Lupa Plus and Magnifier Camera, there are many more that can be downloaded from the Play Store, you just have to go testing to find the best results we get with our cell phone.
Here are the tests and results obtained with the Xiaomi redmi note 9 cell phone, all images were taken without the help of a tripod but the results were equally satisfactory achieved a marked improvement in the photographs.
First we show a picture taken with the cell phone camera and a 10X zoom without the macro lens and then we show the picture taken with a 10X zoom and the Macro lens so that you can compare and notice the differences.

10X zoom

10X zoom + macro lens

10X zoom

10X zoom + macro lens

10X zoom

10X zoom + macro lens

Sugar grains with 10X zoom*

10X zoom + macro lens

10X zoom + macro lens

10X zoom + macro lens
These are some of the results that could have been better if I had used a tripod, however I am satisfied with the results, in the future I intend to improve the gadget by adding some LED lights around the edges to improve the clarity of the images in low light conditions, also add other types of lenses, recycled from disused cameras.
Well friends this can be done using the means and materials at hand, and the use could be varied, even to make macro photographs of insects and plants, and the better the camera of the cell phone better results will be obtained in the photographs.
Salutations to all and until next time 😉.
Photographs taken with the Xiaomi Redmi note 9 cell phone.
You can see me on Facebook.
Text translated to English in Deepl translator.
Cover created in Canva.


