Hola amigos féliz noche espero se encuentren súper bien traigo para ustedes una idea super genial para hacer un hombre de nieve muy lindo para nuestro hogar ya que puede ser el adorno perfecto que le hace falta a nuestra casa para estas navidades, mi suegra me dio la idea y me ayudo ya que ella es muy creativa y es la que siempre me ayuda en mis proyectos de manualidades y costura con muchas ideas y por supuesto con mucha ayuda , este muñeco de nieve queda perfecto en algún espacio de la casa y podríamos colocarle algo de luces , les dejo el paso a paso de cómo hicimos este hermoso adorno para estas navidades❄️☃️
Hello friends, happy night, I hope you are very well, I bring you a super cool idea to make a very cute snowman for the home, since it can be the perfect decoration that our house needs for this Christmas, my mother-in-law gave me the idea and she helped me since she is very creative and she is the one who always helps me in my craft and sewing projects with many ideas and of course with a lot of help, this snowman is perfect in any space of the house and we can place something on it. lights, I leave you the step by step of how we made this beautiful ornament for this Christmas❄️☃️
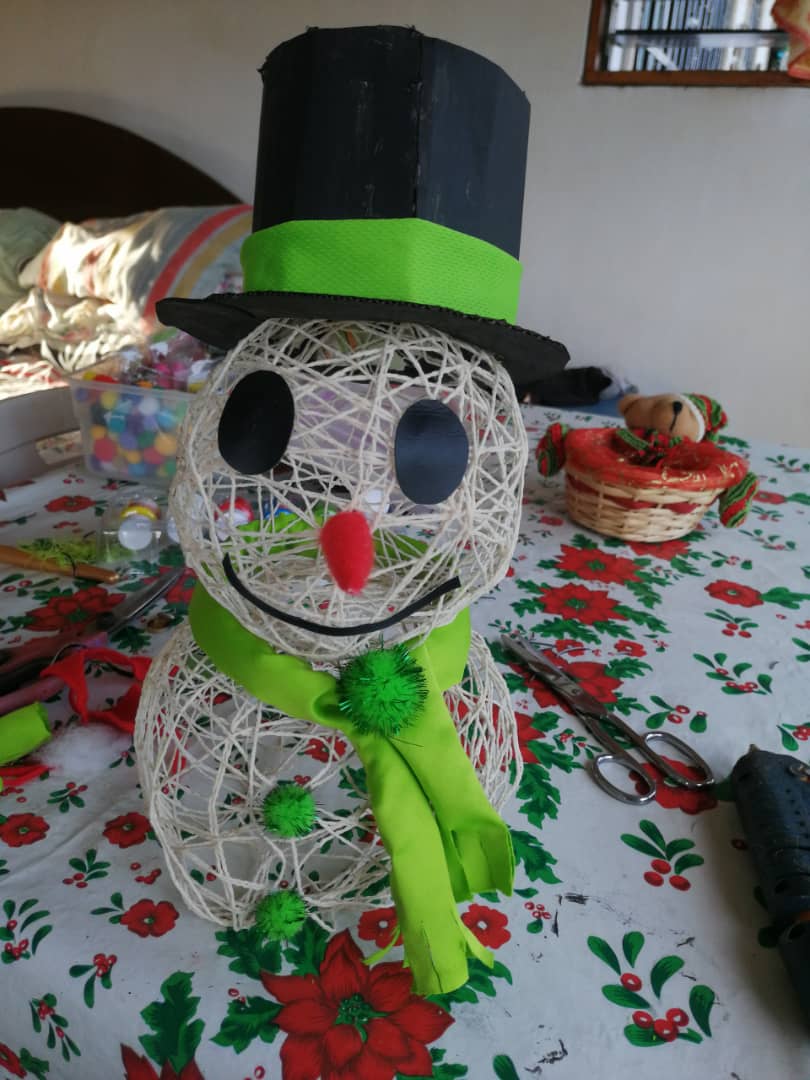
Los materiales que usamos fueron:
• Un rollo de hilo pabilo
• cinta adhesiva
• un frasco de pega blanca de 250g
• una cartulina negra
• Dos globos
• un trozo de cartón
• retazo de fieltro naranja
• pintura al frío color negra
• bolitas decorativas
• retazo de tela verde
• silicona caliente
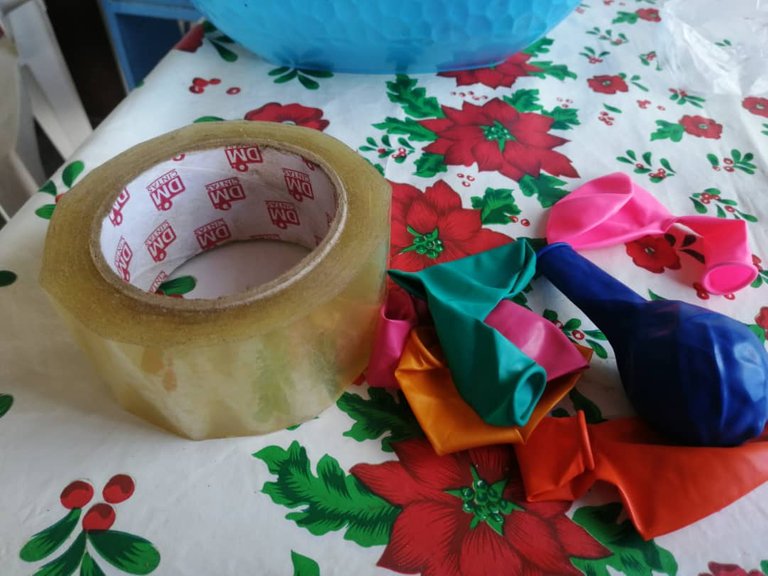
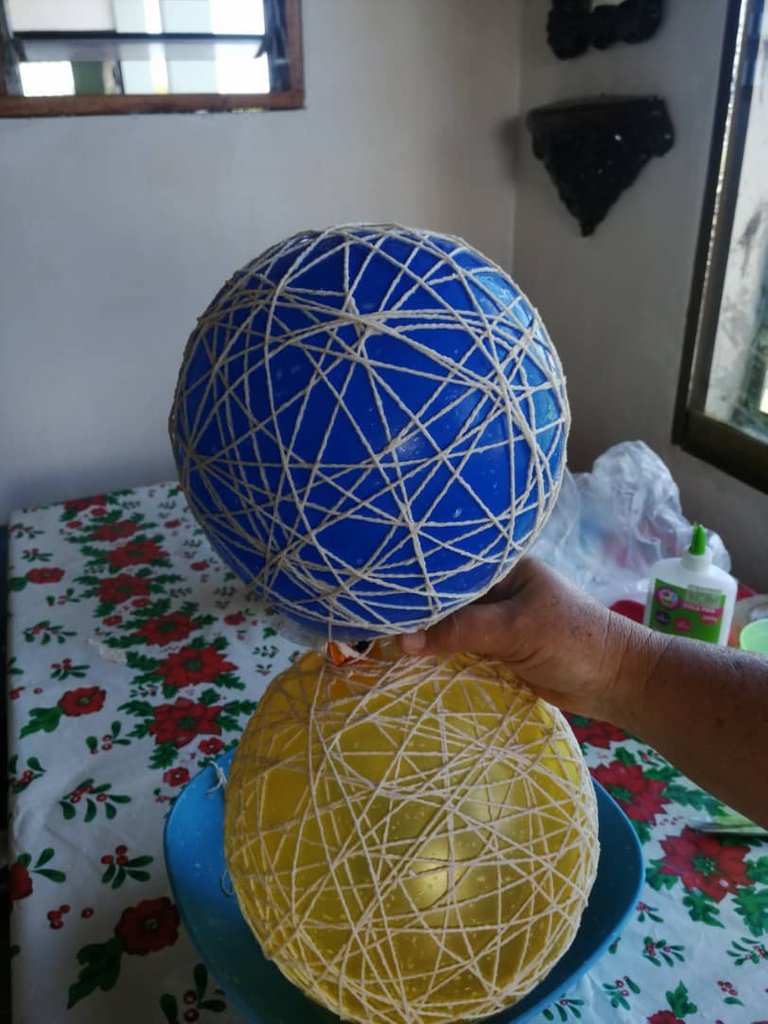
Para comenzar vamos a organizar los materiales ya que realizar este muñeco nos toma aproximadamente dos días ya que el primer paso hay que dejar secar todo un día , vamos a inflar los dos globos del tamaño que deseamos que sea nuestro muñeco y luego vamos a unirlo a los extremos dándole la forma del muñeco de nieve con Ayuda de cinta adhesiva.
The materials we used were:
• A roll of wick thread
• Scotch tape
• a 250g bottle of white glue
• a black cardboard
• Two ballons
• a piece of cardboard
• orange felt scrap
• black cold paint
• decorative balls
• piece of green cloth
• hot glue
To begin we are going to organize the materials since making this doll takes us approximately two days since the first step must be allowed to dry for a whole day, we are going to inflate the two balloons to the size that we want our doll to be and then we are going to join it to the ends giving it the shape of the snowman with the help of adhesive tape.
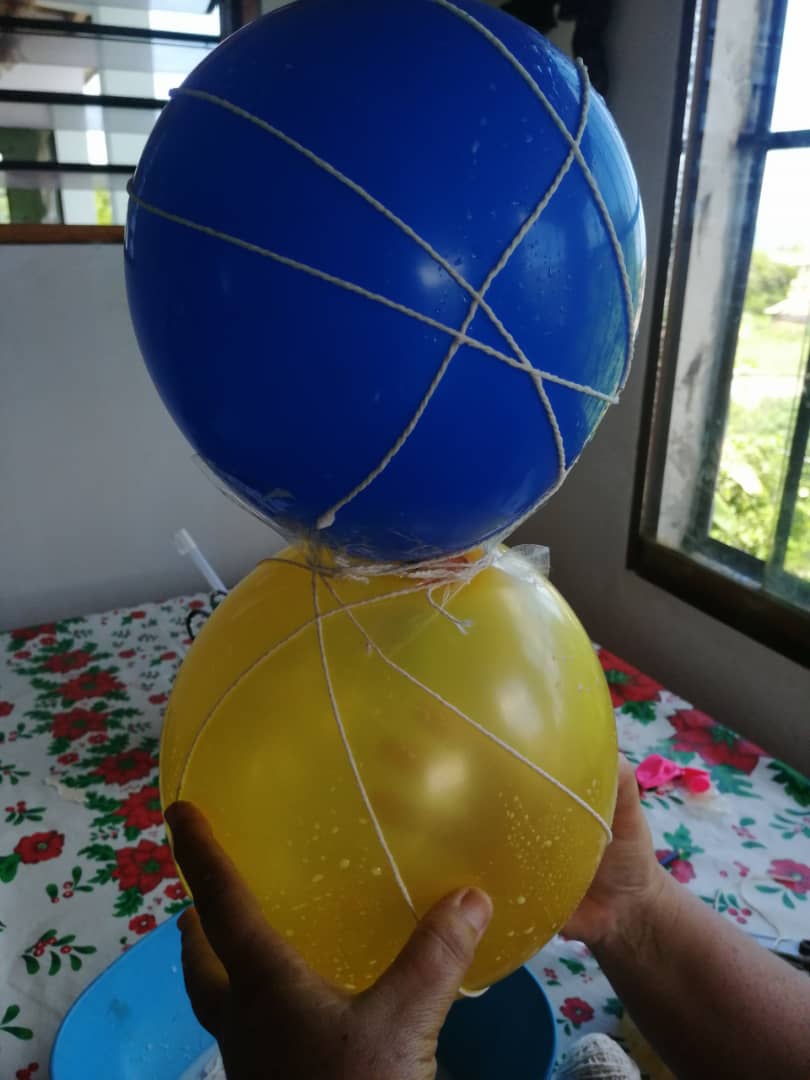
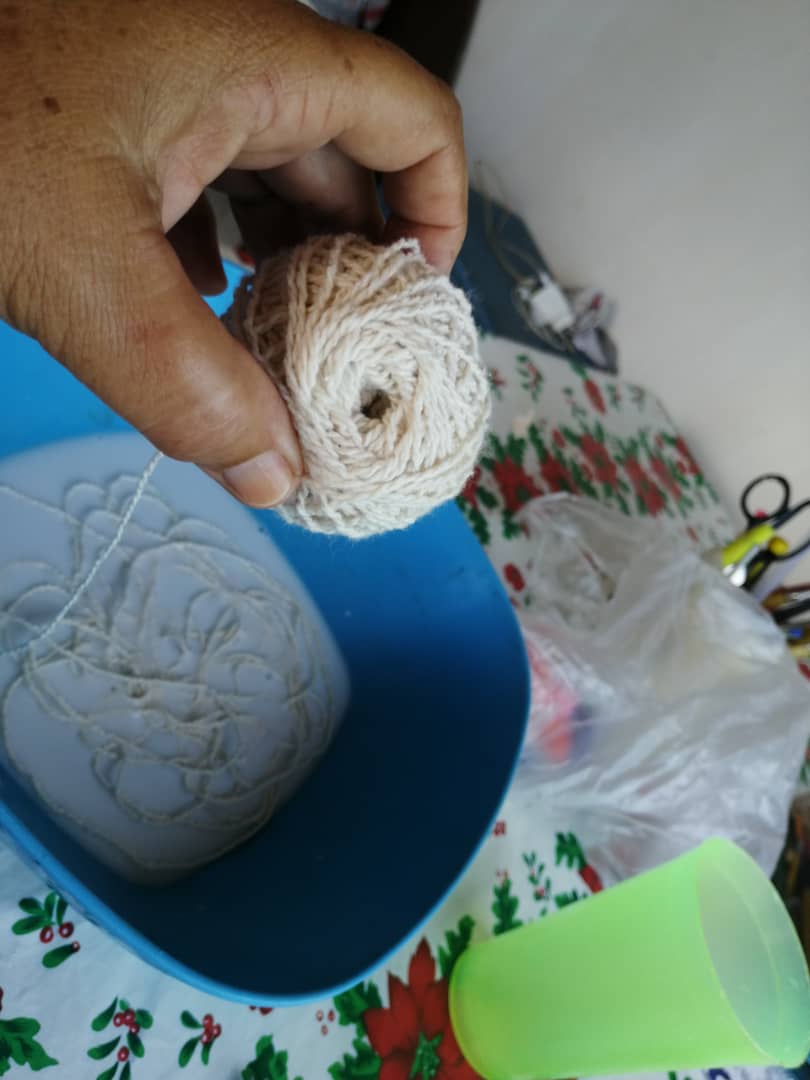
Vamos a preparar una mezcla de una parte de agua por tres partes de pegamento blanco o cola , vamos a sumergir el hilo pabilo en esta mezcla y dejamos que se remoje bien y luego le vamos enrollando alrededor de los globos . Una vez tengamos esto listo vamos a dejar secar por un día completo.
We are going to prepare a mixture of one part of water for three parts of white glue or glue, we are going to submerge the wick thread in this mixture and let it soak well and then we are going to wind it around the balloons. Once we have this ready we are going to let it dry for a full day.

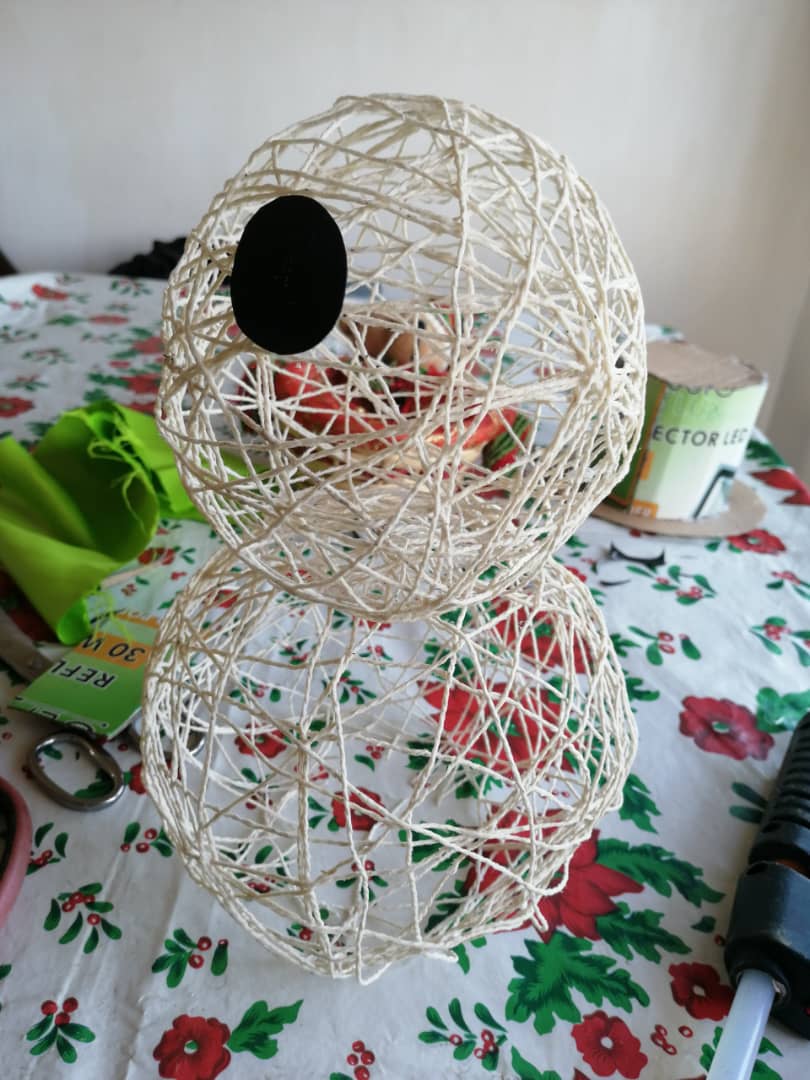
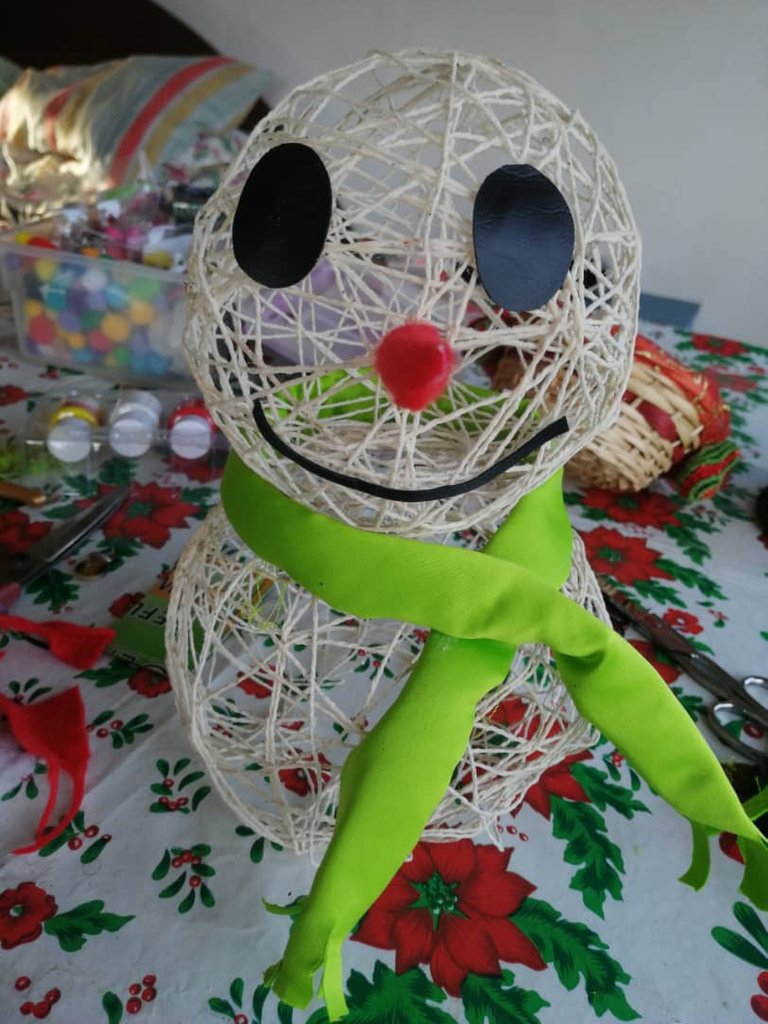
Al día siguiente vamos a reventar los globos y con mucho cuidado quitar los restos sobrantes, y así nos queda la estructura del muñeco de nieves , el siguiente paso es realizar los accesorios con ayuda de una cartulina negra vamos a recortar dos óvalos que usaremos como ojos y vamos a recortar también la sonrisa del muñeco, vamos a pegar con ayuda de pegamento, con un retazo de fieltro color naranja haremos la típica nariz que caracteriza a los muñecos de nieve está la vamos a pegar con silicona caliente.
Con un retazo de tela color verde realizamos una pequeña bufanda para darle un toque más navideño.
The next day we are going to burst the balloons and very carefully remove the excess remains, and thus we have the structure of the snowman, the next step is to make the accessories with the help of a black cardboard we are going to cut two ovals that we will use as eyes and we are also going to cut out the smile of the snowman, we are going to paste it with the help of glue, with a piece of orange felt we will make the typical nose that characterizes snowmen, we are going to glue it with hot silicone.
With a piece of green fabric we made a small scarf to give it a more Christmas touch.
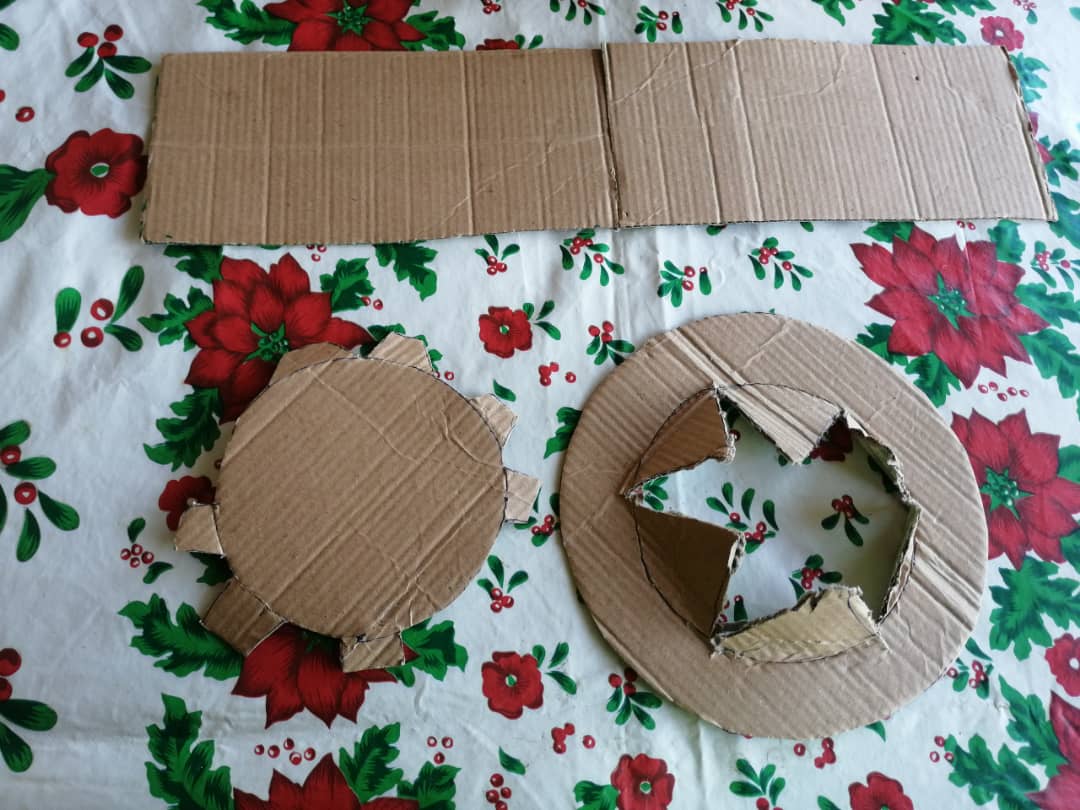
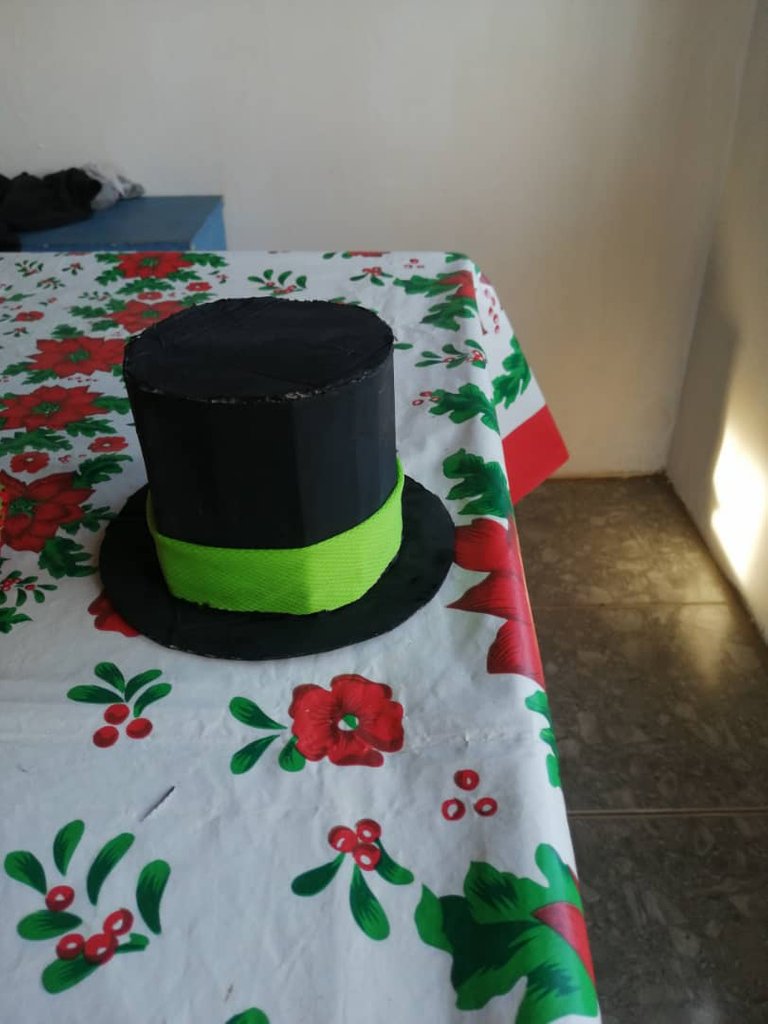
Por último realizamos un sombrero con un pedazo de cartón reciclado, cortamos tres piezas dos en forma de círculo y una en rectángulo, para la base del sombrero abrimos un agujero para poder ponérselo, pegamos y unimos las piezas con silicona caliente y pintamos con pintura negra y ayuda de un pincel , con un poco de la tela verde le pusimos alrededor para que combinará con su bufanda.
Finally we made a hat with a piece of recycled cardboard, we cut three pieces, two in the shape of a circle and one in a rectangle, for the base of the hat we opened a hole to put it on, we glued and joined the pieces with hot silicone and painted with black paint and with the help of a brush, with a bit of the green fabric we put around it so that it will match your scarf.
Por último agregamos unas bolitas decorativas que dieron el toque final de brillo , y así luego de dos días de trabajo quedo un hermoso muñeco de nieve con mucho estilo y elegancia quedará perfecto para cualquier área que deseen colocarlo en su hogar .
Finally we added some decorative balls that gave the final touch of shine, and so after two days of work, a beautiful snowman with a lot of style and elegance was left, it would be perfect for any area that you wish to place it in your home.

Hasta aquí el post de hoy amigos espero que les gustará agradezco a todos por leerme y su apoyo nos vemos en un próximo post y espero poder compartir más de mis proyectos. Feliz noche 🌙
So far today's post friends I hope you like it I thank everyone for reading me and your support see you in a next post and I hope to share more of my projects. Happy night 🌙


