Hola buen día, amigos creativos que formamos esta apreciada y hermosa comunidad hivediy, espero se encuentren muy bien y feliz comienzo de semana para todos, Dios les bendiga, tenía tiempo que no participaba en los concursos y hoy me di la oportunidad de volver a participar en este concurso. Como siempre les traigo un divertido tutorial de como elaborar una plantilla para elaborar una caja para obsequios de forma cuadrada, esta caja se la puede obsequiar a las personas más importantes para ustedes en fechas importantes, como cumpleaños, aniversarios de bodas, u otras cosas que ustedes deseen y además está elaborada con materiales que son fáciles de conseguir, y ahora sin más que decir empecemos con el paso a paso.
Hello good day creative friends who make up this appreciated and beautiful hivediy community, I hope you are very well and happy start to the week for all, God bless you, I haven't participated in the contests for a long time and today I gave myself the opportunity to participate again in this contest. As always, I bring you a fun tutorial on how to make a template to make a square-shaped gift box. You can give this little box to the most important people for you on important dates, such as birthdays, wedding anniversaries, or other things that you want and it is also made with materials that are easy to get, and now without further ado let's start with the step by step

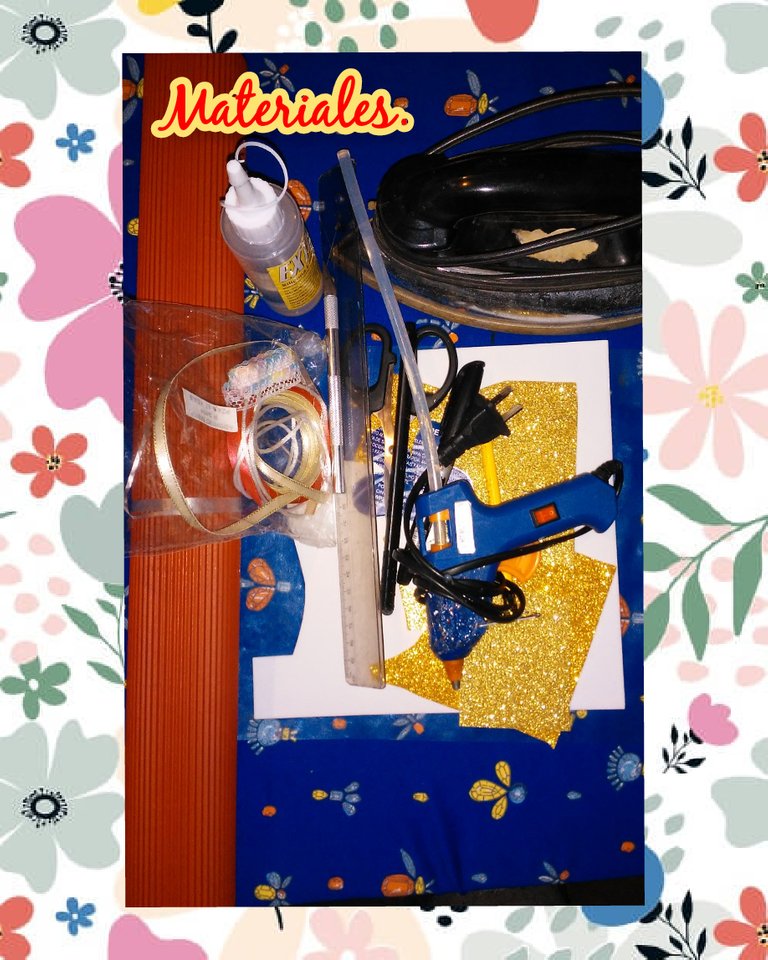
Para elaborar esta plantilla para hacer la caja para obsequios vamos a necesitar los siguientes materiales y herramientas:
*Cartulina corrugada, de color roja.
*Foami de varios colores y texturas.
*1 tijera.
*1 lápiz.
*1 regla métrica.
*Cinta de tela.
*Pistola de silicona caliente.
*Silicona líquida.
*Trozo de acetato.
*Cutter.
*Perlas corridas y media perla.
To make this template to make the gift box we will need the following materials and tools:
*Corrugated cardboard, red.
*Foami of various colors and textures.
*1 scissors.
*1 pencil.
*1 metric ruler.
*Cloth tape.
*Hot glue gun.
*Liquid silicone.
*Acetate piece.
*Cutter.
*Round pearls and half pearl.
Let's start with the step by step.
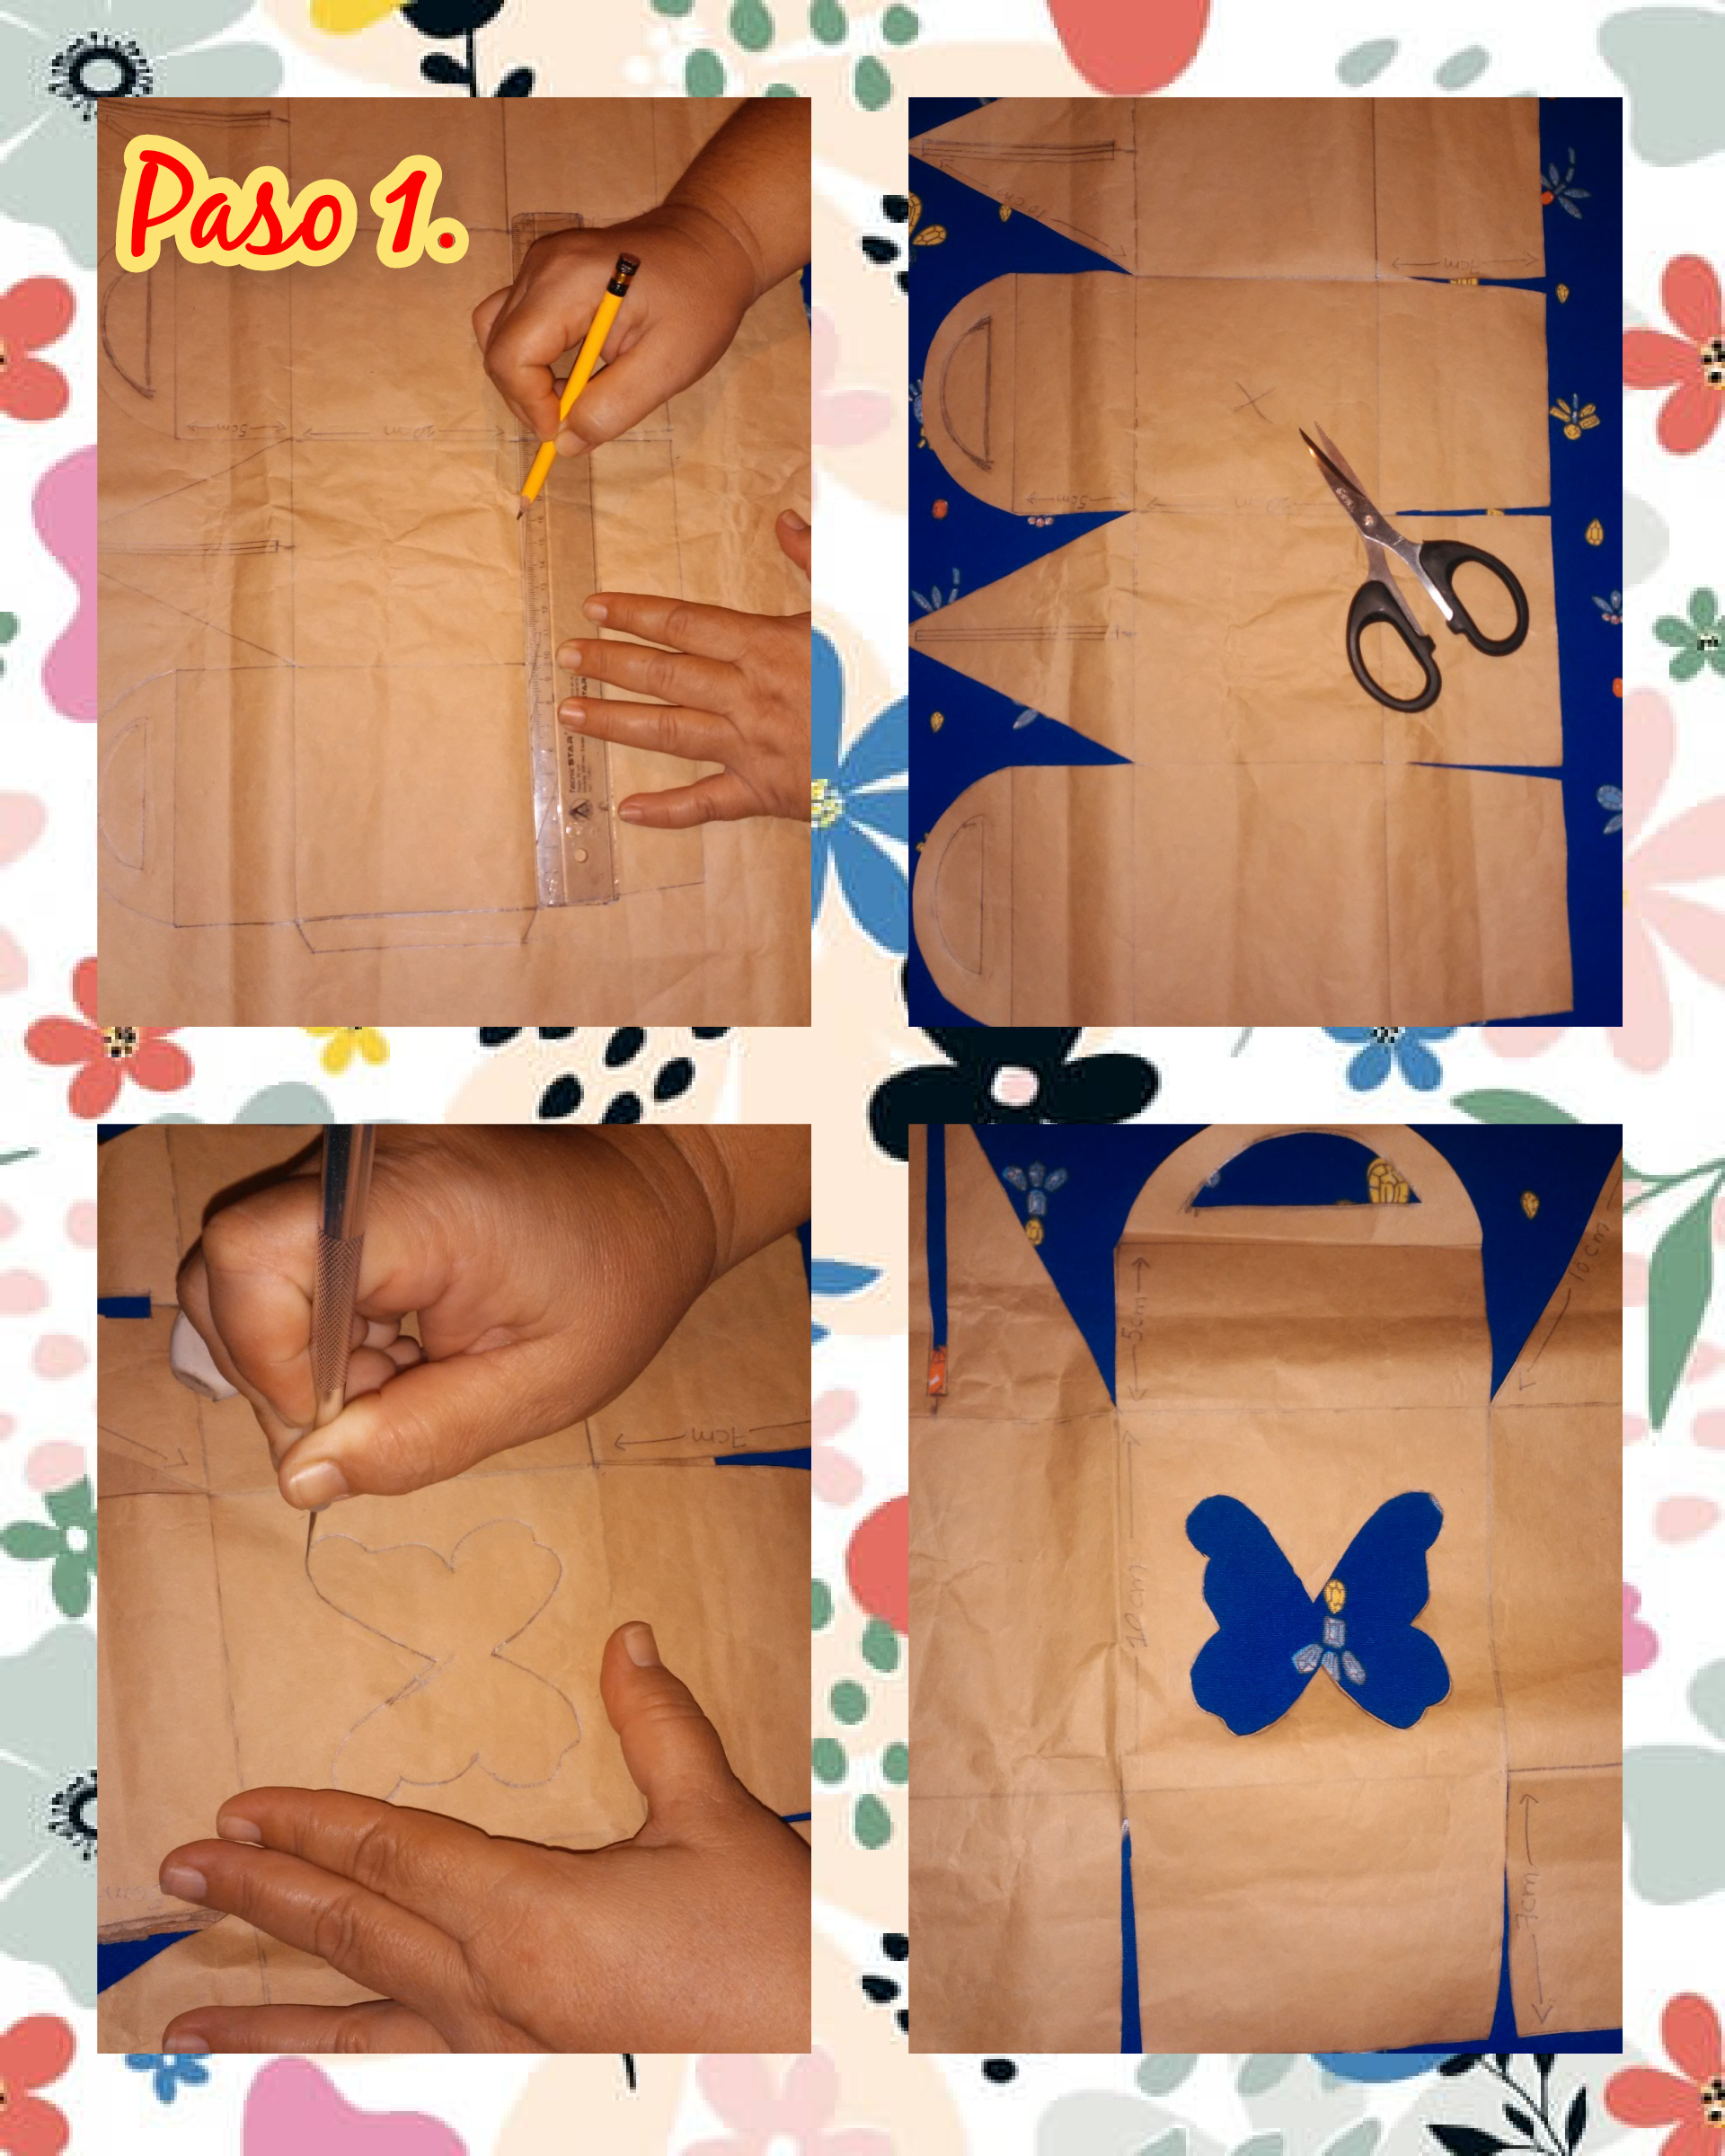
Step 1. To start making this square-shaped gift box, the first thing we have to do is take some recyclable paper and start drawing the template with the following measurements, 10cm wide by 10cm deep. long and with the help of scissors we cut, to remove the template and finally in one of the parts of the template we take a butterfly pattern and mark it and with the help of a cutter we remove the piece, as shown in the images.
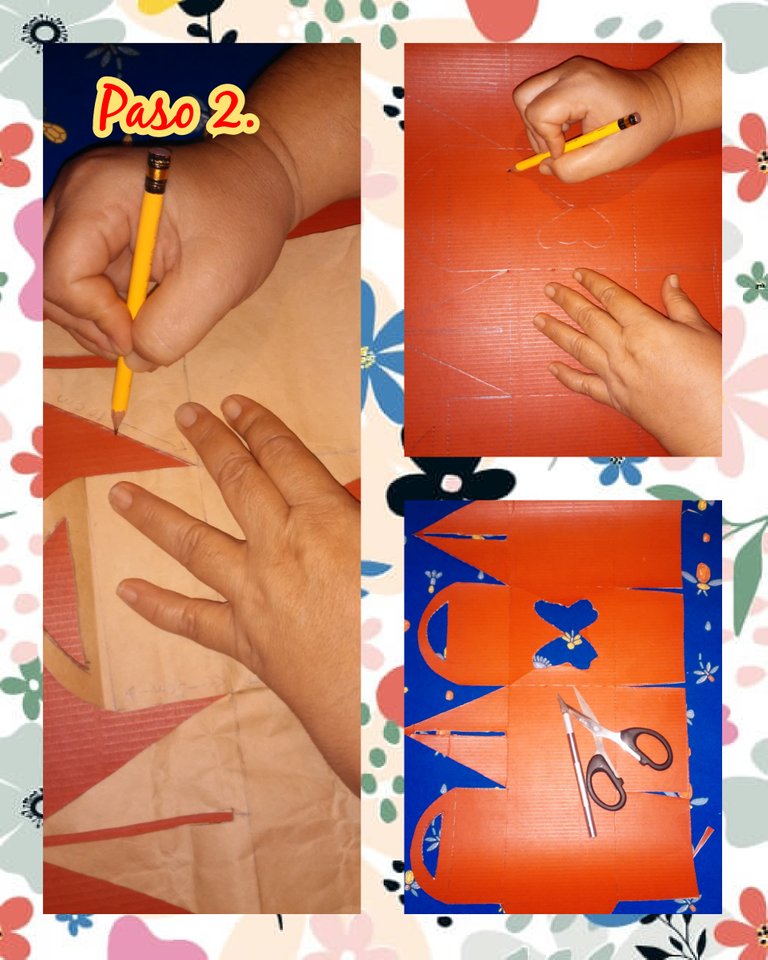
Step 2. After obtaining the template, we take a red corrugated cardboard and mark the template piece and then with scissors we cut it out, and to obtain the butterfly shape we use a cutter, see the images.

Step 3. In this step we are going to take a piece of acetate, mark a square on the piece of acetate, cut it out, turn the template over and glue it with liquid silicone on the part where the silhouette of a butterfly is .
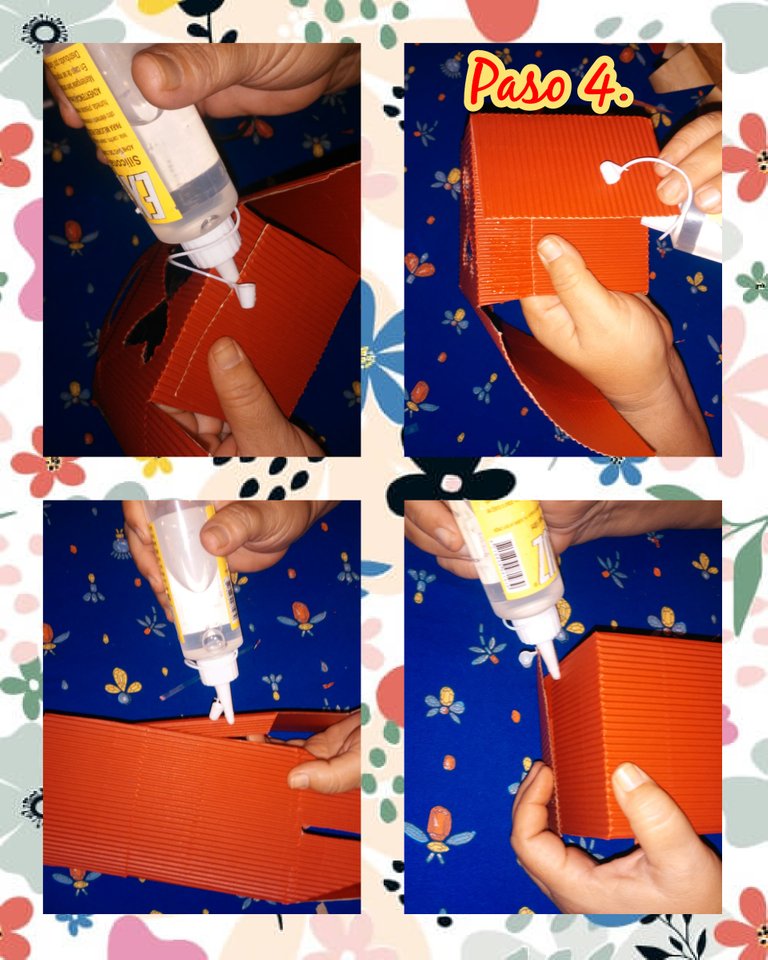
Step 4. Already in this step we begin to form the box for gifts, square, with liquid silicone, gluing the lower parts, the first two covers and then the tab to form the square and we finish closing the lower part with the other two covers that were left over and thus we completed forming the box for gifts in the shape of a square, see the images.
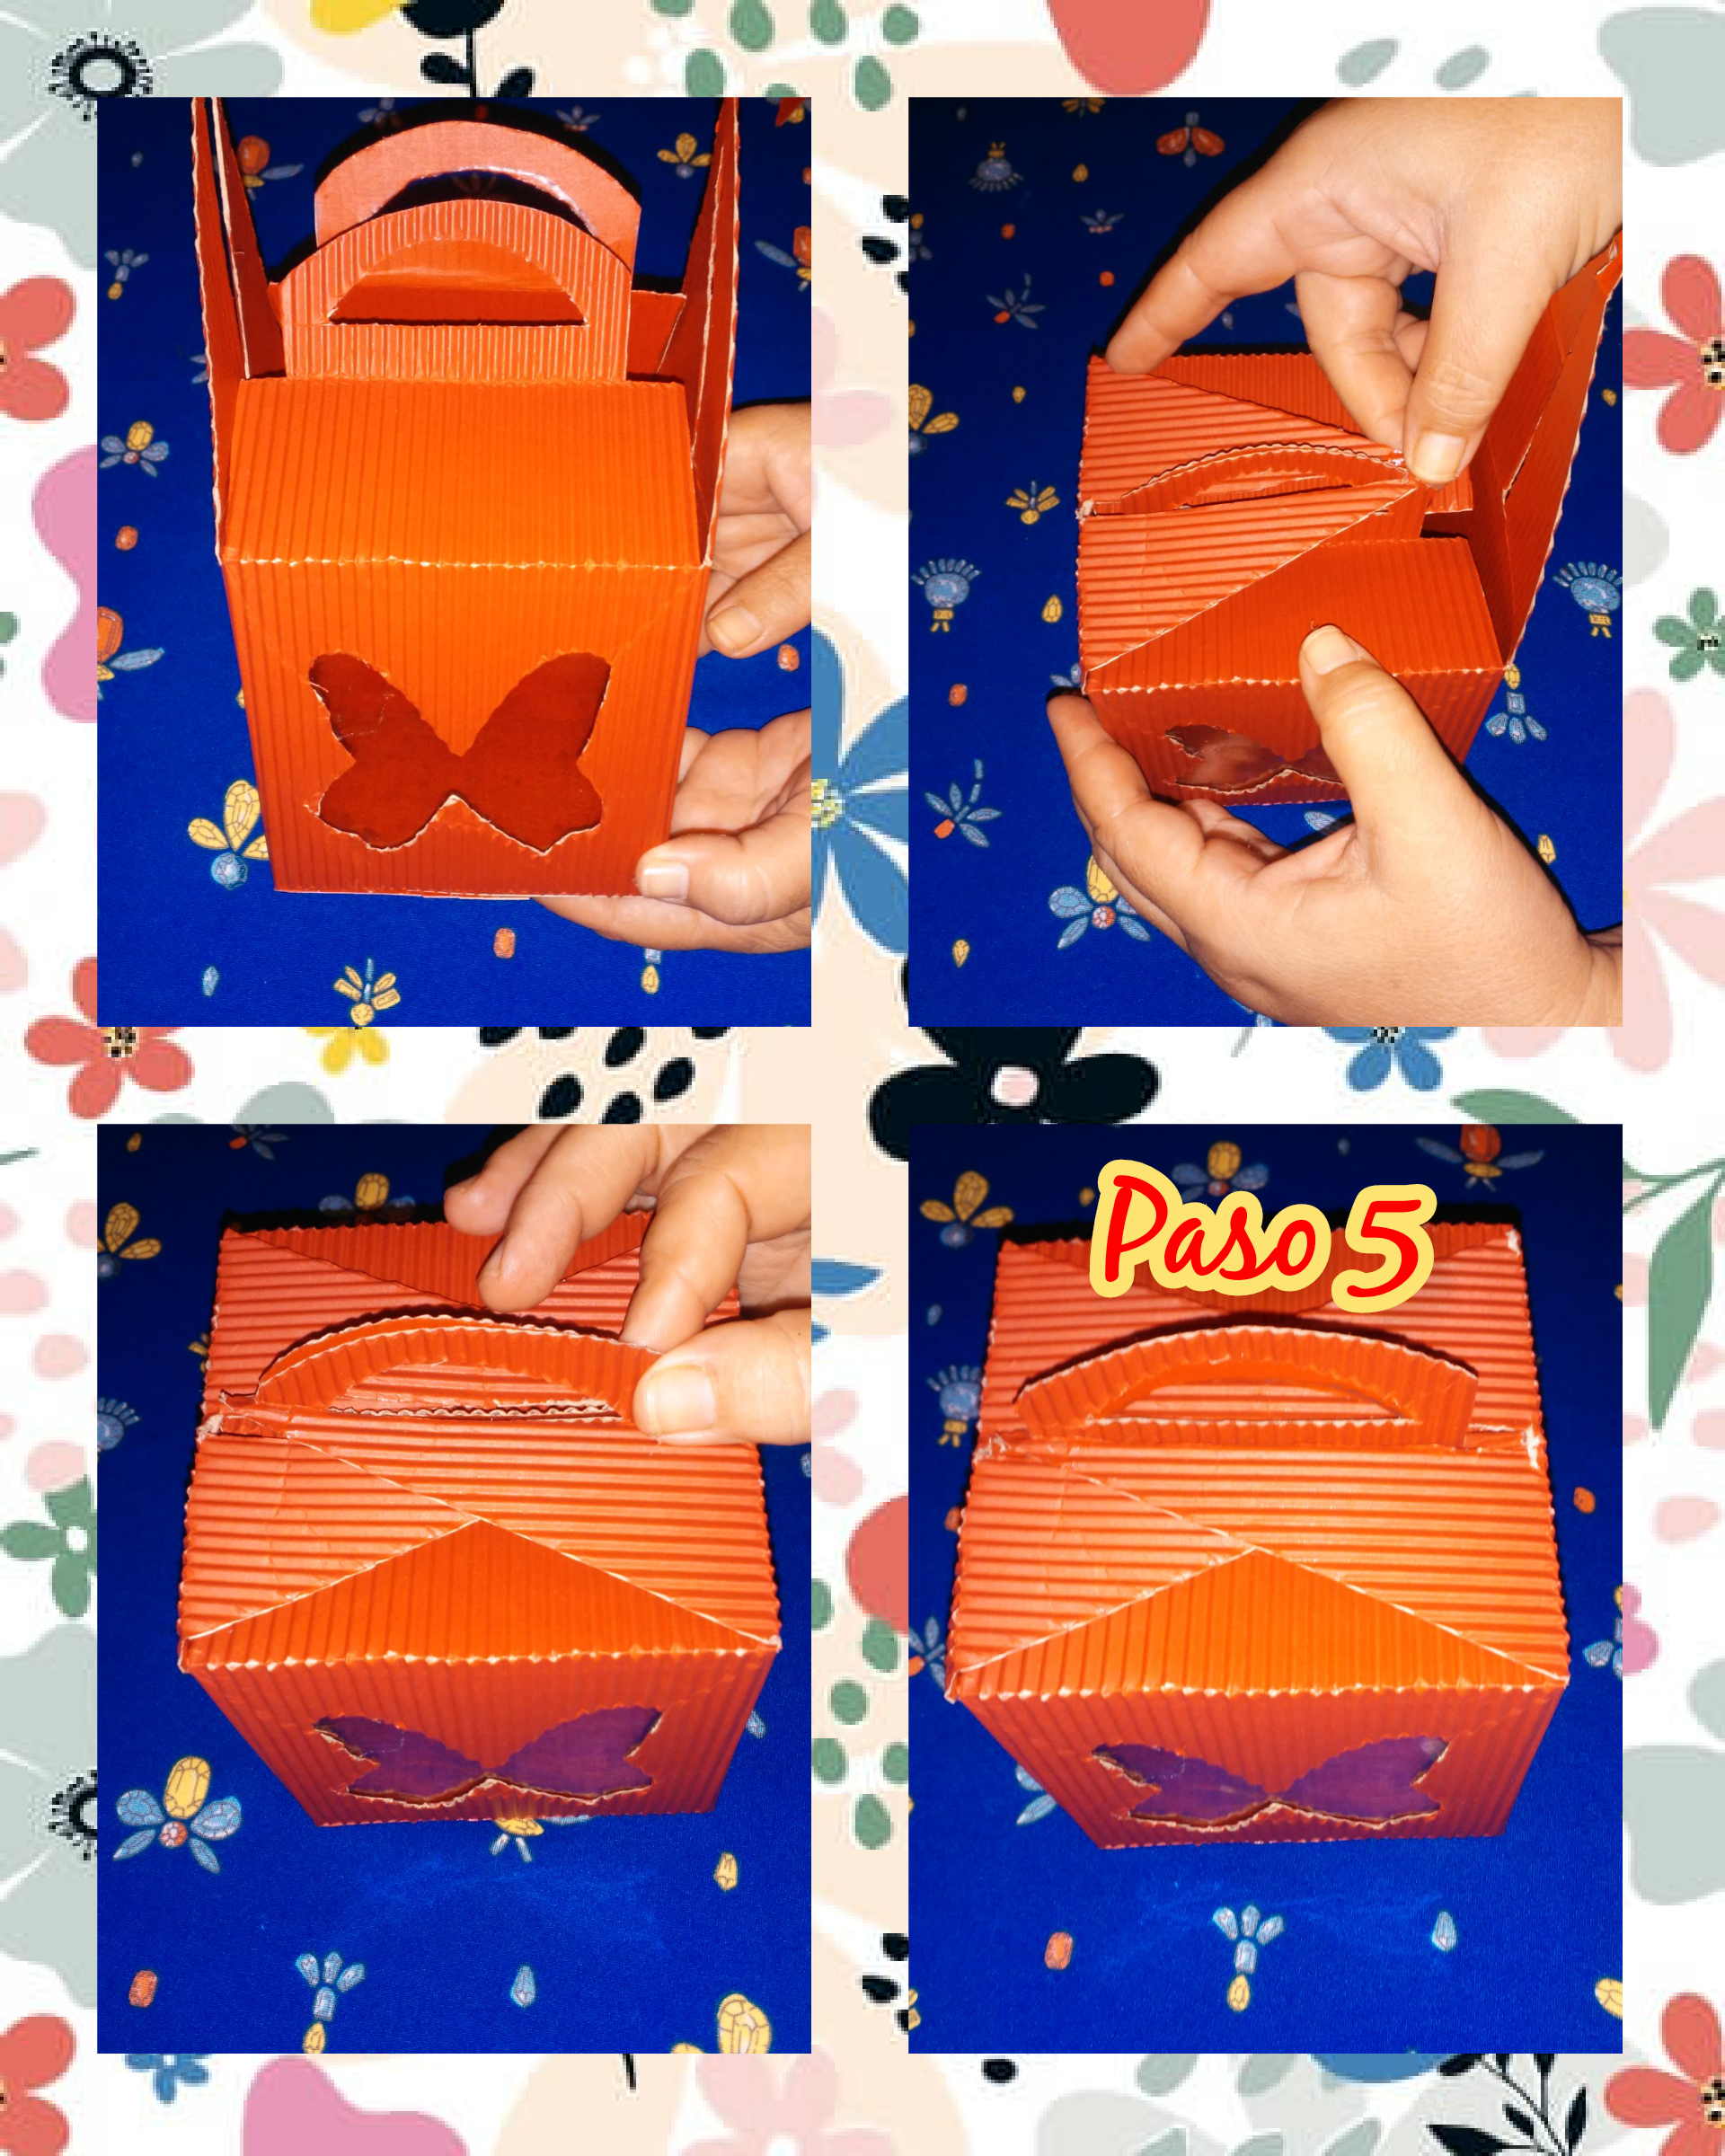
Step 5. Once the box is formed at the bottom, now we form the lid of the upper part to close the gift box, in the lid there are two long square holes and two handles, we are going to insert the handles through the holes one on the right and one on the left, and so we can close the box, as shown in the images.
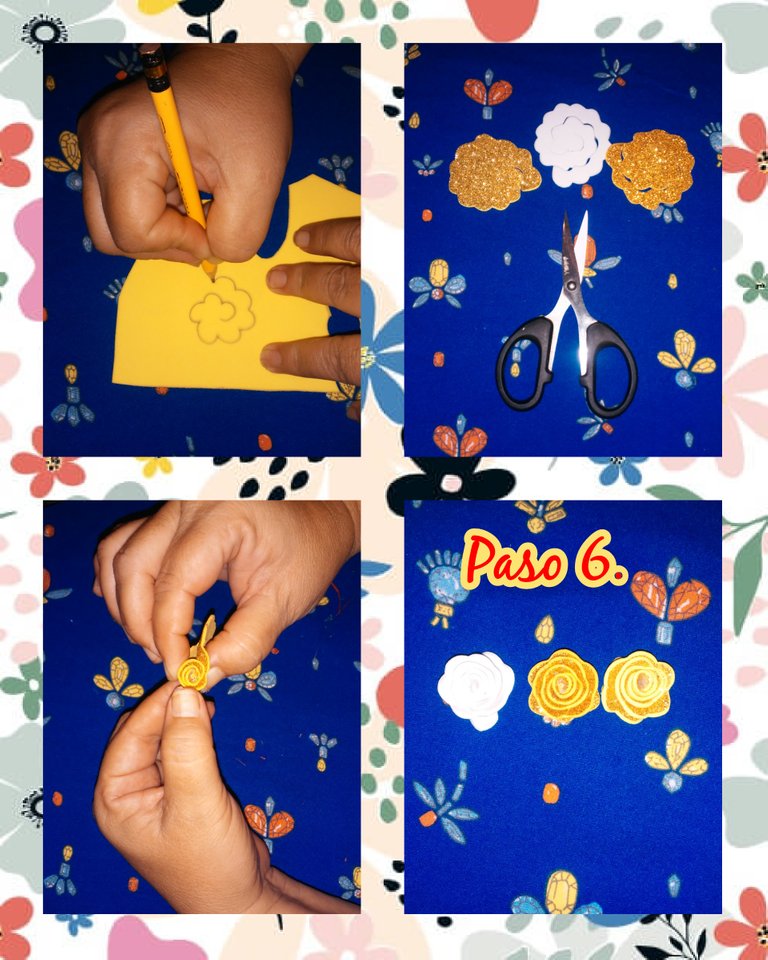
Step 6. In this step we are going to take foami of various colors and textures to make some roses, we mark the shape of the roses on the foamis and then we cut them out, after having cut the pieces we begin to make the roses by rolling them up outside to inside to form the roses, these would be to decorate the square-shaped gift box.
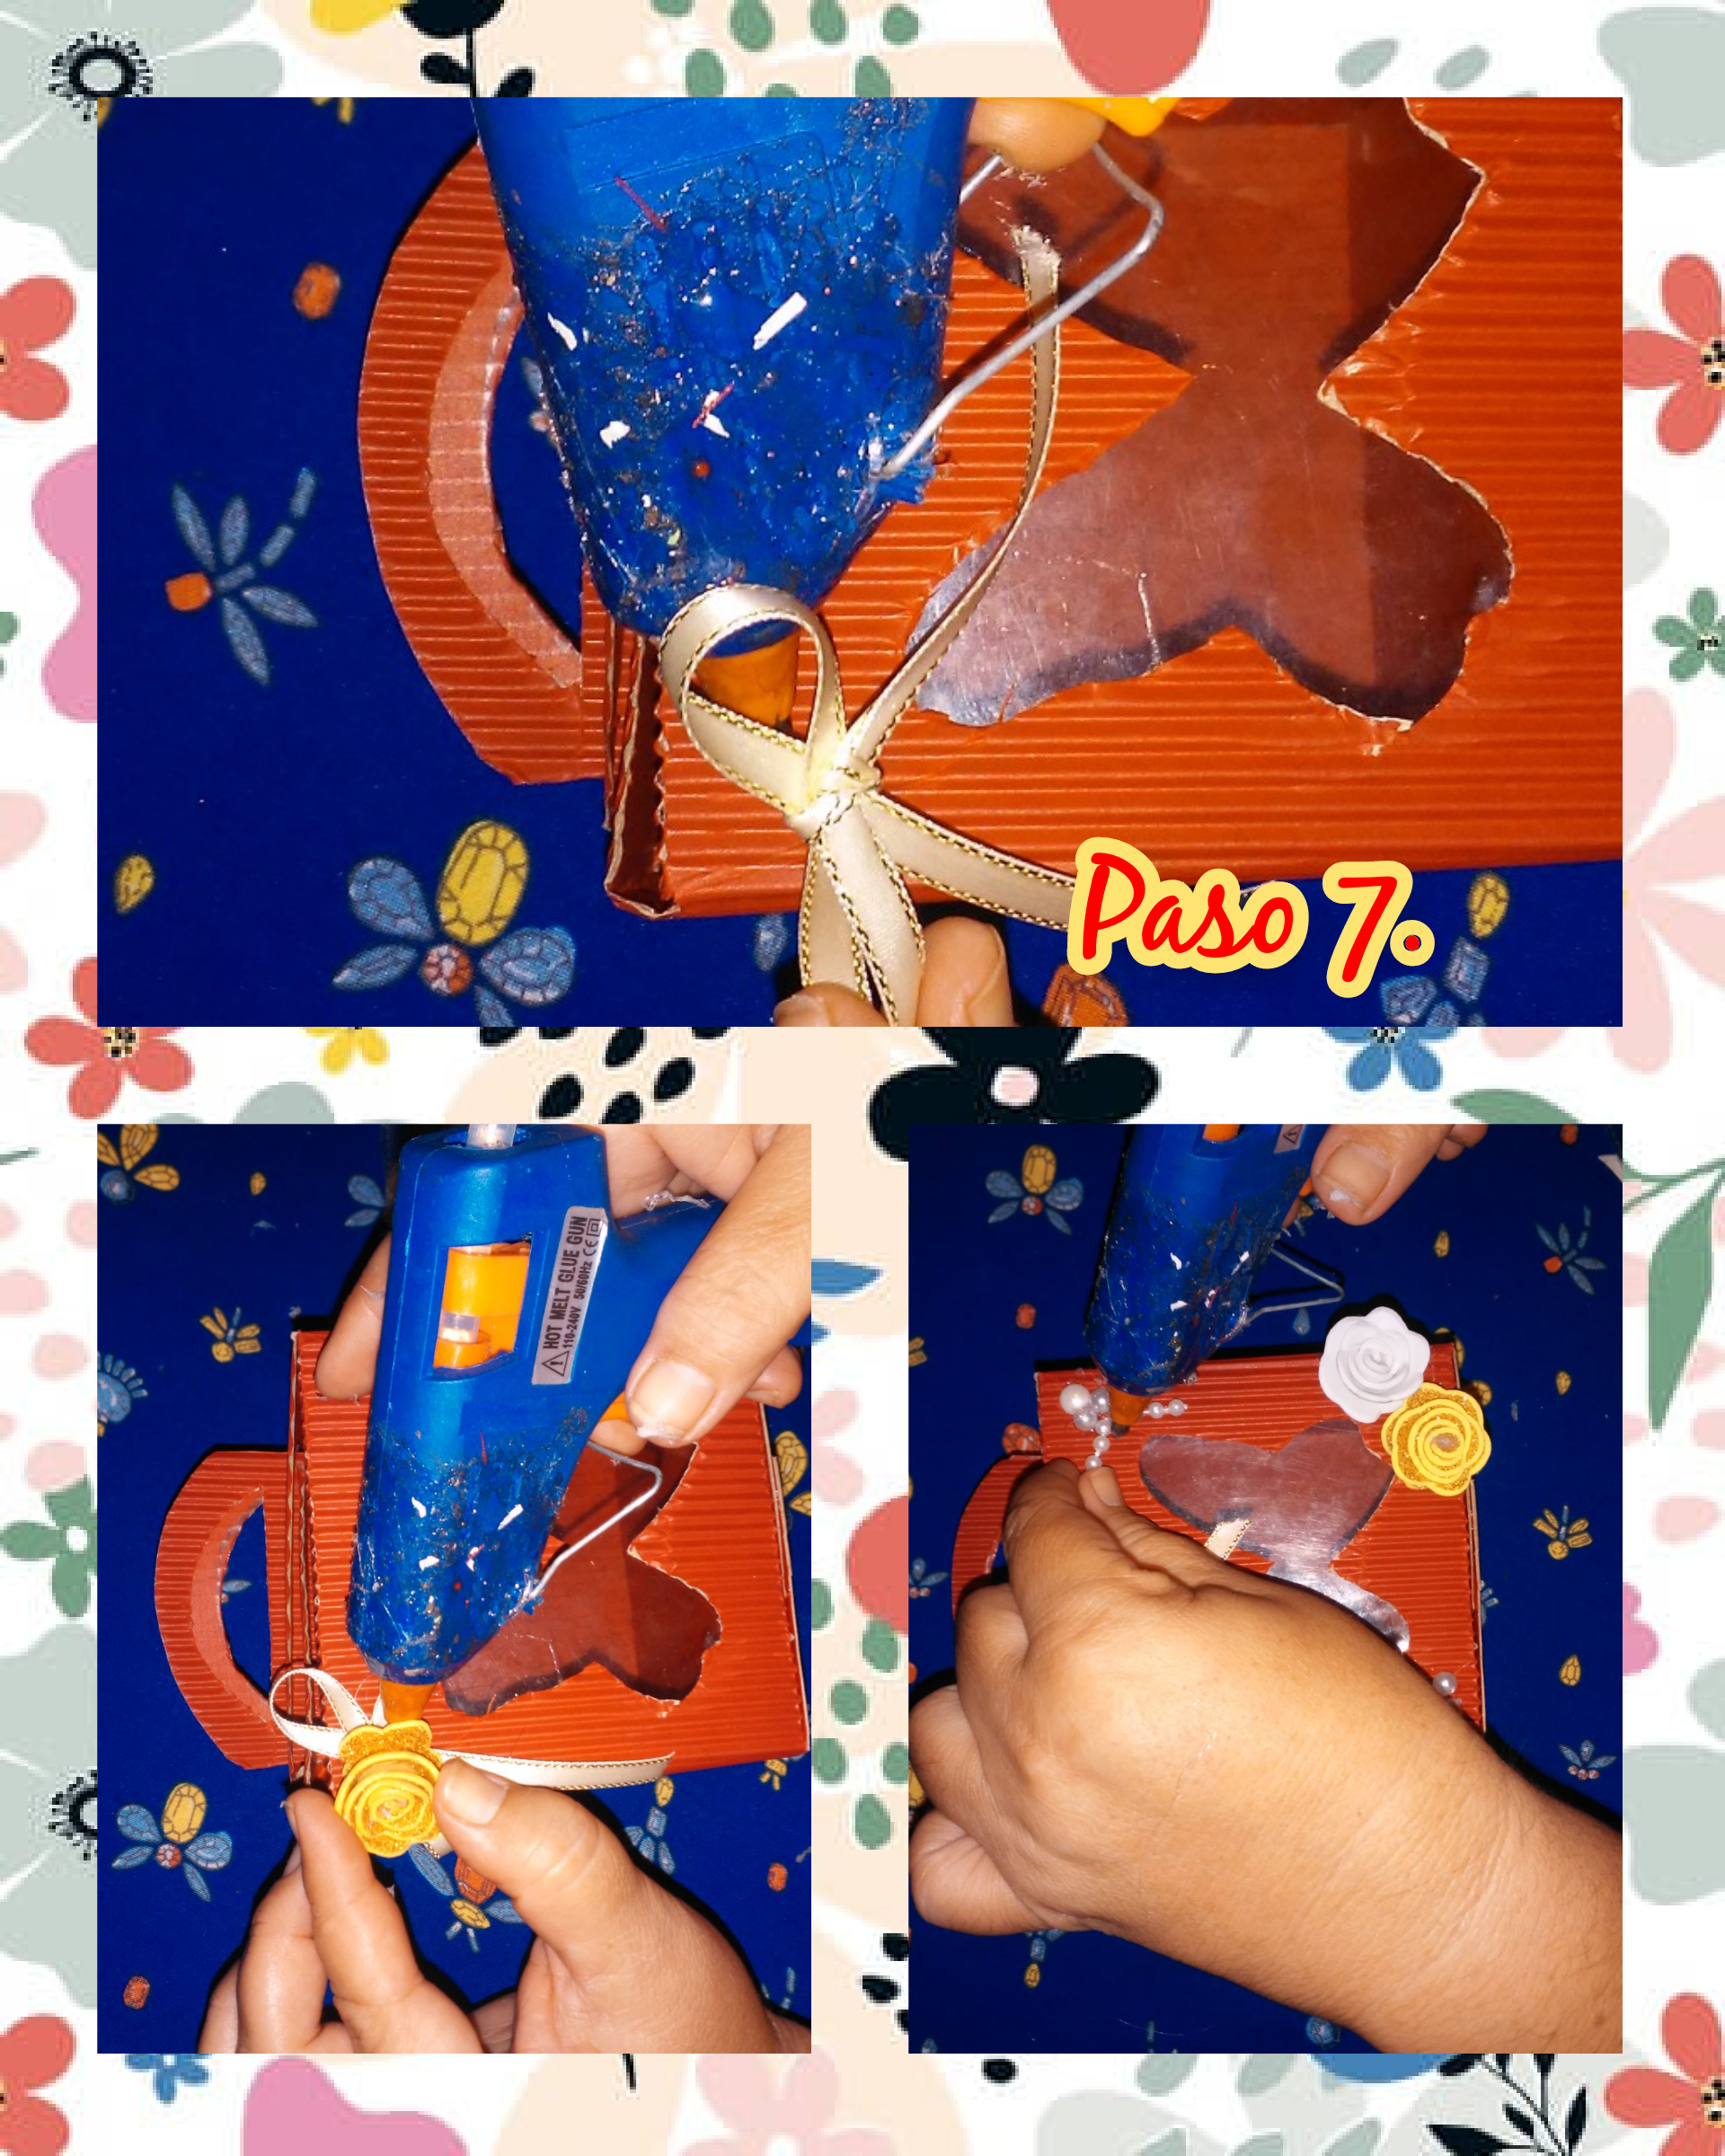
Step 7. Now to finish we begin to decorate the box for gifts, we take a cloth ribbon and make a bow, with hot silicone we paste it in one of the upper corners and we also paste the roses two by two one of the lower corners and the other in the center of the bow, and to finish we continue decorating with running pearls and half pearls and so my gift box is square.
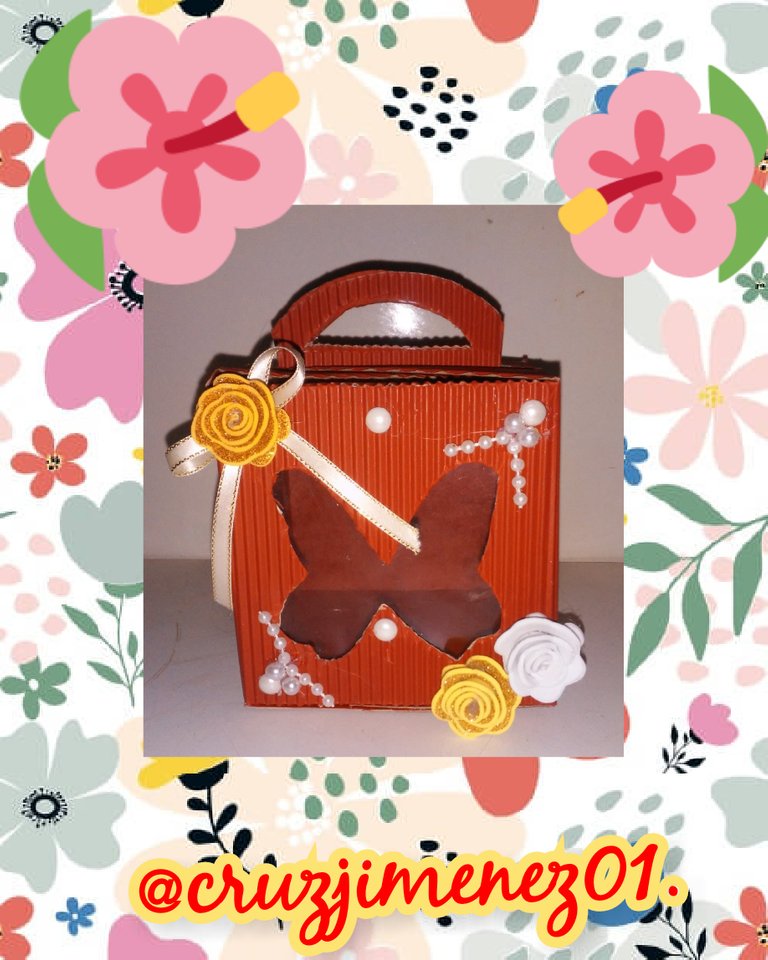
We have reached the end of all the steps and this is the result, a square-shaped gift box, ideal to give to the most important people on special dates. I take this opportunity to invite @sergimarmartinez and @razielmorales to participate in this contest.
Aquí les dejo el link del concurso.
/hive.blog/hive-130560/@hive-130560/contest-design-your-template-and-decorate-to-your-liking-concurso-disena-tu-plantilla-y-decora-a-tu-gusto-espeng
Here is the link to the contest.
/hive.blog/hive-130560/@hive-130560/contest-design-your-template-and-decorate-your-like-contest-design-your-template-and-decorate-your-like- ESPENG
Thanks for watching to the end. Have a good day and many blessings to all.
Las fotos son de mi propiedad y editadas con la aplicación Collage Maker.
Photos are owned by me and edited with Collage Maker app.