Saludos de #hivediy es un gusto saludarlos ✨
Estoy muy feliz de poder compartir con ustedes una nueva manualidad, y más cuando me gusta lo que hago y me ayuda a relajarme.
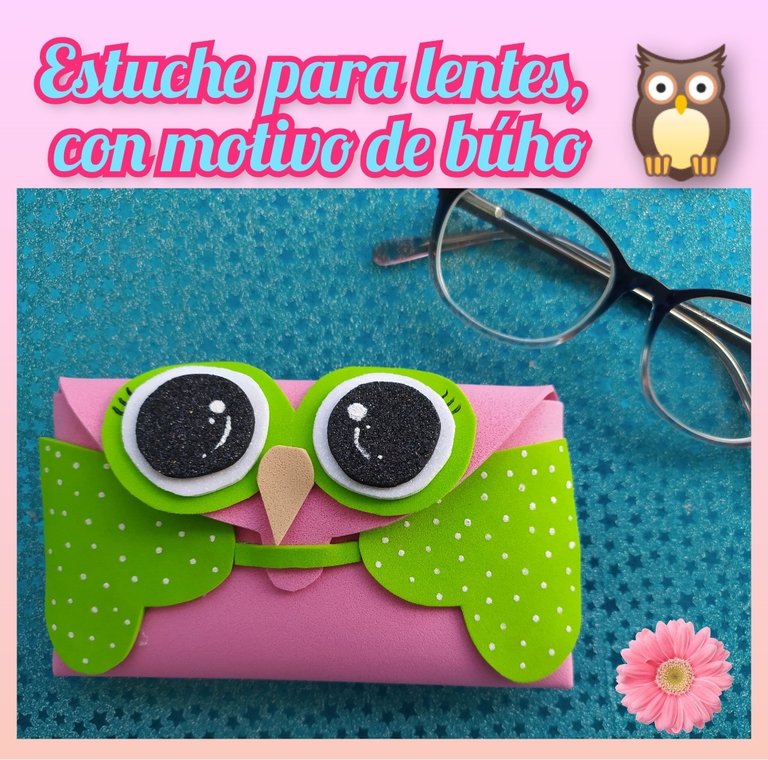
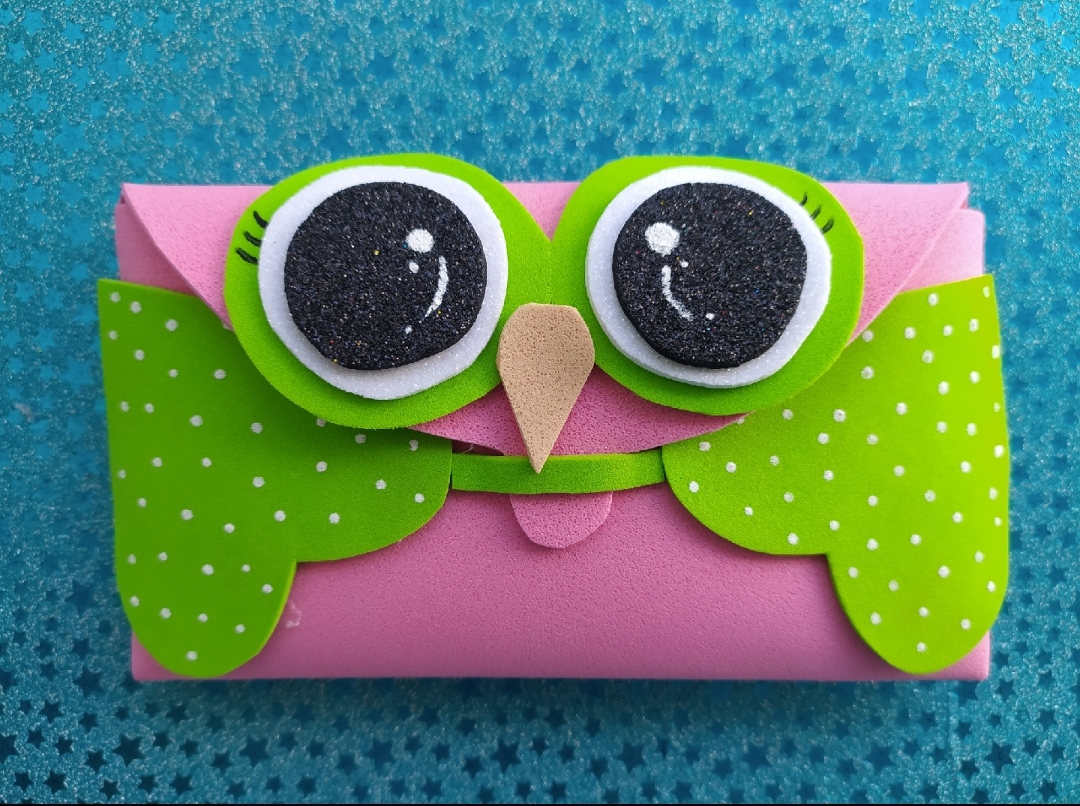
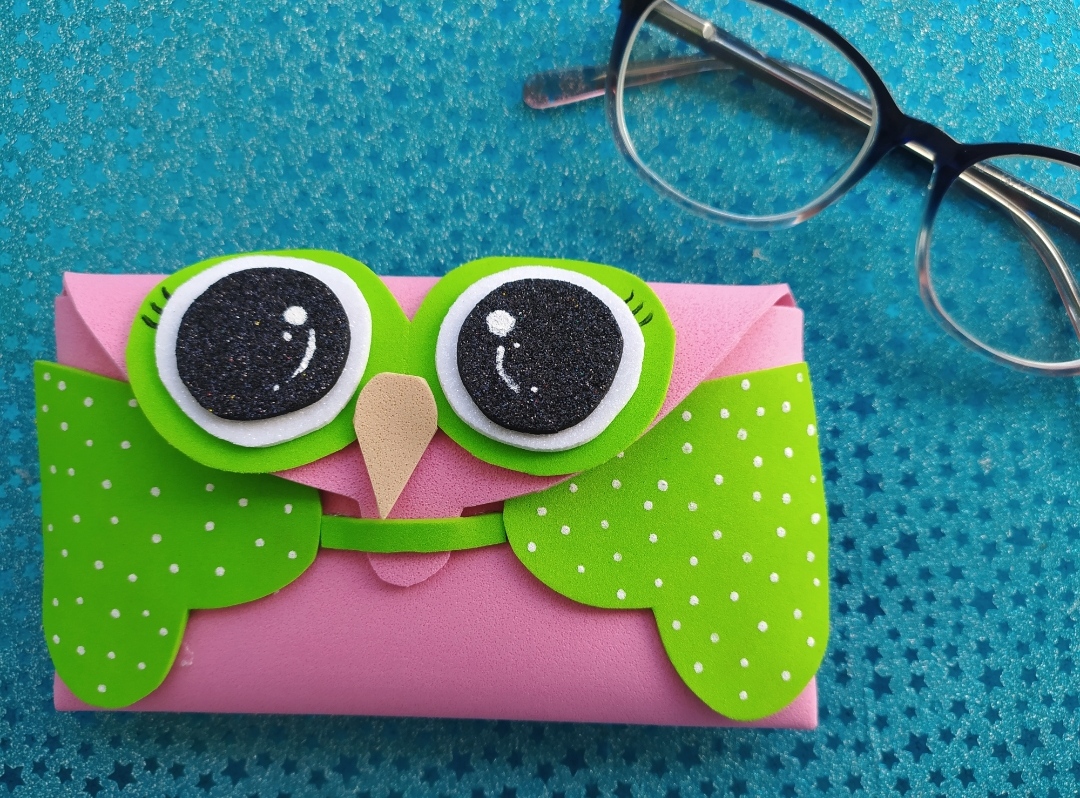
Hoy les traigo el paso a paso , de como elaborar un hermoso estuche para lentes, los cuales son ideales para evitar que estos se rayen o estén extraviados.
I am very happy to be able to share with you a new craft, especially when I like what I do and it helps me to relax.
Today I bring you the step by step, how to make a beautiful case for glasses, which are ideal to prevent them from being scratched or lost.

Para su elaboración utilice
Materiales
- Foamis (rosado,verde, negro,blanco y beis)
- Pintura blanca
- Hija
- Tijera
- Silicón
- Regla
- Lápiz
- Palillo
For its elaboration use
Materials
- Foamis (pink, green, black, white and beige)
- White paint
- Daughter
- Scissors
- Silicone
- Ruler
- Pencil
- Stick

Procedimientos| Procedures
Para comenzar, realizamos en la hoja blanca un rectángulo de 24 cm × 20 cm, y a este le hacemos una pestaña de 8× 1 cm y recortamos. Luego en el extremo más angosto, hacemos la forma de medio arco con un sobrante en el centro. Así tendremos el patrón.
To begin, we make a rectangle of 24 cm × 20 cm on the white sheet, and we make a flange of 8× 1 cm and cut it out. Then at the narrowest end, we make the shape of a half arc with an excess in the center. This way we will have the pattern.
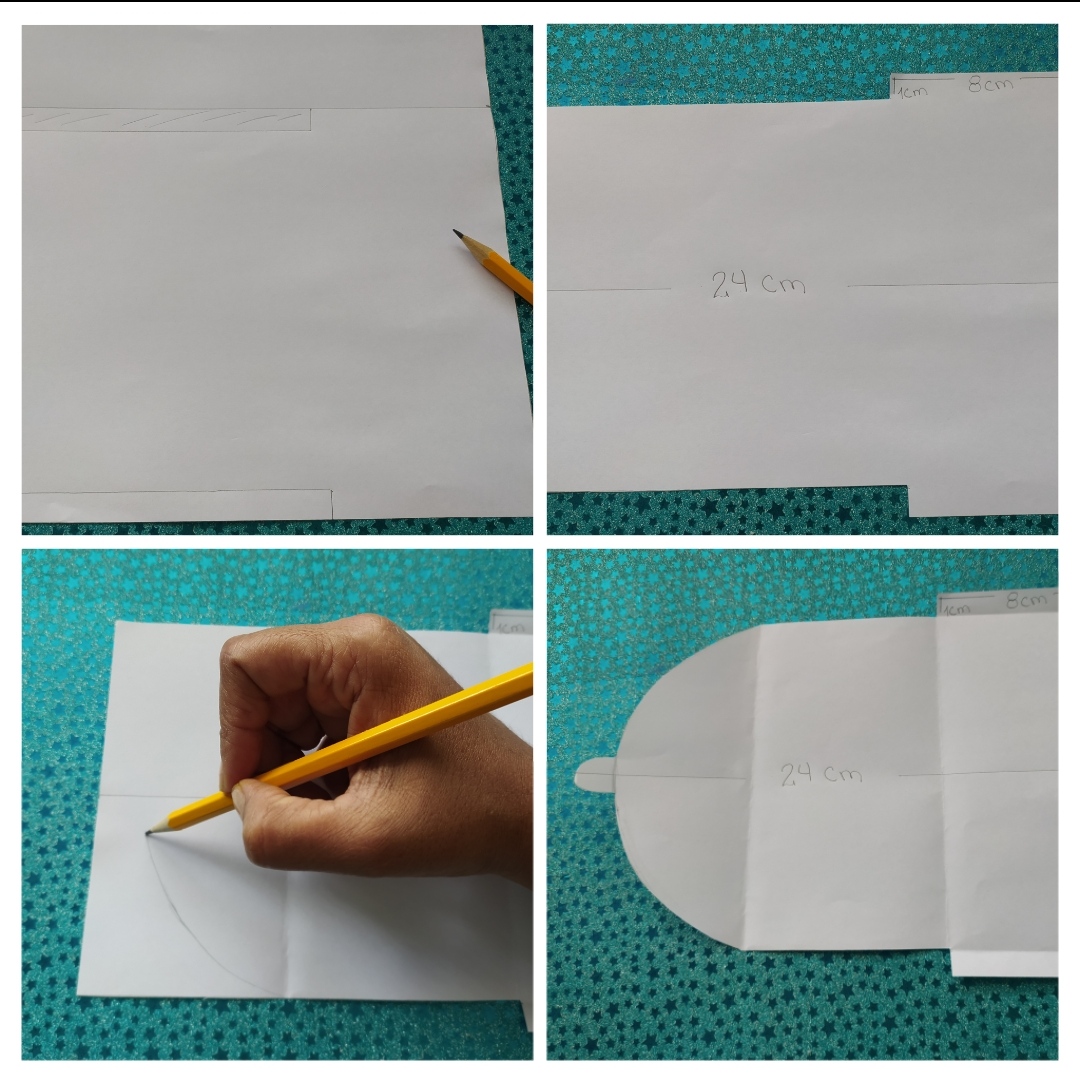
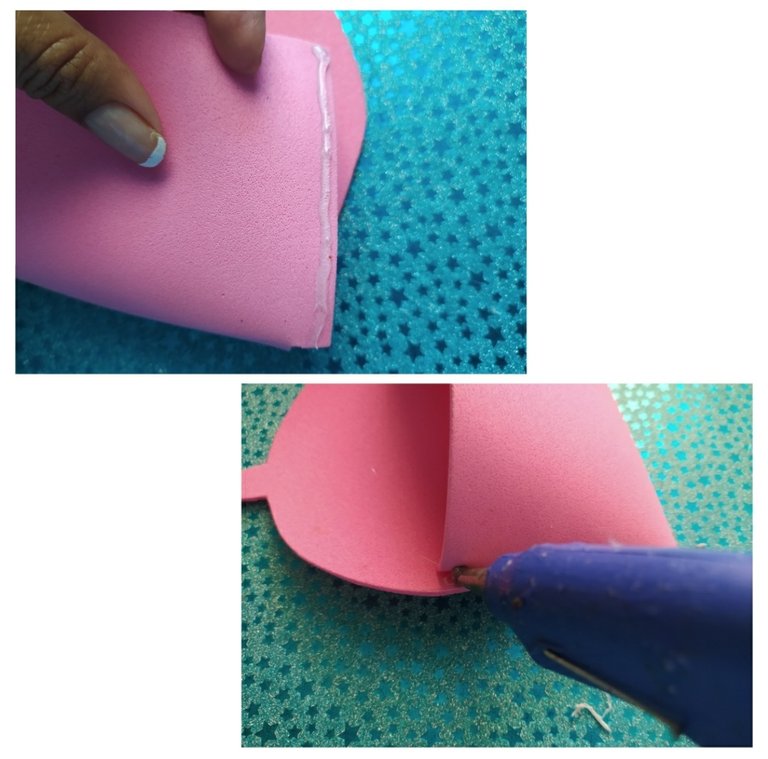
Seguidamente marcamos el patrón en el foami rosado y recortamos.
Then we mark the pattern on the pink foami and cut it out.

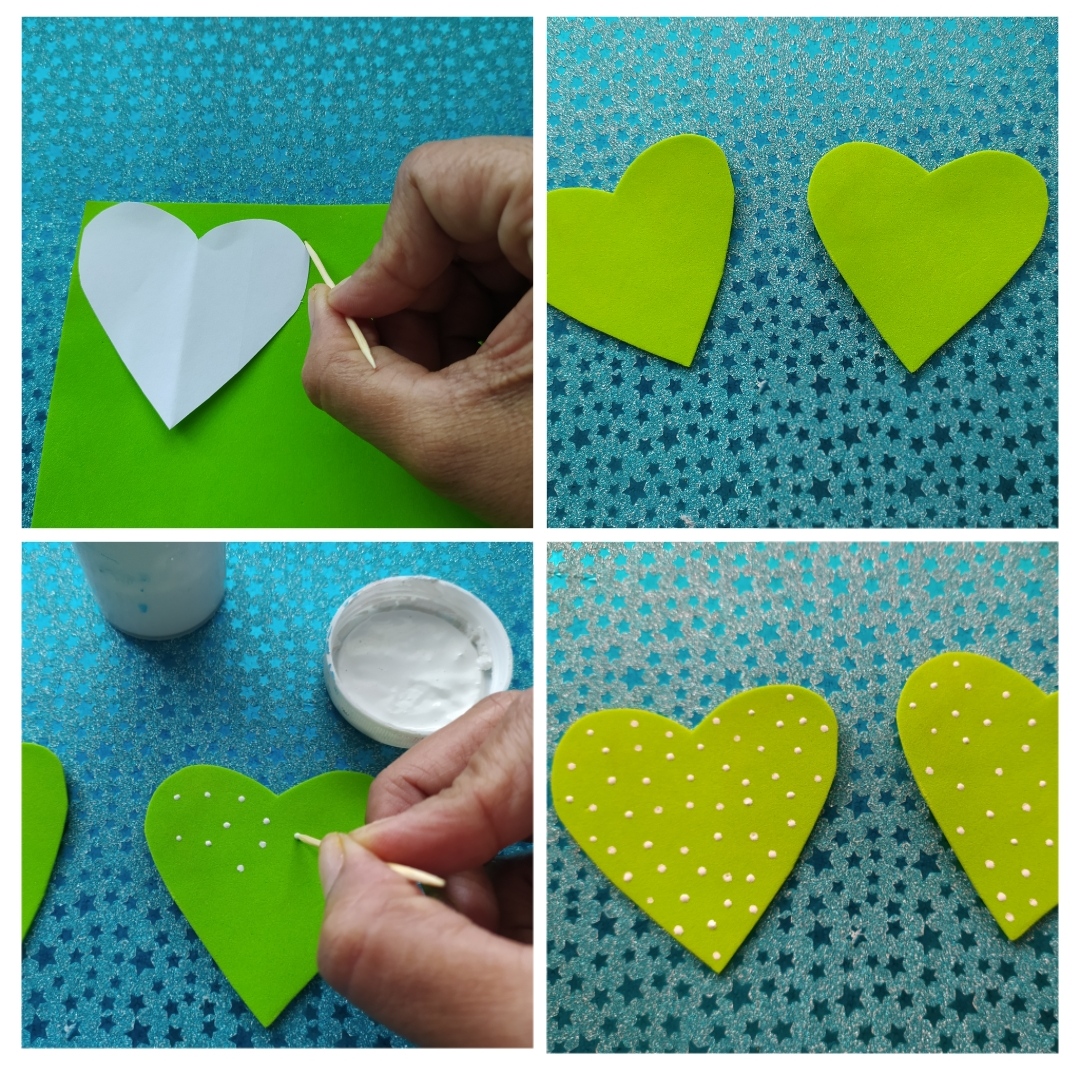
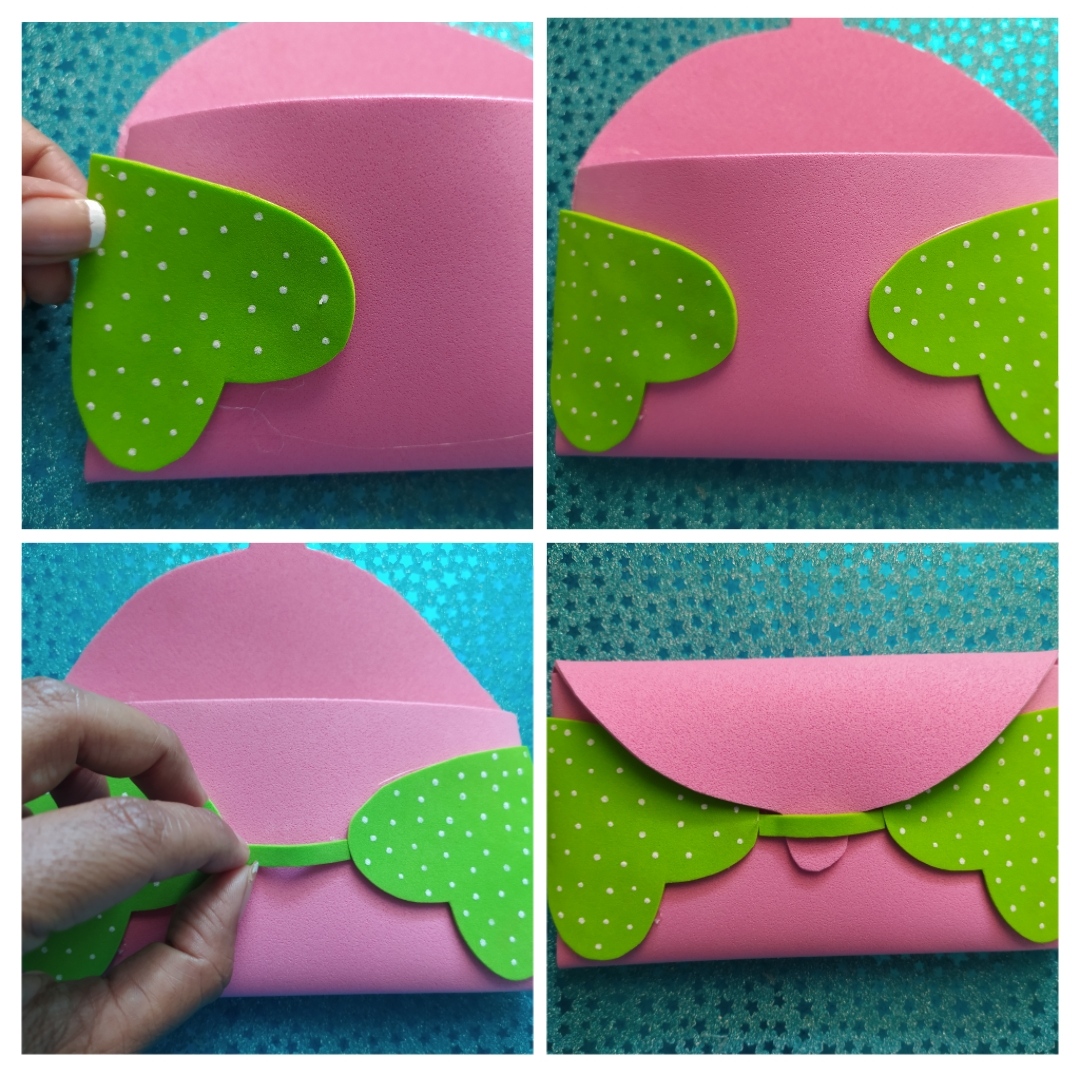
Para continuar, En el foami verde marcamos dos corazones de aproximadamente 5 cm de alto, recortamos y le hacemos unos puntitos con pintura blanca
To continue, we mark two hearts of approximately 5 cm high on the green foami, cut them out and make some dots with white paint.
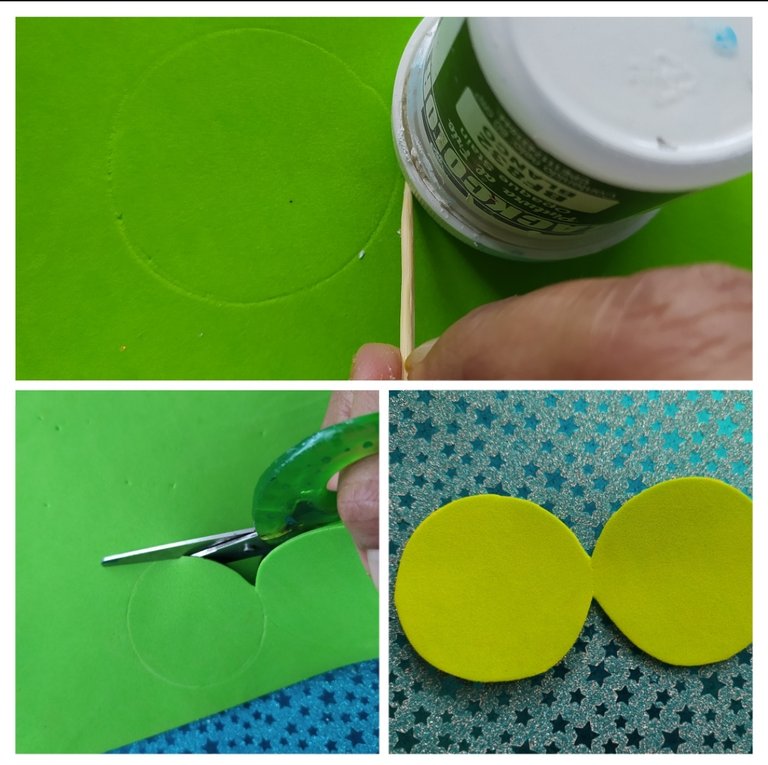
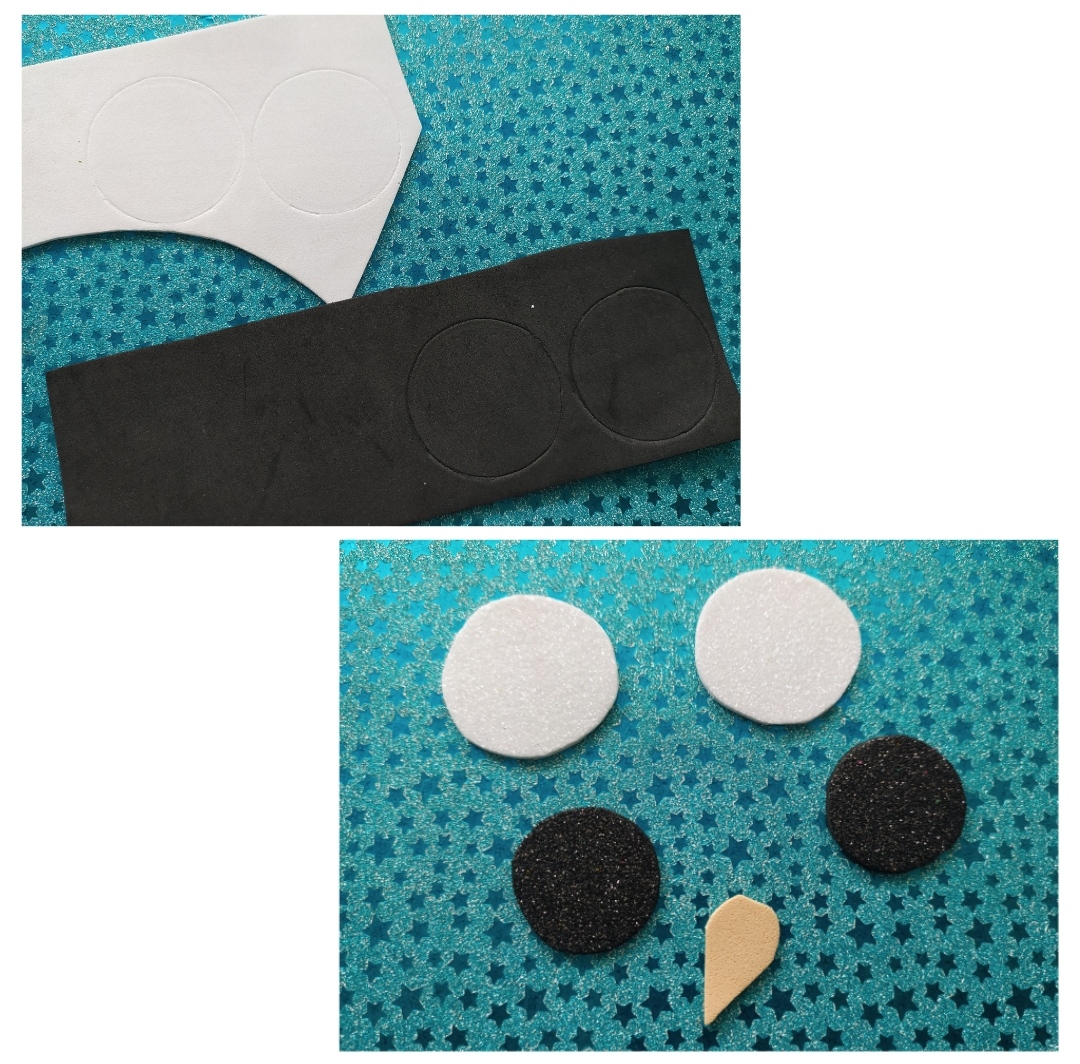
Luego, marcamos dos círculos de 3cm de diámetros (deben estar pegados) y lo recortamos sin separar la unión entre ellos.
Then, we mark two circles of 3cm in diameter (they must be glued together) and cut them out without separating the joint between them.
En el foami blanco marcamos dos círculos más pequeños que el anterior y en el negro dos círculos más pequeños que los blancos. Además en el foami beis, marcamos y recortamos lo que será el pico del búho.
On the white foami we mark two circles smaller than the previous one and on the black one we mark two circles smaller than the white ones. In addition, on the beige foami, we mark and cut out what will be the owl’s beak.
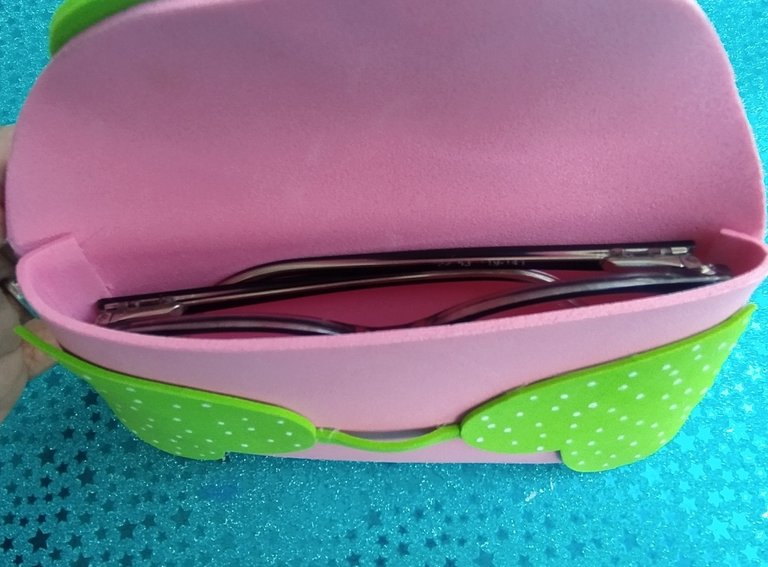
Una vez listo todas las piezas. Doblamos lo que será el estuche, a la medida por dónde está la pestaña de 8cm y se pega la misma.
Once all the pieces are ready. We fold what will be the case, to the measure where the 8cm stinker is and glue it.
Seguidamente pegamos los corazones verdes, de forma invertida, en parte frontal del estuche que acabamos de pegar y en medio de ellos, pegamos un trozo de foami verde, dejando un pequeño espacio en el centro, sin pega, esto nos servirá para sujetar la tapa del estuche.
Then we glue the green hearts, inverted, on the front of the case we just glued and in the middle of them, we glue a piece of green foami, leaving a small space in the center, without glue, this will serve to hold the lid of the case.
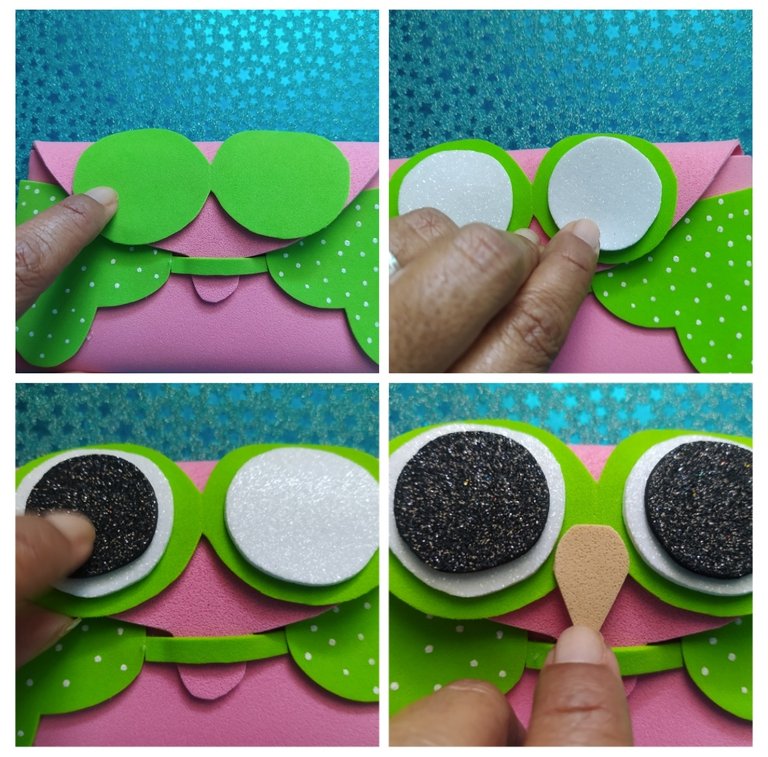
Luego, en la parte de la tapa de estuche, pegamos los círculos verdes que están unidos y sobre ellos los blancos y los negros. Finalmente colocamos el pico del búho
Then, in the part of the case lid, we glue the green circles that are joined together and on them the black and white circles. Finally we place the owl’s beak.
Así quedó| This is how it turned out
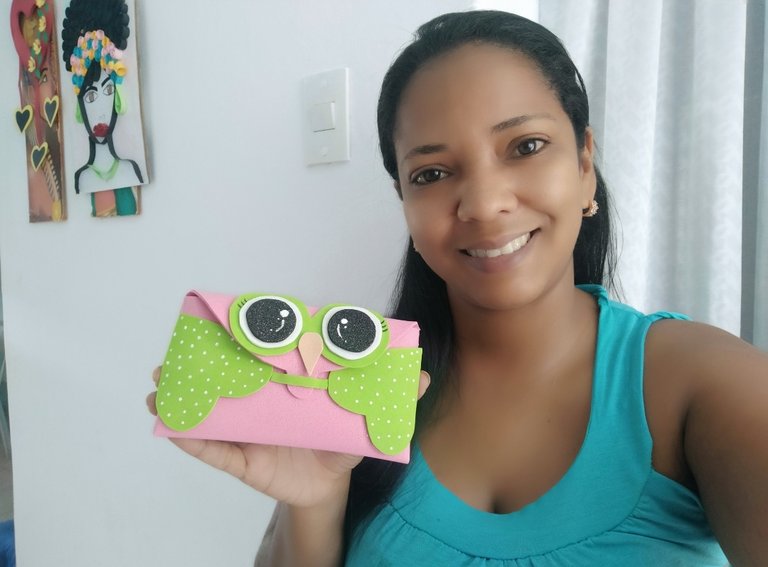
Amigos, estoy muy agradecida con todos los que toman un momento de su tiempo para apoyarme 💞, les deseo mucho éxito y bendiciones en su vida 🙏.
Friends, I am so grateful to all of you who take a moment of your time to support me 💞, I wish you much success and blessings in your life 🙏.

Las imágenes son de mi autoría, tomadas desde mi redmi note 8.
Edición de fotos: Collage Maker y picsart
All photos are authored, taken from my redmi note 8.
Photo editing: Collage Maker and picsart