Saludos de #hivediy es un gusto saludarlos ✨
Amigos , una vez más me he animado a realizar una linda manualidad y así poder mostrarle el paso a paso.
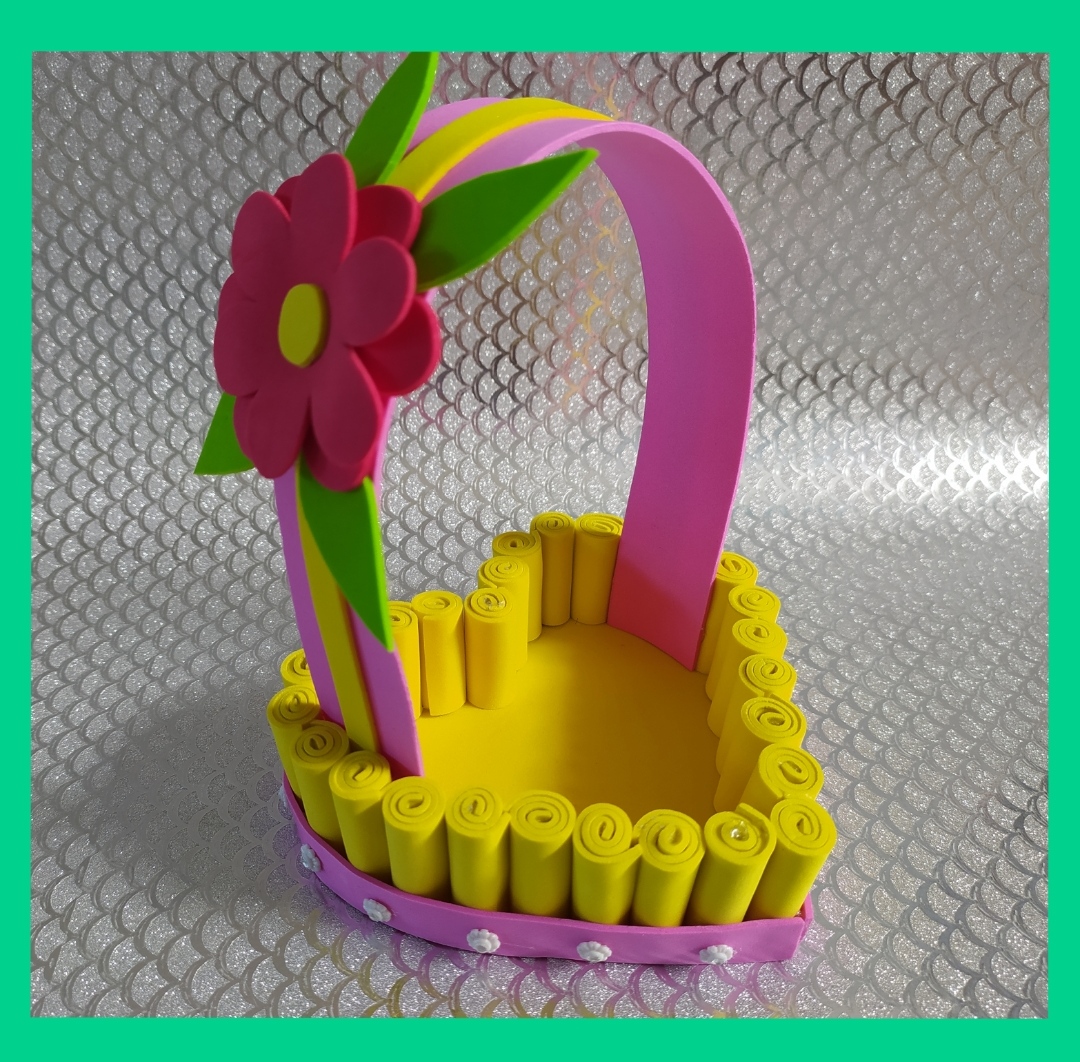
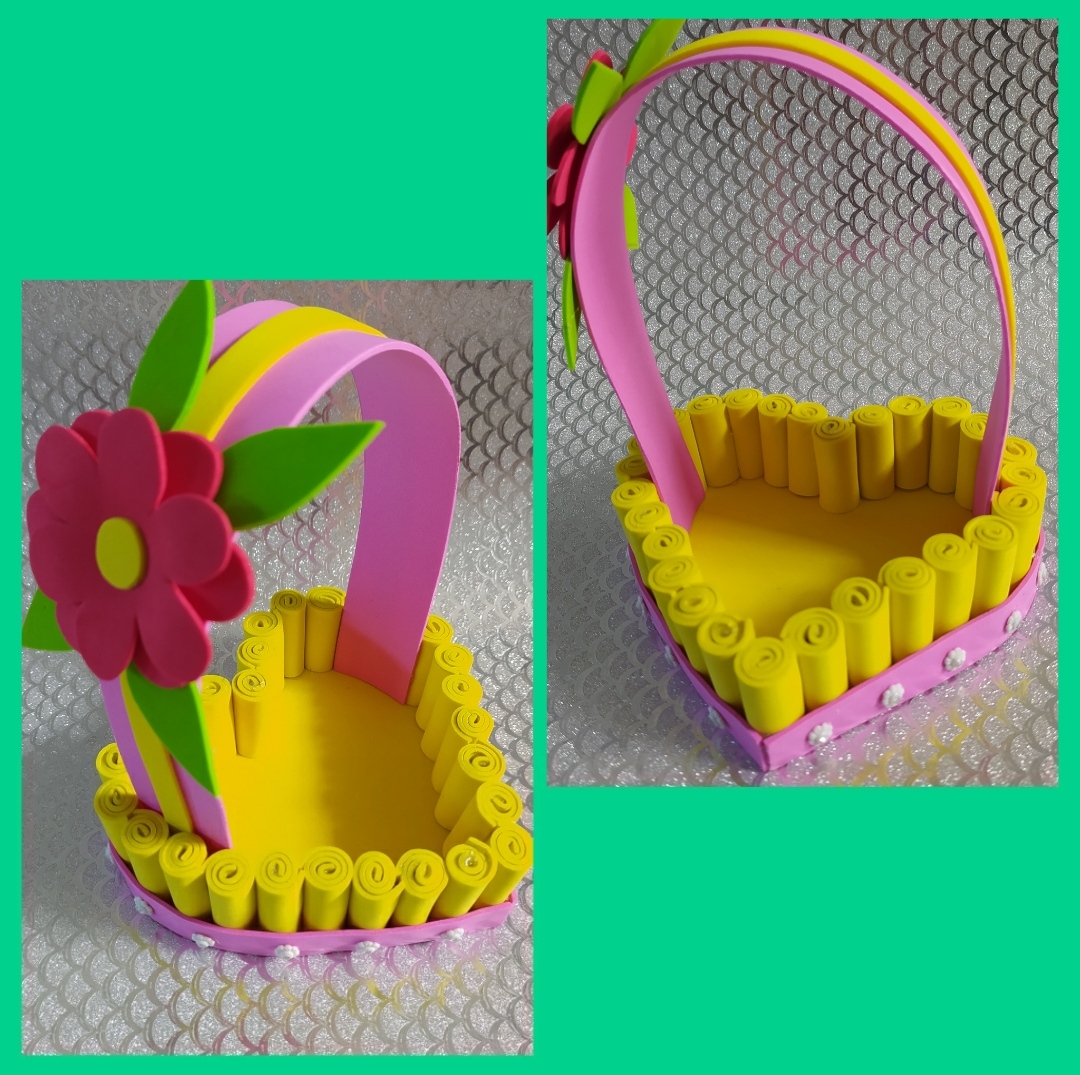
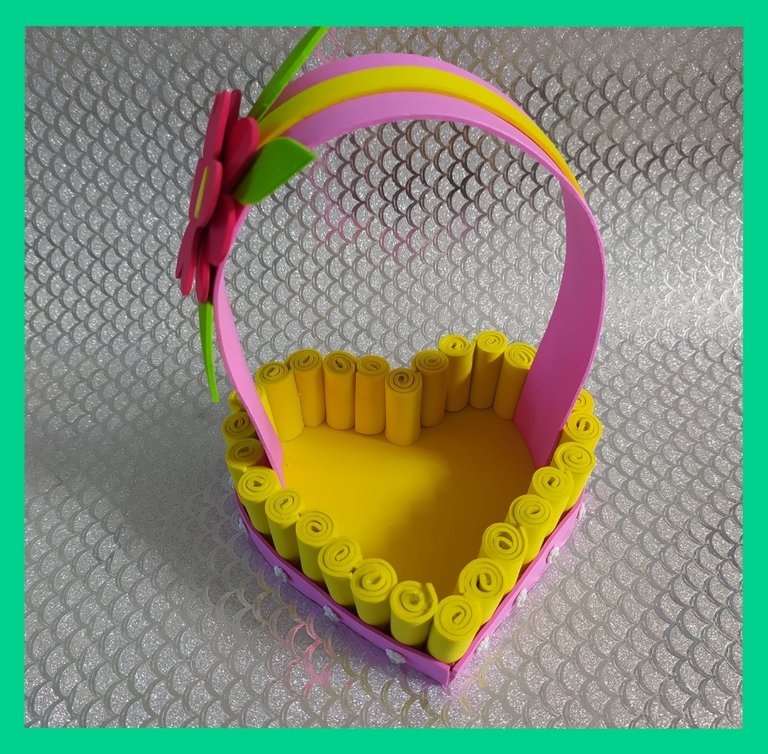
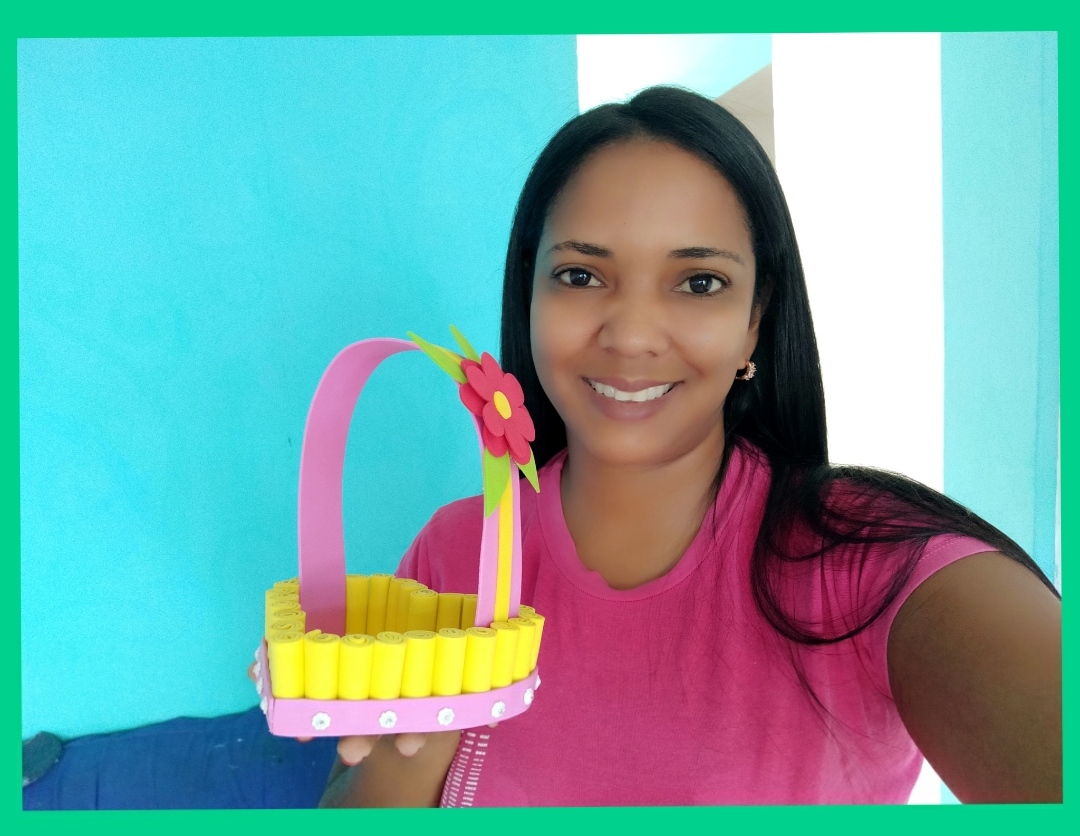
En esta ocasión realicé una linda cesta en foami, con forma de corazón, la cual es ideal para regalar como dulcero, utilizarla como organizador y simplemente para decorar nuestra habitación.
Friends, once again I have been encouraged to make a nice craft and so I can show you the step by step.
This time I made a cute heart-shaped basket in foami, which is ideal to give as a gift as a candy box, use it as an organizer and simply to decorate our room.
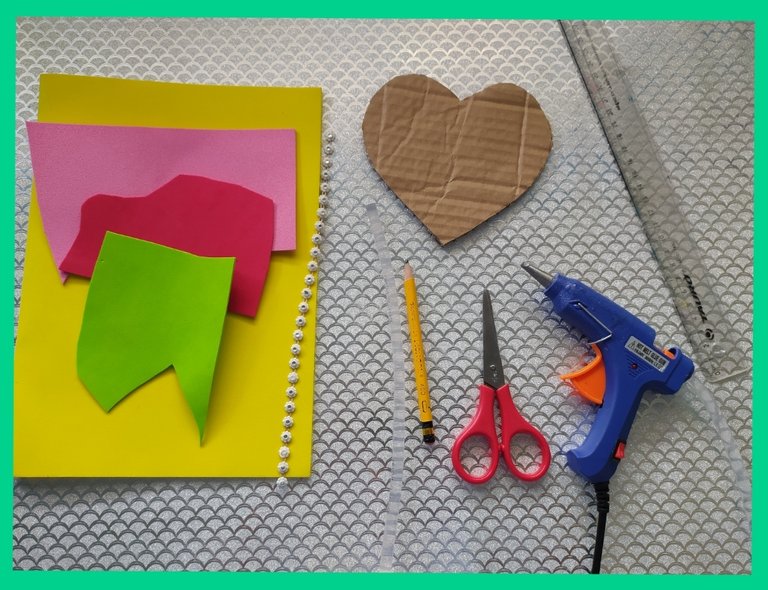
Para su elaboración utilice
Materiales
- Foamis (amarillo, rosado, verde y rojo)
- Silicón
- Tijera
- Pasamanería
- Lápiz
- Regla
- Corazón de cartón (15× 11cm)
- Pasamanería
For its elaboration use
Materials
- Foamis (yellow, pink, green and red)
- Silicone
- Scissors
- Trimmings
- Pencil
- Ruler
- Cardboard heart
- Trimmings
Procedimientos| Procedures
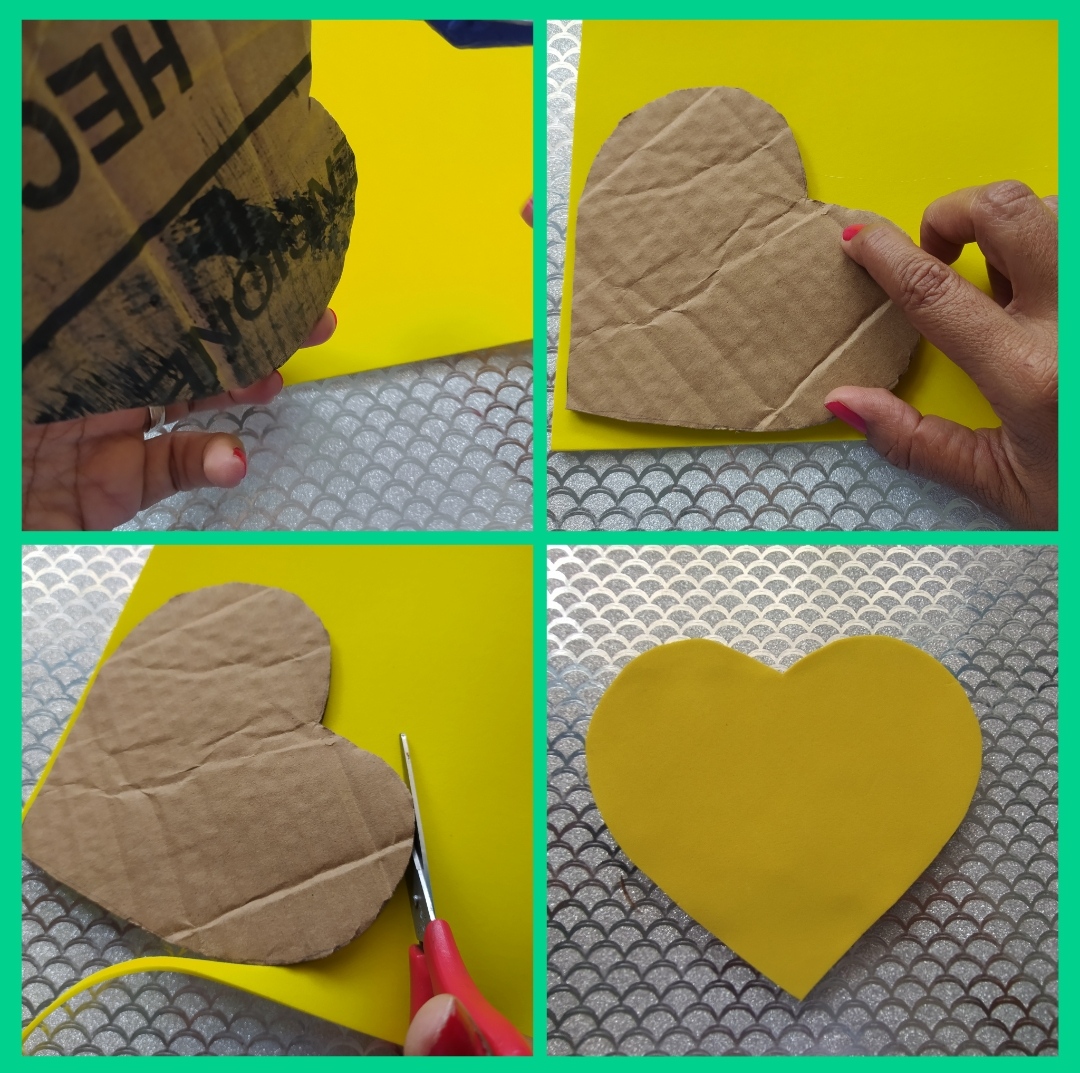
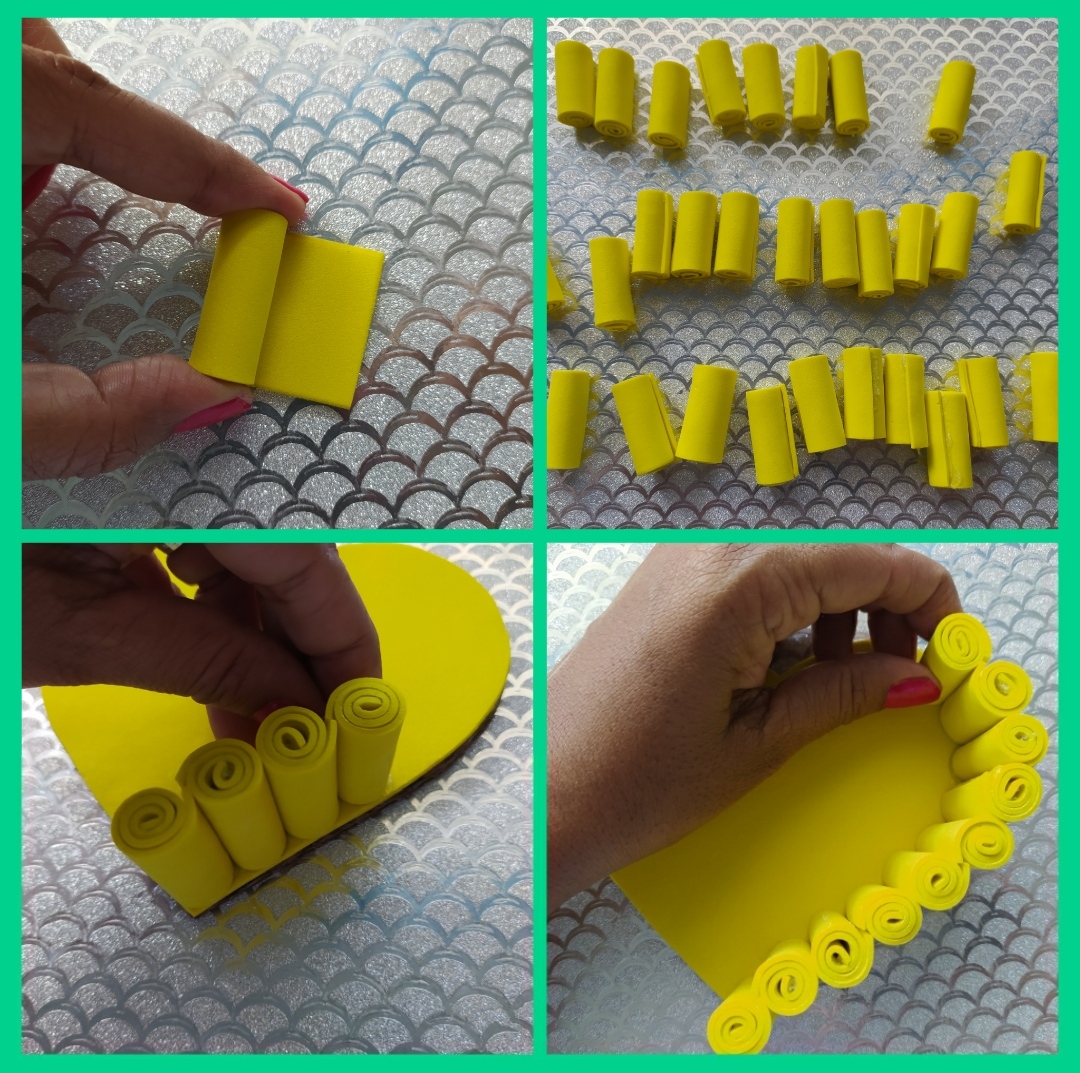
Para comenzar, pegamos uno de los lados del corazón de cartón, en el foami amarillo y recortamos.
To begin, we glue one of the sides of the cardboard heart on the yellow foami and cut it out.
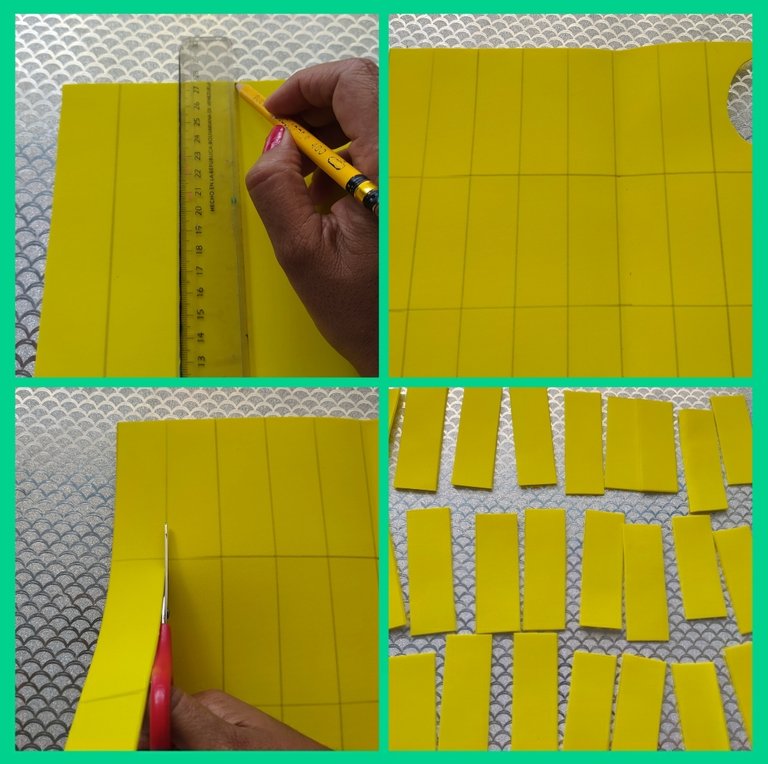
Seguidamente, marcamos y cortamos 26 rectángulos de foami amarillo, de 9× 3 cm.
Next, we mark and cut 26 rectangles of yellow foami, measuring 9× 3 cm.
Una vez tengamos los rectángulos, hacemos unos rollitos y lo pegamos por toda la orilla del corazón.
Once we have the rectangles, we make some rolls and glue them around the edge of the heart.
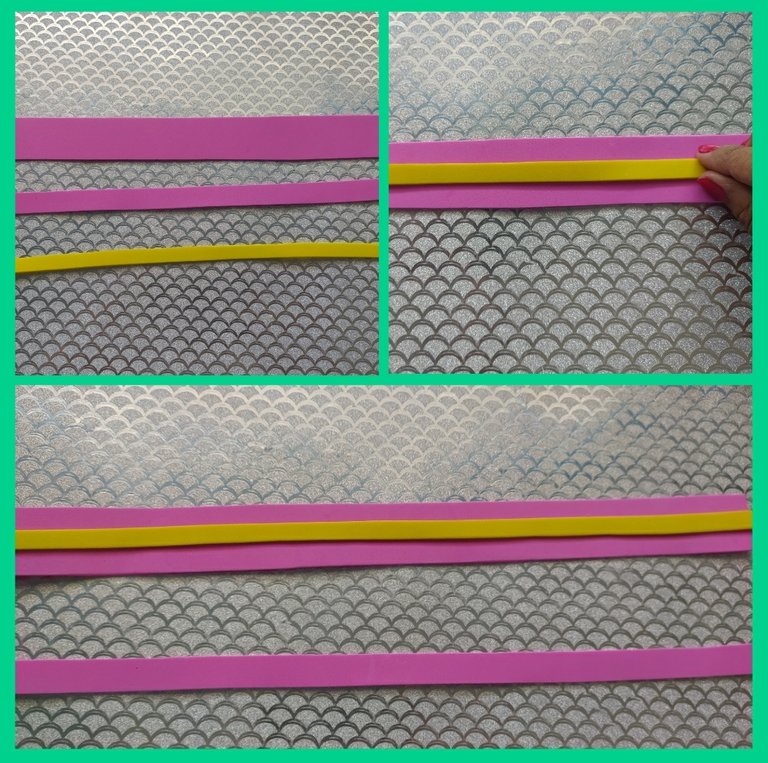
Luego cortamos dos tiras del foami rosado una de 1.5 cm × 35cm y la otra de 3cm× 35 cm. Además cortamos una en el foami amarillo de 1 cm× 35cm, está la pegaremos en el centro de la rosada más gruesa.
Then we cut two strips from the pink foami, one of 1.5 cm x 35 cm and the other of 3 cm x 35 cm. We also cut one in the yellow foami of 1 cm× 35cm, we will glue it in the center of the thicker pink one.
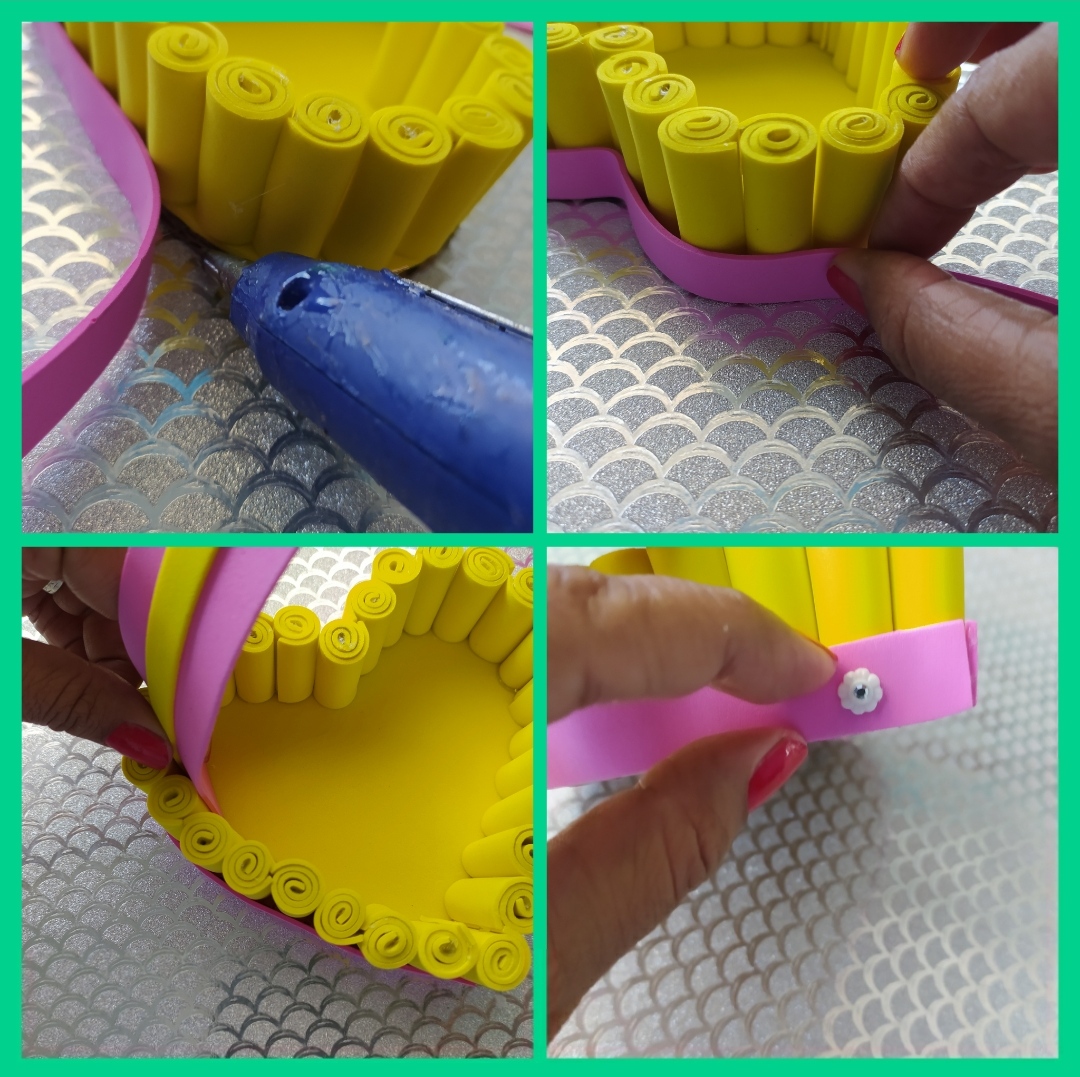
A continuación, pegamos en la parte inferior de la cesta, la cinta rosada más delgada y la más gruesa la pegamos estilo un asa. Ahora, le agregamos unos detalles en la parte inferior de la cesta, con unos apliques de pasamanería.
Next, we glue the thinner pink ribbon to the bottom of the basket, and the thicker one we glue a handle style. Now, we add some details at the bottom of the basket, with some trimmings.
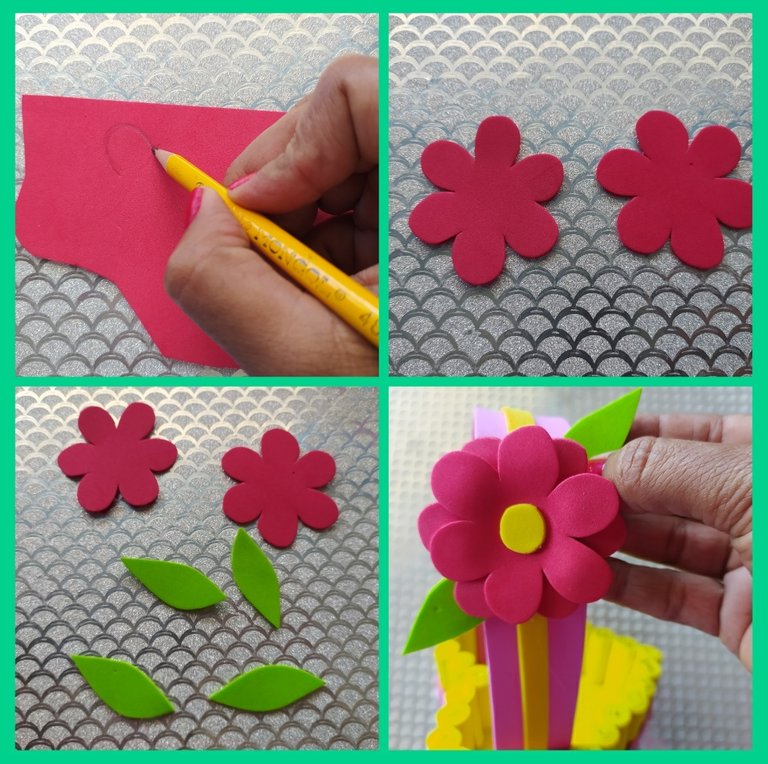
Finalmente, dibujamos unas flores y hojas y la pegamos en el asa de la cesta.
Finally, we draw some flowers and leaves and glue them to the handle of the basket.
Así quedó| This is how it turned out

Amigos, estoy muy agradecida con todos los que toman un momento de su tiempo para apoyarme 💞, les deseo mucho éxito y bendiciones en su vida 🙏.
Friends, I am so grateful to all of you who take a moment of your time to support me 💞, I wish you much success and blessings in your life 🙏.

Las imágenes son de mi autoría, tomadas desde mi redmi note 8.
Edición de fotos: Collage Maker y picsart
All photos are authored, taken from my redmi note 8.
Photo editing: Collage Maker and picsart