Español.
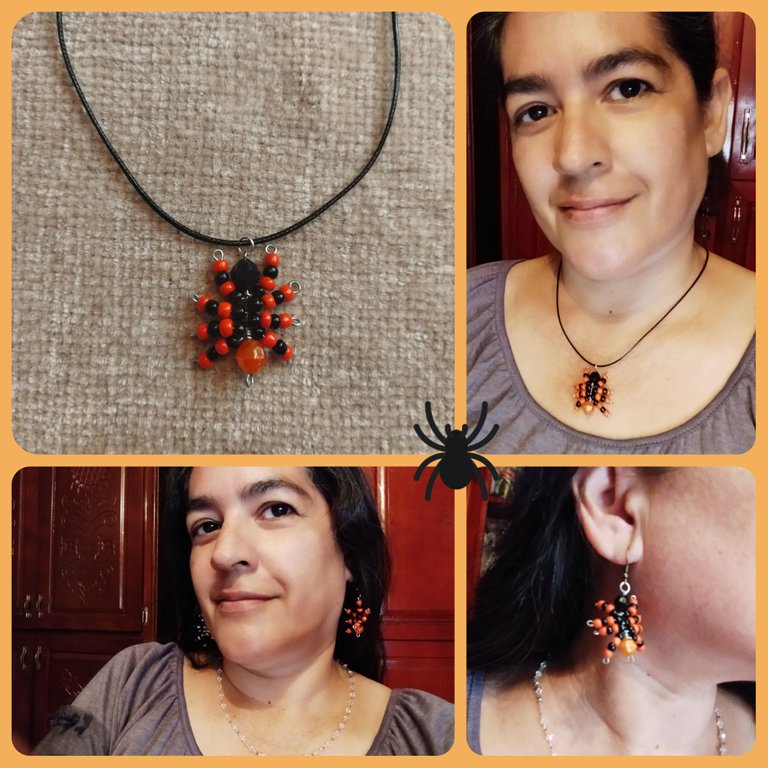
Hola mis amores. Deseo que estén muy bien hoy. Como pueden observar en la miniatura ya me atreví a realizar un accesorio dedicado al día de Halloween 🕷️ Luego de ver sus creaciones me animé a inventar algo sencillo ya que es la primera vez que hago un diseño en alambre para celebrar este día. No me ha quedado perfecto. No todo sale siempre como lo imagino, pero disfruté mucho el proceso y ya sé cómo mejorarlos.
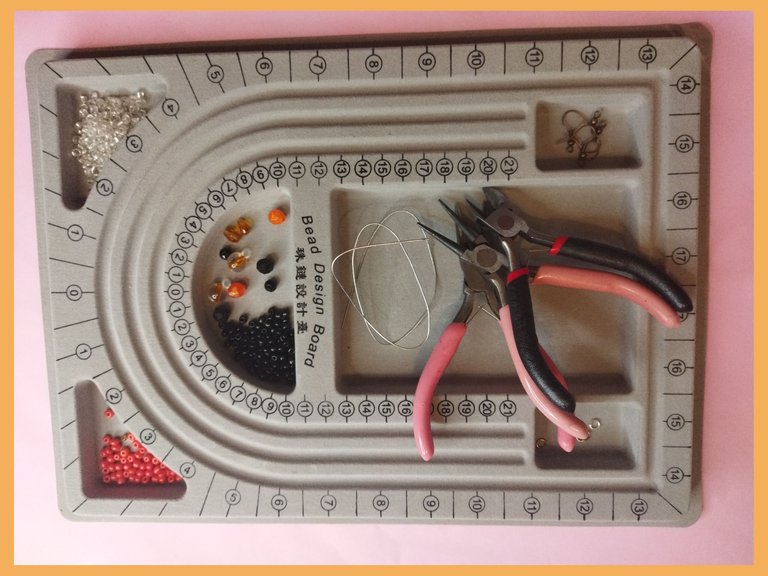
Sobre mi tabla de diseño he colocado algunos materiales para ir tomando inspiración. Aunque no lo crean esta técnica me ha funcionado. Mirando lo que hay allí surgió la idea de mi creación. Les he dicho que creo a partir de los materiales disponibles, si se me ocurre hacer algo y no tengo los materiales pues rápidamente elimino la opción y hago los respectivos cambios. Me gusta ejecutar los proyectos al momento. Claro, sí hay muchos que deben planificarse y hay que salir a comprar insumos. Acá pueden ver las pinzas de bisutería, alambres, anzuelos, aros, mostacillas y abalorios negros y anaranjados.
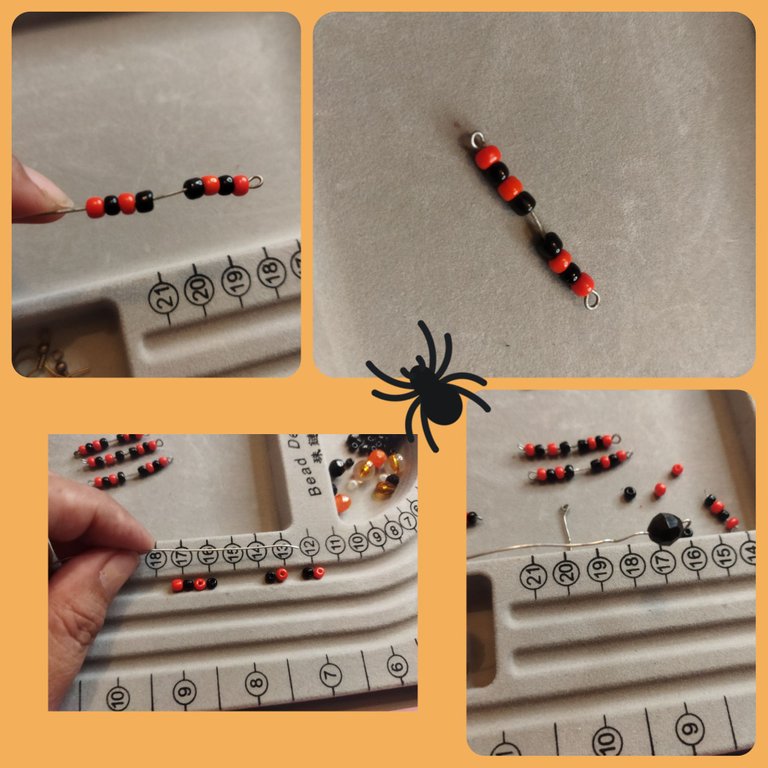
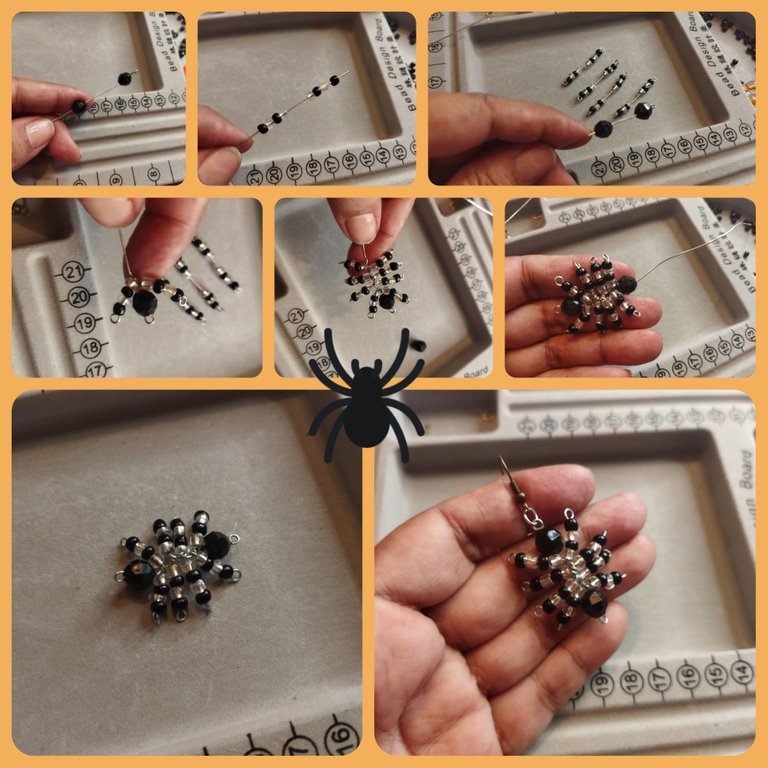
🕷️ Empecé realizando las cuatro patas de la araña. Para ello tomé un trozo de alambre de 6 cm. En uno de los extremos realicé el aro. Luego empecé a meter las mostacillas siguiendo un orden predeterminado. En el alambre deben haber dos grupos de mostacillas con un espacio de 1 cm de separación. Al terminar de meter las 4 mostacillas de cada lado realicé el otro aro. Así mismo hice las otras tres.
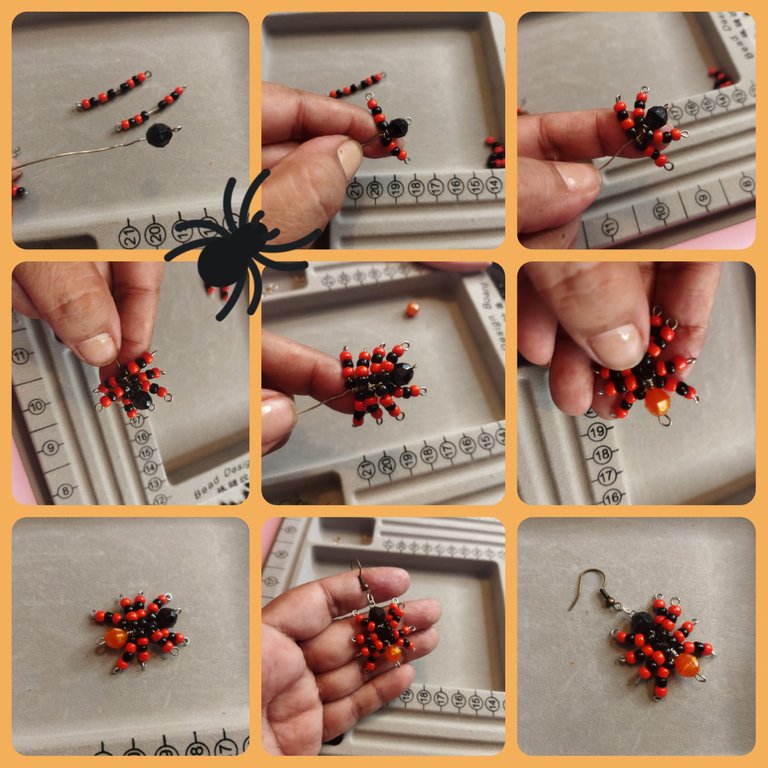
🕷️ Tomando otro trocito de alambre de 8 cm empecé a realizar el cuerpo de la araña. Para ello metí un abalorio negro por un extremo y enseguida hice la argolla. A continuación fui colocando cada una de las patas. Separé ambos grupos de mostacillas y con el alambre libre enrollé en el alambre del cuerpo, solo di dos vueltas bien apretadas. Del mismo modo se colocan las otras tres patas. Al estar bien apretadas le di la forma a cada una. Para finalizar metí el abalorio anaranjado, realicé una argolla y listo.
🕷️ Es la primera araña que hago con alambre. No me parece difícil, sin embargo en un próxima ocasión usaré alambre número 22 para hacer las patas. Este accesorio puede lucirse como lindos zarcillos o en un bonito collar.
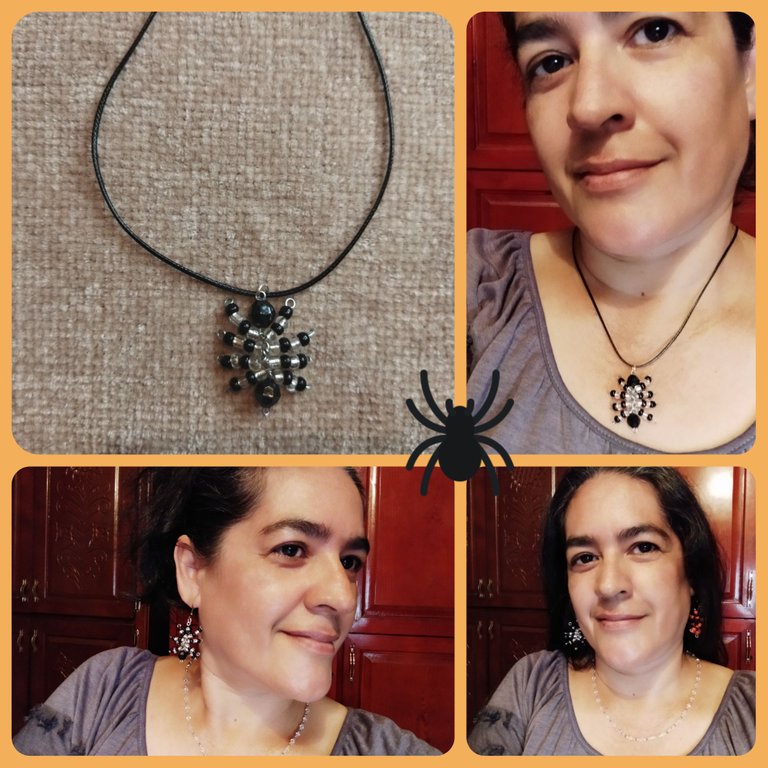
🕷️ Buscando la manera de mejorar el diseño realicé otro igual variando los colores. Para esta nuestra usé mostacillas transparentes y negras. Los abalorios para la cabeza y el cuerpo son negros. Siguiendo los mismos pasos para la anterior creé una araña muy extraña, pero me gustó mucho. Lo mejor de estos días es que podemos jugar con la imaginación y hacer los accesorios lo más llamativos y terroríficos posibles.
🕷️ Estuve un largo rato pensando qué hacer y cómo hacerlo 🙄 me encantó tomarme mi tiempo. Además mi hijo se encargó de preparar la merienda y no tuve que hacer pausa en la labor. Estoy contenta con el resultado. ¡Creo que me da tiempo inventar algo más! ¿No creen?
Todas las fotos donde mi propiedad. Edité con InShot. Usé el traductor de DeepL. Muchas gracias por pasar por aquí. Vuelve pronto. Bendiciones 🤗
English.

Hello my loves. I wish you all well today. As you can see in the thumbnail I already dared to make an accessory dedicated to Halloween 🕷️ After seeing your creations I was encouraged to invent something simple as it is the first time I make a design in wire to celebrate this day. It didn't turn out perfect for me. Not everything always comes out the way I imagine, but I really enjoyed the process and I already know how to improve them.
On my design board I have placed some materials to go taking inspiration. Believe it or not this technique has worked for me. Looking at what's there gave me the idea for my creation. I have told you that I create from the materials available, if I think of doing something and I don't have the materials, I quickly eliminate the option and make the respective changes. I like to execute projects on the spot. Of course, there are many that need to be planned and I have to go out and buy supplies. Here you can see the jewelry clips, wires, hooks, earrings, beads and black and orange beads.

🕷️ I started by making the four legs of the spider. For this I took a 6 cm piece of wire. At one end I made the hoop. Then I started to insert the beads following a predetermined order. In the wire there should be two groups of beads with a space of 1 cm apart. When I finished inserting the 4 beads on each side, I made the other ring. In the same way I made the other three.

🕷️ Taking another small piece of wire of 8 cm I started to make the body of the spider. To do this I put a black bead through one end and then made the ring. Then I placed each of the legs. I separated both groups of beads and with the free wire I wound them on the wire of the body, I only made two tight turns. In the same way I placed the other three legs. When they were well tightened I gave the shape to each one. To finish I put the orange bead, made a ring and that's it.

🕷️ This is the first chandelier I've made with wire. I don't find it difficult, however in a next time I will use #22 wire to make the legs. This accessory can be worn as cute tendrils or on a pretty necklace.

🕷️ Looking for a way to improve the design I made another one just like it varying the colors. For this one I used transparent and black beads. The beads for the head and body are black. Following the same steps for the previous one I created a very strange spider, but I liked it very much. The best thing about these days is that we can play with our imagination and make the accessories as flashy and scary as possible.

🕷️ I spent a long time thinking about what to do and how to do it 🙄 I loved taking my time. Plus my son was in charge of preparing the snack and I didn't have to pause the work. I'm happy with the result, I think I have time to come up with something else, don't you think?

All photos where my property. I edited with InShot. I used the translator of DeepL. Thank you very much for stopping by. Come back soon. Blessings 🤗

