Hola a todos. Hace muchos años una tía me enseñó a realizar los cordones para los llaveros, para ser sincera los he tejido muy poco ya que con la premura con la que realizo los llaveros se me olvida que existe esta opción. El día de hoy hice un repaso a ver si recordaba cómo hacerlos, luego de varios intentos logré hacer uno muy bonito. Permítanme mostrarles el paso a paso.
Hello everyone. Many years ago an aunt taught me how to make the cords for the keychains, to be honest I have knitted them very little because with the haste with which I make the keychains I forget that this option exists. Today I did a review to see if I remembered how to make them, after several attempts I managed to make a very nice one. Let me show you the step by step.

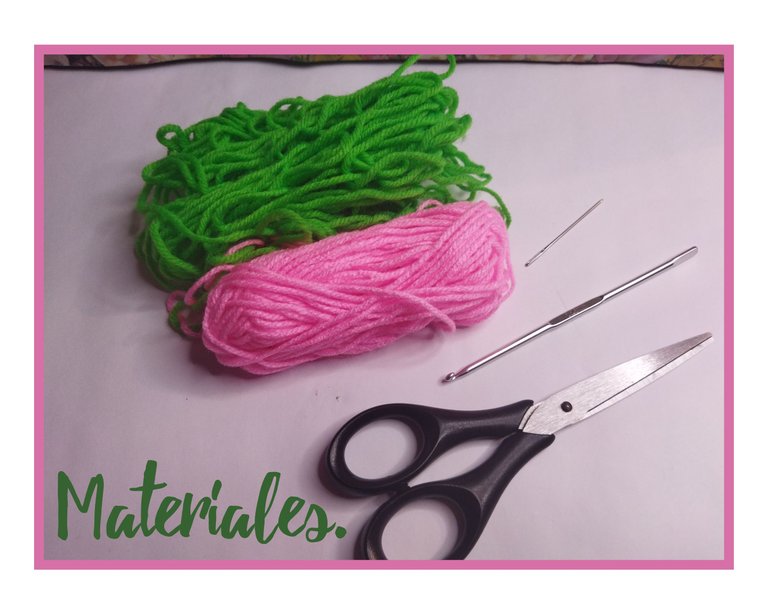
Para hacer estos lindos cordones vamos a necesitar dos colores de hilos, combinados como más te guste. Dependiendo para lo que vayas a usar el cordón se elige el grosor de los hilos. Para esta muestra yo usé estambre escolar y una aguja de 3mm. La aguja lanera no puede faltar porque la usaremos para esconder los restos de hilos que quedan en el tejido.
To make these pretty cords we will need two colors of yarns, combined as you like. Depending on what you are going to use the cord for, choose the thickness of the yarns. For this sample I used school yarn and a 3mm needle. The wool needle is a must because we will use it to hide the leftover threads that remain in the fabric.

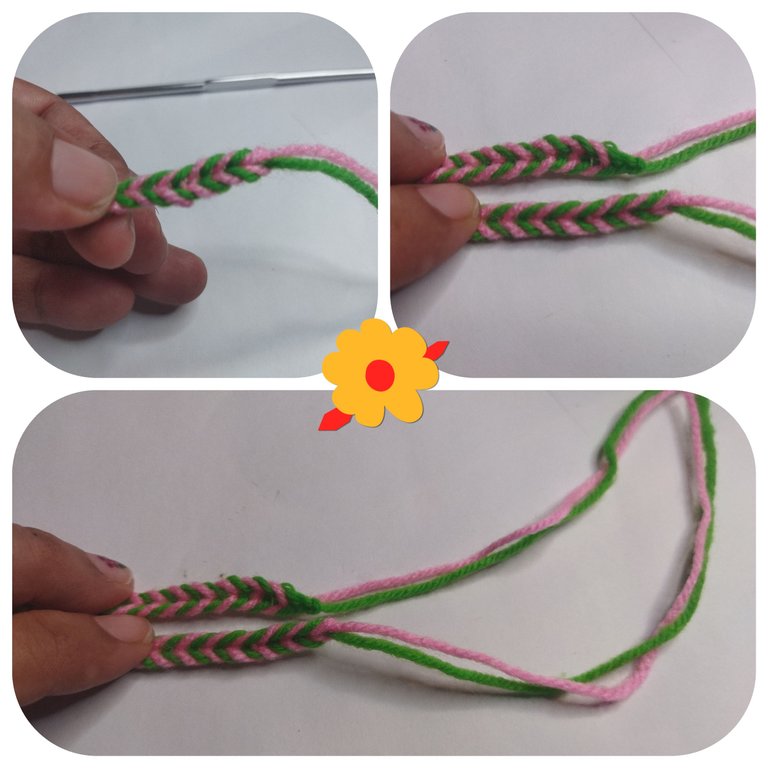
El procedimiento para hacer este cordón es sencillo, sin embargo es necesario estar atento en la puntada que haremos. Iniciamos tejiendo una cadena en un nudo deslizado, seguidamente se pasa el gancho por la hebra que nos queda al hacer la cadena, por allí pasamos el segundo color. Fíjate en el siguiente Gifs.
The procedure to make this cord is simple, however it is necessary to be attentive to the stitch that we will make. We start by weaving a chain in a slip knot, then we pass the hook through the strand that we have left when we make the chain, through there we pass the second color. Look at the following Gifs.
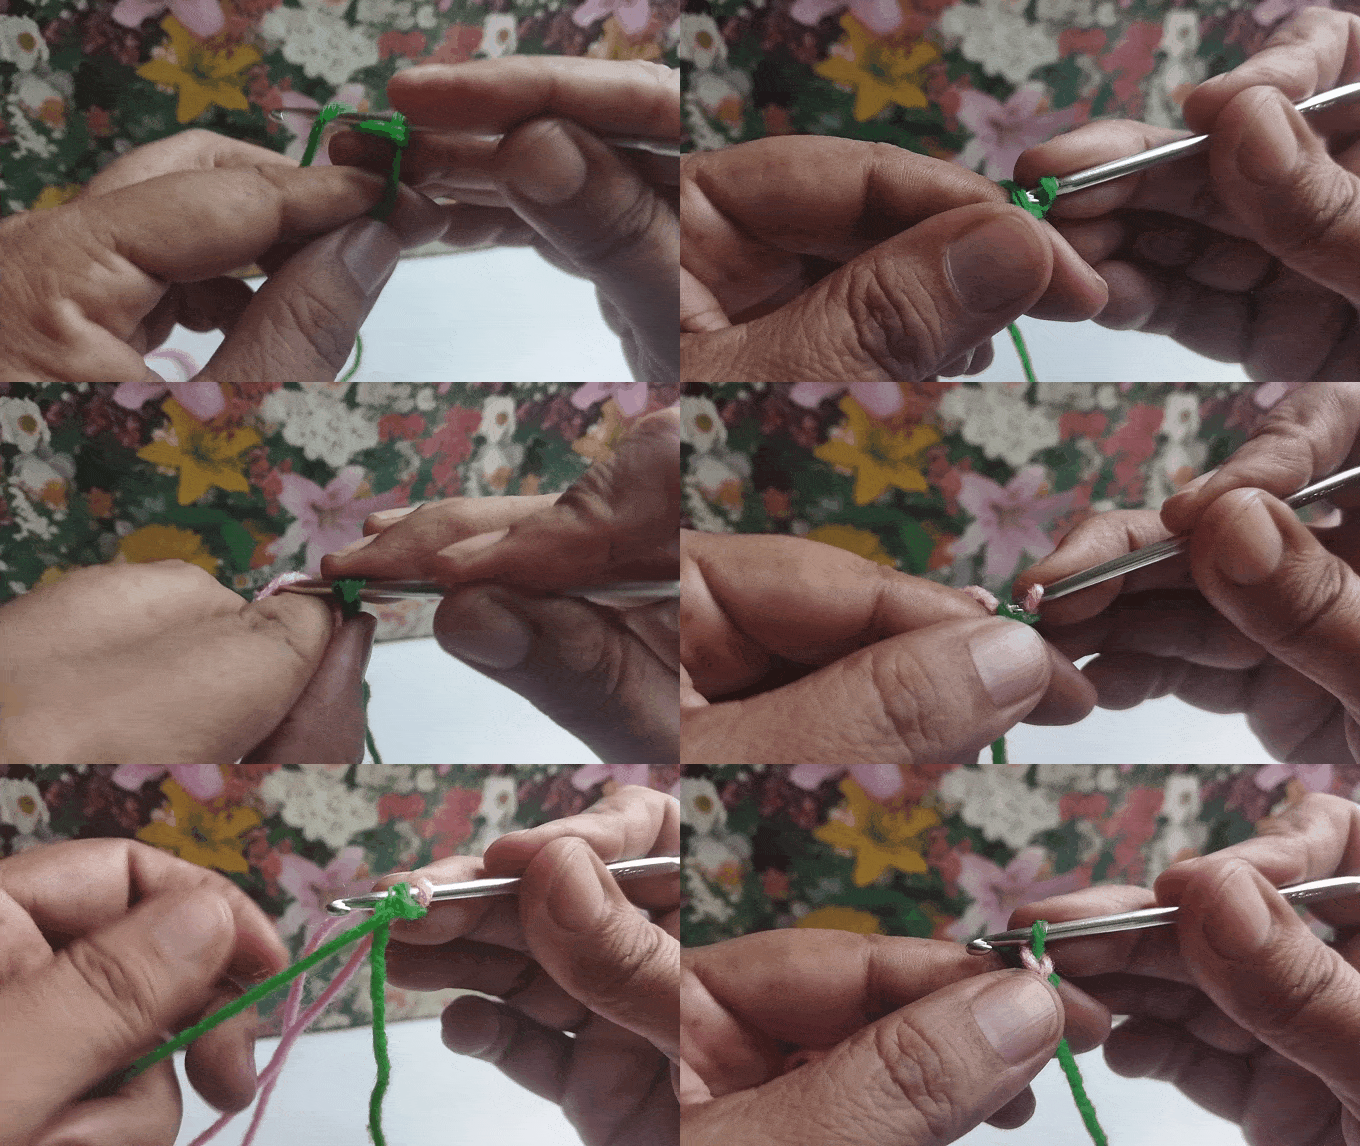
Es muy importante que todos los puntos queden con la misma presión, de este modo el diseño se verá más derecho y bonito. Te sugiero usar colores de hilos no similares ni de la misma gama para facilitar la visión.
It is very important that all the stitches are with the same pressure, this way the design will look straighter and prettier. I suggest using yarn colors that are not similar or in the same range to make it easier to see.
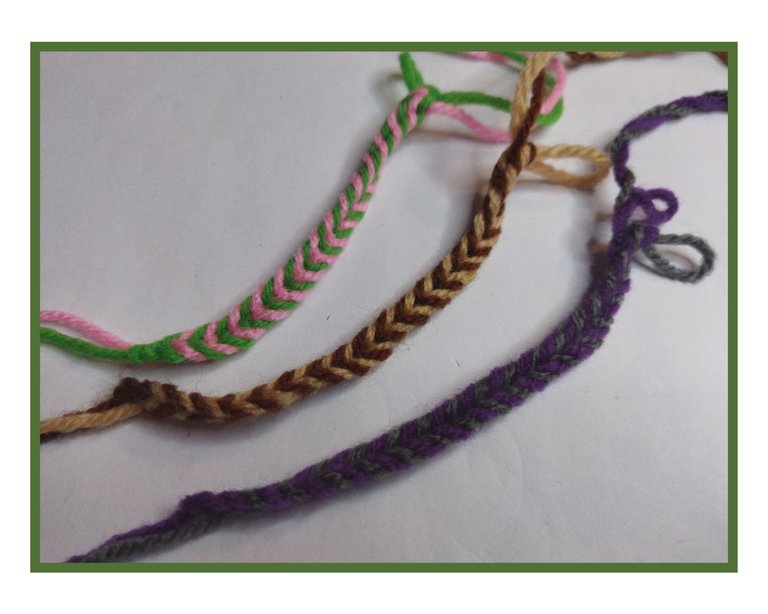
La medida del cordón depende del uso que se le dará. Teje de esta forma hasta obtener el largo que necesites.
The size of the cord depends on the intended use. Weave in this way until you get the length you need.

Al terminar comienza a tejer la pieza en la que sujetarás este cordón. Se inicia con un am de 6pb. En la siguiente vuelta se hace 1pb-1aumento durante toda la vuelta. Seguidamente se tejen tres vueltas más de 9pb cada una. Al culminar se cierra la vuelta y se deja la hebra larga para coser después.
When finished start knitting the piece on which you will hold this cord. You start with an am of 6bp. In the next round you knit 1bp-1increase for the whole round. Then knit three more rows of 9 sts each. At the end of the row, close the row and leave the long strand of yarn for sewing on later.
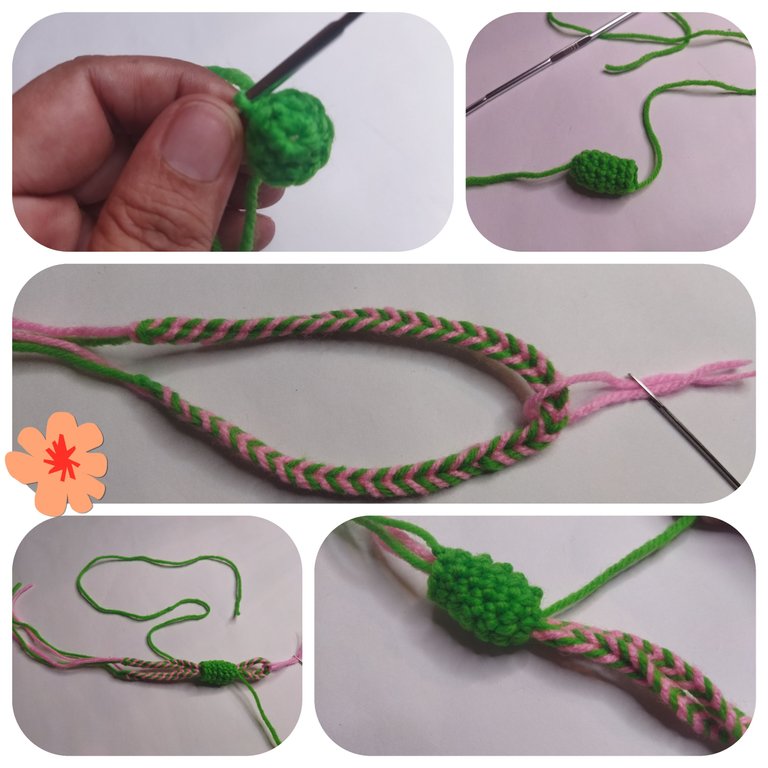
A continuación se toma el cordón a la mitad de su tamaño, ayudándonos con la aguja lanera y una hebra de hilo la pasamos por este sujetador procurando que quede derecho al pasar. Ver imagen.
Then take the cord to half its size, helping us with the wool needle and a strand of thread we pass it through this fastener making sure that it is straight when passing. See image.
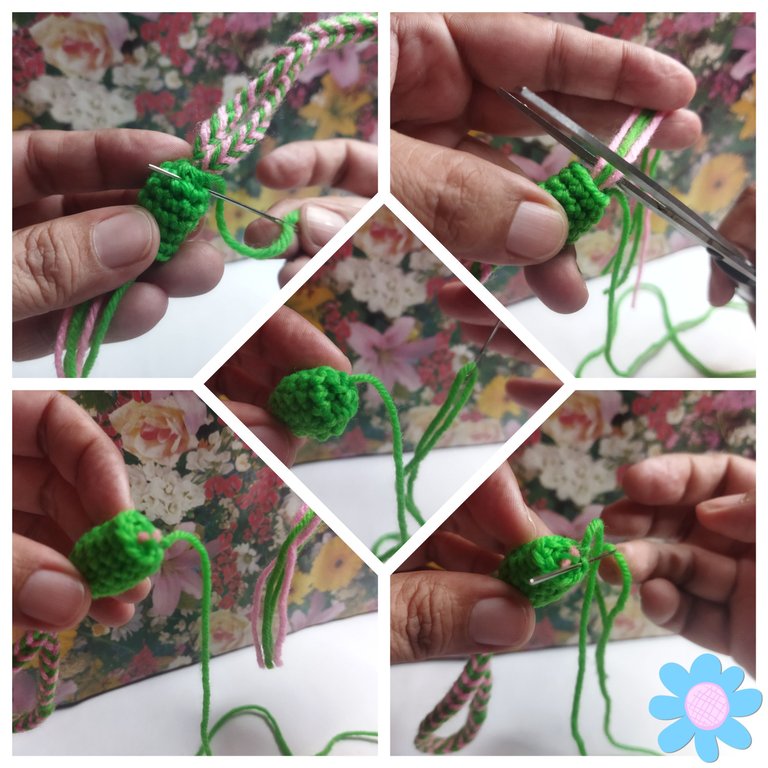
Con la hebra larga que hemos dejado en el sujetador cerraremos este orificio luego de cortar los sobrantes de hilo del cordón. Igualmente con esta hebra vamos a tejer el aro que servirá para guindar o colgar el cordón a lo que queramos.
With the long strand that we have left in the fastener we will close this hole after cutting the excess thread of the cord. With this strand we will also weave the ring that will be used to hang the cord to whatever we want.
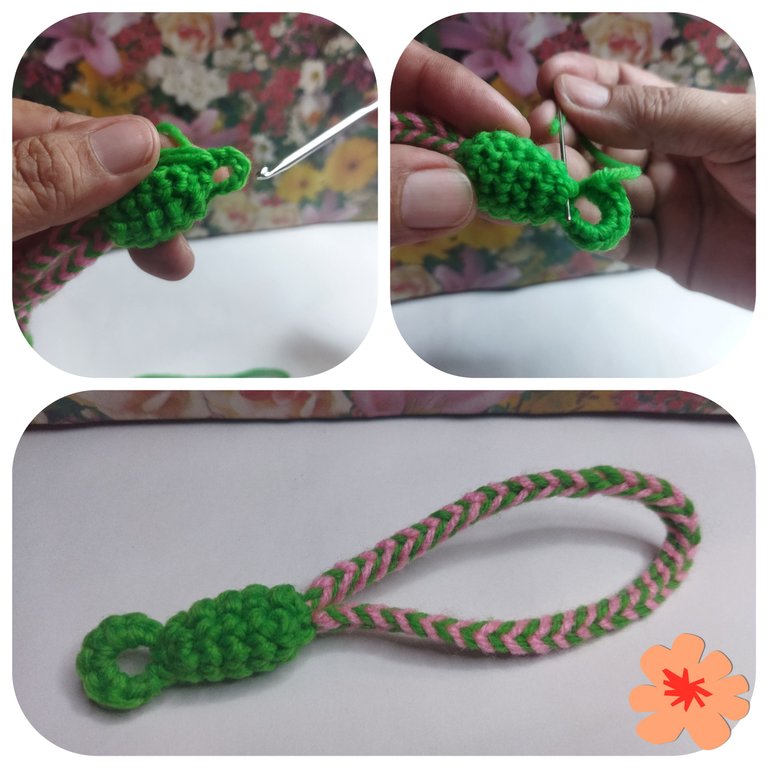
De esta forma veremos terminado este hermoso cordón. Ya solo falta cerrar la vuelta de puntos bajos que hemos realizado para hacer el aro. Escondemos todas las hebras sobrantes y ya podemos usarlo.
This way we will see this beautiful cord finished. Now we just need to close the loop of low stitches that we have made to make the ring. We hide all the excess strands and we can use it.
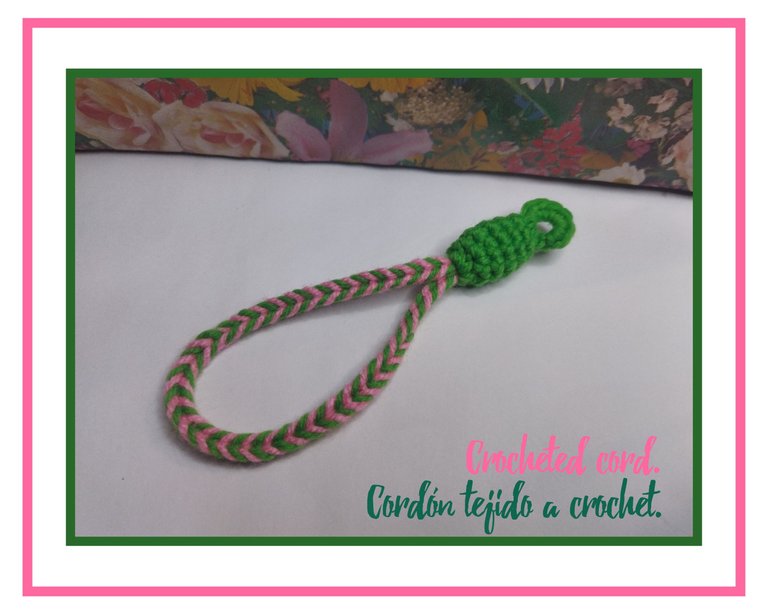
Podemos usar estos cordones en llaveros, portacosméticos, carteras, amigurumis y más. Se tejen muy rápido, combinable con todo y realmente es un lindo TEJIDO. Este cordón también luce perfecto en accesorios como pulseras, collares y aretes. Espero que te haya gustado el tutorial. Todas las fotos son de mi propiedad. Edité con Polish. Usé el traductor de Deelp. Muchas gracias por tu visita. Será hasta un próximo proyecto.
We can use these cords in key chains, cosmetic holders, purses, amigurumis and more. They weave very fast, combinable with everything and it really is a nice weave. This cord also looks perfect in accessories like bracelets, necklaces and earrings. I hope you liked the tutorial. All photos are my property. I edited with Polish. I used Deelp translator. Thank you very much for your visit. I'll see you in a future project.
