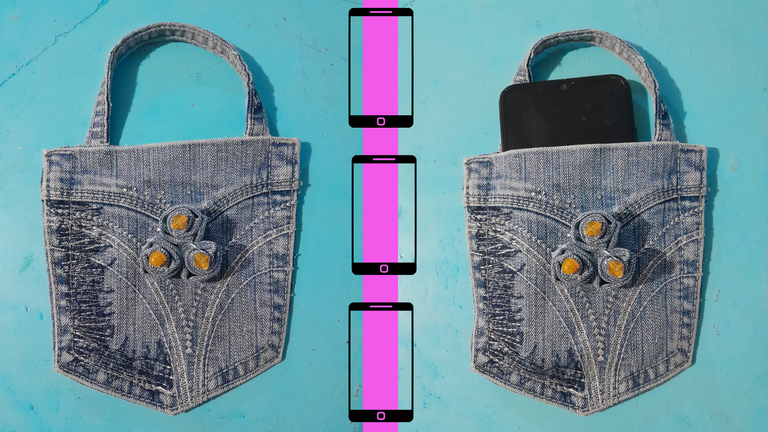
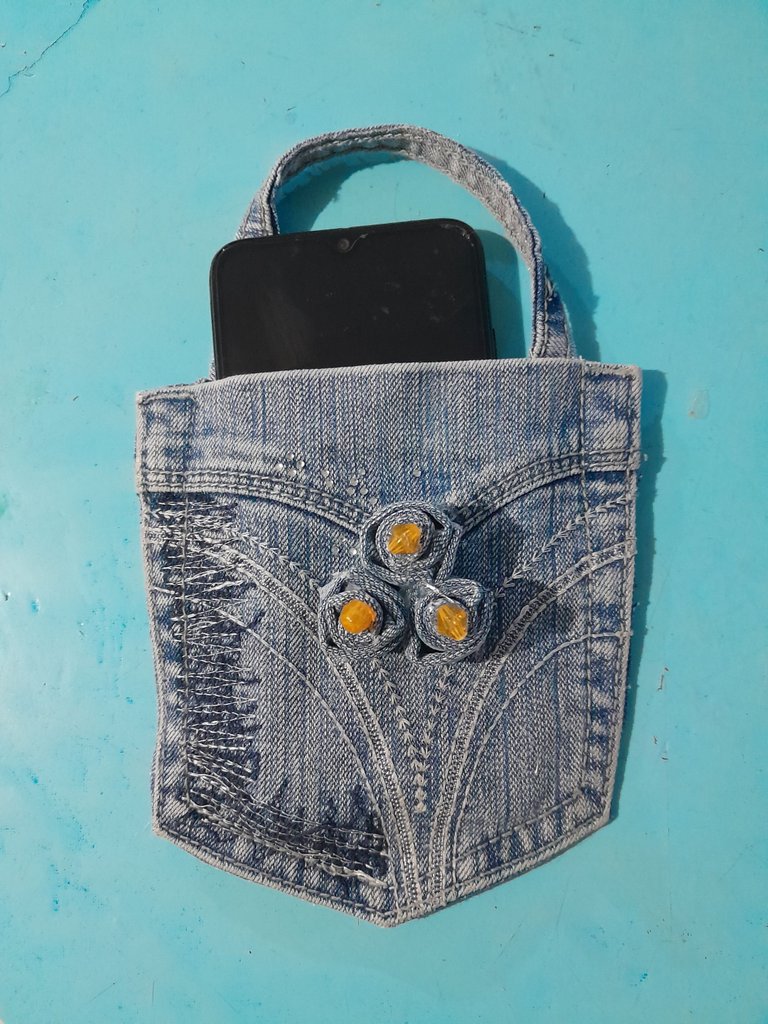
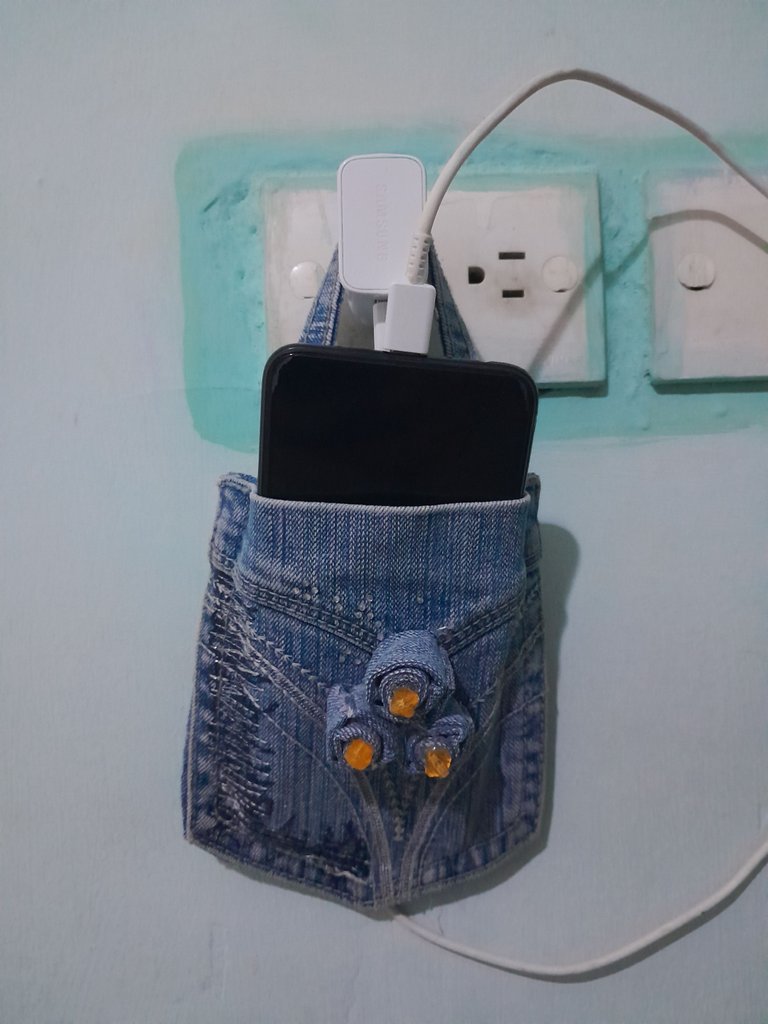
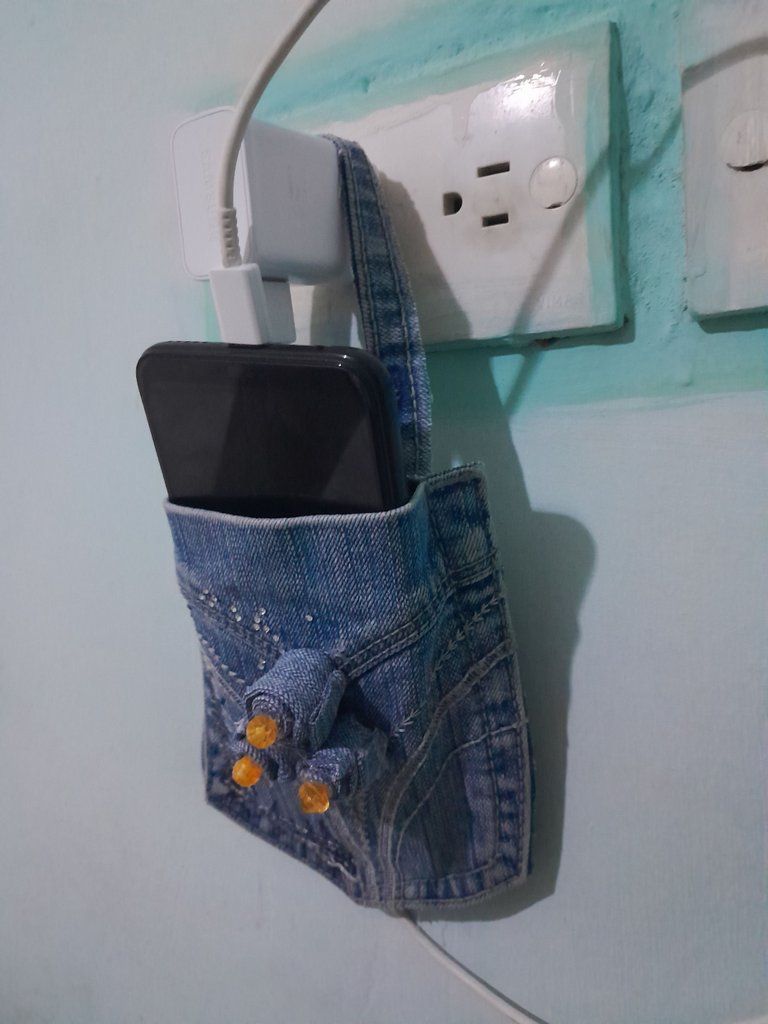
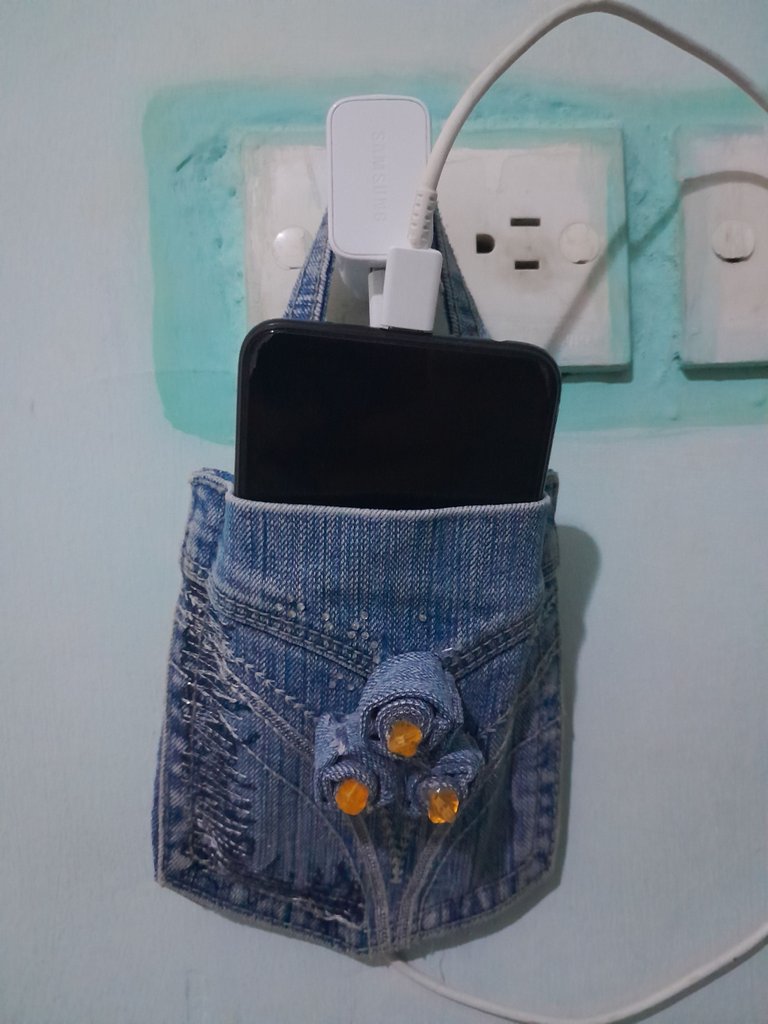
Have an excellent and wonderful day, pleased to be back on my blog, to show you how to make a phone charger holder, with a jeans pocket, there are so many beauties that we can make with old jeans that we no longer use, and the utility that we give reusing them for a new project.
Español:
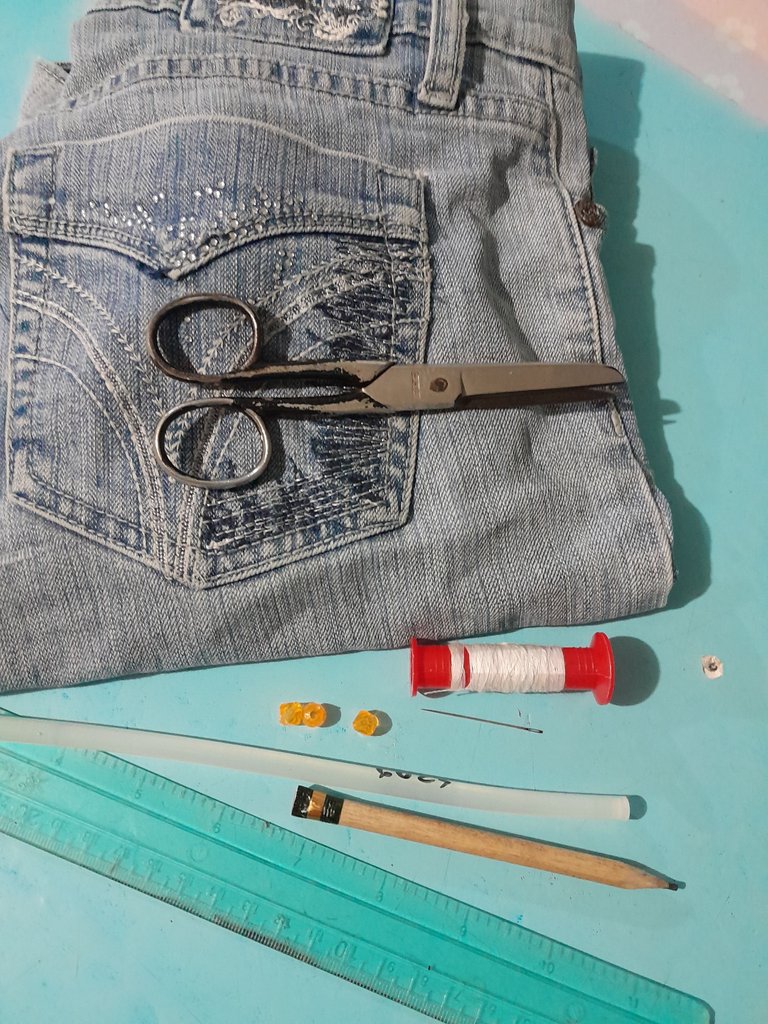
Materiales:
- Un jeans.
- 3 piedritas decorativas.
- Hilo y aguja de coser.
- Tijera.
- Silicon.
- Lápiz.
- Regla.
English:
Materials:
- One jeans.
- 3 decorative pebbles.
- Thread and sewing needle.
- Scissors.
- Silicone.
- Pencil.
- Ruler..

Español:
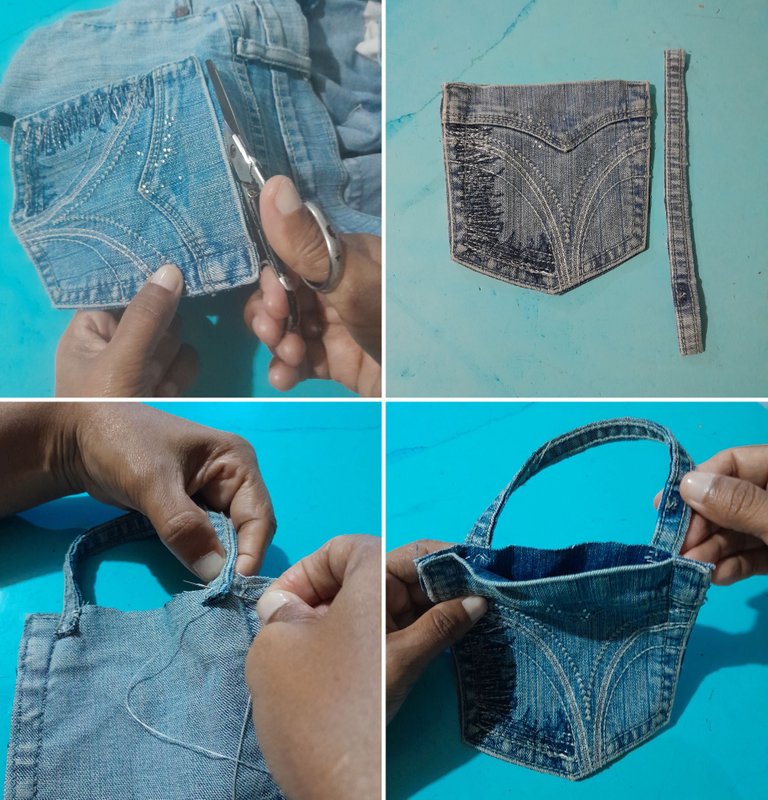
Paso 1:
- Comienzo recortando con la tijera, el bolsillo del pantalón con mucho cuidado por todo el alrededor del bolsillo, luego cortó una tira del mismo jeans, donde procedo a coserlo con el hilo y la aguja en la parte de atrás del bolsillo, quedando como asa del soporte del cargador.
English:
Step 1:
- I start cutting with the scissors, the pocket of the pants with great care all around the pocket, then I cut a strip of the same jeans, where I proceed to sew it with the thread and needle in the back of the pocket, remaining as the handle of the charger support.
Español:
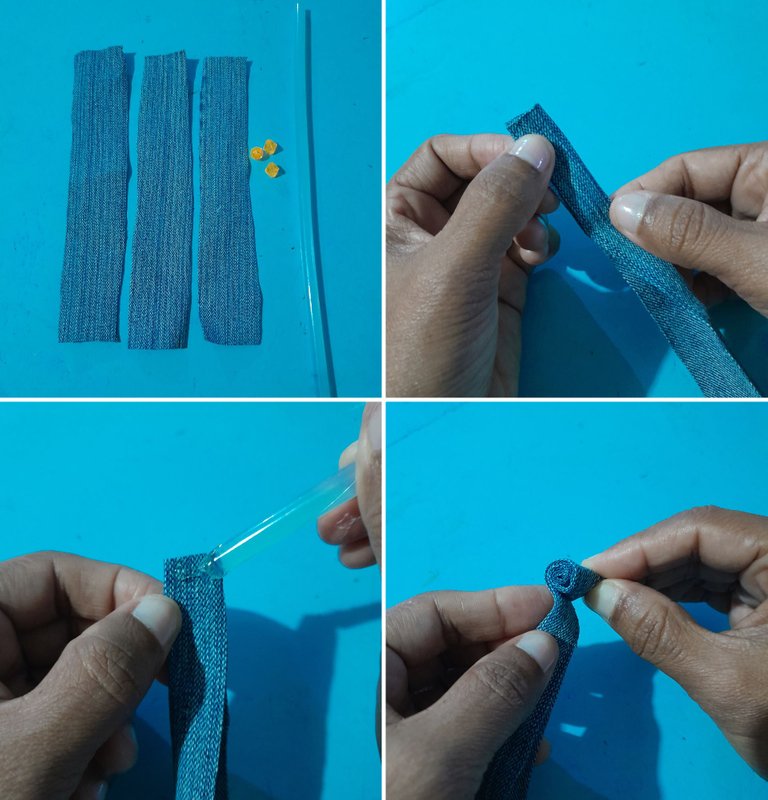
Paso 2:
- continuamos, con la ayuda del lápiz y la regla marco y luego recorto con la tijera 3 tiras de 3 cm de ancho x 14 cm de largo.
- Luego doblo en dos a lo largo de la tira, colocó silicon caliente en la punta y comienzo a enrollar poco a poco, y vamos colocando silicon caliente hasta terminar de enrollar la tira y sellamos con el silicon al finalizar en la otra punta.
English:
Step 2:
- We continue, with the help of the pencil and the ruler I mark and then I cut with the scissors 3 strips of 3 cm wide x 14 cm long.
- Then I fold in two along the length of the strip, put hot silicone on the end and start to roll it little by little, and we put hot silicone until we finish rolling the strip and seal it with the silicone at the end on the other end.
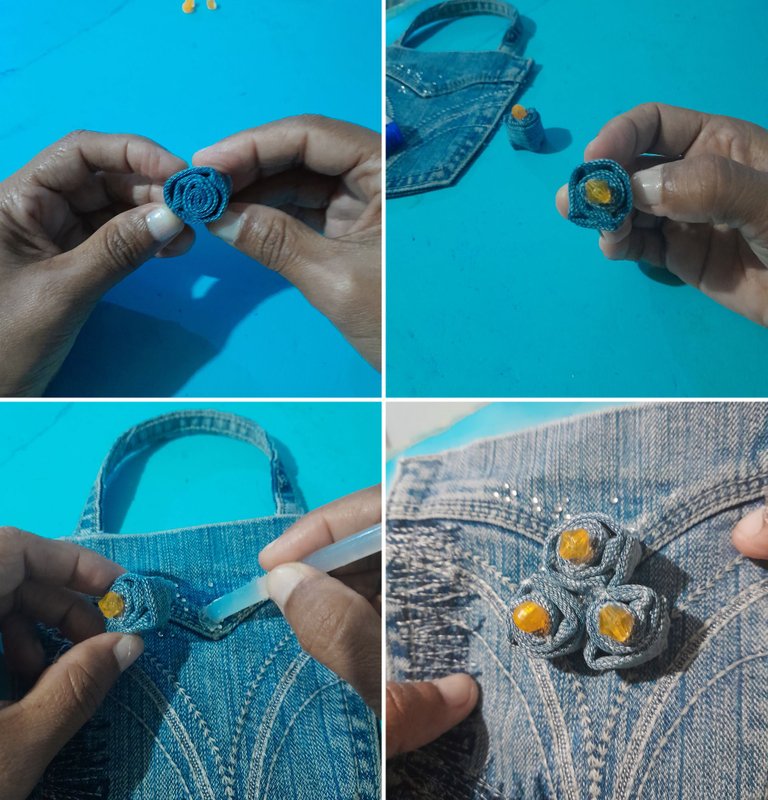
Español:
Paso 3:
- Después que terminamos de enrollar nuestra tira, nos va a quedar una forma de flor, ahora procedo a pegar la piedrita decorativa en el centro de la flor, así obtendremos 3 flores que a continuación la pegamos en la parte frontal del bolsillo, para decorar nuestro bello soporte de cargador.
English:
Step 3:
- After we finish winding our strip, we will have a flower shape, now proceed to glue the decorative stone in the center of the flower, so we will get 3 flowers that we then glue on the front of the pocket, to decorate our beautiful charger holder.
Gracias por visitar mi blog, espero les haya gustado mi resultado final, hasta luego.
Thanks for visiting my blog, I hope you liked my final result, see you later.

Todas las fotos son de mi autoría y editadas con Canva. Traductor: DeepL Translate.
All photos are my own and edited with Canva. Translator: DeepL Translate.