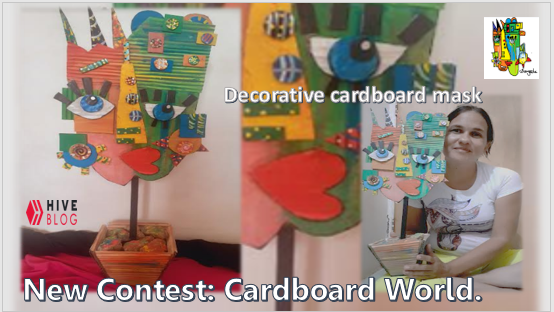
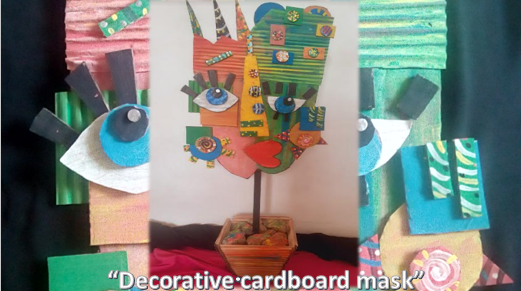
Hola comunidad creativa de Hive Diy, es mi primera entrada a un concurso en esta original comunidad, "mundo de cartón". la verdad soy recicladora compulsiva así que para mi participación quiero compartir con ustedes una "Máscara de cartón" para decorar al estilo cubismo.
Hello Hive creative community Diy, this is my first entry to a contest in this original community, "cardboard world". the truth is I am a compulsive recycler so for my participation I want to share with you a "Cardboard mask" to decorate in cubism style.
¿Conoces este arte?, aquí desaparece la perspectiva tradicional, enfatiza las formas de la naturaleza por medio de figuras geométricas, fragmentando líneas, superficies y colores, este arte fue creado por Pablo Picasso. ¡me encanta!. acá les dejo como elaborarla.
Do you know this art, here the traditional perspective disappears, it emphasizes the forms of nature through geometric figures, fragmenting lines, surfaces and colors, this art was created by Pablo Picasso, I love it!
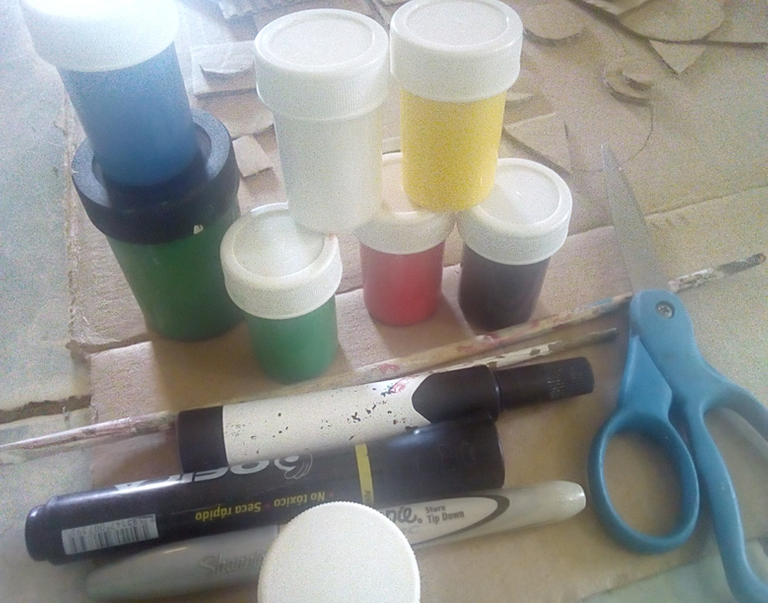
Materiales a utilizar:
- Cartón
- Pinturas roja, blanca, negra, azul, amarilla, verde.
- Esponja
- Pincel celdas finas
- Tijera
- Hoja de papel
- marcador punta gruesa o fina negro
- Pegamento líquido
- Silicona en barra.
- Palo de madera
- Piedras.
Materials to be used:
- Cardboard
- Red, white, black, blue, yellow, green paints.
- Sponge
- Brush fine cells
- Scissors
- Sheet of paper
- Thick or thin black marker
- Liquid glue
- Silicone stick.
- Wooden stick
- Stones.
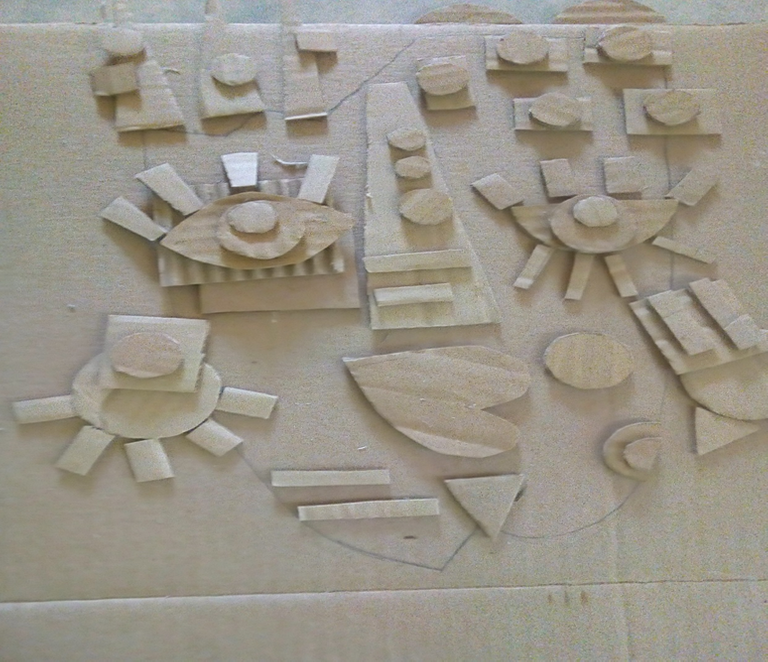
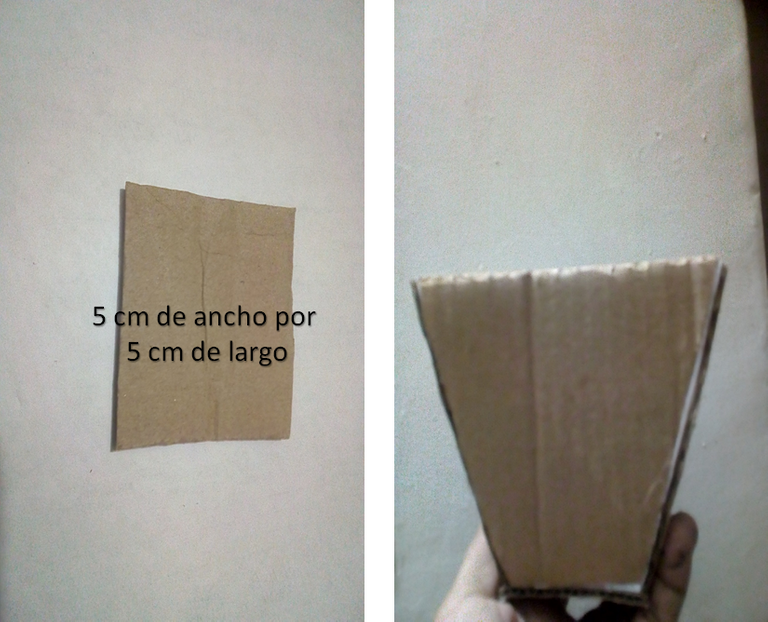
Paso 1
Realizar el boceto en la hoja de papel, transfiere al cartón y recorta.
Step 1
Make the sketch on the sheet of paper, transfer to cardboard and cut out.
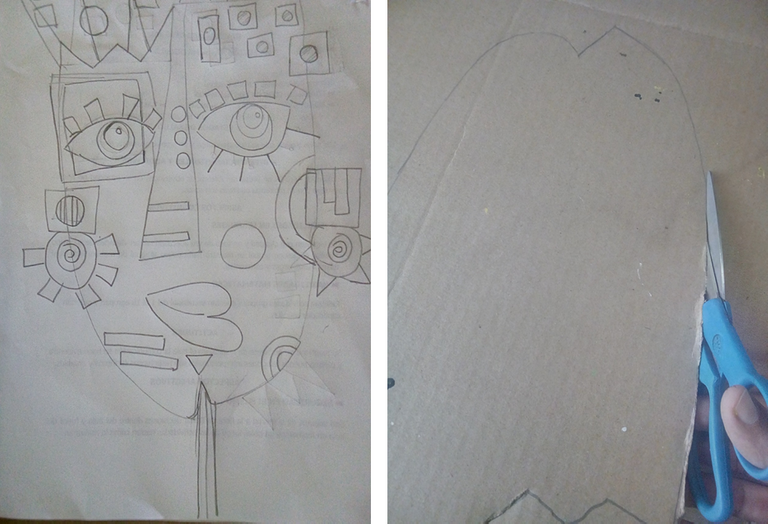
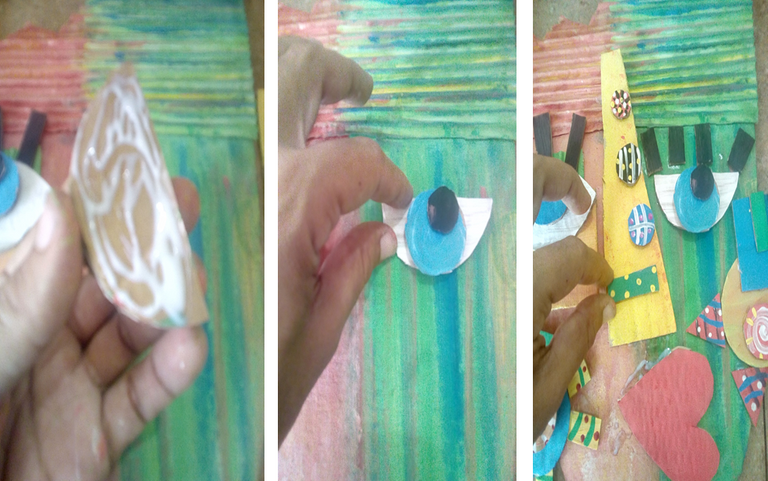
Paso 2
Dibujar en un cartón cada parte de la máscara, guiado por el boceto. recortar cada parte, organizar.
Step 2
Draw on a cardboard each part of the mask, guided by the sketch.
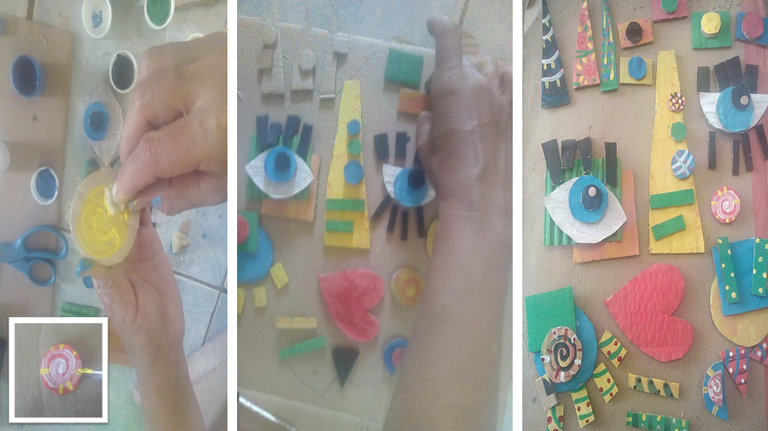
Paso 3
Pintar cada parte, agregar detalles de líneas, puntos y formas según el boceto o preferencia.
Step 3*
Paint each part, add details of lines, dots and shapes according to the sketch or preference.
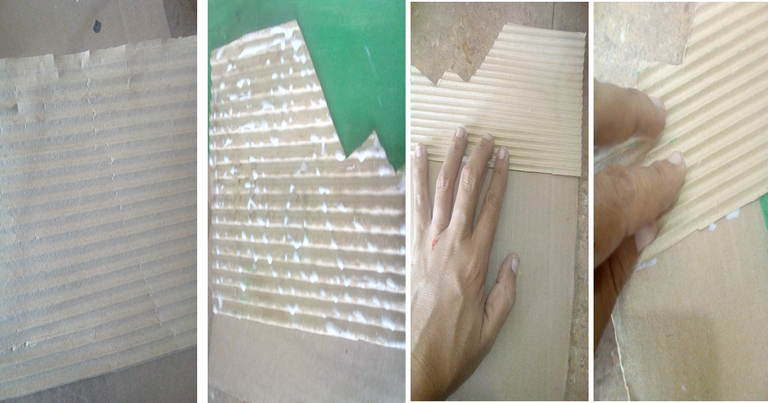
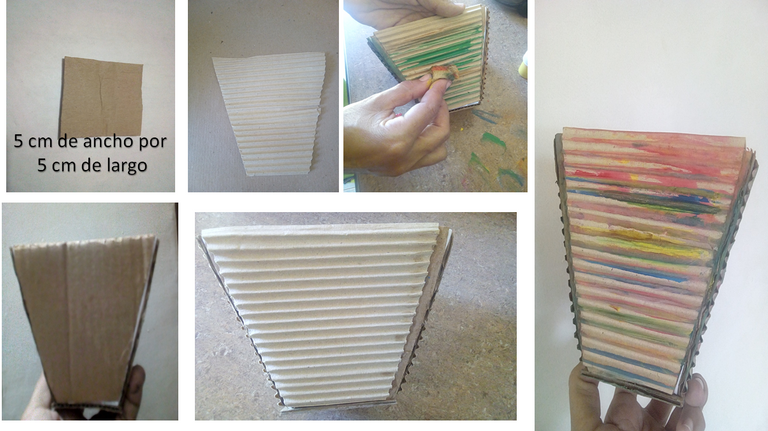
Paso 4
Crear cartón corrugado para la parte de arriba de la máscara, para ello moja una cara del cartón, retirar con cuidado la capa de arriba y ya se obtiene el corrugado. Recortar a la forma de la máscara y pegar en la parte de arriba. dejar secar.
Step 4
Create corrugated cardboard for the top of the mask, to do this wet one side of the cardboard, carefully remove the top layer and you have the corrugated. Cut to the shape of the mask and glue on the top. let dry.
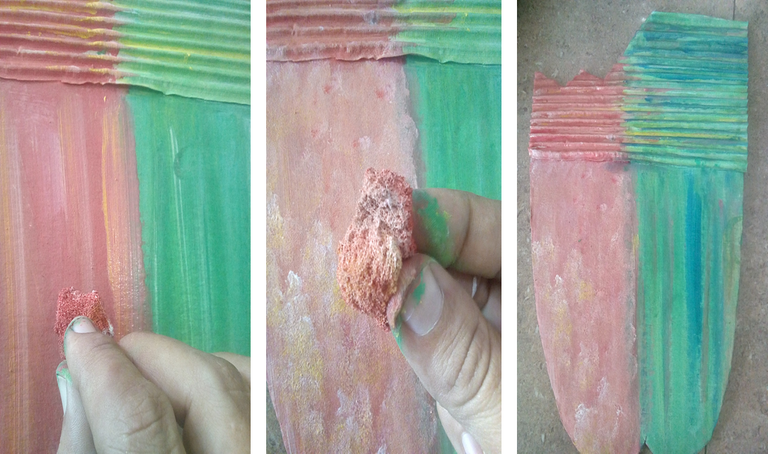
paso 5
Pintar la máscara con la esponja, mezclando pinturas para crear diferentes tonalidades. dejar secar.
step 5.
Paint the mask with the sponge, mixing paints to create different shades. let it dry.
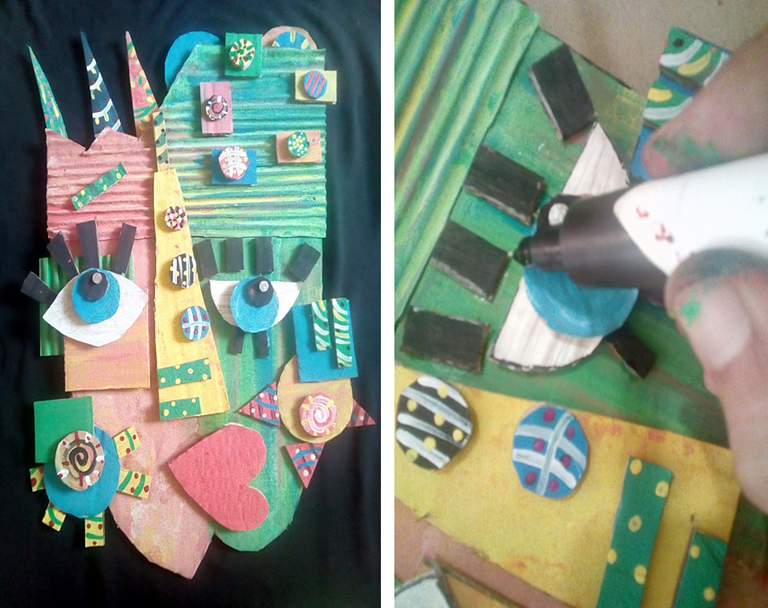
paso 6
Pegar cada parte según corresponda en la máscara, dejar secar.
Step 6
Glue each part as appropriate to the mask, allow to dry.
paso 7
Una vez seca la mascara, resaltar algunos contornos con marcador negro.
step 7.
Once the mask is dry, highlight some contours with black marker.
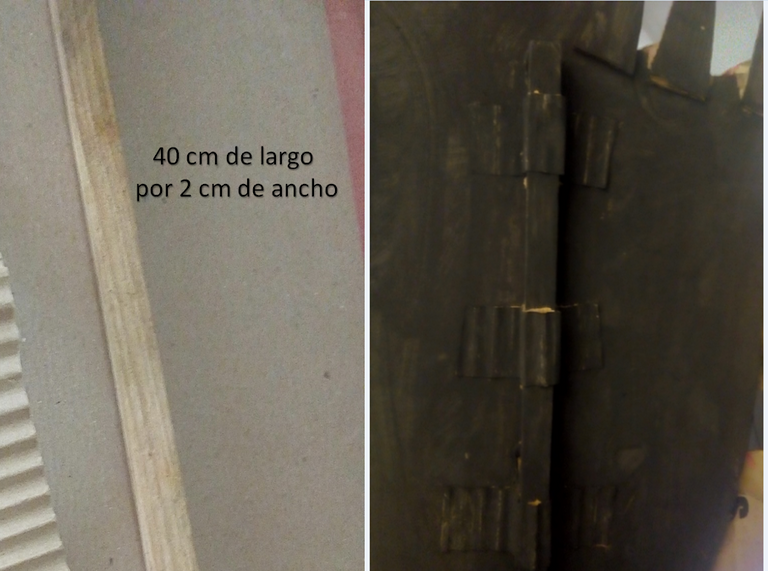
paso 8
Tomar el palo de madera, pintar con pintura negra, secar y pegar en la parte de atrás de la máscara, utilizando silicona en barra.
step 8
Take the wooden stick, paint with black paint, dry and glue on the back of the mask, using silicone stick.
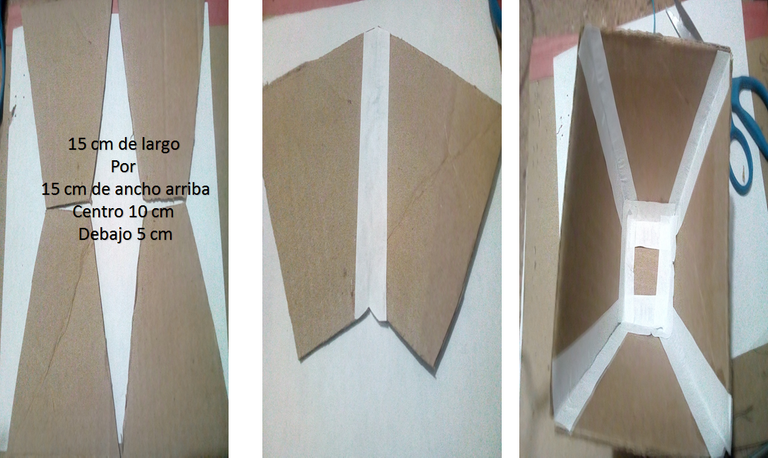
paso 9
Para la base trazar y recortar 4 figura de, cortar unas tiras de papel de 2 cm de ancho, aplicar pegamento y unir cada parte, dejar secar. Recortar un cuadrado de cm, recortar, aplicar pegamento colocar tiras de papel en la parte interna de la base, dejar secar.
Step 9
For the base, trace and cut out 4 figures, cut 2 cm wide strips of paper, apply glue and join each part, let dry. Cut out a square of cm, cut out, apply glue, place paper strips on the inside of the base, let dry.
Paso 10
Pegar a cada lado papel cartón corrugado, pintar con la misma técnica mezclando colores, dejar secar
Step 10
Glue corrugated cardboard paper on each side, paint with the same technique mixing colors, let dry.
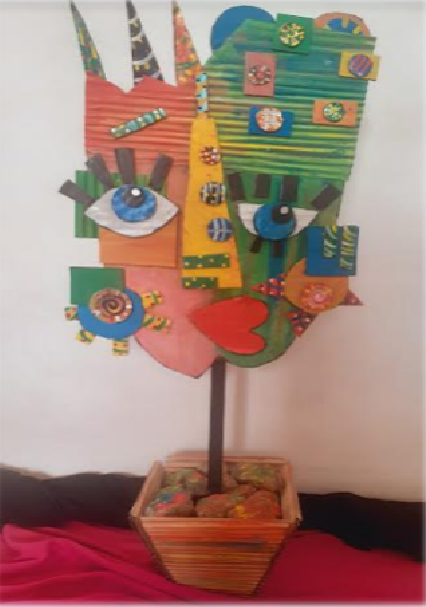
Paso 11
Armar la máscara decorativa en su base, colocar las piedras dentro para dar soporte. lista para decorar y embellecer cualquier área.
Step 11
Assemble the decorative mask on its base, place the stones inside to give support. Ready to decorate and embellish any area.
Invitación especial para @andreaag21
Special invitation for @andreaag21
Gracias por tu visita y lectura.
Thank you for your visit and reading.
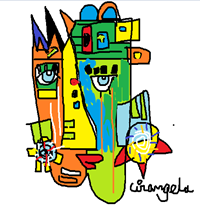
Fotografías propias de mi autoria. album eco-manualidades.
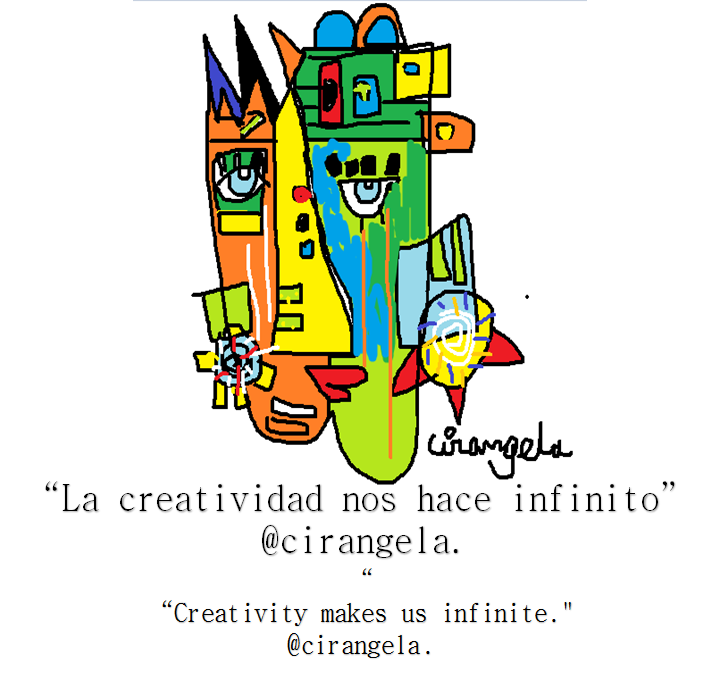
Dibujo digital diseñado con paint. mi autoria.
Traducción con https://www.deepl.com
Photographs of my own authorship. album eco-manualidades.
Digital drawing designed with paint. my authorship.
Translation with https://www.deepl.com
