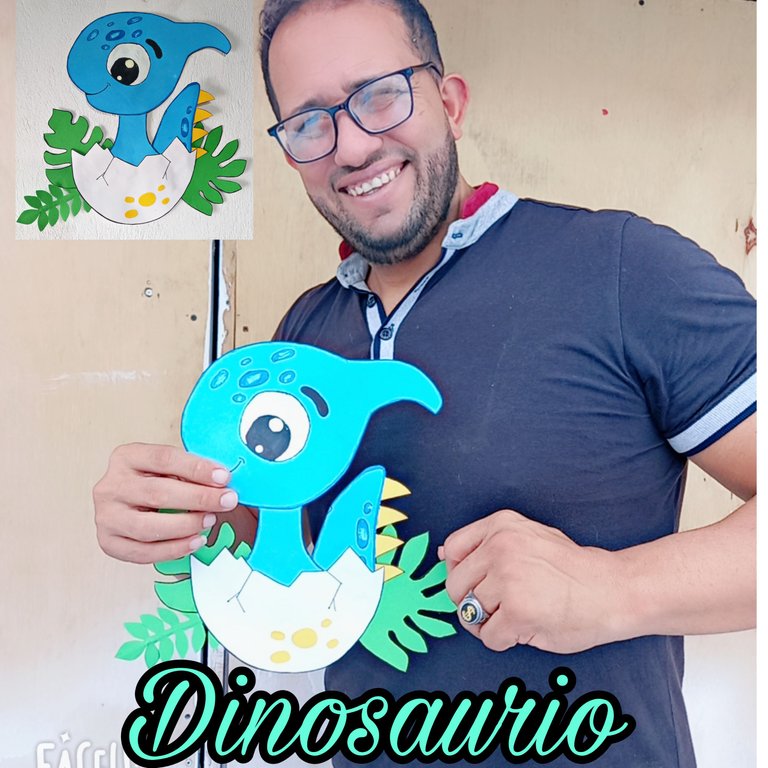
Hola qué tal apreciados amigos manualistas de ésta creativa comunidad, espero estén pasando un grandioso día con mucha salud, hoy les mostraré cómo realizar un Simpático Dinosaurio saliendo del cascarón, está genial 😁.
Hello howdy dear crafting friends of this creative community, I hope you are having a great day with lots of health, today I will show you how to make a Sympathetic Dinosaur hatching, it looks great 😁.
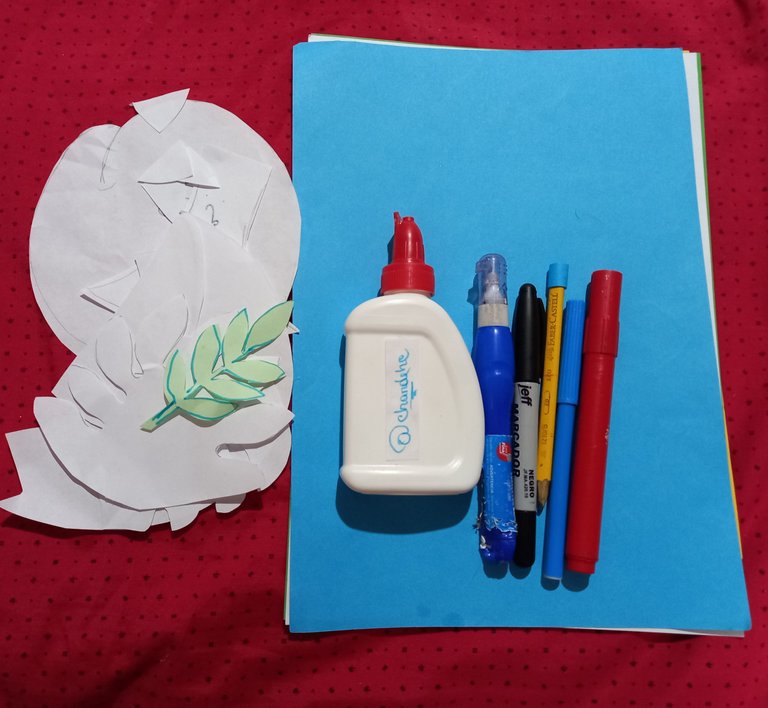
MATERIALES:
- Cartulina azul, blanca, amarilla y verde.
- Marcadores colores varios.
- Patrones del Dinosaurio (cabeza, cuerpo, cascarón, cola y púas.
- Patrones de hojas.
- Pega blanca.
- Tijeras.
- Corrector blanco.
MATERIALS:
- Blue, white, yellow and green cardboard.
- Markers of various colors.
- Dinosaur patterns (head, body, shell, tail and spikes.
- Leaf patterns.
- White glue.
- Scissors.
- White corrector.
PROCEDIMIENTO
PROCEDURE
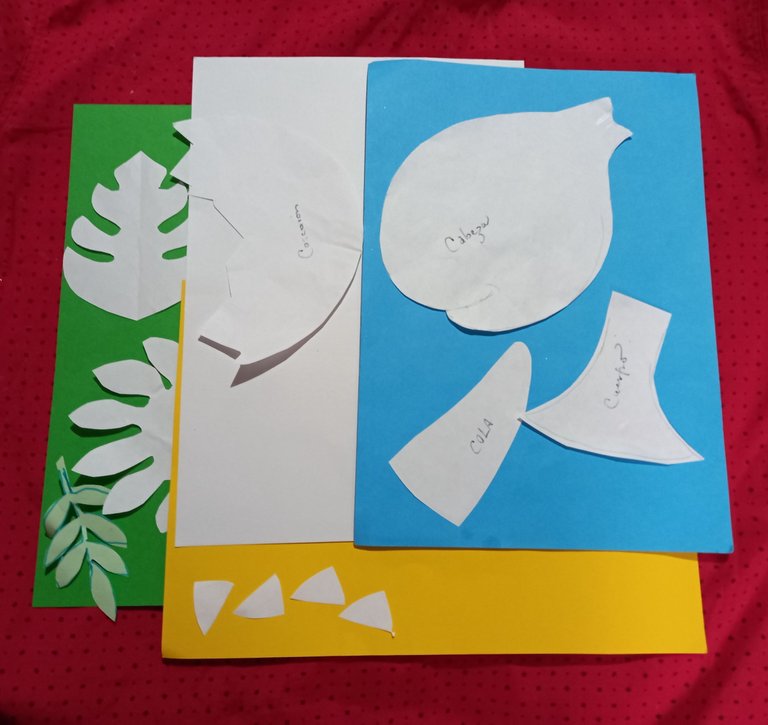
Comenzaremos marcando los patrones que tenemos sobre las cartulinas, azul para el cuerpo, la cola y la cabeza, amarilla para las púas, verde para las hojas y blanco para el cascarón y recortamos todos estos.
We will start by marking the patterns we have on the cardboard, blue for the body, tail and head, yellow for the spikes, green for the leaves and white for the shell and cut them all out.
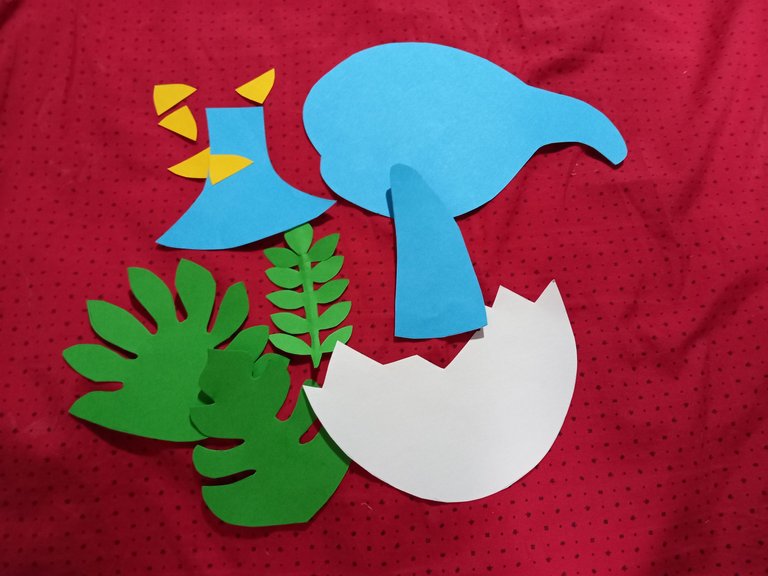
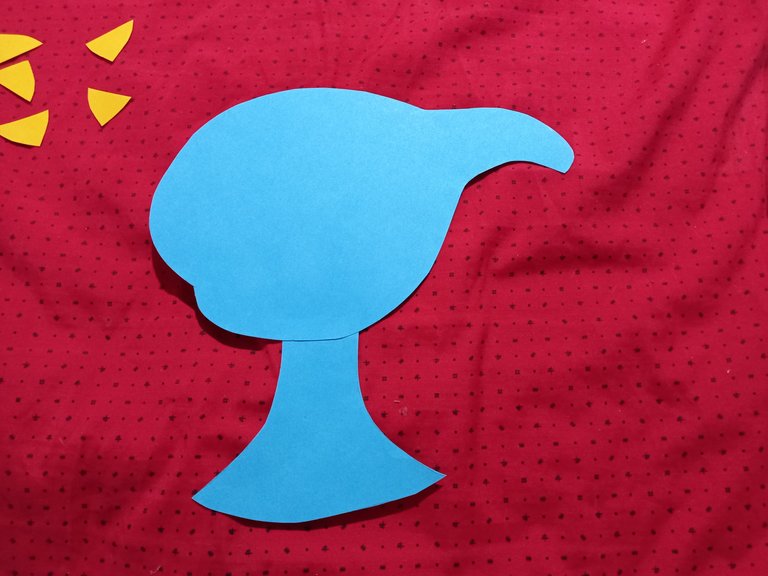
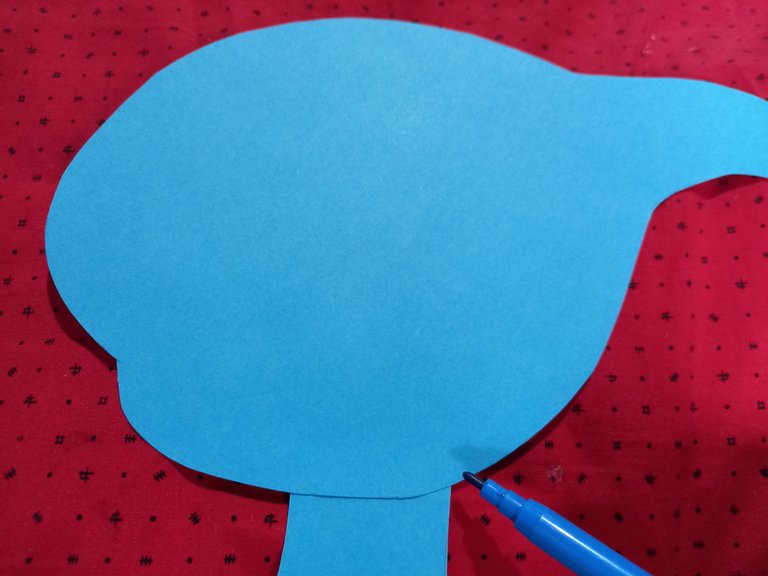
Una vez que hayamos cortado todos los patrones, procedemos a unir la cabeza con el cuerpo y marcamos sus bordes con marcador azul.
Once we have cut all the patterns, we proceed to join the head to the body and mark the edges with blue marker.
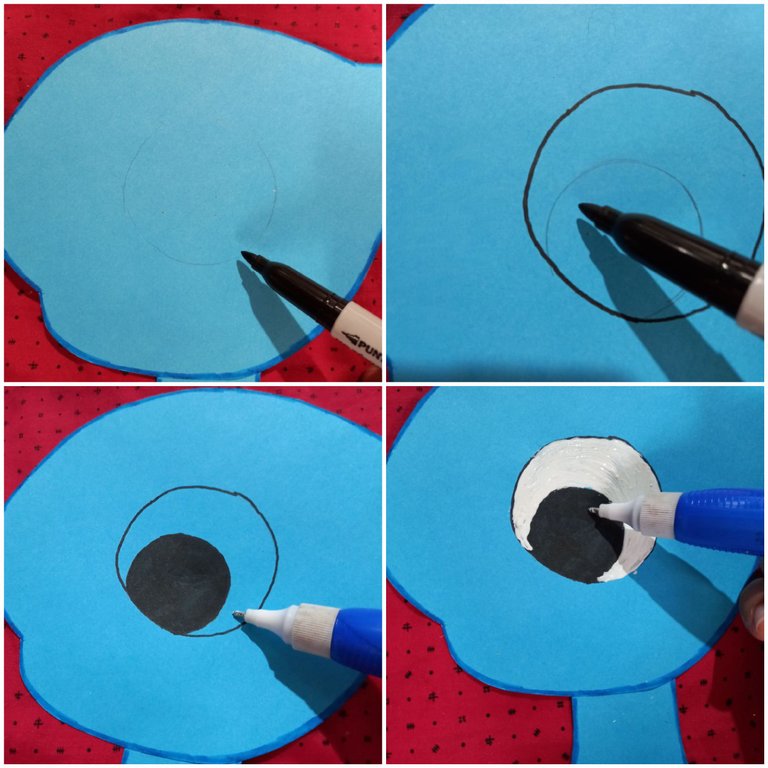
Para hacer el ojo utilizaremos un marcador y un corrector blanco, lo haremos de forma circular con dos puntos de brillo.
To make the eye we will use a marker and a white concealer, we will do it in a circular shape with two points of glitter.
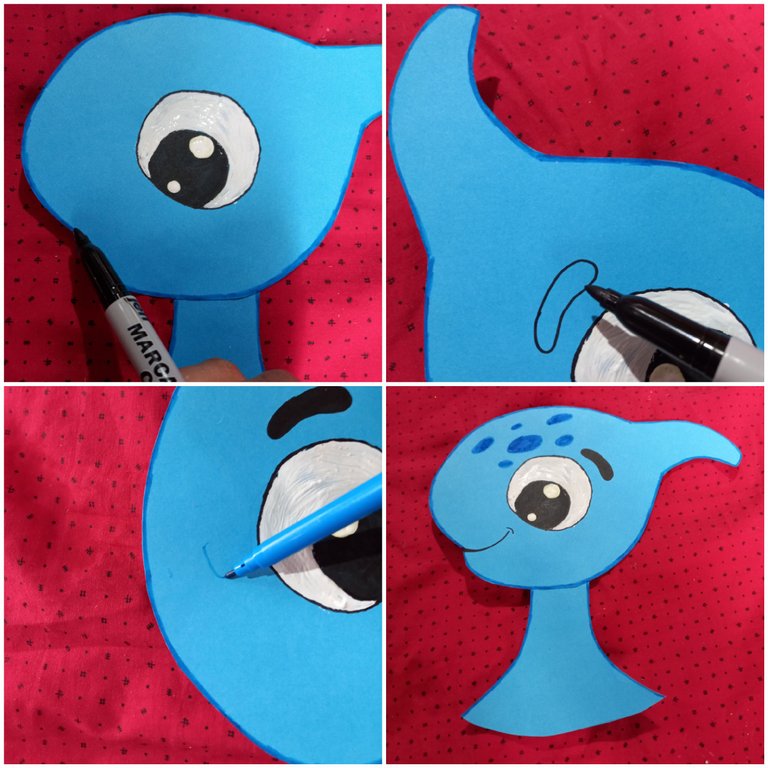
Asimismo pintaremos las cejas y la boca con marcador negro. De igual manera haremos unas pequeñas manchas en la parte de arriba de la cabeza, cerca del ojo con marcador azul y bordes negro.
We will also paint the eyebrows and the mouth with black marker. In the same way we will make some small spots on the top of the head, near the eye with blue marker and black borders.
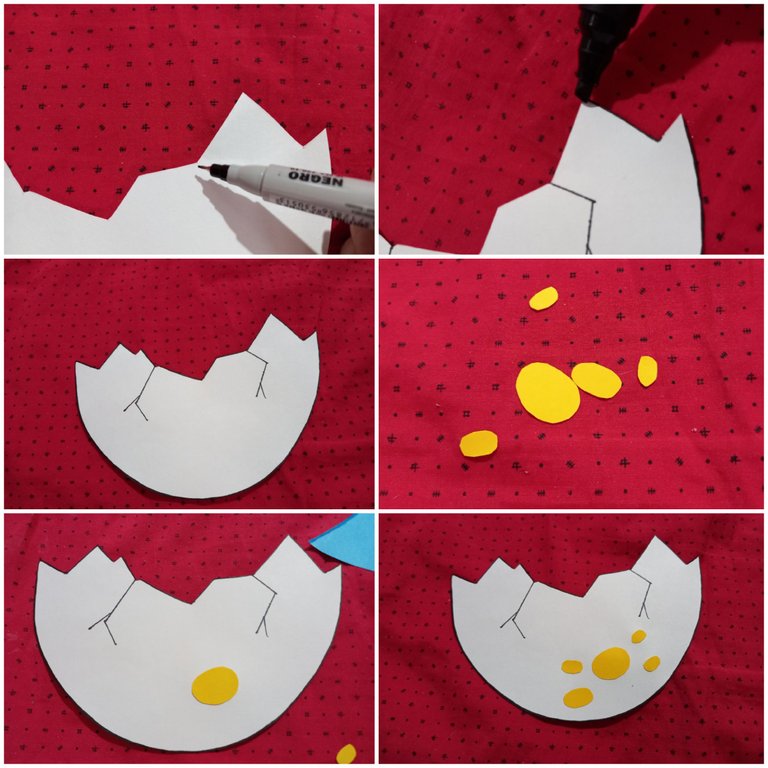
Después pintamos las grietas del cascarón con marcador negro y marcamos todo el borde.
Then we paint the cracks in the shell with black marker and mark the entire edge.
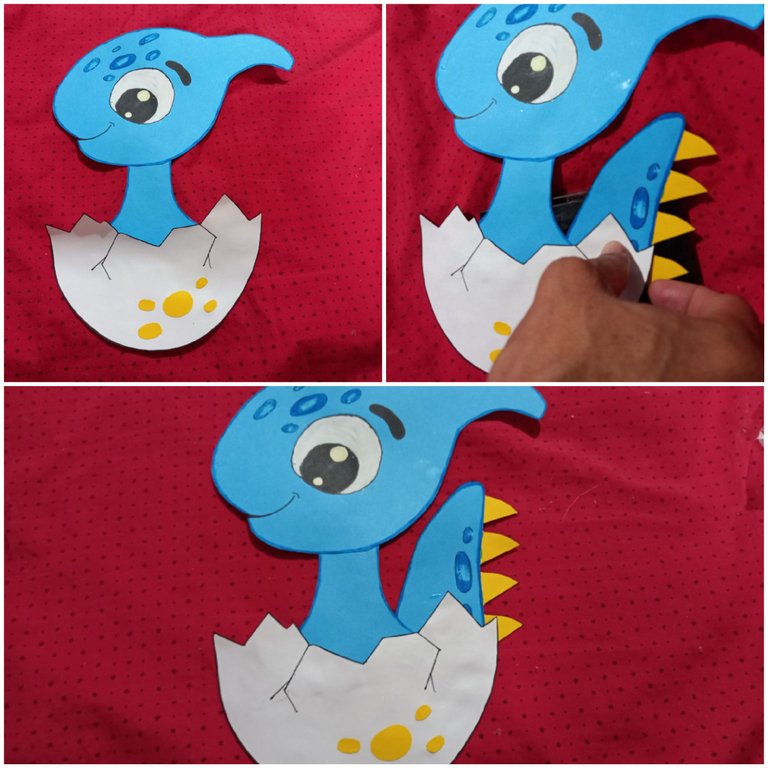
Luego marcamos el borde de la cola con marcador azul, pegamos las púas y le pintamos unas pequeñas manchas con marcador azul.
Then we marked the edge of the tail with blue marker, glued the barbs and painted some small spots with blue marker.
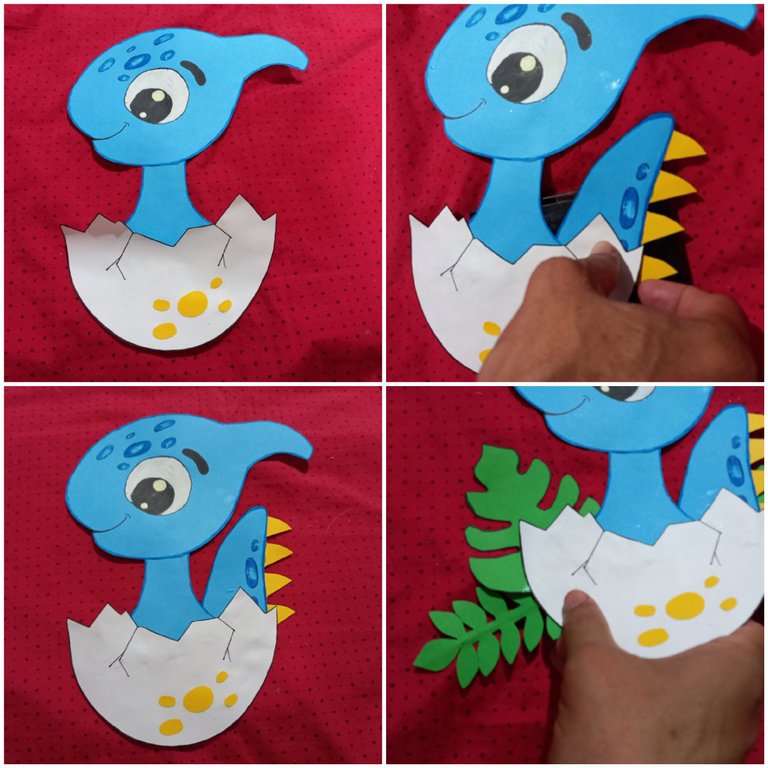
Finalmente pegamos la cáscara por la orilla inferior del cuerpo , la cola detrás del cascarón, a un lado del cuerpo y las hojas en los laterales del cascarón.
Finally we glue the shell on the lower edge of the body, the tail behind the shell, on one side of the body and the leaves on the sides of the shell.
RESULTADO FINAL
RESULT FINALLY
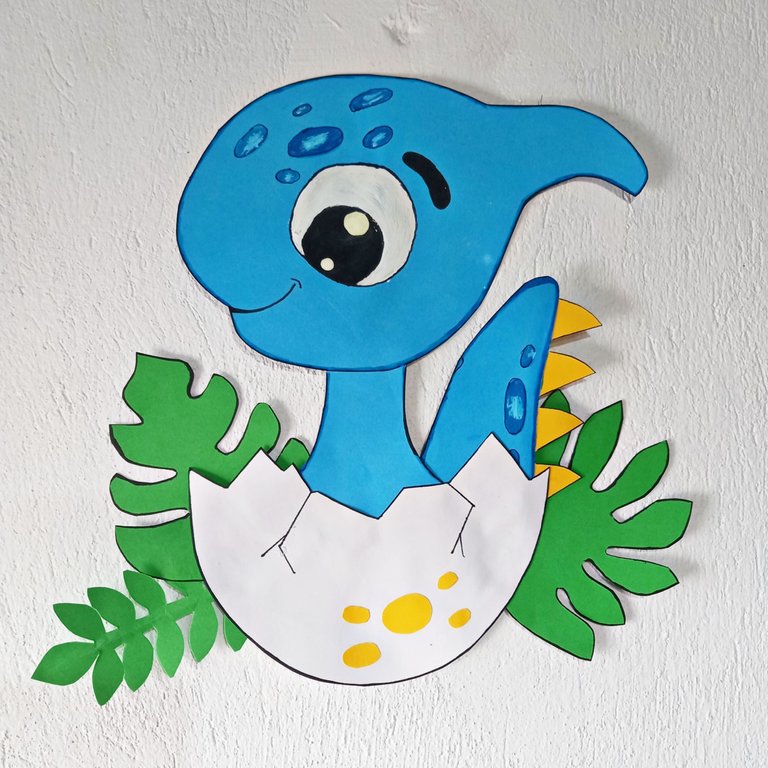
Espero que les haya gustado el resultado de éste proyecto creativo apreciados lectores. BENDICIONES...
I hope you liked the result of this creative project, dear readers. BLESSINGS...