
Hola amigos hivers
Hello friends hivers
Les comento que no tenia algún tiempo con esta idea de realizar este proyecto de repisa pero no había reunido todo el material para elaborarla, pero ya el dia llego y les quiero compartir como elaborar una repisa aérea con motivo de LOVE, sin estenderme más les explico el paso a paso a continuación.
I had the idea of making this shelf project for some time but I hadn't gathered all the material to make it, but now the devil has arrived and I want to share with you how to make an aerial shelf with the LOVE motif, without going any further I'll explain the step by step below.
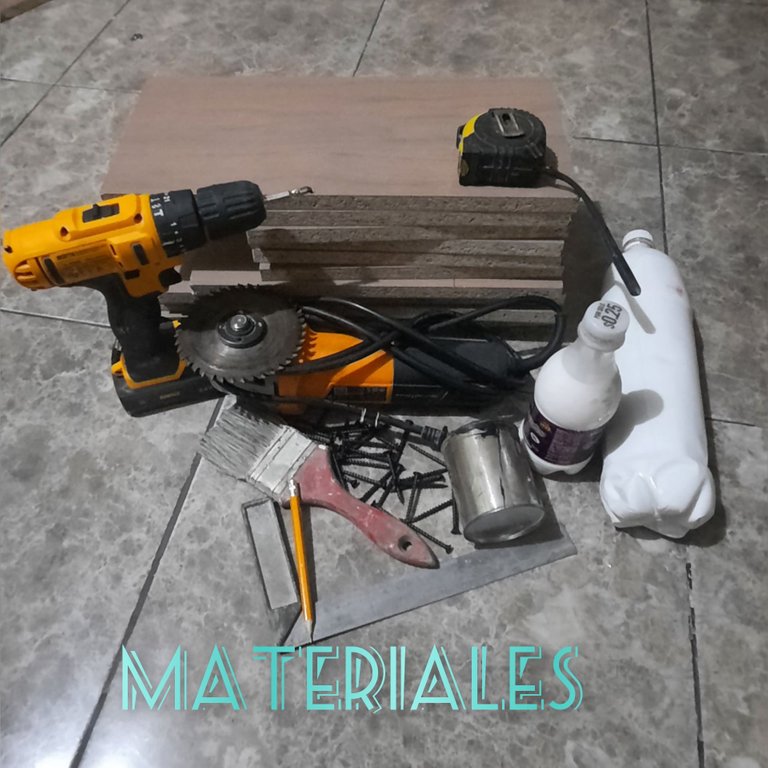
Herramientas:
- 12 maderas
- Taladro y mechas
- Flexometro
- Esmeril
- Tornillos tira fondo
- Escuadra
- Pegamento blanco
- Pingura de colores negro y blanco.
Herramientas:
- 12 timbers
- Drill and drill bits
- Flexometer
- Grinder
- Screws for bottom strip
- Square
- White glue
- Black and white colored paint.
Manos a la obra mis amigos
Let's get to work my friends
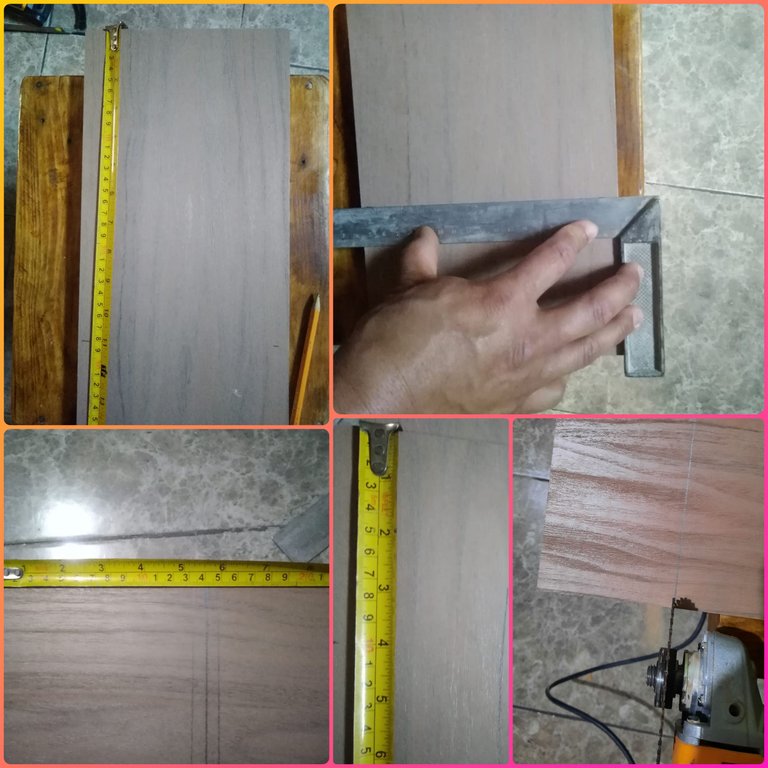
Comenzamos marcando las maderas en el siguiente orden, 6 maderas de 28 centímetros 5 maderas de 30 centímetro y 1 madera de 10 centímetros, luego picamos con el esmeril.
We start marking the woods in the following order, 6 woods of 28 centimeters, 5 woods of 30 centimeters and 1 wood of 10 centimeters, then we grind them with the emery.
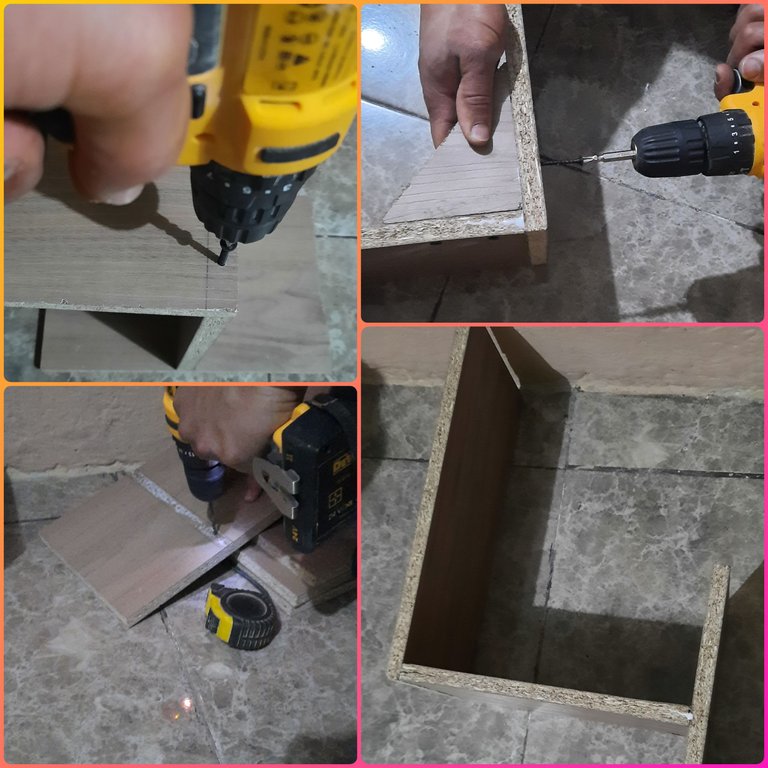
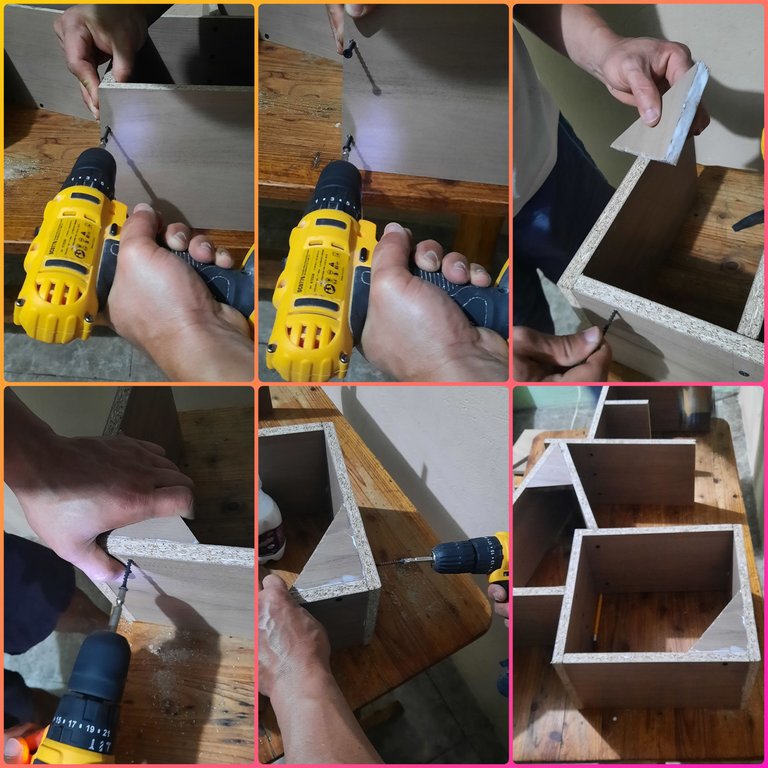
Es hora de armar nuestra repisa, colocamos 1 madera de 30 centímetros de forma vertical y luego otra madera de 28 centímetros de modo horizontal.
Now it's time to assemble our shelf, we place 1 wood of 30 centimeters vertically and then another wood of 28 centimeters horizontally.
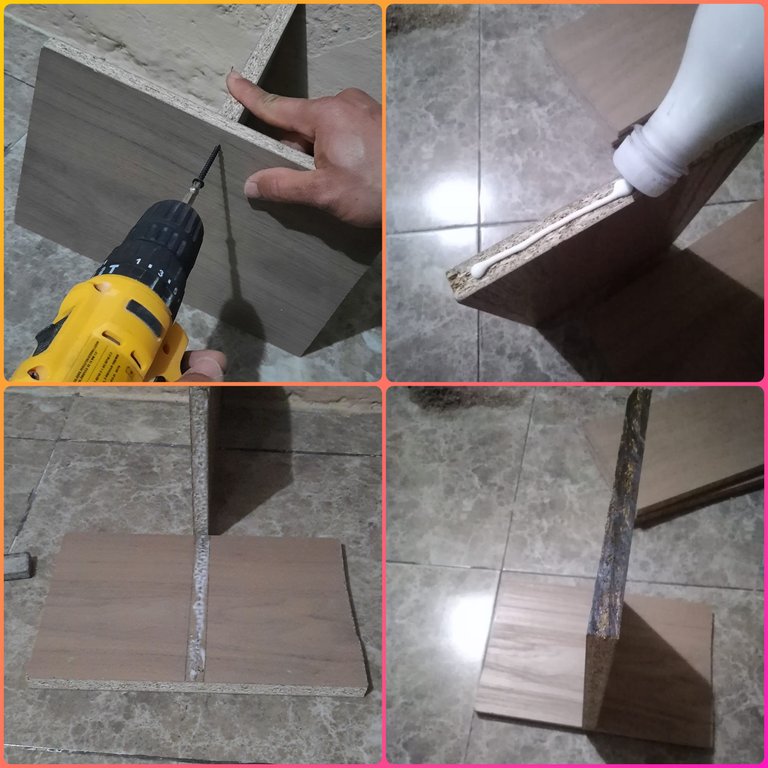
Seguidamente sujetamos con tornillos las 2 primeras madera de la letra O.
Then we fasten with screws the first 2 pieces of wood of the letter O.
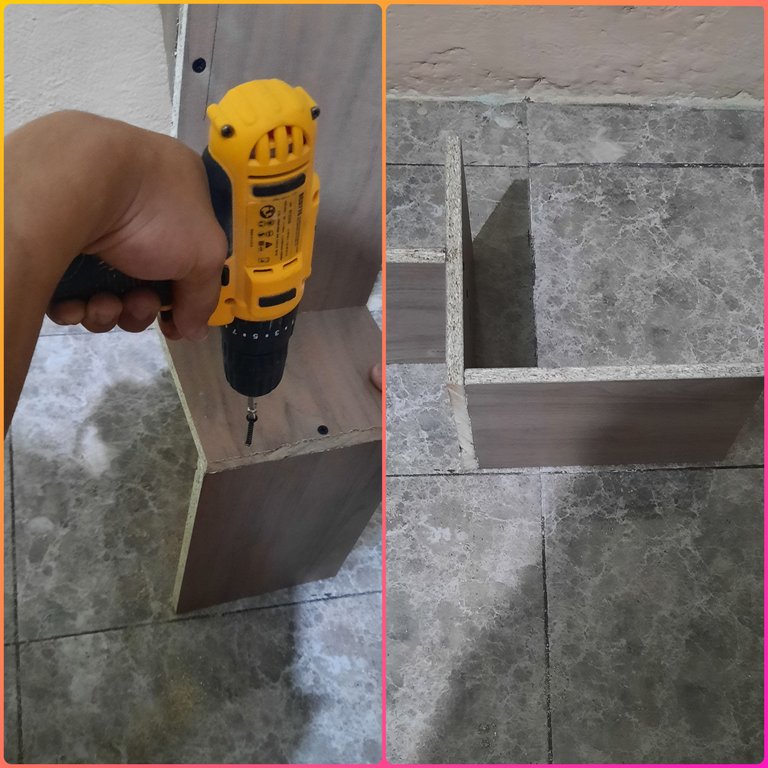
Por otro lado vamos a armar la letra V con dos maderas de 30 centímetros, colocamos pegamento y la sujetamos con tornillos a la madera horizontal de la letra O.
On the other hand, we are going to assemble the letter V with two 30-centimeter pieces of wood, apply glue and fasten it with screws to the horizontal wood of the letter O.
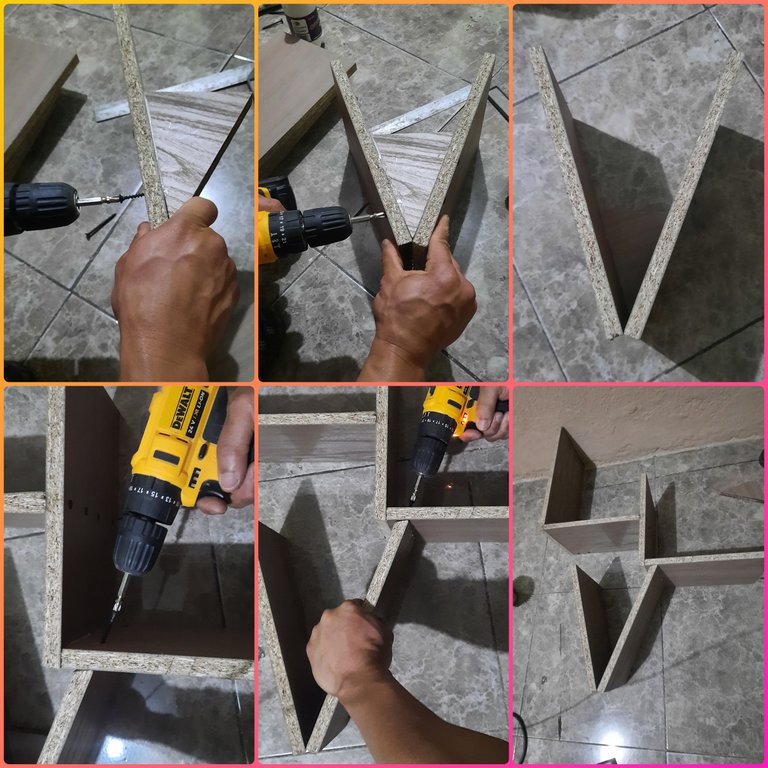
Una vez terminada la letra V procedemos a colocar las maderas horizontales de la letra E, aplicamos un poco de pegamento y aseguramos con tornillos.
Once the letter V is finished, we proceed to place the horizontal timbers of the letter E, apply a little glue and secure with screws.
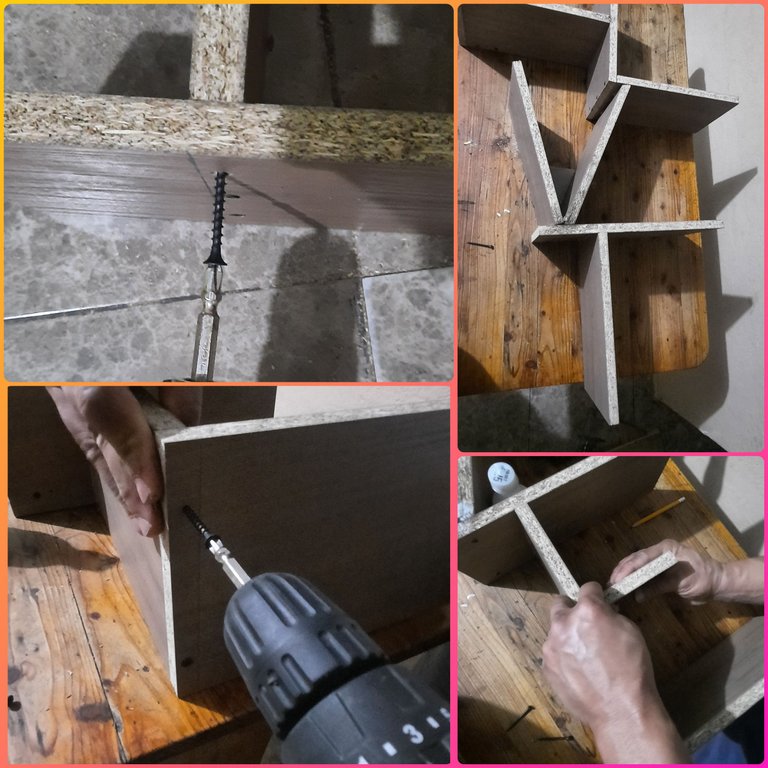
Para terminar de armar la palabra LOVE, colocamos las 2 maderas de la letra O, sujetando bien con tornillos. Luego vamos a cortar unas triángulos pequeños y lo sujetamos en la parte posterior de la repisa para darle más fuerza y firmeza.
To finish assembling the word LOVE, we place the 2 pieces of wood of the letter O, fastening them well with screws. Then we will cut some small triangles and attach them to the back of the shelf to give it more strength and firmness.
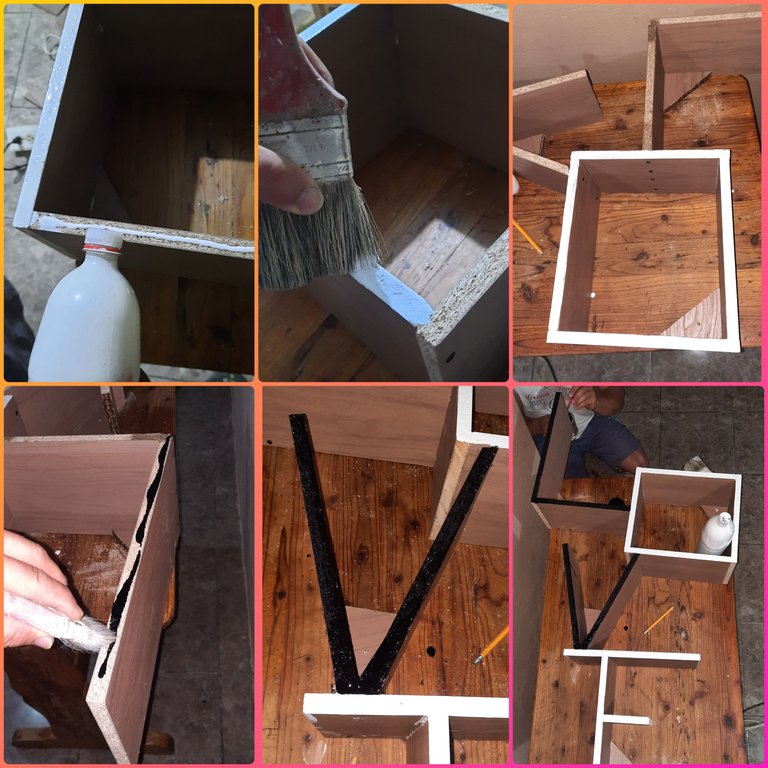
Procedemos a pintar las letras O y E con la pintura de color blanco. Luego pintamos las letras L y V con la pintura color negro.
We proceed to paint the letters O and E with the white paint. Then we paint the letters L and V with the black paint.
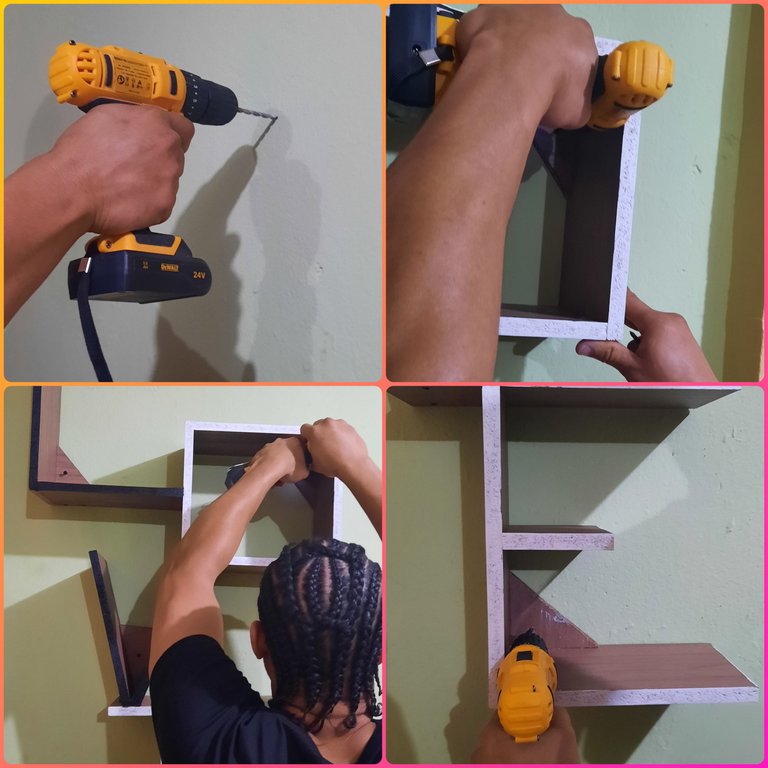
Esperemos que seque bien las pinturas para poder colgar, con ayuda del taladro perforamos la pared en los lugares deseados, sujetamos con tornillos largos para mejor agarre.
Let's wait for the paints to dry well to be able to hang, with the help of the drill we perforate the wall in the desired places, we fasten with long screws for better grip.
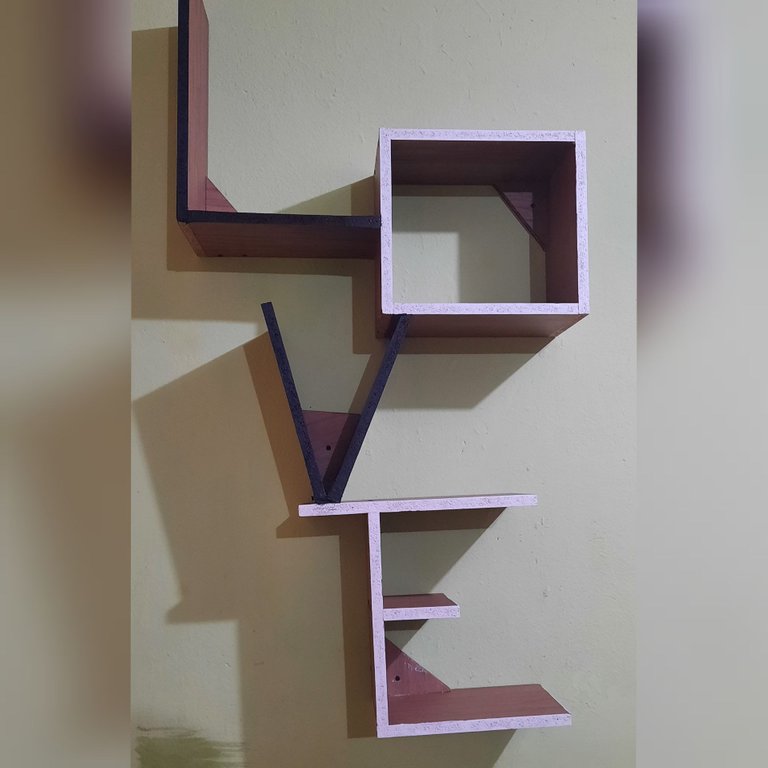
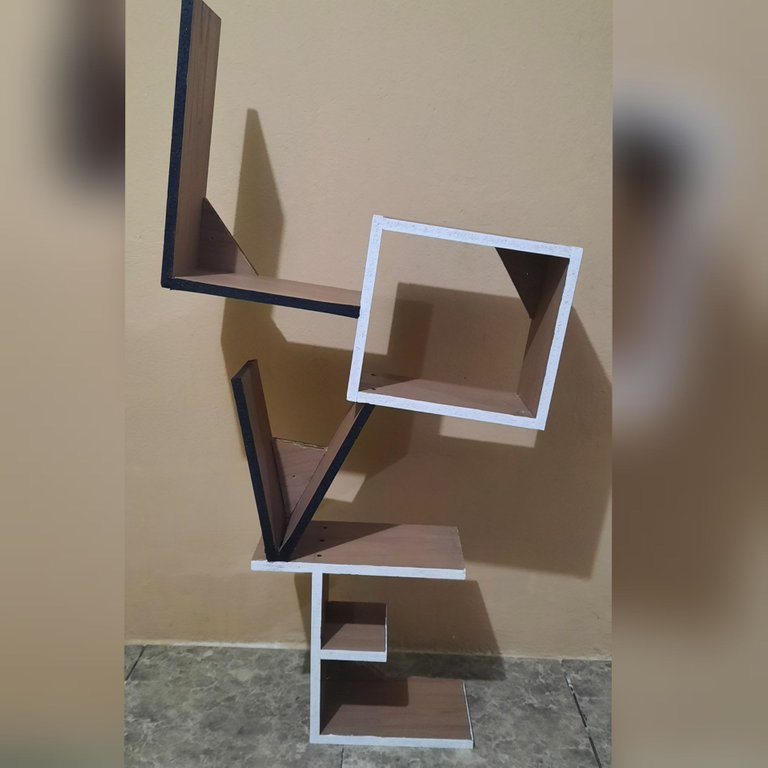
Le muestro el resultado
I show you the result

Gracias por pasar a leer y apoyar mi post espero sea de tu agrado, me despido hasta otra oportunidad, dios te bendiga 🙏 grandemente
Thank you for reading and supporting my post, I hope you like it, I'll say goodbye until another opportunity, God bless you 🙏 greatly.


