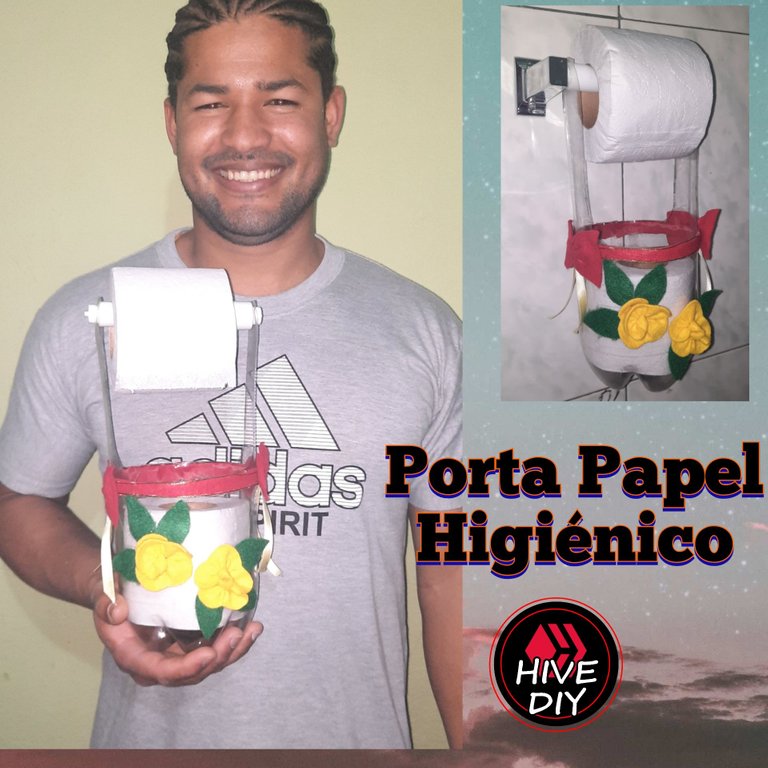
Hola comunidad hivediy
Hello hivediy community
Un saludo cordial a todos los artesanos, Craftero, creadores, pintores y de más que integran esta maravillosa colmena, me encuentro por acá con ustedes en esta ocasión para mostrarles cómo realizar un práctico porta papel higiénico reutilizando una botella de plástico, los invito a ver el proceso de elaboración.
A cordial greeting to all the artisans, crafters, creators, painters and more that make up this wonderful hive, I am here with you on this occasion to show you how to make a practical toilet paper holder reusing a plastic bottle, I invite you to see the process of elaboration.
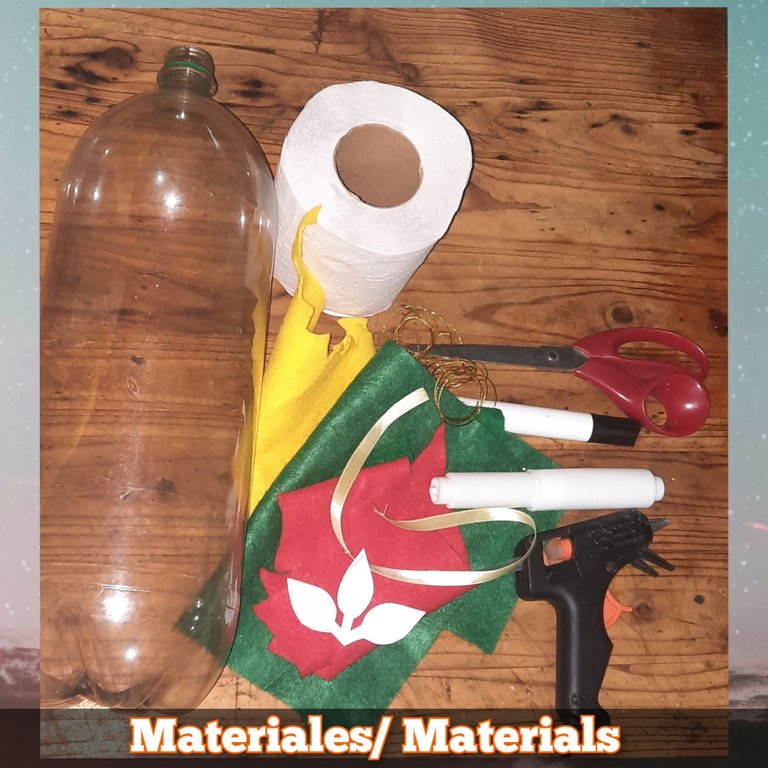
MATERIALES
✳ Botella plástica de 3 litros
✳ Tijera
✳ Fieltro
✳ Pistola de Silicón
✳ Marcador
✳ Hilo dorado
✳ Cinta de tela amarilla
MATERIALS
✳ 3-liter plastic bottle
✳ Scissors
✳ Felt
✳ Silicone gun
✳ Marker pen
✳ Gold thread
✳ Yellow fabric ribbon
✳ Yellow fabric tape
Acompañenme a ver el paso a paso
Join me to see the step by step
Paso 1
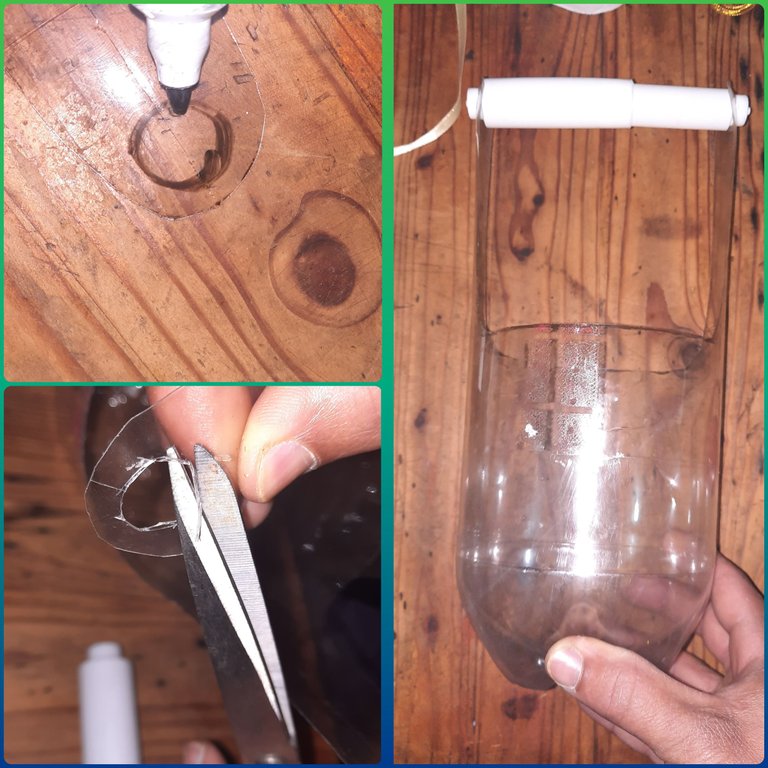
Mis amigos comenzamos marcando el tamaño del papel higiénico en la botella de plastico y cortamos, dejando una aza de cada lado.
Step 1
My friends we start by marking the size of the toilet paper on the plastic bottle and cut, leaving a loop on each side.
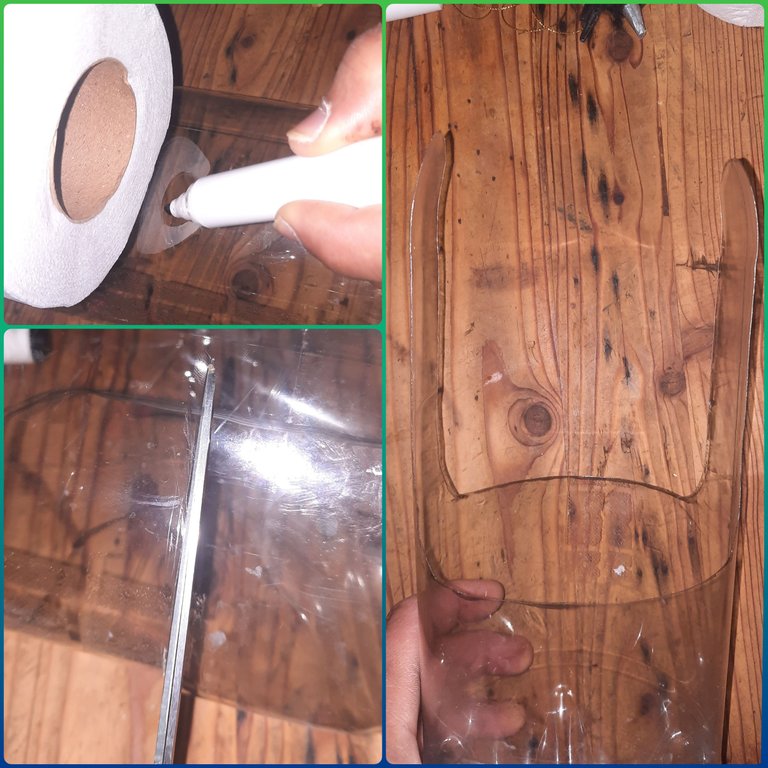
Paso 2
Marcamos en cada aza un círculo del tamaño del sujetador de papel, luego recortamos y colocamos en sujetador.
Step 2
Mark a circle the size of the paper fastener on each cup, then cut it out and place it on the fastener.
Paso 3
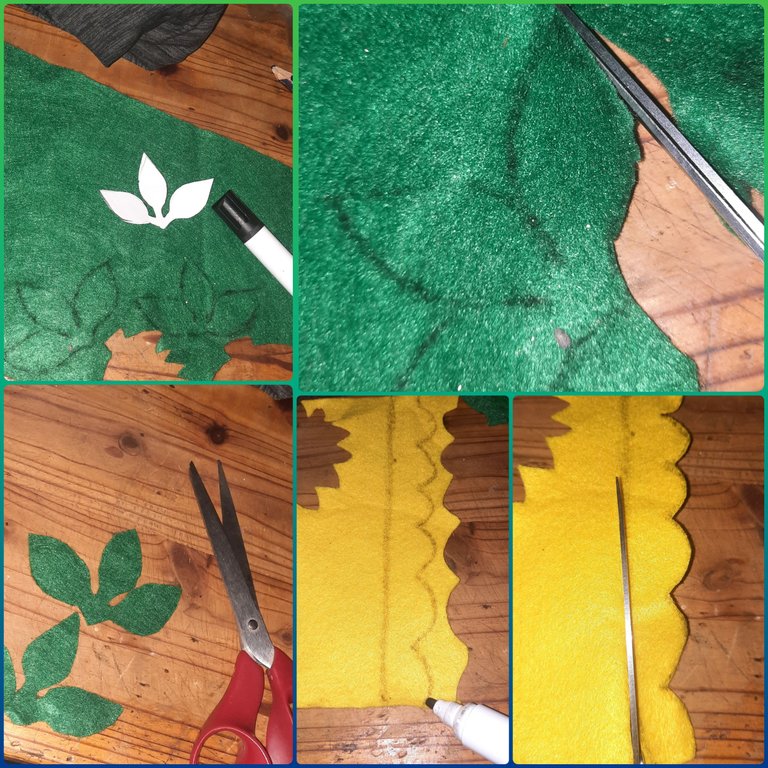
En el fieltro verde marcamos el patrón de las hojas, también marcamos unas líneas curvas en el Fieltro amarillo, una tira en el fieltro rojo y recortamos todo.
Step 3
On the green felt we mark the pattern of the leaves, we also mark some curved lines on the yellow felt, a strip on the red felt and cut out everything.
Paso 4
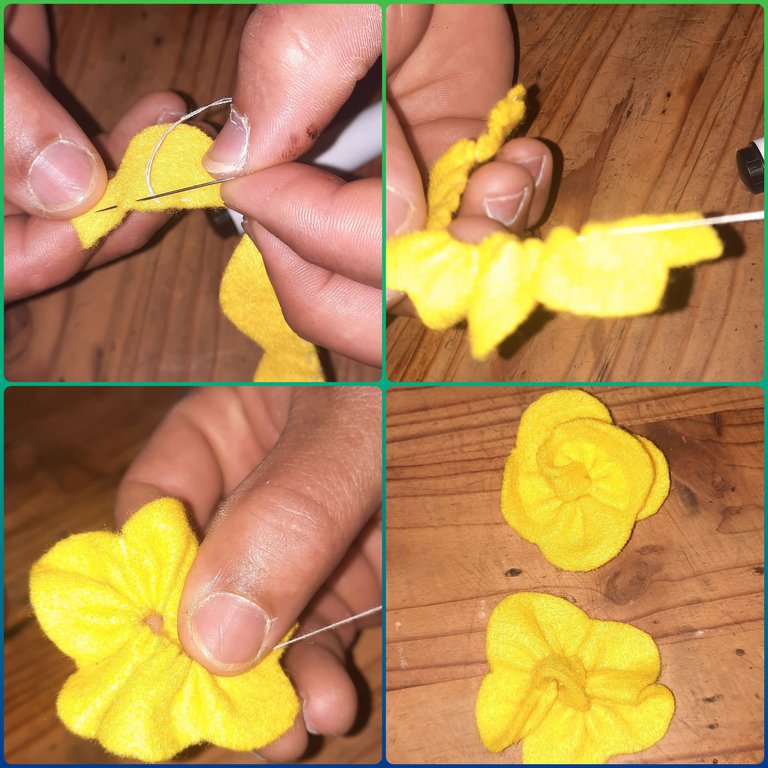
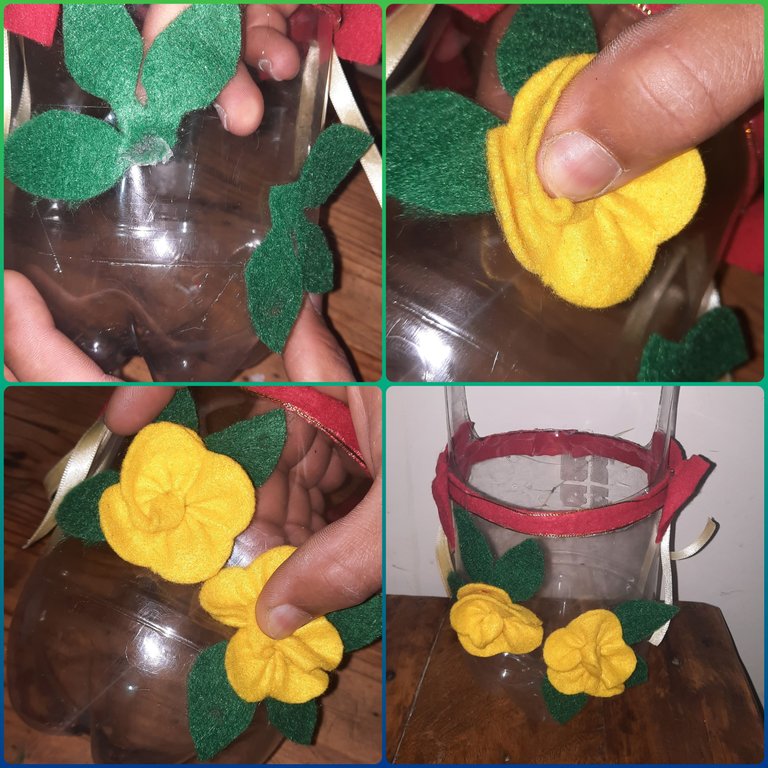
Con ayuda de la aguja cocemos el borde del fieltro amarillo que antes recortamos y vamos a armar dos flores.
Step 4
With the help of the needle we sew the edge of the yellow felt that we previously cut out and we are going to make two flowers.
Paso 5
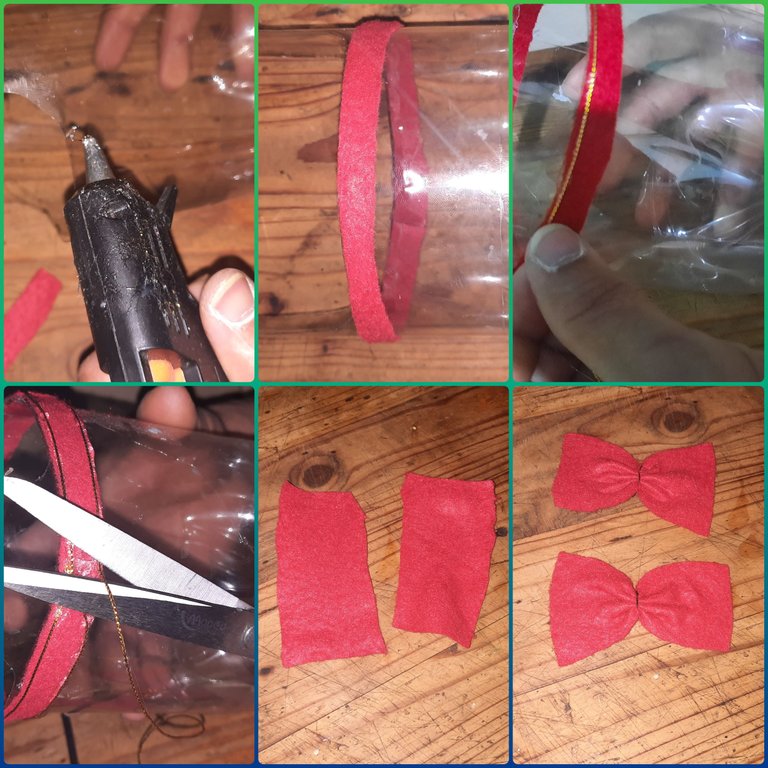
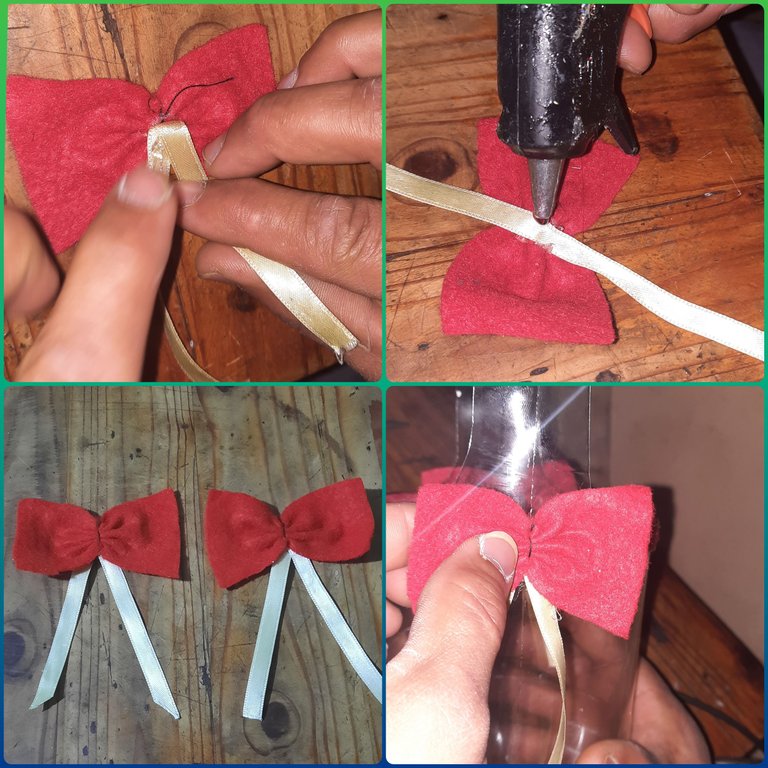
Seguidamente vamos a pegar la tira del fieltro rojo por el borde de la botella, también pegamos el hilo dorado encima de la tira de fieltro, recortamos 2 cuadrados en el fieltro rojo y armamos los lazos.
Step 5:
Next we are going to glue the strip of red felt around the edge of the bottle, we also glue the golden thread on top of the strip of felt, we cut out 2 squares in the red felt and we make the bows.
Paso 6
Luego pegamos la cinta detrás del lazo rojo y lo pegamos a cada lado de la botella de plastico
Step 6
Then we glue the ribbon behind the red ribbon and glue it to each side of the plastic bottle.
Paso 7
Para finalizar pegamos las hojas de fieltro verde y las 2 flores de fieltro amarillo.
Step 7
Finally, glue the green felt leaves and the 2 yellow felt flowers.
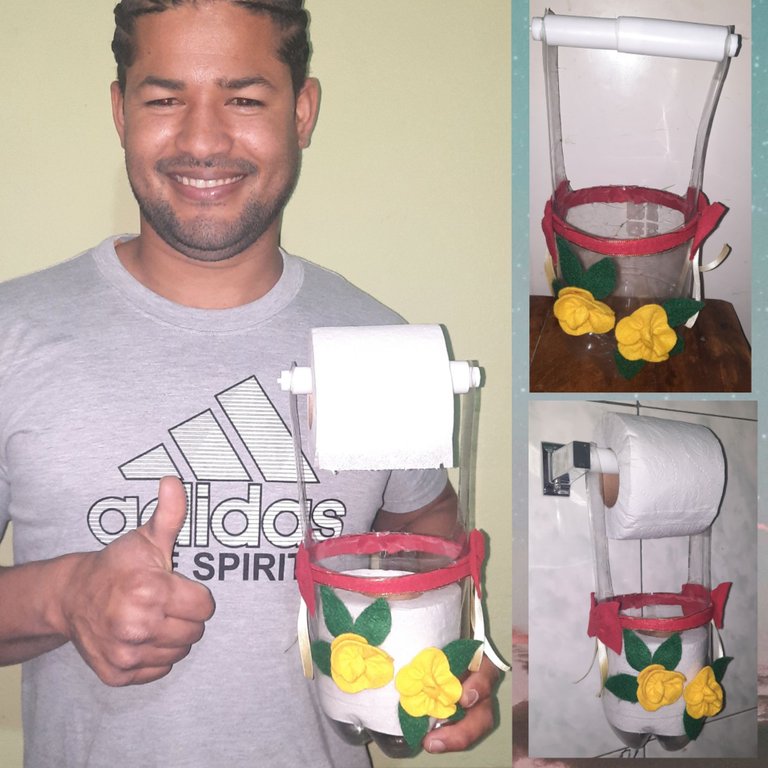
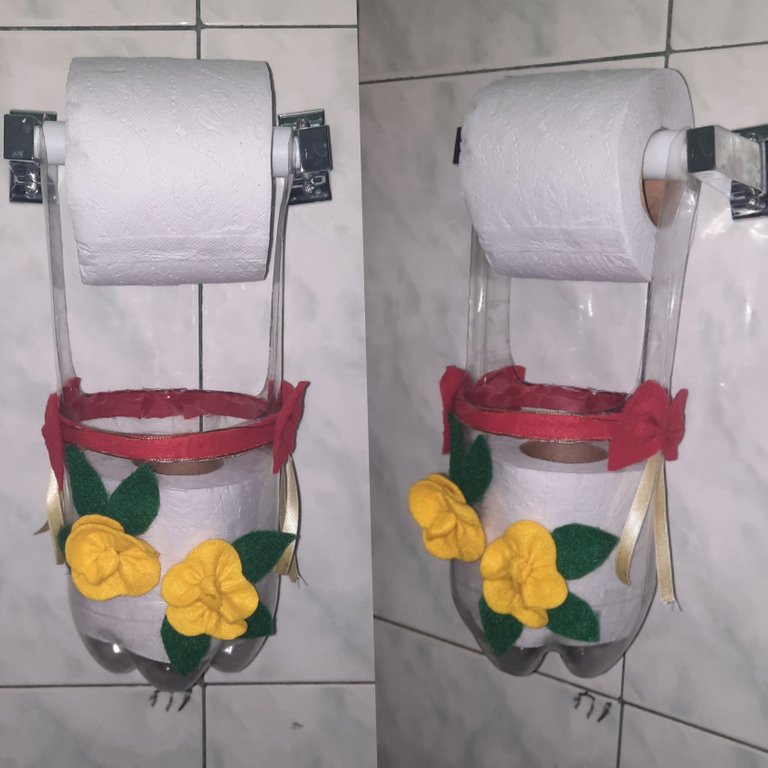
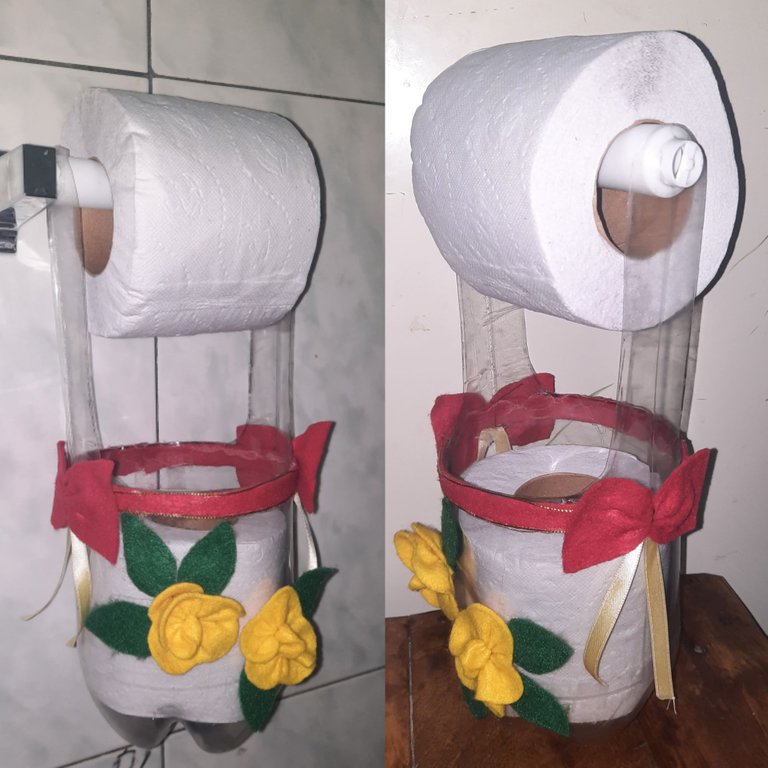
Así nos quedo el práctico porta papel higiénico
This is how we got our practical toilet paper holder
De ante mano GRACIAS por el apoyo y por leer mis publicaciones espero se encuentren excelente y les halla gustado el resultado de mi trabajo, me despido hasta otra oportunidad les deseo éxito en su vida y la bendición del todo poderoso
First of all THANK YOU for your support and for reading my publications, I hope you are excellent and that you like the result of my work, I bid you farewell until another opportunity, I wish you success in your life and the blessing of the Almighty.
Las fotos fueron tomadas por mi teléfono Huawei Y6 y fueron editadas en la aplicación Incollage Traductor www.DeepL.com/Translator (free version) The photos were taken by my Huawei Y6 phone and were edited in the Incollage application. Translator www.DeepL.com/Translator (free version)


