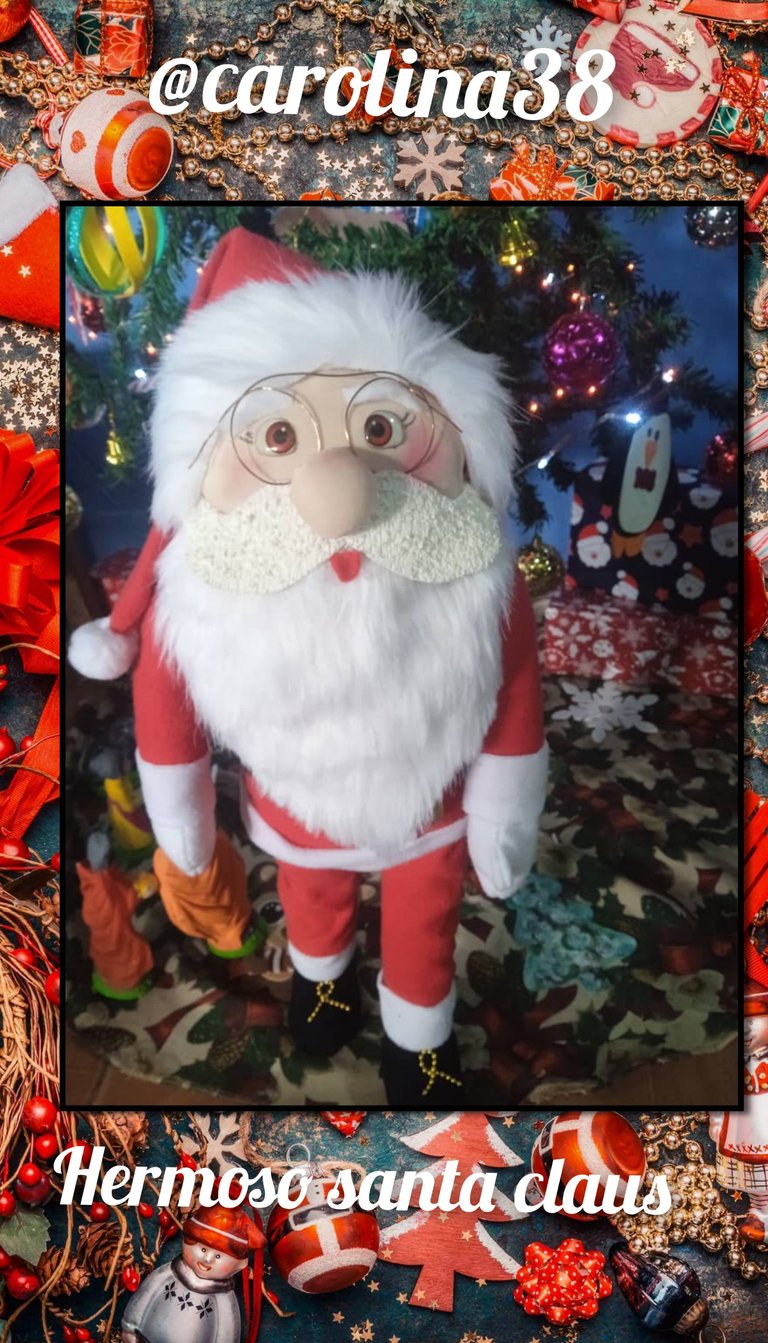
hola comunidad reciban un cordial saludo deseándole qué en cada rincón estemos bien de salud y con buen ánimo para continuar trabajando y esforzándonos, Hoy les traigo un nuevo trabajo hecho a mano y con material reciclado les mostrare como hacer un hermoso santa de pie ideal para decorar y ambientar cualquier espacio de nuestra casa en esta navidad espero y les guste y puedan hacer.
hello community receive a warm greeting wishing you that in every corner we are in good health and in good spirits to continue working and striving, Today I bring you a new handmade work and recycled material will show you how to make a beautiful standing santa ideal for decorating and setting any space in our home this Christmas I hope you like it and you can do.
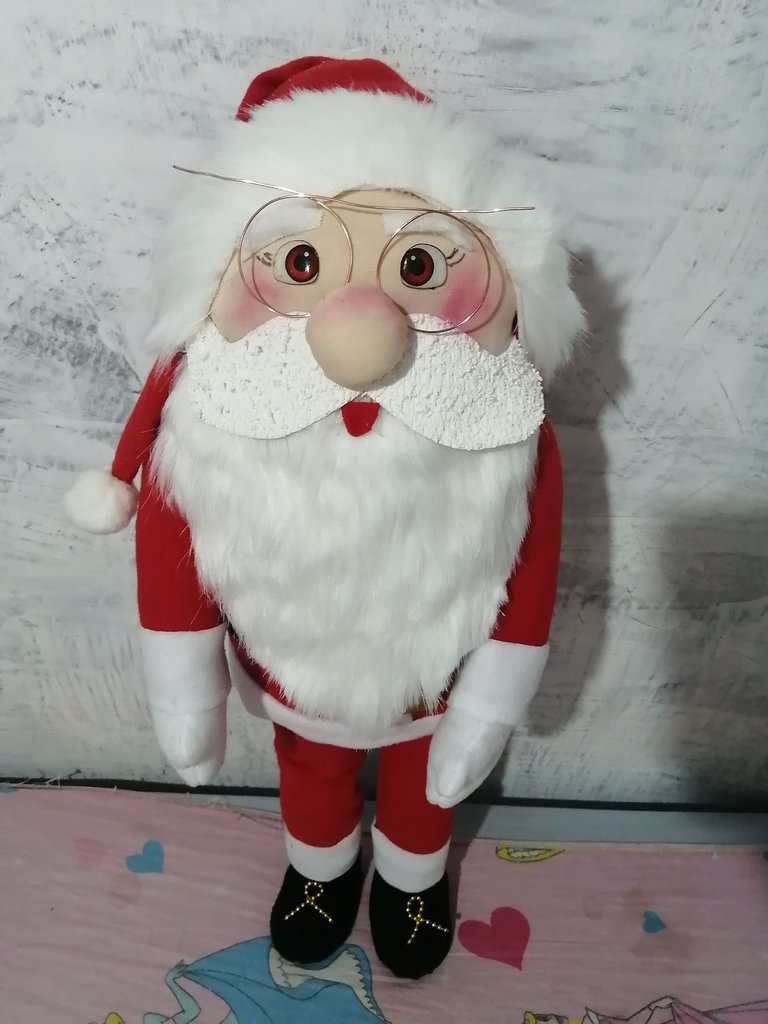
MATERIALES:
botella plastica
silicon
carton grueso
guata o reyeno
Pistola de silicon
exacto
2 palitos de cepillo de 20 cm
tela roja
tela blanca
Tela peluche para la barba
foami peluche
tijera
alambre para los lentes
tela color piel
ojos
colorete
patrones
aguja y hilo
Tela negra
foami dorado
**MATERIALS
plastic bottle
silicone
thick cardboard
wadding or reyeno
silicone gun
exact
2 sticks of 20 cm brush
red cloth
white cloth
Plush beard cloth
plush foami
scissors
wire for glasses
skin-colored cloth
eyes
blusher
patterns
needle and thread
black fabric
gold foami
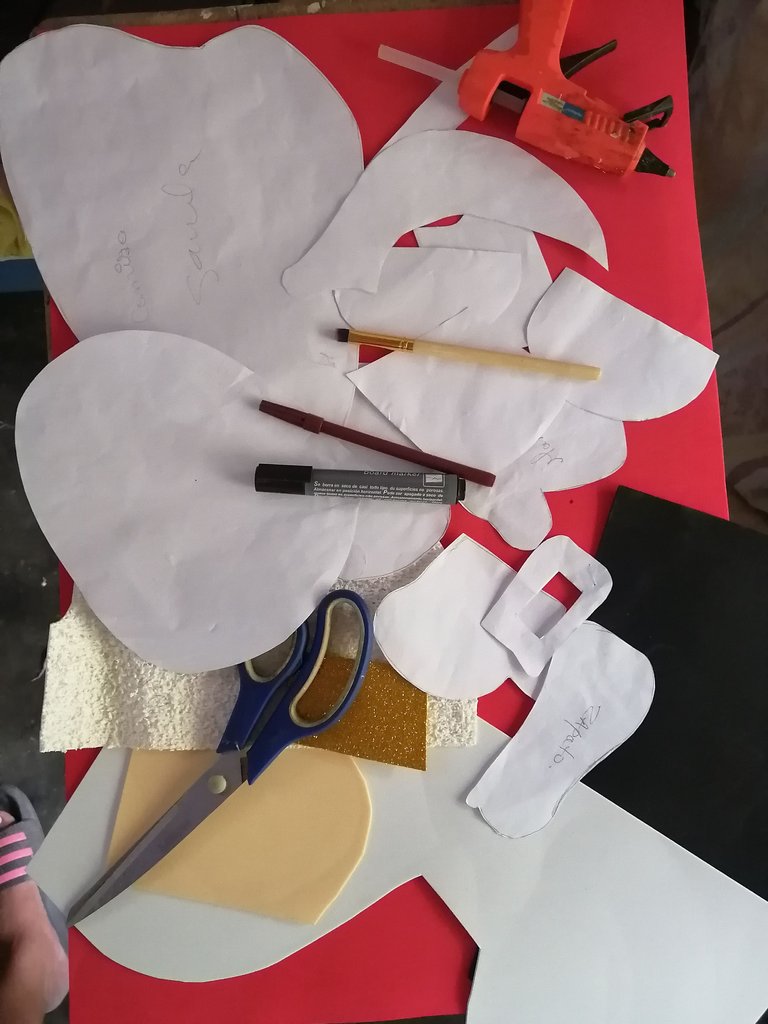
Elaboremoslo Juntos
Let's work it out together
Procedimientos
Procedures
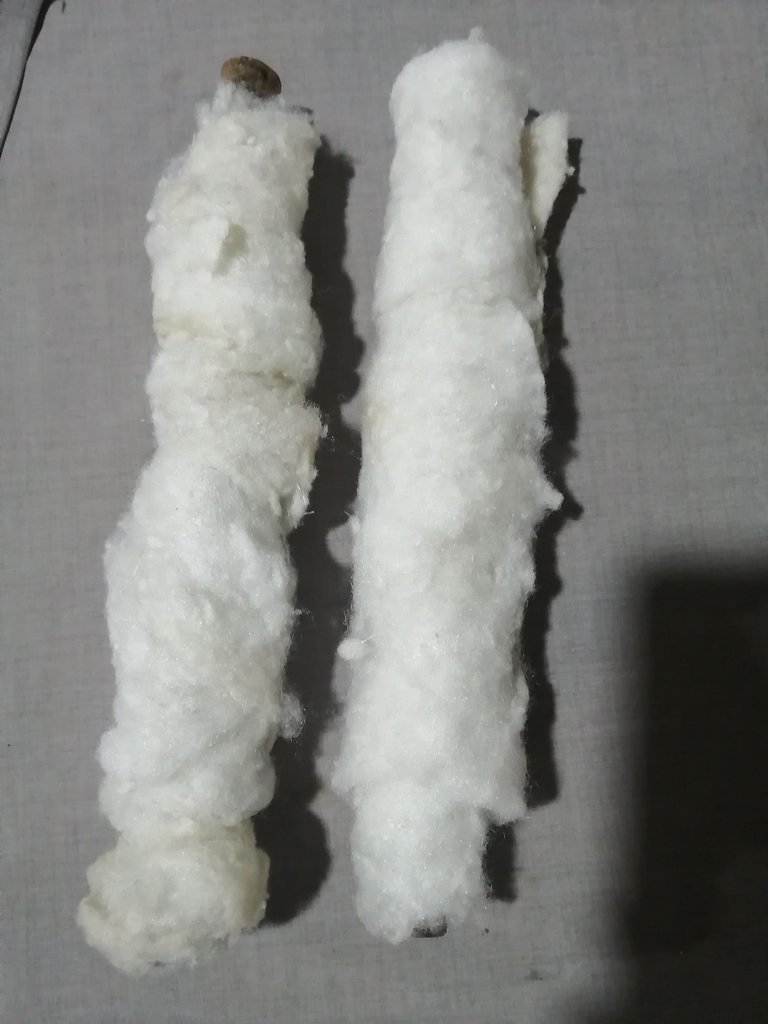
lo primero que haremos es pegar guata o reyeno al rededor del palo de cepillo, la cantidad de reyeno sera la qué crea usted conveniente, para el grosor de las piernas.
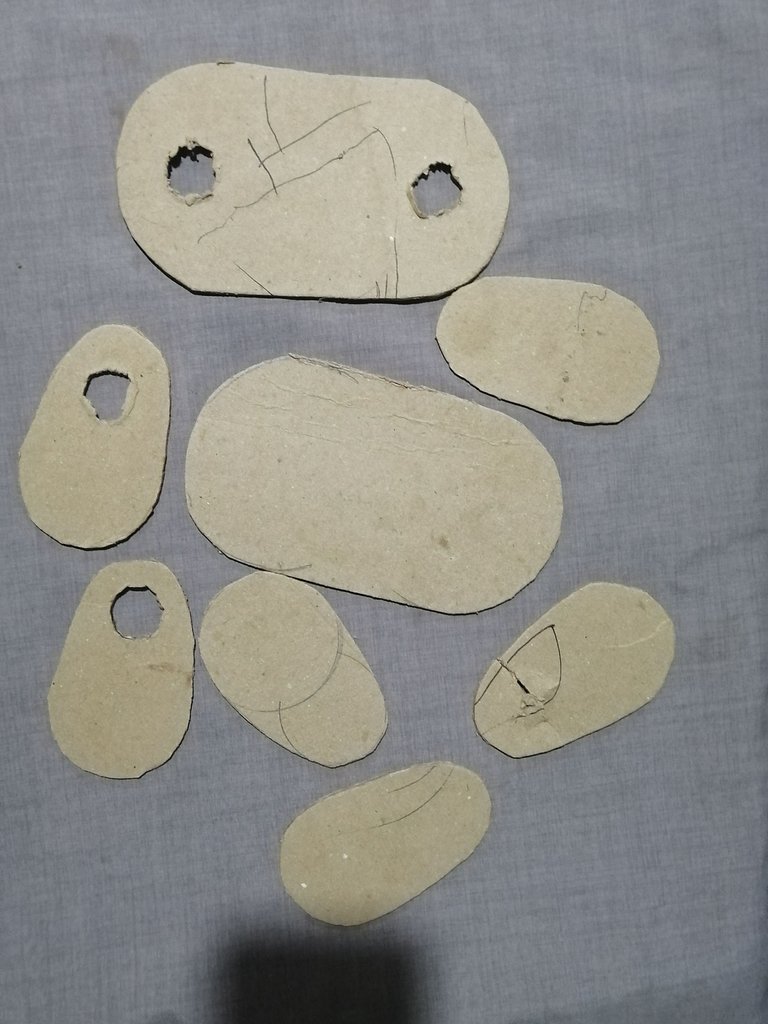
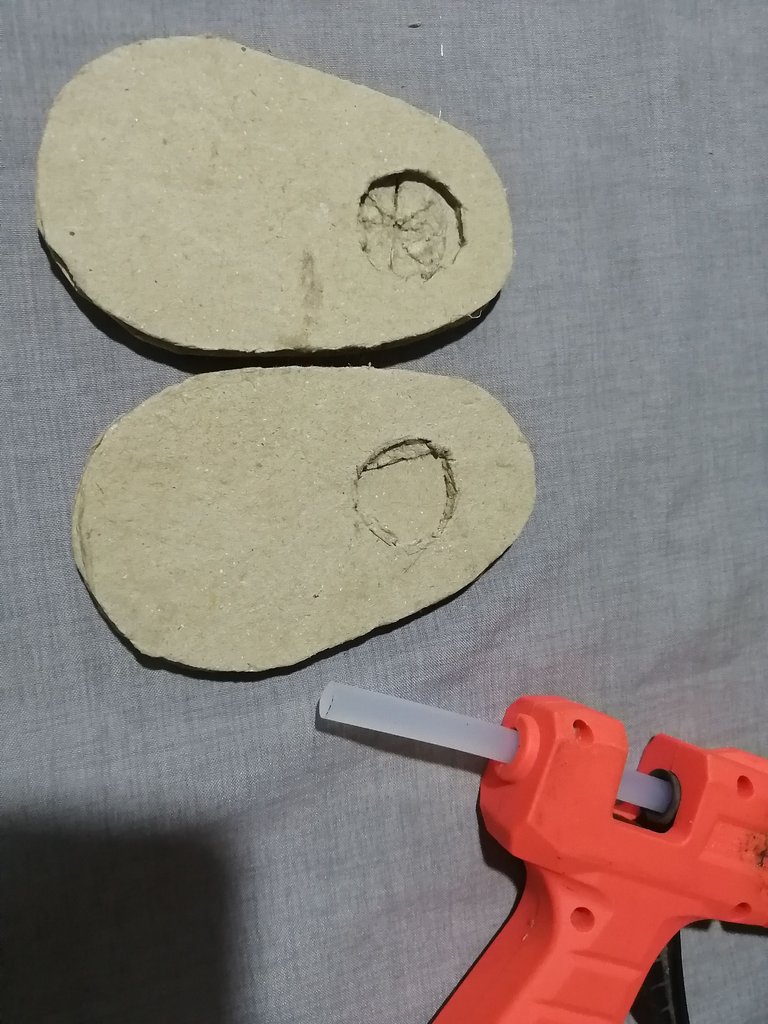
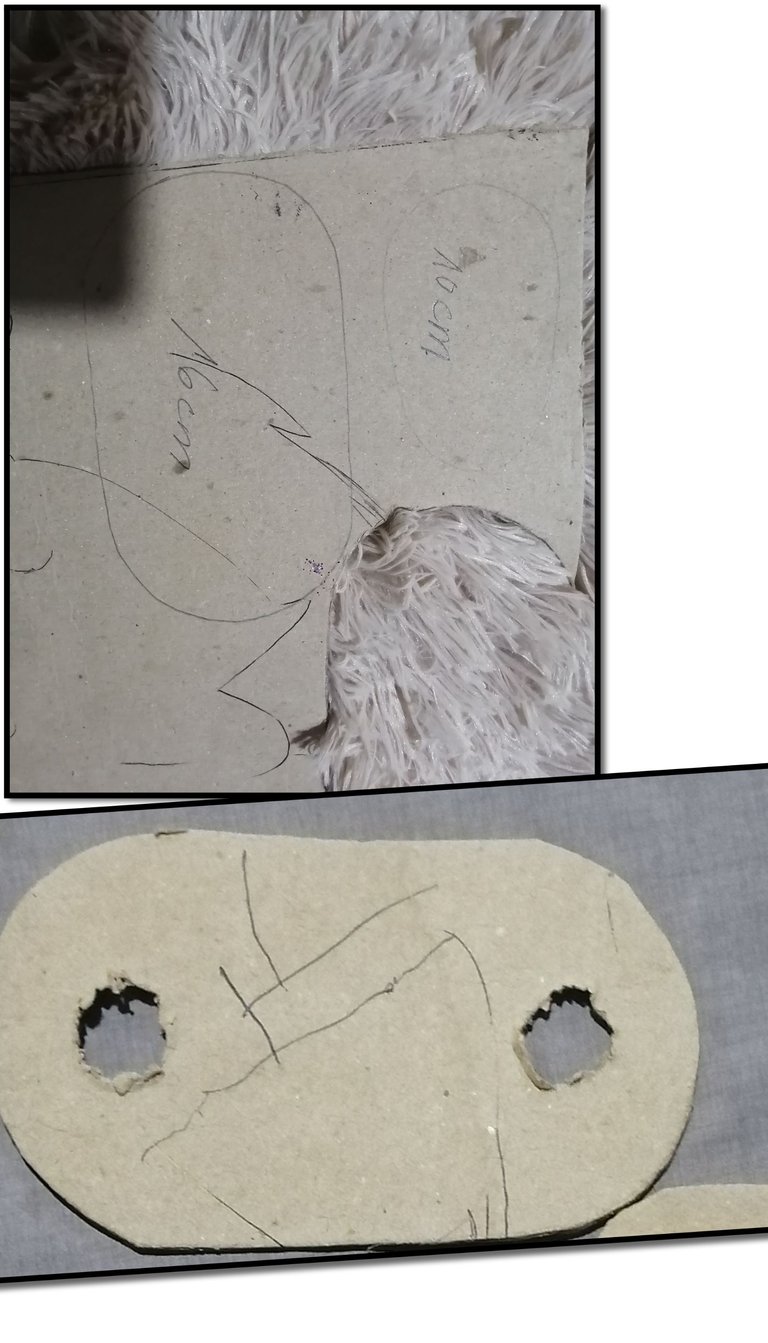
el siguiente paso sera marcar el patrón del zapato sobre el cartón 3 veses per cada zapato y a una de las piezas le hacemos 2 hueco del grosor del palo a usar, pegamos las 3 piezas colocando la del huecos de primero como les muestro en la imagen.
The next step is to mark the pattern of the shoe on the cardboard 3 times for each shoe and to one of the pieces we make 2 holes of the thickness of the stick to use, we glue the 3 pieces placing the one with the holes first as I show you in the image.
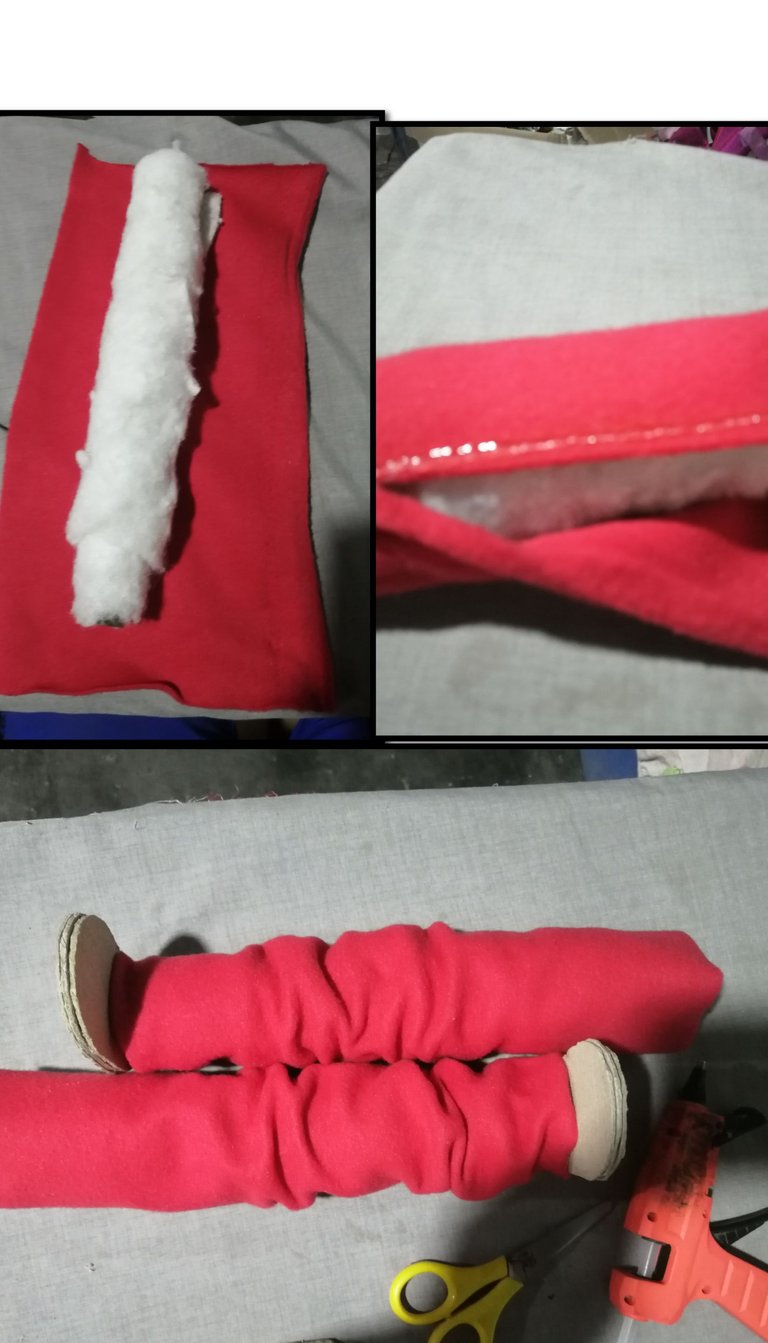
lo siguiente sera cortar dos rectángulos en tela roja del ancho de las piernas luego pegamos con silicon poco a poco y después lo pegamos a la pieza anterior
The next step is to cut two rectangles in red fabric the width of the legs, then we glue them with silicone little by little and then we glue them to the previous piece.
ahora cortamos en cartón la base qué va a depender de la forma del envase plástico en este caso lo coloque ovalado y corte los mismos 3 piezas y les hice el huecos en una de las piezas para pegar las piernas.
Now we cut in cardboard the base which will depend on the shape of the plastic container in this case I placed it oval and cut the same 3 pieces and I made the holes in one of the pieces to glue the legs.
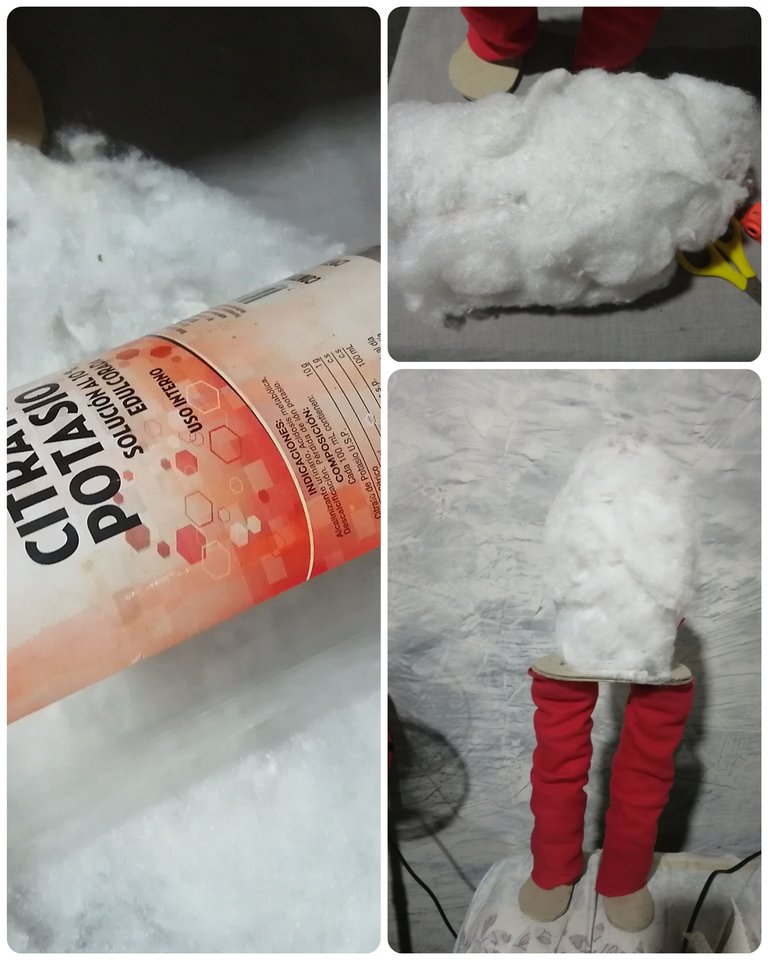
lo siguiente que haremos sera pegar las pierna en la base ovalada y luego forrar el envase plástico con bastante guata o reyeno luego pegamos el mismo sobre la base como les muestro en la imagen.
The next thing to do is to glue the legs to the oval base and then line the plastic container with plenty of wadding or reyeno and then glue it to the base as shown in the image below.
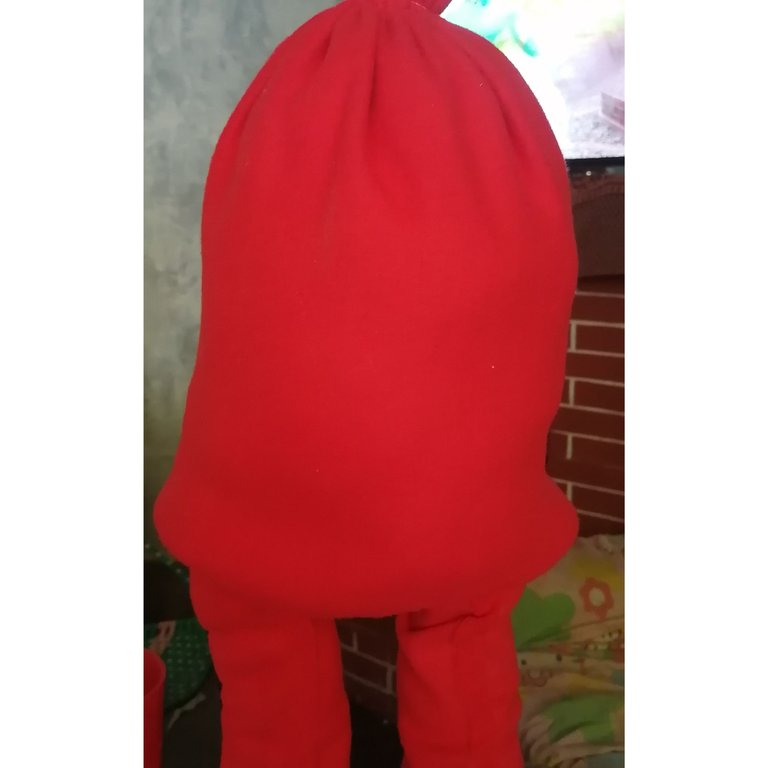
lo que haremos ahora será forrar con tela roja el envase reyeno de esta manera tendremos el cuerpo de dicho santa, dejamos la tela 2cm más abajo qué la pieza y recojamos la parte de arriba con hilo.
What we will do now is to line with red fabric the Reyeno container in this way we will have the body of the santa, we leave the fabric 2cm lower than the piece and pick up the top with thread.
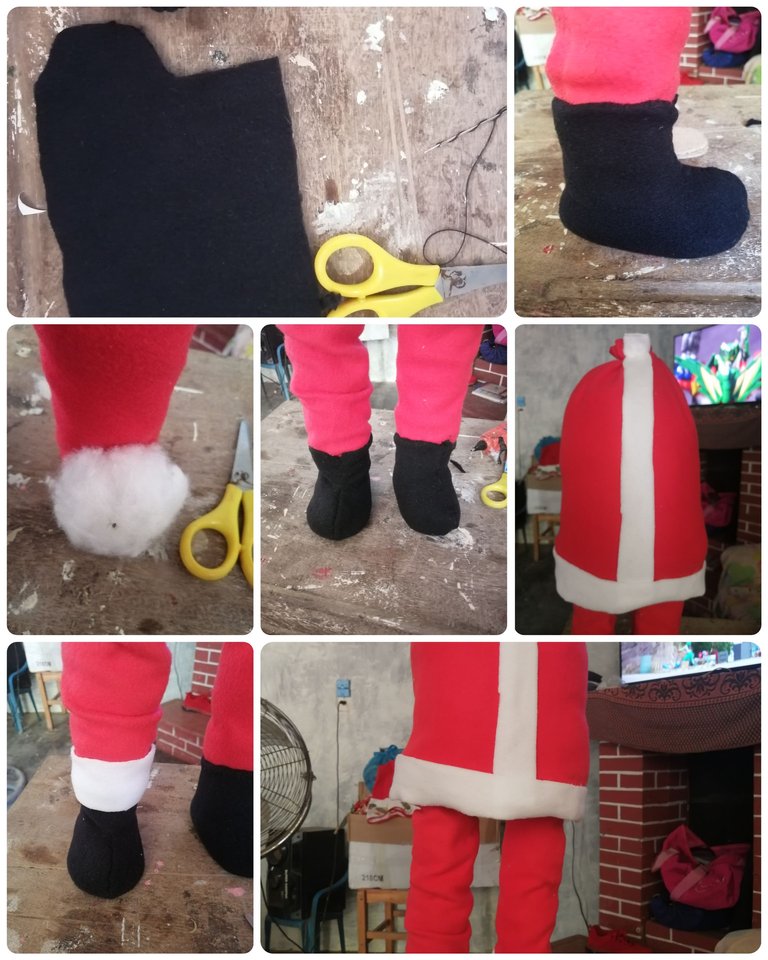
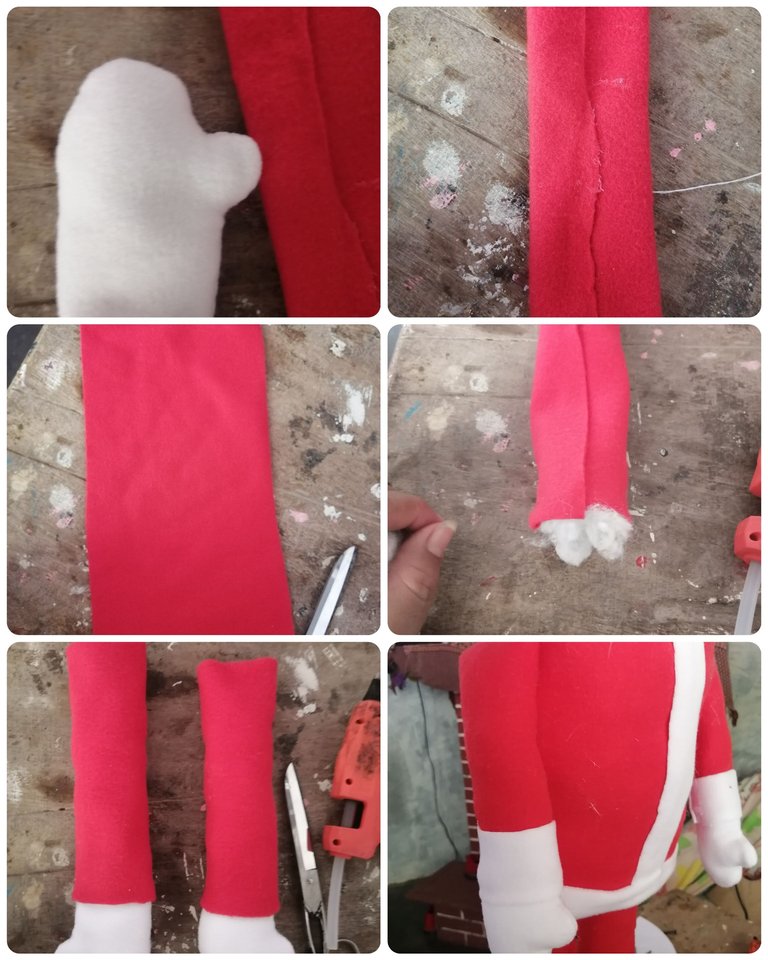
Lo siguiente sera cortar piezas en forma de bota del ancho de la base de los pies pegamos alrrededor delos mismo y les reyenamos un poco, ahora cortamos tiras blancas de 3cm y le ponemos en la base de las patas, en el borde del traje y en el centro del traje.
The next step is to cut boot-shaped pieces the width of the base of the feet, glue them around the base of the feet, and then we will cut white strips of 3cm and put them at the base of the legs, at the edge of the suit and in the center of the suit.
en este paso cortamos dos rectangulos de 22cm x 5cm en tela roja, unimos 2 partes pegándola o cosiendolas, cortamos dos guantecitos qué será las manitas luego las unimos a la pieza interior y rellenamos con un poco de reyeno estas serán las manos, la pegarnos en la parte inferior de arriba de la pieza.
in this step we cut two rectangles of 22cm x 5cm in red fabric, we join 2 parts by gluing or sewing them together, we cut two little gloves which will be the hands then we join them to the inner piece and fill with a little reyeno these will be the hands, the glue on the bottom of the top of the piece.
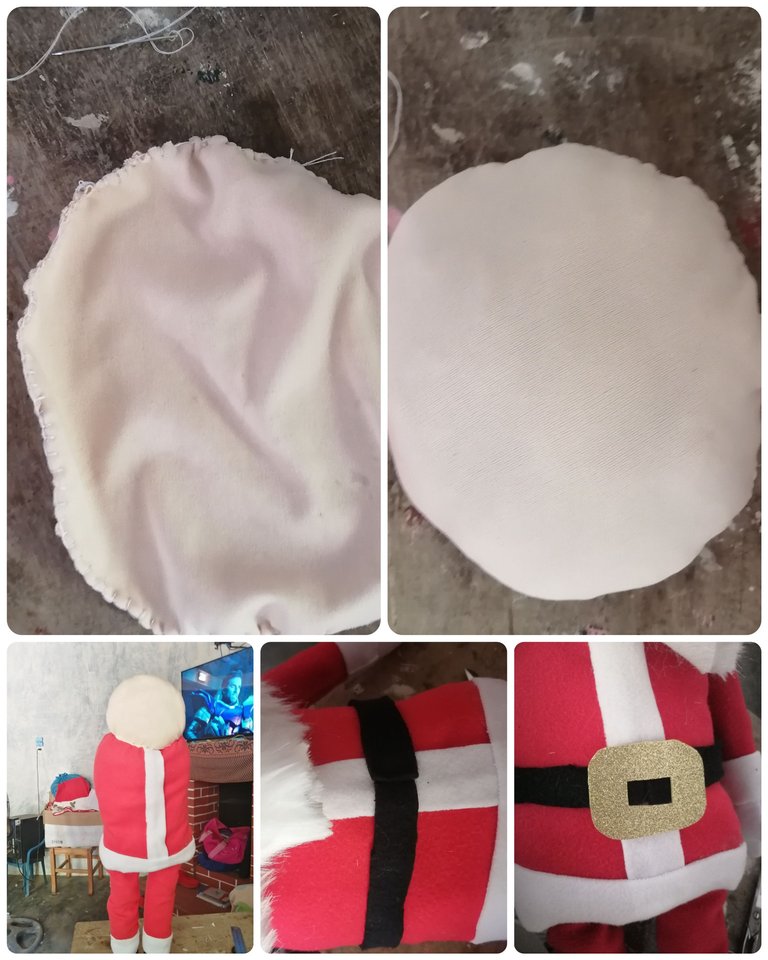
cortamos 2 círculos de 20cm en color piel, cosemos y luego rellenamos, después pegamos para formar la cabeza,cortamos una tira de color negro y pegamos a la altura de las caderas del mismo y pegamos una hebilla sobre el cinturon.
cut 2 circles of 20cm in leather color, sew and then fill, then glue to form the head, cut a strip of black color and glue at the height of the hips and glue a buckle on the belt.
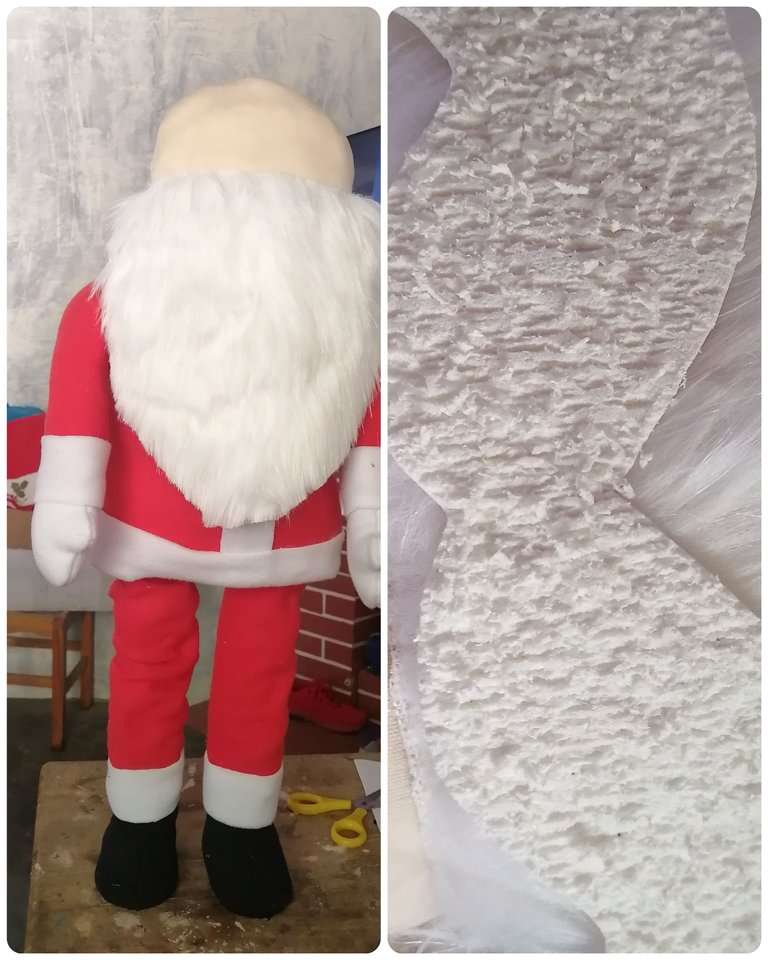
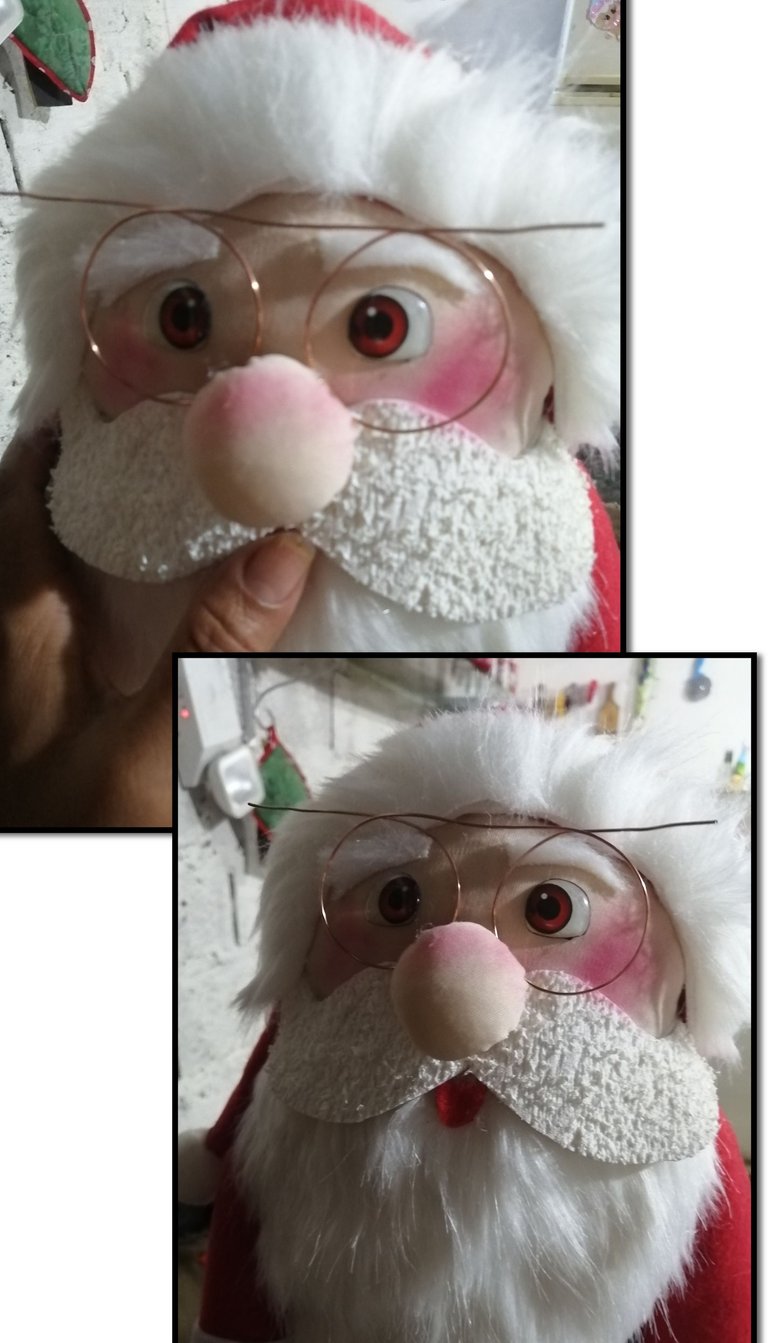
continuamos recortando un triángulo del ancho de la cara en tela de peluche y pegamos, luego cortamos un bigote en foami peluche también pegamos, cortamos un círculo en tela color carne para formar la nariz lo recogemos por el borde, rellenamos y pegamos.
We continue by cutting out a triangle the width of the face in plush fabric and glue, then we cut a mustache in plush foami and glue, we cut a circle in flesh-colored fabric to form the nose, we pick it up by the edge, fill it and glue.
ahora cortamos un triángulo de 40cm en color rojo para el gorro pegamos reyenamos, pegamos un pompon grande en la punta del gorro y una tira en el borde del mismo, y pegamos a la pieza principal, luego pegamos las pestañas y los ojos.
Now we cut a 40cm triangle in red for the hat, glue a large pompon on the tip of the hat and a strip on the edge of it, and glue it to the main piece, then we glue the eyelashes and the eyes.
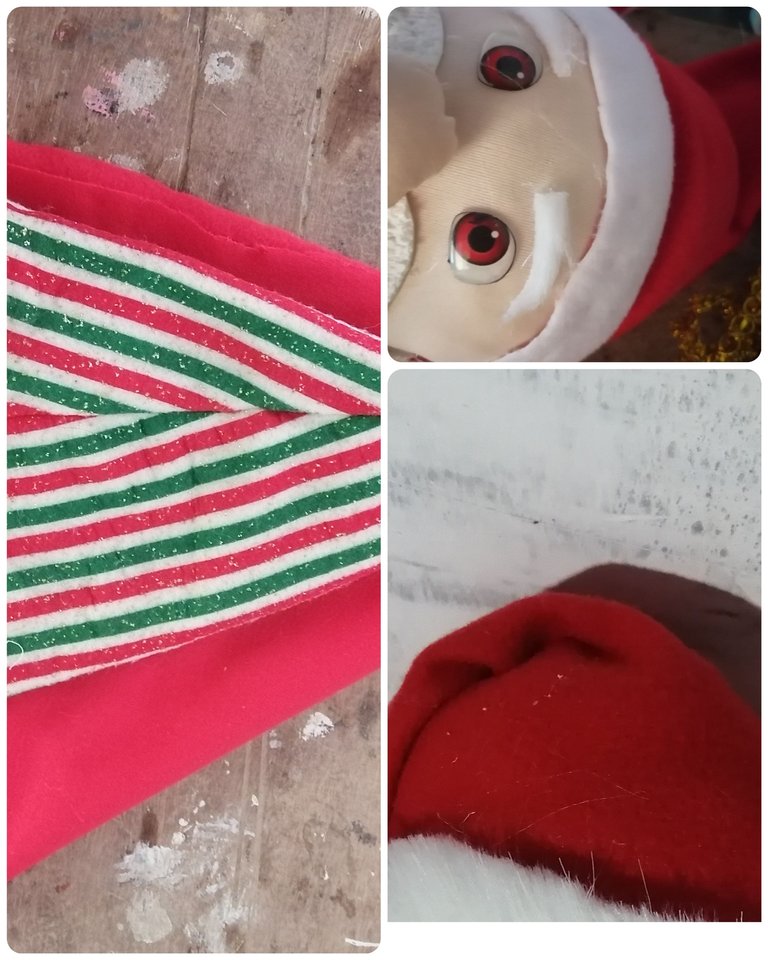
en este paso cortamos 25 cm de alambre y con ayuda de un vaso pequeño hacemos los lentes luego maquillamos y hacemos los retoques qué queramos.
Now we cut a 40cm triangle in red for the hat, glue a large pompon on the tip of the hat and a strip on the edge of it, and glue it to the main piece, then we glue the eyelashes and the eyes.
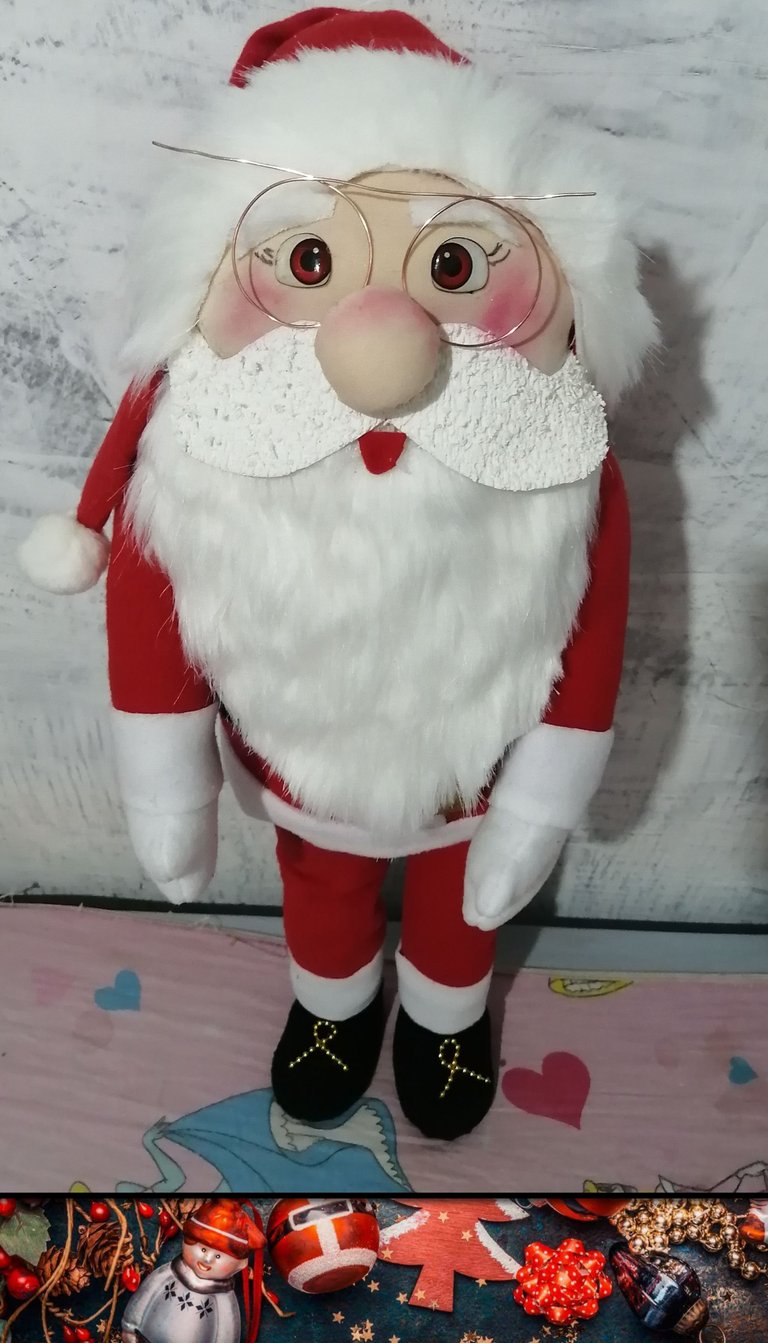
VEAMOS EL RESULTADO
LET'S SEE THE RESULT
Muchas gracias por leerme, espero que te haya gustado, que Dios te bendiga, hasta la próxima.
Thank you very much for reading me, I hope you liked it, God bless you, until next time.
</div
