
¡Hola amigos de Hive! 💗✨
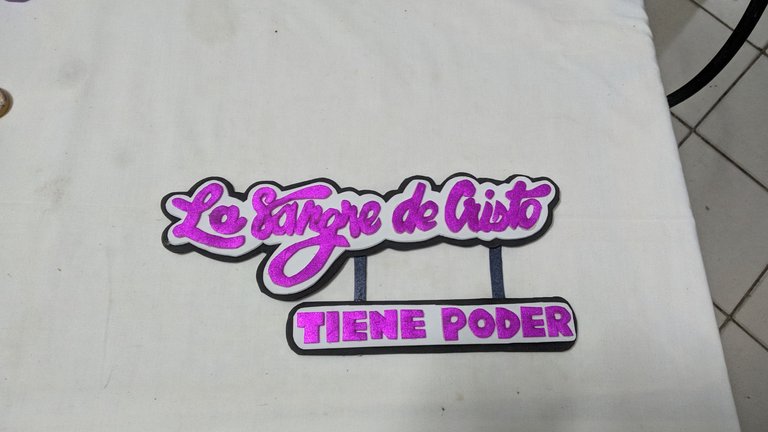
Hoy les mostraré estas letras en relieve con foami o goma Eva (según lo conozcas en tu país) para decorar el hogar de una tía con una linda frase que ella escogió, utilicé el color fucsia como ella lo eligió, el blanco y negro para el fondo. Comencé buscando una imágen de referencia acá les dejo el enlace de las letras. Ella deseaba estas letras para colgarlas en una pared y es bastante significativo para mí realizarlas con mucho cariño, a mis tías les gustaron tanto que pronto realizaré unas nuevas 💗
Hello friends of Hive! 💗✨
Today I will show you these embossed letters with foami or eva gum (depending on what you know in your country) to decorate the home of an aunt with a nice phrase that she chose, I used the color fuchsia as she chose, black and white for the background. I started looking for a reference image, here is the link to the letters. She wanted these letters to hang on a wall and it is quite meaningful for me to make them with much affection, my aunts liked them so much that soon I will make new ones 💗
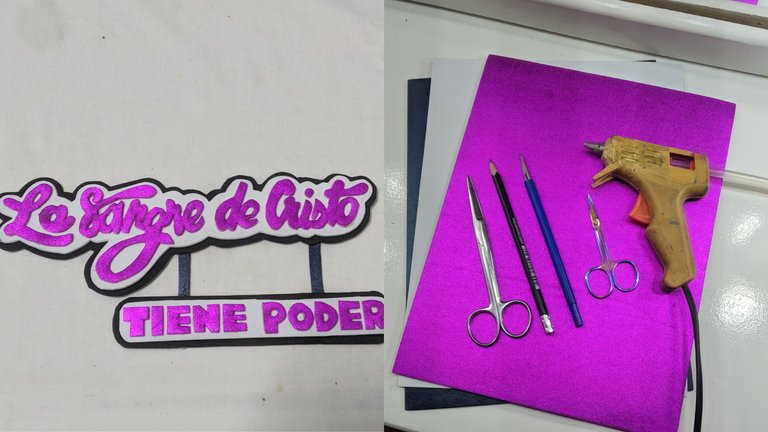
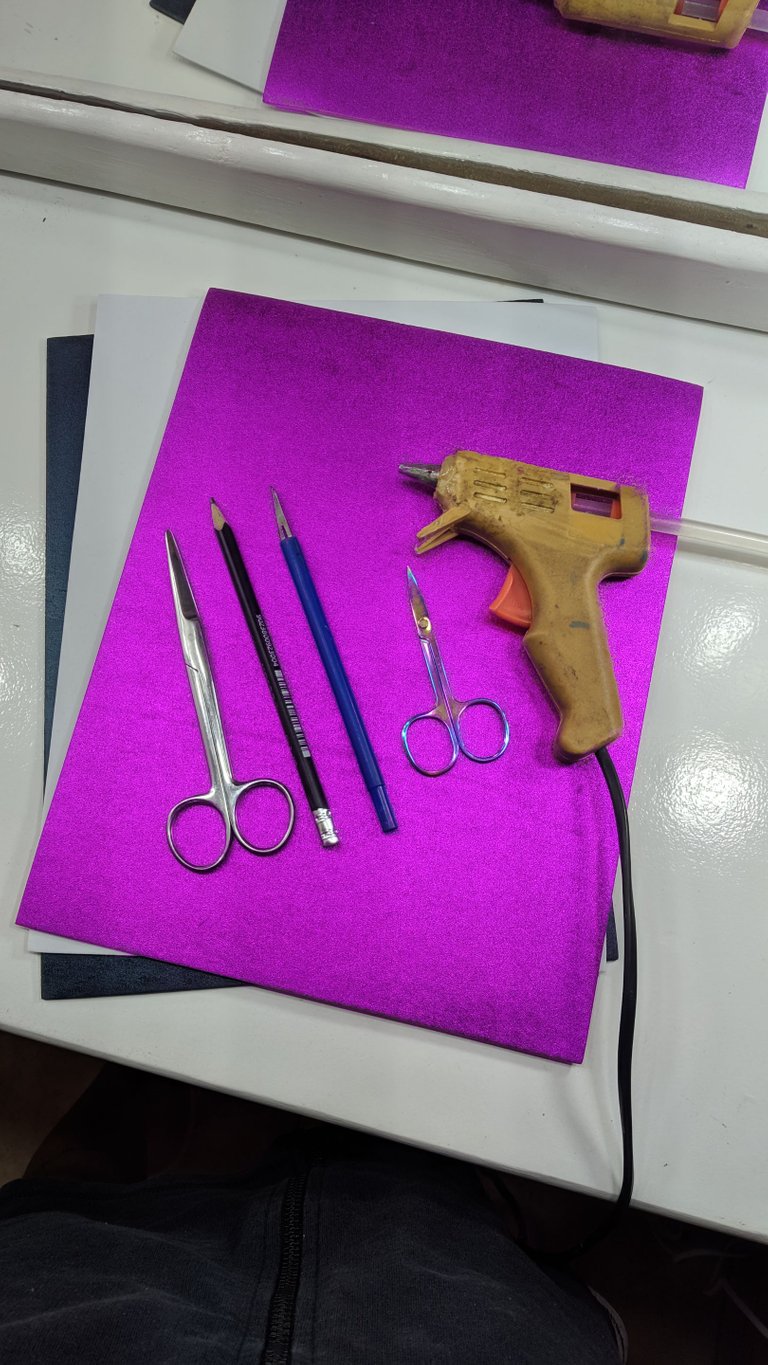
MATERIALES:
- Foami (tres colores)
- Lápiz
- Exacto
- Tijeras
- Pegamento (En este caso utilicé silicón caliente)
- plantillas hechas a mano
MATERIALS:
- Foami (three colors)
- Pencil
- Cutter
- Scissors
- Glue (In this case I used hot silicone)
- handmade stencils
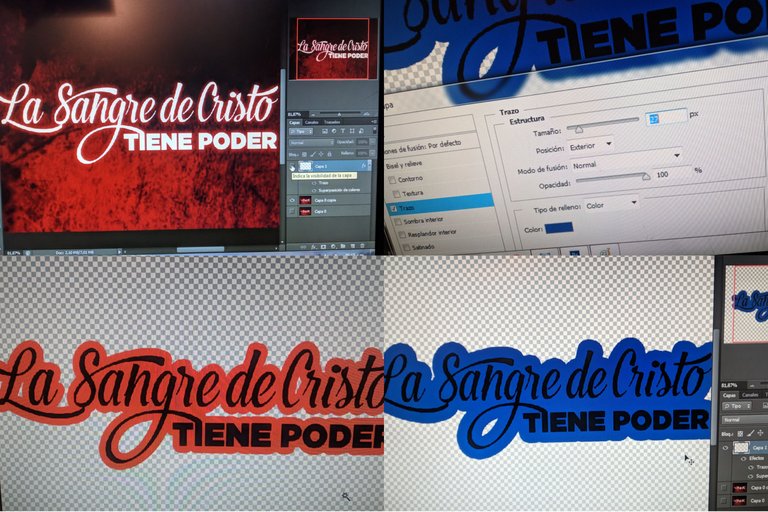
Primero seleccioné la imagen que les comparto arriba y la abriremos en alguna aplicación que nos permita modificar su grosor, es decir sus bordes yo utilizo (Photoshop) para poder hacer el molde de la letra en papel a mano ✍🏼 entonces, le quitó el fin a la imagen, selecciono las letras y ya que soy muy delgadas aumento el trazo de las letras en estilo de capa, y lo cambio a algún colo como el de la siguiente imagen (rojo o azul) para poder calcar en papel directamente con un lápiz desde el monitor de la computadora y por ejemplo el Foami fucsia al ser las letras debe de tener menor grosor que el blanco y el negro que solo serán las siluetas.
First I select the image that I share above and open it in an application that allows us to modify its thickness, ie its edges I use (Photoshop) to make the mold of the letter on paper by hand ✍🏼 then, I remove the end of the image, select the letters and since I am very thin I increase the stroke of the letters in layer style, and I change it to some color like the following image (red or blue) to be able to trace on paper directly with a pencil from the computer monitor and for example the fuchsia Foami being the letters must have less thickness than the black and white that will only be the silhouettes.
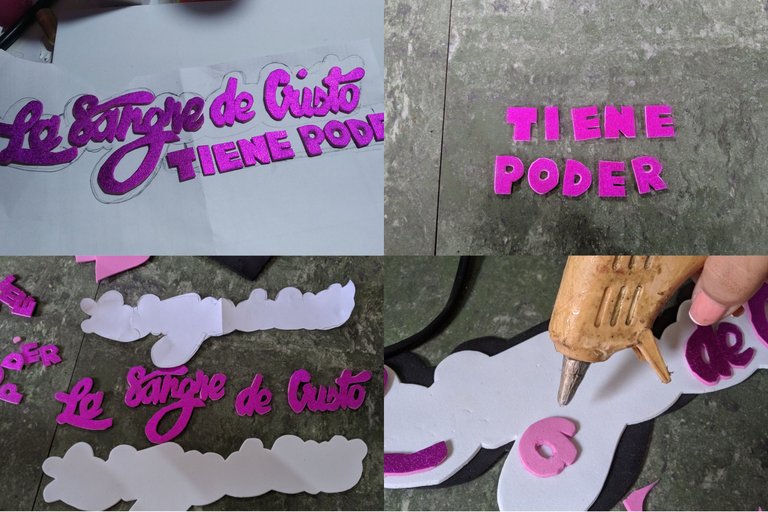
En una hoja reciclada y un lápiz, calque la letras segun el trazo deseado desde el monitor de mi computadora que es exactamente del tamaño de una hoja y luego las recorté para colocarlas volteada para que en el Foami se puedan ver derechas al recortar (Se que hay muchas más formas de pasar las letras al foami y aunque está es más tardada es la más cómoda para mí) con un lápiz voy hacer el trazo en el Foami y si alguna letra queda con algún defecto solo marco correctamente con el lápiz. Con unas tijeras hago el corte externo y utilicé unas más pequeñas para algunos detalles aunque es opcional y con un cutter o exacto contaremos la parte interna de las letras como la "O" y como me quedaron un poco gruesas algunas letras las rebajé un poco con la misma tijera.
In a recycled sheet and a pencil, trace the letters according to the desired stroke from the monitor of my computer which is exactly the size of a sheet and then cut them to place them upside down so that in the Foami can be seen straight when cut (I know there are many more ways to pass the letters to the foami and although this is more time consuming is the most comfortable for me) with a pencil I will make the stroke on the Foami and if any letter is with a defect just mark correctly with the pencil. With scissors I make the external cut and I used smaller ones for some details although it is optional and with a cutter or exact we will count the inner part of the letters as the "O" and as some letters were a little thick I lowered them a little with the same scissors.
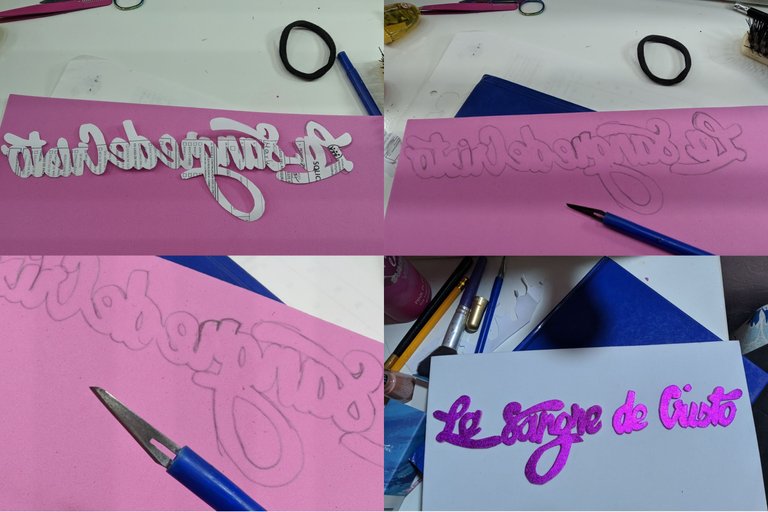
Coloqué las letras ya recortadas sobre una hoja reciclada y a mano le hice el contorno que sería el relieve en color blanco y una vez recortando igual que las letras coloqué el molde volteado en el Foami, hice lo mismo con las letras individuales recortando una a una. Repetí el proceso para poder sacar también el relieve en el Foami negro, guiandome por el blanco hasta ir pegado letra por letra, primero al fondo blanco y luego al negro, recomiendo muchísimo utilizar silicón frío en vez de caliente, por último solo agregué dos pequeñas tiras para unir ambos conjuntos de palabras y para las letras de abajo no realicé trazado, solamente hice un cuadro de el tamaño de estás.
Asi quedan estas letras sencillas, si te gustó déjamelo saber en un comentario y espero pronto hacer muchas manualidades más 💘
I placed the letters already cut out on a recycled sheet and by hand I made the outline that would be the relief in white color and once I cut out the same as the letters I placed the mold turned over on the Foami, I did the same with the individual letters cutting one by one. I repeated the process to also remove the relief on the black Foami, guided by the white until I glued letter by letter, first to the white background and then to the black, I highly recommend using cold silicone instead of hot, finally I just added two small strips to join both sets of words and for the letters below I did not draw, I just made a box of the size of these.
This is how these simple letters look like, if you liked it let me know in a comment and I hope to make many more crafts soon 💘.