
¡Hola amigos de Hive!🤍
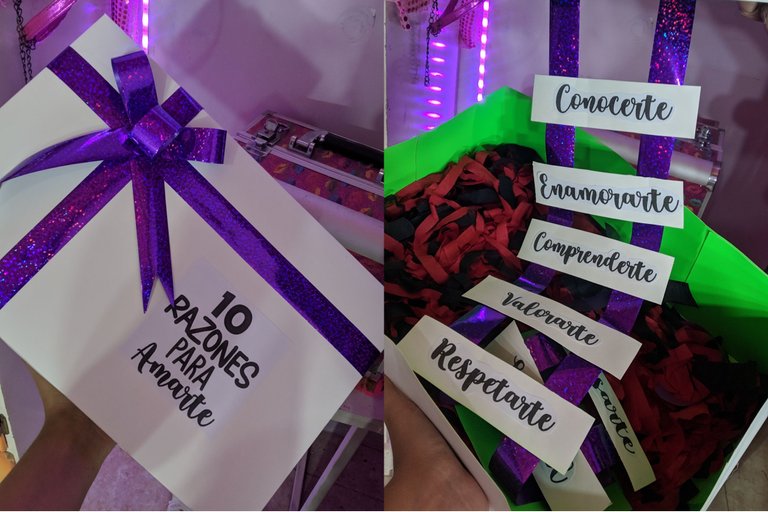
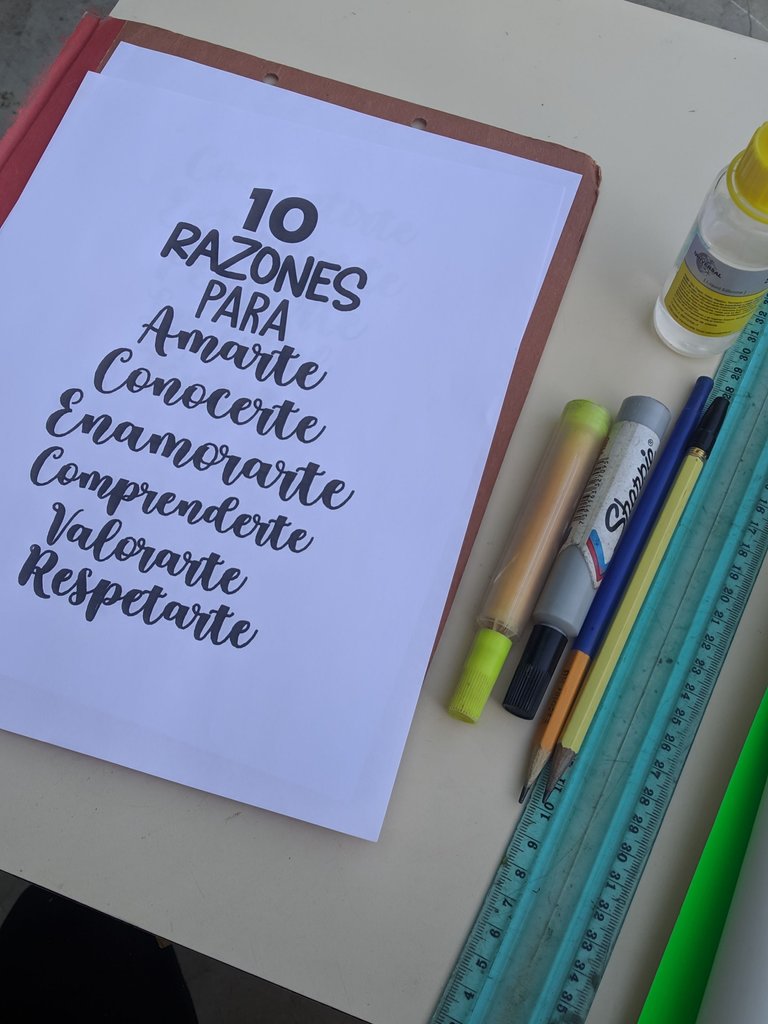
Si hay alguna cosa que me gusta muchísimo es hacer manualidades y por ello siempre mis amigos me han buscado para realizar arreglos o regalos para ocasiones especiales, para mí es un placer y para esta vez tuve que hacer todo de cero, incluyendo las letras, realicé el diseño en programas de edición y luego las imprimí en papel tamaño carta, todo esto con el fin de hacer una caja con el título que trata sobre "10 razones para amarte" y en su interior están las diez razones especificadas una a una.
El paso uno es armar todas las letras.en algún programa así sea Word con alguna fuente, en mi caso una fuente tipo lettering.
Hello friends of Hive!
If there is one thing that I like very much is to make crafts and therefore my friends have always sought me to make arrangements or gifts for special occasions, for me it is a pleasure and for this time I had to do everything from scratch, including the letters, I made the design in editing programs and then printed them on letter size paper, all this in order to make a box with the title that is about "10 reasons to love you" and inside are the ten reasons specified one by one.
Step one is to assemble all the letters in a Word program with some font, in my case a lettering font.

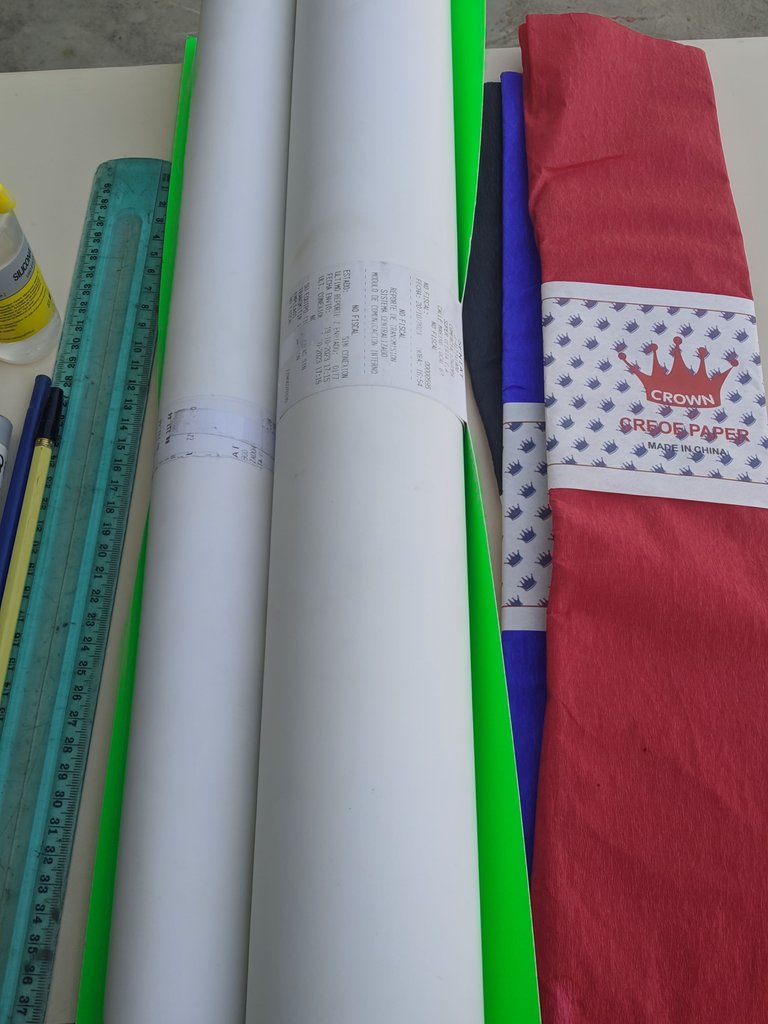

Los materiales que utilicé fueron :
- Cartulina (2)
- Tijera
- Regla
- Lápiz
- Goma
- Silicón frío
- Cinta de regalo
- Papel crepé
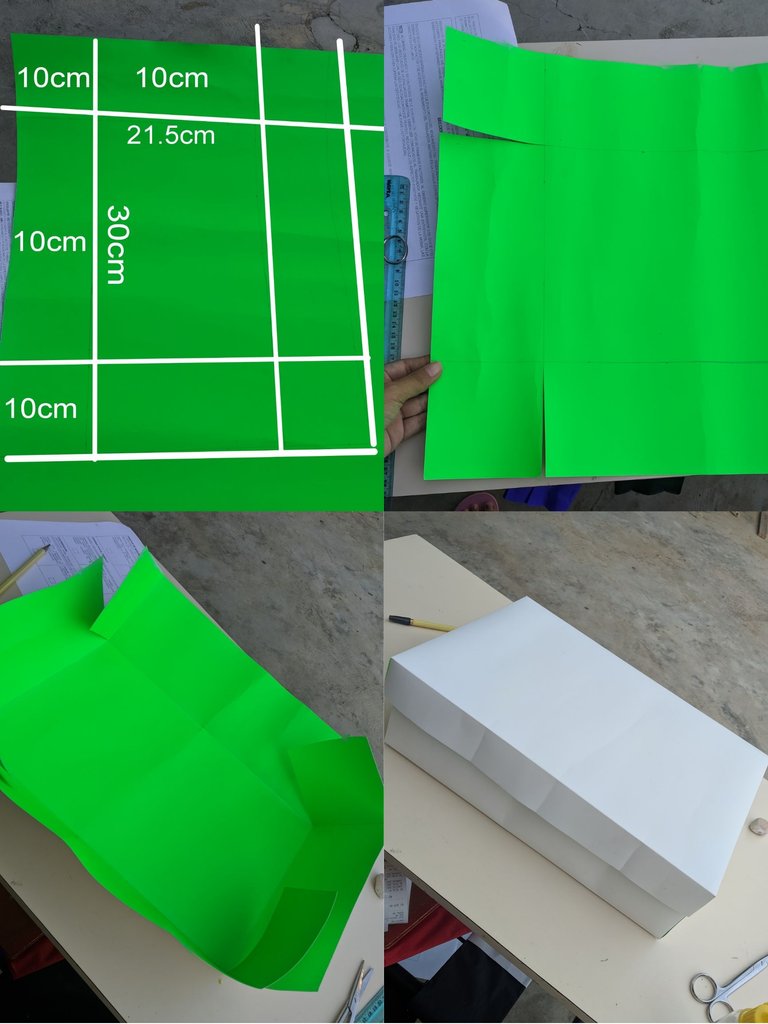
Y comencé por marcar todas las medidas que les dejo en la primera imagen, está cartulina tiene doble color y me intención era hacerlo de color blanco por lo que empecé a marcar todo por la parte de color verde, los siguientes cortar las esquinas para poder formar la caja y pegarlo con silicón frío, todo lo dolo lo remarcó con una tijera antes de pegarlo.
Para la tapa hice las mismas medidas solo que agregué de casa lado un centímetro más, y de altura solo le agregué 4 cm en vez de 10 cm.
The materials I used were :
- Cardboard (2)
- Scissors
- Ruler
- Pencil
- Rubber
- Cold glue
- Gift ribbon
- Crepe paper
And I started by marking all the measures that I leave in the first image, this cardboard has double color and I intended to make it white so I started to mark all the green part, the following cut the corners to form the box and glue it with cold silicone, all the pain I marked it with a scissors before gluing it.
For the lid I made the same measurements only that I added one centimeter more on each side, and in height I only added 4 cm instead of 10 cm.
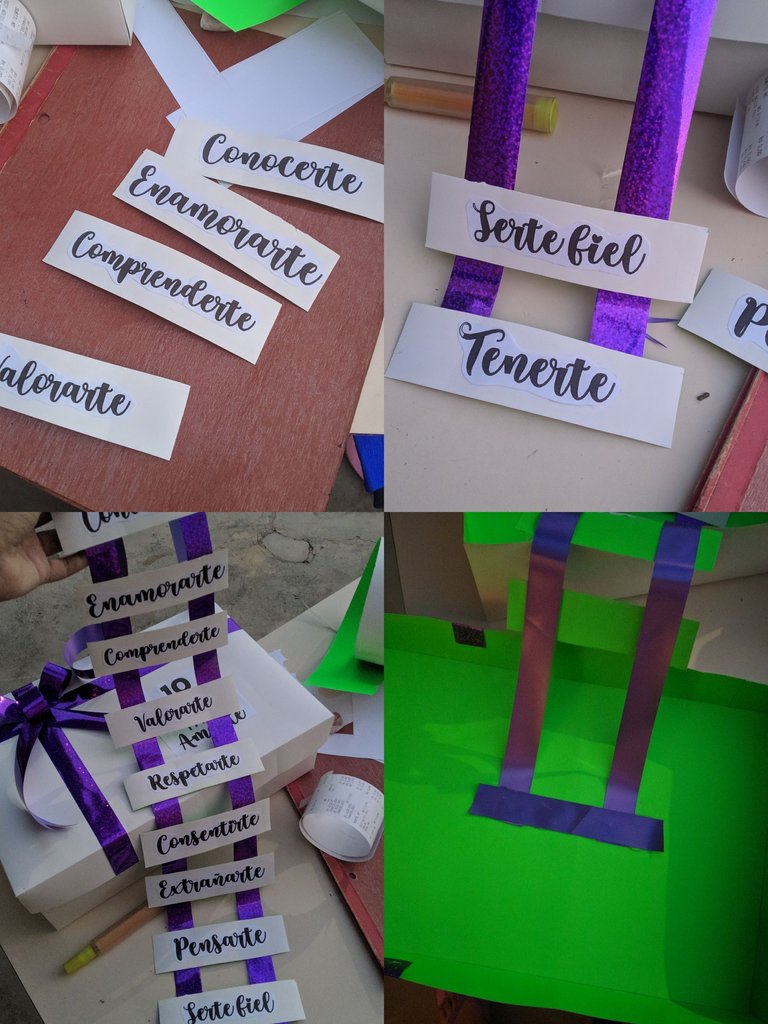
Ahora, el texto que yo imprimí estaba un poco junto por lo que le hice con un lápiz y la regla una especie de cuadro por donde cortarlo para que quedara mucho más prolijo, lo pegué a la tapa de la caja a la cual también le hice una especie de cruce con cinta de regalo y un lazo.
La verdad es que el lazo simplemente fue cortado y pegado por partes, y para hacer cada parte de las razones elegí unos cuadros de 10 cm x 4 cm al igual, marcando todo con un lápiz por la parte verde.
Now, the text that I printed was a little close together so I made with a pencil and a ruler a kind of square where to cut it to make it much neater, I glued it to the lid of the box to which I also made a kind of cross with gift ribbon and a bow.
The truth is that the ribbon was simply cut and glued in parts, and to make each part of the reasons I chose squares of 10 cm x 4 cm, marking everything with a pencil on the green part.
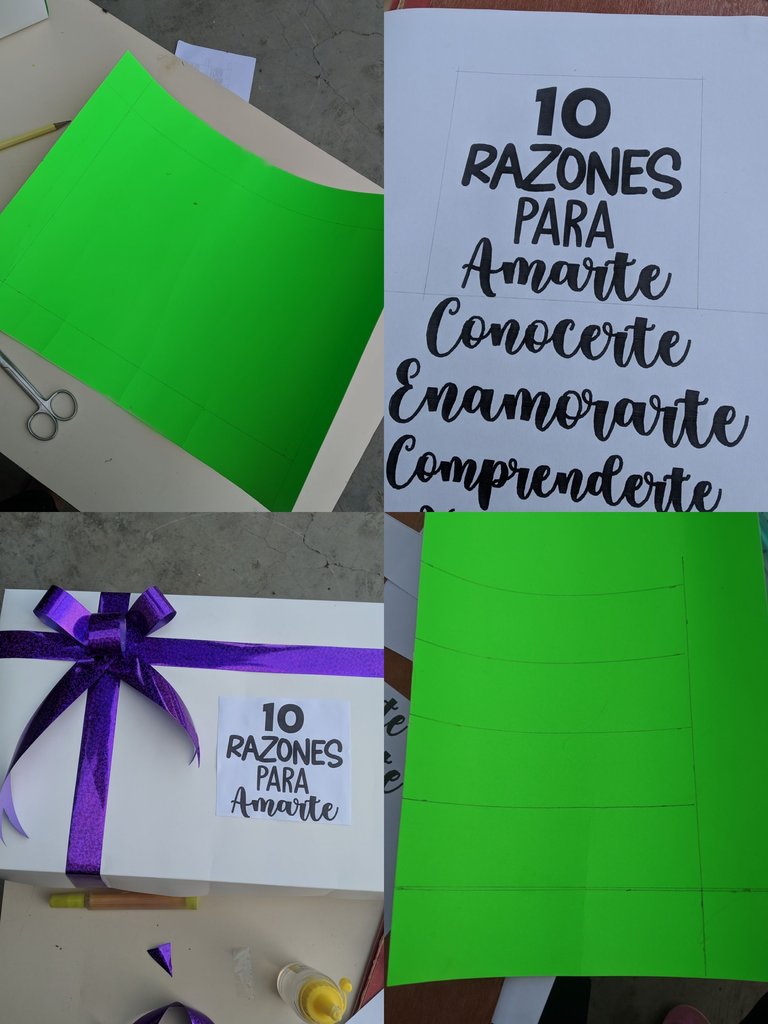
Los cuadritos anteriores son para pegar palabras por palabras para unirlas con una cinta de regalo en la tapa de la cajita para que al abrir se despliegue. Este regalo fué para un amigo que quería dárselo a su novia por su aniversario y yo se lo hice con mucho cariño, me pareció bonito y lo comparto con ustedes, dentro de la caja solo agregué papel crepé en tiras para que él colocara lo que quisiera regalarle, es bastante sencillo de hacer y es algo que me trajo mucha nostalgia ya que las manualidades es algo que yo solía hacer mucho y me parece bonito retomarlo.
The squares above are to glue words by words to join them with a gift ribbon on the lid of the box so that when opened it unfolds. This gift was for a friend who wanted to give it to his girlfriend for their anniversary and I made it with love, I thought it was nice and I share it with you, inside the box I just added crepe paper strips for him to place whatever he wanted to give her, it is quite simple to do and it is something that brought me a lot of nostalgia because crafts is something I used to do a lot and I think it's nice to take it up again.
