Amigos Siempre son Bienvenidos a mi Blog/Friends are always welcome to my Blog
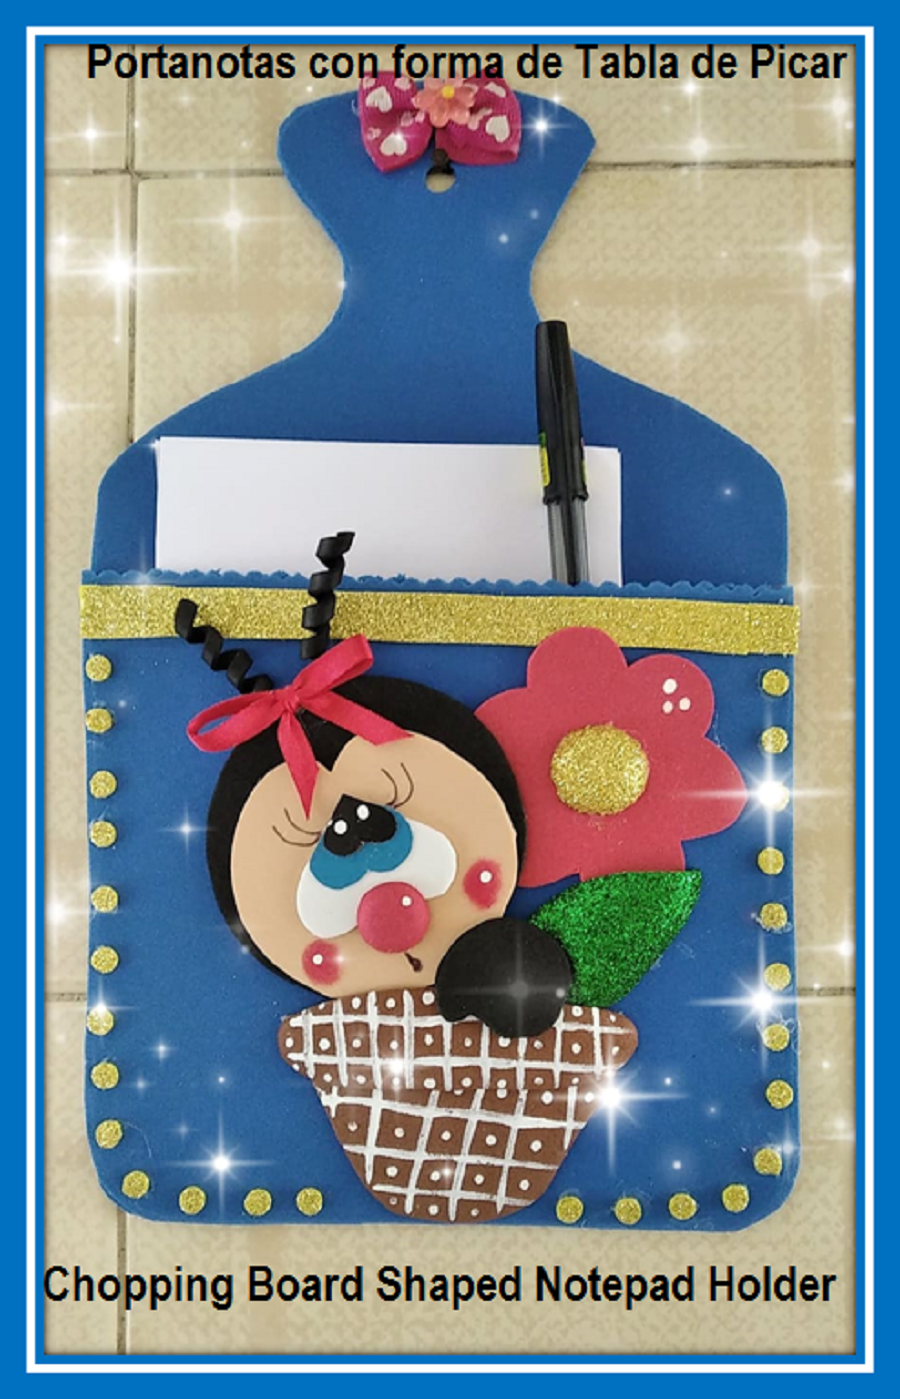
Feliz y bendecido día tengan todos mis amigos. Bienvenidos una vez más a mi Blog, espero se encuentren excelentemente bien. La manualidad de hoy consiste en la realización de un útil y práctico Portanotas con forma de tabla de picar hecho con goma Eva o Foami. Me di cuenta que no contaba con un Portanotas en casa. Ahora cuando necesito escribir algo solo tomo trozos de papel de mi nueva creación y listo mi problema está resuelto. A continuación, les muestro como lo hice
Happy and blessed day to all my friends. Welcome once again to my Blog, I hope you are feeling great. Today's craft consists of making a useful and practical note holder in the shape of a chopping board made with Eva rubber or Foami. I realized that I didn't have a note holder at home. Now when I need to write something I just take pieces of paper from my new creation and my problem is solved. Below, I show you how I did it
MATERIALES/MATERIALS
- Foami azul
- Foami rojo
- Foami dorado
- Foami verde escarchado
- Foami marrón
- Cartulina azul
- Cartulina negra
- Silicón caliente
- Silicón liquido
- Pintura blanca
- Pincel delgado
- Tijera
- Blue Foami
- Red Foami
- Gold Foami
- Green frosted Foami
- Brown Foami
- Blue cardboard
- Black cardboard
- Hot glue
- Liquid silicone
- White paint
- Thin brush
- Scissors
PASO A PASO/STEP BY STEP
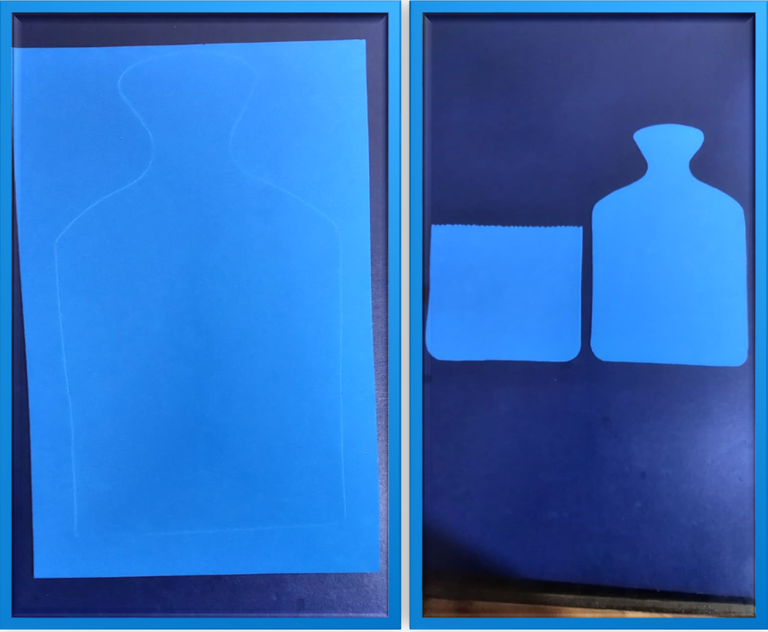
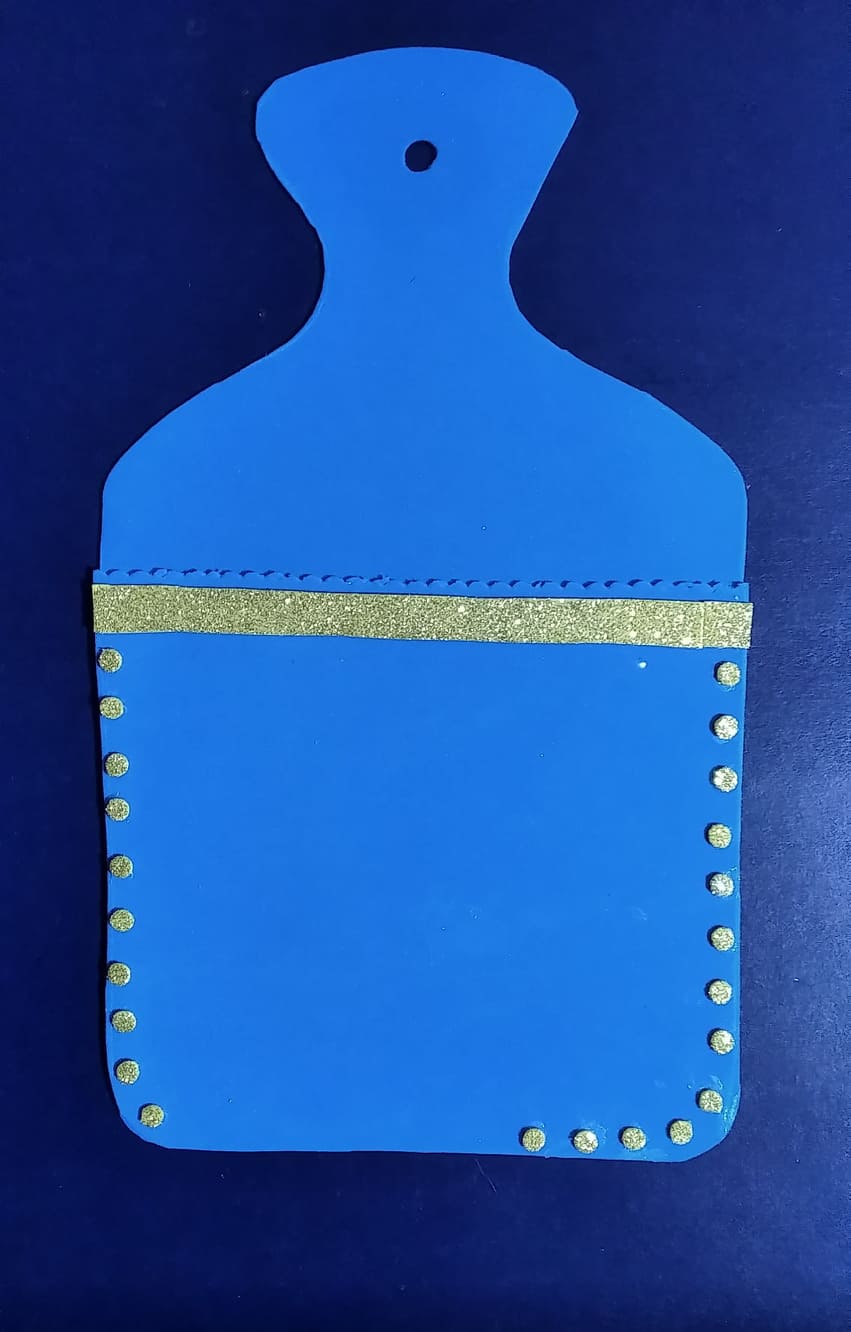
Lo primero que hice fue dibujar la forma de la tabla en el foami azul, luego dibujé en otro trozo de foami la forma de la parte de abajo de la tabla
The first thing I did was to draw the shape of the board on the blue foami, then I drew on another piece of foami the shape of the bottom of the board.
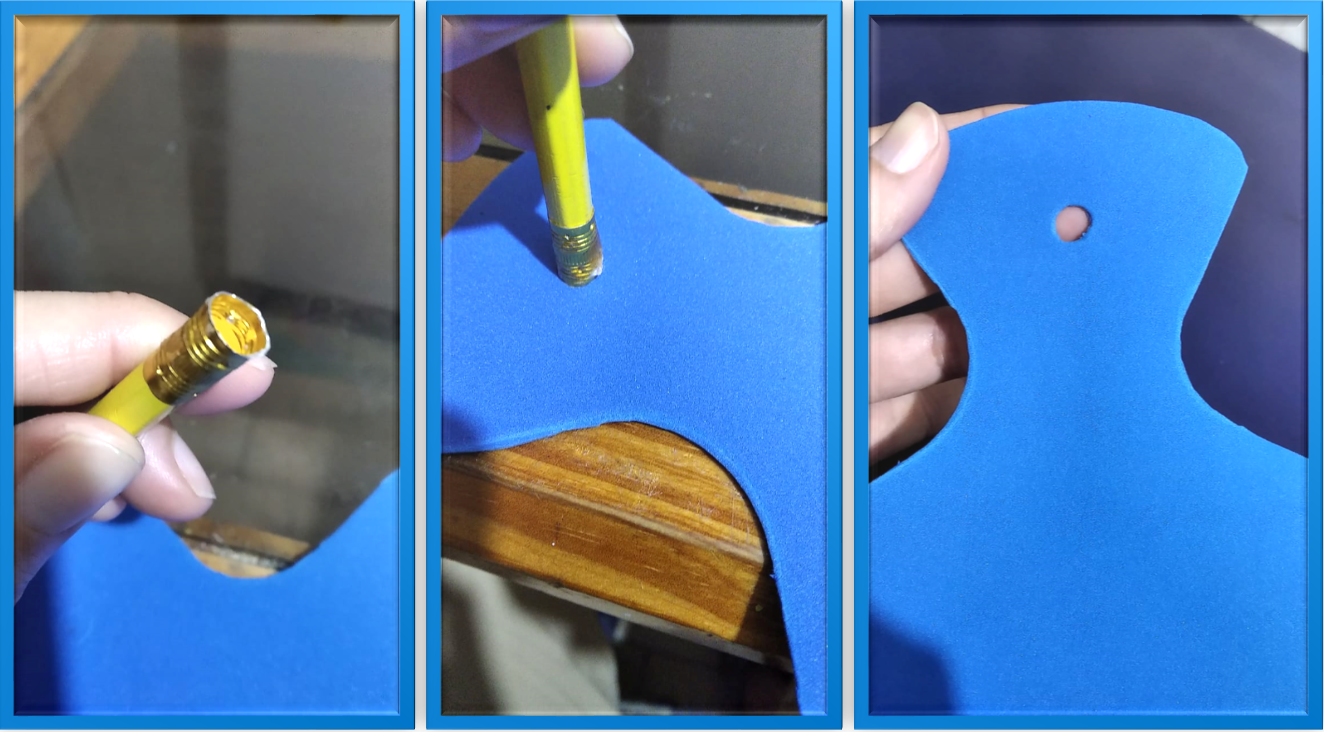
Con un lápiz viejo que tenía en casa sin borrador realice un pequeño circulo sobre el foami
With an old pencil that I had at home without an eraser, I made a small circle on the foami.
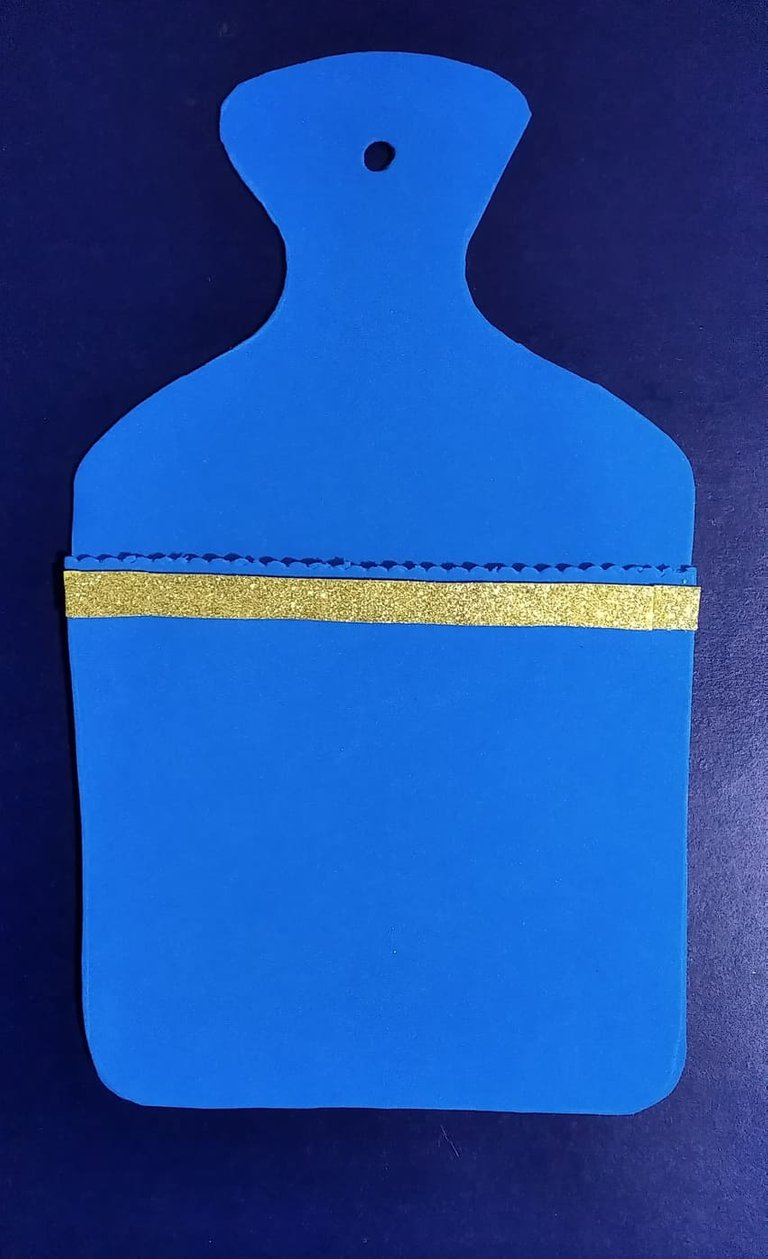
Uní los foami recortados con silicón caliente, esta unión es la que permite que quede una cavidad entre ambos para introducir las hojas del portanotas. Después recorte una tira de foami dorado y la pegue para decorar
I joined the cut foami with hot silicone, this union is the one that allows a cavity between the two to insert the leaves of the note holder. Then I cut a strip of gold foami and glued it to decorate it.
Pegue alrededor círculos de foami dorado
Glue around gold foami circles
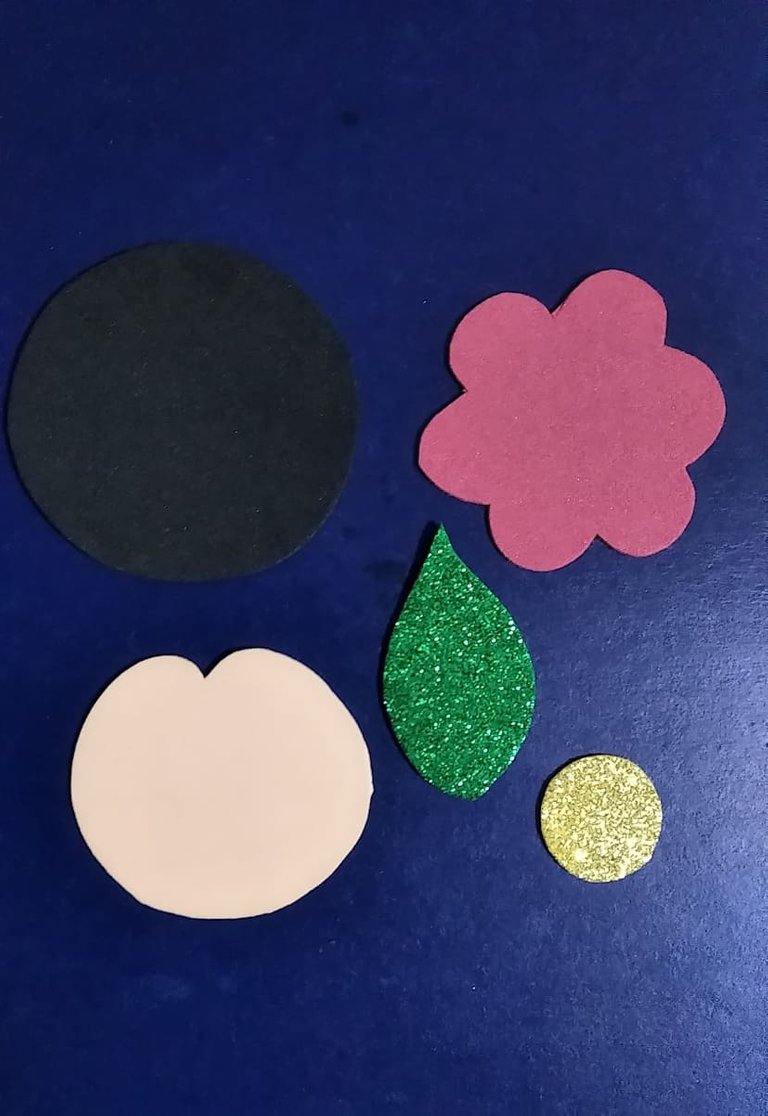
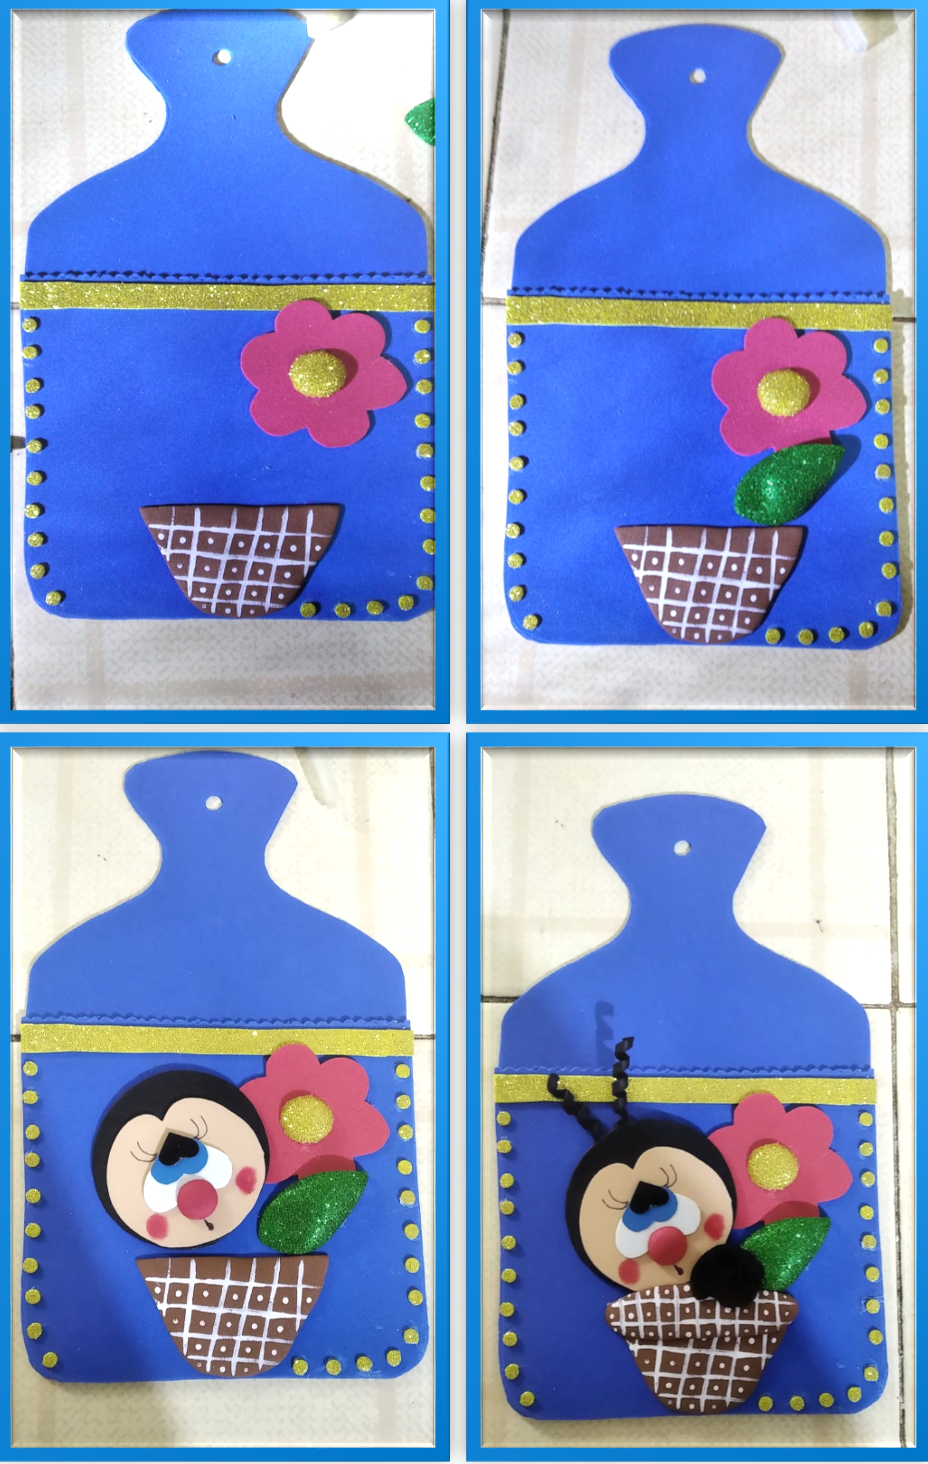
Para decorar mi portanotas realice el rostro de un mariquita, una flor con hoja, y un macetero. Para el rostro recorte un circulo en foami color piel y di la forma que se ve en la imagen. Luego se recorta un circulo negro. La flor se recorta en foami rojo, la hoja en foami verde y el botón de la flor en foami dorado
To decorate my note holder I made the face of a ladybug, a flower with a leaf, and a flowerpot. For the face I cut out a circle in skin-colored foami and gave it the shape shown in the image. Then cut out a black circle. The flower is cut in red foami, the leaf in green foami and the flower button in gold foami.
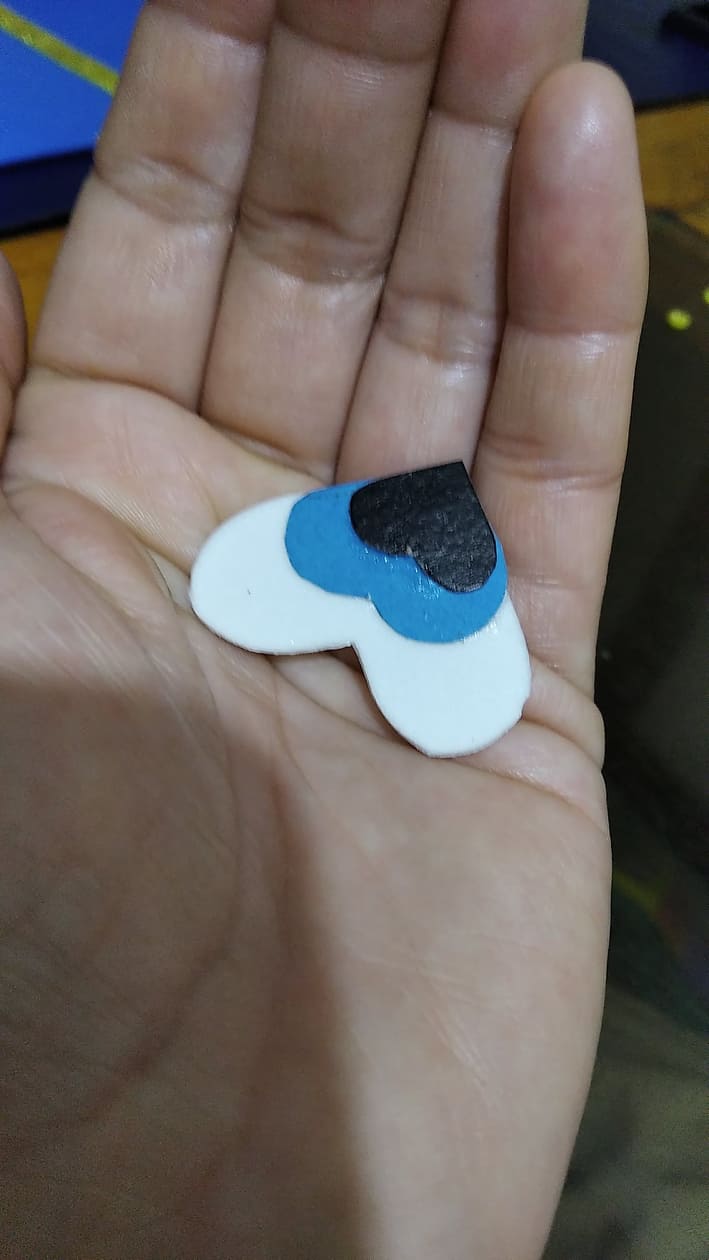
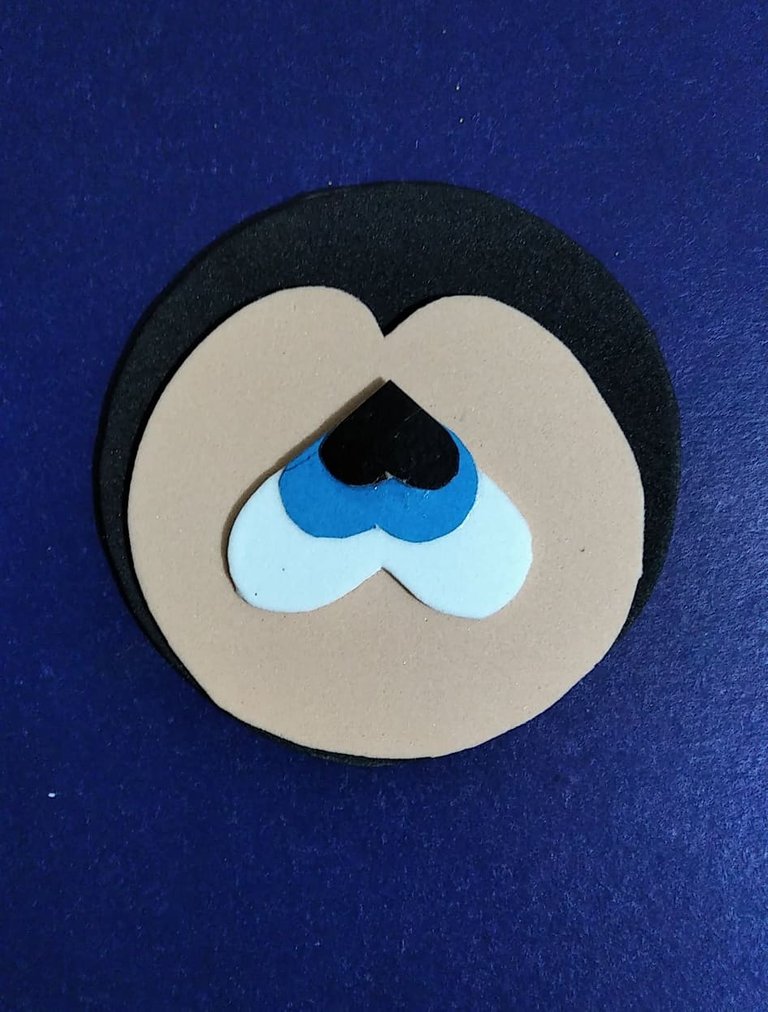
Para recrear los ojos recorte tres corazones uno blanco otro azul y el ultimo de color negro. Para la nariz recorté un círculo rojo el cual le di volumen con la plancha caliente. Dibuje una mano en foami negro
To recreate the eyes I cut out three hearts, one white, one blue and the last one black. For the nose I cut out a red circle which I gave volume with the hot iron. I drew a hand in black foami

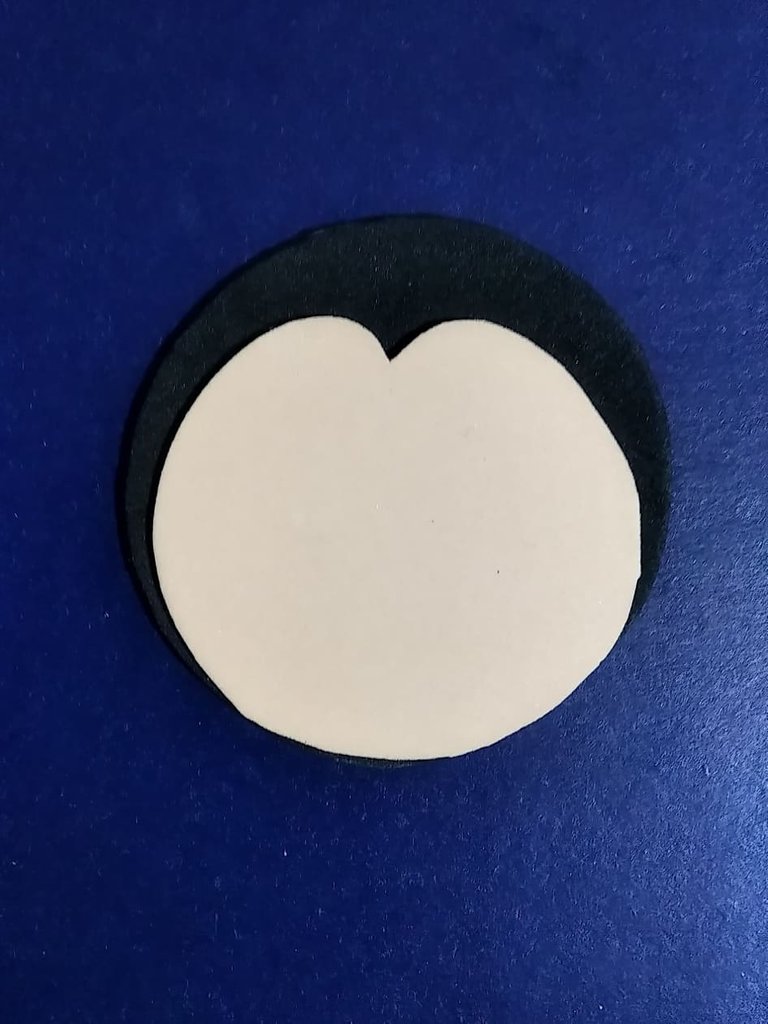
Ya con todas las partes listas comenzamos a armar dando inicio con la cabeza, se pega el circulo color piel sobre el circulo negro
Once all the parts are ready, we begin to assemble, starting with the head, glue the skin-colored circle over the black circle.
Para realizar los ojos unimos los tres corazones de esta forma
To make the eyes, we join the three hearts as follows
Se ubica el centro de la cara y se pagan los lindos ojitos
The center of the face is located and the pretty little eyes are paid for
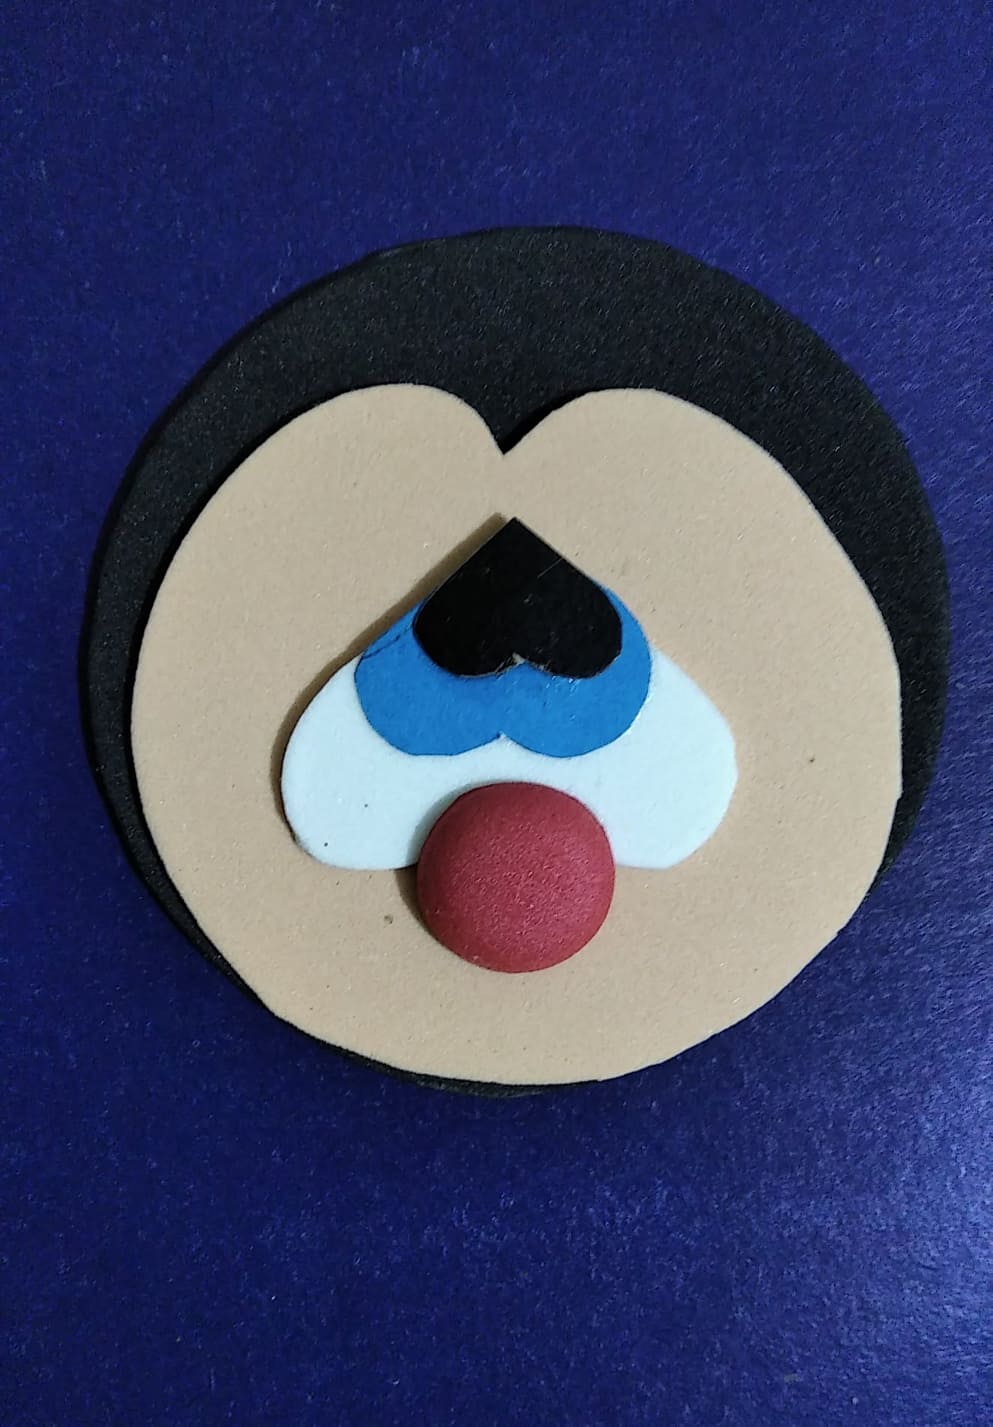
Luego se pega la redonda nariz roja entre los ojos y la piel
The round red nose is then glued between the eyes and the skin.
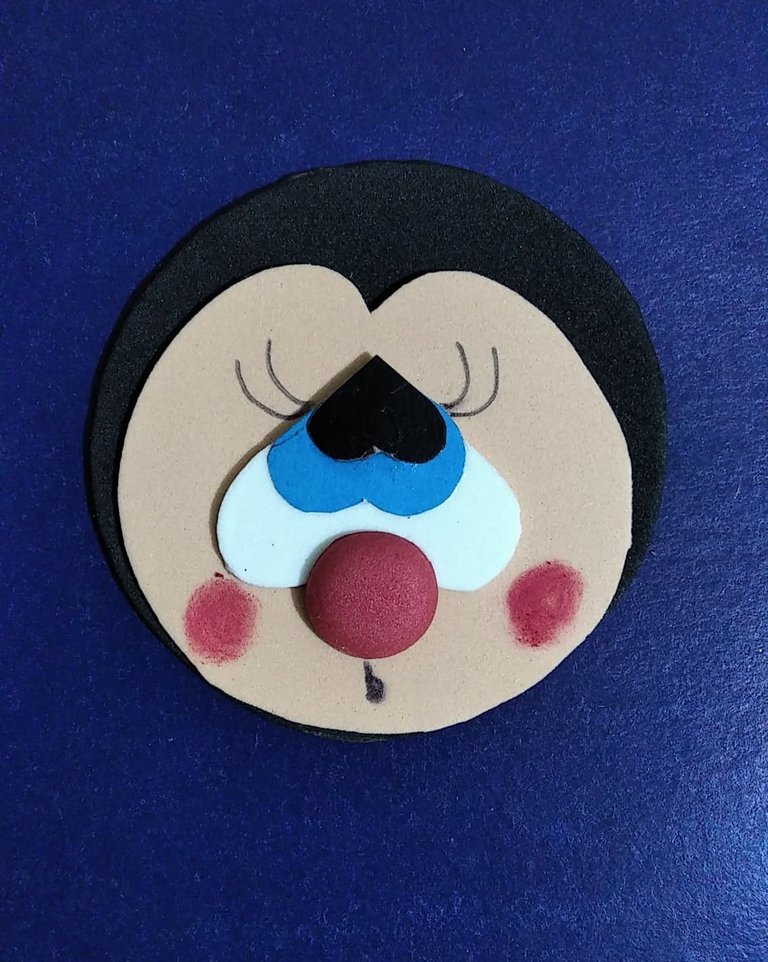
Con un bolígrafo de color negro dibujé las pestañas y la boca. El rubor de sus mejillas los hice con un hisopo y pintura labial
With a black pen I drew the eyelashes and the mouth. The blush on her cheeks I did with a cotton swab and lipstick.
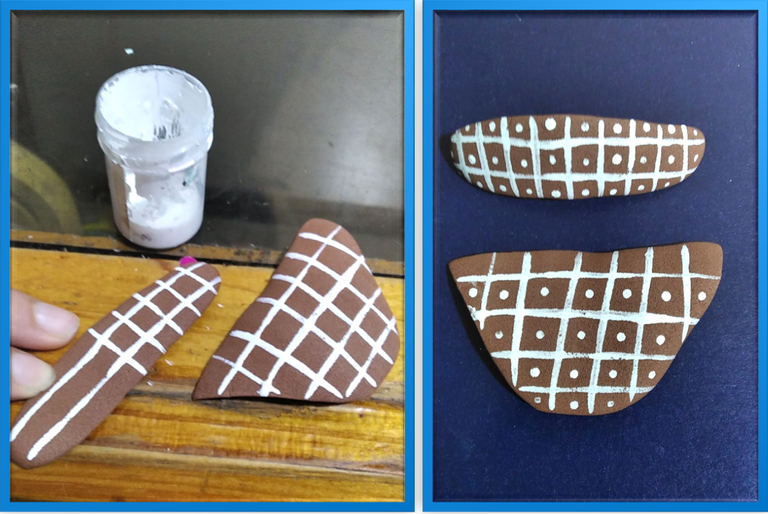
Recorte la forma del macetero y luego lo pite con pintura de color blanco. El diseño que realice con la pintura es sencillo solo son líneas horizontales y verticales y puntitos en cada cuadro
Cut out the shape of the pot and then paint it with white paint. The design I made with the paint is simple, just horizontal and vertical lines and dots in each square.
Se pega la parte de abajo del macetero y a su derecha de pega la flor. Luego debajo de la flor se pega la hoja. A la izquierda de la flor se pega el rostro de la mariquita. Luego se pega la parte faltante del macetero y sobre este se pega la mano. Y para finalizar con esta parte se colocan dos antenitas en la cabeza que se realizan con foami de color negro
Glue the bottom of the pot and on the right side glue the flower. Then glue the leaf under the flower. To the left of the flower glue the face of the ladybug. Then glue the missing part of the flowerpot and on top of it glue the hand. And to finish with this part, two little antennas are placed on the head, which are made with black foami.
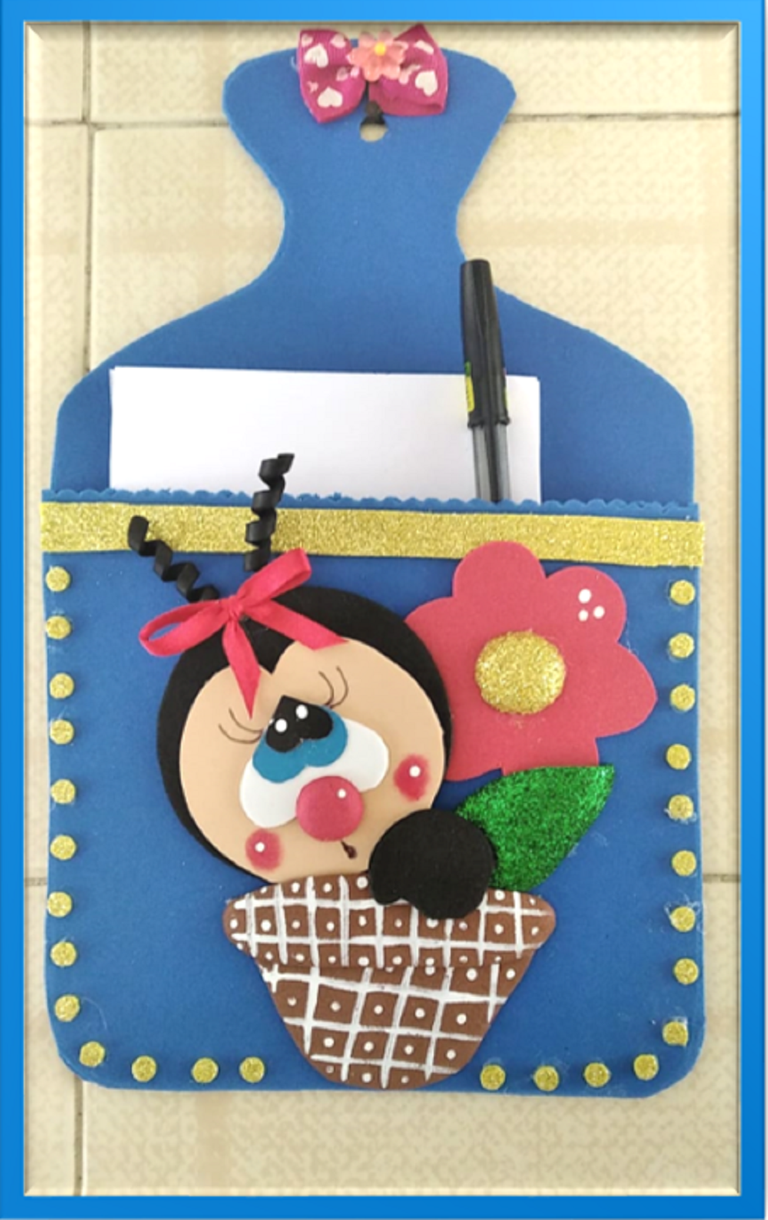
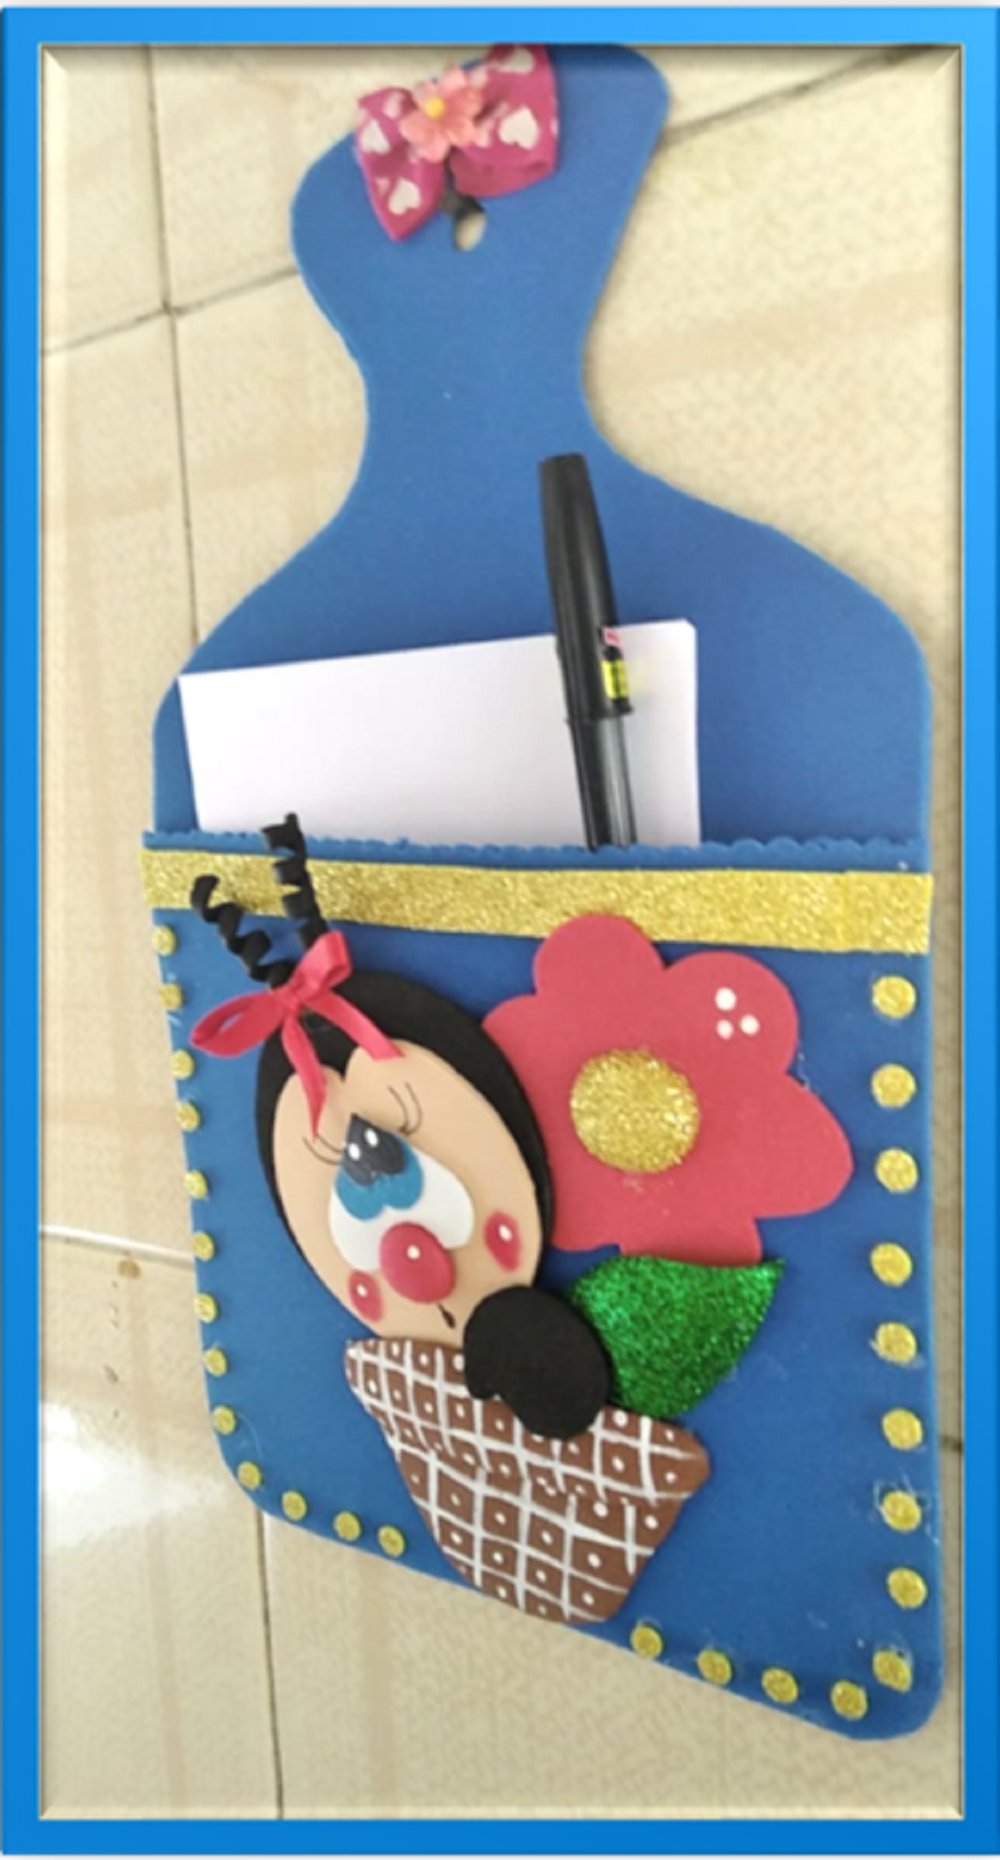
ASI DE HERMOSO QUEDO MI PORTANOTAS/THIS IS HOW BEAUTIFUL MY NOTE HOLDER IS
Las fotos son de mi autoría y fueron tomadas con mi celular Xiaomi Redmi 7A
Traducido con www.DeepL.com/Translator (versión gratuita)
Edite las fotos con PowerPoint
The photos are my own and were taken with my Xiaomi Redmi 7A cell phone
Translated with www.DeepL.com/Translator (free version)
Edit the photos with PowerPoint
Me despido mis amigos será hasta la próxima publicación. Se les quiere
I will say goodbye my friends until the next publication. You are loved
