Español:
Materiales:
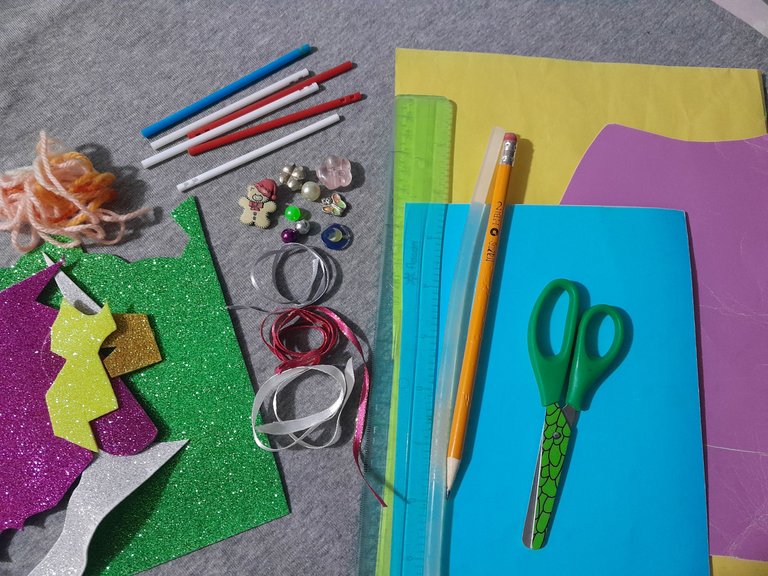
- Piedritas u objetos decorativos.
- Palillos de chupeta.
- Foami escarchado.
- Silicon en barra.
- Cartulina.
- Estambre.
- Cinta.
- Regla.
- Tijera.
- Lápiz.
English:
Materials:
- Pebbles or decorative objects.
- Lollipop sticks.
- Frosted Foami.
- Silicon stick.
- Cardboard.
- Twine.
- Ribbon.
- Ruler.
- Scissors.
- Pencil.


Español:
Paso 1:
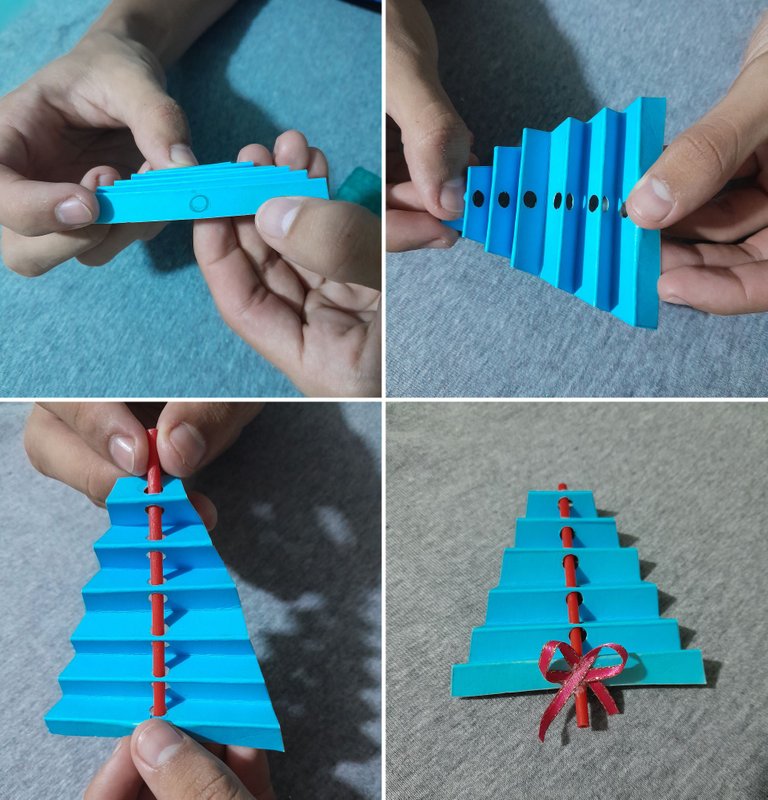
- En una hoja de papel, dibujo el patrón del arbolito, con sus respectivas medidas, se recorta con la tijera y se marca en la cartulina, sacando su diseño. Luego con la cinta realizo un lazito con el foami, dibujo y recorto círculos pequeños de varios colores, y ahora continuamos armando el arbolito comenzando a doblar la cartulina de abajo hacia arriba en forma de acordeón, con 1 cm en cada dobles.
English:
Step 1:
- On a sheet of paper, I draw the pattern of the tree, with its respective measures, cut it out with the scissors and mark it on the cardboard, drawing its design. Then with the ribbon I make a bow with the foami, I draw and cut small circles of various colors, and now we continue assembling the tree starting to fold the cardboard from bottom to top in an accordion shape, with 1 cm in each fold.
Español:
Paso 2:
- Ahora con la cartulina en forma de acordeón, la unimos marcamos un circulo en el centro de la cartulina, para abrir los huecos con la ayuda de un abre hueco, (ya que se me olvido colocarlo en la lista de los materiales), luego introducimos el palillo de chupeta por los agujeros, pegando el lazito a 1 cm de la parte inferior del palillo.
English:
Step 2:
- Now with the cardboard in the shape of an accordion, we mark a circle in the center of the cardboard, to open the holes with the help of a hole opener, (since I forgot to put it in the list of materials), then we introduce the lollipop stick through the holes, gluing the bow to 1 cm from the bottom of the stick.
Español:
Paso 3:
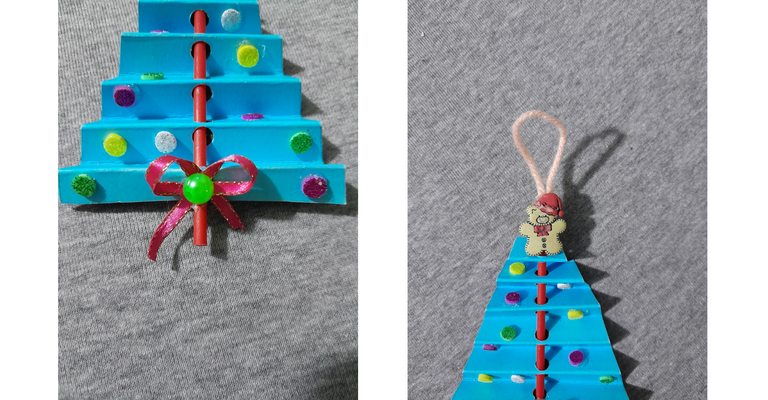
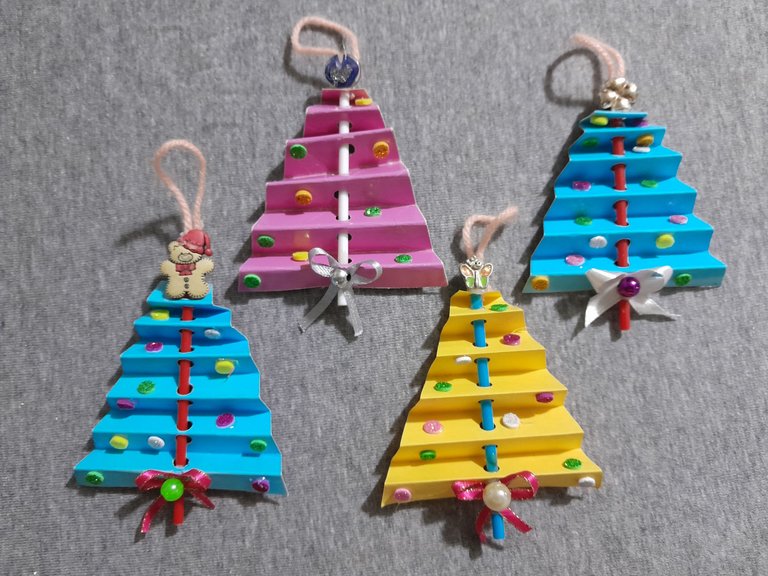
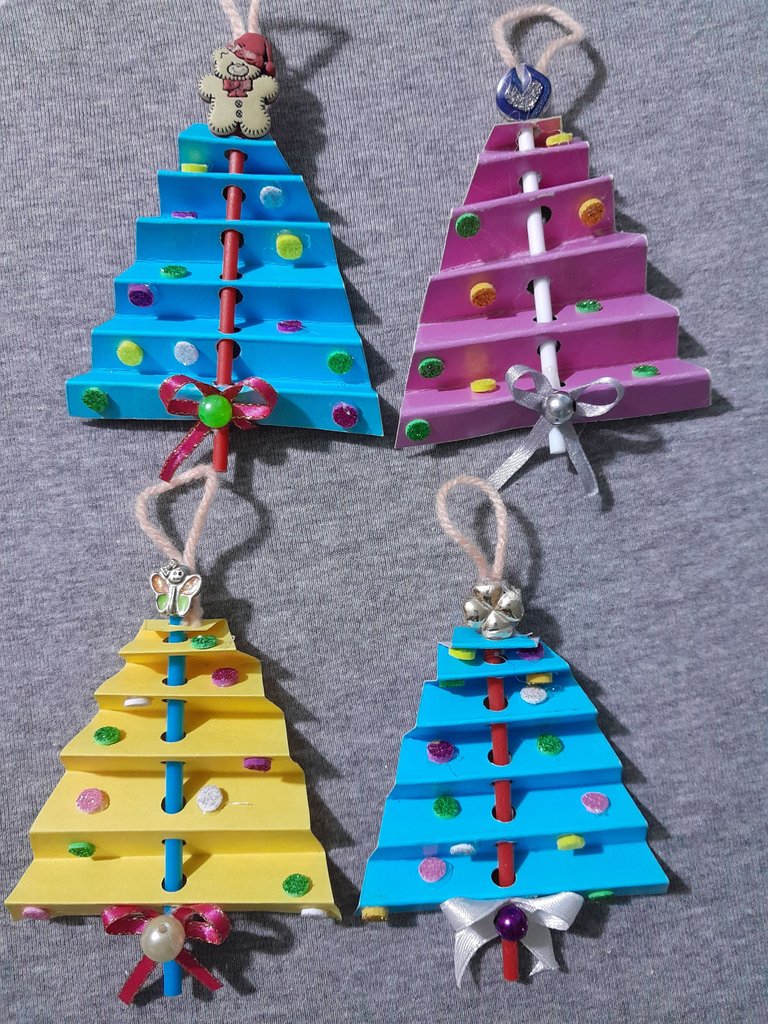
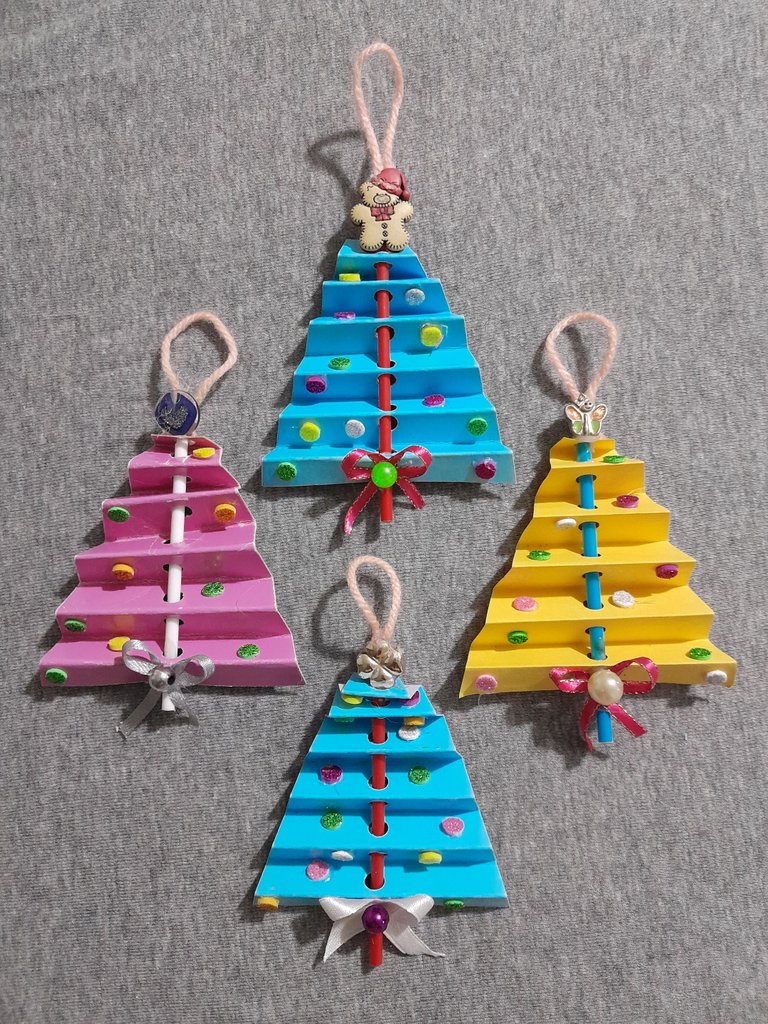
- Pegamos con la barra de silicon, una piedrita decorativa al lazito, y los circulos de foami a la cartulina, después pegamos un adorno u objeto decorativo en la parte superior del palillo, y para terminar pego en la parte de atrás una tira colgante de estambre.
English:
Step 3:
- We glue with the silicon stick, a decorative pebble to the bow, and the foami circles to the cardboard, then we glue an ornament or decorative object on the top of the stick, and finally we glue on the back of the stick a hanging strip of yarn.
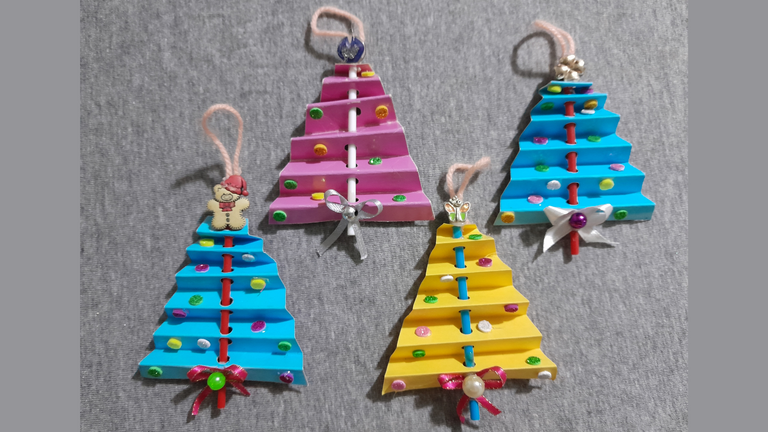
Aquí esta mi resultado final, espero les haya gustado, saludos hasta la próxima.
Here is my final result, I hope you liked it, greetings until next time.
Todas las fotos son de mi autoria y editadas con Canva.
Traductor: DeepL Traslate.
All photos are my own and edited with Canva. Translator: DeepL Traslate.

Traductor: DeepL Traslate.
All photos are my own and edited with Canva. Translator: DeepL Traslate.