Elaboremos un mini unicornio de tela paso a paso | Let's make a mini fabric unicorn step by step ☺️

in #hive-1305603 years ago


IMG_20220211_154359.jpg

¡Hola amigos! Espero que se encuentren muy bien y saludables, estuve ausente por varios días en la plataforma y me alegra estar nuevamente de regreso🤗. En esta oportunidad vamos a elaborar un mini unicornio de tela que podemos utilizar como adorno para nuestros llaveros, mochilas, bolsos, etc. Este es un tutorial ideal para compartir con los pequeños de la casa que están empezando a conocer el mundo de la costura ¡Comencemos!
Hi friends! I hope you are very well and healthy, I was absent for several days on the platform and I am glad to be back again🤗. This time we are going to make a mini cloth unicorn that we can use as an ornament for our key rings, backpacks, bags, etc. This is an ideal tutorial to share with the little ones in the house who are just beginning to learn about the world of sewing. Let's get started!

Materiales - Materials:

  • Tela
  • Aguja y alfileres
  • Hilo
  • Cinta de 1cm
  • Una hoja de papel
  • Lapicero
  • Decoraciones
  • Cloth
  • Needle and pins
  • Thread
  • 1cm tape
  • A sheet of paper
  • Pen
  • Decorations

Elaboración - Elaboration

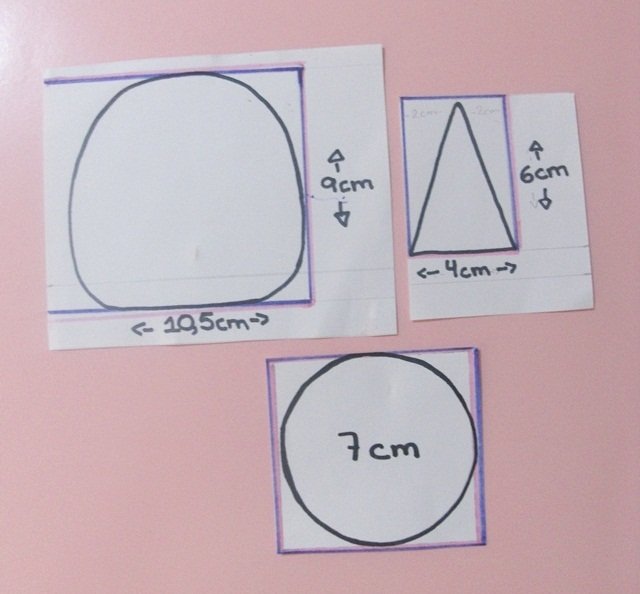
Paso 1. Primero vamos a dibujar las tres figuras que se muestran en la imagen y si desean pueden utilizar las mismas medidas o medidas diferentes. Estas tres figuras son los patrones básicos que necesitamos para elaborar nuestro unicornio: la cabeza, el cuerno y las orejas
Step 1. First we are going to draw the three figures that are shown in the image and if they wish they can use the same measurements or different measurements. These three figures are the basic patterns we need to make our unicorn: the head, the horn and the ears

paso 1.JPG


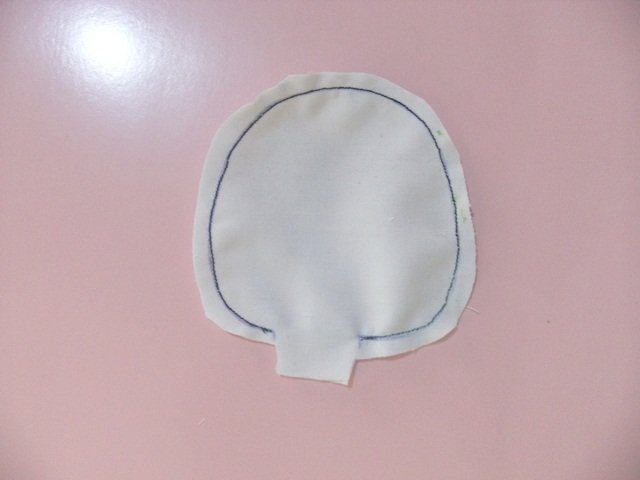
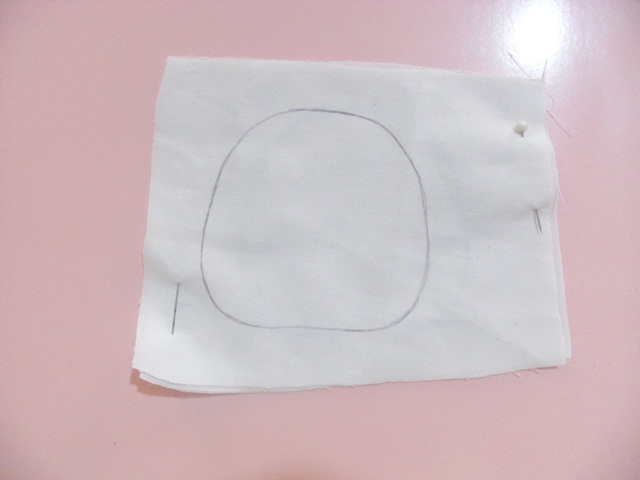
Paso 2. Doblamos un retazo de tela y dibujamos la cabeza del unicornio, es importante que coloquemos alfileres para que la tela no se ruede. Seguidamente vamos a coser por casi todo el contorno del dibujo dejando una pequeña abertura preferiblemente en la parte inferior . Cuando recortemos el excedente de tela es importante dejar más margen de tela debajo de la abertura porque esto nos facilitará voltear la pieza y también será más sencillo elaborar la “costura invisible” al momento de cerrar esa abertura
Step 2. Now we fold a piece of fabric and draw the unicorn's head, it is important that we put pins so that the fabric does not roll. Next we are going to sew along almost the entire contour of the drawing, leaving a small opening preferably in the lower part. When we cut off the excess fabric, it is important to leave more margin of fabric under the opening because this will make it easier for us to turn the piece over and it will also be easier to make the “invisible seam” when closing that opening.

paso 2.JPG

paso 2-1.JPG


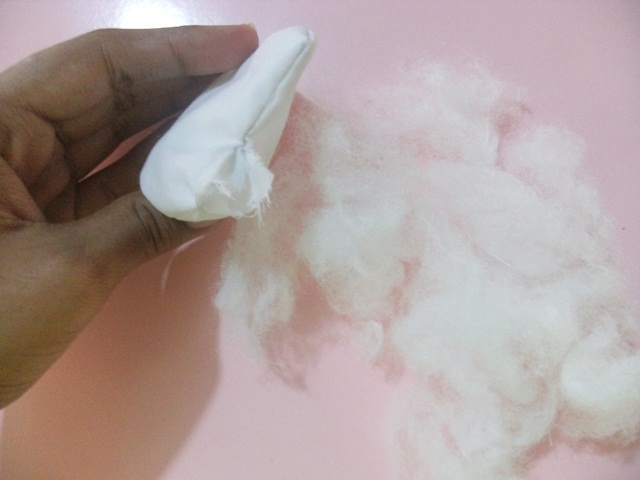
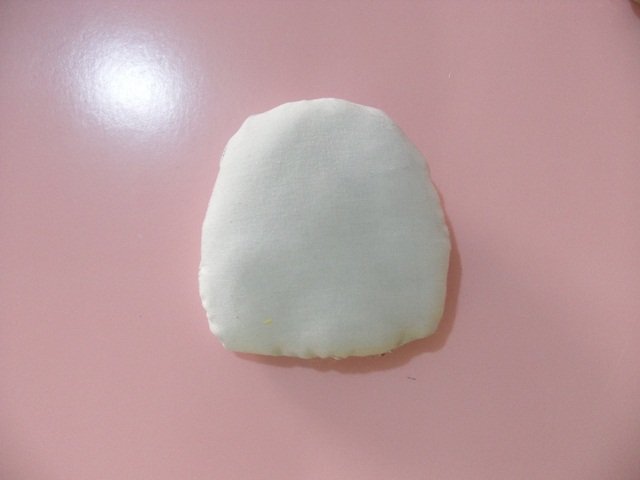
Paso 3. Ahora volteamos la tela y empezamos a rellenar. Para el relleno podemos utilizar algodón o también podemos utilizar pequeños retazos de tela. Si optamos por la segunda opción es necesario que esos mini retazos de tela sean acordes al color de la tela que estamos utilizando para elaborar el unicornio. Si la tela es blanca y el relleno es de colores obviamente se notará. Luego vamos a cerrar la abertura con costura invisible o también conocido como “punto escondido”
Step 3.Now we turn the fabric over and start stuffing. For the filling we can use cotton or we can also use small pieces of fabric. If we opt for the second option, it is necessary that these mini pieces of fabric match the color of the fabric that we are using to make the unicorn. If the fabric is white and the filling is colored, it will obviously be noticed. Then we are going to close the opening with an invisible seam or also known as "hidden stitch"

paso 3.JPG

paso 3-1.JPG


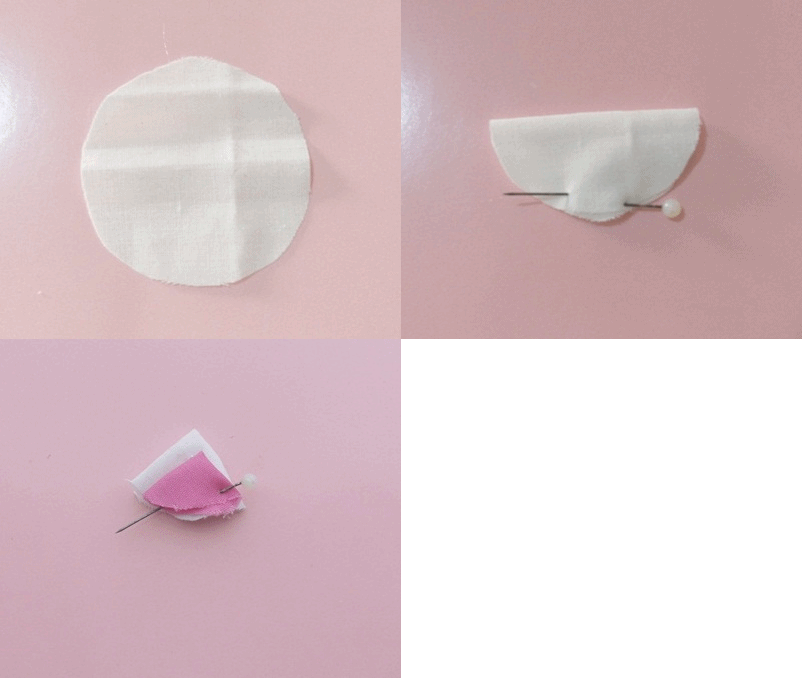
Paso 4. En este paso vamos a elaborar las orejitas. Solo debemos recortar dos círculos de tela que en este caso miden 7 cm y adicionalmente recortamos dos círculos de tela más pequeños que puede ser de 4 cm. Para empezar tomamos un círculo de 7cm y lo doblamos hacia la mitad, luego volvemos a doblar hacia la mitad para formar un triángulo, este procedimiento lo debemos repetir con el círculo de 4cm y luego cosemos ambos triángulos por los bordes, de esta manera quedará lista la primera orejita
Step 4.In this step we are going to make the ears. We only have to cut two circles of fabric that in this case measure 7 cm and additionally we cut two smaller circles of fabric that can be 4 cm. To start we take a 7cm circle and fold it in half, then we fold it in half again to form a triangle, we must repeat this procedure with the 4cm circle and then we sew both triangles by the edges, in this way it will be ready the first ear

4 - gif.gif

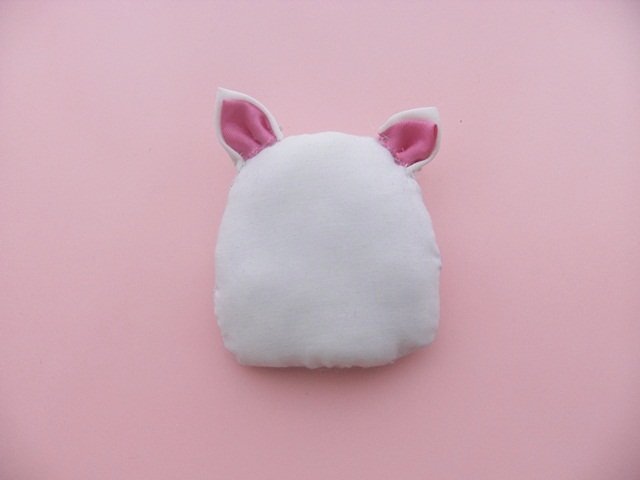
Luego podemos coser o pegar las orejas, en mi opinión es preferible coser para que queden bien aseguradas
Then we can sew or glue the ears, in my opinion it is preferable to sew so that they are well secured

paso 4-1.JPG


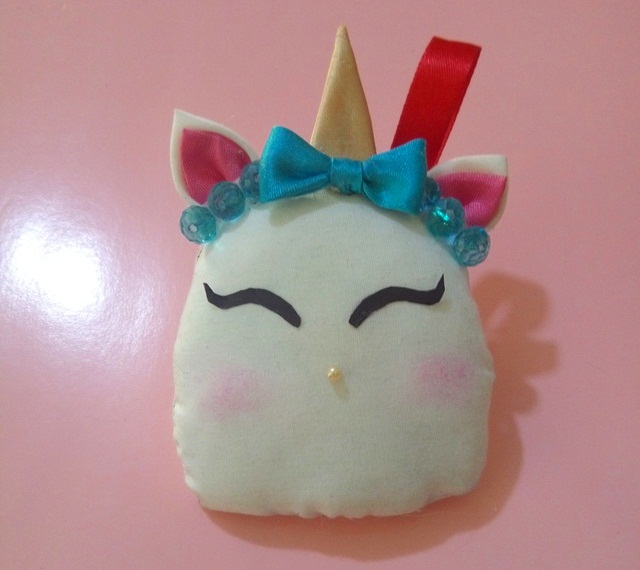
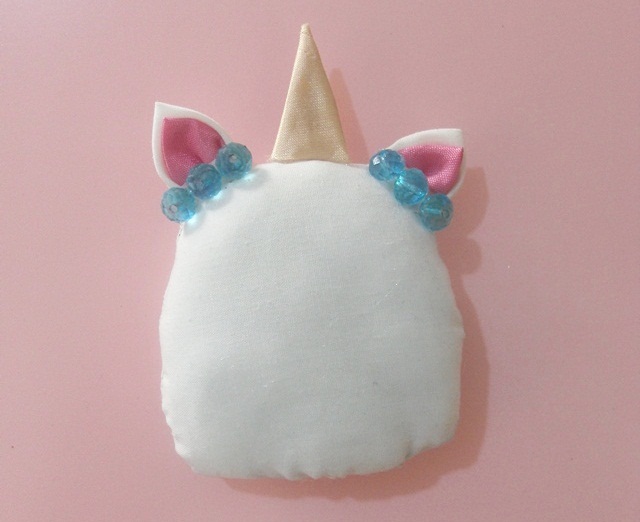
Paso 5.Para elaborar el cuerno solo debemos recortar la figura sobre una tela doble de tonalidad dorada o del color de nuestra preferencia y unir sus bordes con costura o silicon. En las orejitas les coloque tres decoraciones de cada lado.
Step 5.To make the horn, we only have to cut the figure out of a double fabric of a golden hue or the color of our choice and join its edges with seams or silicone. In the ears I place three decorations on each side.

paso 5.JPG


Para elaborar los ojos podemos utilizar foami, cartón, tela o también podemos utilizar cartulina como en este caso hice yo. Para la nariz utilice una pequeña perlita y como paso opcional con una sombra rosada le colocamos “rubor” a nuestro unicornio
To make the eyes we can use foami, cardboard, fabric or we can also use cardboard as in this case I did. For the nose use a small pearl and as an optional step with a pink shadow we put "blush" on our unicorn

IMG_20220211_154359.jpg

Muchas gracias por visitar mi publicación, espero que te haya gustado y sobretodo que pueda ser de utilidad, ¡hasta la próxima oportunidad!
Thank you very much for visiting my publication, I hope you liked it and above all that it can be useful, until next time!

Para la traducción de esta publicación utilice Traductor de Google. Para editar las imagenes y bajar la resolución utilice PhotoScape
For the translation of this publication use Google Translate. To edit the images and lower the resolution use PhotoScape
Sort:  

Que lindo unicornio amiga!
Es muy tierno y lo chevere es que lo hiciste en tela y ademas se le puede dar varios usos.
Saludos

Graciaaas amiga😊

Thank you for sharing this amazing post on HIVE!
  • Your content got selected by our fellow curator @rezoanulvibes & you just received a little thank you via an upvote from our non-profit curation initiative!

  • You will be featured in one of our recurring curation compilations and on our pinterest boards! Both are aiming to offer you a stage to widen your audience within and outside of the DIY scene of hive.

Join the official DIYHub community on HIVE and show us more of your amazing work and feel free to connect with us and other DIYers via our discord server: https://discord.gg/mY5uCfQ !

If you want to support our goal to motivate other DIY/art/music/homesteading/... creators just delegate to us and earn 100% of your curation rewards!

Stay creative & hive on!


The rewards earned on this comment will go directly to the person sharing the post on Twitter as long as they are registered with @poshtoken. Sign up at https://hiveposh.com.

Your content has been voted as a part of Encouragement program. Keep up the good work!

Use Ecency daily to boost your growth on platform!

Support Ecency
Vote for new Proposal
Delegate HP and earn more

Graciaas😀


Colmena-Curie.jpg

¡Felicidades! Esta publicación obtuvo upvote y fue compartido por @la-colmena, un proyecto de Curación Manual para la comunidad hispana de Hive que cuenta con el respaldo de @curie.

Si te gusta el trabajo que hacemos, te invitamos a darle tu voto a este comentario y a votar como testigo por Curie.

Si quieres saber más sobre nuestro proyecto, acompáñanos en Discord: La Colmena.


Muchaaas gracias por su apoyo amigos! 😊

Congratulations @beidacarolina! You have completed the following achievement on the Hive blockchain and have been rewarded with new badge(s):

You received more than 1500 upvotes.
Your next target is to reach 1750 upvotes.

You can view your badges on your board and compare yourself to others in the Ranking
If you no longer want to receive notifications, reply to this comment with the word STOP

Check out the last post from @hivebuzz:

Hive Power Up Month - Feedback from February day 11
Valentine's day challenge - Give a badge to your beloved!
Support the HiveBuzz project. Vote for our proposal!

Gracias hivebuzz😊

De nada @beidacarolina
Apóyenos también y vote por nuestro testigo.
Recibirá una insignia adicional y un voto más fuerte de nuestra parte cuando le notifiquemos.