DIY Cómo elaborar una agenda en 4 sencillos pasos, por @beidacarolina | DIY How to make an agenda in 4 easy steps, by @beidacarolina

in #hive-1305603 years ago
¡Hola amigos! ☺ , estamos a casi nada de terminar el año!. Cuando estamos a punto de cerrar un ciclo es importante organizar nuestras ideas, pensamientos y metas, es por ello que en esta oportunidad elaboraremos una sencilla agenda con materiales faciles de conseguir en casa y utilizando la técnica de encuadernación japonesa
Hi friends! ☺, we are almost nowhere near the end of the year !. When we are about to close a cycle it is important to organize our ideas, thoughts and goals, that is why this time we will prepare a simple agenda with materials easy to get at home and using the Japanese binding technique
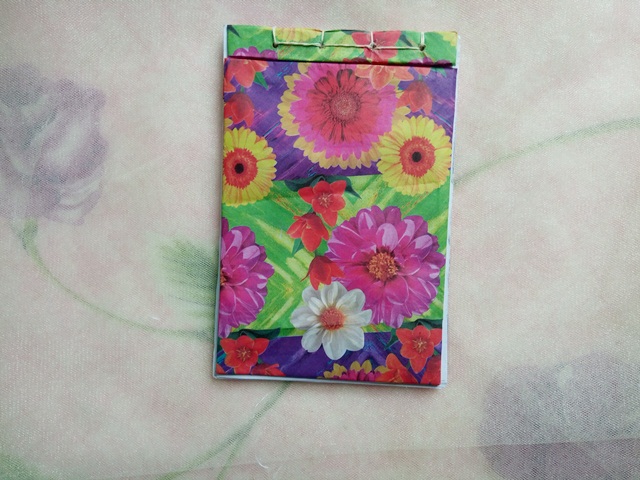
foto final.jpg


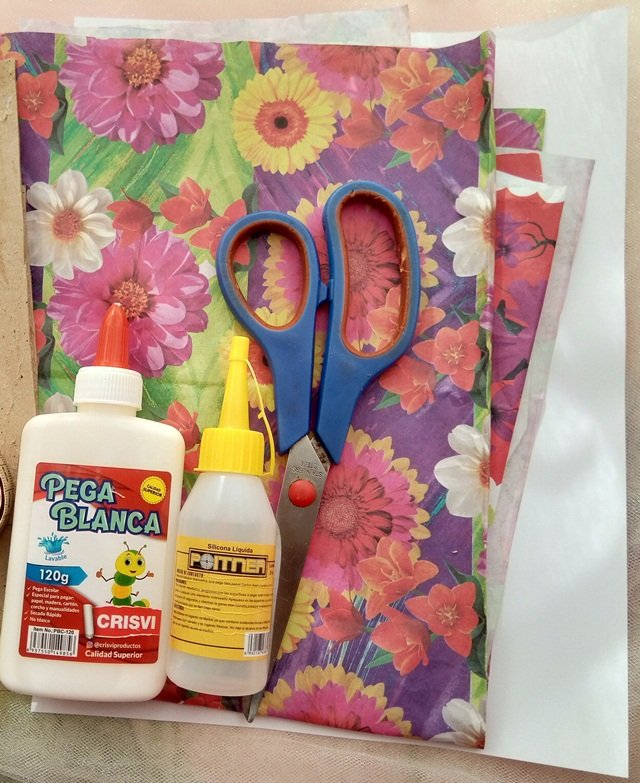
Materials

  • Cartón
  • Papel de regalo
  • Pega blanca
  • Silicón líquido
    -Tijera
  • hojas blancas
  • Paperboard
  • Gift Wrap
  • White glue
  • Liquid silicone
    -Scissor
  • White sheets


1 -  Materiales @beida.jpg


✃Procedimiento - Process ✃

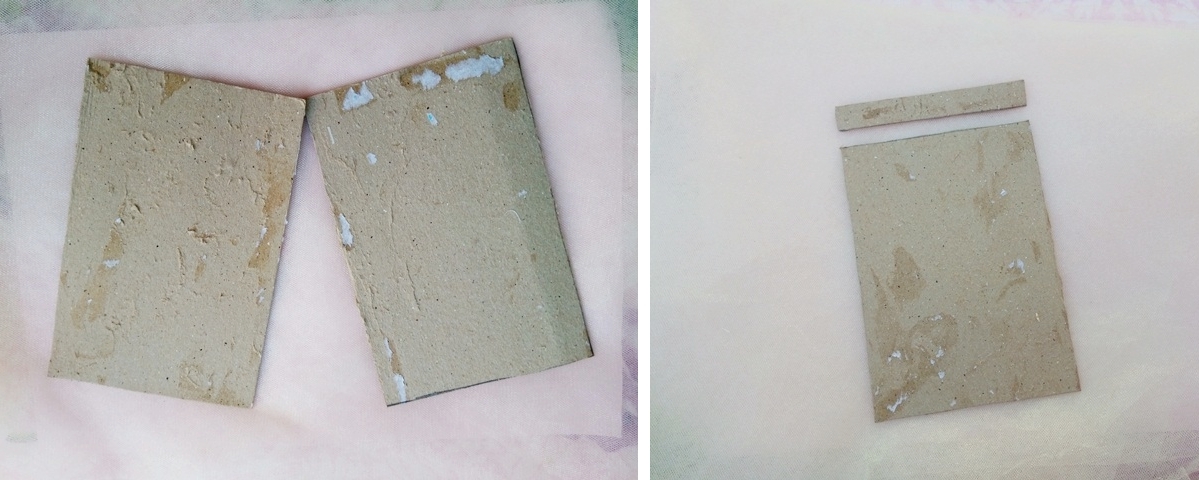
Paso 1.Para empezar cortaremos dos rectángulos de cartón que medirán 18,5 cm de altura y 12 cm de ancho. Seguidamente tomamos uno de los rectángulos y en la parte superior lo dividimos cortando 2 cm , esta será la portada de nuestra agenda
Step 1. To begin we will cut two cardboard rectangles that will measure 18.5 cm in height and 12 cm in width. Next we take one of the rectangles and in the upper part we divide it by cutting 2 cm, this will be the cover of our agenda

paso 1.jpg


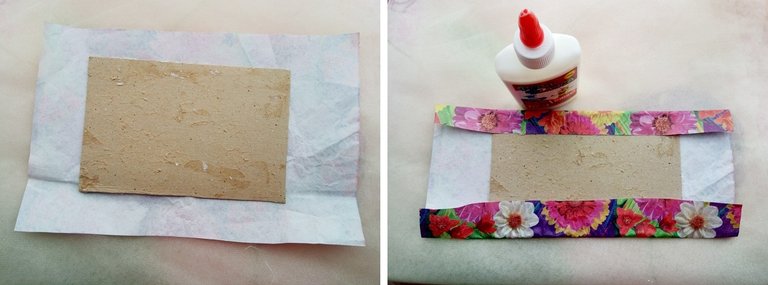
Paso 2. Para forrar cada cartón utilizaremos papel de regalo y pega blanca
Step 2. To cover each cardboard we will use wrapping paper and white glue

paso 2.jpg


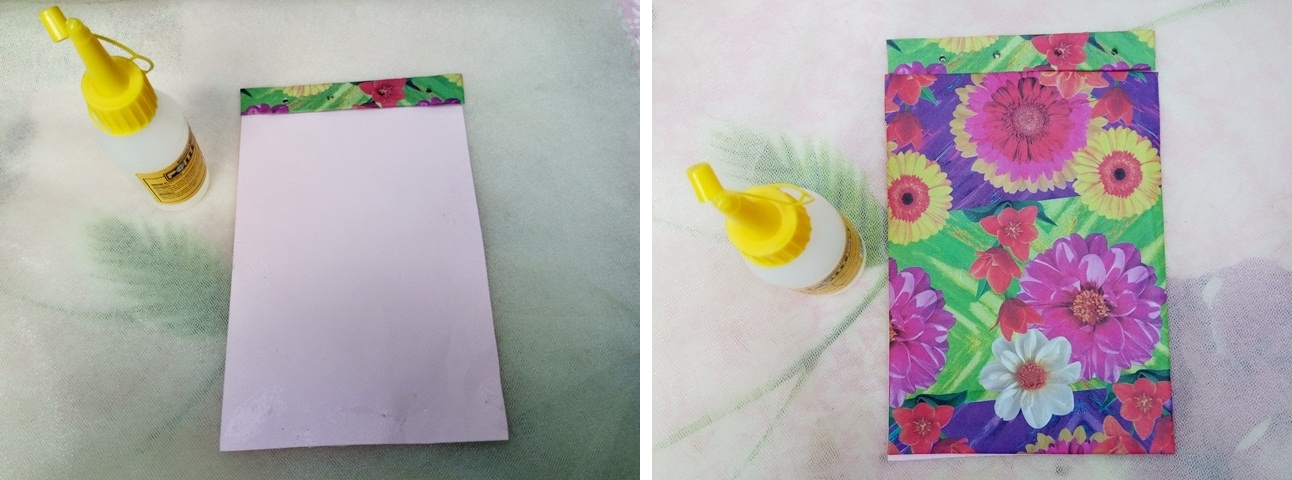
Una vez que terminemos de forrar ambos rectángulos debemos elaborar una base para nuestra portada porque anteriormente divimos en dos partes. Solo necesitaremos cortar un trozo de cartulina de la misma medida y pegar con silicon líquido ambas piezas. Esto nos permitirá tener mayor movilidad y facilidad al utilizar la agenda
Once we finish lining both rectangles we must make a base for our cover because previously we divided into two parts. We will only need to cut a piece of cardboard of the same size and glue both pieces with liquid silicone. This will allow us to have greater mobility and ease when using the agenda

paso 2,1.jpg


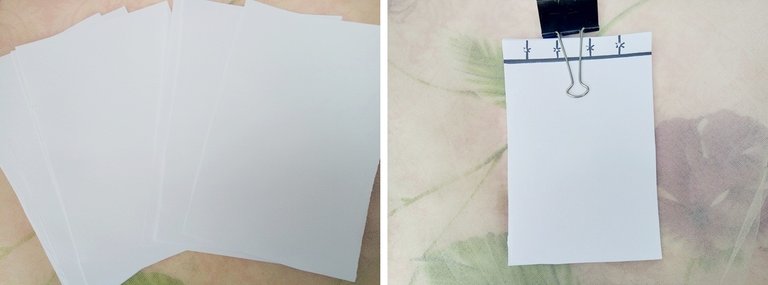
Paso 3. Ahora debemos cortar hojas que midan 8,5 cm de altura y 12 cm de ancho, es decir que deben medir lo mismo que las tapas de cartón. Seguidamente elaboramos una guía en donde esten marcados los puntos por donde debemos perforar y juntamos muy bien todas las hojas para que no se salgan
Step 3. Now we must cut sheets that measure 8.5 cm in height and 12 cm in width, that is, they must measure the same as the cardboard covers. Then we elaborate a guide where the points where we must drill are marked and we put together all the sheets very well so that they do not come out

paso 3.jpg


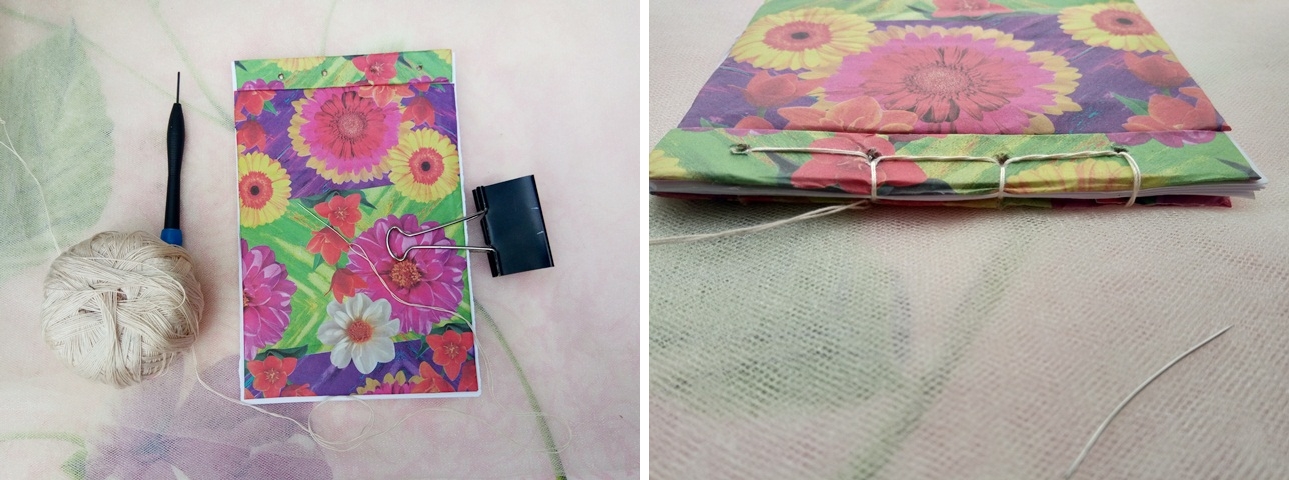
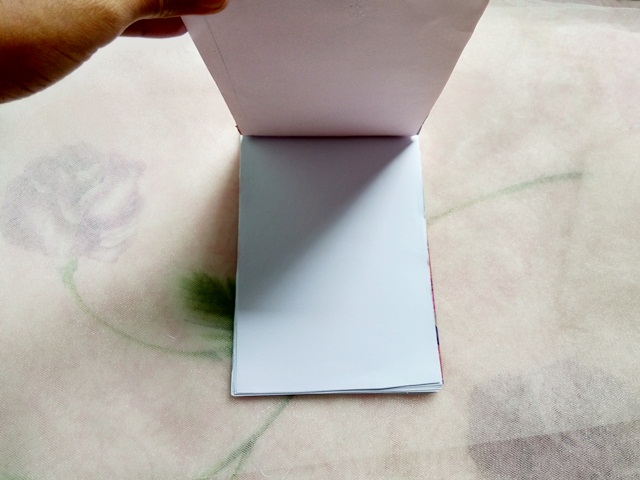
Paso 4. Finalmente unimos las tapas de cartón y las hojas, aquí pondremos en practica esta famosa técnica que basicamente consiste en realizarle una costura visible a las agendas, para esta actividad es recomendable utilizar un hilo de bordar o cualquier hilo que sea resistente
Step 4.Finally we join the cardboard covers and the sheets, here we will put into practice this famous technique that basically consists of making a visible seam to the diaries, for this activity it is advisable to use an embroidery thread or any thread that is resistant

paso 4.jpg


foto final.jpg


foto final2.jpg


Muchas gracias por visitar mi publicación♥, realmente esta agenda es una manualidad facil de hacer y no tenemos excusas para crear y personalizar una linda agenda con nuestras propias manos!, Feliz año amigos!, Hasta la próxima, cuidense!

Thank you very much for visiting my publication ♥, this agenda is really an easy craft to do and we have no excuses to create and customize a beautiful agenda with our own hands! Happy New Year friends! Until next time, take care!

Sort:  


The rewards earned on this comment will go directly to the person sharing the post on Twitter as long as they are registered with @poshtoken. Sign up at https://hiveposh.com.

Thank you for sharing this amazing post on HIVE!
  • Your content got selected by our fellow curator @rezoanulvibes & you just received a little thank you via an upvote from our non-profit curation initiative!

  • You will be featured in one of our recurring curation compilations and on our pinterest boards! Both are aiming to offer you a stage to widen your audience within and outside of the DIY scene of hive.

Join the official DIYHub community on HIVE and show us more of your amazing work and feel free to connect with us and other DIYers via our discord server: https://discord.gg/mY5uCfQ !

If you want to support our goal to motivate other DIY/art/music/homesteading/... creators just delegate to us and earn 100% of your curation rewards!

Stay creative & hive on!

Congratulations @beidacarolina! You have completed the following achievement on the Hive blockchain and have been rewarded with new badge(s):

You received more than 200 upvotes.
Your next target is to reach 300 upvotes.

You can view your badges on your board and compare yourself to others in the Ranking
If you no longer want to receive notifications, reply to this comment with the word STOP

Check out the last post from @hivebuzz:

PUD - PUH - PUM - It's all about to Power Up!
Christmas Challenge - 1000 Hive Power Delegation Winner
Support the HiveBuzz project. Vote for our proposal!