¡Saludos amigos de Hive! El día de hoy quiero compartir con ustedes un tutorial sobre como hacer una corona para tus fotografías o algún evento temático.
Si recuerdan mi participación en el Hive's top model reto: Makeup (naturaleza y vida), utilice como accesorio una corona que para mí representaba la naturaleza misma y muchos de sus elementos a través de ella. Tales como eran los rayos del sol, el inicio de la vida y la fauna silvestre que nace de ella, y como un toque especial coloque las estrellas del firmamento, porque representa el balance, así como existe el día, existe la noche y todos coexistimos bajo un mismo cielo.
Una vez que tenía la idea clara de lo que quería hacer y representar, fue momento de ubicar los materiales necesarios para hacerla. Como trabajo en una ferretería, pude conseguir dichos materiales a buen costo y hacer mi corona.
Hi Hive friends! Today I want to share with you a tutorial on how to make a crown for your photographs or any themed event.
If you remember my participation in the Hive's top model challenge: Makeup (nature and life), I used as an accessory a crown that for me represented nature itself and many of its elements through it.
Such as the rays of the sun, the beginning of life and the wildlife that is born from it, and as a special touch I put the stars of the firmament, because it represents balance, just as there is day, there is night and we all coexist under the same sky.
Once I had a clear idea of what I wanted to do and represent, it was time to locate the necessary materials to make it. As I work in a hardware store, I was able to get these materials at a good price and make my crown.

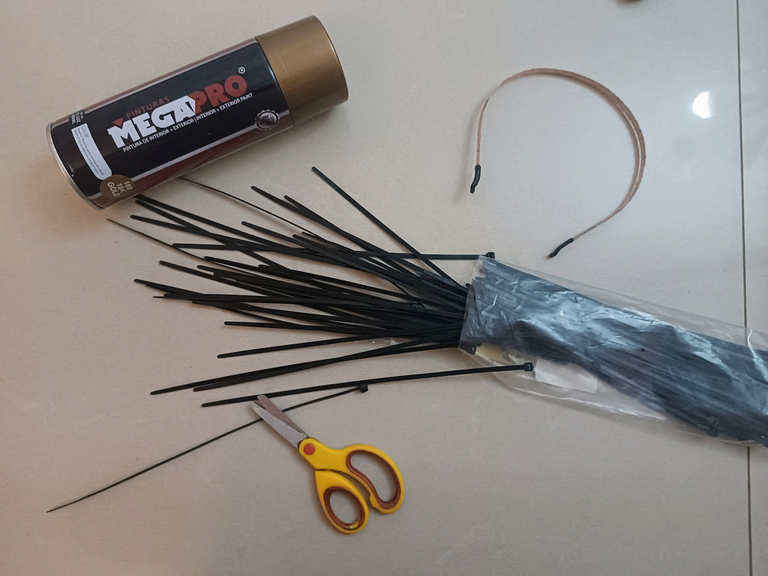
Los materiales necesarios son los siguientes:
- Un cintillo
- Tire racks
- Aerosol dorado
- Una tijera
- Creatividad ✨
The materials needed are as follows:
- A headband
- Tire racks
- Gold spray
- A scissors
- Creativity ✨.

El boceto. ✏️
El proceso de elaboración de nuestra corona es bastante sencillo, pero conlleva bastante paciencia y creatividad. Antes de comenzar a hacer mi corona, hice un boceto de qué era lo que esperaba lograr. As+i tuve una idea preliminar de mi resultado.Armar
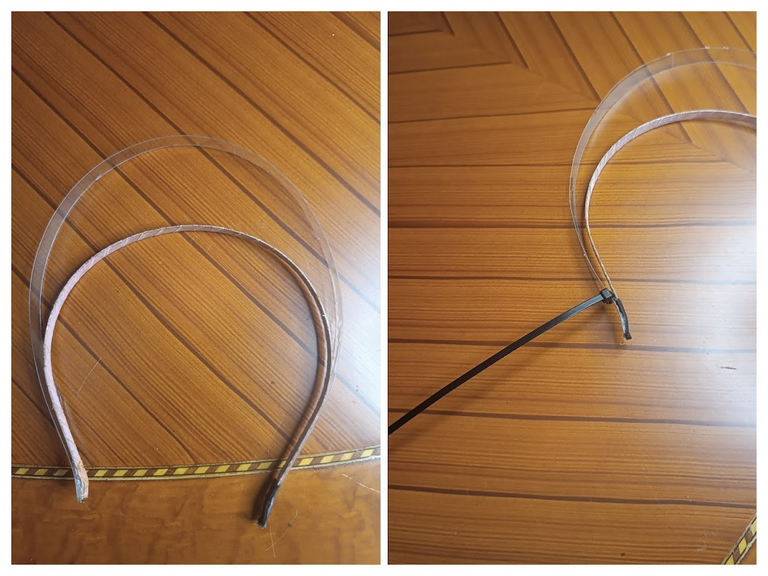
Para que tuviera un poco más de altura y reflejara la circunferencia del sol, corte un círculo de plástico de una botella de agua de 5 litros y lo fije muy bien con silicona a las bases del cintillo. Luego de esto, comencé con el proceso de colocar los tire racks en su sitio, uno al lado del otro.
The sketch. ✏️
The process of making our wreath is fairly simple, but involves quite a bit of patience and creativity. Before I started making my wreath, I sketched out what I hoped to accomplish. This gave me a preliminary idea of my outcome.Assemble
To give it a little more height and reflect the circumference of the sun, I cut a plastic circle from a 5 liter water bottle and attached it very well with silicone to the bases of the headband. After this, I began the process of placing the tire racks in place, one next to the other.
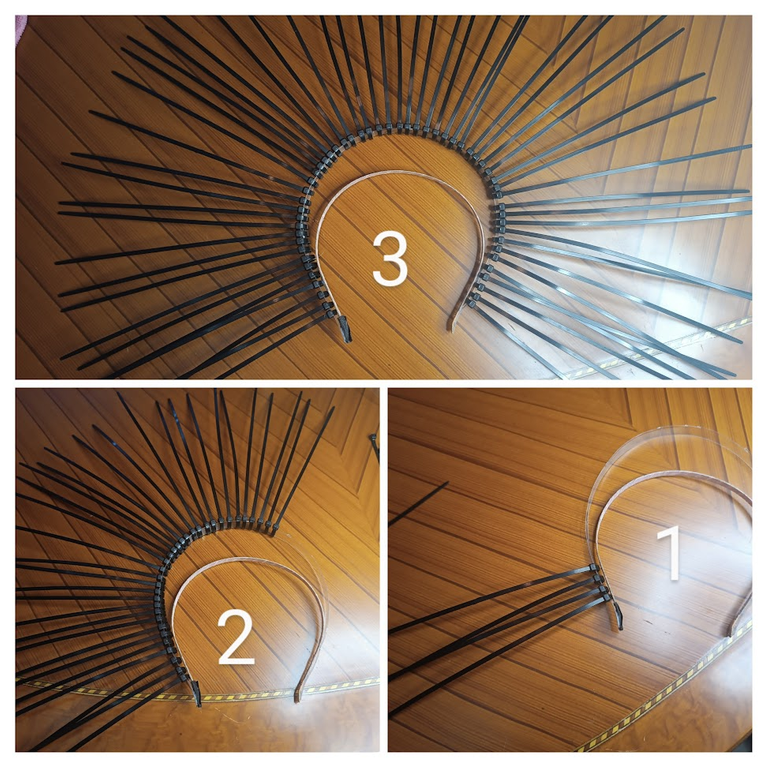
Luego, es necesario repetir este proceso al rededor de todo nuestro cintillo cubriendo todos los espacios. Es un paso un poco tedioso debido a lo repetitivo, pero es parte del proceso.
Acá podemos ver como se ve nuestro cintillo armado.
Then, it is necessary to repeat this process all around our headband covering all the spaces. This step is a bit tedious due to the repetitive nature of the process, but it is part of the process. Here we can see how our headband looks assembled.
3.Pintar
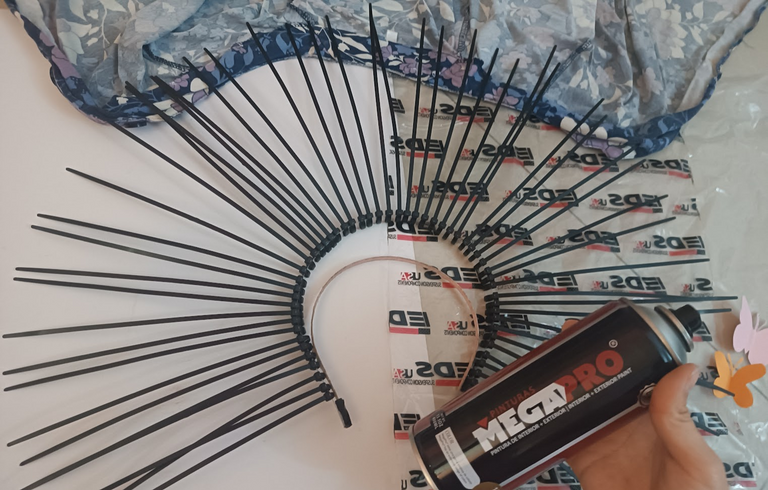
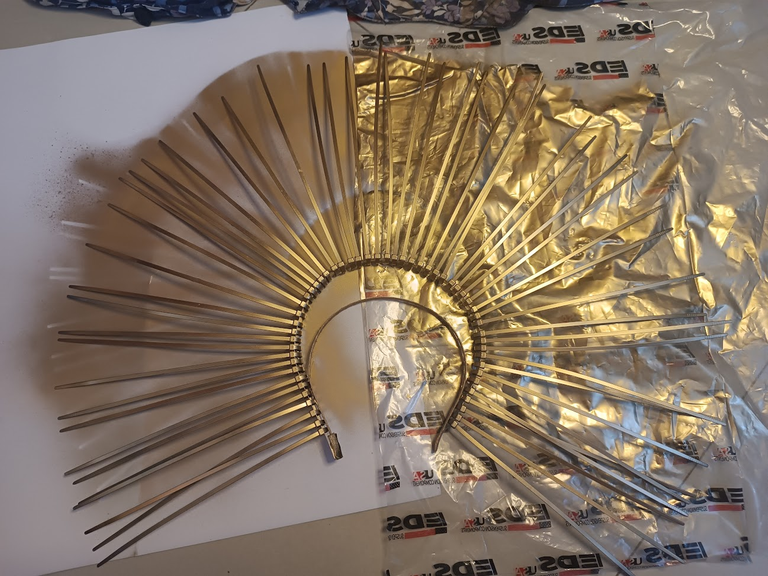
Una vez que tenemos armado nuestra corona, ha llegado el momento de ponerle color y darle los detalles finales.
Para esto, utilice una pintura en spray de color dorado y prepare mi área de trabajo con un plástico y cartulinas para evitar manchar el piso o las paredes del apartamento 😅
3.Paint
Once we have our wreath assembled, it's time to color it and give it the finishing touches.
For this, I used a gold spray paint and prepared my work area with plastic wrap and cardboard to avoid staining the floor or the walls of the apartment 😅
Y así de brillante y hermosa queda nuestra corona una vez pintada 👑
4- Personalizar
Una vez que nuestra corona esta lista, es momento de darle los detalles finales. Como quería representar la naturaleza y vida, pensé en añadirle algunas mariposas y unas estrellas a la decoración, las cuales recorte en cartulina y luego también pinte con la pintura en spray.
4- Customize
Once our wreath is ready, it's time to add the finishing touches.
Since I wanted to represent nature and life, I thought I would add some butterflies and stars to the decoration, which I cut out of cardstock and then spray painted with spray paint.
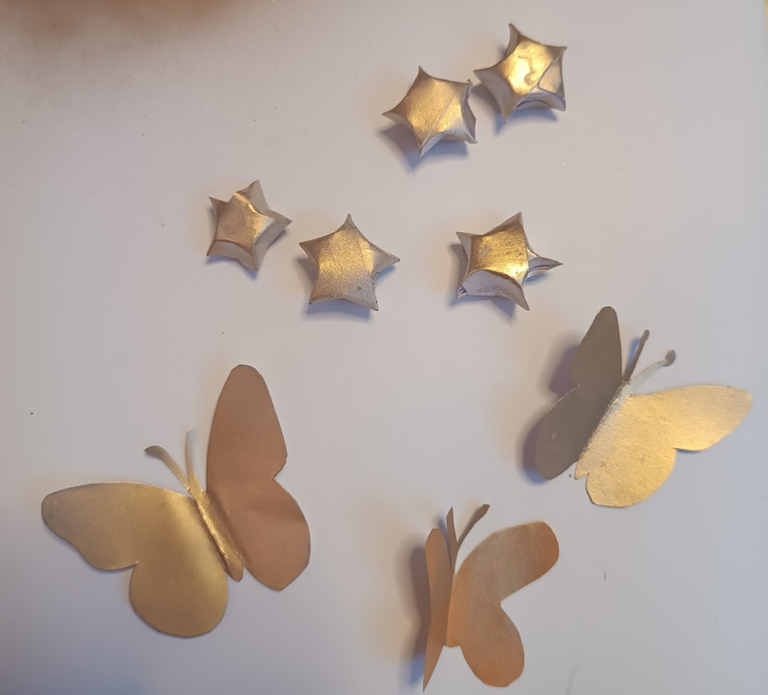
Una vez que tenemos nuestros apliques, ahora solo falta colocarlos en nuestra corona y darle un toque personalizado a nuestro gusto.
Once we have our appliqués, now we just need to place them on our wreath and give it a personalized touch to our liking.
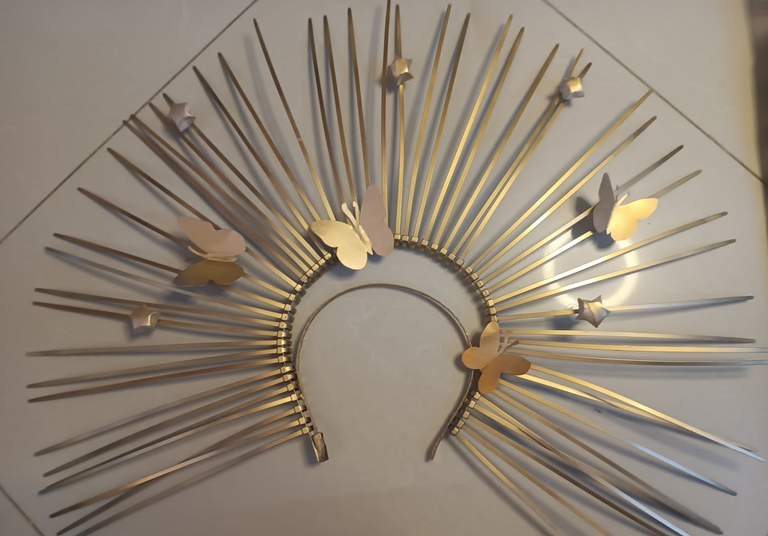
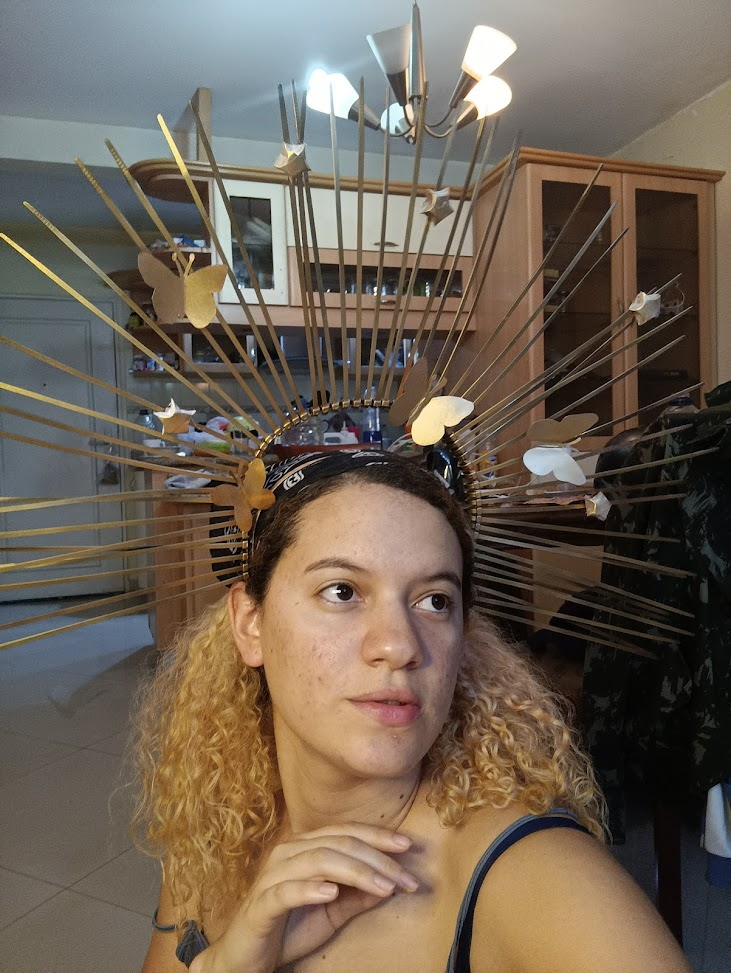
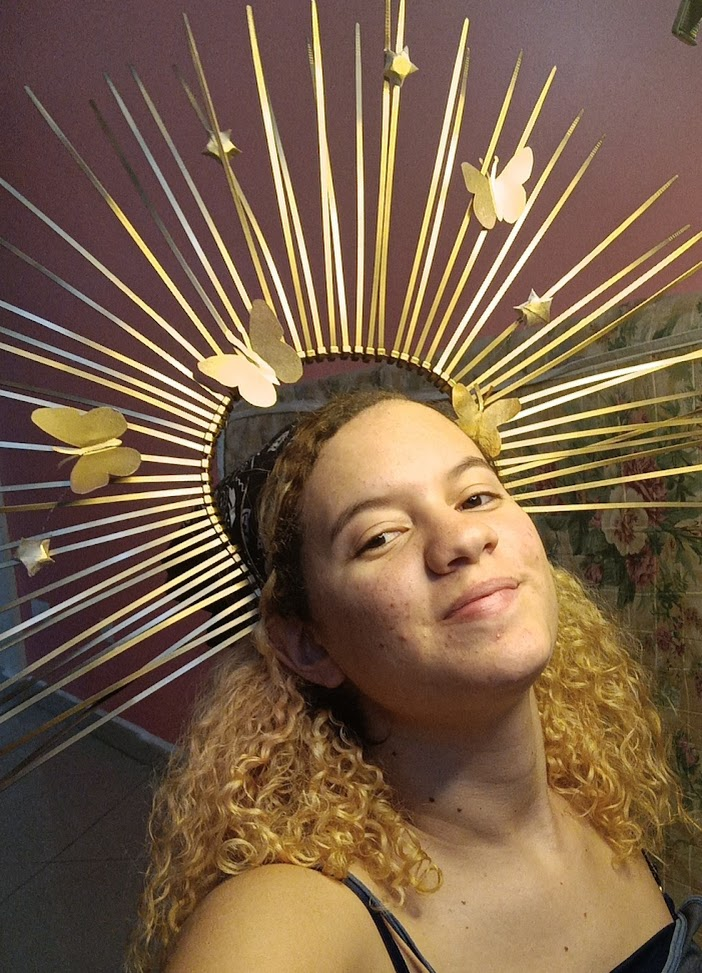
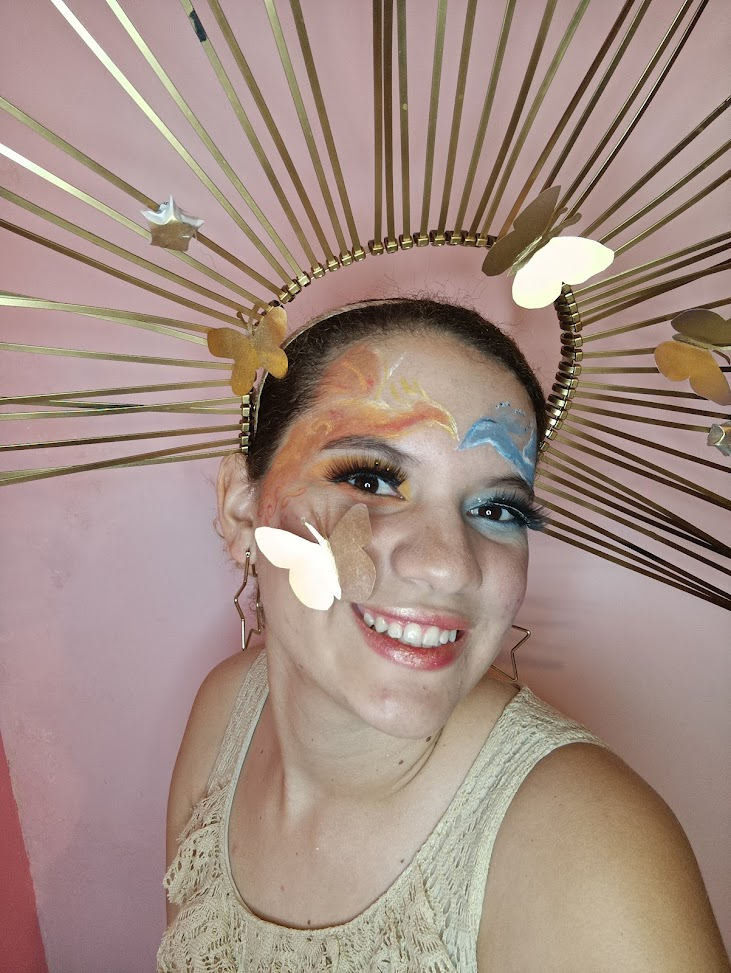
Así de hermosa quedó nuestra corona 🥰✨

Acá les muestro unas fotos del resultado final. De verdad que quedé encantada con el resultado y siento que reflejaba exactamente lo que deseaba ✨
Here are some pictures of the final result. I was really pleased with the result and I feel that it reflected exactly what I wanted ✨.
¡Lo maravilloso de este proyecto es que puedes personalizarlo a tu propio estilo y cono los elementos decorativos que más te gusten! Podías emplear rosas, distintos tamaños e inclusive distintos colores para tu corona.
The wonderful thing about this project is that you can customize it to your own style and with whatever decorative elements you like! You could use roses, different sizes and even different colors for your wreath.

La portada de este post fue diseñada en CANVA


