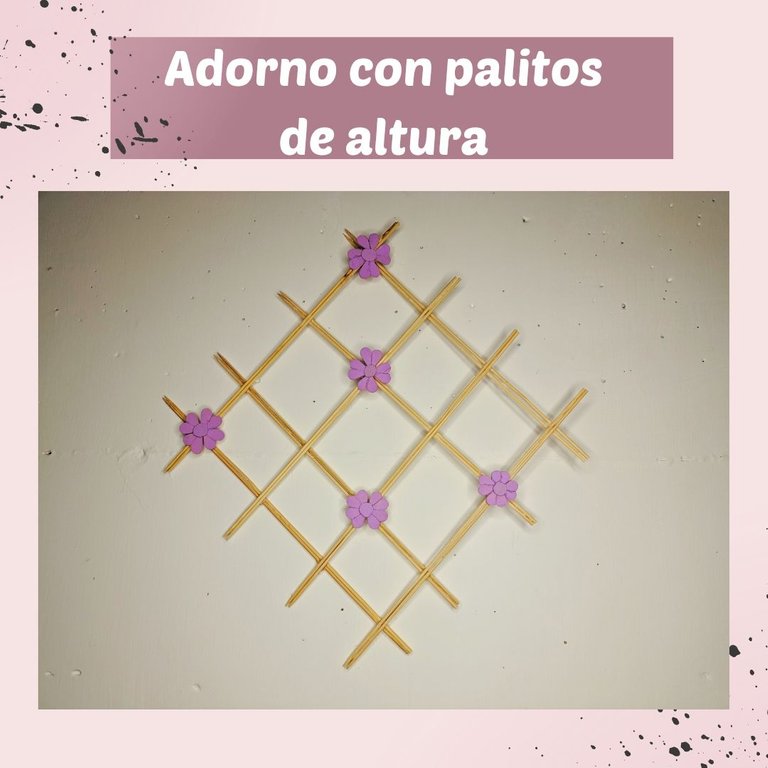
Hola amigos de hive, hoy quiero mostrarle este lindo adorno con palitos de altura que realice para decorar, me gustó este día como se ve los palitos de forma natural, además que es súper sencillo de hacer y podemos utilizar diferentes cosas para colocarle, con que lo decoramos ya es de nosotros, los colores también, como lo iba a colocar en una pared blanca utilice un color suave.
Hello friends of hive, today I want to show you this cute ornament with sticks that I made to decorate, I liked this day as the sticks look natural, plus it is super simple to do and we can use different things to place it, with what we decorate it is up to us, the colors too, as I was going to place it on a white wall I used a soft color.
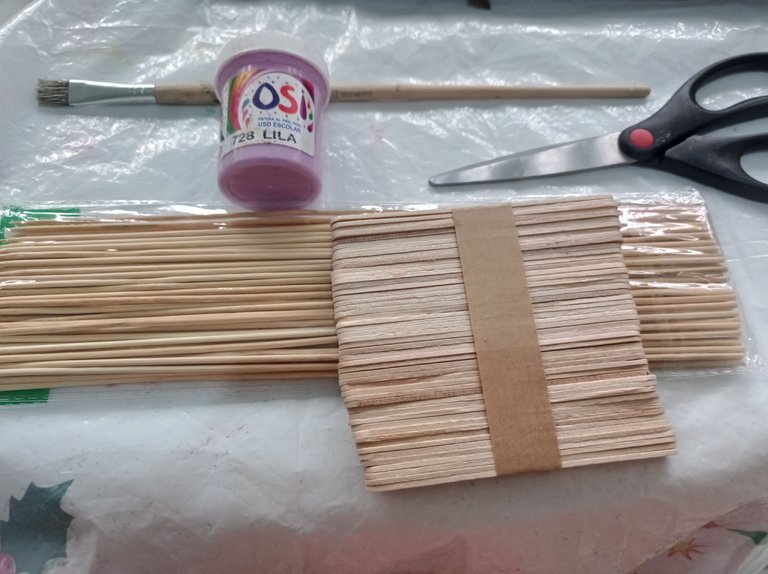
Materiales/ Materials
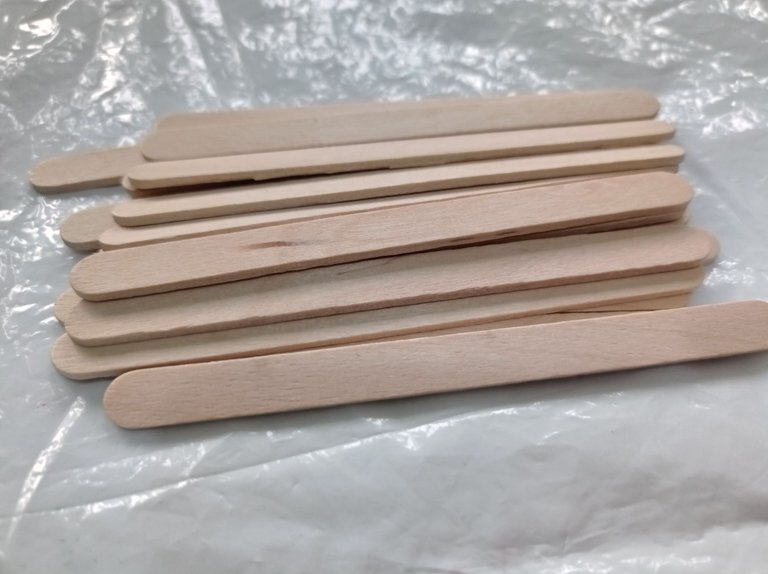
- Paletas de madera
- Pintura
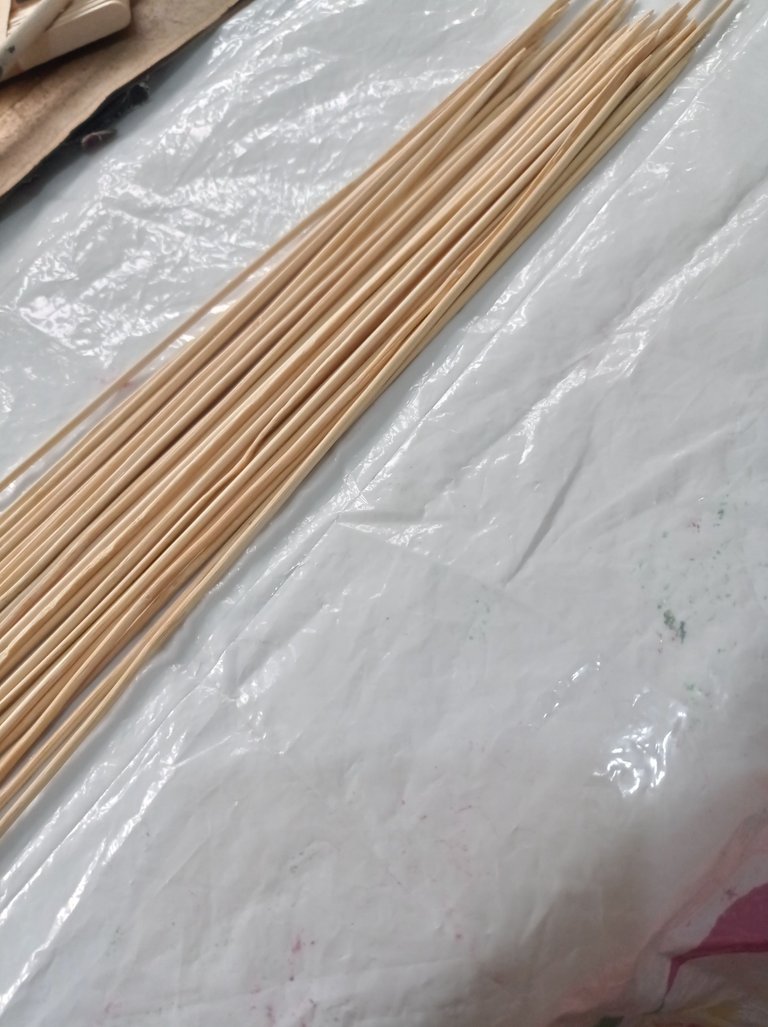
- Palillos de altura
- Silicón
- Pincel
- Tijera
- Cartón
- Wooden pallets
- Paint
- Sticks of height
- Silicone
- Paintbrush
- Scissors
- Cardboard
Comenzamos sacando los palitos de altura y lo colocamos de dos en dos, en pocas palabras hacer 8 pares, esto es para que esté más reforzado el adorno y lo que le pongamos no allá inconveniente, después de eso vamos pegando con silicón caliente poco a poco cada par hasta que veamos que están bien pegados, esto tenemos que estar pendiente ya que se puede desarmar, cuando tengamos los 8 pares listos podemos seguir.
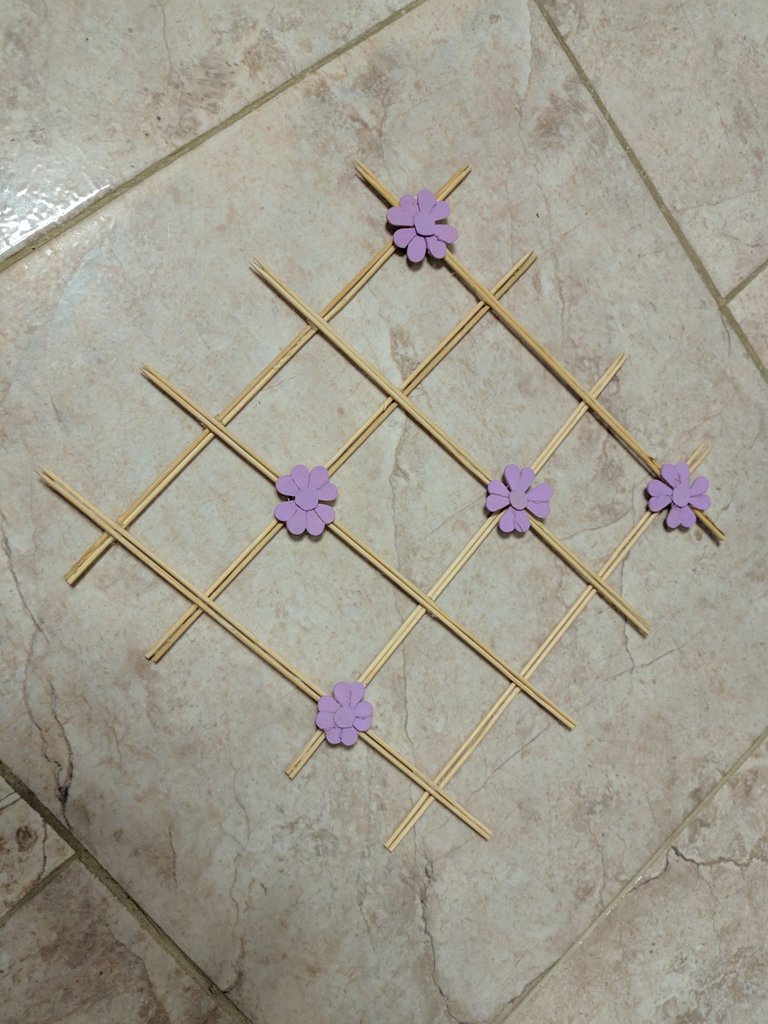
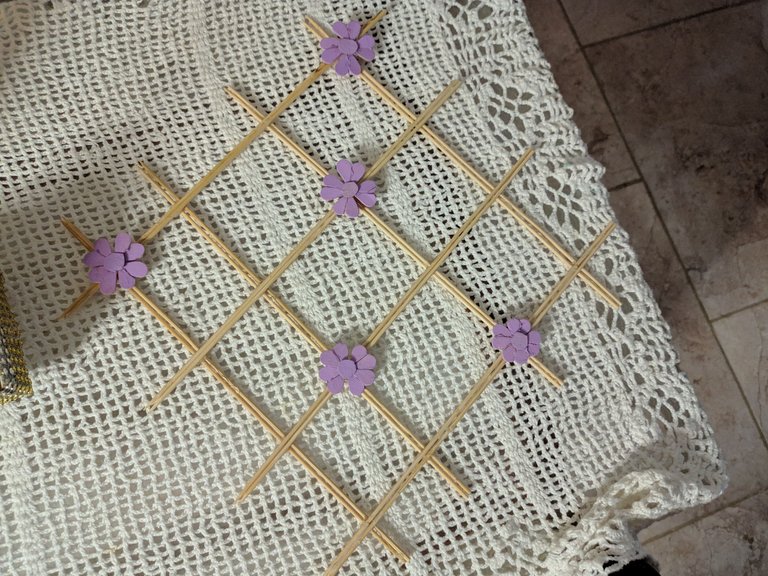
Seguimos ahora con armar y pegar la estructura con los palitos de altura que previamente hicimos para eso colocamos 4 columnas y 4 filas cruzadas entre si con la misma distancia de separación eso ya depende de nosotros tambien, ya que el tamaño es a nuestro gusto, podemos quitar o agregar, lo importante es que esté centrado para que se vea bonito.
We continue now with assembling and gluing the structure with the sticks of height that we previously made for that we place 4 columns and 4 rows crossed each other with the same distance of separation that already depends on us too, since the size is to our taste, we can remove or add, the important thing is that it is centered so that it looks nice. Ahora lo que hacemos es agarrar las paletas de madera y con una tijera cortamos en la esquina de forma diagonal esto se vera como la mitad de un corazón, así que hacemos 4 corazones, lo vamos pegando, para luego unir los 4, y así hacemos la flor, podemos hacer de varios tamaños es a nuestro gusto, lo que es un poquito difícil es cortar la paleta por eso se tiene que realizar con una buena tijera para que no haya problema.
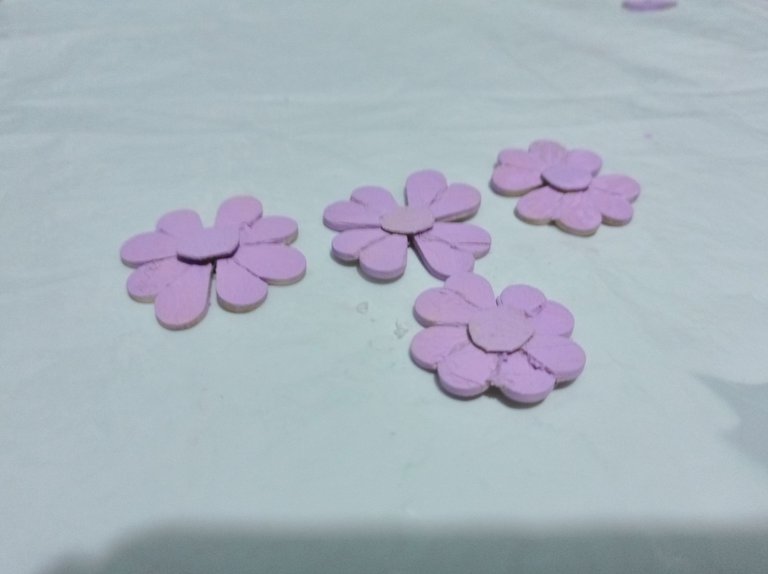
Now what we do is to take the wooden pallets and with a scissors we cut the corner diagonally, this will look like half of a heart, so we make 4 hearts, we glue it, and then join the 4, and so we make the flower, we can make various sizes is to our liking, what is a little difficult is to cut the pallet so it has to be done with a good scissors so there is no problem. Cuando tengamos las flores listas lo que hacemos cortar un círculo de cartón y se la ponemos en el centro, luego es pintarlas como el color es claro le pase dos manos de pintura, y esperé varios minutos que se secaran bien, cuando veamos que están bien secas podemos continuar con el siguiente paso.
Ya con todo listo lo que hacemos es pegar con silicón las flores en la estructura en forma de diamante de palitos de altura que hicimos previamente, las colocamos como queramos y ya tendremos nuestro sencillo adorno con flores pequeñas para decorar.
Espero les guste. I hope you like it. Fotos de mi propiedad. Fotos tomadas por Teléfono Xiaomi Redmi note 9📱 Edición realizada en Canva
We begin by removing the sticks high and place them in pairs, in short make 8 pairs, this is to be more reinforced ornament and what we put there is no inconvenience, after that we are sticking with hot silicone little by little each pair until we see that they are well glued, this we have to be aware that it can be disassembled, when we have the 8 pairs ready we can continue.


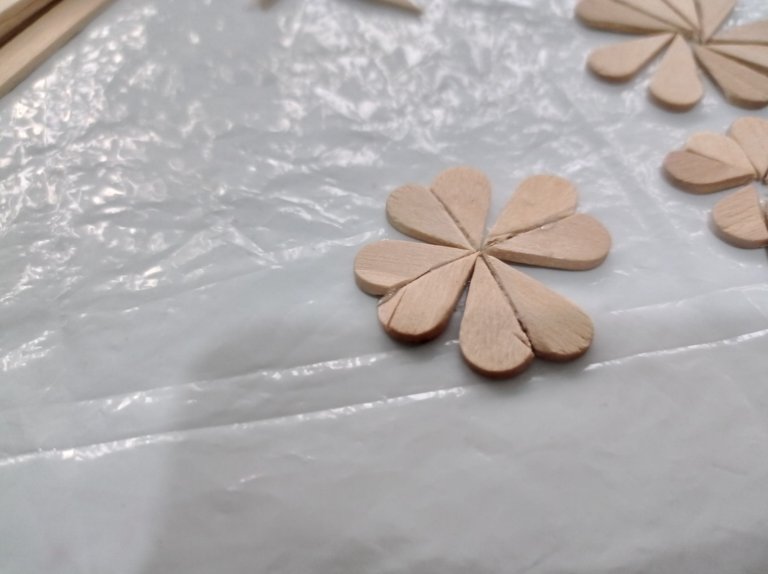
When we have the flowers ready what we do is cut a circle of cardboard and we put it in the center, then paint them as the color is clear and wait several minutes to dry well, when we see that they are dry we can continue with the next step.
Once everything is ready, we glue the flowers with silicone on the diamond-shaped structure of sticks that we previously made, we place them as we want and we will have our simple ornament with small flowers to decorate.