Hot rod car made of recycled cardboard
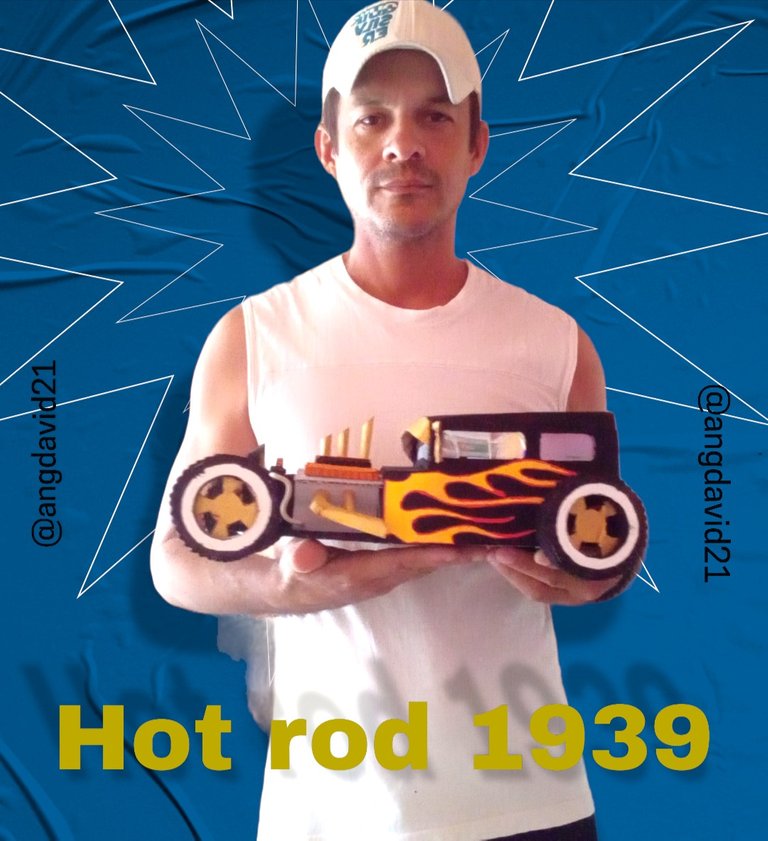
Hello my friends from #diy have a happy day everyone in the community, after a time away from the community today I want to activate with you and share another craft work made with recycling material ♻️ like what is cardboard, this time I wanted to do what I like the most, a 1939 hot rod type car, I hope you like my post, and then I will show you the step by step of its elaboration.
Hola mis amigos de #diy feliz día tengan todos en la comunidad, luego de un tiempo ausente de la comunidad hoy quiero activarme con uds y compartir otro trabajo de manualidad realizado con material de reciclaje ♻️ como lo es el cartón, en esta ocasión quise hacer lo que más me gusta, un carro tipo hot rod de 1939, espero les guste mi post, y a continuación les muestro el paso a paso de su elaboración.
| Materials |
|---|
| Cardboard |
| Cold painting |
| Brushes |
| Silicon |
| Scissors |
| Compass |
| Exact |
| Pencil |
| Rule |
| Materiales |
|---|
| Cartón |
| Pintura al frío |
| Pinceles |
| Silicio |
| Tijera |
| Compás |
| Exacto |
| Lápiz |
| Regla |
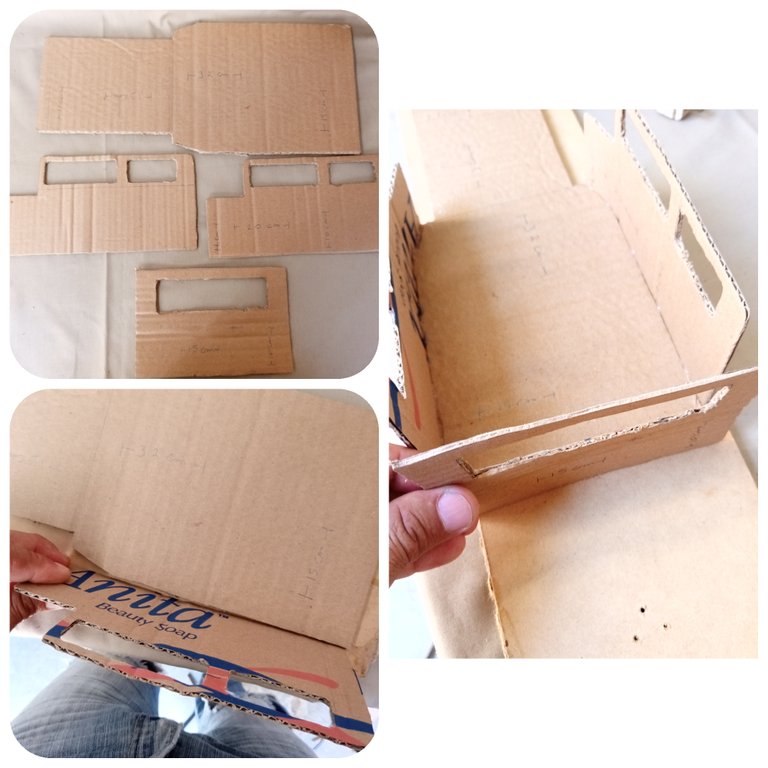
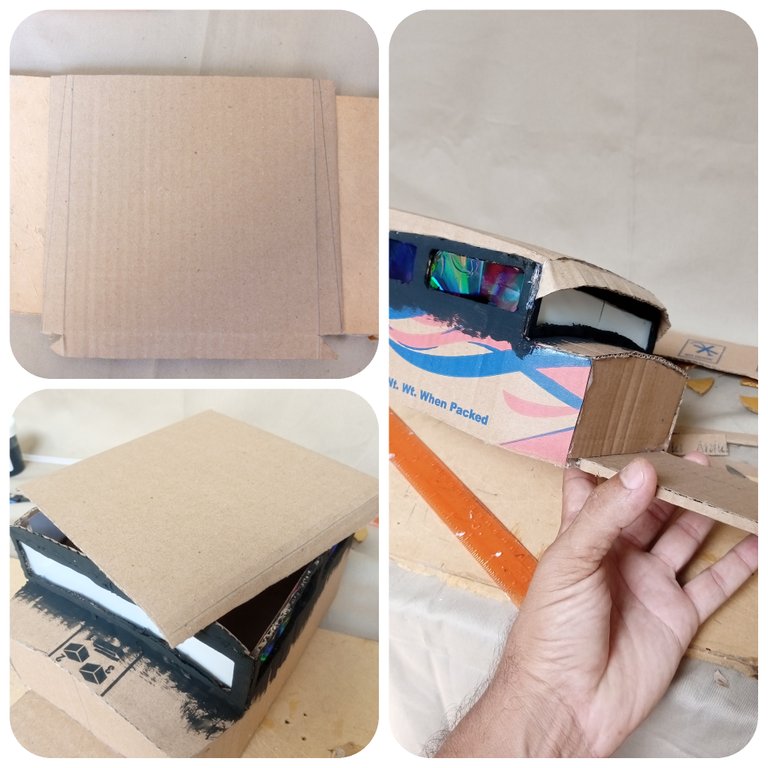
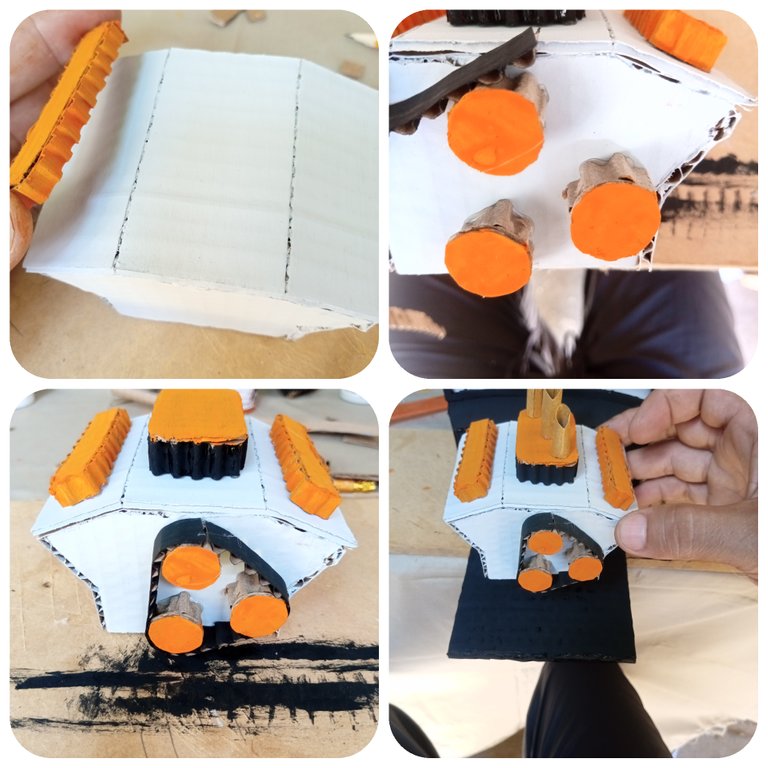
In this first step we begin by taking a piece of cardboard, we measure, we draw some lines so that it will be the first part of our car. The base of our car will measure 32 CM x 15 CM x 11 CM the sides will measure 20cm x 10cm x 6cm and our tailgate will measure 10cm x 15cm
En este primer paso comenzamos tomando una parte de cartón medimos trazamos unas líneas para que será la primera parte de nuestro carro. La base de nuestro carro medirá 32 CM x 15 CM x 11 CM los laterales medirán 20cm x 10cm x 6cm y nuestra compuerta trasera medirá 10cm x 15cm
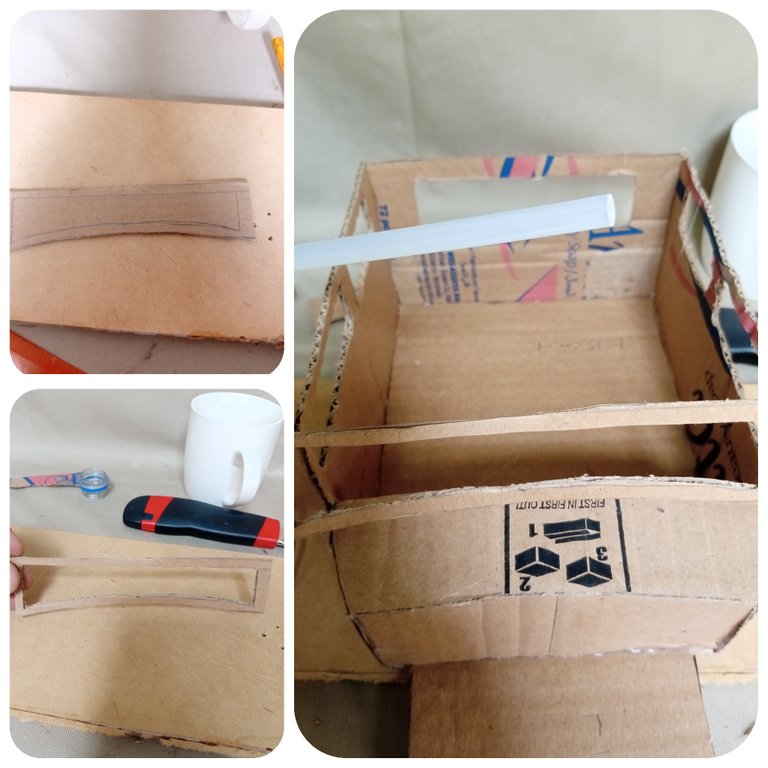
Ready with the first part of the car we begin to design what will be the part of the windshield and the main grill of the car. The windshield will measure 14.5 CM x 4cm, the grill will be made by cutting cardboard strips to complete the 6 CM wide by 7 CM high.
Listo con la primera parte del carro comenzamos a diseñar lo que será La parte del para brisas y la parrilla principal del carro. El parabrisas medirá 14,5 CM x 4cm, la elaboración de la parrilla será cortando tiras de cartón hasta completar los 6 CM de ancho por 7 CM de alto.

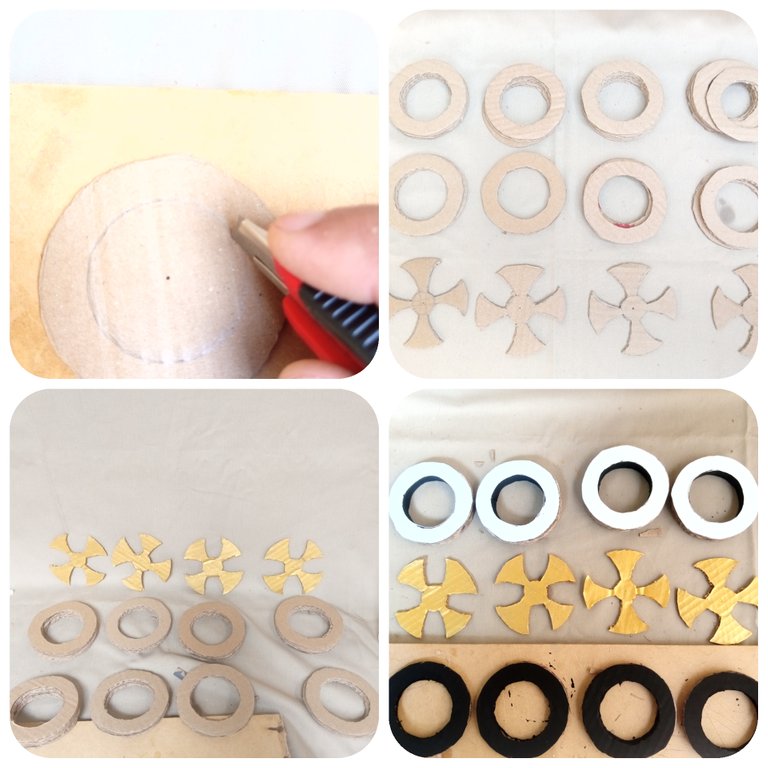
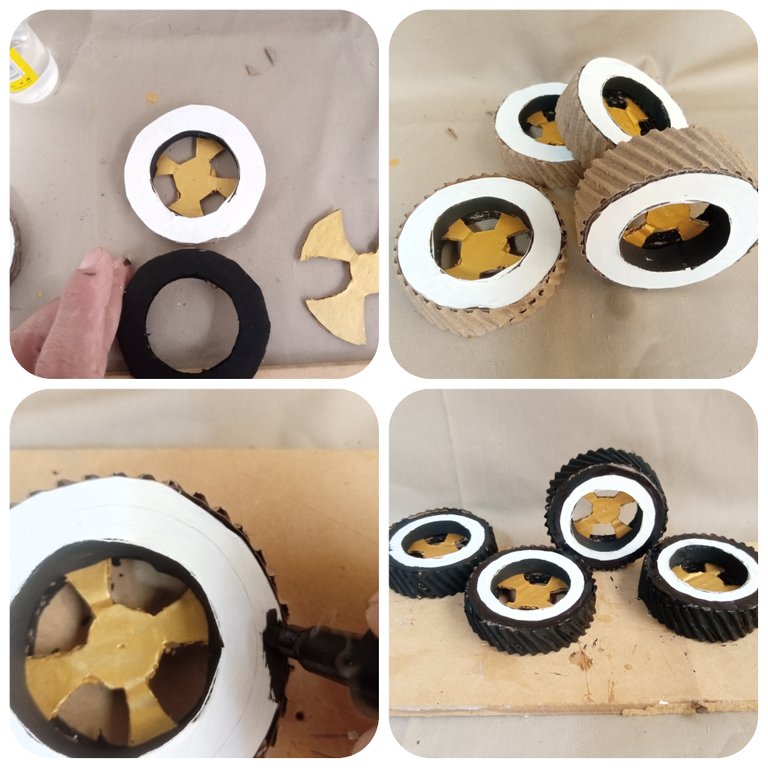
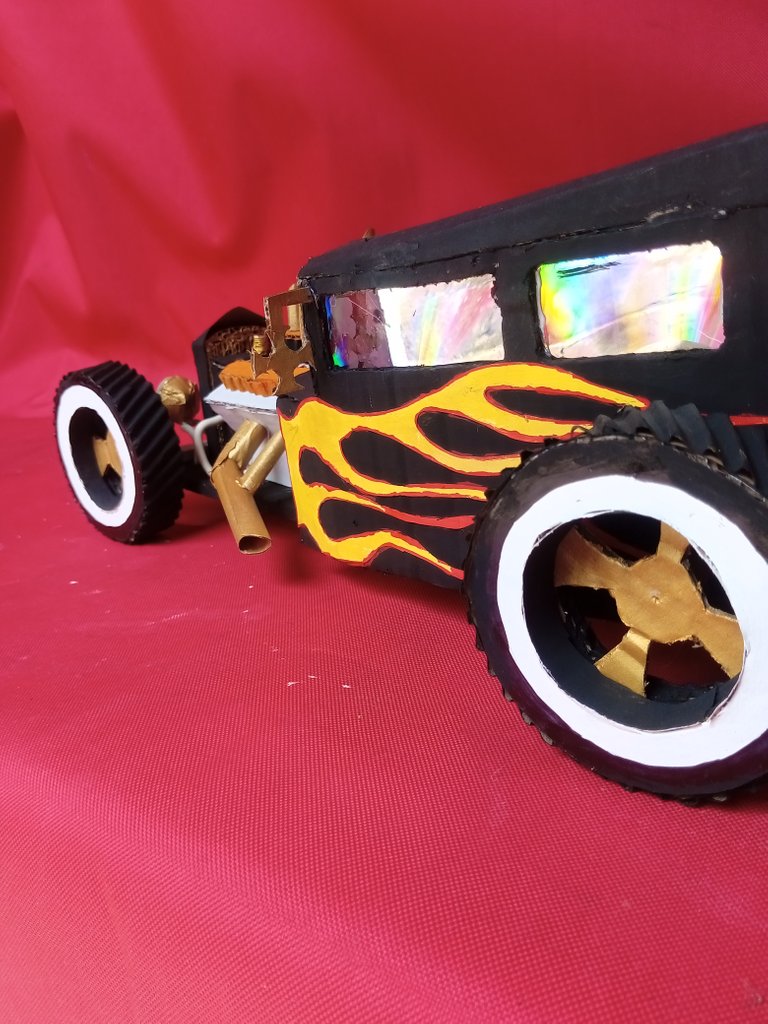
Now we have to make the wheels. They will be tall and wide wheels that characterizes that type of car, we will remember 32 circles of 8 with circumference, of those 32 circles we will take 4 to design what the Rhine will be, and the others will be transformed into rings with a thickness of 2 CM, such as will be shown in the picture.
Ahora nos toca hacer las ruedas. Serán ruedas altas y anchas colo lo caracteriza ese tipo de carros, recordaremos 32 círculos de 8 con de circunferencia, de esos 32 círculos tomaremos 4 para diseñar lo que será el Rin, y a los demás los transformarnos en aros con grosor de 2 CM, como se mostrará en la imagen.
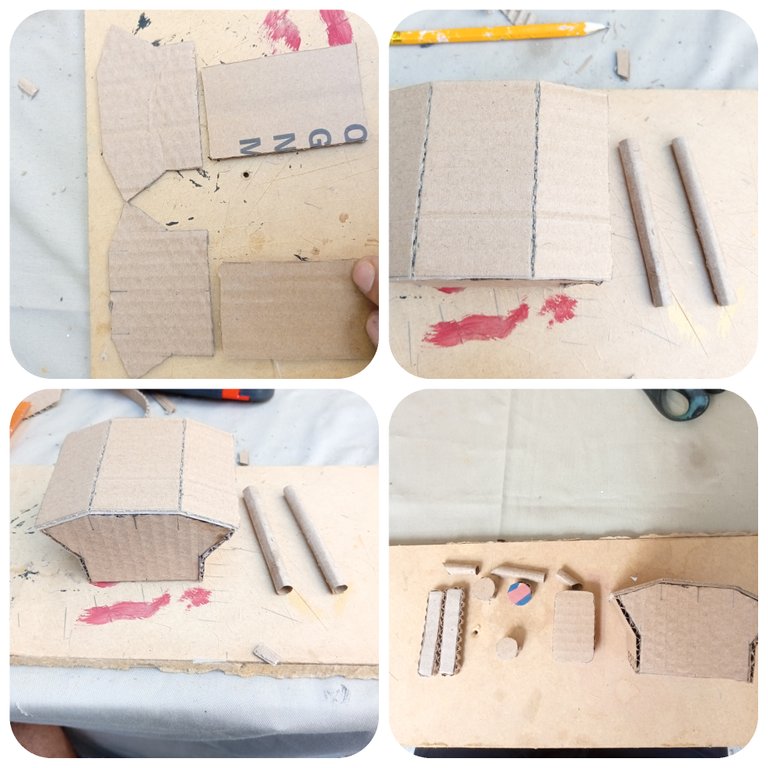
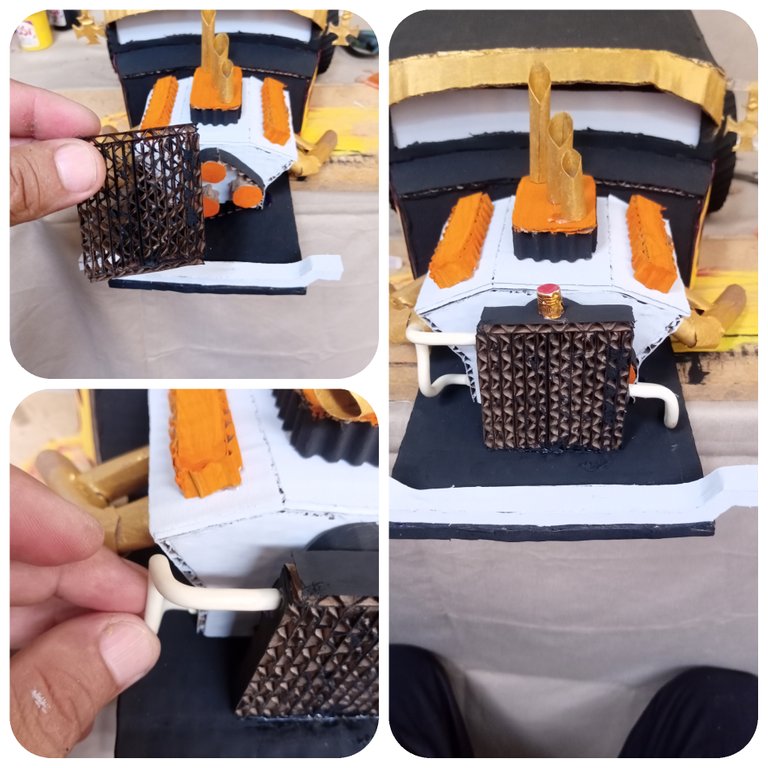
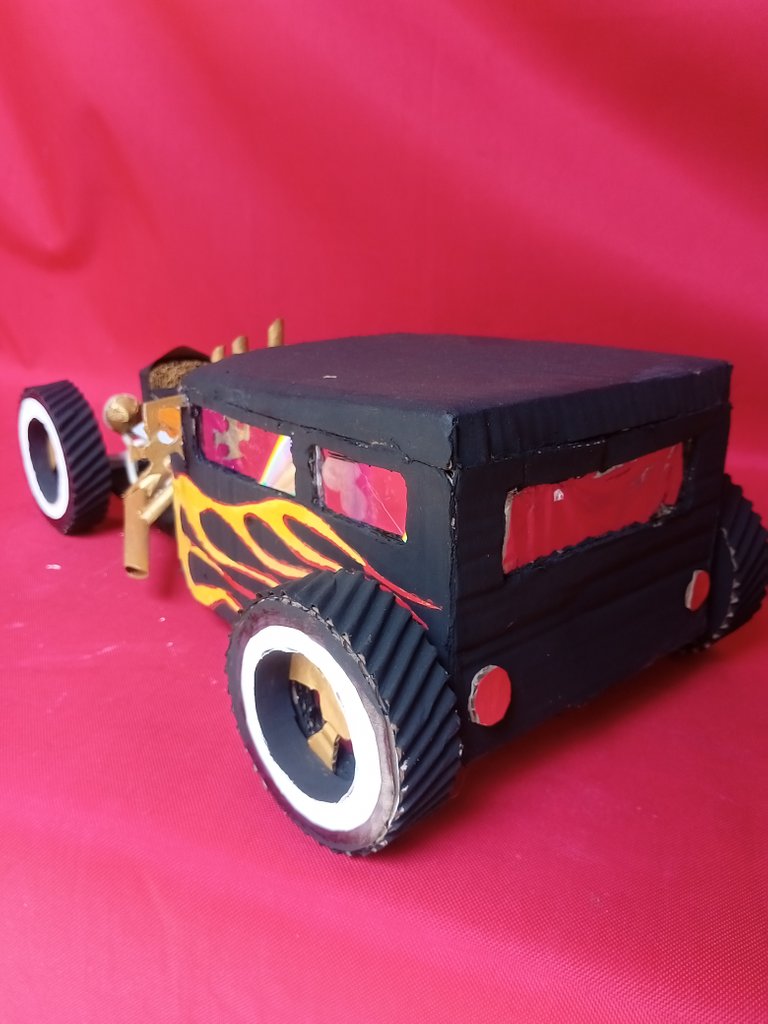
Finishing the wheels, we will begin to make the roof, it will measure 18 cm wide by 16 long. On the edges of the Roof we will make a small double on the edges to give it a curved look.
Terminando las ruedas, empezaremos a realizar el techo, este medira 18cm de ancho por 16 de largo. En los bordes del Techo le haremos un pequeño dobles en los bordes para darle un aspecto curvo.
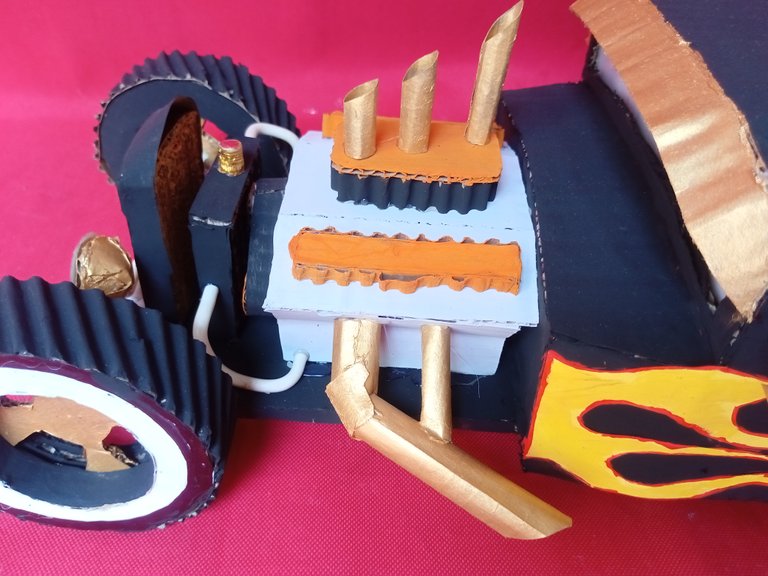
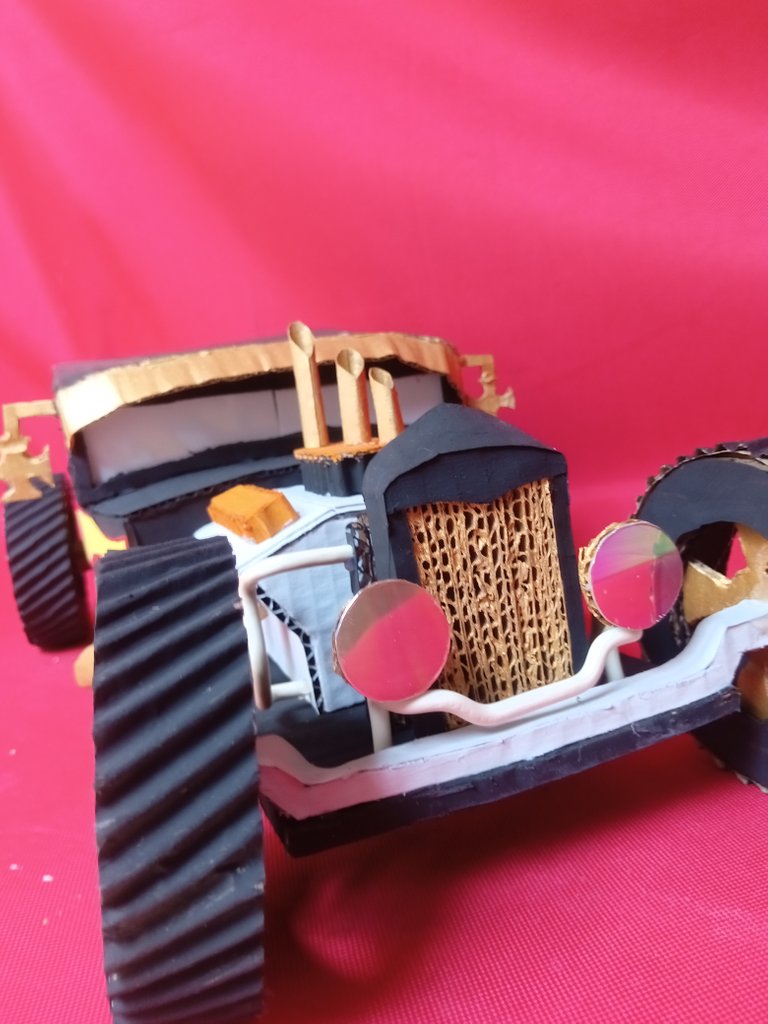
One of the parts that I like to make is the engine, it is about doing as detailed as possible 😁 in this case I made the cameras, air filter with carburetor, timing belt and made the radiator with water inlet and outlet, to This uses thick cables simulating water hoses.
Una de las partes que me gusta realizar es el motor se trata de hacer lo más detallista posible 😁 en este caso le hice las cámaras, filtro de aire con carburador, correa del tiempo y le fabrique el radiador con entrada y salida de agua, para este use unos cables gruesos simulando a unas mangueras para el agua.
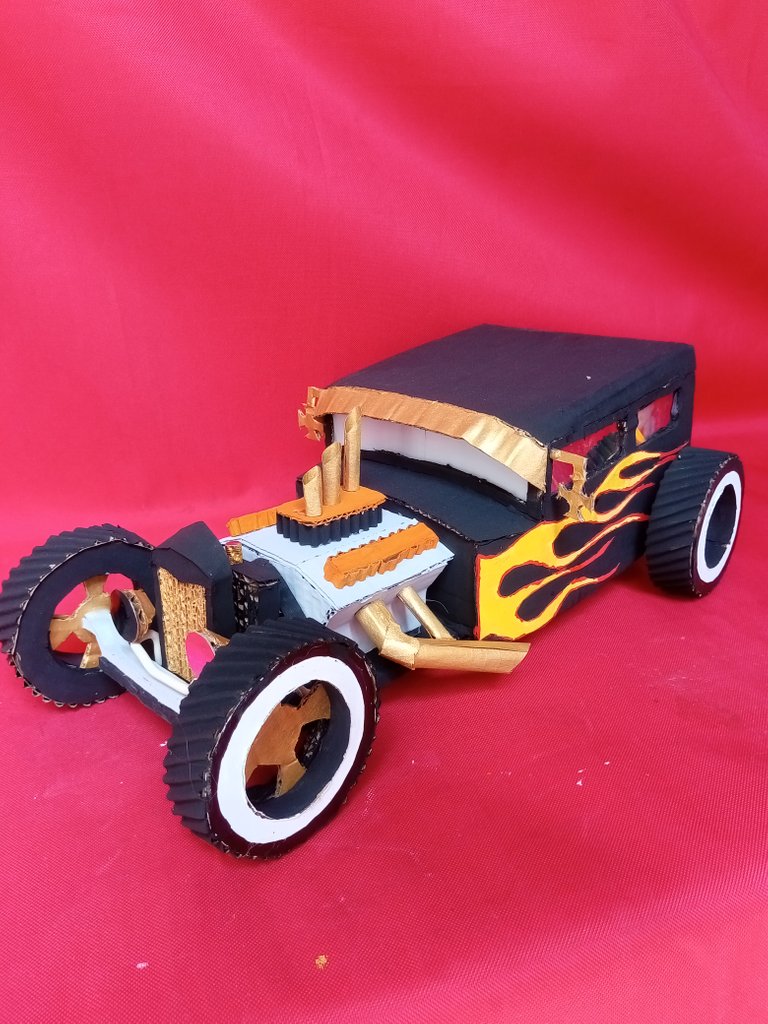
At this point I wanted to give it a bit of personality 😁 I drew a flame on paper, painted them and pasted them on both sides of the car, I would have liked to draw them directly but the brushes I have were not going to help me and in addition to that I must have a surgeon's pulse to make it super perfect😀, I also made the exhaust pipes.
En este punto quise darle un poco de personalidad 😁 dibuje una flamas en papel las pinte y pegue en ambos Lados del carro, me hubiese gustado dibujarlas directamente pero los pinceles que tengo no me iban ayudar y sumado a eso debo tener un pulso de cirujano para que quede super perfecto😀, también realice los tubos de escapes.

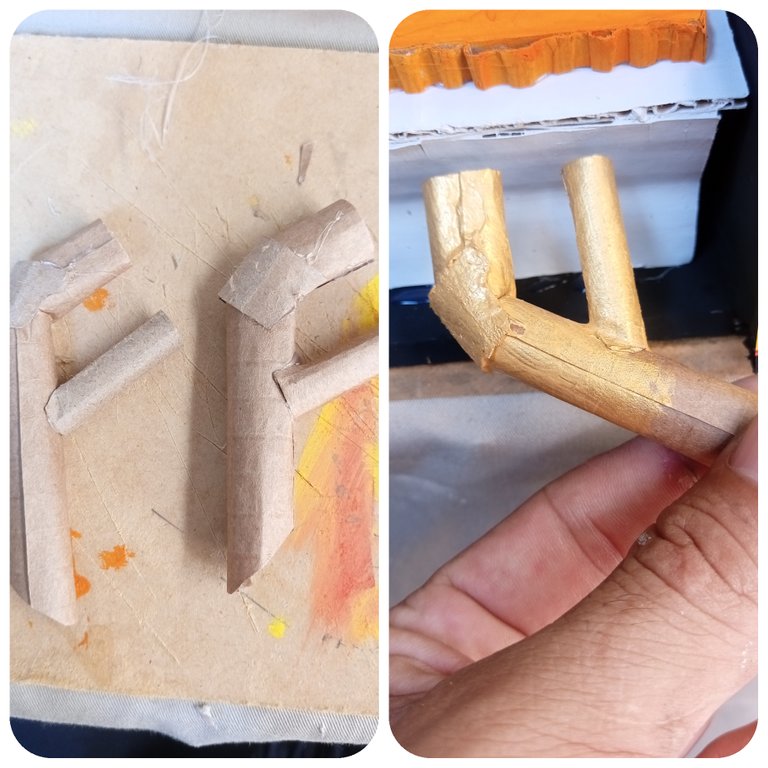
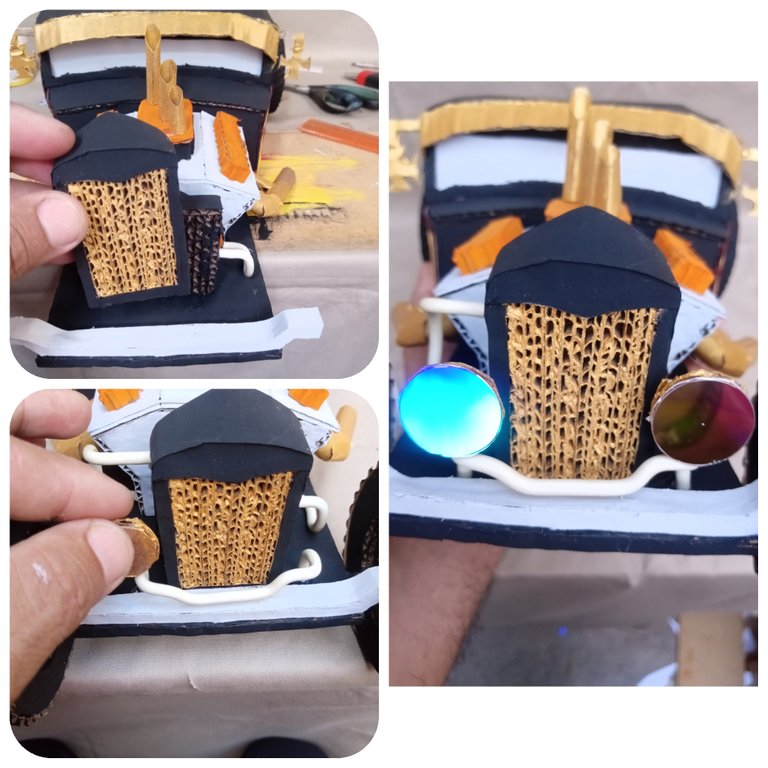
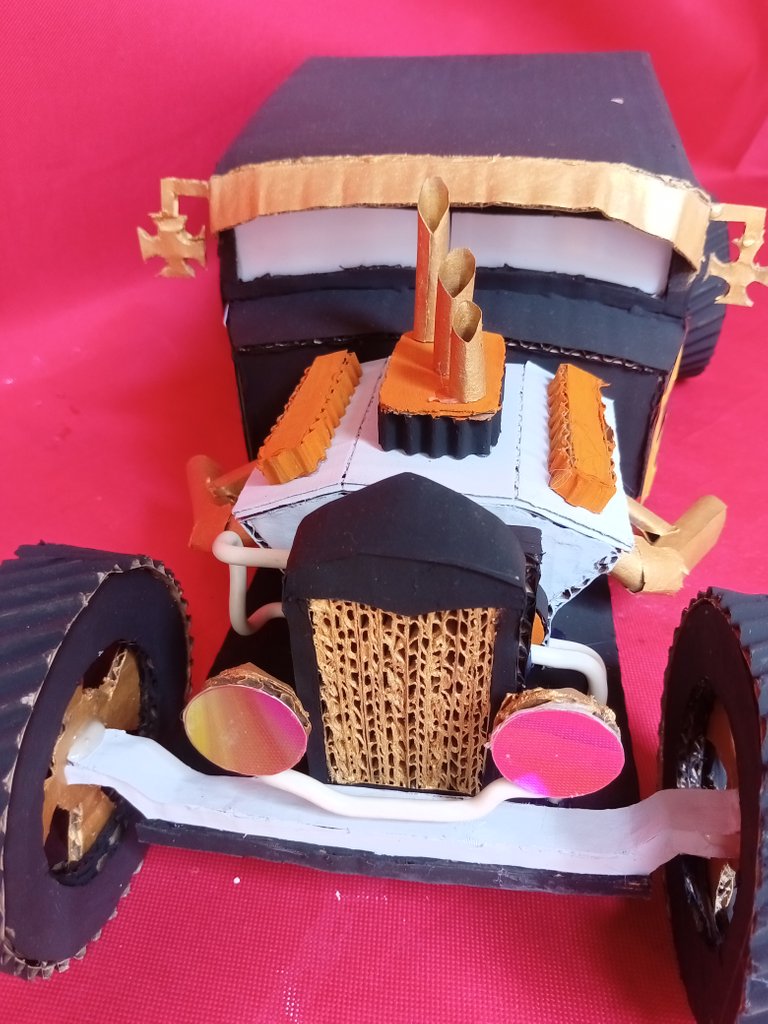
We are almost finished, we only have to assemble what will be the front of the car, glue the light headlights to the grill, to these headlights I cut a circle from an old CD to give the impression of shiny and that it was glass. Now we only have to finish giving the final touches of paint.
Ya casi terminamos, solo nos queda armar lo que será el frente del carro, pegar la parrilla los faros de luz, a estos faros le recorte un círculo de un CD viejo para que diera la impresión de brillante y que fuese vidrio. Ahora solo nos queda terminar de dar los toque finales de pintura.
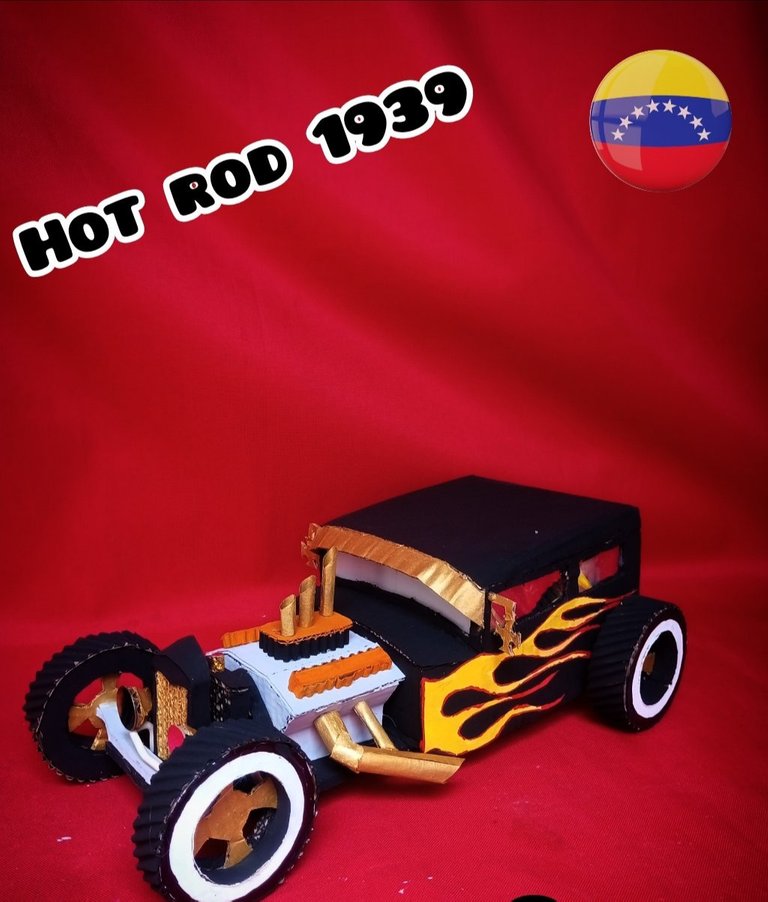
After a couple of days of manual work the result of our HOT ROD 1939 is ready.
Final result
Resultado final
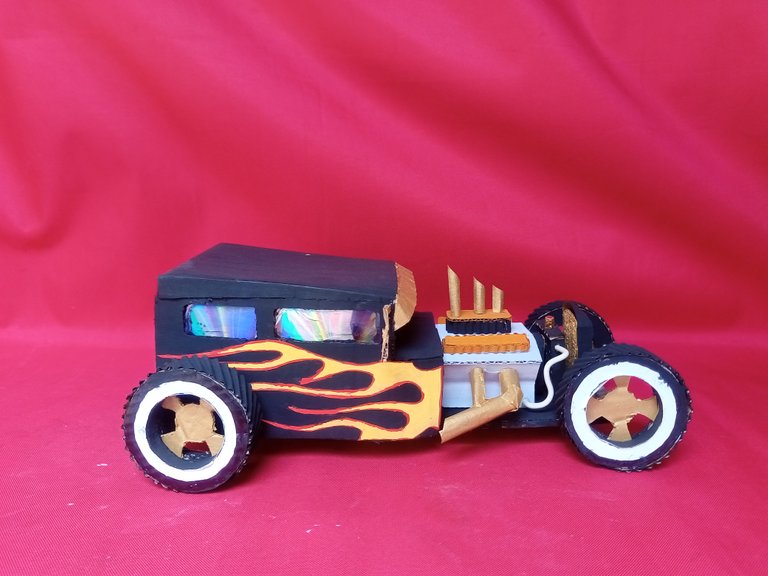
Well friends, this way I made this hot rod, I hope you liked my work and my publication. Thank you very much for visiting and it will be until the next opportunity.
God bless you greatly 🙏
Dios los bendiga grandemente 🙏
Imágenes editadas en photocollage de Android
All photos were taken by my Alcatel 1v Smartphone
This post is translated by android app Google translate