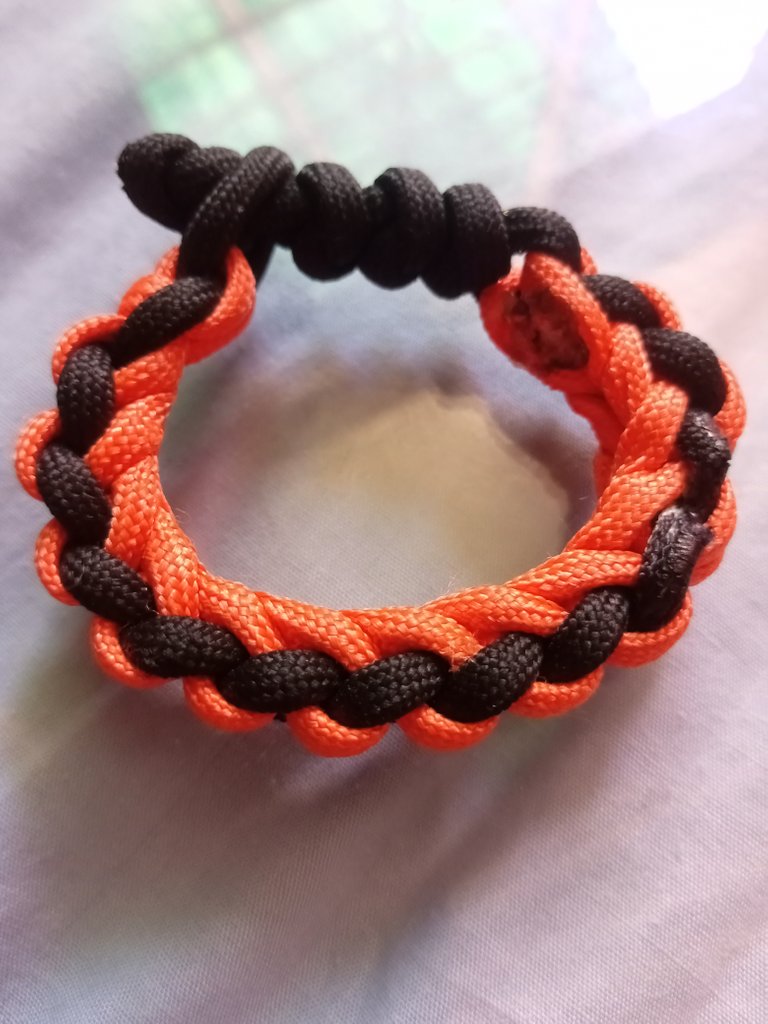
ENG/ ESP Paracord bracelet for children. Pulsera Paracord para niño.

in #hive-1305603 years ago

Paracord bracelet for children.

img_0.0768079110874859.jpg


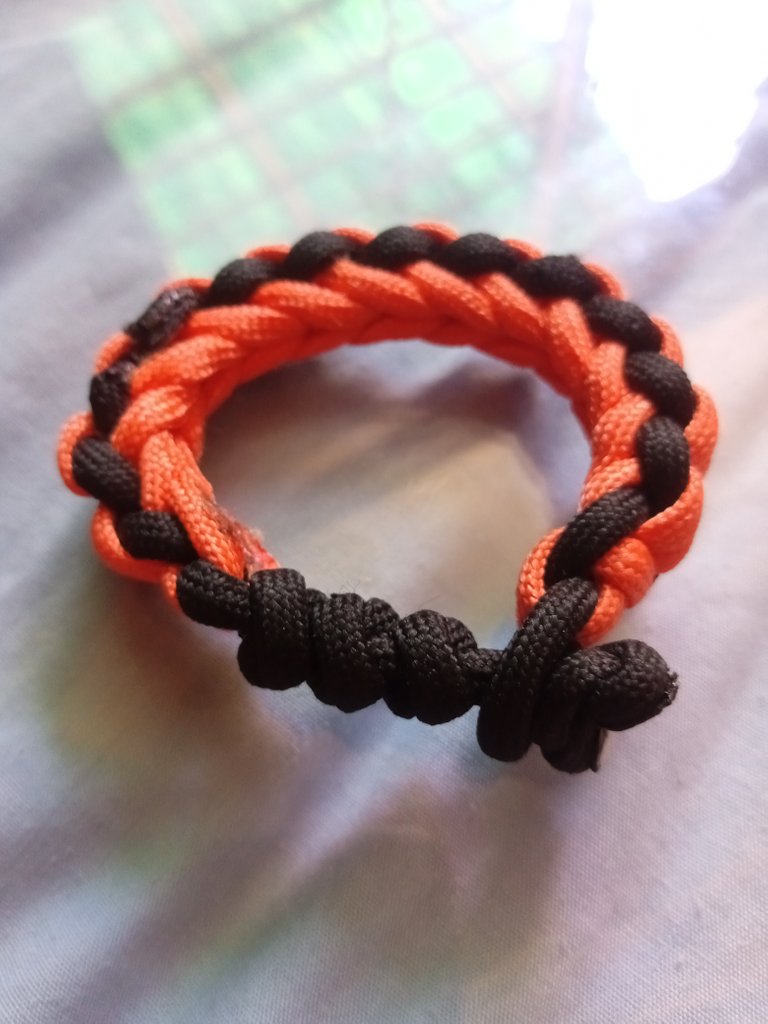
Hello friends of #diy as always it is a pleasure to publish in the community and present the crafts for you, this time I want to bring you the making of a Paracord bracelet for children, time ago I used to make a lot of this type of bracelets of all the fabric models that you can learn there are some that take a lot of dedication as well as others that are easily learned, this type of rope is called survival, it is used by many people who dedicated to extreme excursions, their unique style became very fashionable due to its originality and beauty to the point that it was also used as a watch strap, the truth is that Paracord bracelets are an accessory that in my opinion combines with the personality of each person and in this post I want to show you one of the braids or knots that I learned, this time I wanted to make one for the youngest of the house. Next I show you the step by step.

Hola que tal amigos de #diy como siempre es un placer publicar en la comunidad y presentar las manualidades para uds, en esta ocasión quiero traerles la elaboración de una pulsera con cuerda Paracord para niños, tiempo atrás me dedicaba a realizar mucho este tipo de pulseras de todos los modelos de tejidos que puede aprender hay algunos que llevan mucha dedicación como también hay otros que fácilmente se aprenden, este tipo de cuerda es denominado como de supervivencia, lo usan muchos personas que se dedican a la excursión extrema, su estilo único se colocó muy de moda por su originalidad y belleza a tal punto que también fue empleado como correa para reloj, lo cierto es que las pulseras Paracord es un accesorio que en mi opinión combina con la personalidad de cada persona y en este post quiero mostrarles uno de los trenzados o nudos que aprendí, en esta ocasión quise realizar una a el pequeño menor de la casa. A continuación les muestro el paso a paso.

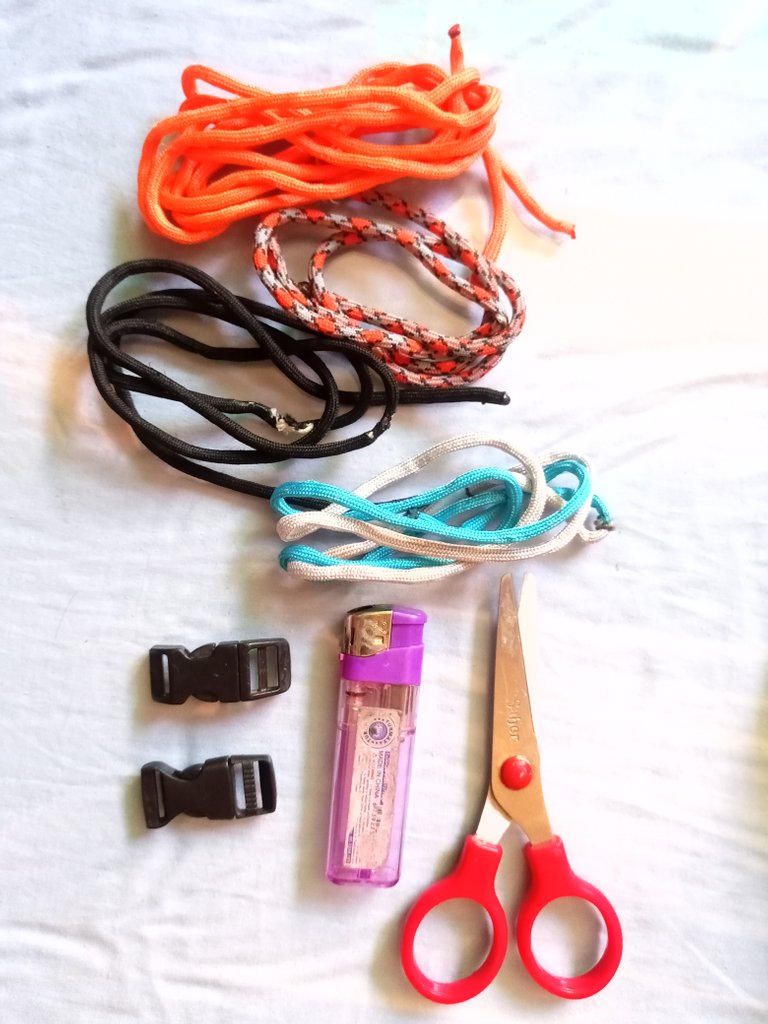
Materials to use

  • 1.50 MTS of orange Paracord rope
  • 1.50 MTS of black Paracord rope
  • Pair of scissors
  • Lighter

Materiales a utilizar

  • 1.50 MTS de cuerda Paracord color naranja
  • 1.50 MTS de cuerda Paracord color negro
  • Tijeras
  • Encendedor

img_0.37659156783965664.jpg


Step 1

Paso 1

In this first step we will take both ropes and fold them in half, take the black rope and cross it as if it were a loop, then take the orange rope, in the hole that the black rope shows us, pass it through there and tie or fasten as shown in the following images.
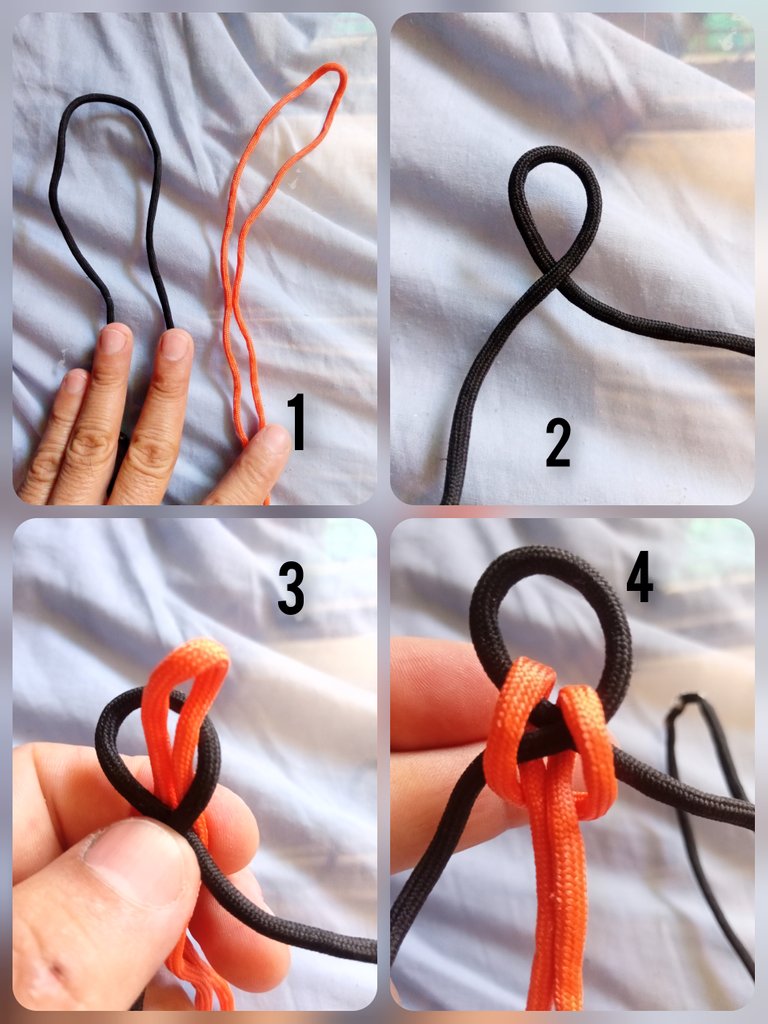
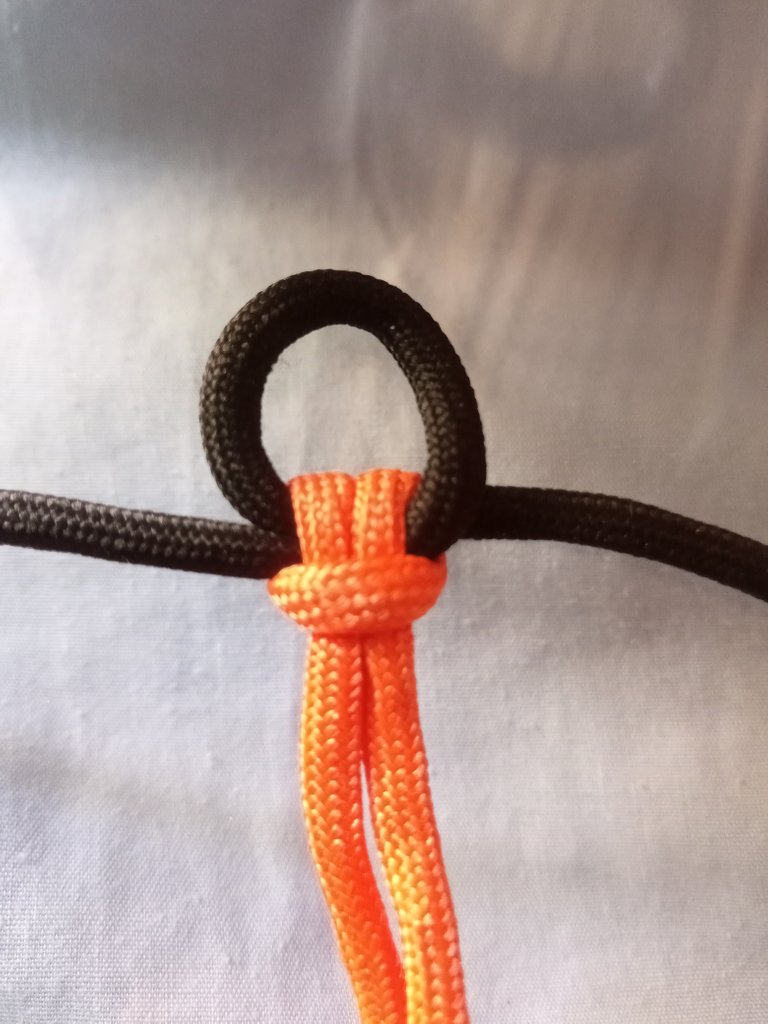
En este primer paso tomaremos ambas cuerda y la doblamos a la mitad, cojemos la cuerda negra y haremos la cruzamos como si fuese un lazo, luego tomamos la cuerda naranja, en el orificio que nos muestra la cuerda negra, la pasamos por allí y amarramos o sujetamos así como se muestra en las siguientes imágenes.

img_0.48153405658098763.jpg

img_0.4417509008696845.jpg


Step 2

Paso 2

In this next step we'll take the ends of the black rope, the right side of the rope goes to the left, and the left side to the right, we'll just place it that way. Then we will take one end of the orange rope and we will pass it over the black rope, in the same way we do with the other end of the orange rope, once we have done the procedure we begin to press hard until we have a knot left, these steps we will do it until almost all the orange rope is completed.
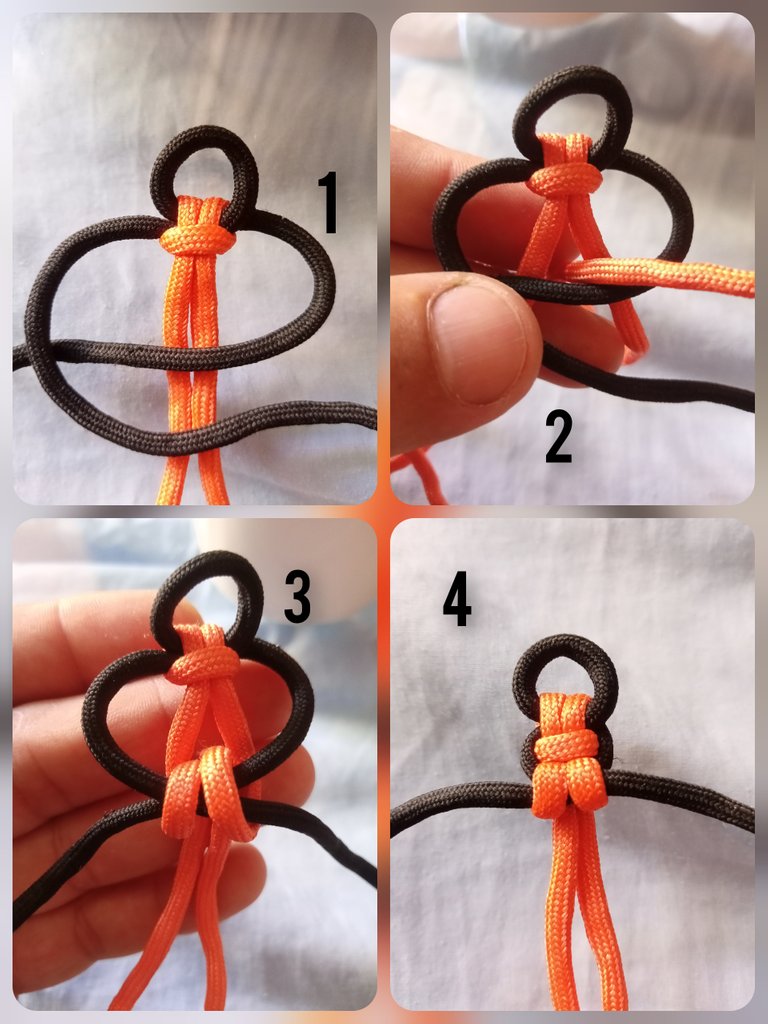
En este siguiente paso tomaremos los extremos de la cuerda negra, el lado derecho de la cuerda va a la izquierda, y el lado izquierdo a la derecha, solo lo colocaremos de esa forma. Luego tomaremos un extremo de la cuerda naranja y la pasaremos por encima de la cuerda negra, de igual manera hacemos con el otro extremos de la cuerda naranja, una vez hayamos hecho el procedimiento comenzamos apretar con fuerza hasta que nos quede un nudo, estos pasos lo realizaremos hasta completar casi toda la cuerda naranja.

img_0.5318285048143573.jpg

We repeat the steps as shown in the following image
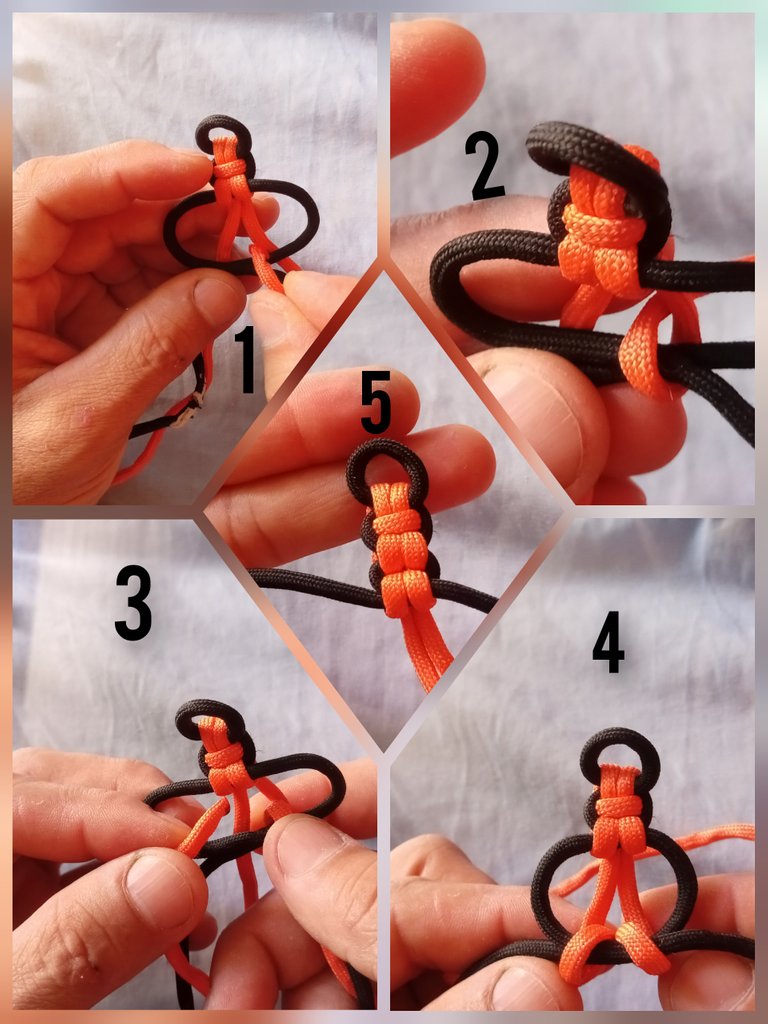
Repetimos los pasos así como se muestra en la siguiente imagen

img_0.08262848155569345.jpg


Step 3

Paso 3

Once we have completed all the braiding, we will have an orange piece which we cut and burn the ends with the lighter so that it does not come loose. Then the 2 black ropes remain, we take one end of them we will make a circle and with the other end of the rope we pass it inside the circle then we return with the same rope and pass it under the circle, with this we will have a knot which we will repeat 3 times, as shown in the image.
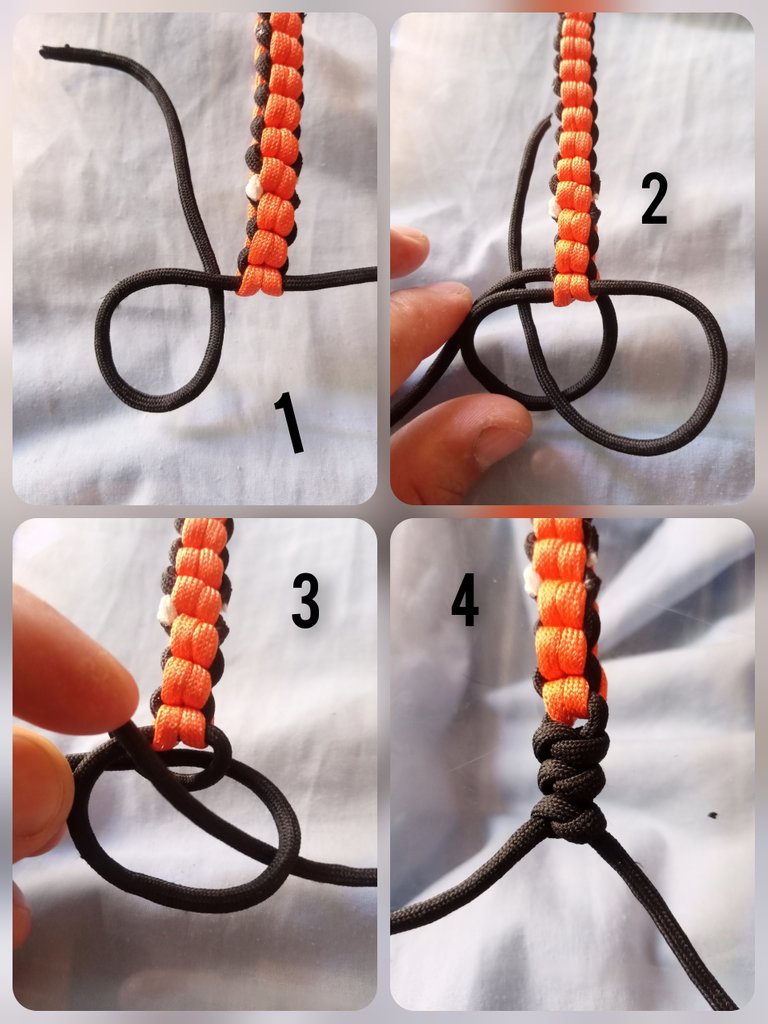
Una vez hayamos completado todo el trenzado, nos quedará un trozo de color naranja el cual cortamos y quemamos con el encendedor las puntas para que no se nos suelte. Luego quedan las 2 cuerdas negras, tomamos un extremo de ellas haremos como un círculo y con el otro extremo de la cuerda la pasamos dentro del círculo seguidamente nos regresamos con la misma cuerda y la pasamos por debajo del círculo, con esto nos quedará un nudo el cual repetiremos 3 veces, así como se muestra en la imagen.

img_0.0016574260585462146.jpg


Fourth and last step

Cuarto y último paso

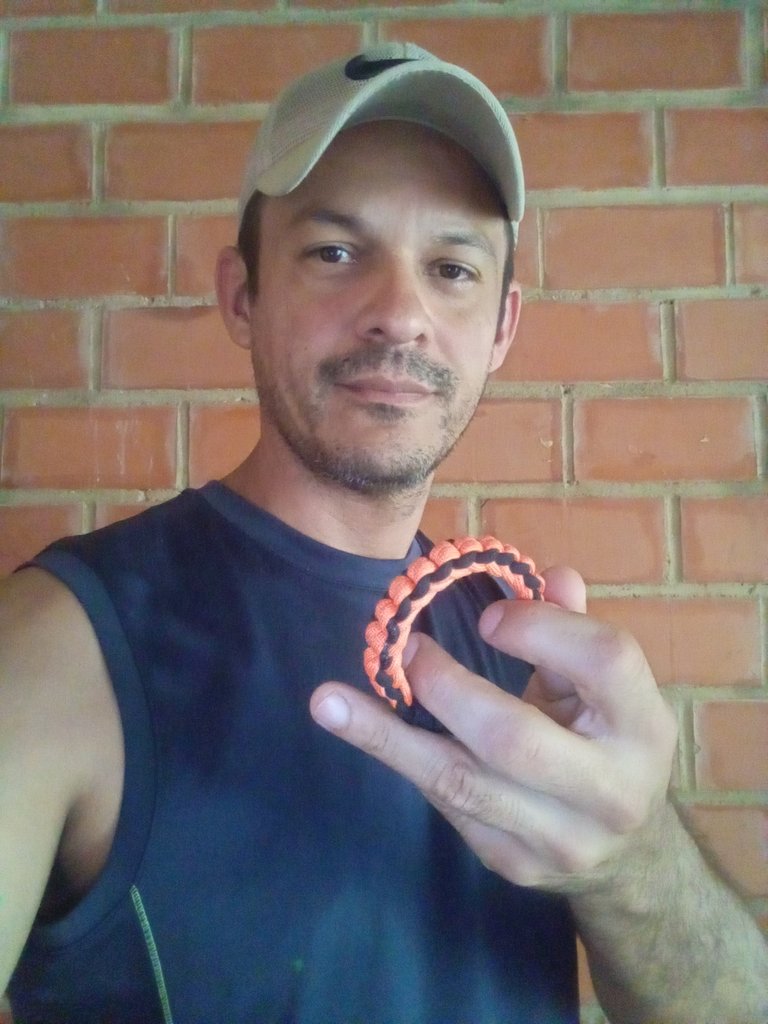
In this last step we will make the new one that will serve as a clasp for the bracelet. We will take both ends of the rope, one goes behind the bracelet and the other above, leaving 2 holes in which we will turn it over the circle on both sides, and start tightening then cut the excess rope, burn with the lighter And that's it, we have a bracelet for children, if you like to make one for adults, I just added a meter or more of rope, it depends on who is going to wear it, in my case my wrist takes 2.20 meters of rope for this braiding model, yes it is a more scientific braiding 😁😀 it has more rope.
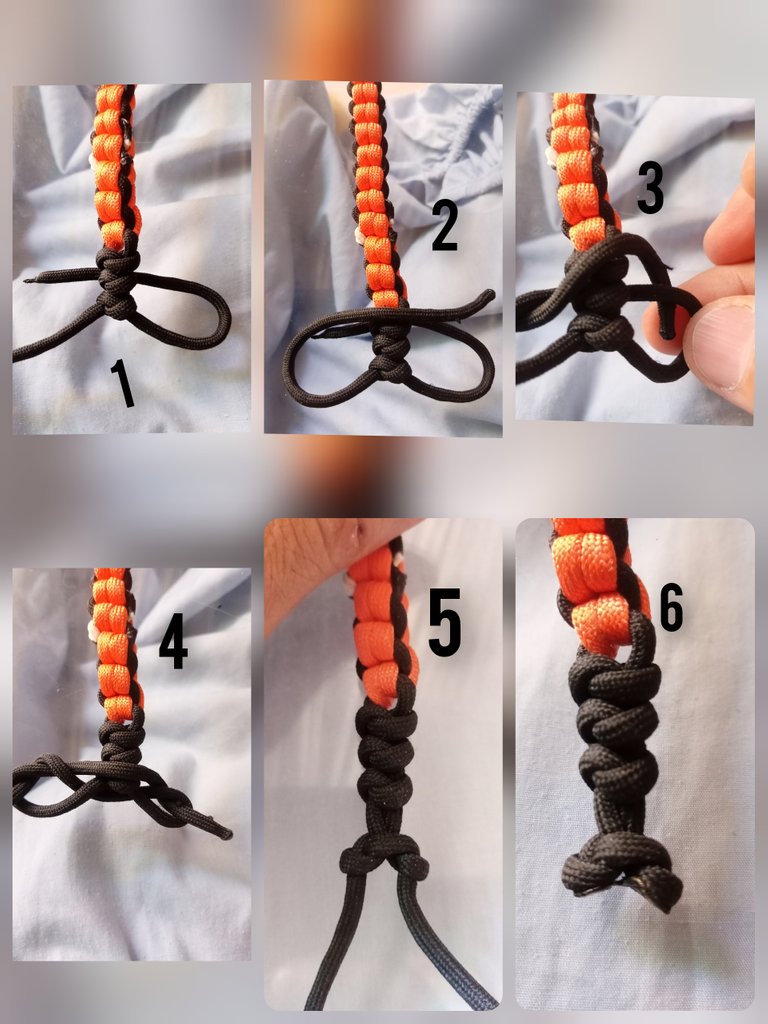
En este último paso haremos el nuevo que servirá de broche para la pulsera. Tomaremos ambos extremos de la cuerda, una va por detrás de la pulsera y la otra por encima quedando 2 orificios en el cual le daremos un vuelta sobre el círculo en ambos lados, y empezamos apretar luego cortamos los excedentes de cuerda, quemamos con el encendedor y listo, tenemos una pulsera para niños, si gusta realizar una para adulto solo agregué un metro o más de cuerda, depende de que persona lo va portar, en mi caso mi muñeca se lleva 2.20 metros de cuerda para este modelo de trenzado, si es un trenzado más científico 😁😀 lleva más cuerda.

img_0.5693646313677732.jpg


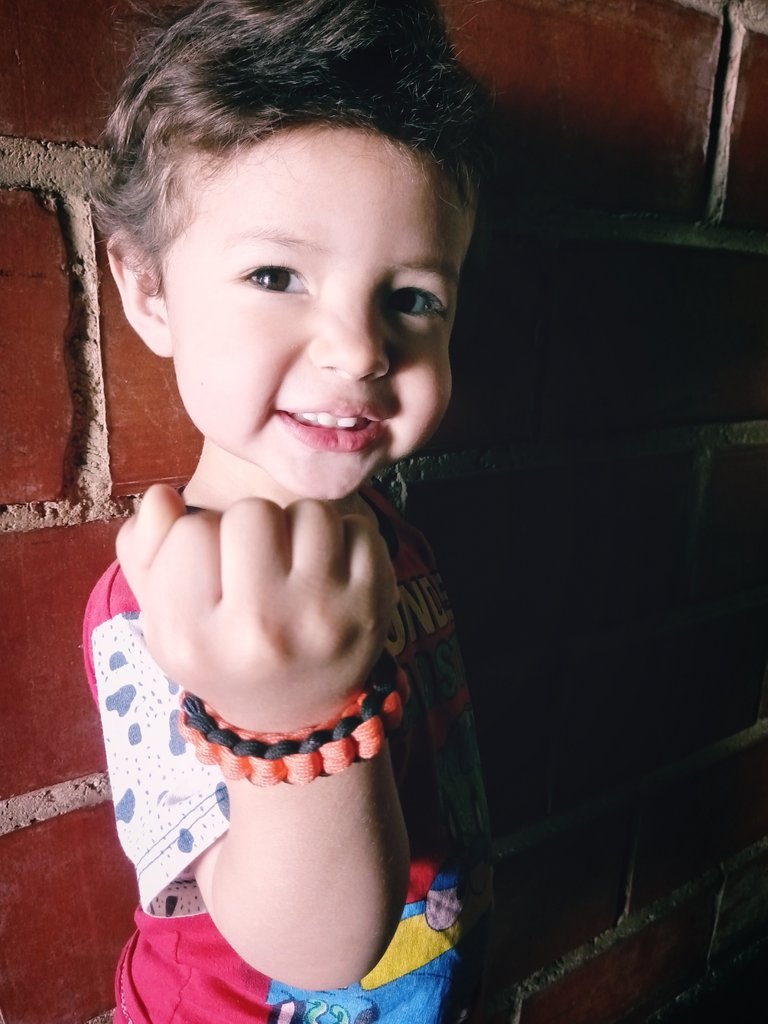
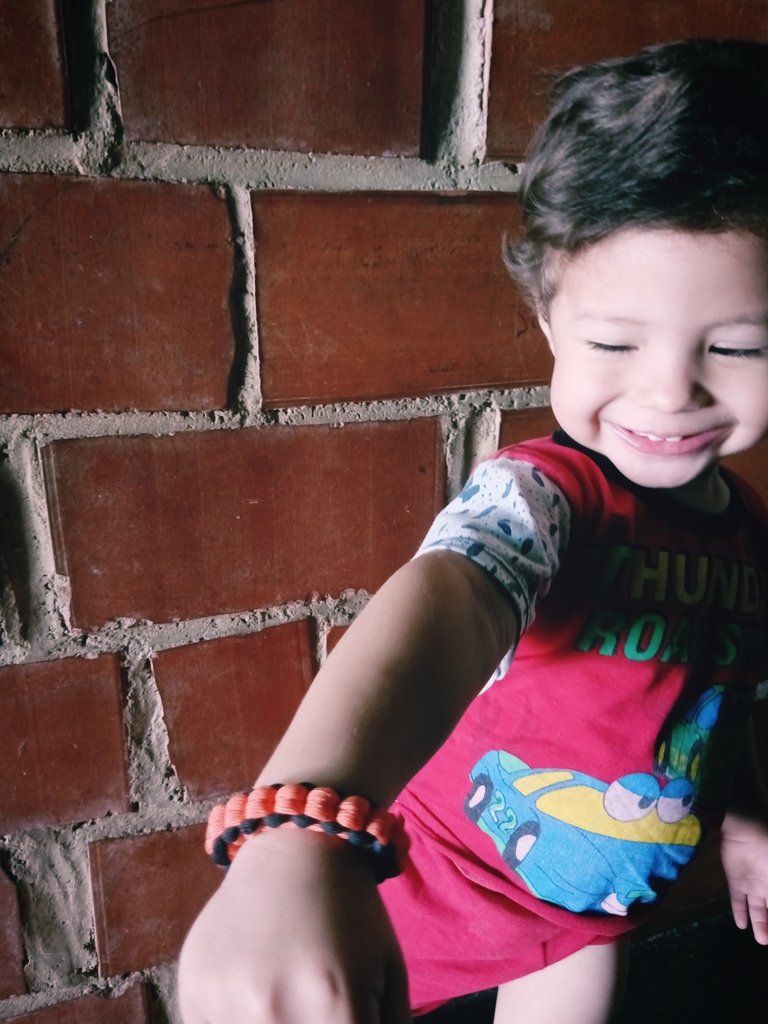
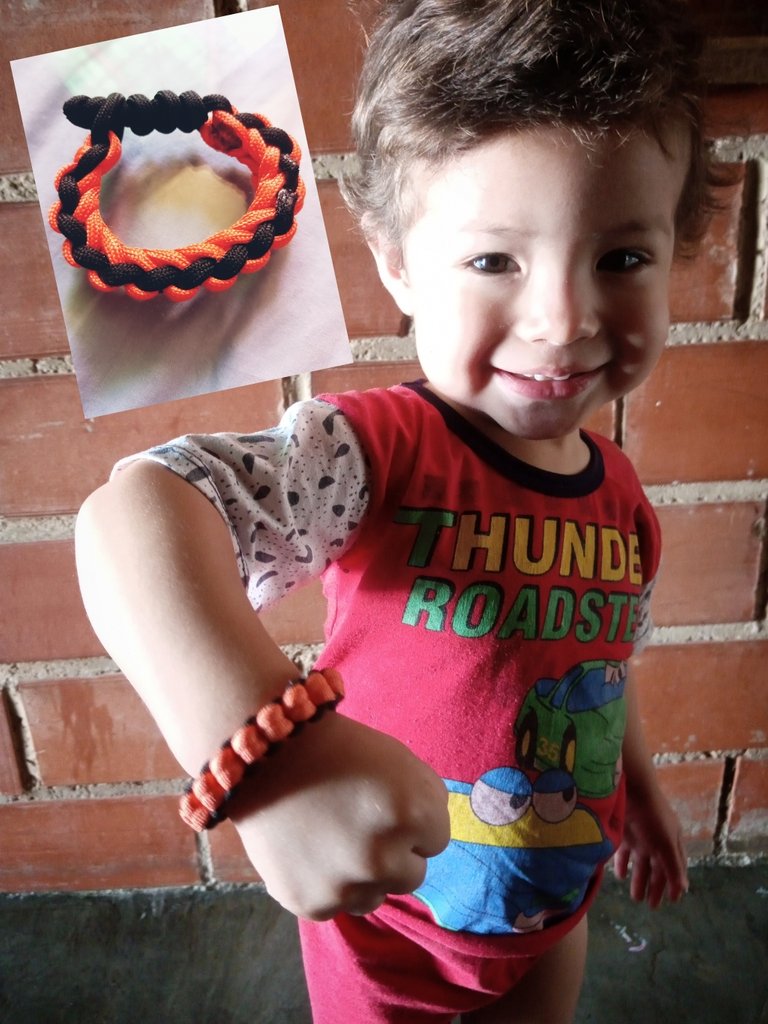
Final result happy customer 😀

Resultado final cliente feliz 😀

img_0.7373888760685137.jpg

img_0.976813104280121.jpg

img_0.016043802358638223.jpg

img_0.18454219594950788.jpg

img_0.9969442277702006.jpg


Thank you very much friends for visiting my post, I hope you liked today's tutorial. God bless you greatly and see you another time

Muchas gracias amigos por visitar mi post, espero les haya gustado el tutorial de hoy. Dios los bendiga grandemente y nos vemos en otra oportunidad

This post is translated by android app Google translate

All photos were taken by my Alcatel 1v Smartphone

Image edited by Android app collage maker

Imagen editada por la aplicación de Android collagemaker

img_0.3122141157113693.jpg

Sort:  

Your content has been voted as a part of Encouragement program. Keep up the good work!

Use Ecency daily to boost your growth on platform!

Support Ecency
Vote for new Proposal
Delegate HP and earn more

QUE LINDA TE HA QUEDADO...Y EL MODELO PRECIOSO Y FELIZ CON SU PULSERA.

Hola, muchas gracias por tomar un minuto de tu tiempo y visitar mi post. A él le encantó ya no se la quiere quitar 😁 gracias nuevamente.

Saludos y feliz día.