Hola mis queridos amigos de hive diy!.🙋
Hello my dear hive diy friends!🙋
Feliz y bendecida tarde para toda ésta hermosa comunidad!😃 les envio un fuerte abrazo a toda ésas personas que día tras día se esfuerzan por compartir hermosos proyectos. Dandole gracias a Dios por darme la oportunidad de volver a estar compartiendo nuevamente con todos ustedes a través de ésta plataforma.
Happy and blessed afternoon for all this beautiful community!😃 I send a big hug to all those people who, day after day, strive to share beautiful projects. Giving thanks to God for giving me the opportunity to share again with all of you through this platform.
Quiero disculparme por no tener un poco de tiempo para estar con ustedes, hoy quiero volverme a integrarme a la comunidad hive diy. Y que mejor que comenzar con mi participación en éste gran concurso de patchwork.
Para mi es un placer volver a estar con todos compartiendo mi proyecto de participación. Quiero hablarles un poco de la técnica del patchwork; la cual consiste en unir trozos de tela utilizando diferentes técnicas y lograr elaborar hermosas cosas.
I want to apologize for not having a little time to be with you, today I want to rejoin the community, and what better than to start with my participation in this great patchwork contest. For me it is a pleasure to be with everyone again sharing my participation project. I want to tell you a little about the patchwork technique, which consists of joining pieces of fabric using different techniques and making beautiful things.
Ésta técnica se realizaba en tiempos pasados únicamente por nuestras abuelas, hoy día ha cobrado mucha fuerza por que ya no solamente nuestras abuelas pueden hacerlo, sino que también todos podemos hacerlo.
This technique was performed in the past, only by our grandmothers, today it has gained a lot of strength, because not only our grandmothers can do it, but also everyone can do it.
Quiero contarles un poco mi experiencia mientras realizaba éste proyecto el cual es una lindo y colorido estuche para guardar colores o cualquier otros implementos. Para su elaboración utilicé retazos de tela tipo popelina, jersey dry, raso estampado entre otros.
Cabe destacar que ésta técnica requiere de mucha paciencia y tiempo, nunca había practicado ésta técnica del patchwork, y pensé que era sencillo, y pude experimentar que no lo es.
Éste estuche llevo un día completo para hacerlo por que lo realicé a mano, creo que con un poco de práctica, lo puedo hacer en menos tiempo.
I want to tell you a little about my experience while doing this project which is a cute and colorful case to store colors or any other implements. For its elaboration I used pieces of poplin type fabric, dry jersey, printed satin among others. It should be noted that this technique requires a lot of patience and time, I had never practiced this patchwork technique, and I thought it was simple, and I was able to experience that it is not.
This case took a full day to make because I made it by hand, I think that with a little practice, I can do it in less time.
Fue muy divertido poder confeccionar éste estuche con ésta técnica, por que aparte que jugue con la combinación de los colores, e incentive a mi hija a coser enseñándole que es posible hacer cosas hermosas utilizando ésta técnica. Que hermoso es darles uso a todos esos retazos que tenemos en casa y hacer desde un estuche hasta cosas más grandes😄 waoo!! esto es increible, les doy las gracias a los organizadores del concurso por incentivar a ésta comunidad a realizar hermosos proyectos utilizando la técnica patchwork.
Amigos sin más que decir, les hago la cordial invitación para que me acompañen a leer hasta el final de mi publicación,Vamos!.
It was very fun to be able to make this case with this technique, because apart from playing with the combination of colors, I encouraged my daughter to sew by teaching her that it is possible to make beautiful things using this technique. How beautiful it is to use all those pieces we have at home and make from a case to bigger things😄 wow!! this is amazing, I thank the organizers of the contest for encouraging this community to make beautiful projects using the patchwork technique. Friends without further ado, I cordially invite you to accompany me to read until the end of my publication, Come on!.
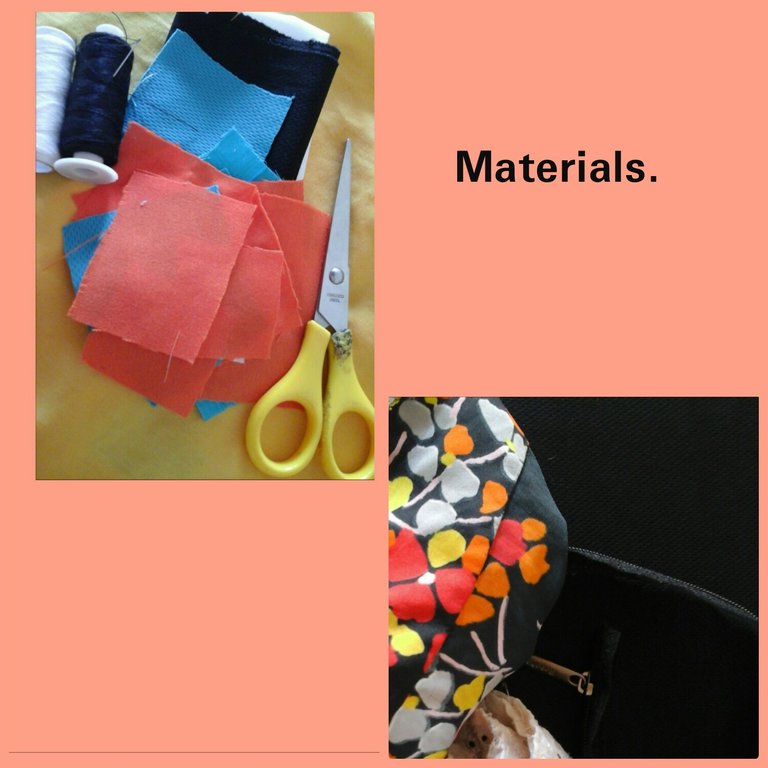
Los materiales que necesitaremos:
- Retazos de tela.
- Hilo y aguja.
- Tijera.
- Lápiz.
- Cierre.
The materials we will need:
- Pieces of cloth.
- Thread and needle.
- Scissors.
- Pencil.
- Closure.
Comencemos!.
Let's get started!
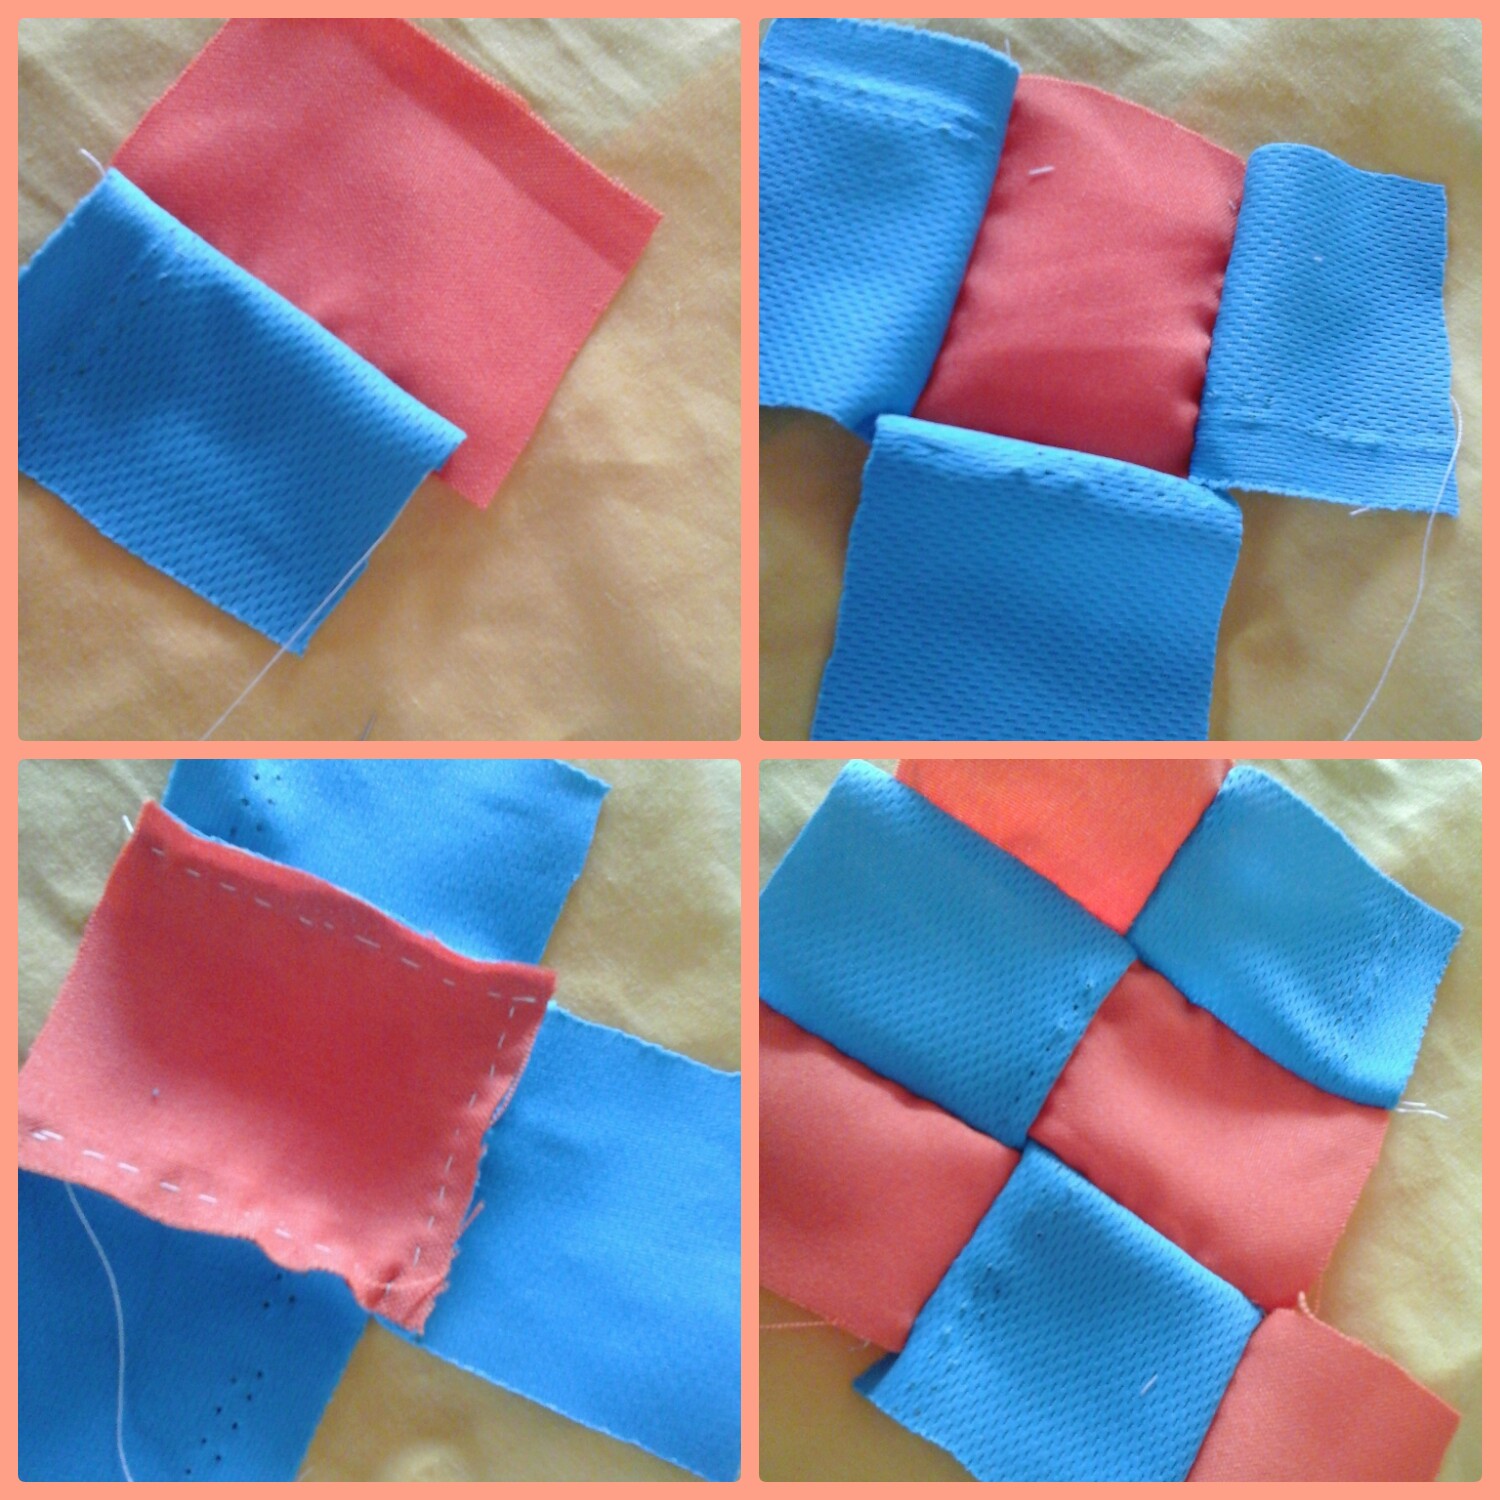
Paso 1.
Para comenzar lo primero que hice fue recortar muy bien los retazos, de modo que queden en forma de cuadros, una vez que estén listos comenzamos a coser para unir uno con otro.
Step 1.
To begin, the first thing I did was cut the pieces very well, so that they are in the form of squares, once they are ready we begin to sew to join one with another.
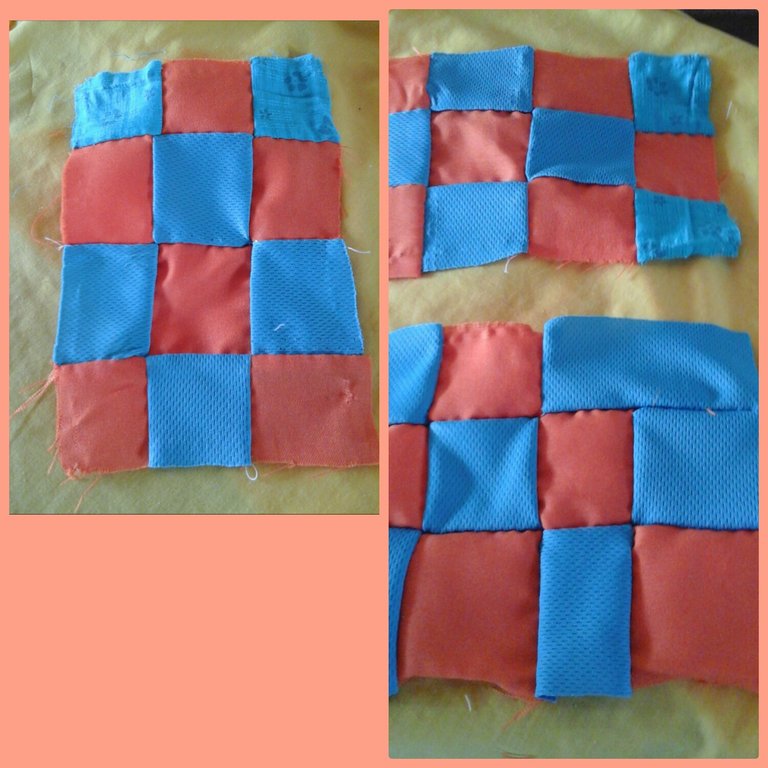
Paso 2.
Aquí ya he terminado de coser todos, y tengo dos rectángulos que logré hacer uniendo cada pequeño cuadro. Puedes hacer solo un rectángulo y luego recortar para dividirlos y así obtener un par de éstos.
Step 2.
Here I have finished sewing all of them, and I have two rectangles that I managed to make by joining each small square. You can just make a rectangle and then trim to divide them to get a pair of these.
Paso 3.
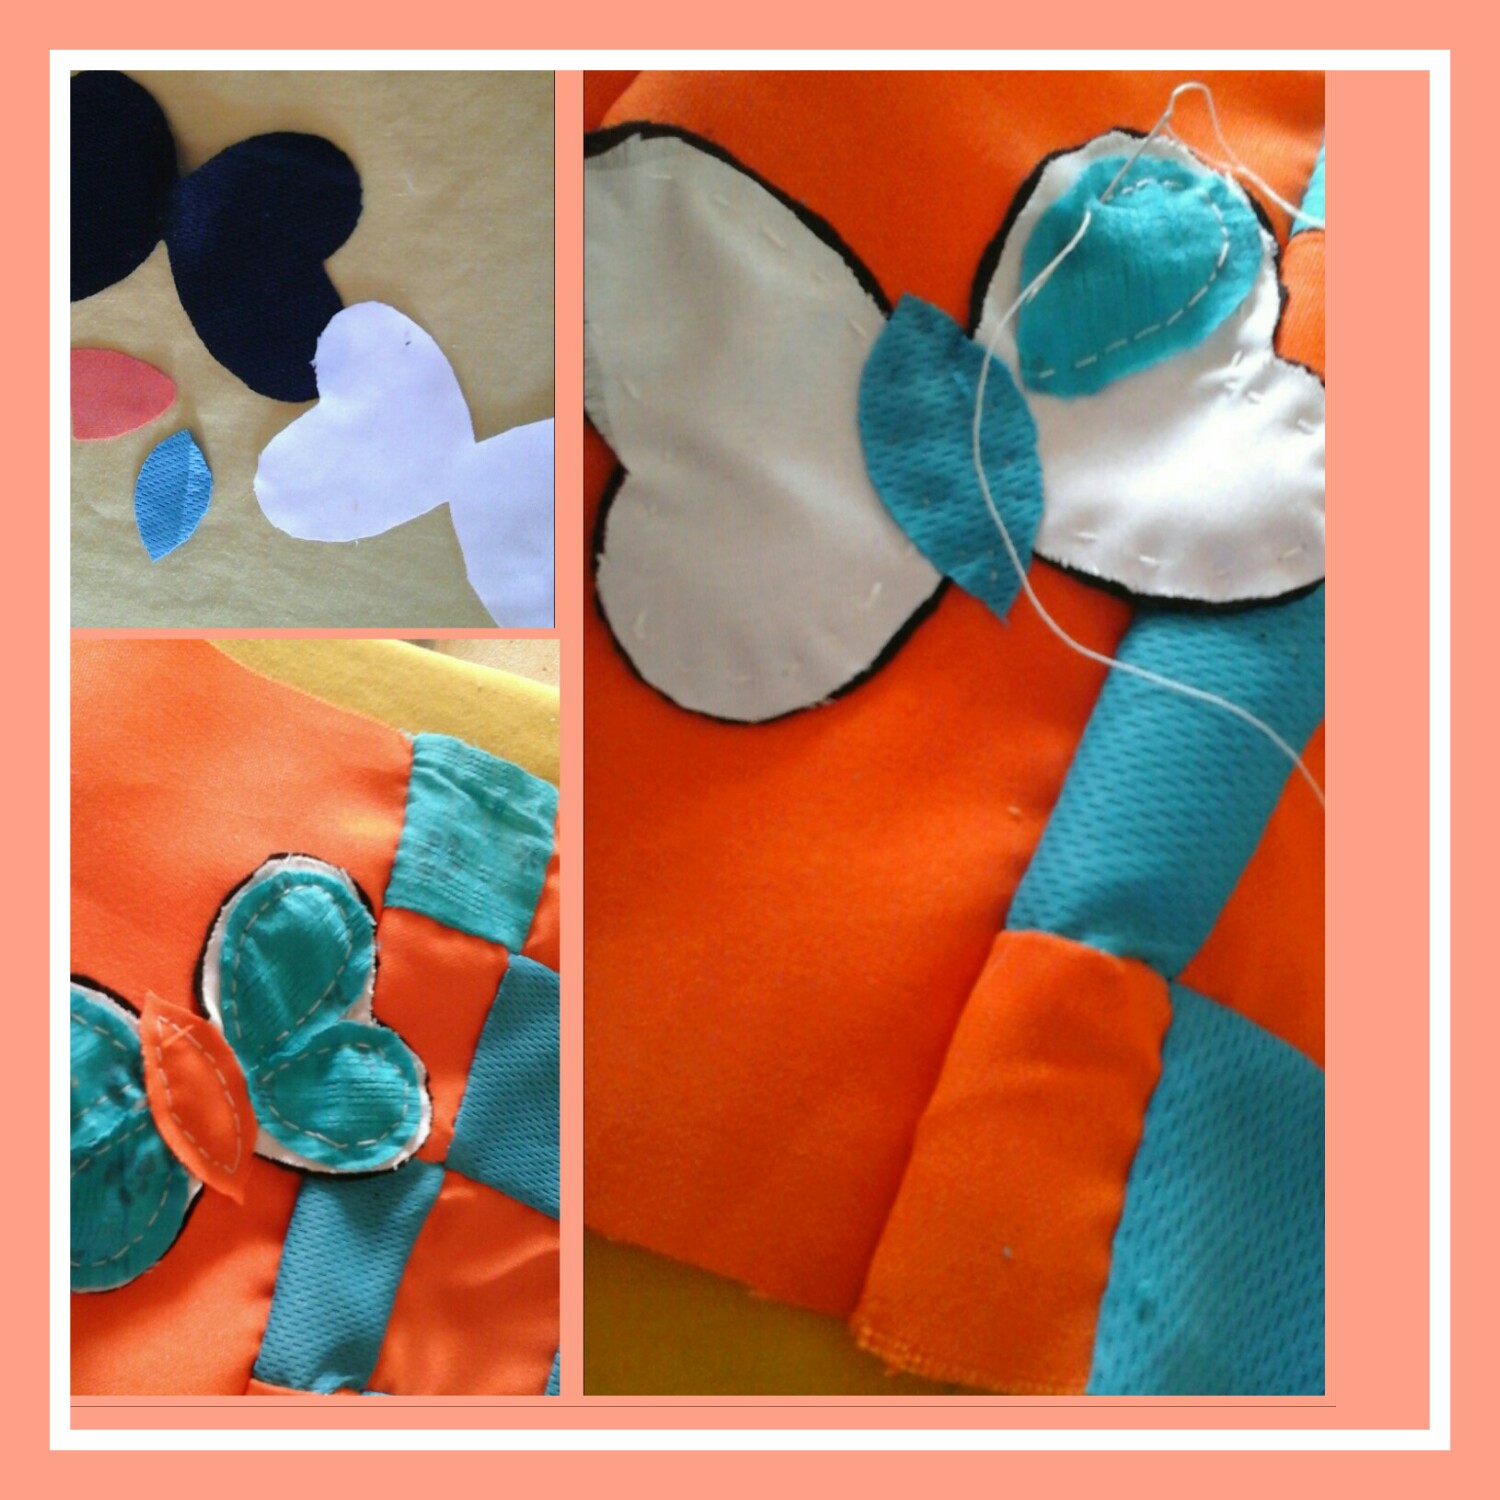
En éste paso tomé un pequeño retazo en forma de rectángulo, color naranja y lo uni cosiendo a mis cuadros azul turquesa y naranja. Con retazos negro y blanco, recorté en forma de mariposa para decorar la parte externa de mi estuche, coloqué la figura en tela negra en la parte de abajo y la blanca arriba, ésto hará que mi mariposa tenga un fondo y resalte. De ésta manera termine de coser cada pieza.
Step 3.
In this step I took a small piece in the shape of a rectangle, orange color and I joined it by sewing to my turquoise blue and orange squares. With black and white scraps, I cut out the shape of a butterfly to decorate the outside of my case, I placed the figure in black fabric at the bottom and the white one on top, this will make my butterfly have a background and stand out. In this way finish sewing each piece.
Paso 4.
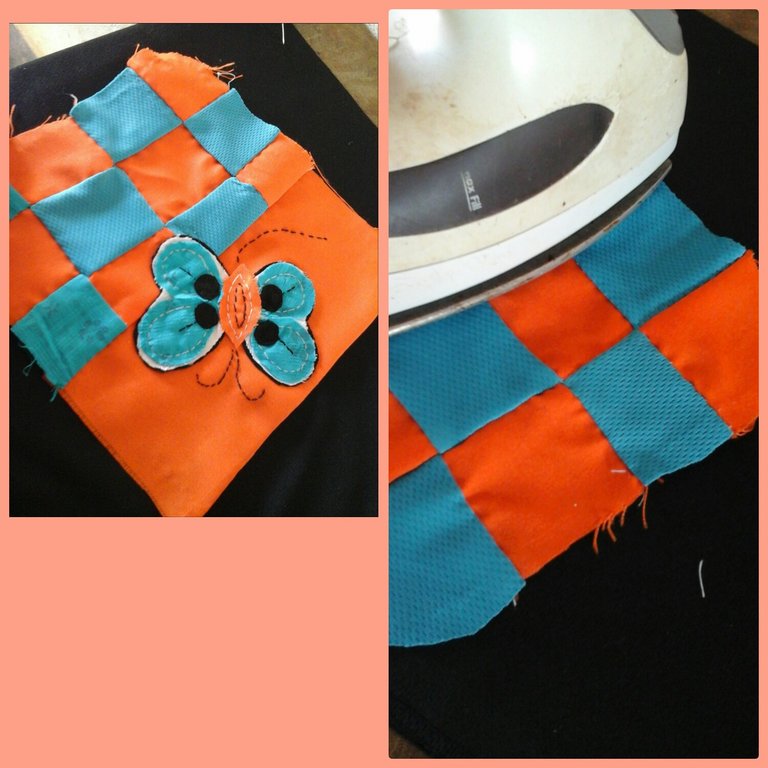
Como pueden observar la mariposa la cosi a la parte naranja para que resalte más y no le quite el protagonismo a los cuadros. Te recomiendo que cuando estés uniendo los retazos, uses la plancha de ropa para que el trabajo quede perfecto. Una vez que hayamos terminado de coser la mariposa y planchar, procedemos a unir y coser la pieza restante de cuadros para hacer una sola pieza completa con forma de rectángulo.
Step 4.
As you can see, I sewed the butterfly to the orange part so that it stands out more and does not take away the prominence of the paintings. I recommend that when you are joining the pieces, you use the clothes iron so that the work is perfect. Once we have finished sewing the butterfly and ironing, we proceed to join and sew the remaining piece of plaid to make one complete piece in the shape of a rectangle.
Paso 5.
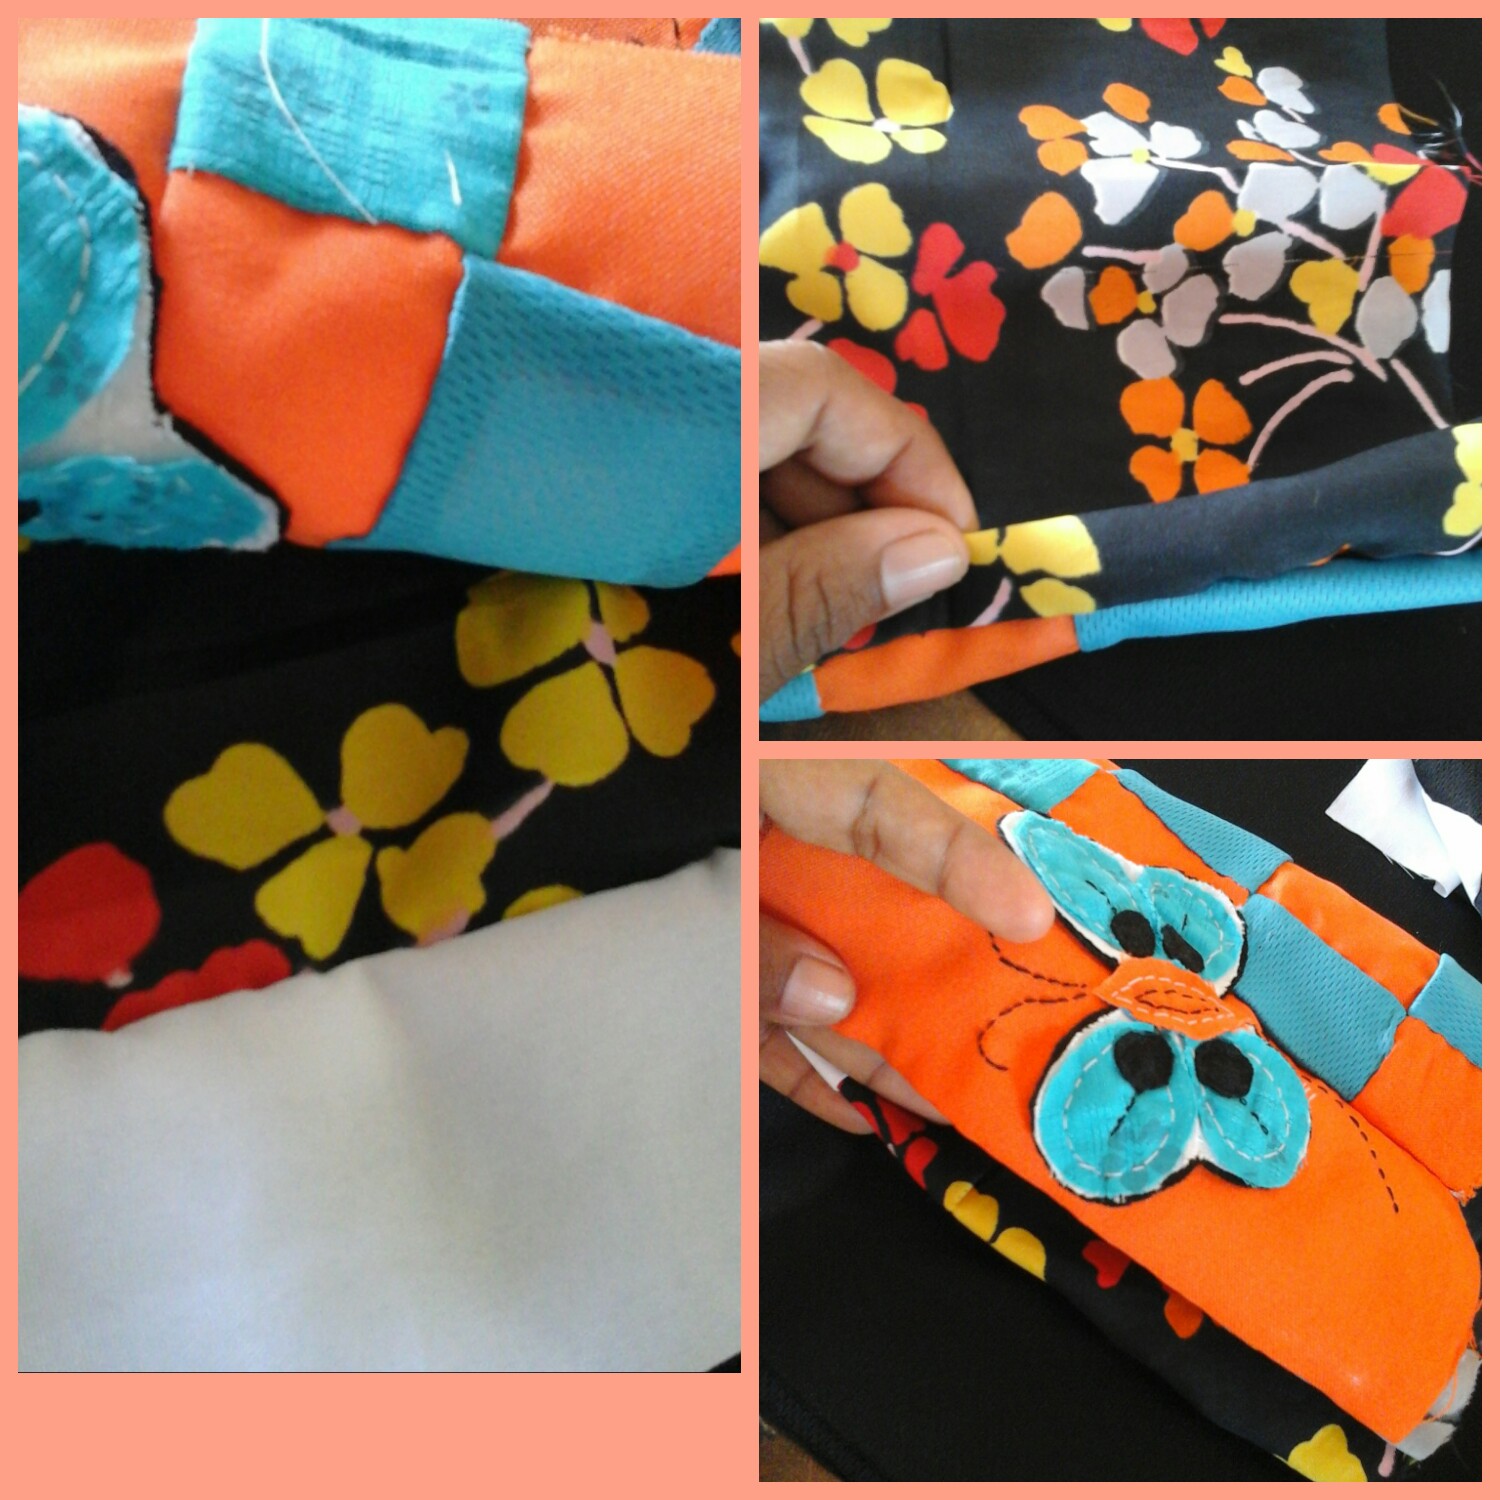
En éste paso tomé un retazo de tela estampada de flores y la recorte del mismo tamaño que la pieza anterior de cuadros. Éste estampado será la parte interior de nuestro estuche.
Colocamos frente con frente de la tela, y cosemos, solo por los extremos más cortos de nuestro rectángulo. Volteamos, quedando la costura por la parte revés de la tela.
Step 5.
In this step I took a piece of flower print fabric and cut it to the same size as the previous piece of squares. This pattern will be the inside of our case. We place front to front of the fabric, and sew, only by the shorter ends of our rectangle. We turn, leaving the seam on the wrong side of the fabric.
Paso 6.
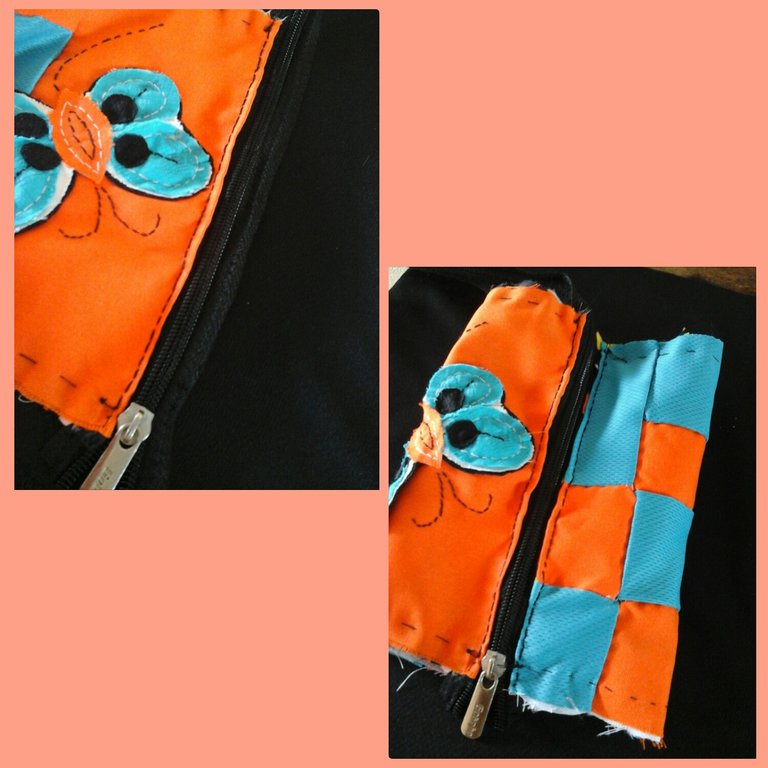
Como puden observar la parte de los cuadros a quedado por fuera y la estampada por dentro, procedo a coser el cierre por la parte donde unimos las piezas. Una vez que termine de coser el cierre, quedó en forma de cilindro, por que es la forma que quiero para mi estuche.
Step 6.
As you can see the part of the paintings left on the outside and the part stamped on the inside, I proceed to sew the closure on the part where we join the pieces. Once I finished sewing the closure, it was in the shape of a cylinder, because that is the shape I want for my case.
Paso 7.
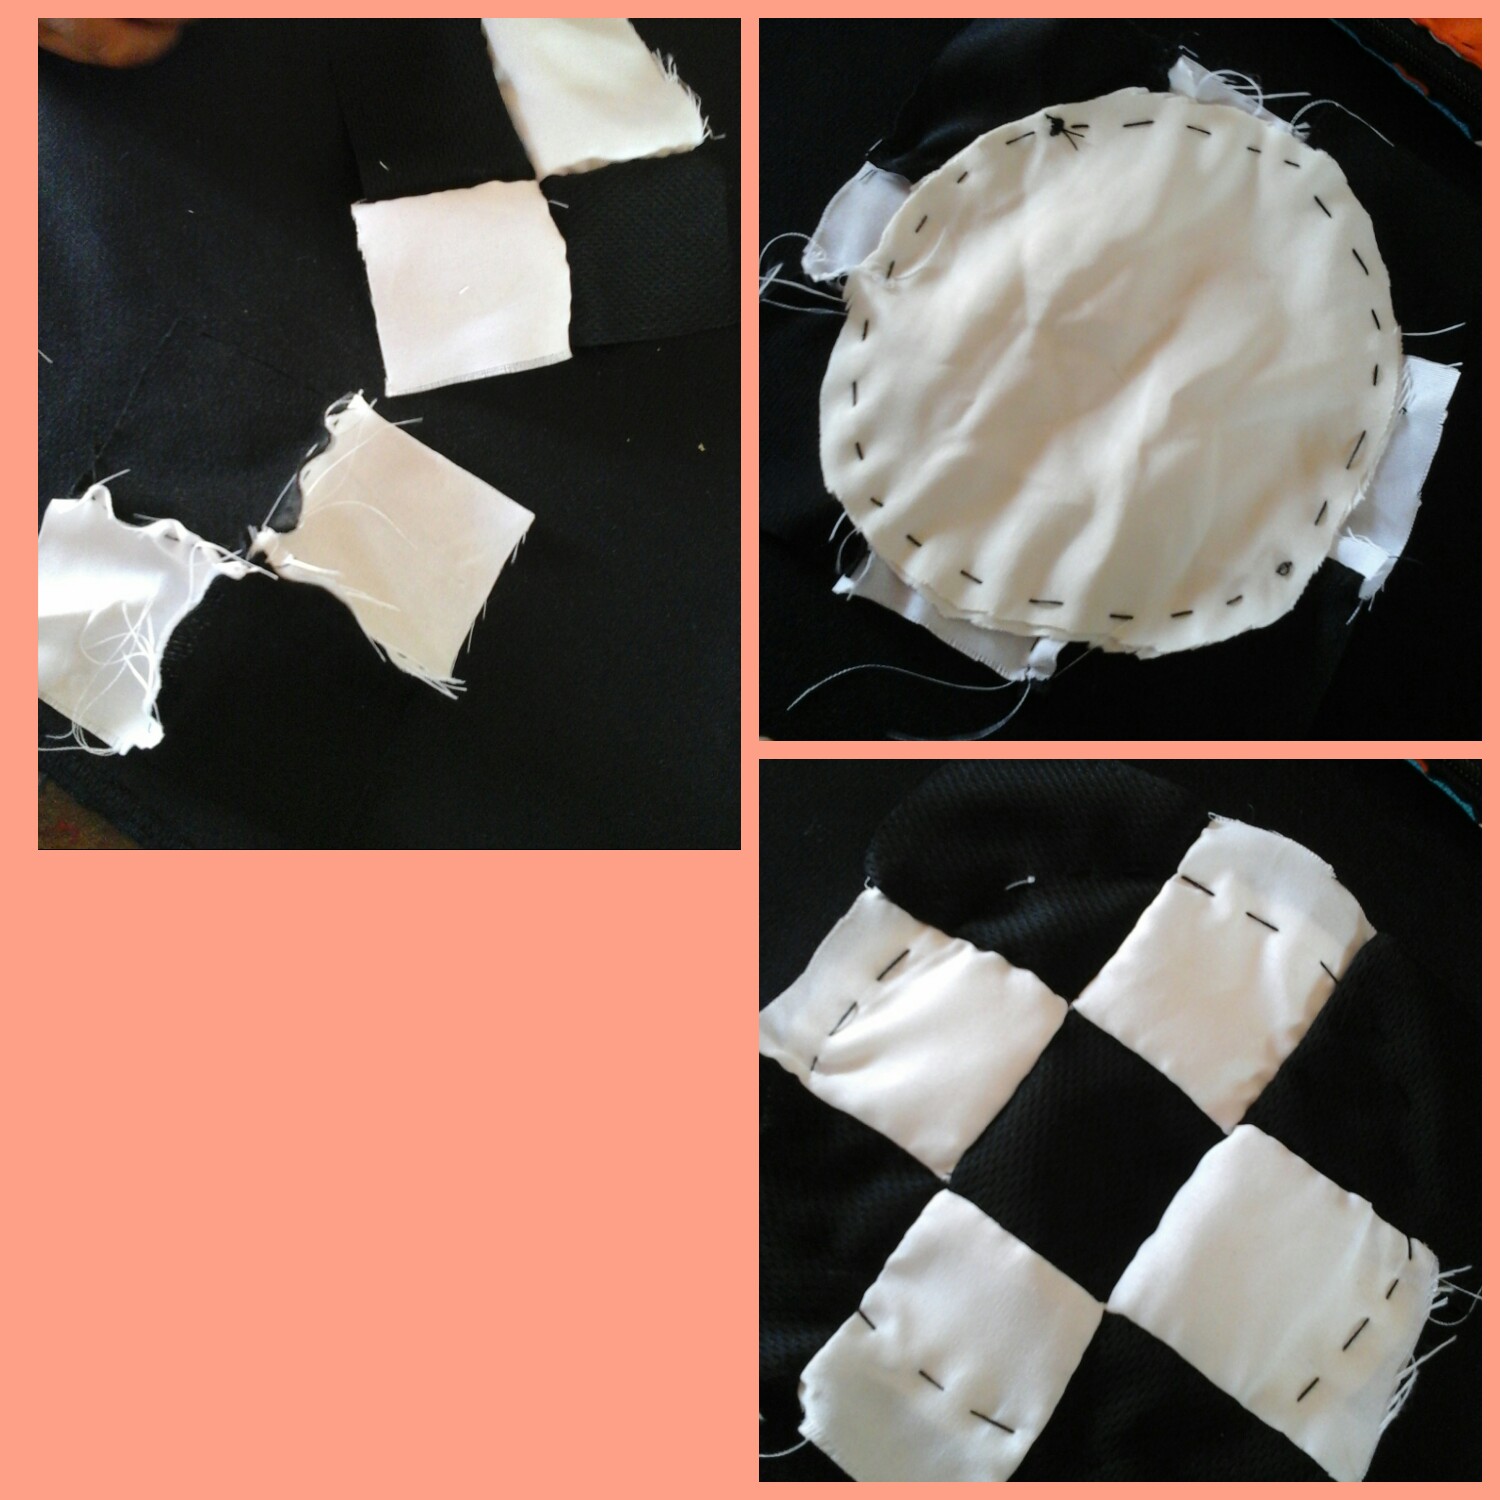
Casi para terminar hice la parte lateral de nuestro estuche, tomé retazos de tela blanco y negro recorte en forma de cuadros y uni unos con otros hasta lograr hacer un pequeño cuadro. Tomé retazos blancos y recorte en forma de círculo, seguidamente coloqué mi cuadro de retazos y lo coloqué sobre el círculo y cosi al rededor, hice un par de éstos.
Step 7.
Almost to finish I made the side part of our case, I took pieces of black and white fabric cut in the form of squares and joined them together until I made a small square. I took white scraps and cut out in the shape of a circle, then I placed my square of scraps and placed it on top of the circle and sewed around it, I made a couple of these.
Paso 8.
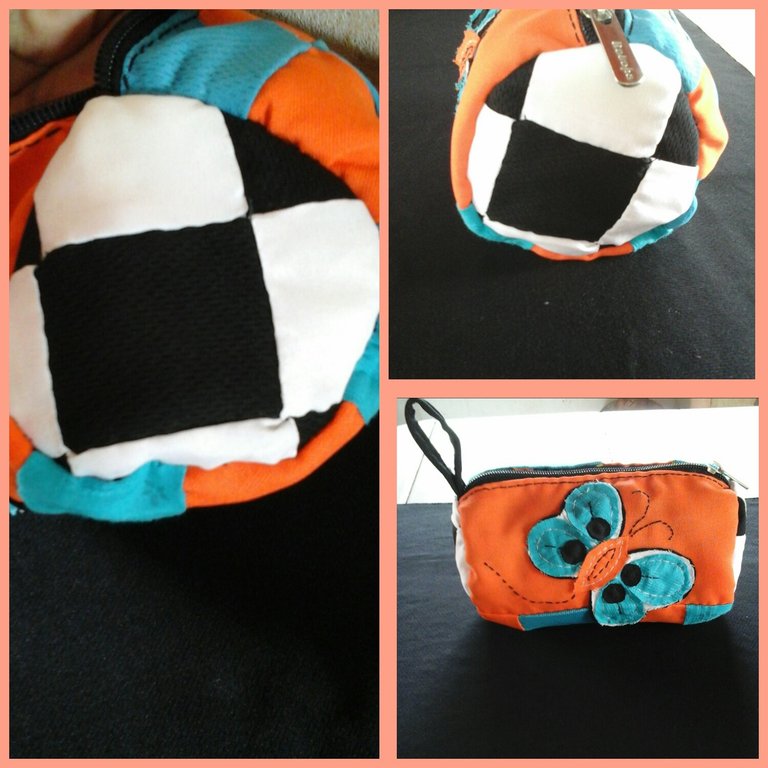
En éste último paso cosemos los círculos a cada lado del estuche, cosemos por dentro y una vez que hayamos terminado, volteamos el estuche y debe quedar de ésta manera, puedes colocarle una tira para poder sujetarlo y listo!.
Step 8.
In this last step we sew the circles on each side of the case, we sew inside and once we have finished, we turn the case over and it should be this way, you can place a strip on it to hold it and that's it!.
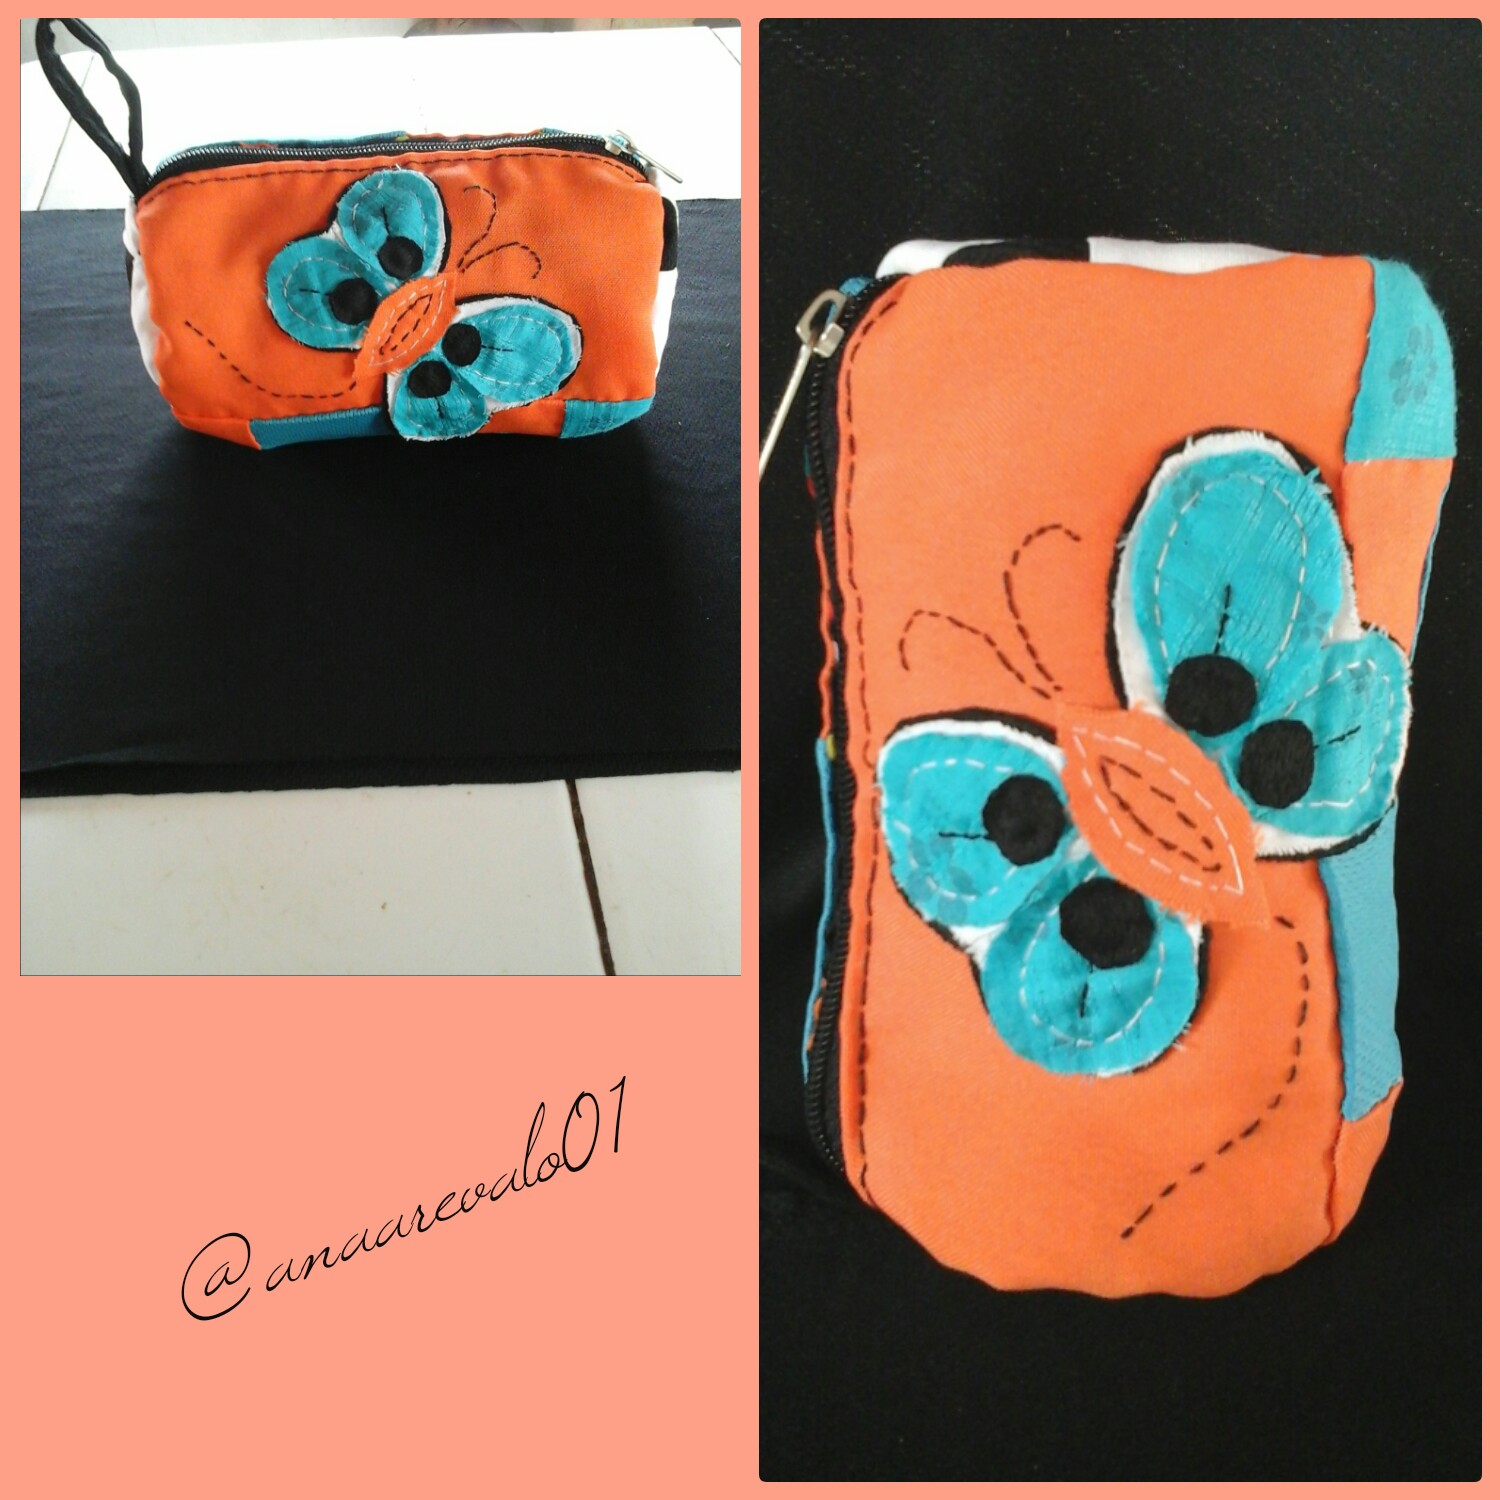
PROYECTO TERMINADO.
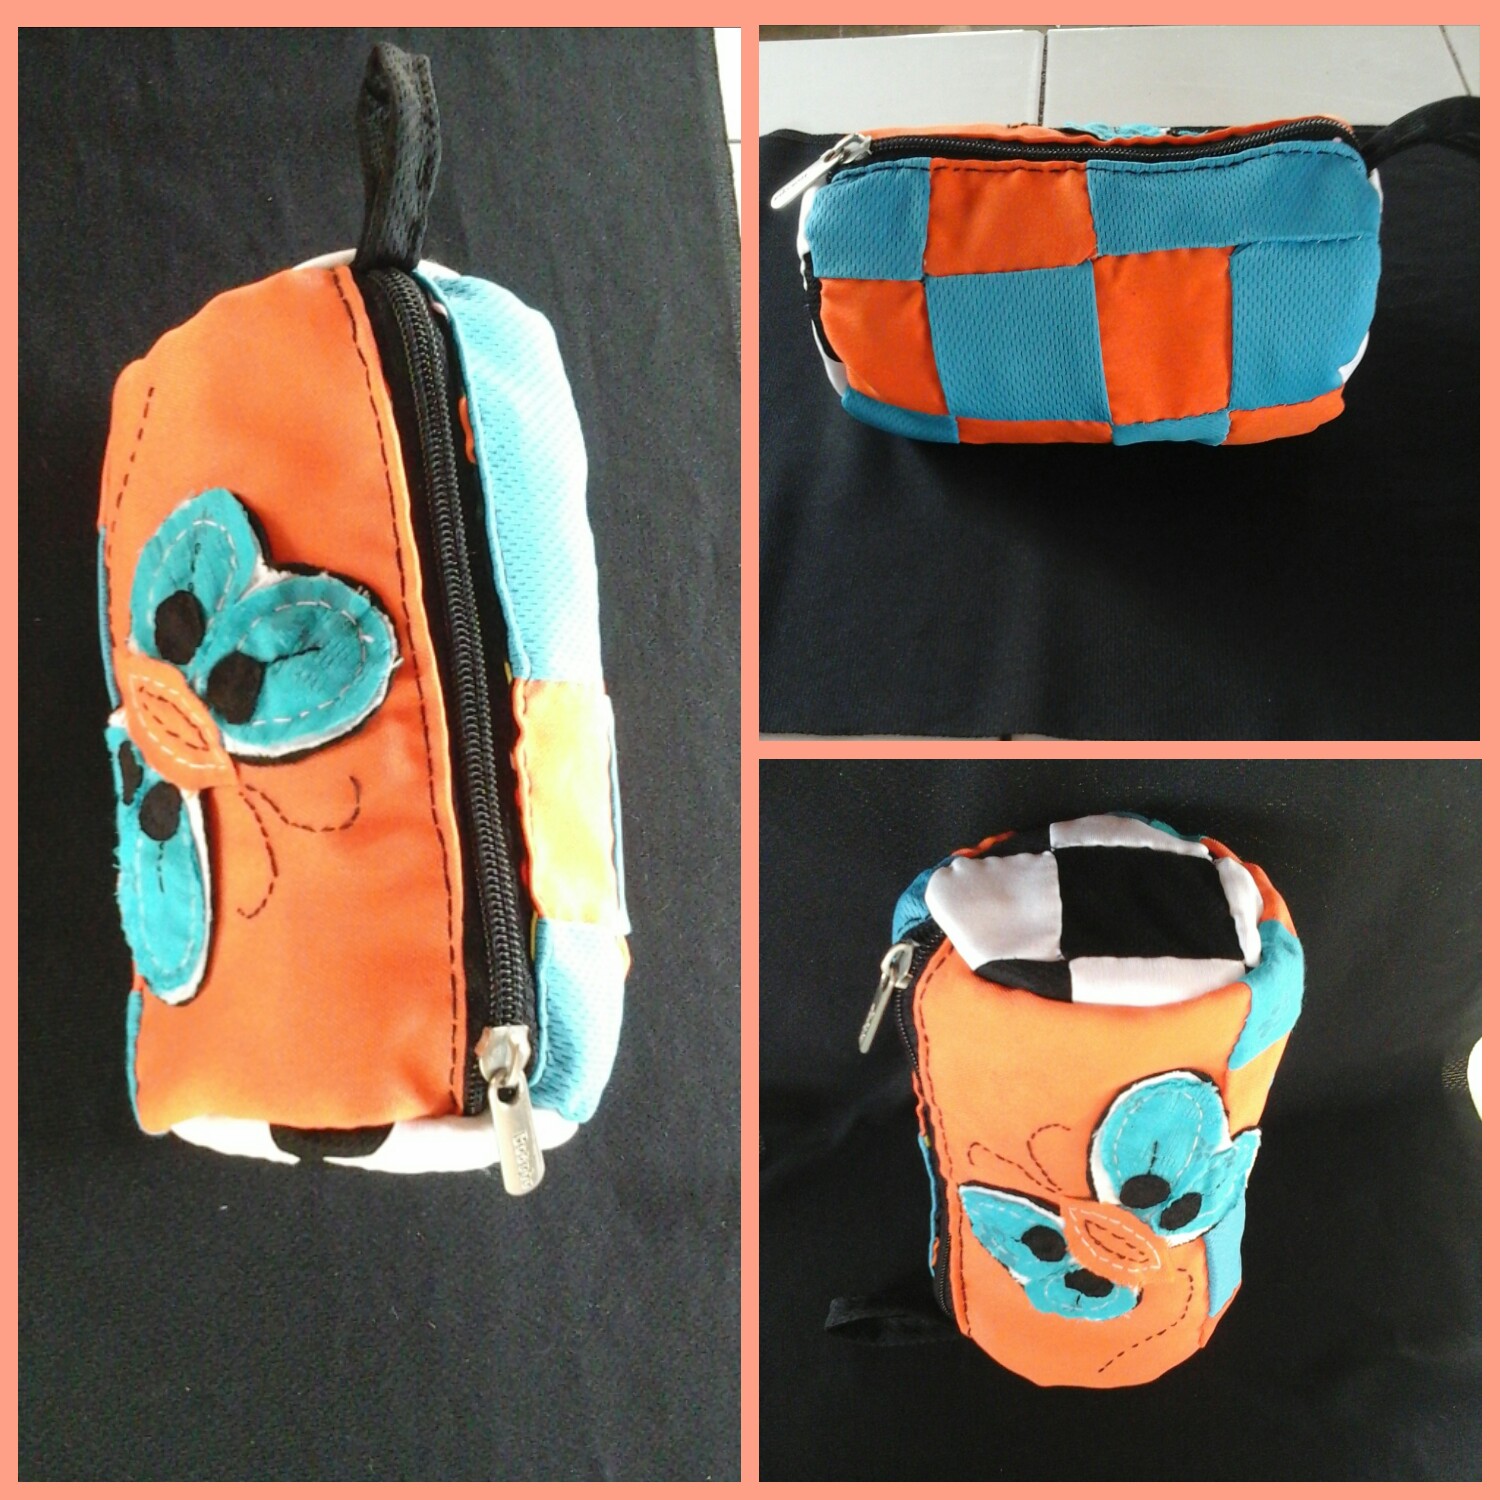
De ésta forma, se ha dejado este simpático y divertido estuche para guardar colores y lápices. Si pueden ver la parte de adelante esta hecha de cuadritos naranja y azul turquesa, con una mariposa que lo hace ver muy bonito, la parte de atrás solo esta hecha de cuadritos y los costados en blanco y negro que resaltan los demás colores. Este es un proyecto hermoso, me encantó y estoy muy satisfecha con el resultado; Esta técnica de "pactwork" es fascinante!!😁
FINISHED PROJECT.
In this way, this cute and fun case has been left to store colors and pencils. If you can see the front part is made of orange and turquoise blue squares, with a butterfly that makes it look very pretty, the back part is only made of squares and the black and white sides that make the other colors stand out.
This is a beautiful project, I loved it and I am very satisfied with the result; This "pactwork" technique is fascinating!!😁
Queridos amigos, hoy hemos terminado con éste hermoso proyecto, espero que les haya gustado, ya que lo hice con mucho amor y esfuerzo para compartirlo con todos ustedes. Le agradezco que se haya quedado conmigo hasta el final de mi publicación y se haya tomado unos minutos de su valioso tiempo para leer cada paso.
Quiero invitar a mi amiga @sergimarmartinez a que se anime a participar en éste hermoso concurso. Me despido de toda esta hermosa comunidad creativa y les deseo una excelente y feliz tarde, espero que pronto nos veamos para seguir compartiendo a través de esta plataforma.
Dear friends, today we have finished with this beautiful project, I hope you liked it, since I did it with a lot of love and effort to share it with all of you. I appreciate you sticking with me to the end of my post and taking a few minutes of your valuable time to read each step.
I want to invite my friend @sergimarmartinez to be encouraged to participate in this beautiful contest. I say goodbye to all this beautiful creative community and I wish you an excellent and happy afternoon, I hope that we will see each other soon to continue sharing through this platform.
NO ME QUEDA MÁS QUE DECIRLES GRACIAS Y UN FUERTE ABRAZO!
I HAVE NO OTHER THAN TO SAY THANKS AND A BIG HUG!😙😙
Todas las fotos son de mi autoria capturadas por mi tablet Samsung galaxy.
Editadas por Collage_maker.
Traductor Español /Inglés (google.com).
All photos are my own, captured by my Samsung galaxy tablet.
Edited by Collage_maker.
Spanish / English translator (google.com).